1/32 Revell Me262B-1/U1 Nachtjager

Post your work in progress of your aircraft builds in here.
Post Reply
User avatar
jkim
Elite Member
Posts: 3923
Joined: Mon Apr 10, 2017 4:03 pm

1/32 Revell Me262B-1/U1 Nachtjager

Post by jkim »

Time to start another build! My next project will be...

Image

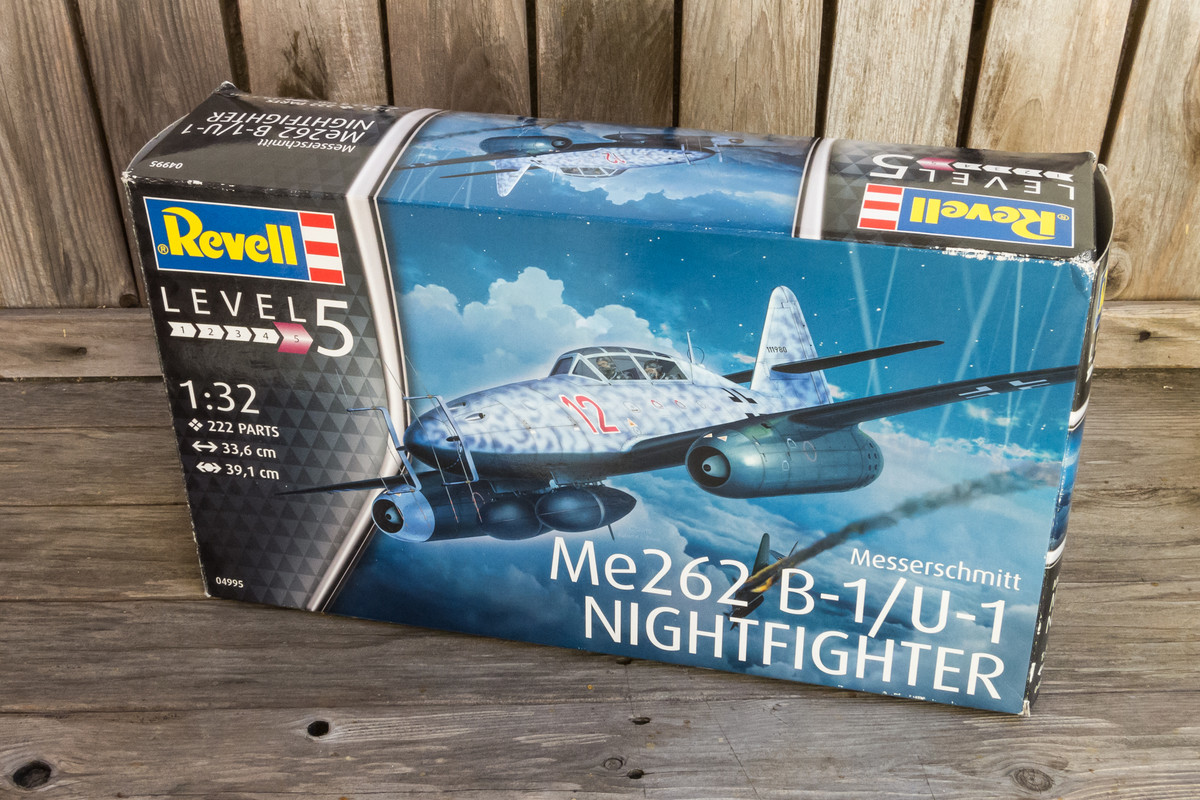
I've built the Trumpeter Me262A and I've been curious to see how Revell has depicted this iconic fighter. But this time around I'll be doing the two-seat nightfighter version. As usual, I'll be throwing a bit of aftermarket stuff into the mix and using my Silhouette Portrait cutter to produce masks for the larger markings. Let's a take a closer look at the kit itself.

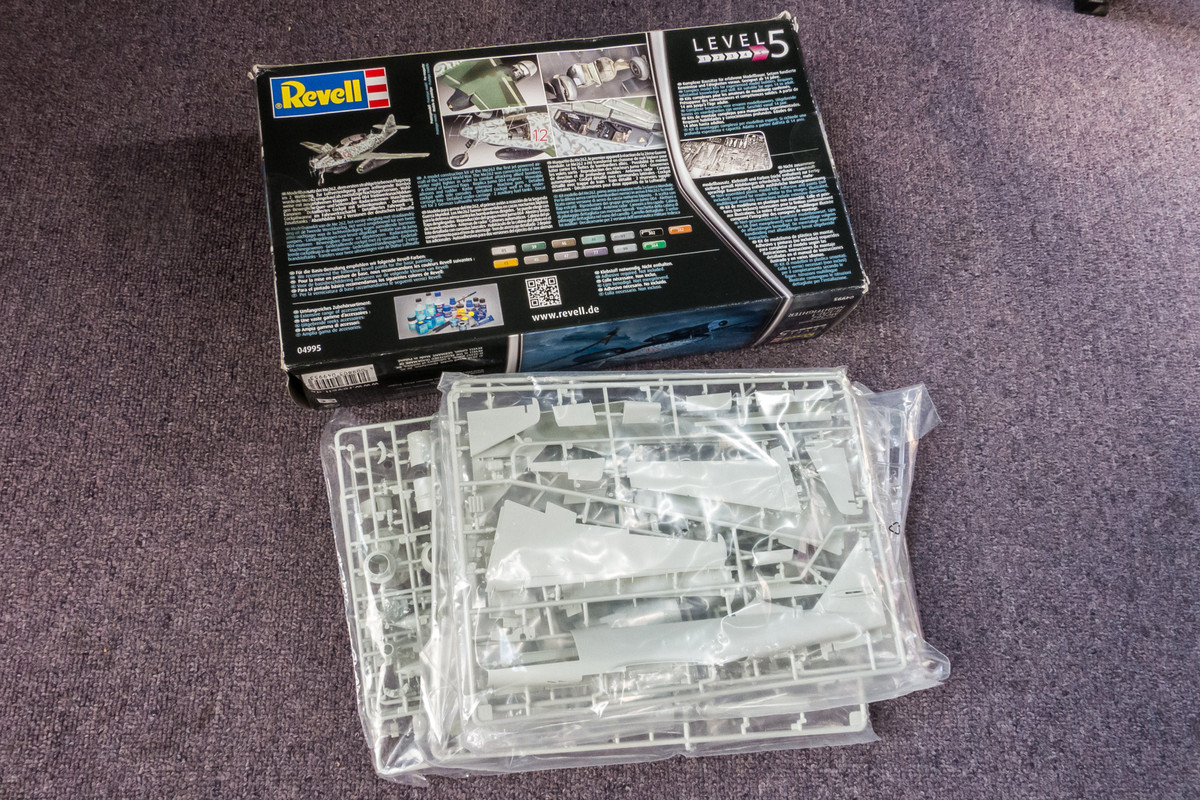
This kit is a relatively new release, coming out in 2016. The Nachtjager comes in Revell's customary end-opening boxes, which I personally am not a fan of. Not only are they flimsier than the normal top-opening boxes, getting the contents in and out of the box is so much more of a hassle. The parts come in a light grey plastic and the frets are separated, two apiece, in plastic bags.
Image

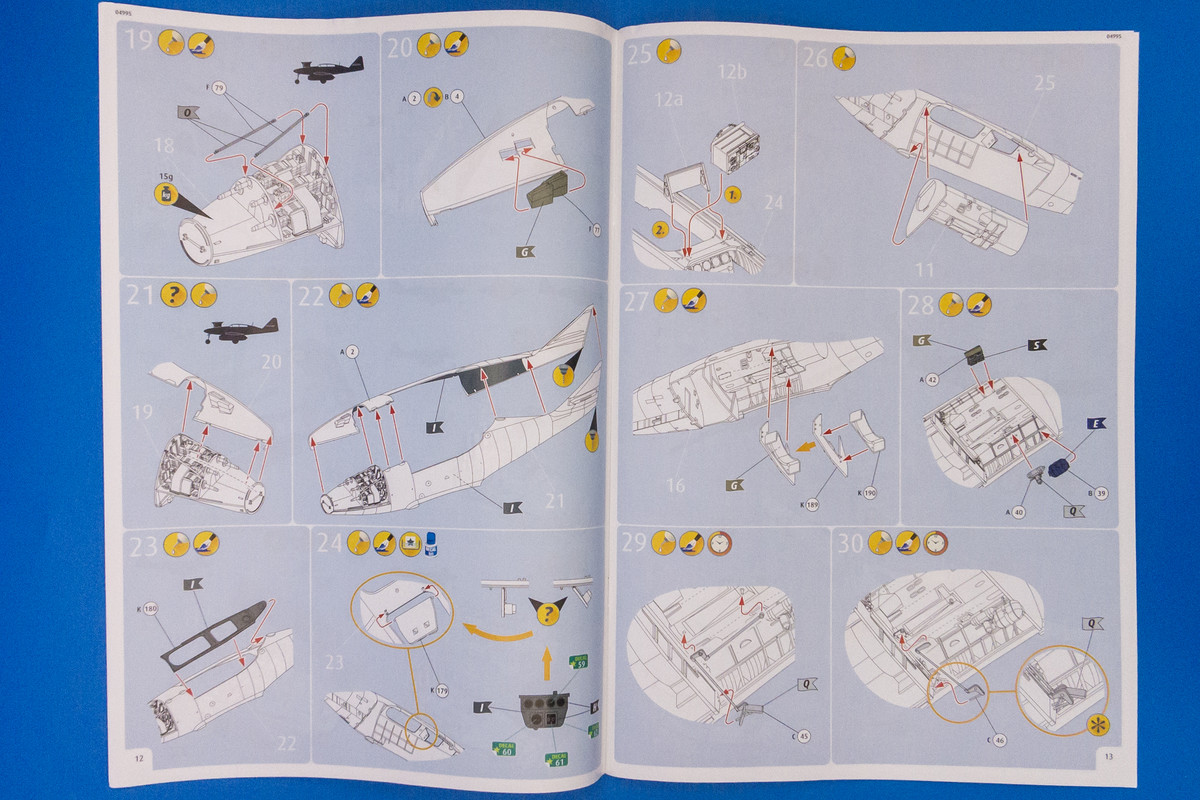
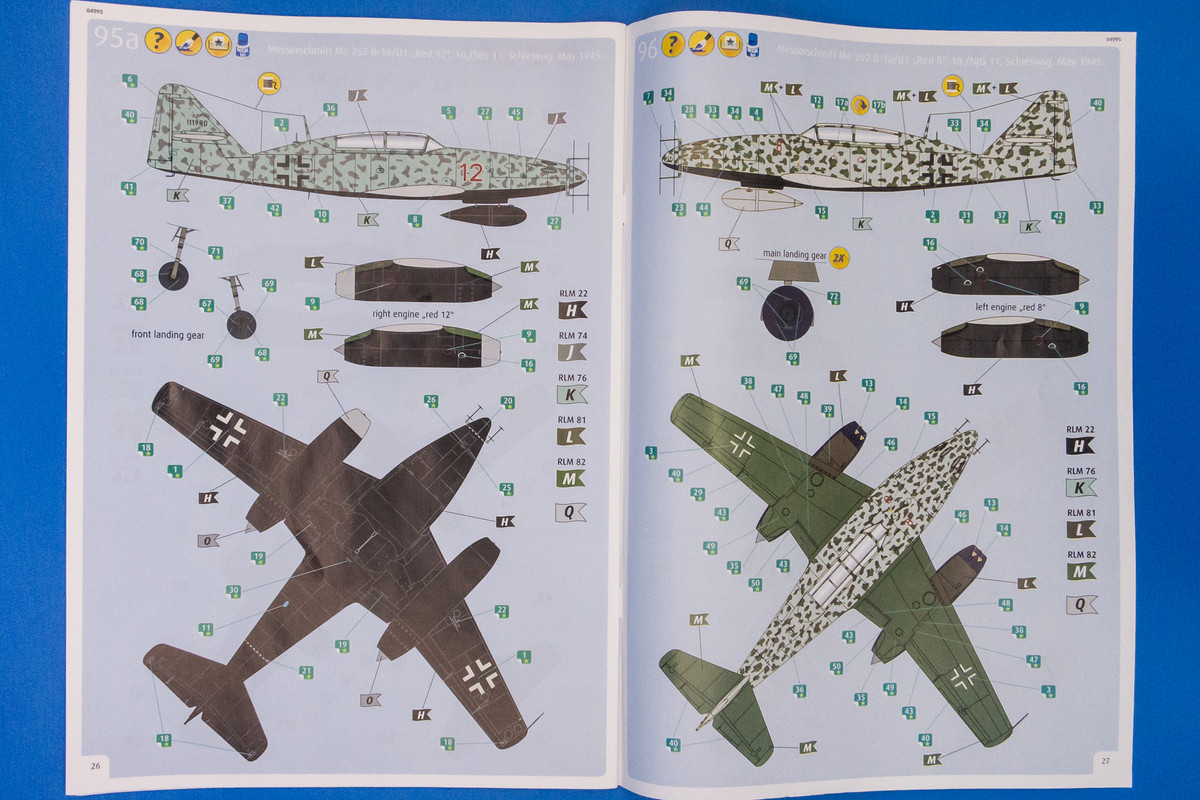
Revell has upgraded its instructions from black and white to color. International pictographs with little written instructions are still the primary form of communication. The full color palette on the profile drawings are a nice touch.
Image
Image
Image

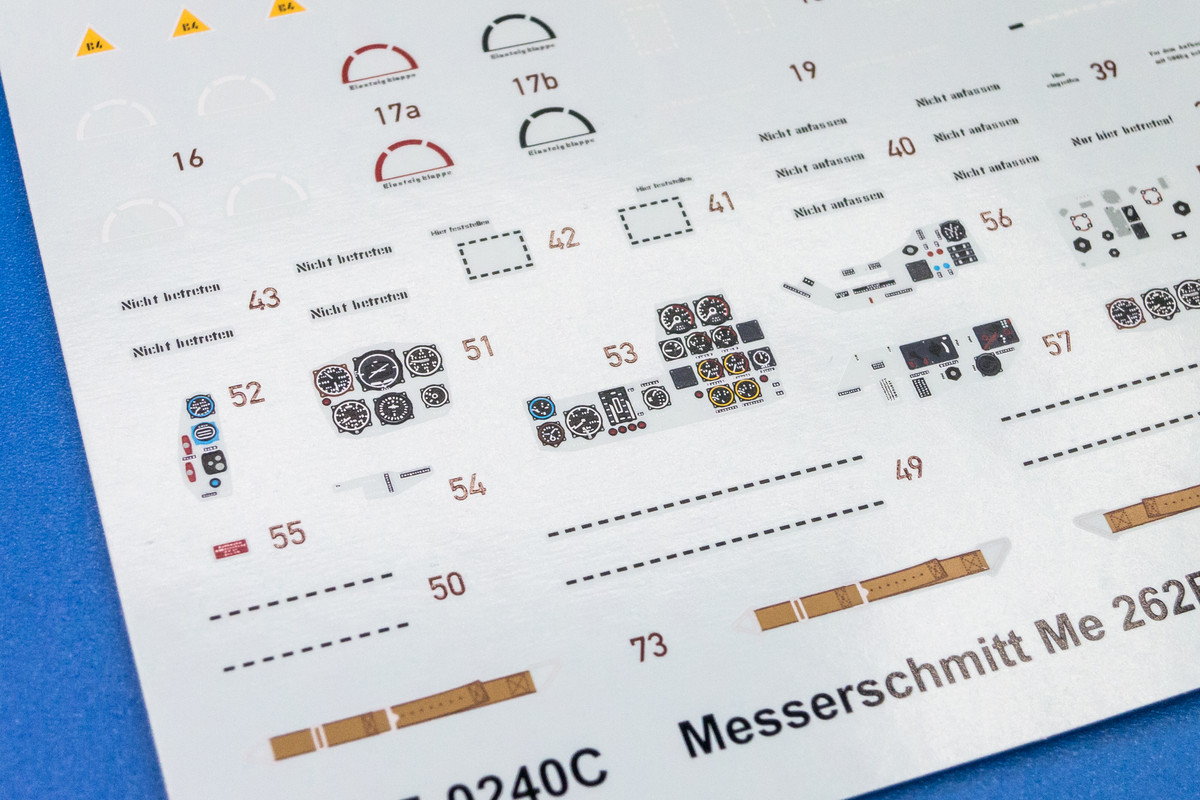
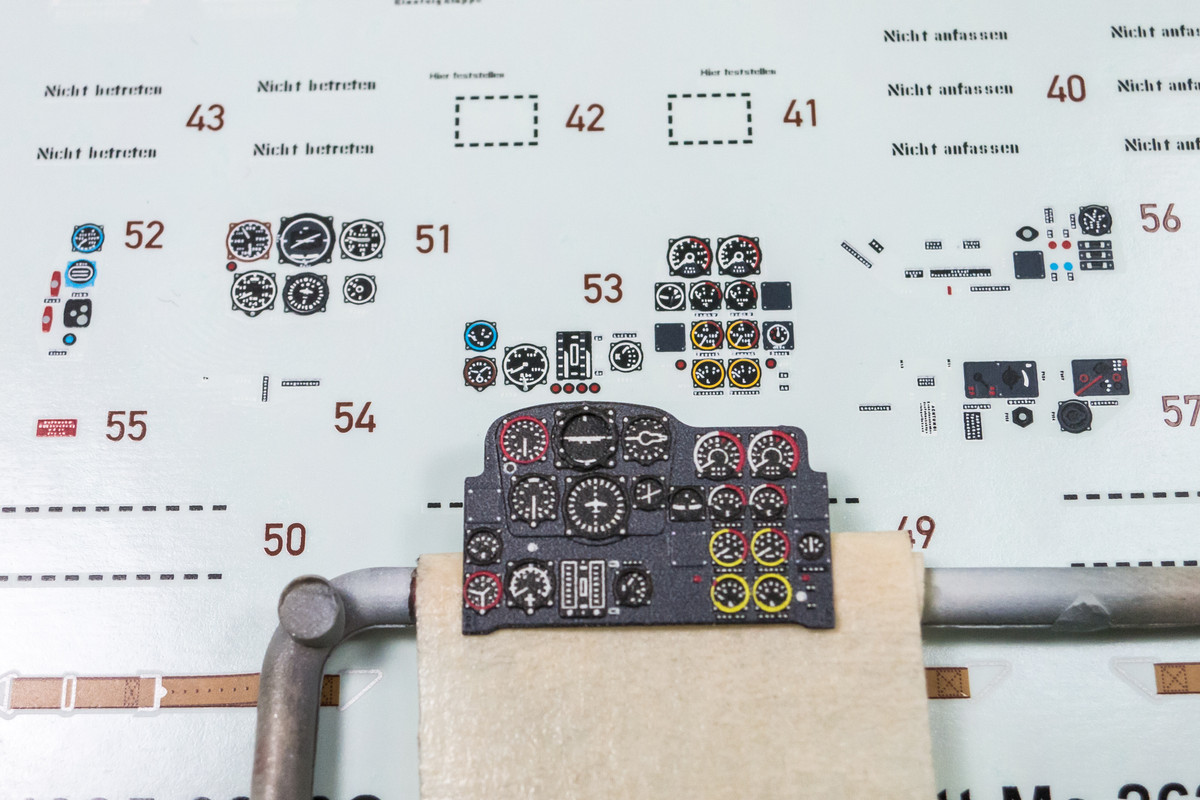
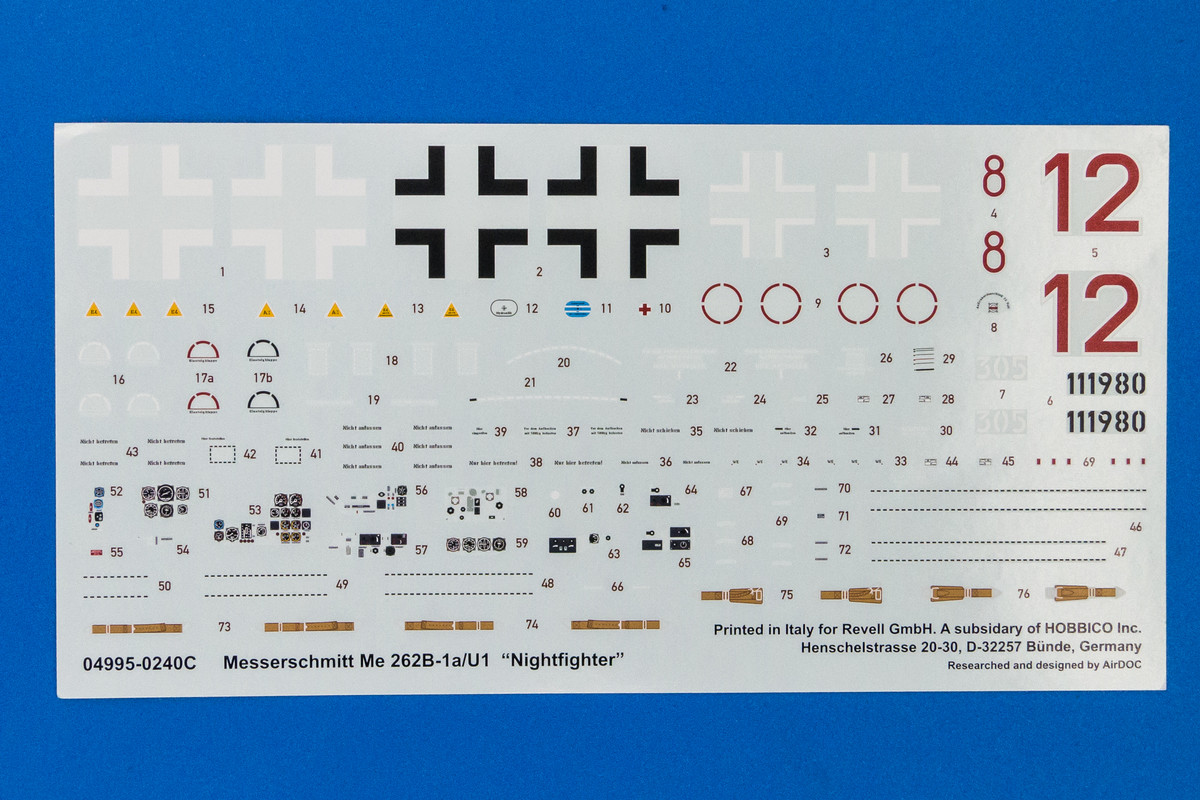
For such a large aircraft, the small decal sheet is a bit of a surprise but these nightfighters were quite sparse when it came to markings. The decals have a matt surface and are labelled as "Printed in Italy" (Cartograf?). Decal printing seems to be of very high quality and includes not only the instrument panels but decals for the side panels as well.
Image

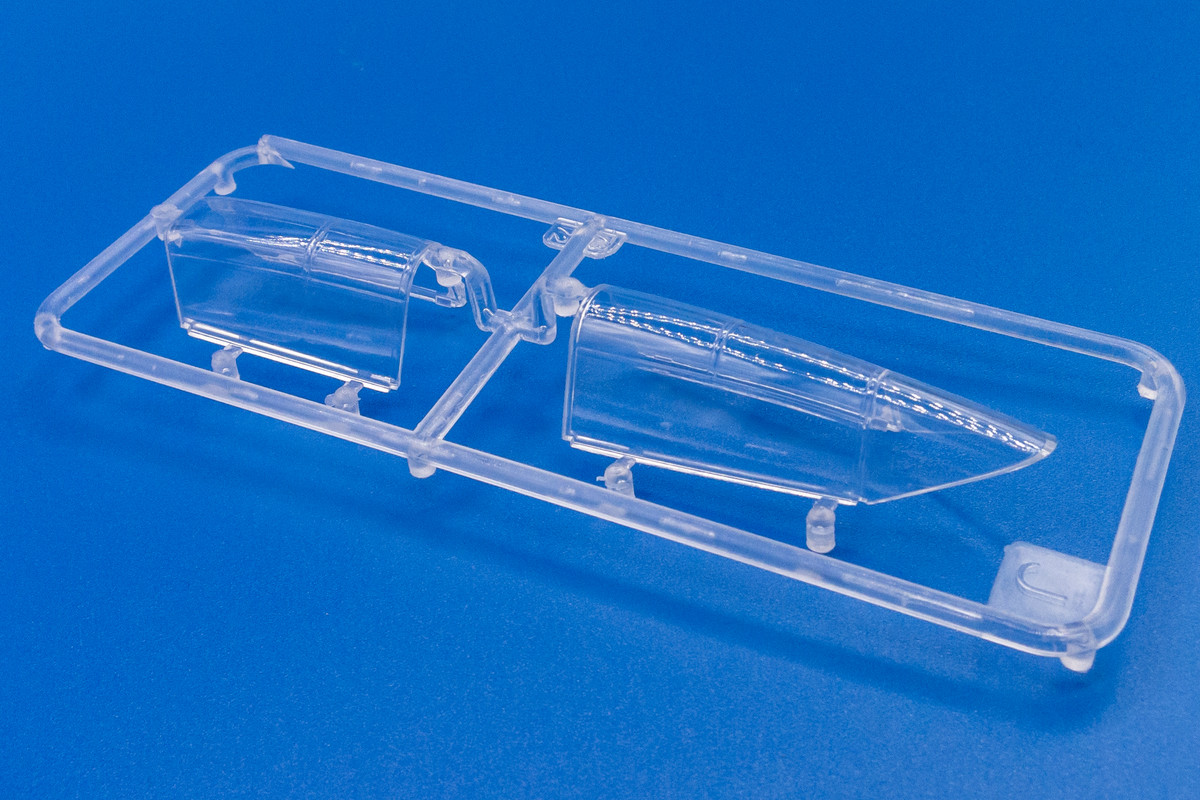
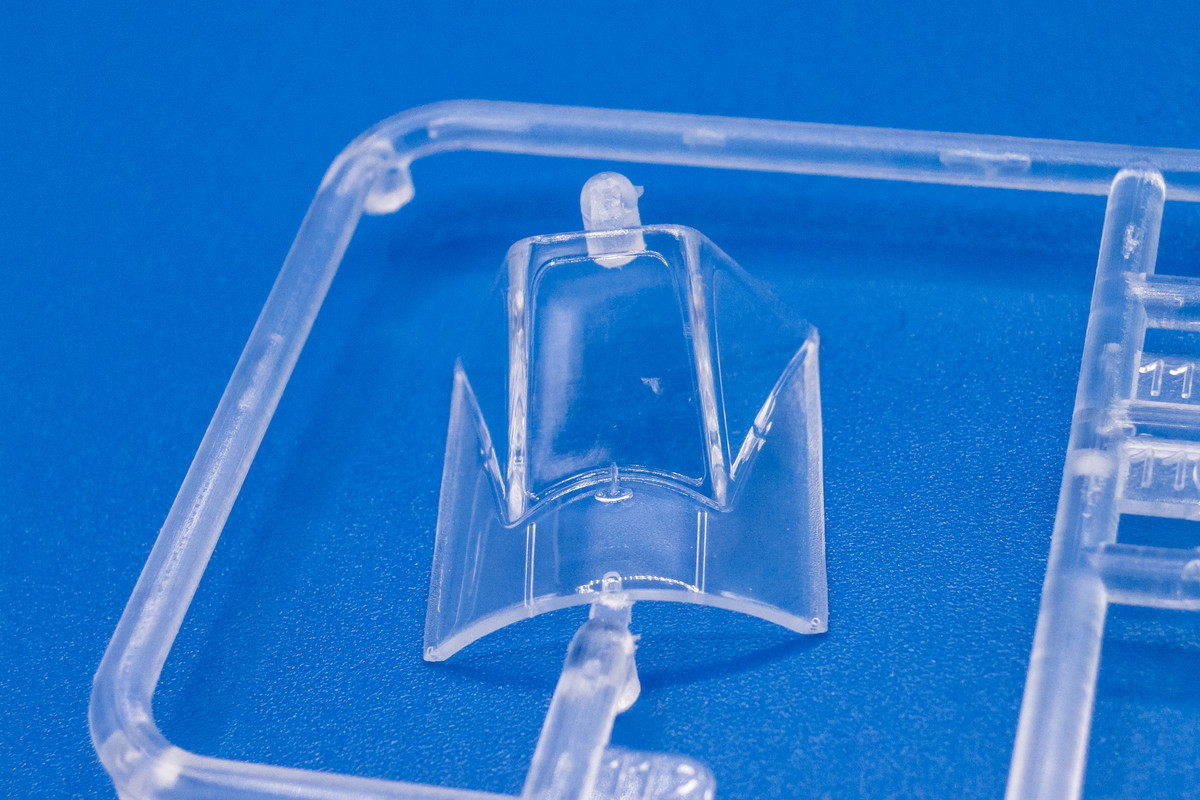
The clear parts look pretty good. Due to the windshield becoming loose in the bag, it suffered from a small spot scratch which will need to be polished out when the time comes.
Image
Image
Image

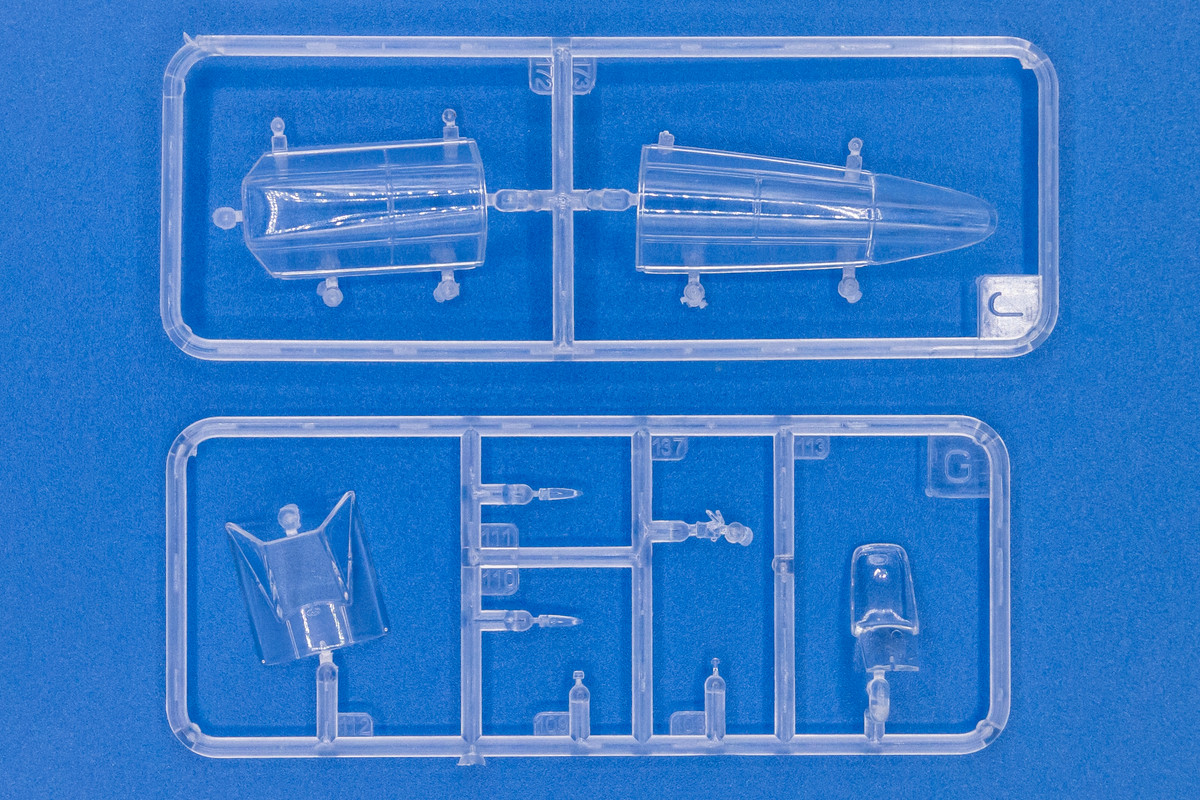
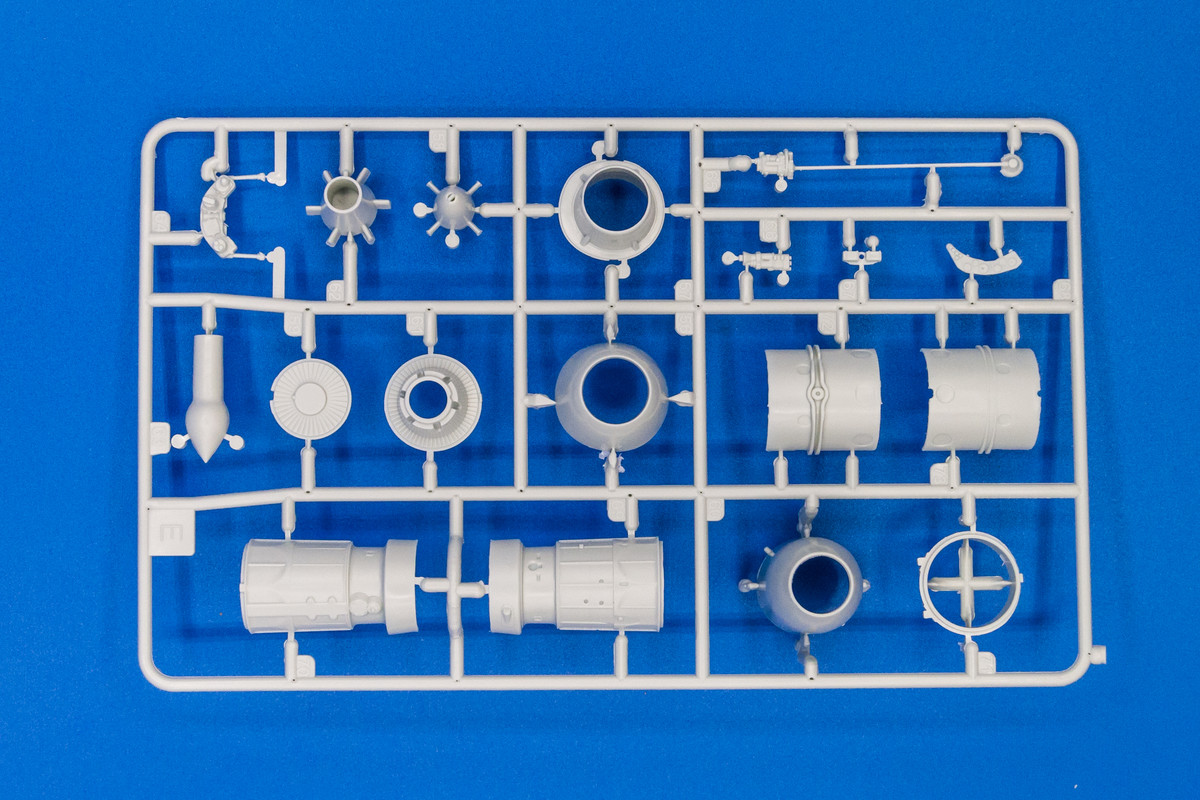
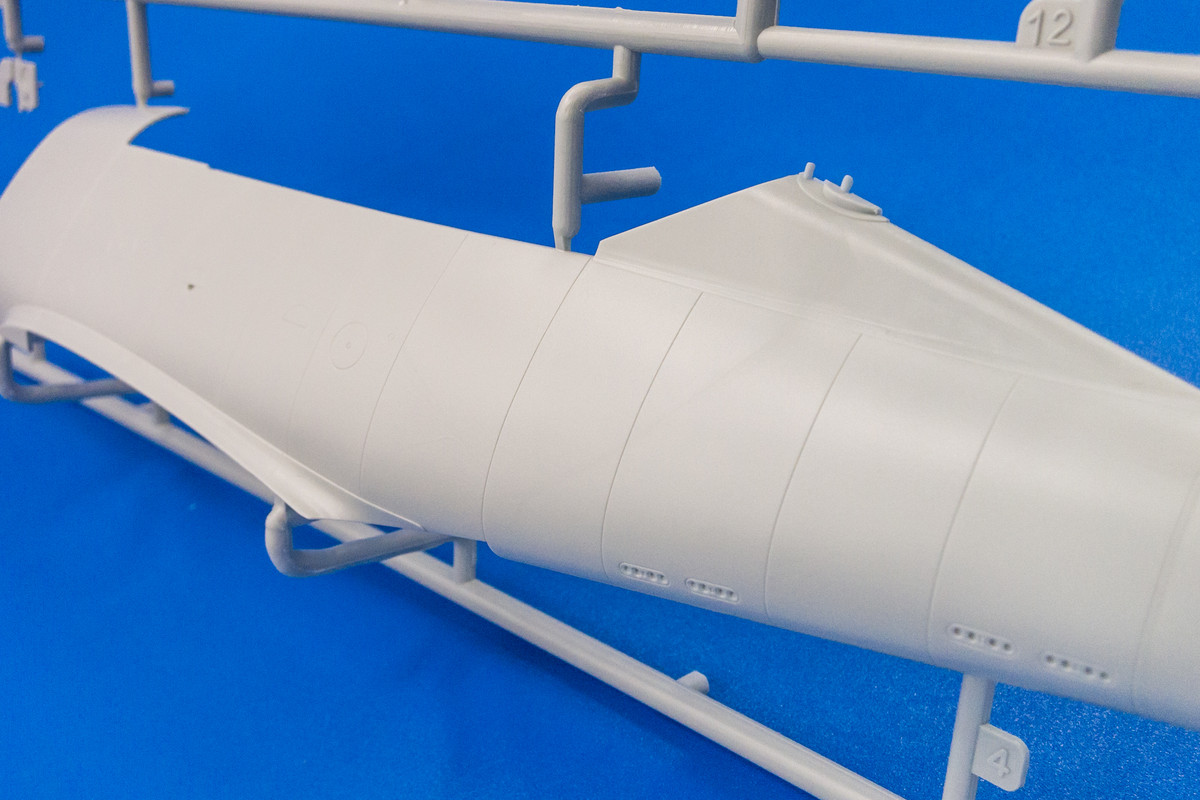
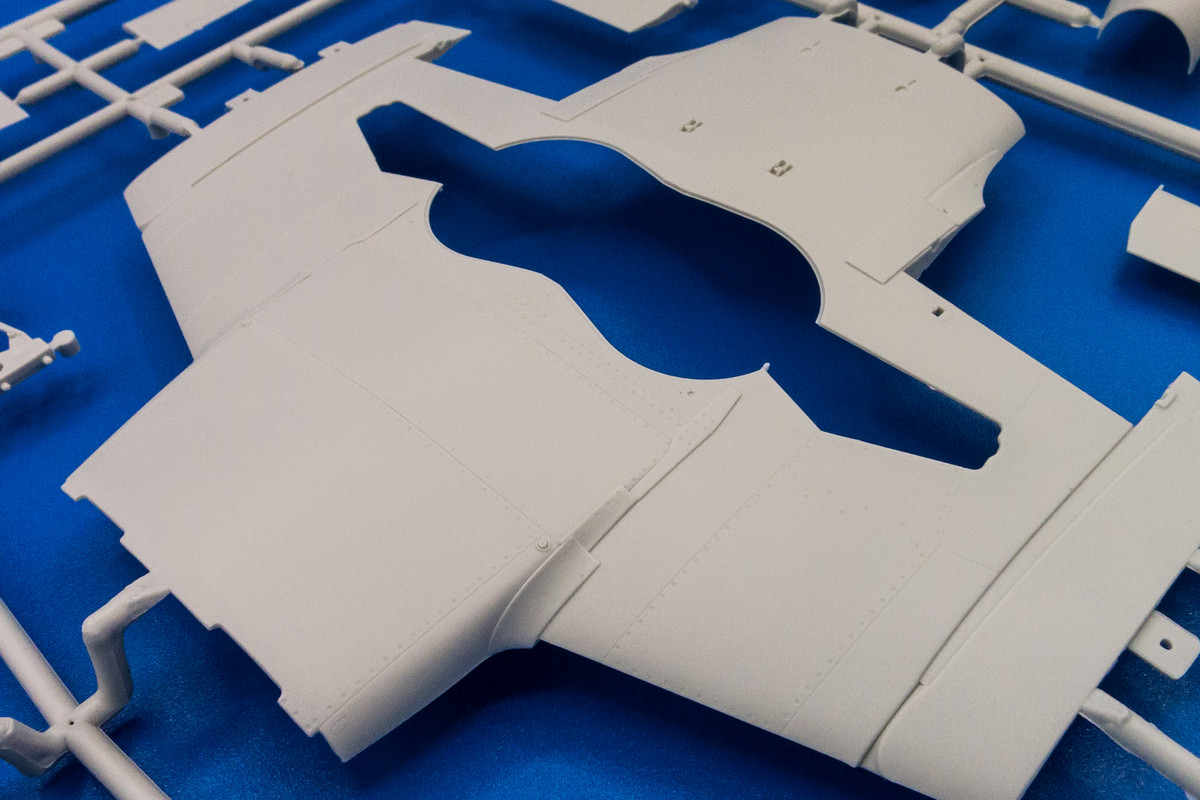
Overall mold quality looks very good. Interesting that the side panels are not flat-faced but feature molded detail, which seems to conflict with the use of decals... can't tell whether this is a good or bad thing.
Image
Image

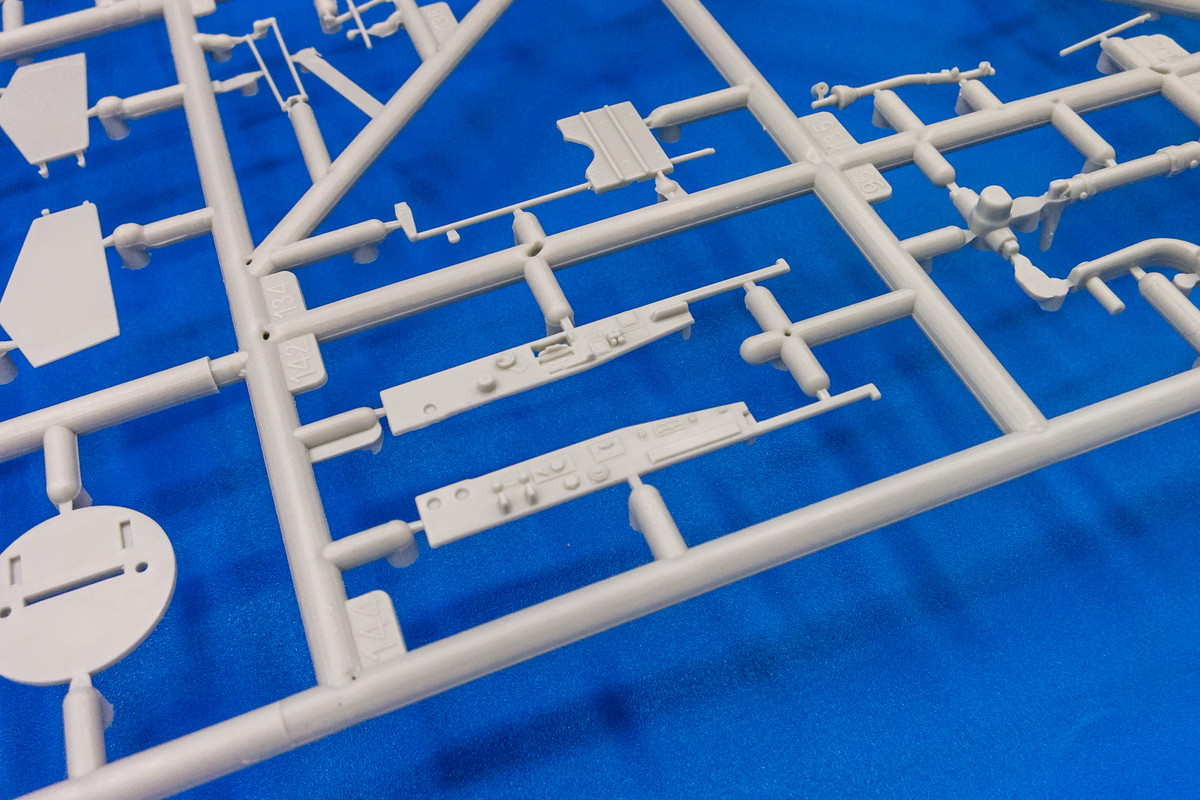
The major exterior components are not riveted unlike Trumpeter's offering.
Image
Image
Image

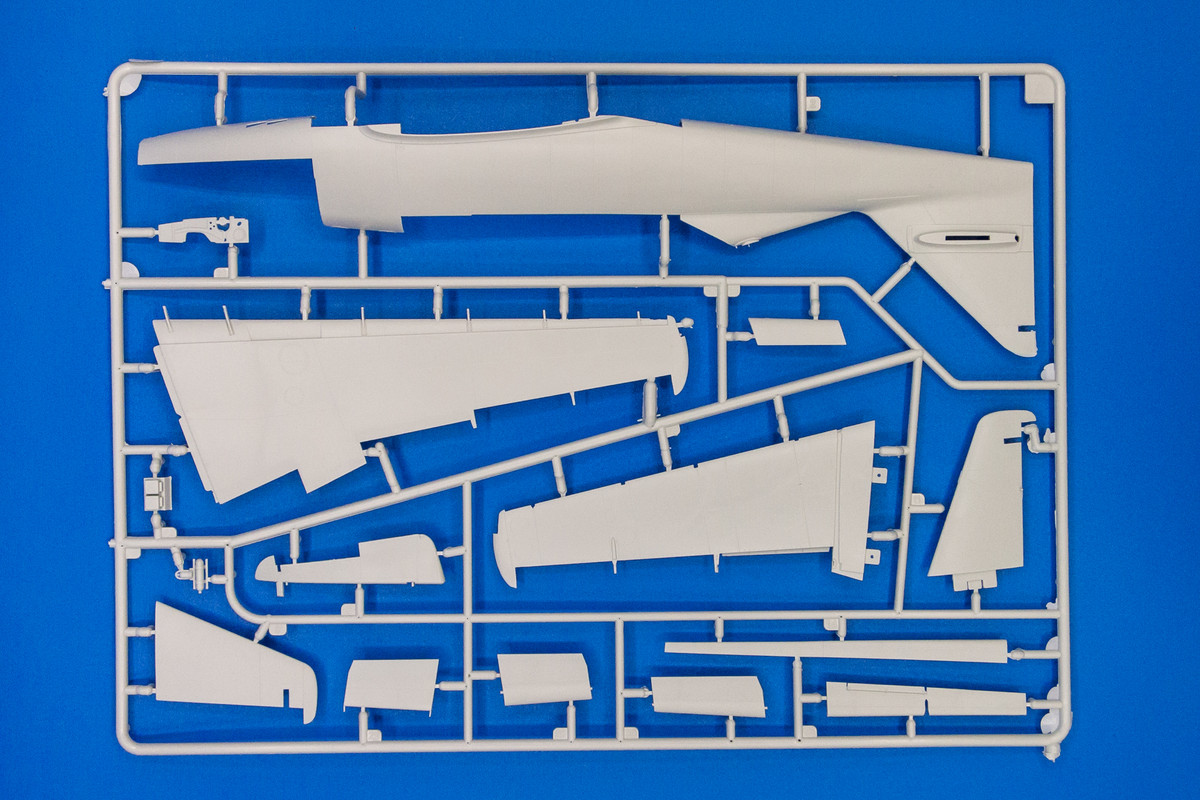
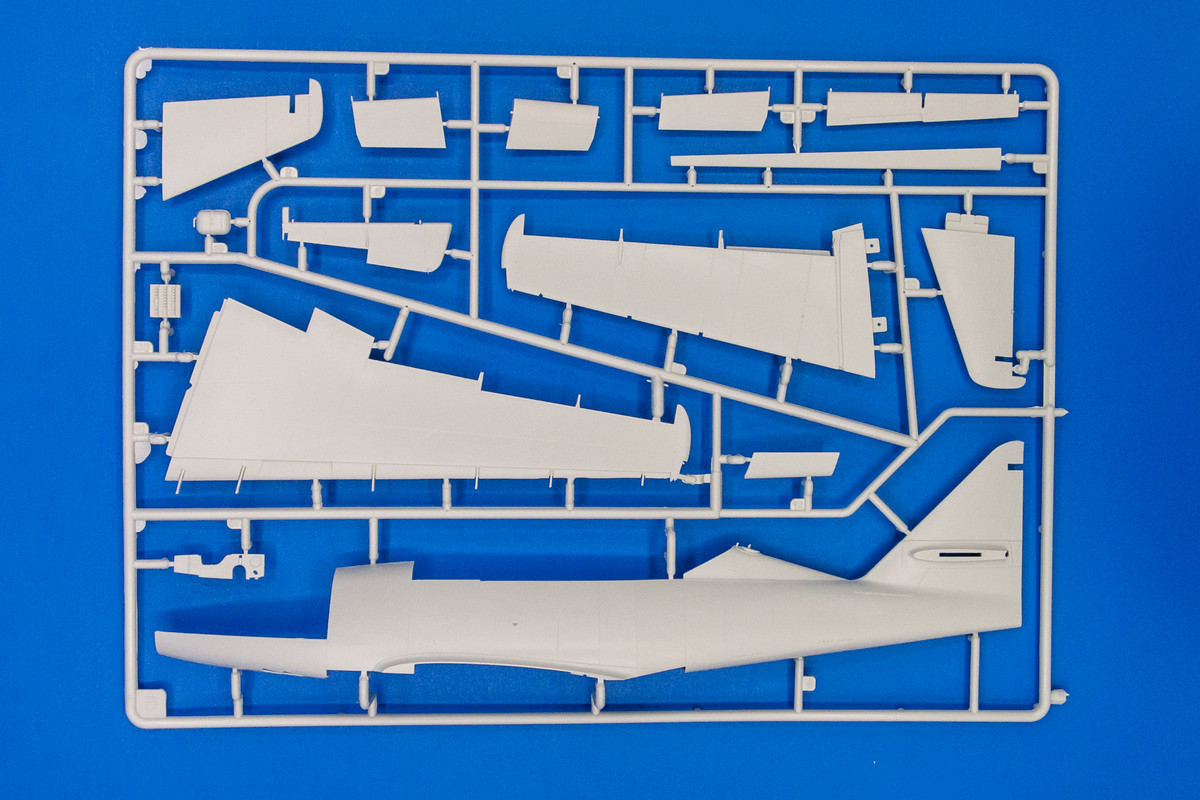
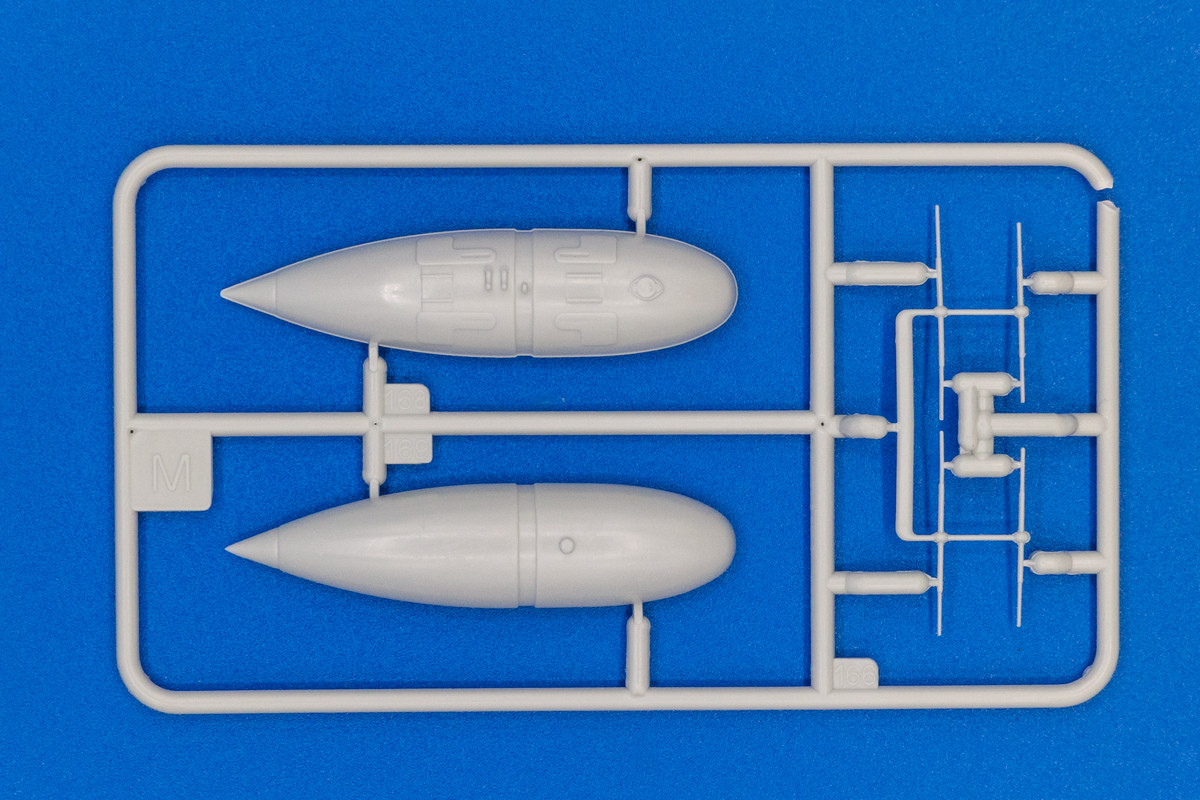
Parts breakdown is a little unusual in that the bottom wing is not a single piece but broken up into three parts: left, center and right.
Image
Image

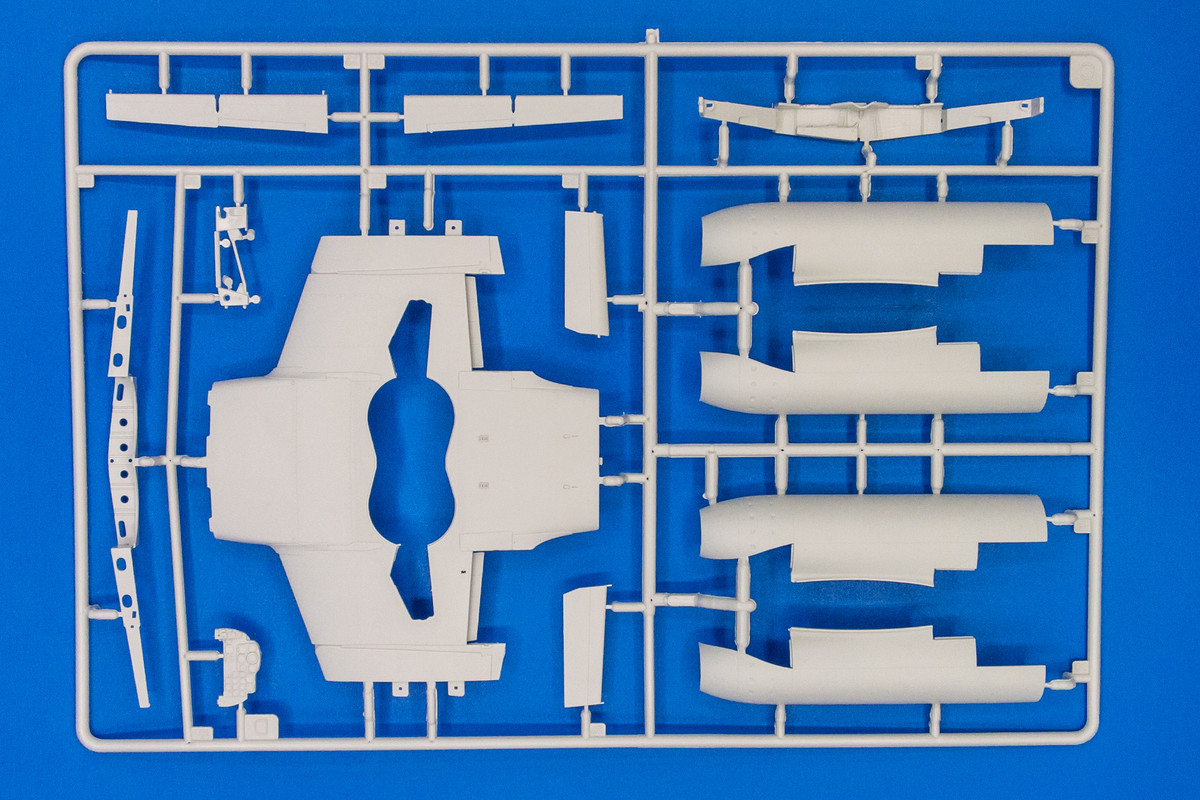
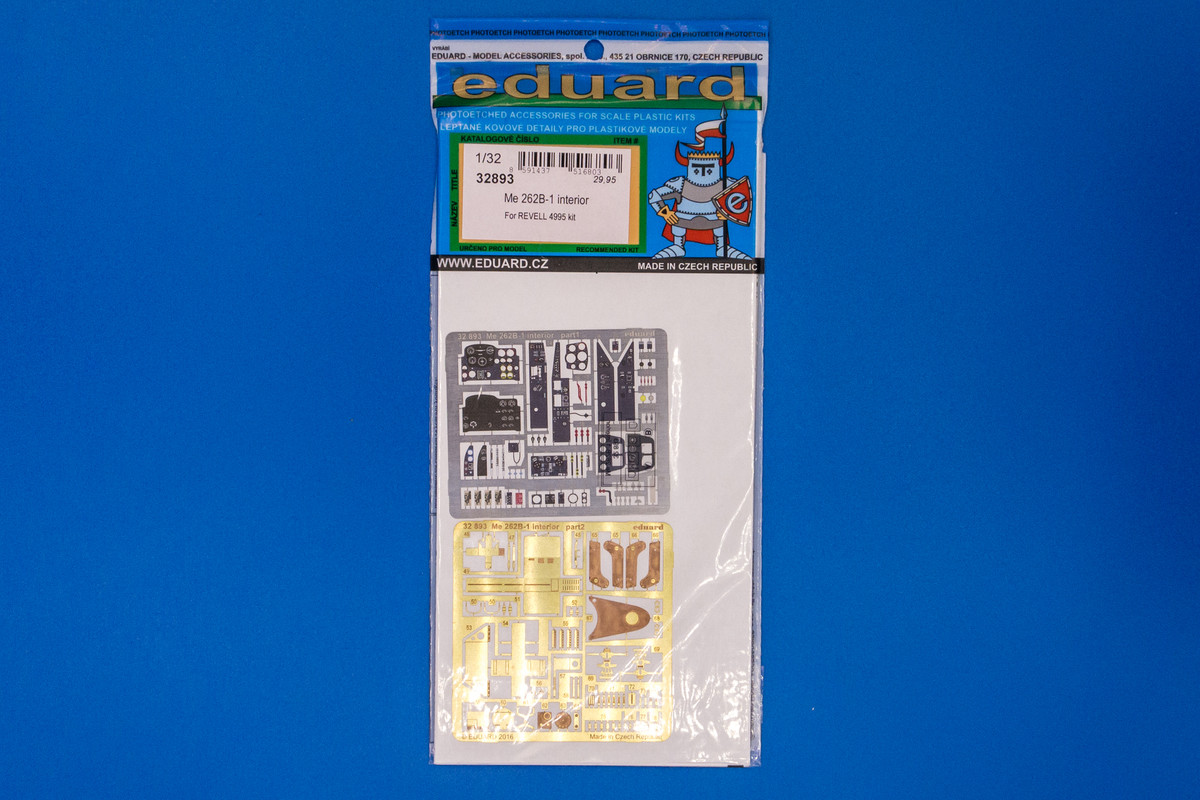
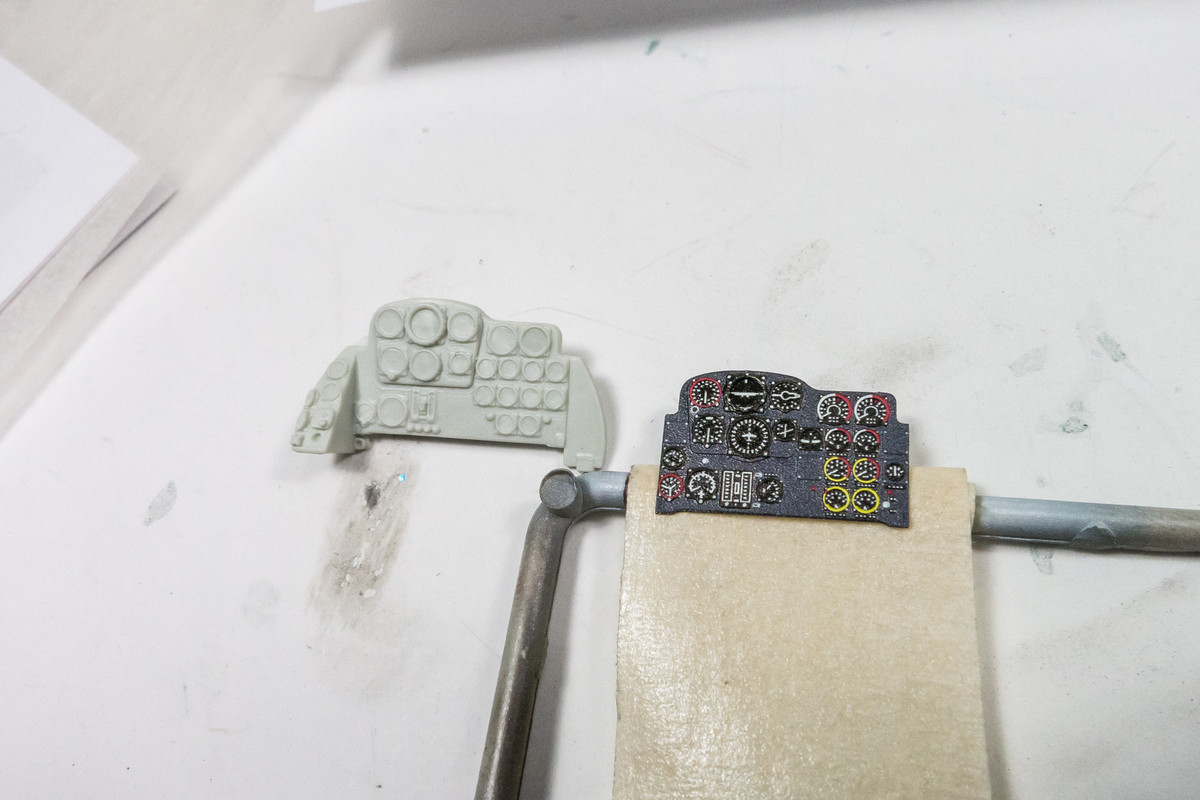
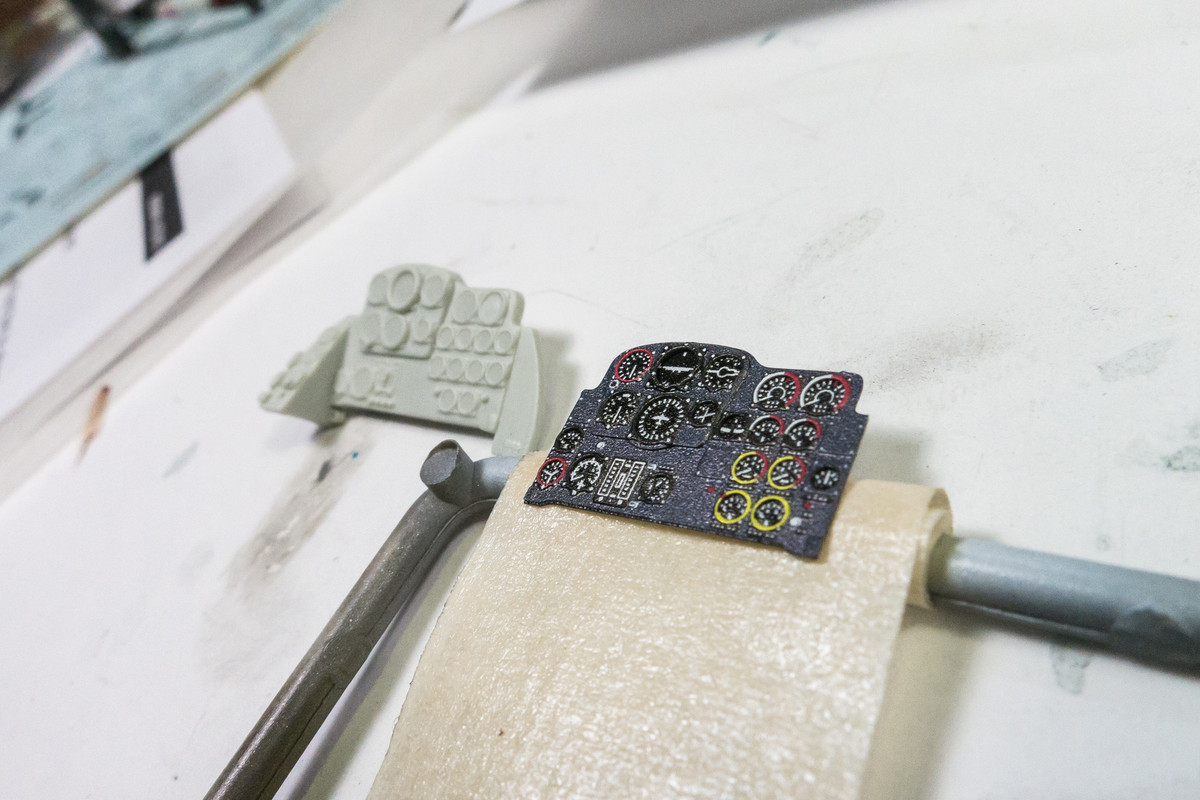
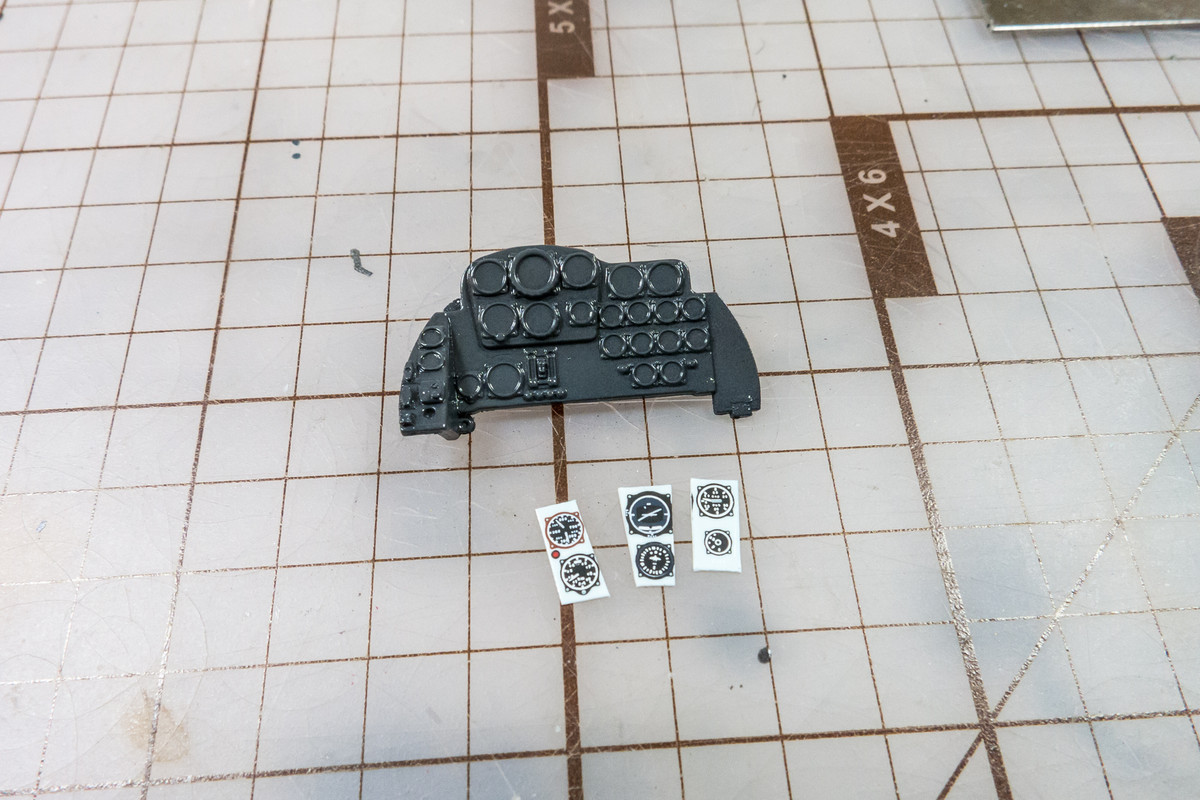
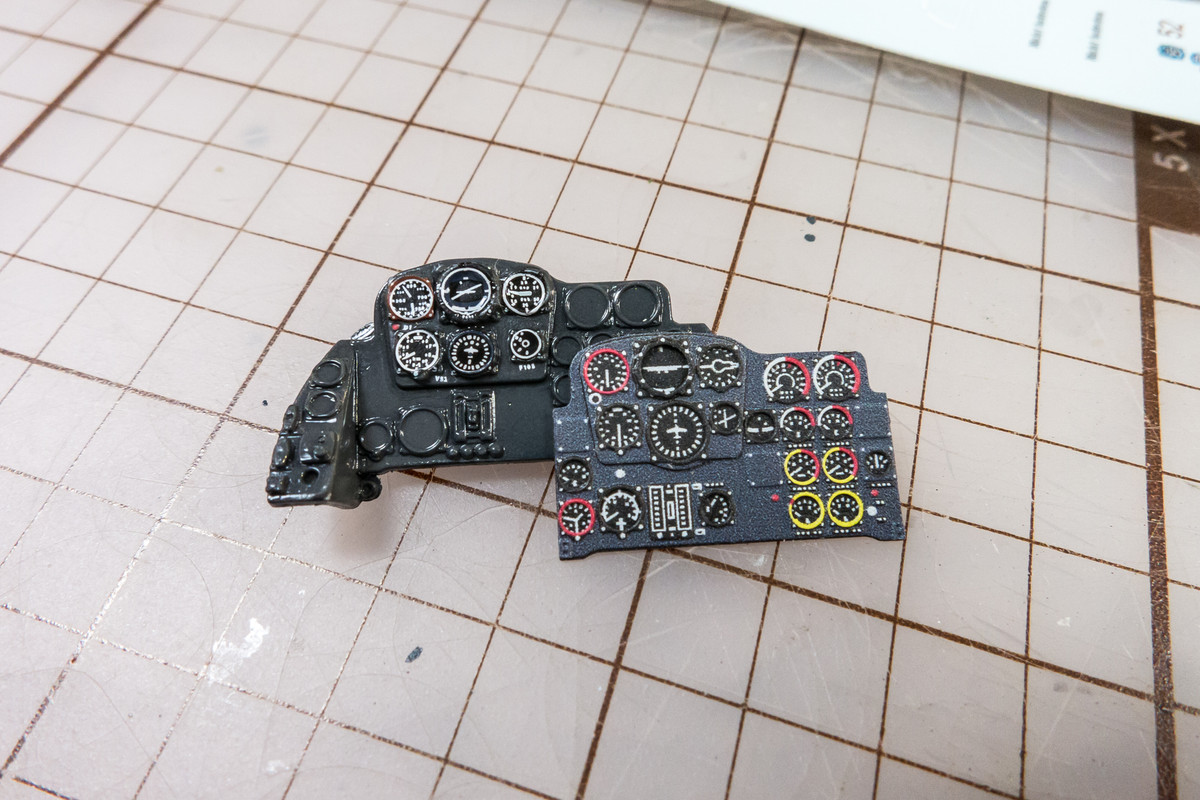
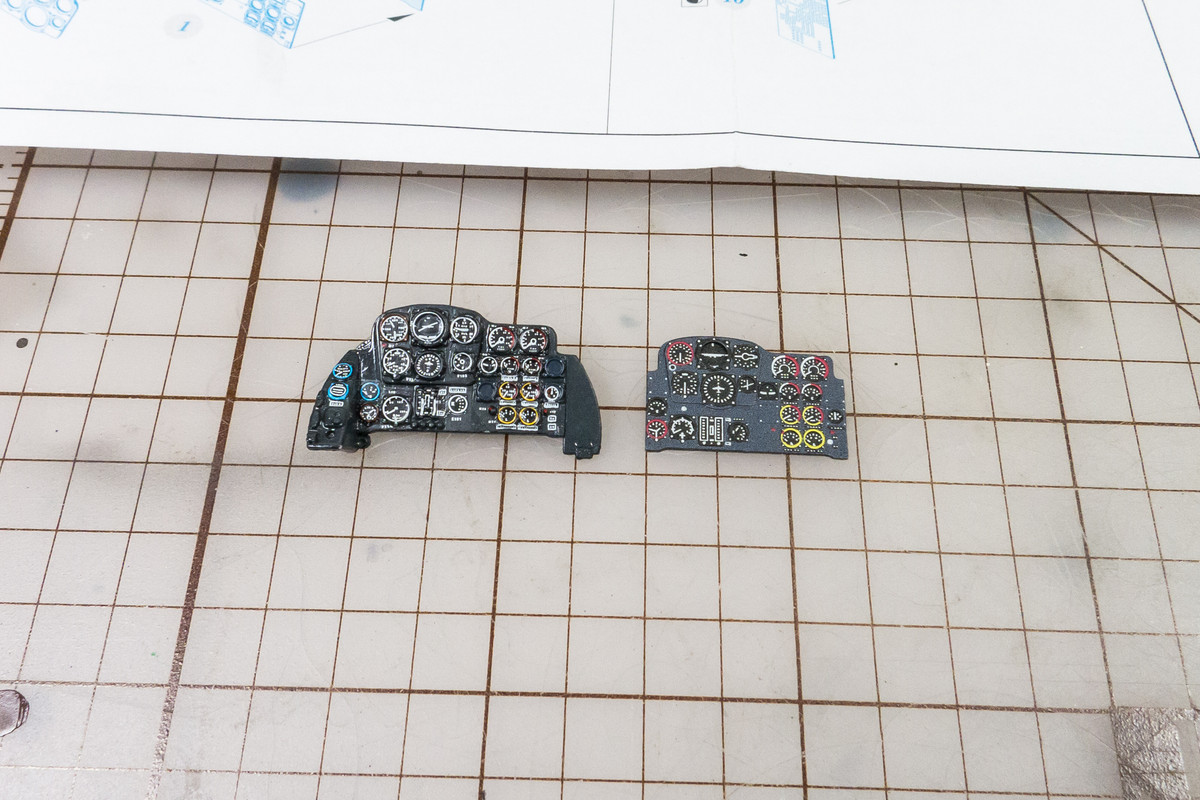
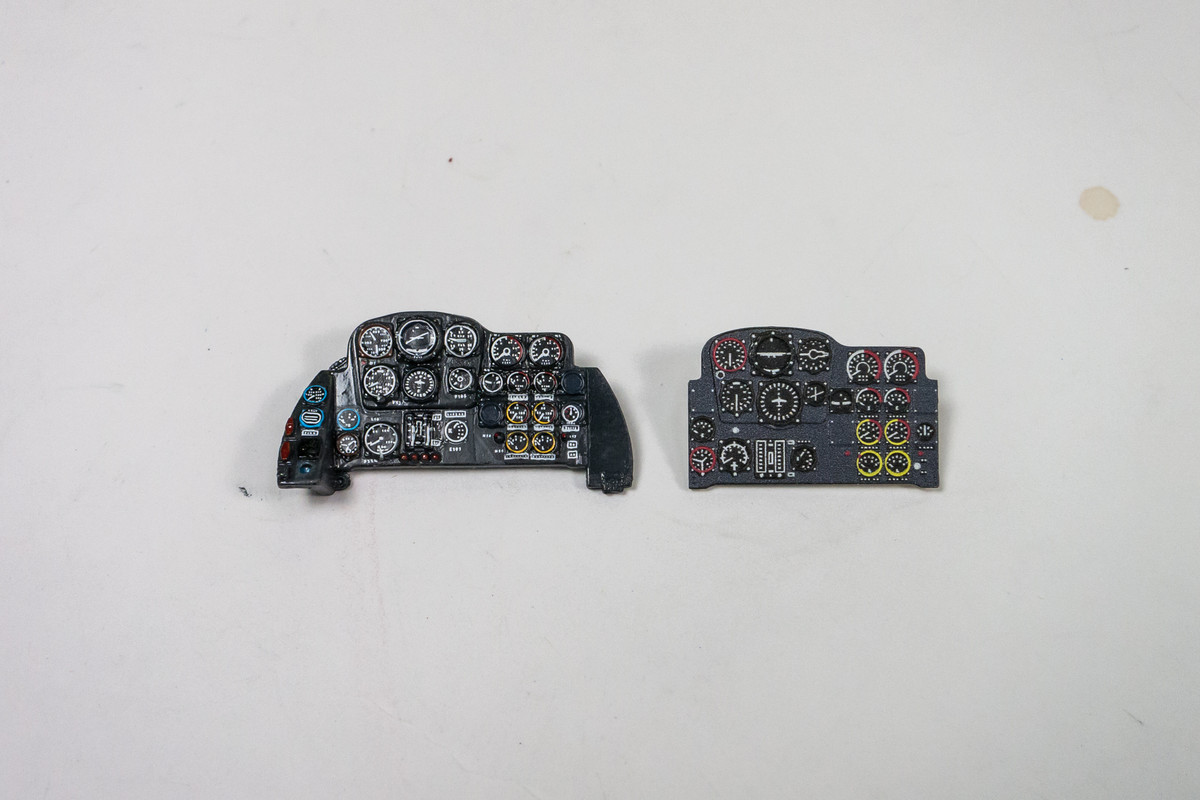
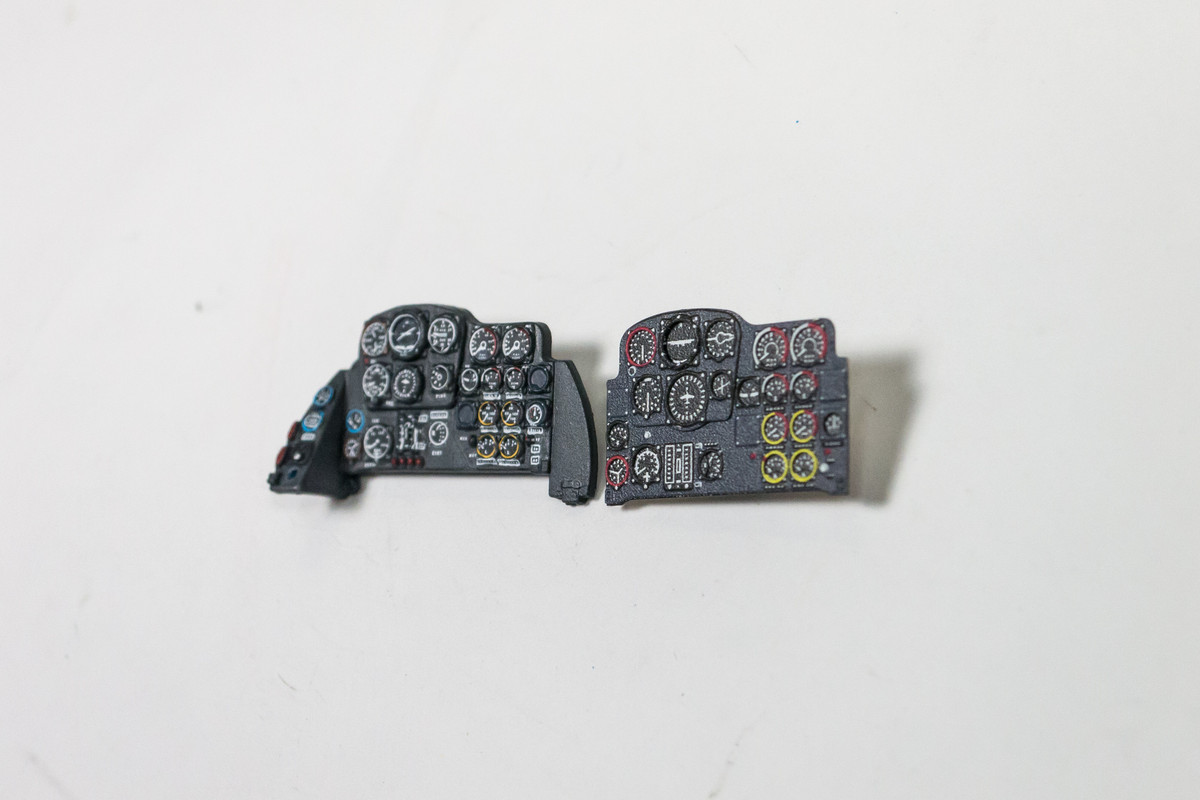
The instrument panel is very nicely molded. Since I have Eduard's photoetch version of the instrument panel, the first thing I'm going to do is compare the two.
Image

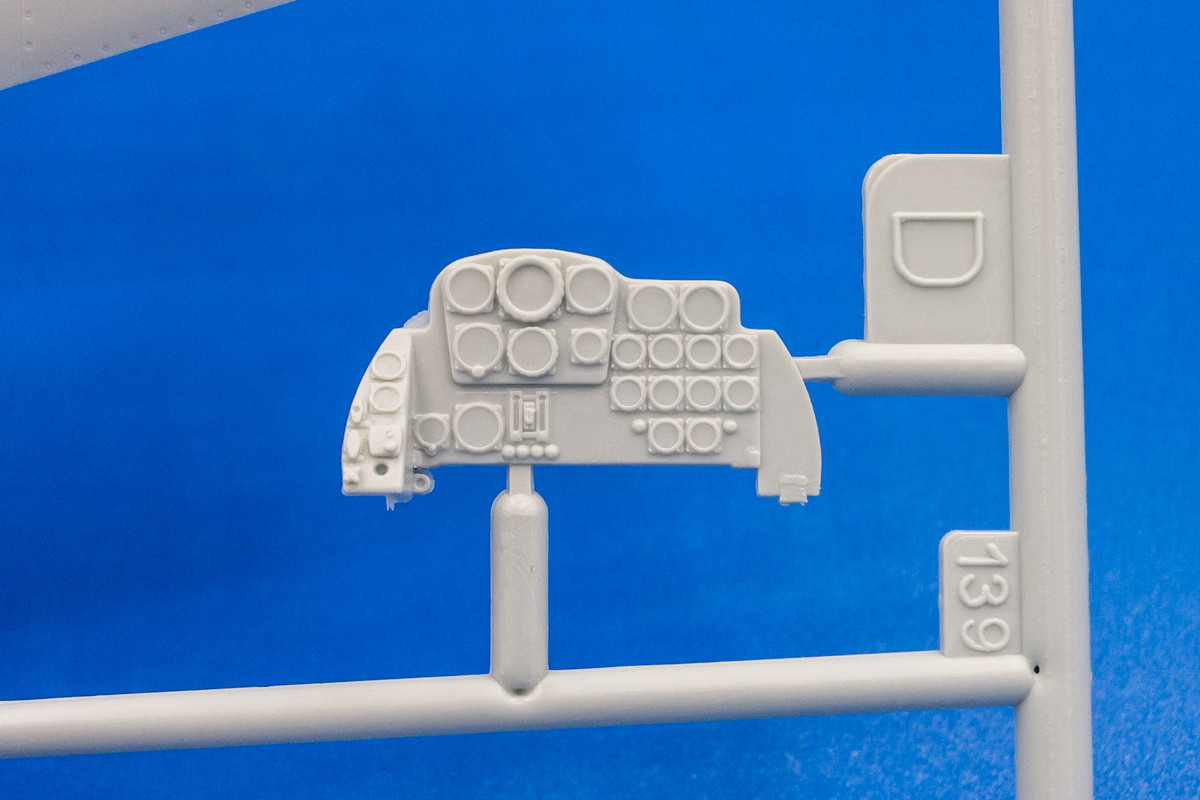
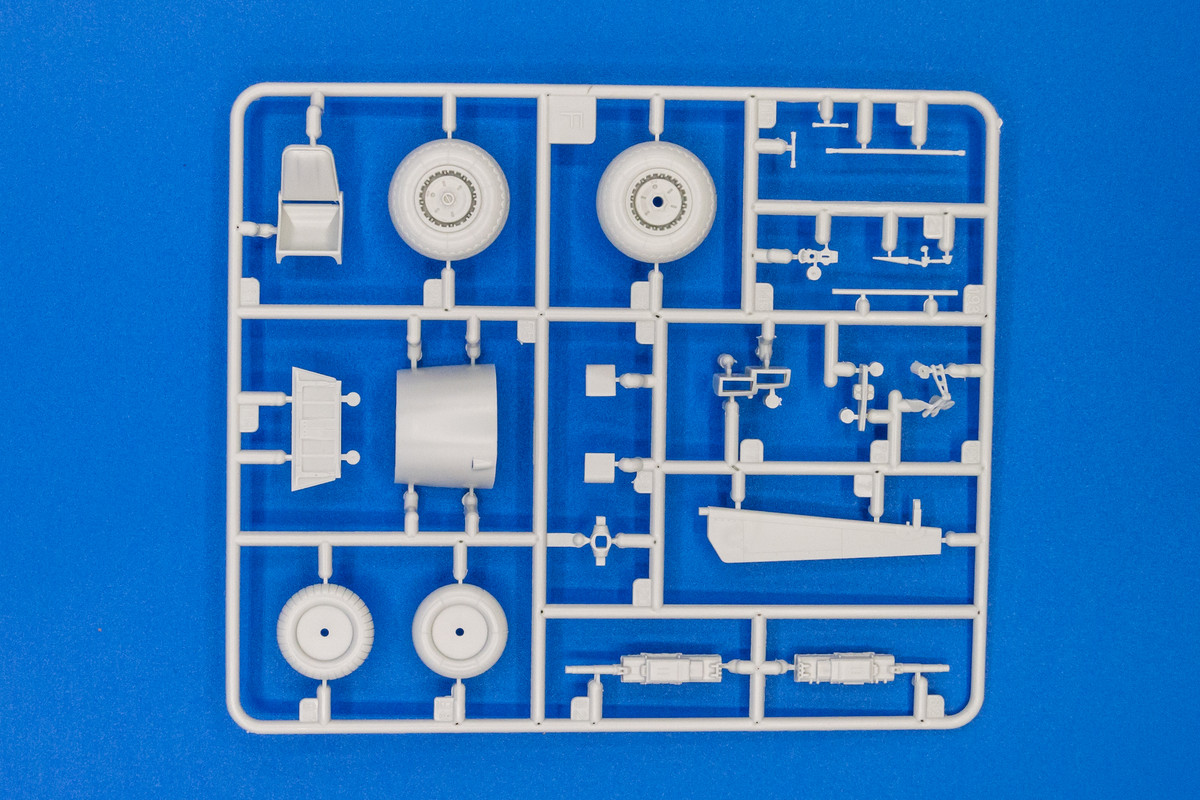
The kit provides two copies of these smaller frets. Overall impression of the kit at this point is very positive!
Image
Image
Image
Image
John aka JKim
-----------<><
Image
User avatar
Stuart
Elite Member
Posts: 9573
Joined: Sun Apr 06, 2014 1:06 pm
Location: North Wales
Contact:

Re: 1/32 Revell Me262B-1/U1 Nachtjager

Post by Stuart »

Should be an interesting build John, some of the new Revell kits are very nice - I'll be looking forward to seeing what you do with it.
jkim wrote:... The Nachtjager comes in Revell's customary end-opening boxes, which I personally am not a fan of. Not only are they flimsier than the normal top-opening boxes, getting the contents in and out of the box is so much more of a hassle.

Image
Tape all the sides up and then cut out the top (all except one of the long sides - that way it'll give you a tray with a flip lid.
Stuart Templeton 'I may not be good but I'm slow...'

My blog: https://stuartsscalemodels.blogspot.com/
User avatar
jkim
Elite Member
Posts: 3923
Joined: Mon Apr 10, 2017 4:03 pm

Re: 1/32 Revell Me262B-1/U1 Nachtjager

Post by jkim »

The aftermarket list is relatively short for this build. First up are brass versions of the Neptun radar array by Master Model. Since the radar array is stuck onto the nose, it's going to be very prominent. There is a lot of benefit in getting these to look right.
Image

I picked up a set of resin wheels from Barracuda. If you look closely at the photos of the kit tires, you'll notice that the tread pattern does cover the entire contact surface. These replacements will address that deficiency and also add some nice detail in the form of the brake line fittings.
Image

My preferred approach to the seat harnesses are the HGW fabric belts.
Image

Eduard offers a few photoetch sets for the Revel 262 kit. I normally perform a level of effort/worth the benefit analysis of the photoetch and will probably not be using everything from these sets.
Image
Image

And of course, I can't go without having a set of trusty Eduard masks to speed up the canopy masking process. This canopy has lots of frames so it will be a great time-saver!
Image
John aka JKim
-----------<><
Image
User avatar
jkim
Elite Member
Posts: 3923
Joined: Mon Apr 10, 2017 4:03 pm

Re: 1/32 Revell Me262B-1/U1 Nachtjager

Post by jkim »

Stuart wrote:Should be an interesting build John, some of the new Revell kits are very nice - I'll be looking forward to seeing what you do with it.

Tape all the sides up and then cut out the top (all except one of the long sides - that way it'll give you a tray with a flip lid.
Thanks Stuart! I usually use a top-opening box from another kit during the build!
John aka JKim
-----------<><
Image
User avatar
Stuart
Elite Member
Posts: 9573
Joined: Sun Apr 06, 2014 1:06 pm
Location: North Wales
Contact:

Re: 1/32 Revell Me262B-1/U1 Nachtjager

Post by Stuart »

Also a good idea :grin: I do agree though, side opening boxes are crap.
Stuart Templeton 'I may not be good but I'm slow...'

My blog: https://stuartsscalemodels.blogspot.com/
User avatar
Medicman71
Elite Member
Posts: 9698
Joined: Mon Apr 07, 2014 9:32 am
Location: Houston, Tx

Re: 1/32 Revell Me262B-1/U1 Nachtjager

Post by Medicman71 »

Can't wait to see this!!!
Mike

Sponsored by Boeing, Lockheed Martin, Northrop Grumman, Saab, BAE, and Dassault
User avatar
jkim
Elite Member
Posts: 3923
Joined: Mon Apr 10, 2017 4:03 pm

Re: 1/32 Revell Me262B-1/U1 Nachtjager

Post by jkim »

A few things caught my eye during my unboxing of the kit. First, I thought the kit instrument panel was very nicely molded. And the decal sheet provides a very good representation of the instrument panel dials and details. Revell intended that the modeler apply the instrument decal on top of their instrument panel part, which has significant raised detail. Whether this works or not will depend on how the decal can be made to settle into that raised detail. I like how they printed the dials on clear decal film, which gives a better chance at success.
Image

I also have access to the Eduard photoetch instrument panel. It is meant to be applied to the kit instrument panel after the details are scraped off the top. So I won't be able to make direct comparisons since both methods utilize the same part. The Eduard panel is comprised of four parts which are layered upon one another. Even so, the flatness of the Eduard panel compared to the kit part is obvious. The Eduard panel is also afflicted with an overly purple version of RLM 66 and a noticeably textured surface.
Image
Image

How do the printed details compare? Look for yourself... I would give the nod to the decal sheet as the Eduard panel seems to resolve into dots at the individual instrument level. The Eduard panel was given a shot of clear flat, which helps to knock down that texture.
Image

So my game plan is to paint the kit instrument panel and attempt to utilize the kit decals on it. If that doesn't work, I can scrape it off and employ the Eduard instrument faces.
John aka JKim
-----------<><
Image
User avatar
Medicman71
Elite Member
Posts: 9698
Joined: Mon Apr 07, 2014 9:32 am
Location: Houston, Tx

Re: 1/32 Revell Me262B-1/U1 Nachtjager

Post by Medicman71 »

There's definitely a difference in detail. I'd go with the kit ones myself.
Mike

Sponsored by Boeing, Lockheed Martin, Northrop Grumman, Saab, BAE, and Dassault
User avatar
Stuart
Elite Member
Posts: 9573
Joined: Sun Apr 06, 2014 1:06 pm
Location: North Wales
Contact:

Re: 1/32 Revell Me262B-1/U1 Nachtjager

Post by Stuart »

interesting comparison. I've used the decal over raised detail a number of times and it often looks good, especially when they break the decal up into segments like they do here.

Sometimes I wonder if we use AM for the sake of it, rather making best use of what's supplied in the kit.
Stuart Templeton 'I may not be good but I'm slow...'

My blog: https://stuartsscalemodels.blogspot.com/
User avatar
jkim
Elite Member
Posts: 3923
Joined: Mon Apr 10, 2017 4:03 pm

Re: 1/32 Revell Me262B-1/U1 Nachtjager

Post by jkim »

The big test will be how the decal settles onto the uneven surface of the instrument panel. It could become a distorted blob so let's see! I've given the IP a coat of RLM 66 (Mr Hobby Aqueous) and a layer of clear gloss to help protect it from the decal solvent(s) I'll be throwing at it. In order to help align the decals into the correct orientation, I've decided to sub-divide the instrument panel decal into smaller parts.
Image

I've built up an assortment of decal solvents including Micro Sol, Tamiya Mark Fit, Mr Mark Softer and Walters Solvaset. Of these, I've found that Solvaset is the best at bullying tough decals to conform so that is what I'm going to use for this trial. Without any solvent, the decal simply sits like a board on top of the instrument bezels. Using a fine brush, I liberally moisten the decal with Solvaset. Coaxing the fluid under the decal via the edges seems to help get the decal to conform. It takes multiple applications of Solvaset and also some physical depression using a cotton swab to get the decals to look presentable.
Image

Eventually, all of the decals are set into place.
Image

There were a few buttons and switch handles that I chose to paint by hand.
Image

A sharp knife is used cut the clear decal film in between the rows of instruments and a few stubborn areas. A final round of Solvaset and cotton swab pressing gets the decal layer as flat as it is going to get. Now a quick flat coat to even everything out...
Image
Image

Not perfect. It's tough getting the decals perfectly centered on each dial but I think this is acceptable. And I think it looks better than the photoetch. I can further enhance the panel by adding clear gloss or maybe UV epoxy into each of the dial faces.
John aka JKim
-----------<><
Image
Post Reply

Return to “Aircraft Work in Progress”