I started this kit maaaaannnnnyyyy years ago when it was first released, about 2001, in a hurry etc. and sorta messed it up, so it went back in the box..... I have a whole bunch of started kits that really should be a priority to finish so I dragged it back out and fixed what I had messed up, also thinned down and added some new details to the front shield
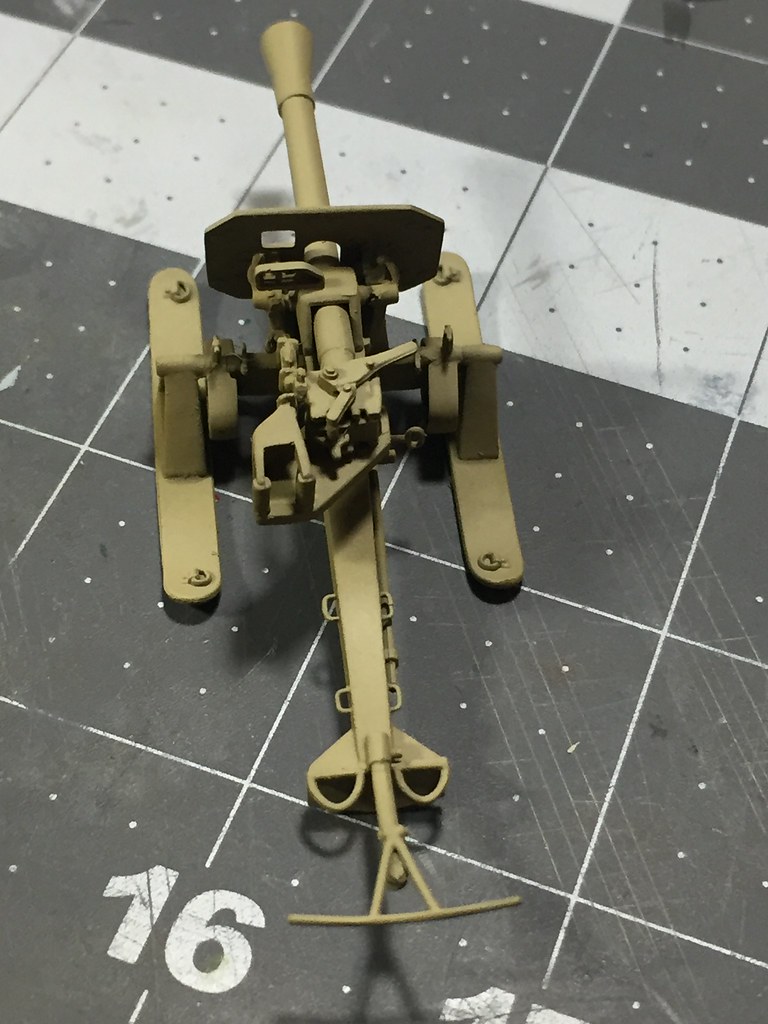
Sprayed it with a mix of Tamiya Dark Yellow and Deck Tan....
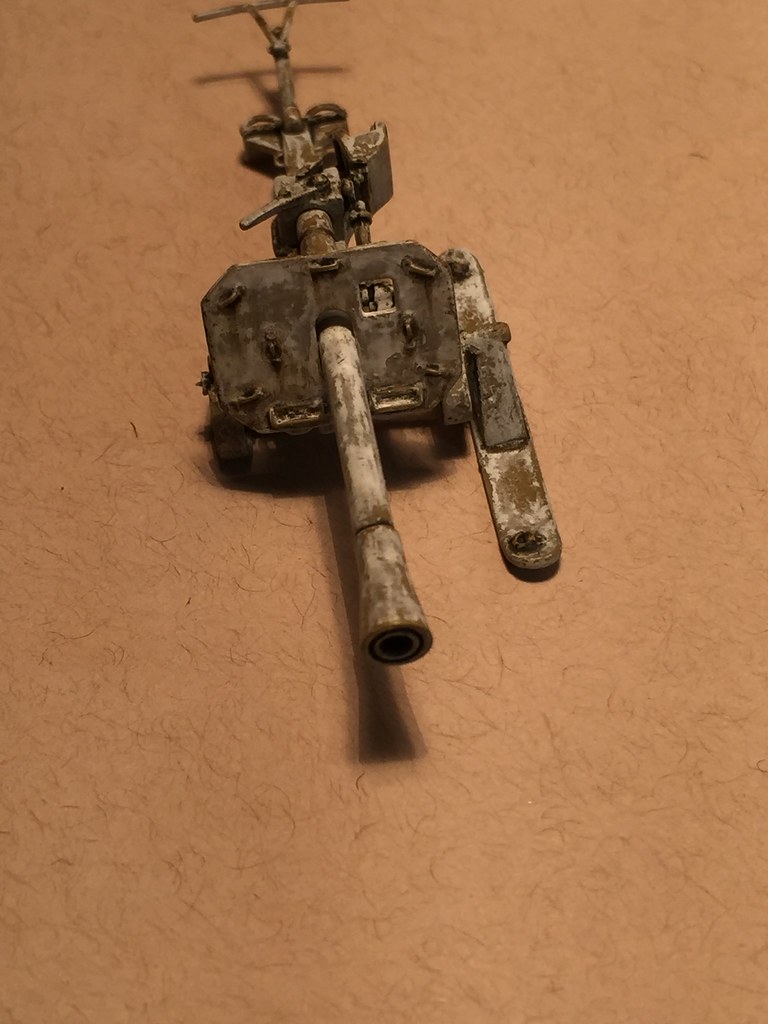
Then sprayed it white......
Then broke one of the skis off and gave it a weathered whitewash finish...
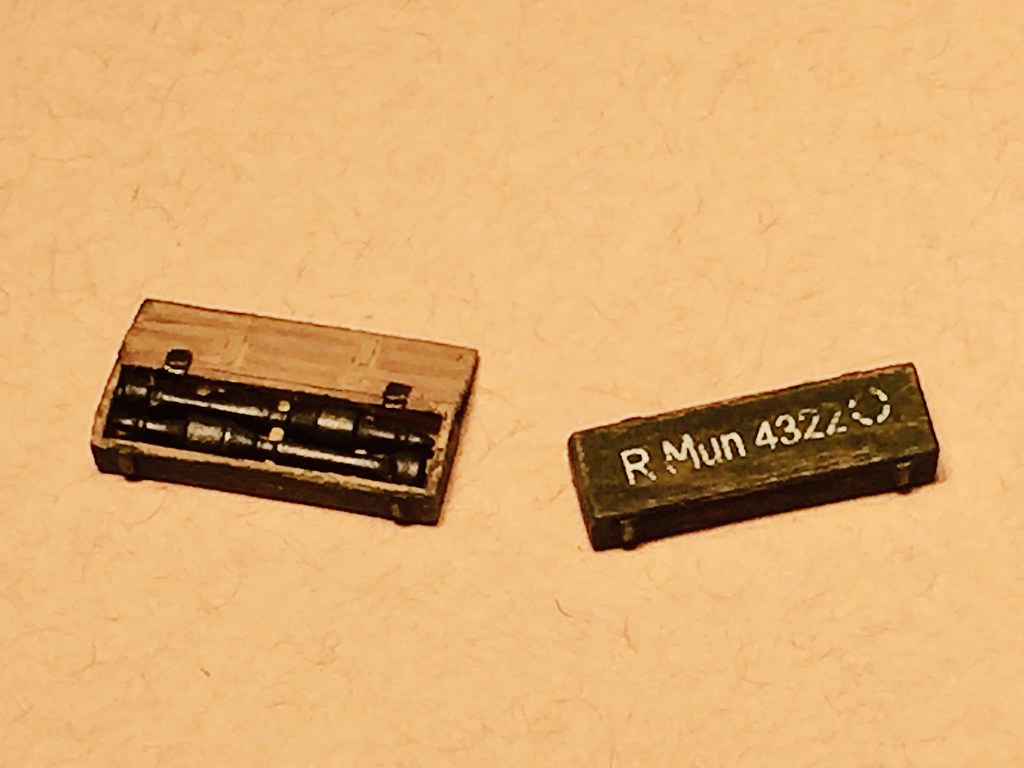
Then decided to build the ammo crates and texture them with a razor saw blade and paint them in a wood finish using craft paints
Then gave them a coat of hairspray, and sprayed a coat of Gunze Aqueous Dark Green that I bought in about 1992-'94 and chipped some off. The decals suffered some moisture damage while in storage, and not only was I surprised to actually find them in the box, but I also got them to work!
I painted the shells a very dark grey and them burnished them with some metallic pigment to give them a metal look and added them to the open crate..
I also sanded, stained, and varnished a wooden base, built up a piece of groundwork from Milliput and got some stuff to make snow.
I had planned to finish this off around the holidays but with shipping at that time being backed up / delayed / generally screwed up, the AK snow product didn't arrive in time for that to happen. So if the planets align, the universe finds harmony, and those that bother me by wanting me to fulfill spousal, parental, or adult responsibilities leave me alone for a while I am going to try to finish off the snow base this weekend and claim my first finish of 2021! We,ll see how that goes, though I am cautiously optimistic.
1/35 Puppchen.........Project for the Weekend
- Stikpusher
- Moderator
- Posts: 18922
- Joined: Sat Apr 05, 2014 8:37 pm
- Location: Ceti Alpha 5
Re: 1/35 Puppchen.........Project for the Weekend
That’s a nice little weekend project.
"Surely I have made my meaning plain? I intend to avenge myself upon you, Admiral. I have deprived your ship of power, and when I swing 'round, I intend to deprive you of your life."
FLSM
FLSM
Re: 1/35 Puppchen.........Project for the Weekend
It's looking excellent! Can't wait to see the final little diorama.
March as one, Don't look back
Odin's sons... Attack!
Unleash hell! Do not repent! Warfare grants us no lament
Let your weapons slash and tear This is no place for fear
Hold the lines! Move as one! In unity our victory's won
Our shields will form a mighty wall
United we shall never fall
Odin's sons... Attack!
Unleash hell! Do not repent! Warfare grants us no lament
Let your weapons slash and tear This is no place for fear
Hold the lines! Move as one! In unity our victory's won
Our shields will form a mighty wall
United we shall never fall
- mustang1989
- Moderator
- Posts: 4903
- Joined: Tue Mar 18, 2014 8:35 pm
Re: 1/35 Puppchen.........Project for the Weekend
Will be watchin' this.
Re: 1/35 Puppchen.........Project for the Weekend
Cool project. I assume they would somehow secure the gun before firing. Imagine firing on skis?!
Thanks,
John
John
Re: 1/35 Puppchen.........Project for the Weekend
That looks great!! Your work is fun ro watch. Love the color.
To make each build less crappy than the last one. Or, put another way, "Better than the last one, not as good as the next one!"..
Re: 1/35 Puppchen.........Project for the Weekend
Not really, the gunner usually sat or knelt behind the gun. It fired a rocket propelled projectile so the recoil was not bad. In essence this was very simply a bazooka with a carriage and breech block added on, it fired the same basic projectile as some of the other German shoulder fired weapons used in the latter part of the war. It could be towed by a Kettenkrad, so it was really not very big.keavdog wrote:Cool project. I assume they would somehow secure the gun before firing. Imagine firing on skis?!
Re: 1/35 Puppchen.........Project for the Weekend
Thank you Lyle, appreciate it.LyleW wrote:That looks great!! Your work is fun ro watch. Love the color.
- Medicman71
- Elite Member
- Posts: 9764
- Joined: Mon Apr 07, 2014 9:32 am
- Location: Houston, Tx
Re: 1/35 Puppchen.........Project for the Weekend
Very cool project!
Mike
Sponsored by Boeing, Lockheed Martin, Northrop Grumman, Saab, BAE, and Dassault
Re: 1/35 Puppchen.........Project for the Weekend
So....This took a little longer to finish that I anticipated!
I first laid out the gun and shell boxes until I got an arrangement that I liked. Then I took this picture cuz, well, old sucks, and I wanted to place everything back in the same spot.
Then I put on some of the snow paste. It has the consistency of frosting so I spread it out with a coffee stirrer. Since the stuff is acrylic based, I used a brush dampened with water to blend the surface smooth.
I sprinkled on the Deluxe Materials snow powder and placed the gun, shell crates, and several clumps of Woodland Scenics field grass into the snow so as it dried they would be fastened into place. I also used a Tamiya figurer to add foot prints to the snow around the gun and shell crates, but deliberately left the snow in front of the gun undisturbed. Finally, I added some of the Deluxe Materials sparkle effect to the snow, and that was about it.
The one thing I did not like was how bland and monochromatic the field grass looked, so after the base had dried overnight I drybrushed the grass with Tamiya Dark Yellow to add some more color and variation to it.