tempestjohnny wrote:I don't think I've ever seen one if these built. Now we have three going at the time
Must be the gluten for punishment is in the air...
Re: Hey look - another Bonanza...
Posted: Fri Nov 19, 2021 7:34 am
by LyleW
I may be stripping the paint on mine...just not happy with it. We’ll see.
Stuart, I’ll post my feeble thoughts in on your construction questions in abit...when I have a real keyboard.
Re: Hey look - another Bonanza...
Posted: Fri Nov 19, 2021 8:25 am
by LyleW
For what it is worth, my 4 Euros worth...
Stuart wrote:
I have to say I'm tempted to build up the firewall/IP and fit that BEFORE I cement the wings into place - and then maybe leave the nose unglued until after the engine is fitted and the nose cowl is ready to go on.
I think I would consider gluing the firewall/IP onto one half of the fuselage, then gluing the fuselage together. OR, leave the small seam at the base of the windscreen un-glued until you fit the fire wall assy in place With the IP attached, it is a very tight, twisty fit and you will likely pop a seam ...so leave it un-glued.
Stuart wrote:I've also been checking the position of the gear mounting point when the wing halves are mated. I saw a review on youtube where the guy had an issue with the it being in the wrong place after he'd glue the wing together, and the leg not sitting correctly. It's okay on one side and slightly off on the other (0.25 - 0.5mm maybe). I'll adjust it to fit with the legs in place when I glue it together. I have got a warp in my wing, in the lower fuselage part, but that seems to straighten out when fitted - however I do think the dihedral might be a bit too steep, so I'll have to see if I could adjust.
Could you share the link to this? There is not much room to adjust things.
Stuart wrote: I'm actually wondering if I should attach the lower wing half to the fuselage before I add the upper wing parts.
I attached the upper wings, then slid the whole mess into place. There was a need to sand a miniscule amount from the front ot the wing bottom, and it dropped right in. I believe it was likely flash. There is a LOT of flash and such on this kit. A lot.
If you try to bring the wings up to the fuselage, you get way too much dihedral, as you noted. I did not do that, but filled the small gaps with some plastic stock and putty. . . then some CA on it.
Hope this helps a bit.
Re: Hey look - another Bonanza...
Posted: Sat Nov 20, 2021 1:11 pm
by Stuart
Thanks for the advice Lyle!
This is the link to the youtube vid I mentioned.
Re: Hey look - another Bonanza...
Posted: Sat Nov 20, 2021 6:36 pm
by Stuart
Still test fitting, although I have assembled the IP and the wings, ensuring the mounting holes for the main gear were in the right place...
Re: Hey look - another Bonanza...
Posted: Sat Nov 20, 2021 6:43 pm
by speedgraflex
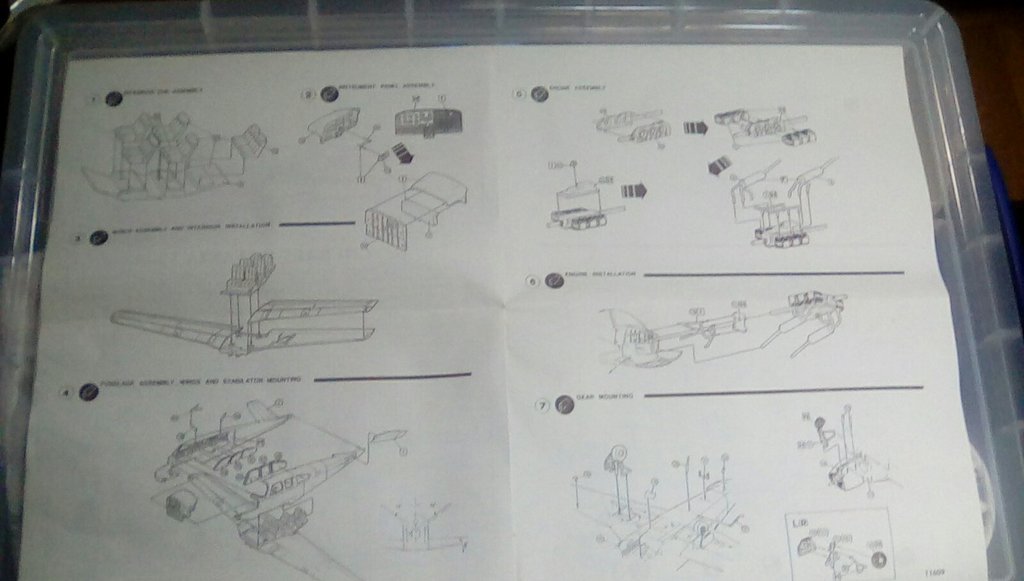
Would you be able to post a quick shot or shots of the assembly destructions or I will look for a link.
I'm actually wondering if I should attach the lower wing half to the fuselage before I add the upper wing parts.