Okay, moving right along...
As I said, I wanted a model airplane, and for my sins, they gave me the Emil. And when this Emil is complete, I don’t ever want another. Since getting sober I’ve discovered there’s a whole world beyond Luftwaffe subjects, and a world beyond Corsairs for that matter, if we’re talking Allied aircraft. I’d like to focus more attention on things like Spitfires, P-47D’s, Mustangs, and the like. But seeing as how I’ve either never been 100% happy with the Emils I’ve completed, or failed spectacularly at them as of late, I’d like to get this one moved off the work bench and onto my shelf so that I can finally say “Yes, I accomplished this goal. Now I can move on.”
My past few Emil projects had, uh,
problems. I was drunk a good bit of the time while building Pip’s Emil, and we all know what happened with that one... it became “Der Franken Emil.” I started Black 1 drunk, then got sober, came back to it and, much to my chagrin, discovered that while Drunk Kenny X is pretty good at painting, he absolutely sucks at construction. I spent more time correcting mistakes and things I’d overlooked due to being drunk than enjoying continuing the build. All while not being 100% satisfied with the project because my outlook, and indeed my whole personality had completely changed after sweating out the booze with the help of The Good LORD. So I tried it again... “Black 1 Remixed.” That one fared better, but holy cow, I ran into all manner of fit issues around the cowling which I couldn’t seem to correct no matter what I did. Port side all lined up fine, a millimeter off on the starboard side. Correct that, BOOM, huge step on the other side. It drove me nuts. So I smashed the project with my Kamagong stick, started devoting more of my time to Kali practice and skateboarding, abandoned my Shelf Of Doom projects, and started working on Spare Parts in small moments here and there... aaaaaaand botched a natural metal finish almost as soon as it began. HAHAHAHAAAA! Damn it.
Before I get going on completing a Mustang (now “Donald Duck”), I want to finish an airplane. For the boost of confidence. And I also want to cement together a new methodology of building, for myself. A better one.
Toward that end, this project has ground rules:
1. Build as much of the airplane as I can in mock-up form first, with tape, to become as intimately familiar as I can with the kit and how it goes together, to avoid trouble spots and surprises.
2. Build it bone stock. The only PE fiddly bits allowed are seatbelts and do the project and subject justice with nothing but solid construction skills/techniques, and good paintwork.
3. Don’t sweat the small stuff
... a big mistake I used to make was jumping right on in and focusing all my effort and attention on the cockpit, only to rush through the construction phase so that I could get to the paint work. I like painting, I’m good at it for the most part, and I’m also lazy. I skimp on things I either don’t think I’m good at, or don’t like doing, and well folks, that bites me in the ass later on every single time.
This project, and subsequent builds, will be different. To wit:
THERE WILL BE NO WORK DONE ON THE COCKPIT UNTIL THE AIRFRAME HAS BEEN MOCKED UP, AND TROUBLE SPOTS HAVE BEEN IDENTIFIED AND DEALT WITH.
Drunk Kenny X loved surprises. Sober Kenny X detests them.
Drunk Kenny X was temperamental and Mercurial when it came to his art.
Sober Kenny X’s temperamental and Mercurial attitude toward his work has been amplified by ten orders of magnitude. While I am working on not sweating the small stuff, there are some things which I will NOT under any circumstances accept, for instance- having to do fills when they could’ve been avoided beforehand by paying more attention.
And folks, let’s be frank about this, that Eduard 109 E-3 kit is amazing and beautiful and absolutely necessitates paying more attention up-front in order to get it to go together in the best possible way
especially if you’re like me and wish to build it al buttoned up.
So, let’s take a look at some past missteps with what became “Der Franken Emil” to illustrate what I’m talking about... brutal self-critique incoming...
Observe the fills and steps around the panels on the port and starboard sides:
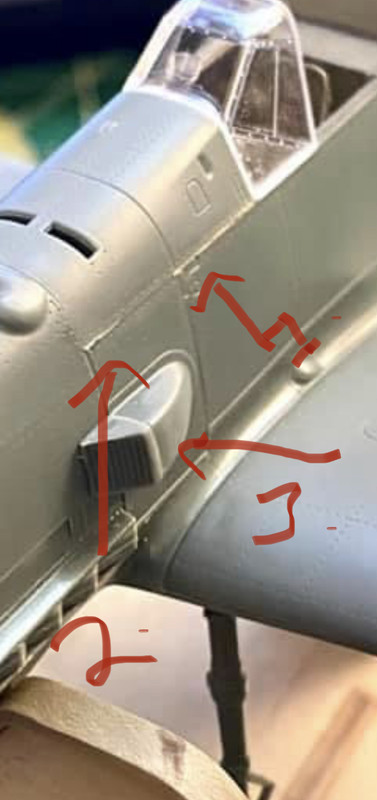
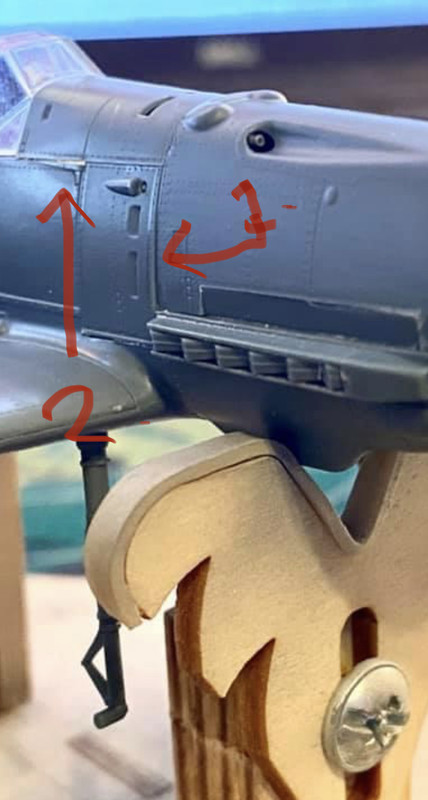
...these trouble spots have been identified not only by me, but by other modelers as well.
I am of the opinion that these areas can be eliminated ahead of time, removing the need for fills and step removal. All we have to do is change how we build that section of the aircraft.
Let’s look at where this latest attempt is, rewinding just a bit.
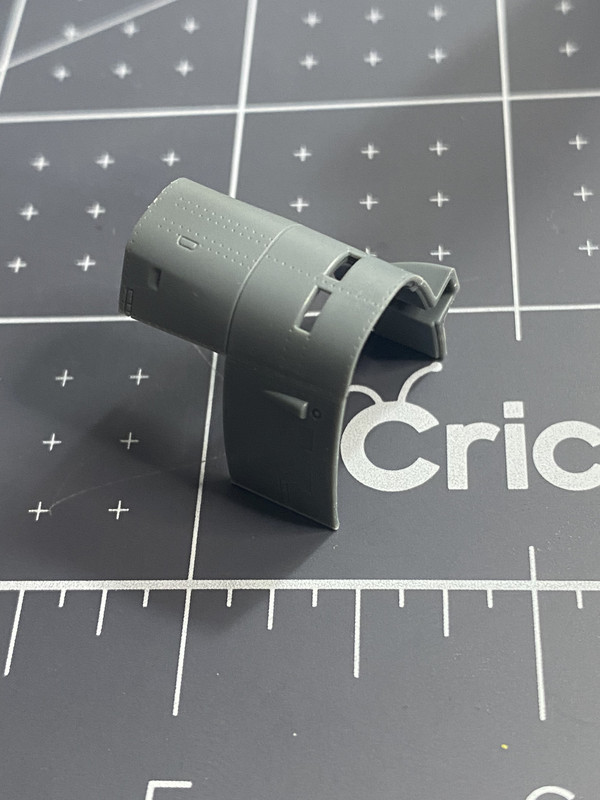
The first thing I did was build the engine as bare-bones as I could, and then promptly chop the top off of it with a saw. This has to be done as the cowling will not fit over the engine if left un-modified:
After chopping off the top of the engine, I added the exhausts. This is necessary, as when joined together, the fuselage halves hold the engine in-place by way of securing the exhausts in the slots in the fuselage. Care must be taken here, because there’s a little bit of play forward and back. Mount the engine too far back and the spinner won’t be able to attach to the shaft and you’ll be stuck drilling it out and affixing a toothpick in there to hold the spinner (that SUCKED), and if you let it travel too far forward you’ll end up with what looks like a gap in the bottom seam. You’ll then fill it, only to discover later on that the lower cowling is now too wide to let the top sit flush. Yes, I’ve made both of those mistakes on two separate builds.
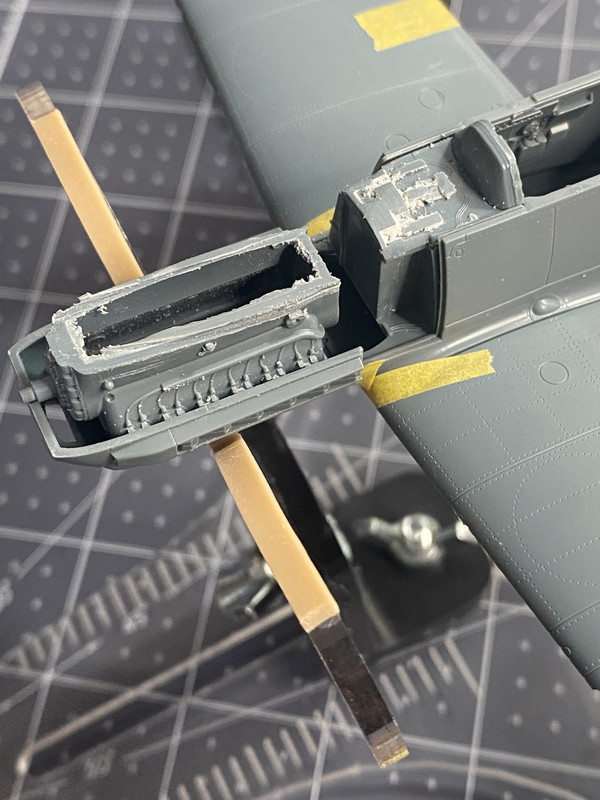
Mocking-up the airframe and dry-fitting the engine at this point is crucial. Make careful note of its exact position, the “sweet spot” and take note of how little the shaft for the spinner protrudes. That’s a very small margin of error. In the photo provided I’ve gotten it just about where I want it.
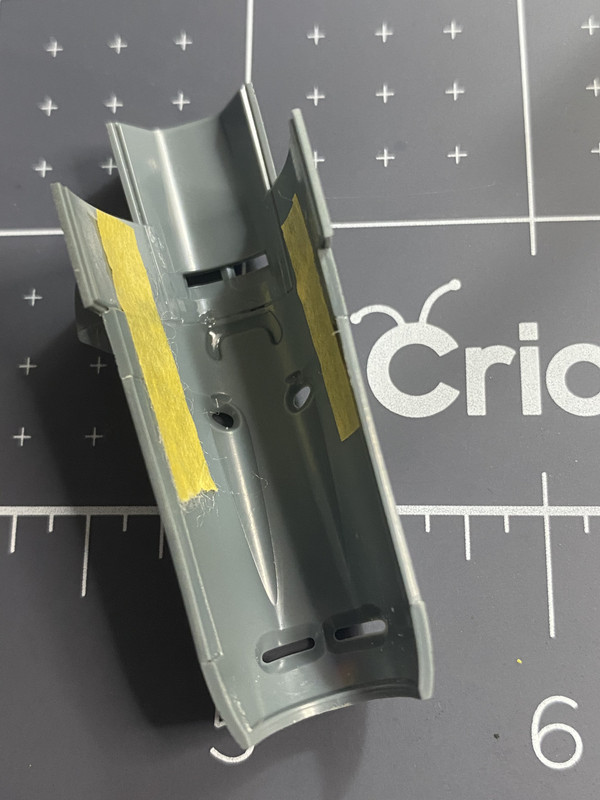
Next, have a look at the gun deck in the photo. I built that subassembly up ahead of time. It attaches to the ammo boxes and forward cockpit bulkhead. I also affixed the IP to it, to allow for the maximum possible doublechecking in terms of alignment. This is fine. It is very easy to paint this way. Furthermore, that bulkhead needs to be in there while mocking-up the fuselage together, to keep it sturdy whilst you dry-fit the various panels together.
Also take note- you have to take off as much material from the top of that gun deck as you can, as the panel which sits atop it will not fit otherwise, and you’ll end up with gaps to fill as shown in the previous photos. I also sanded down the side of the ammo boxes as I had a sneaking suspicion that they were causing that starboard side step.
Next, I carefully added the cowling and panels and taped them all together to check the alignment. I went in this order:
1. Top cowling, because it has a minuscule lip which the other panels mate with.
2. Top of the gun deck.
3. Port side panel, starboard panel
Here it is:
That ain’t bad, but it could be better.
I removed the cowling, and very carefully affixed the port and starboard side panels to the top panel with Tamiya Extra Thin. Each of the side panels has a lip on the inside top which mates with slots in the top panel. I sanded them down just a hair, and working from the inside front, carefully fused them together while they sat on the airframe.
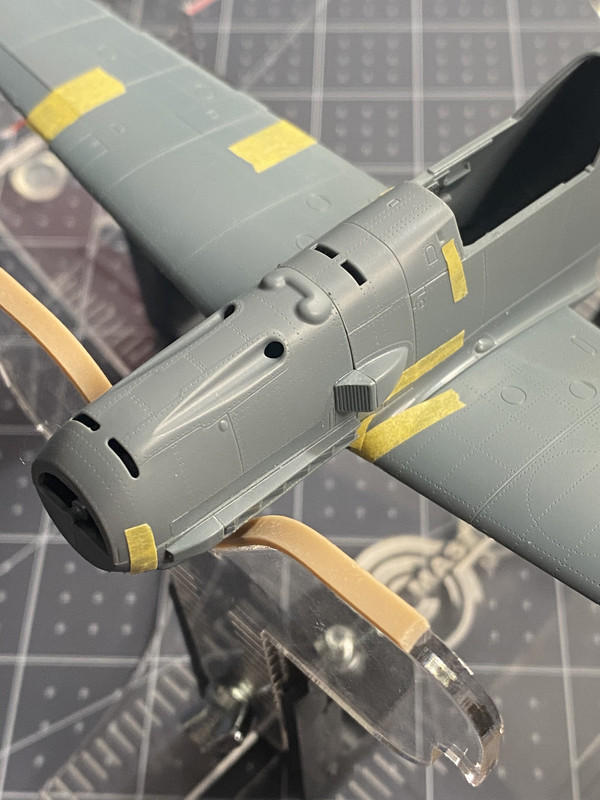
After that, I removed the panel assembly, and affixed this sub-assembly to the cowling. The lip on the upper part of the cowling is small, but it will mate with these parts and allow for a very good fit! I taped it all together from the inside to secure it, and then ran Extra Thin through the inside of the panel joins via the old “capillary action”. The results:
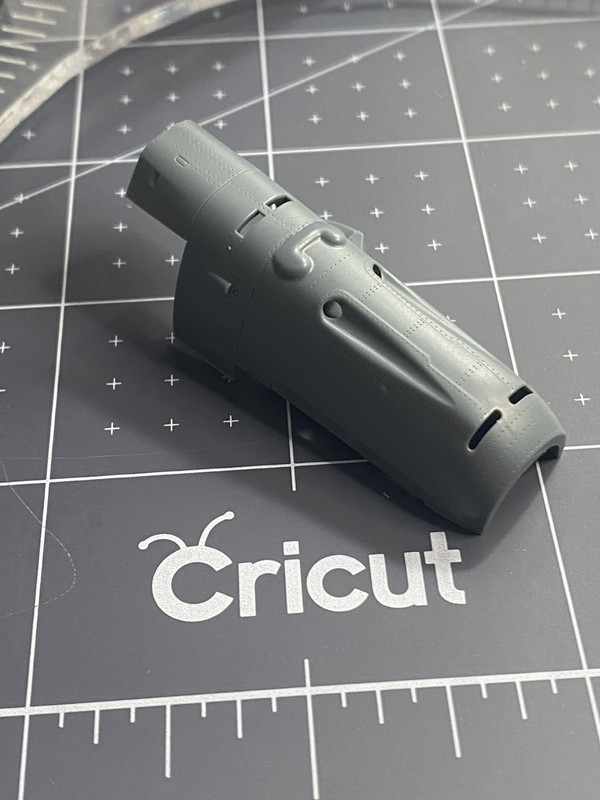
Now to test fit this onto the mocked-up airframe:
Port side, steps are gone and gap is much, much improved:

Same for the starboard side and note- a small amount of pressure removes the gap:
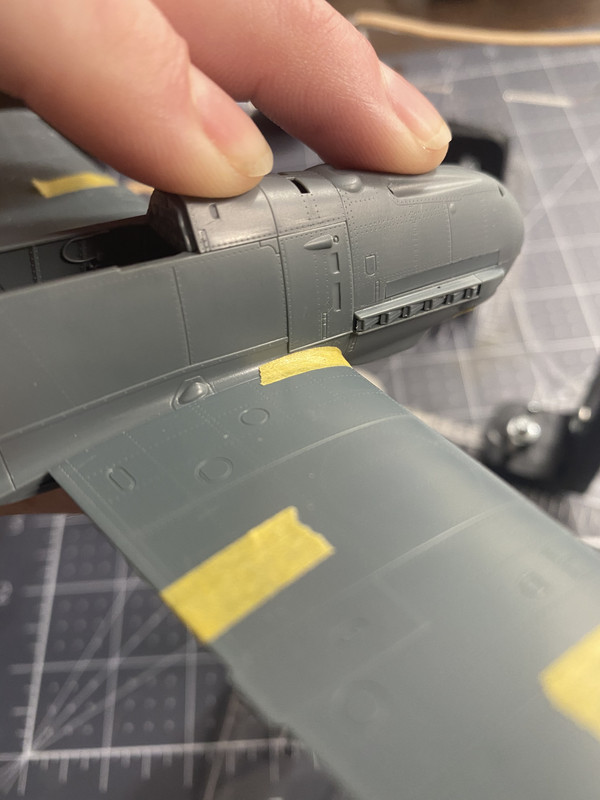
This is roughly two hours worth of preliminary, preparatory work which I believe will pay off big dividends later.
This is the current state of the project, as of this morning.
While I believe that once the cockpit is painted and assembled, and the fuselage is sealed, this work will fit in a lovey way on the airframe, I still intend to do some minor work here and there to make sure. I will detail that in subsequent posts, along with sharing the cockpit work and so forth.
Thank you very much for your time and for your interest in my models. Have a good day :-)