Hasegawa 1/32 Fw 190D-9 Brown 4

-
tempestjohnny
- Elite Member
- Posts: 3357
- Joined: Sat Oct 15, 2016 4:51 am
- Location: Naples. FL
Re: Hasegawa 1/32 Fw 190D-9 Brown 4
Gorgeous results.
-
Medicman71

- Elite Member
- Posts: 9744
- Joined: Mon Apr 07, 2014 9:32 am
- Location: Houston, Tx
Re: Hasegawa 1/32 Fw 190D-9 Brown 4
Wow! The painting looks perfect!
Mike
Sponsored by Boeing, Lockheed Martin, Northrop Grumman, Saab, BAE, and Dassault
Sponsored by Boeing, Lockheed Martin, Northrop Grumman, Saab, BAE, and Dassault

Re: Hasegawa 1/32 Fw 190D-9 Brown 4
Thanks guys!
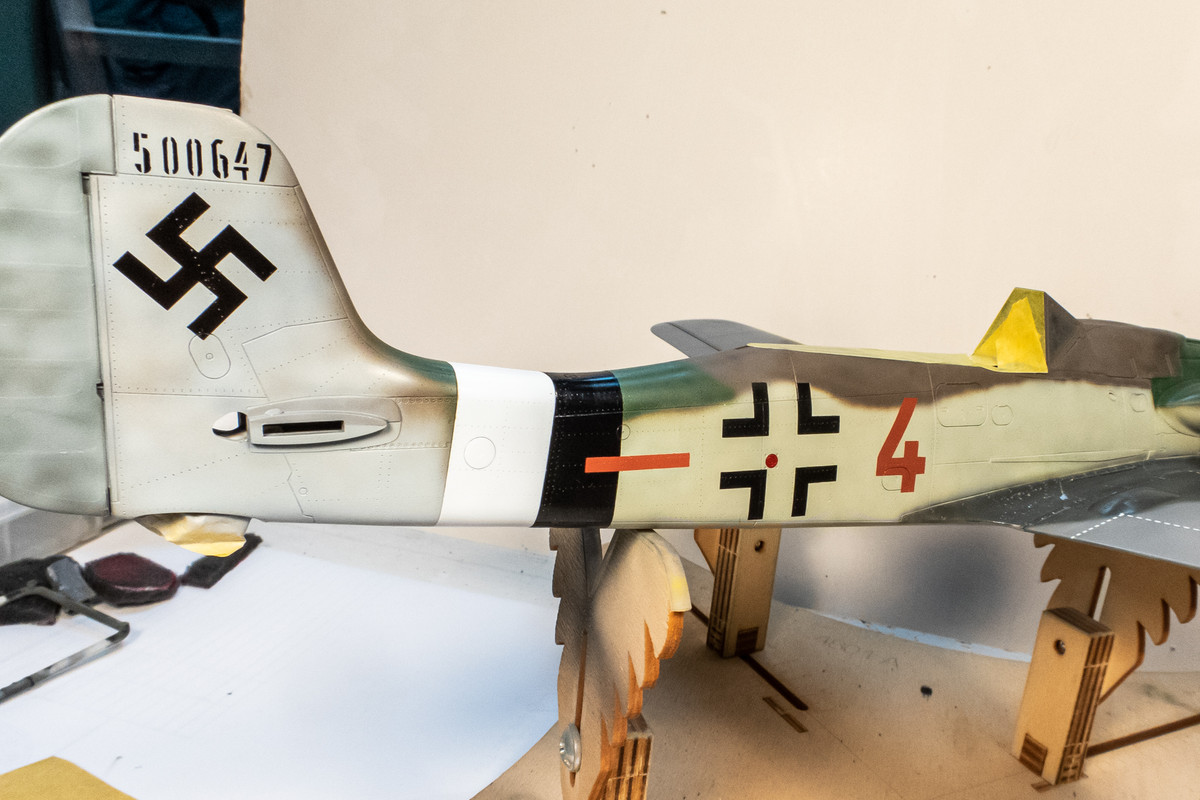
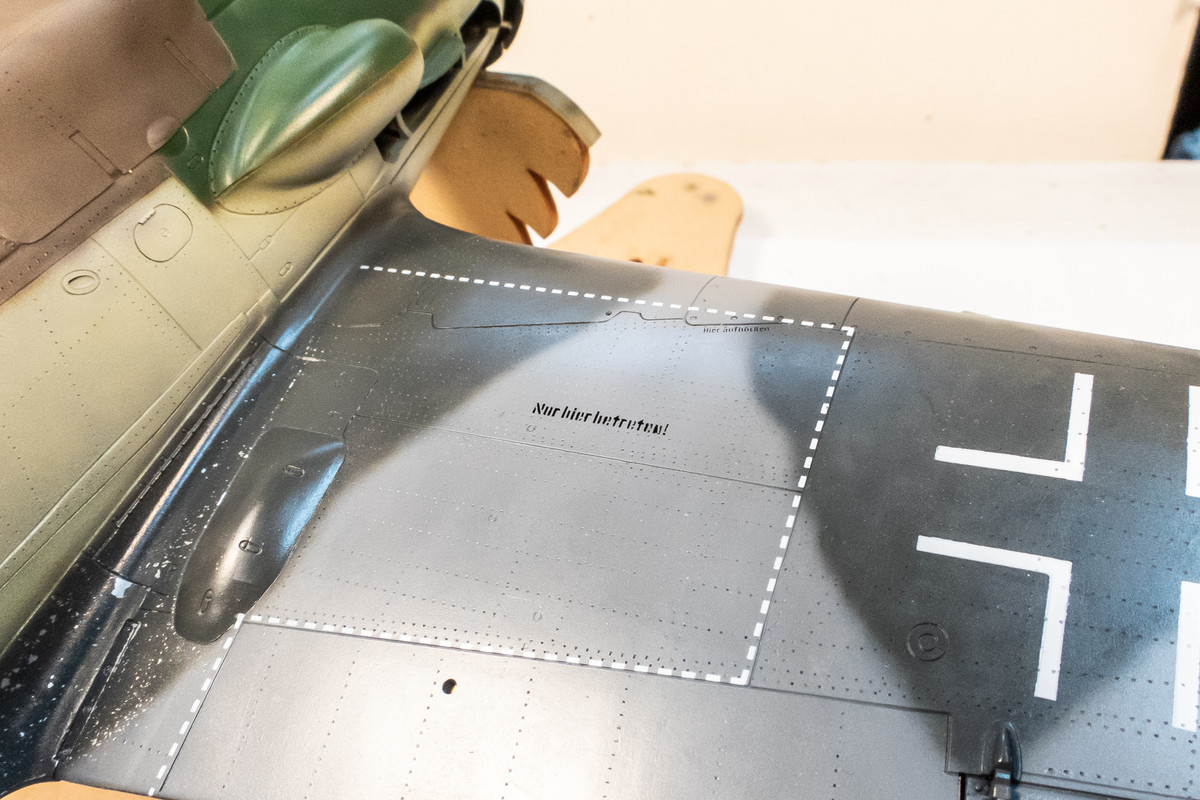
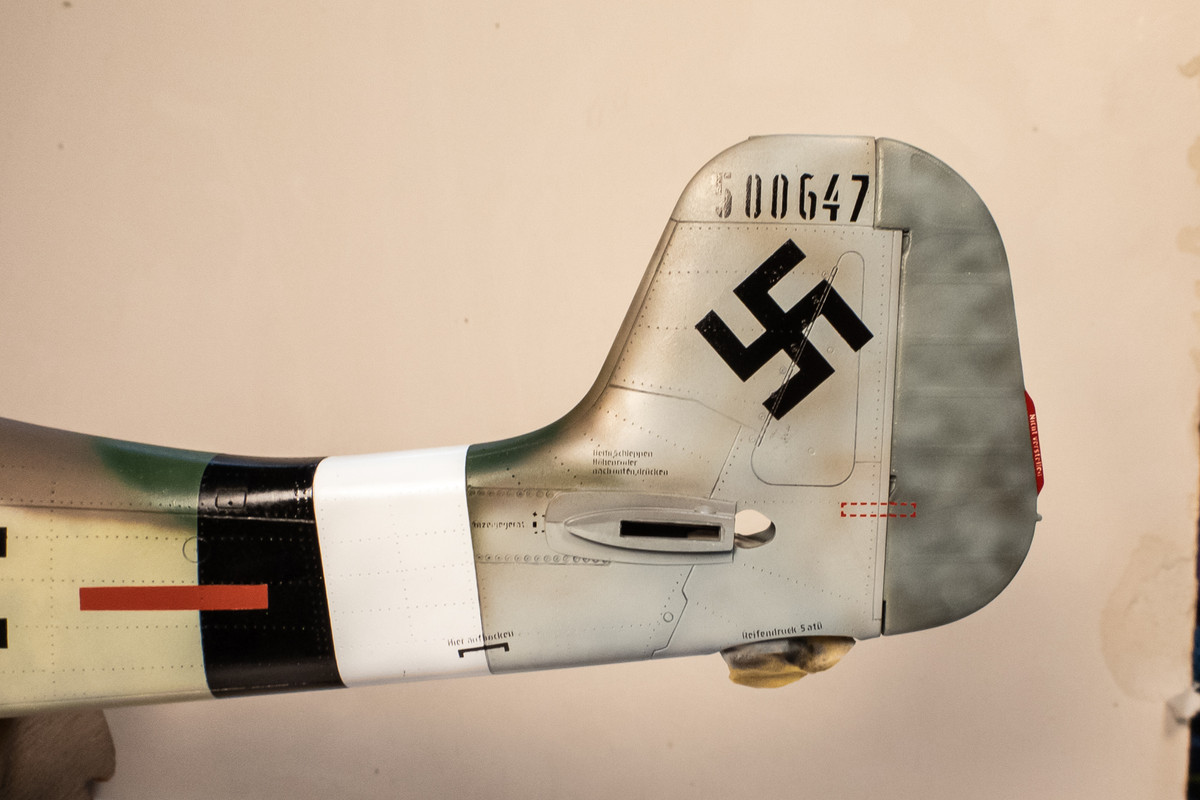
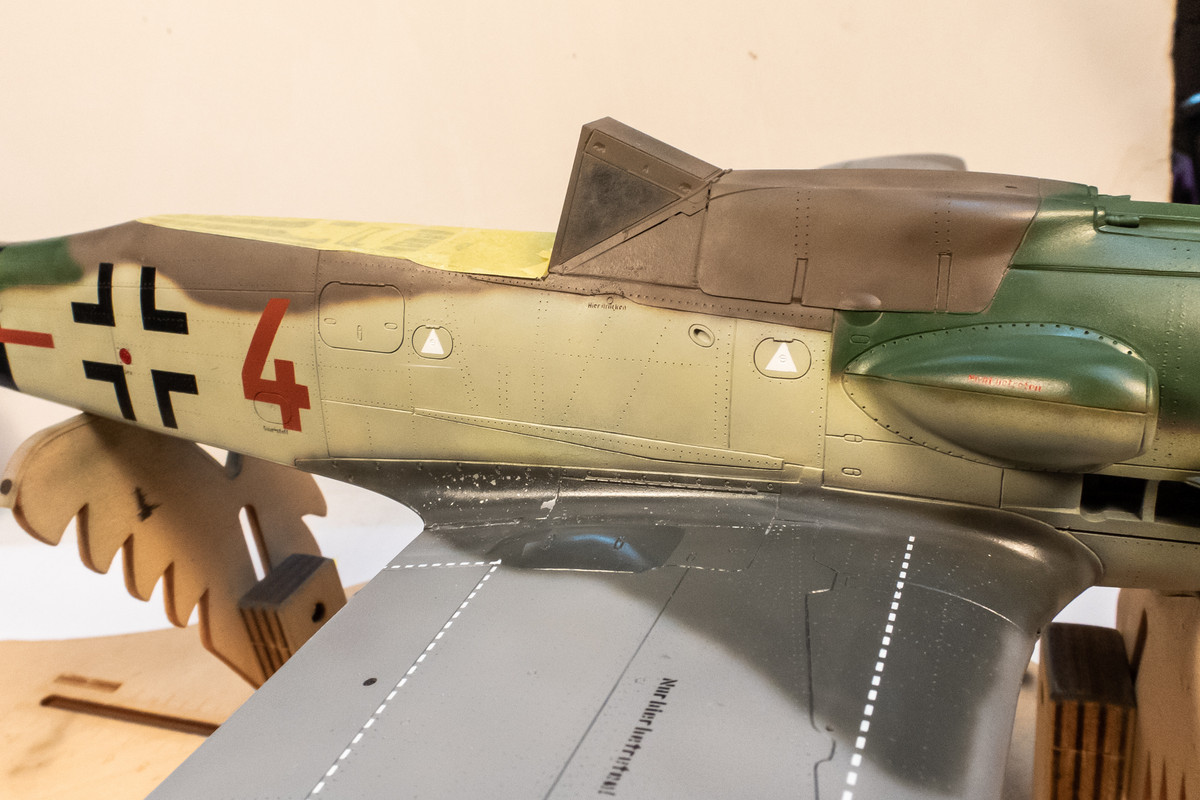
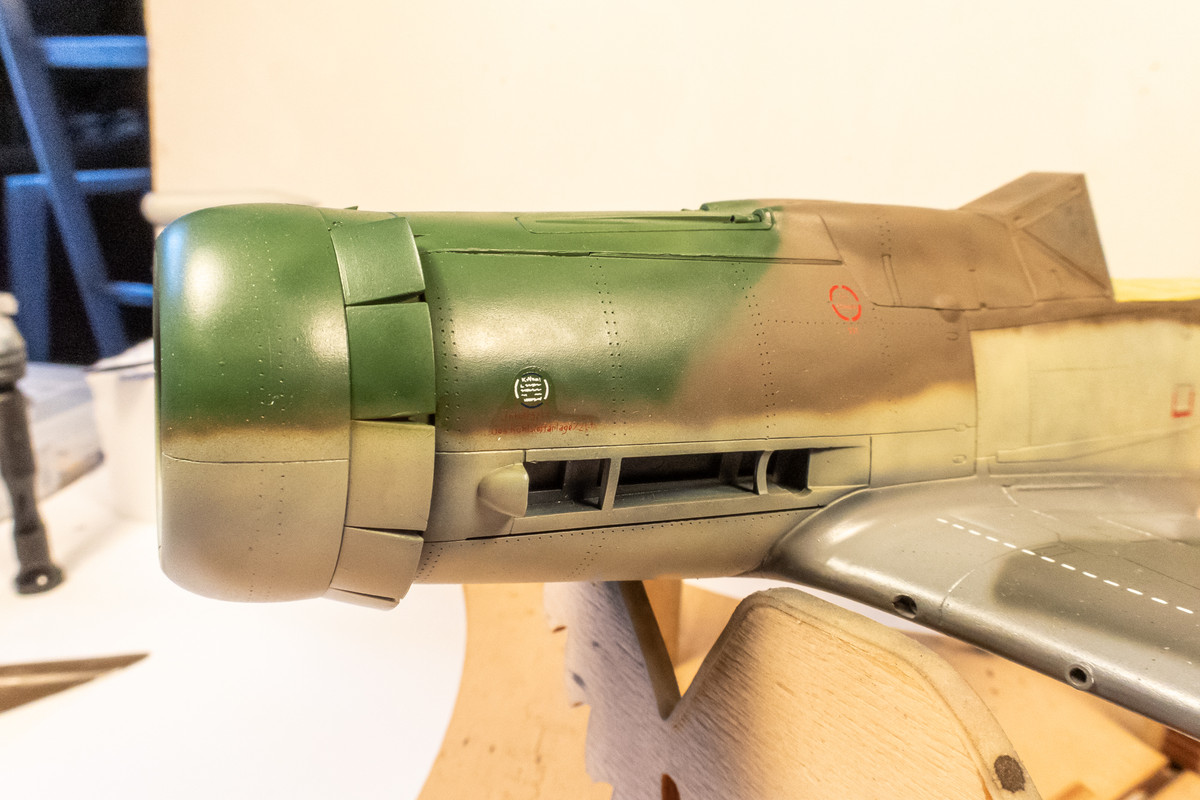
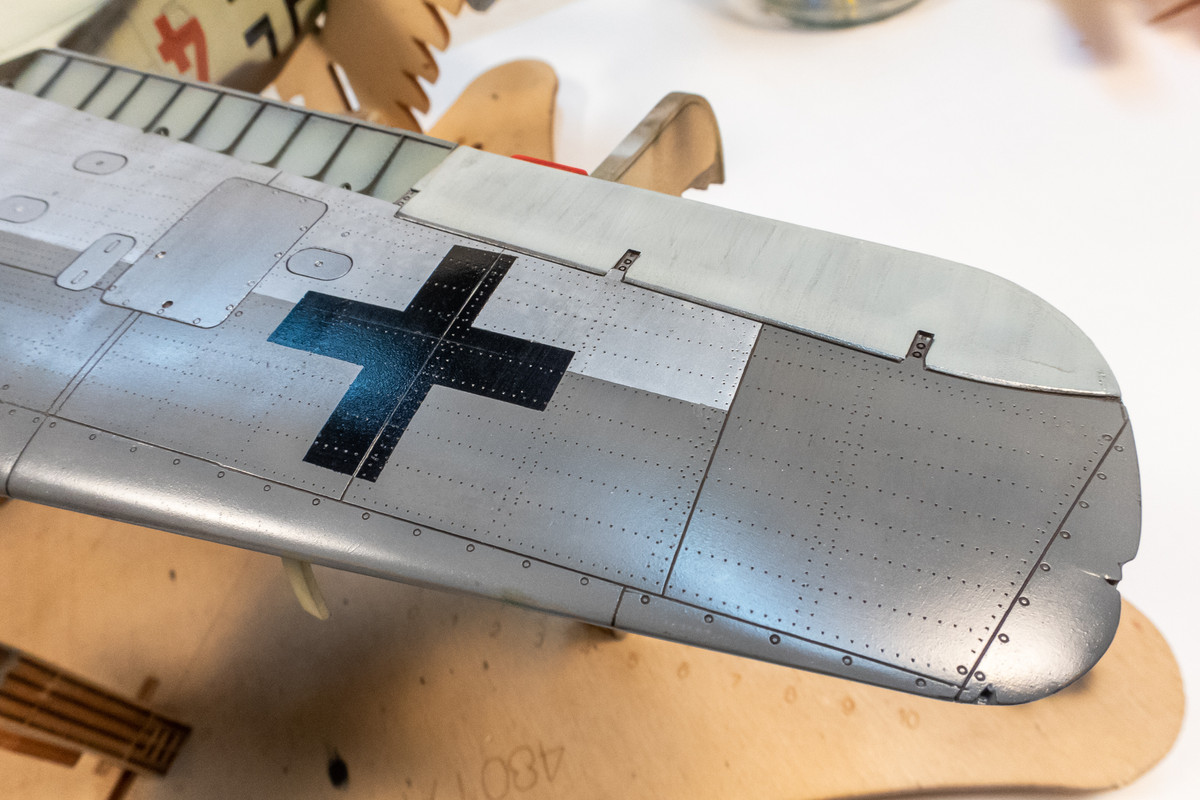
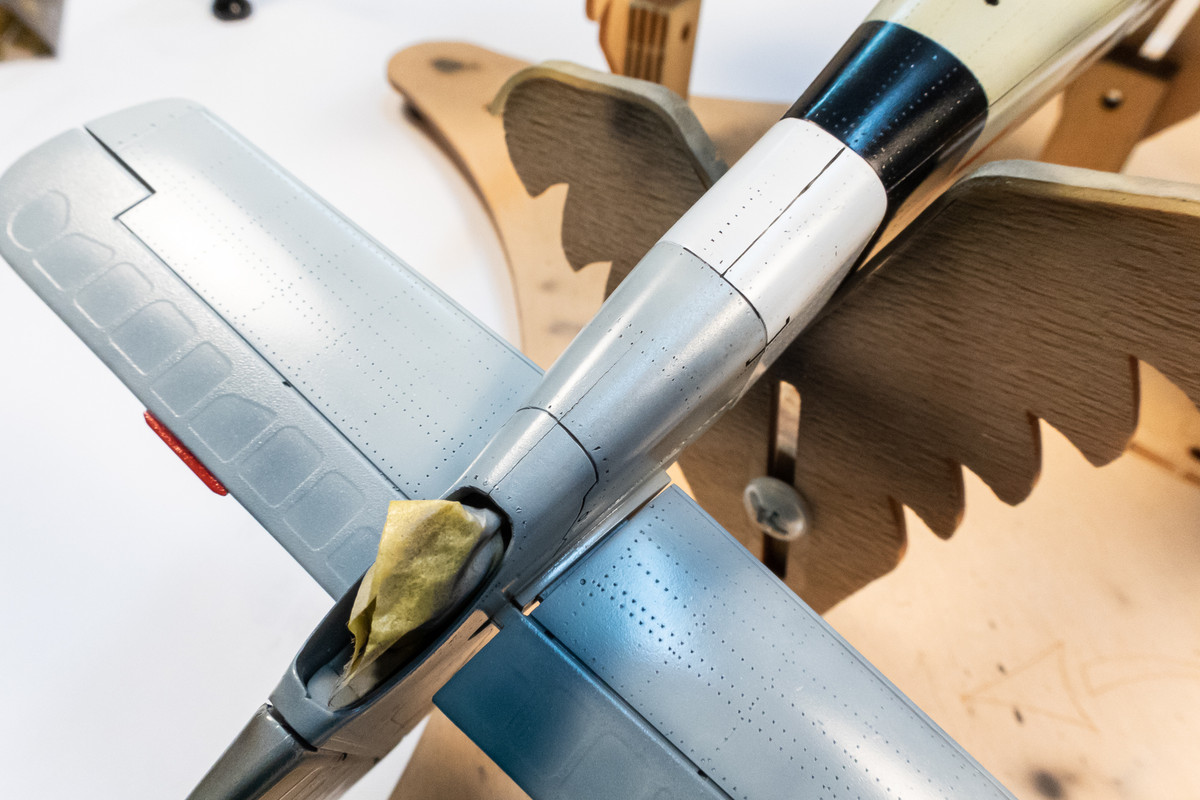
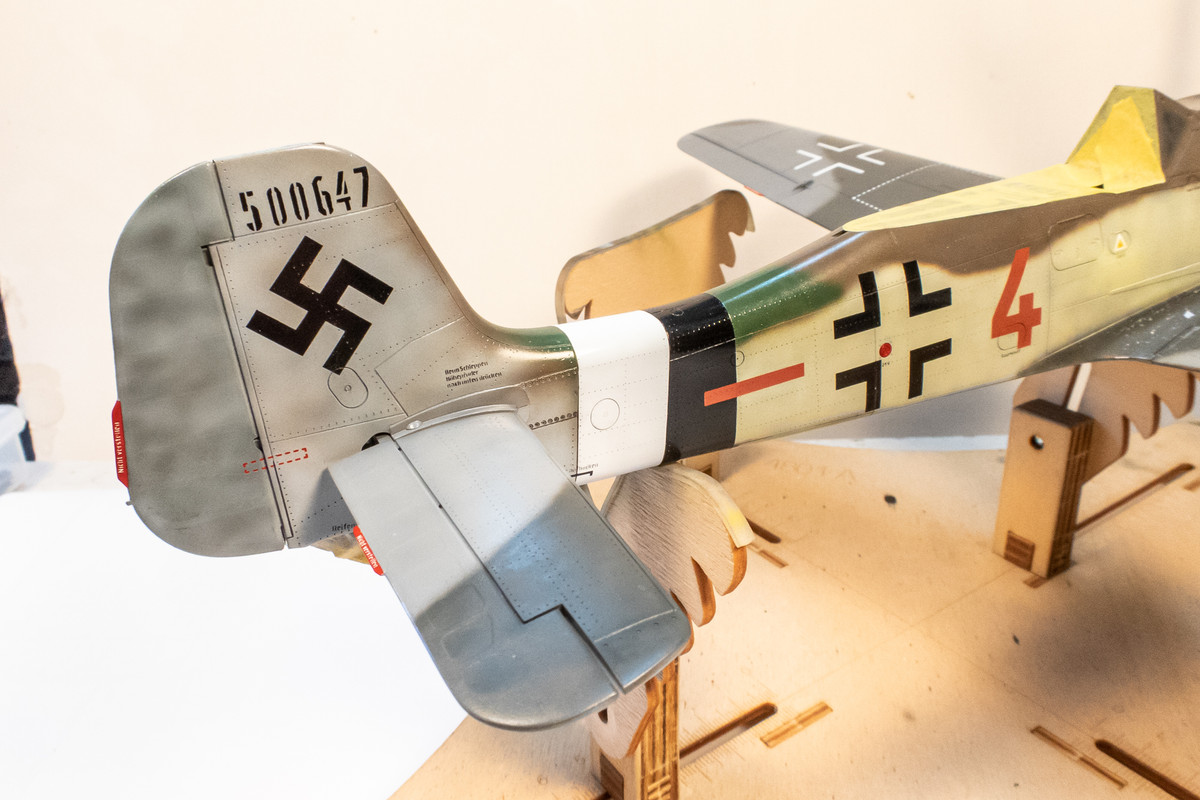
Not quite finished with the painting yet as I wanted to make a few corrections. First is the demarcation between the upper and lower camo colors in the vicinity of the fuselage cross.
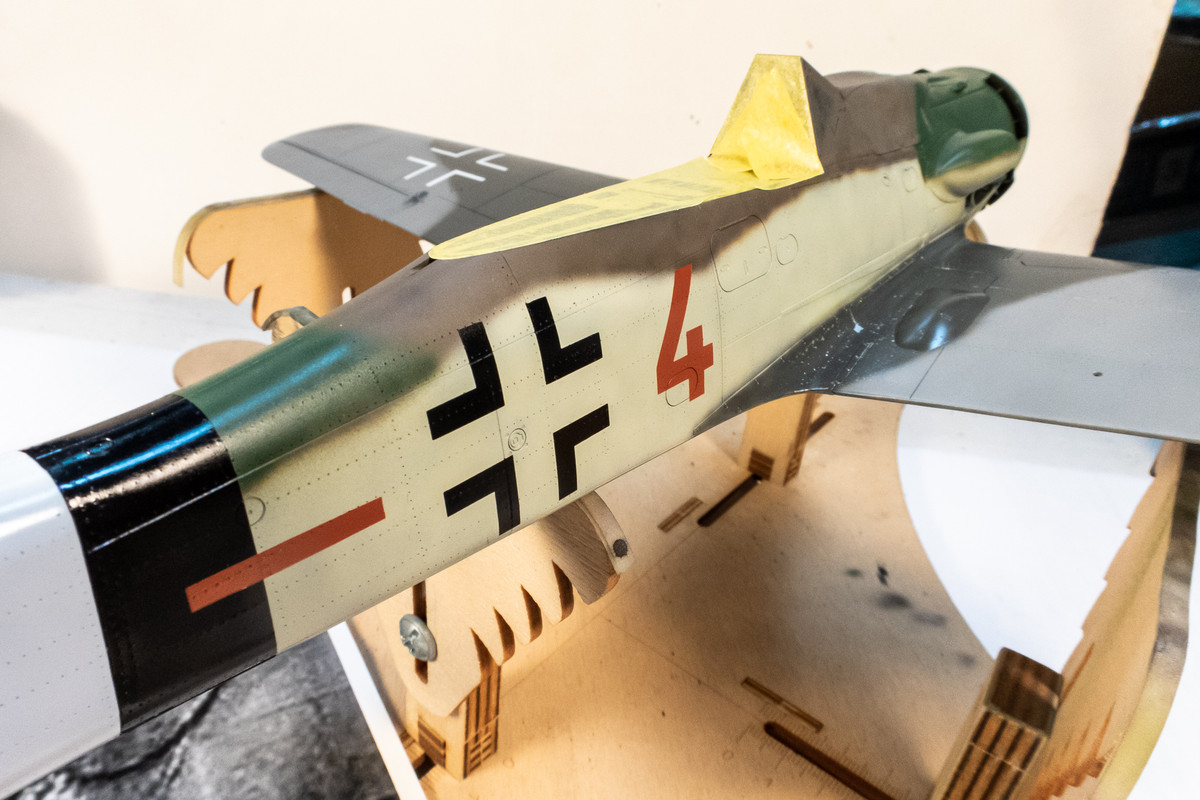
Since I have a photo of the starboard fuselage of Brown 4, I thought I'd try to match the demarcation line a little more closely.

I'm not a huge stickler for this type of matching but this one is easy enough since I can use the leftover mask materials to protect the markings I've already painted.
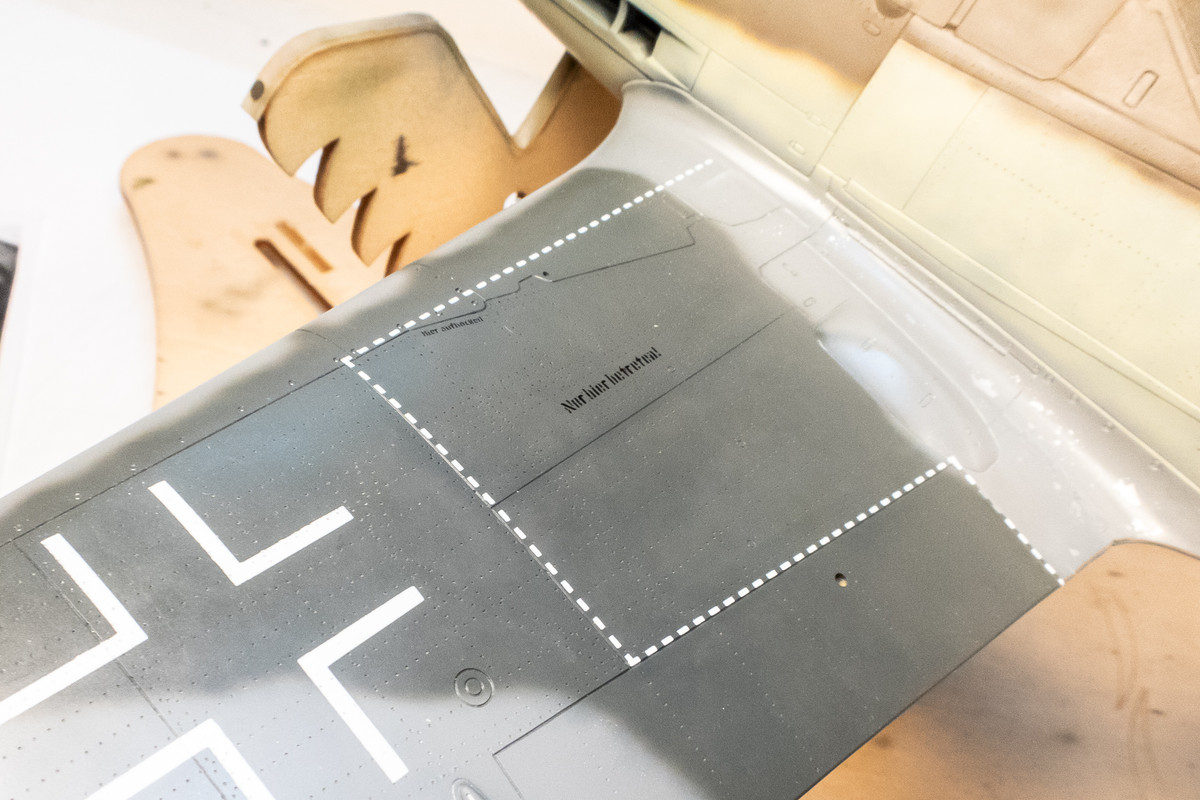
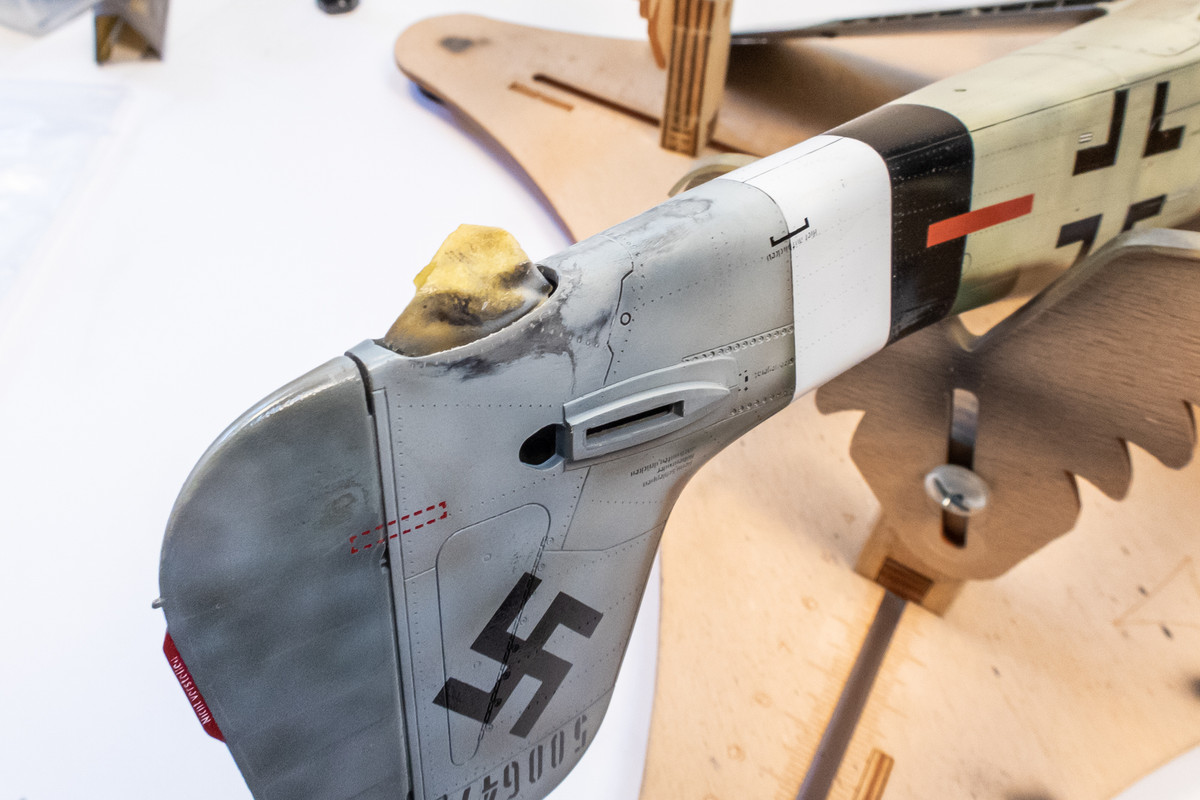
After the minor correction...
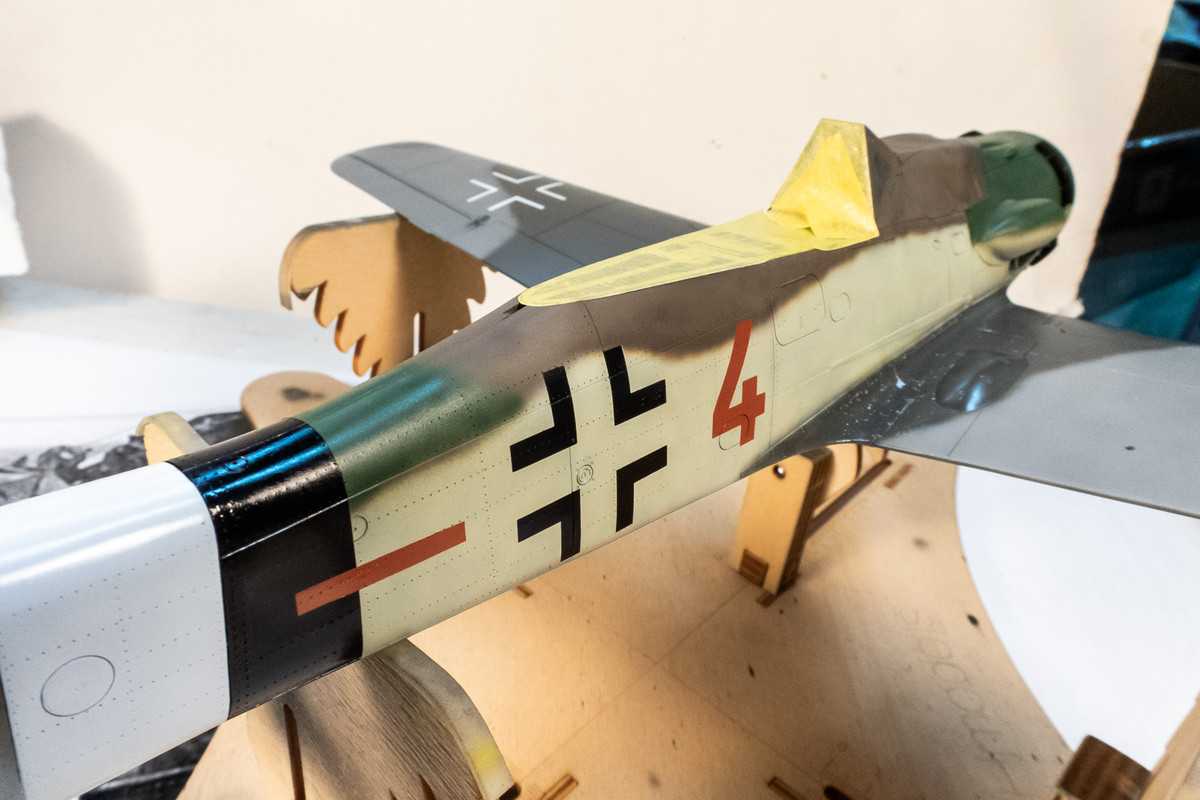
I also noticed that the brown bar on this side is slightly drooping so this was fixed as well. Yes, the bar is noticeably lighter than the "4" so I'll need to adjust that as well.
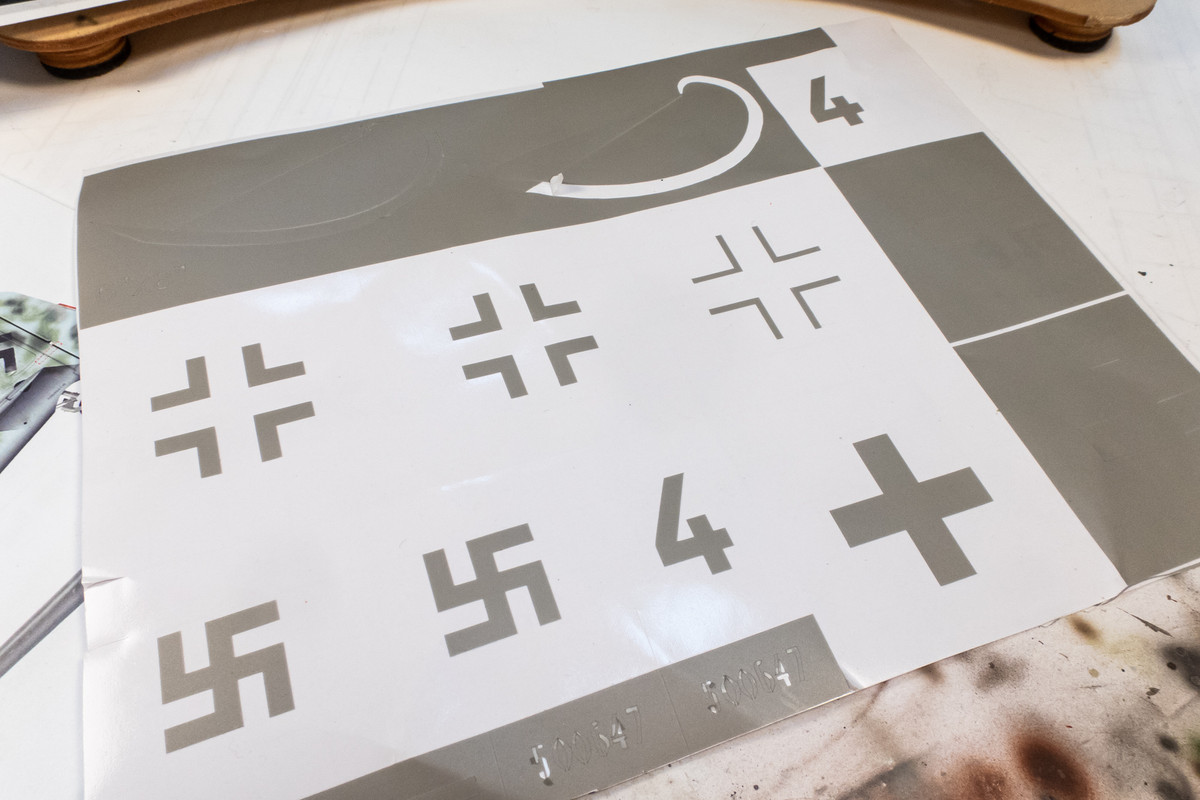
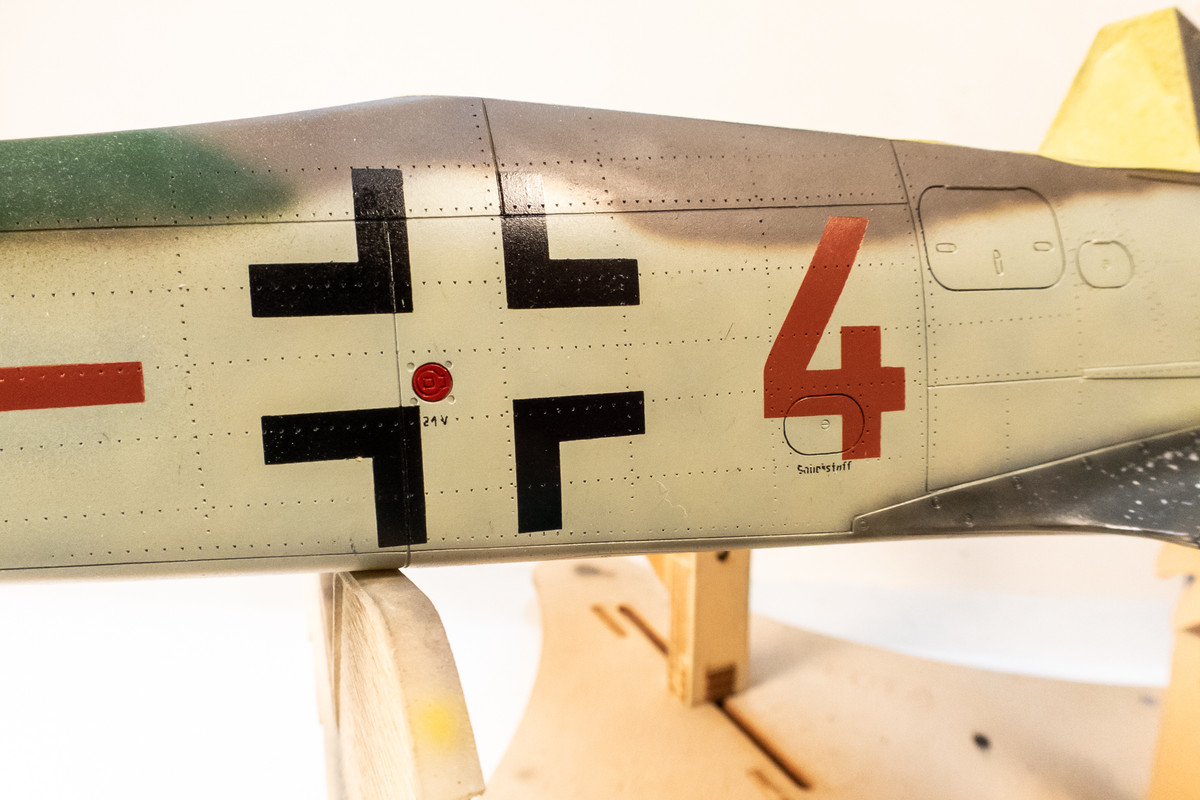
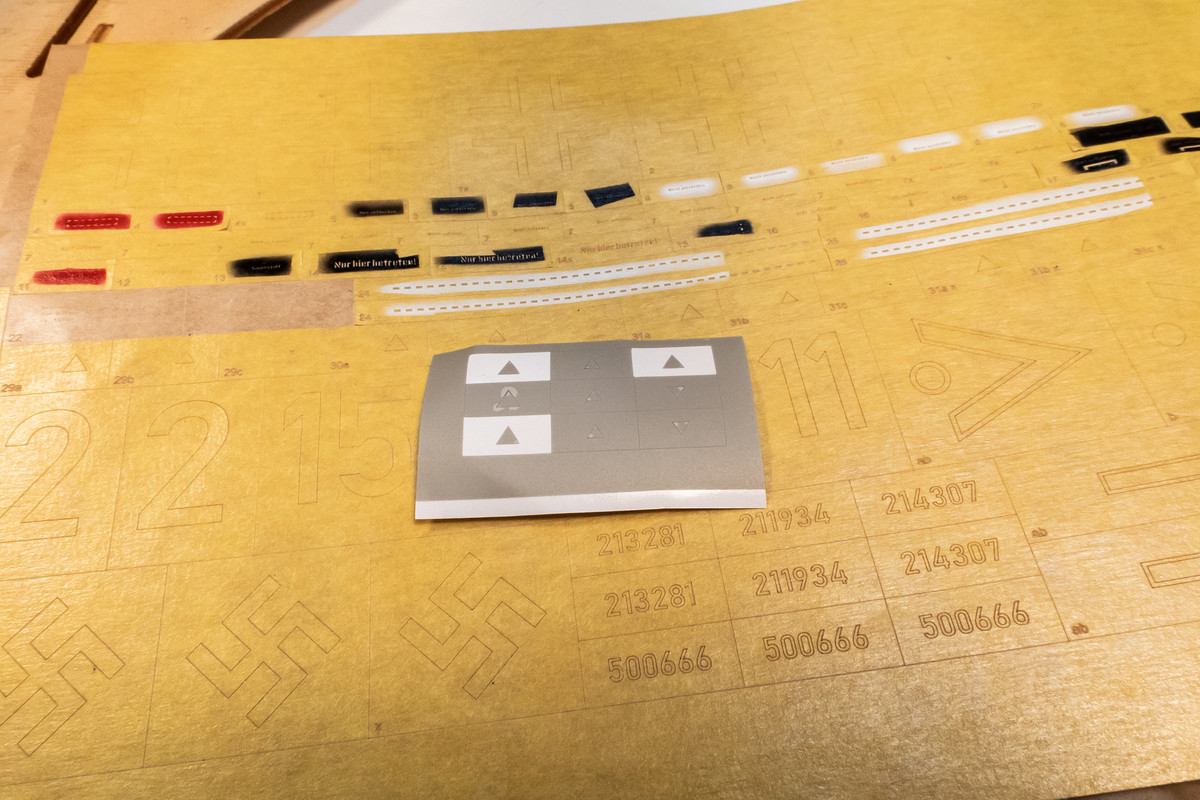
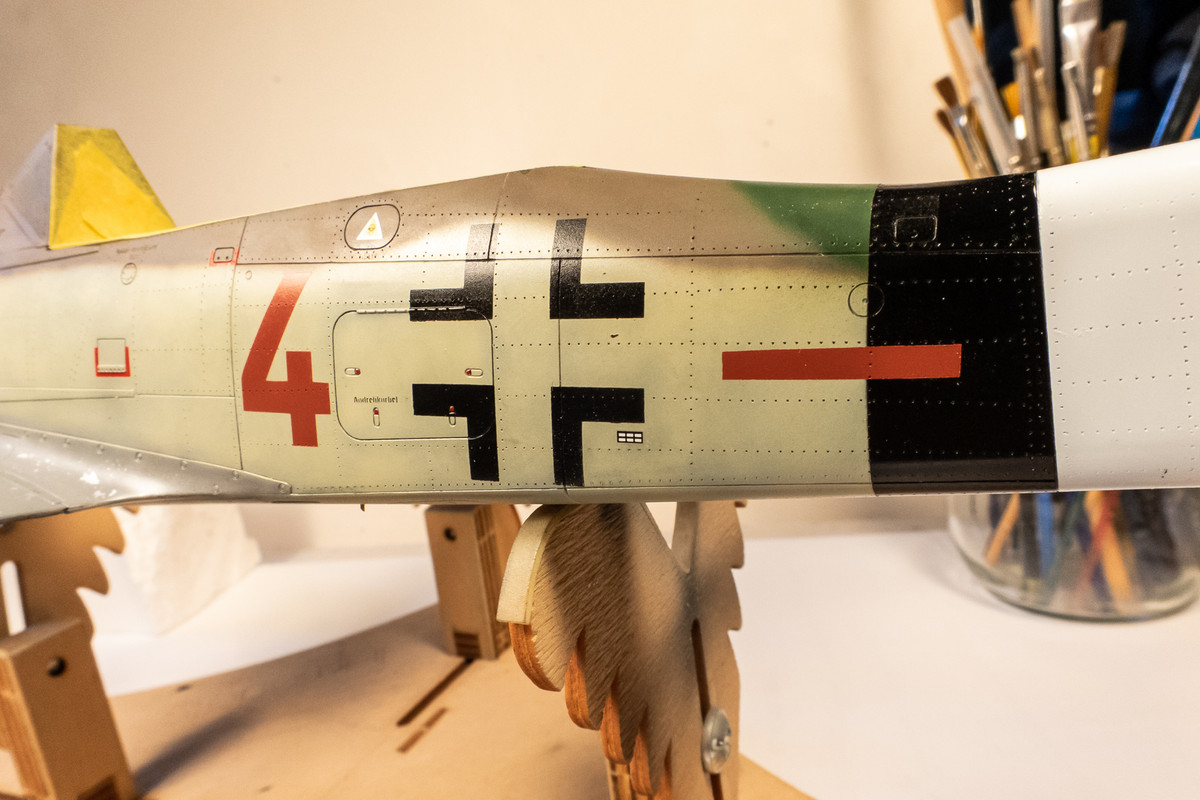
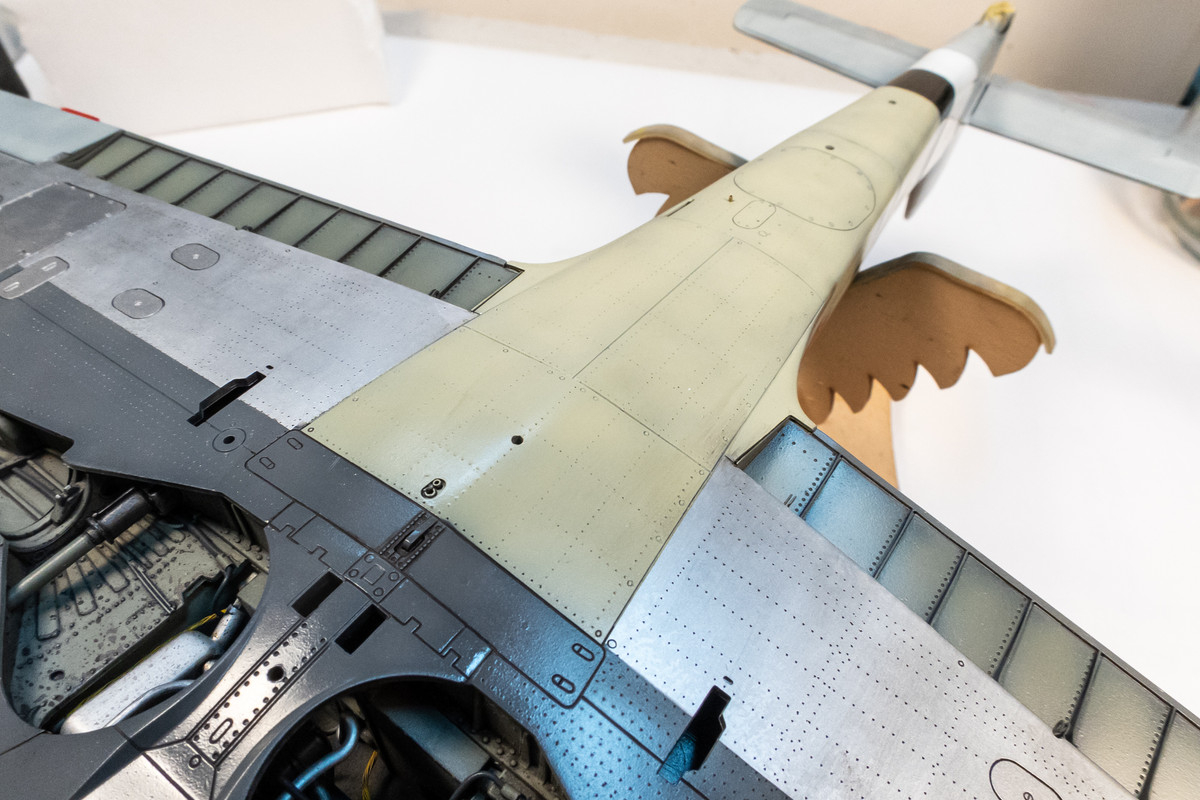
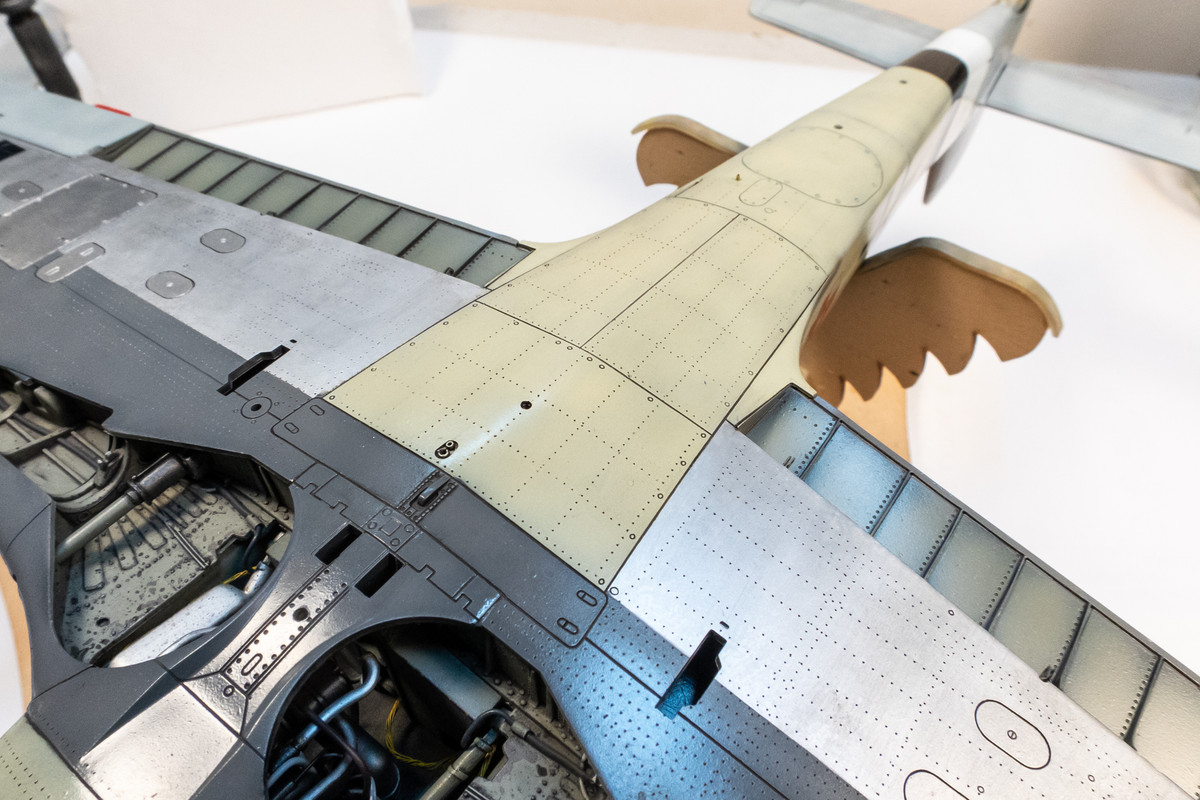
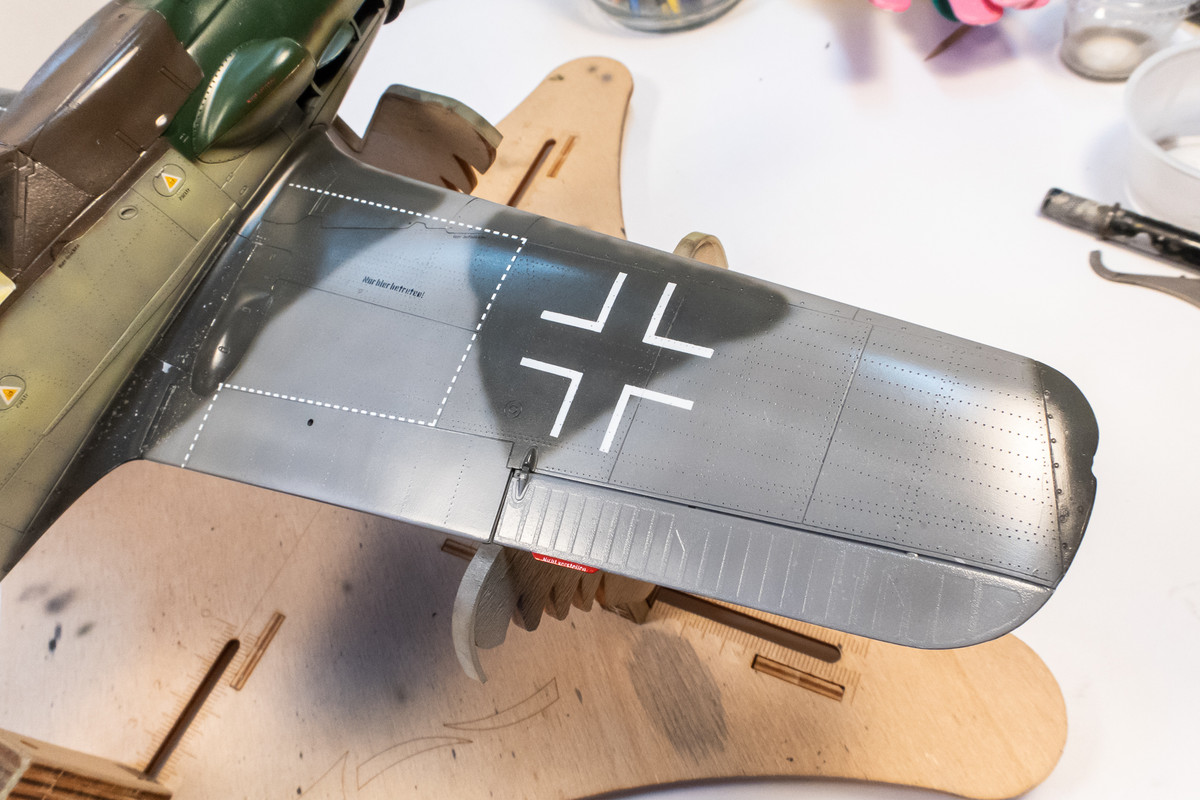
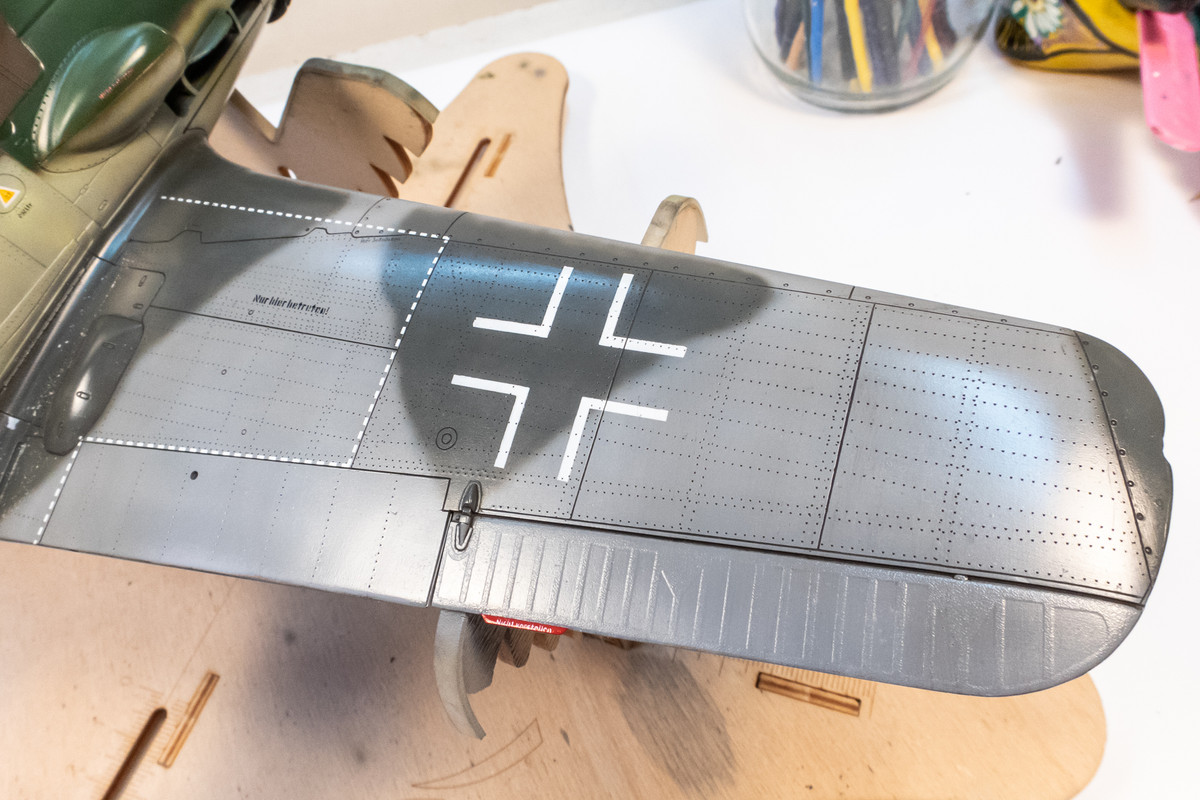
The stencil markings are going to primarily masked and painted using the 1ManArmy laser-cut stencils. These are really cool and, in many ways, superior to decals. Obviously the biggest advantage of painted markings over decals is the absence of decal carrier around the marking. And given the fast-drying nature of the acrylic paints that I'm using, painting is faster than applying decals since the decal solution step is not necessary.
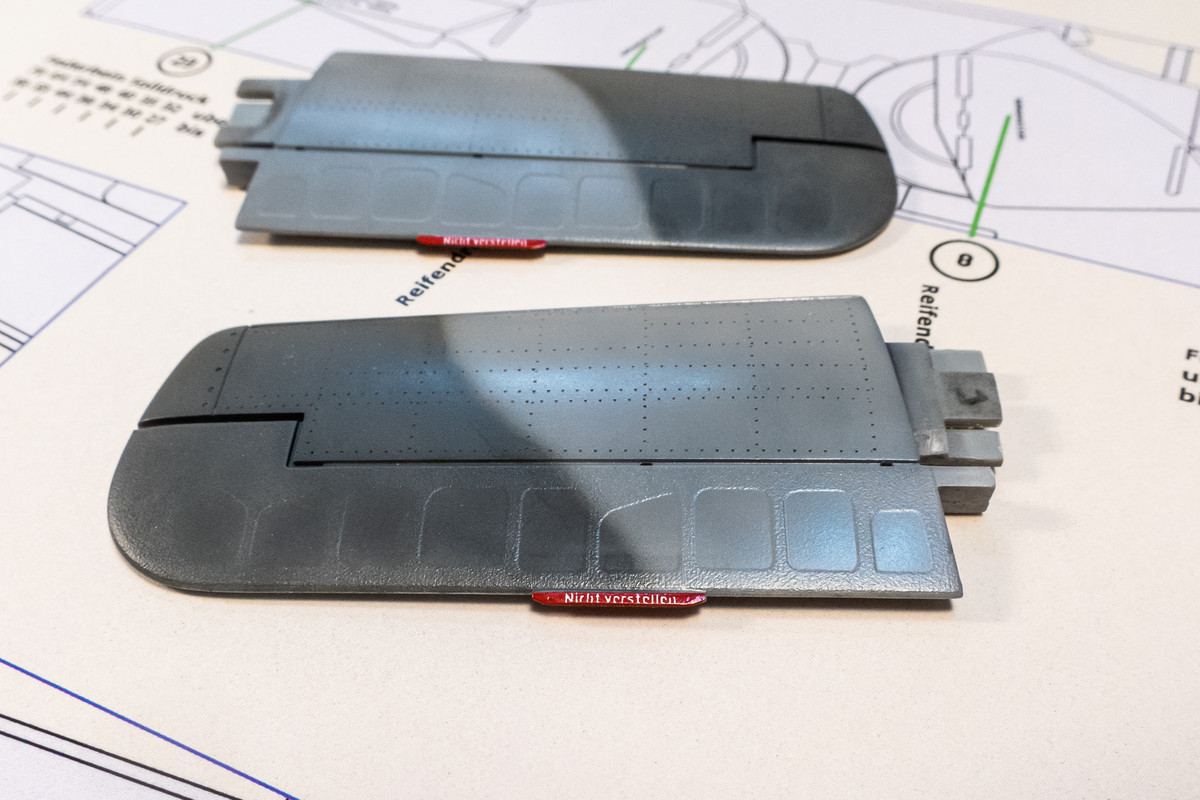
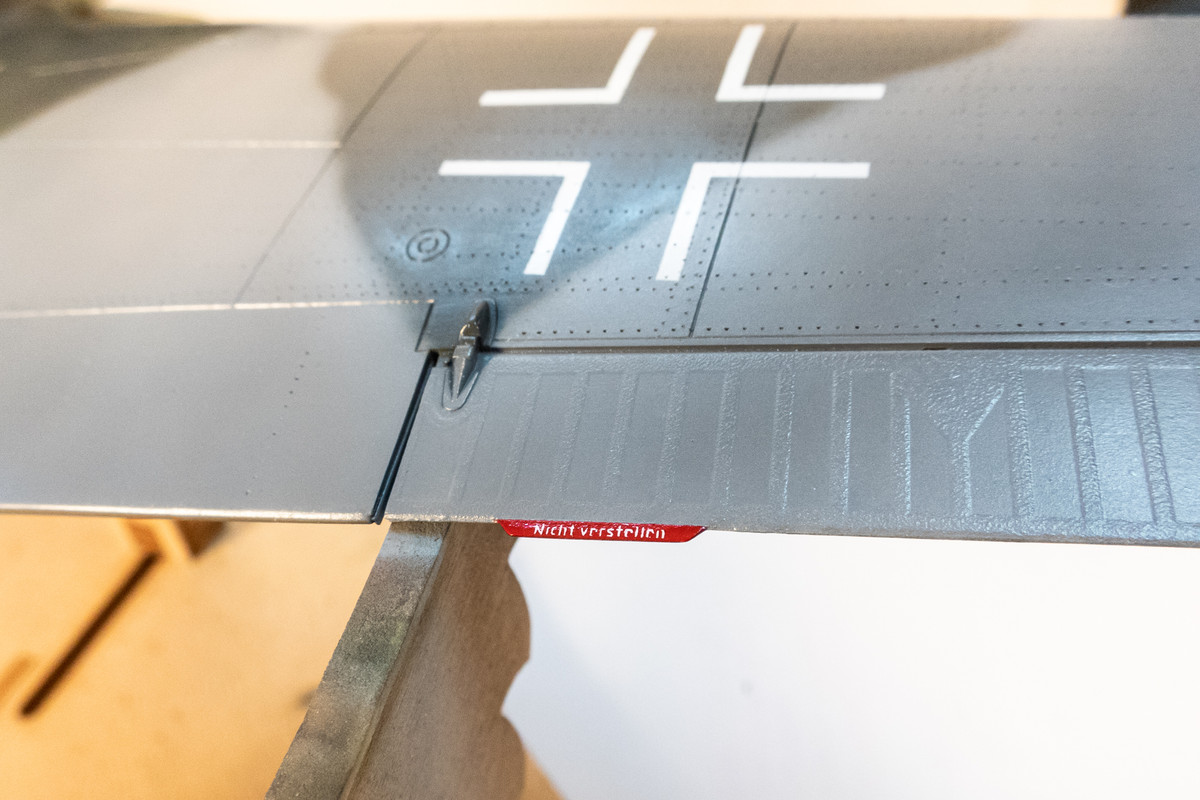
Resolution of the masks is incredibly fine and I highly recommend trying these masks out if you have the chance. Another plus is that they are re-usable. I just replace the masks back onto the sheet after use.
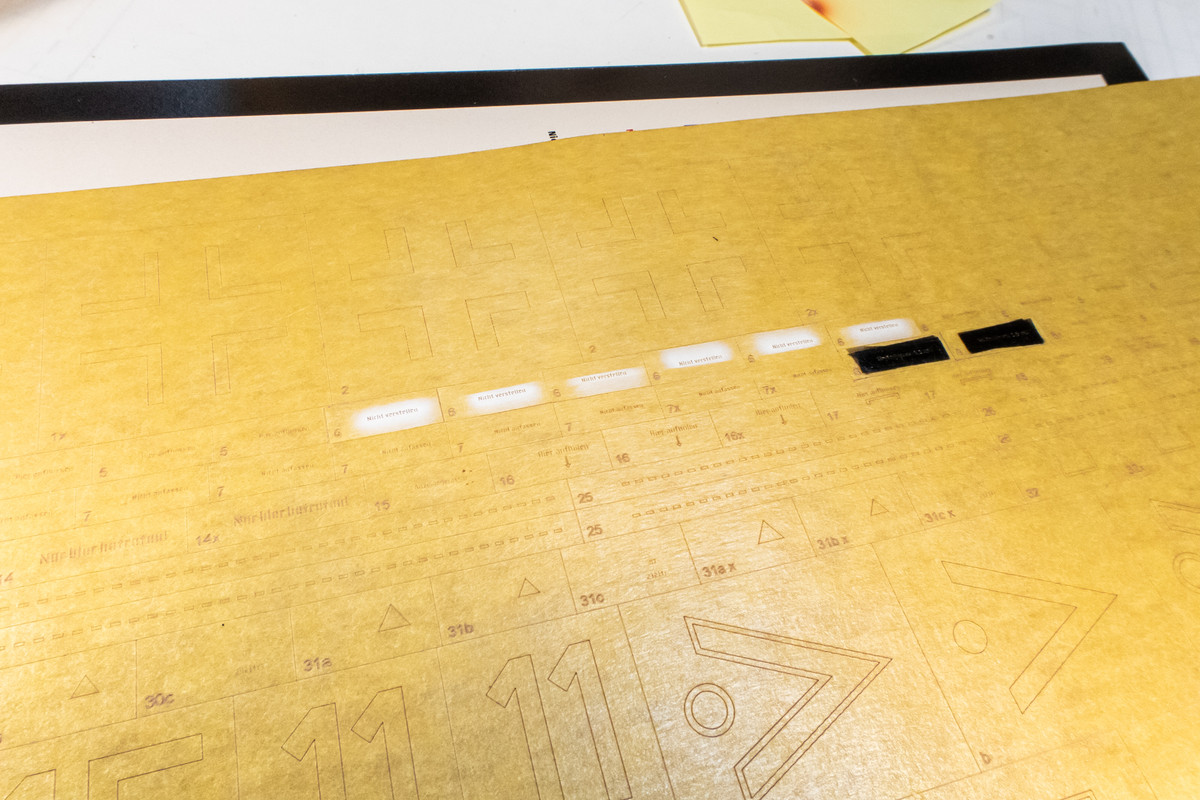
One drawback to using these masks is that since the yellow masking material is opaque, placement can be tricky. Not insurmountable but additional care in placement needs to be practiced. The upper wing stencils have been painted.
Not quite finished with the painting yet as I wanted to make a few corrections. First is the demarcation between the upper and lower camo colors in the vicinity of the fuselage cross.
Since I have a photo of the starboard fuselage of Brown 4, I thought I'd try to match the demarcation line a little more closely.
I'm not a huge stickler for this type of matching but this one is easy enough since I can use the leftover mask materials to protect the markings I've already painted.
After the minor correction...
I also noticed that the brown bar on this side is slightly drooping so this was fixed as well. Yes, the bar is noticeably lighter than the "4" so I'll need to adjust that as well.
The stencil markings are going to primarily masked and painted using the 1ManArmy laser-cut stencils. These are really cool and, in many ways, superior to decals. Obviously the biggest advantage of painted markings over decals is the absence of decal carrier around the marking. And given the fast-drying nature of the acrylic paints that I'm using, painting is faster than applying decals since the decal solution step is not necessary.
Resolution of the masks is incredibly fine and I highly recommend trying these masks out if you have the chance. Another plus is that they are re-usable. I just replace the masks back onto the sheet after use.
One drawback to using these masks is that since the yellow masking material is opaque, placement can be tricky. Not insurmountable but additional care in placement needs to be practiced. The upper wing stencils have been painted.
John aka JKim
-----------<><

-----------<><

Re: Hasegawa 1/32 Fw 190D-9 Brown 4
Looking really good! The 4 being straight but looking curved depending on how you view it was a great bit of detective work on your part. The painted on stencils are a huge upgrade to decals. If I ever build 1/32 subject I will definitely use them.
March as one, Don't look back
Odin's sons... Attack!
Unleash hell! Do not repent! Warfare grants us no lament
Let your weapons slash and tear This is no place for fear
Hold the lines! Move as one! In unity our victory's won
Our shields will form a mighty wall
United we shall never fall
Odin's sons... Attack!
Unleash hell! Do not repent! Warfare grants us no lament
Let your weapons slash and tear This is no place for fear
Hold the lines! Move as one! In unity our victory's won
Our shields will form a mighty wall
United we shall never fall

Re: Hasegawa 1/32 Fw 190D-9 Brown 4
Agreed, those painted stencils look superb John - this whole project is superb!
Stuart Templeton 'I may not be good but I'm slow...'
My blog: https://stuartsscalemodels.blogspot.com/
My blog: https://stuartsscalemodels.blogspot.com/
Re: Hasegawa 1/32 Fw 190D-9 Brown 4
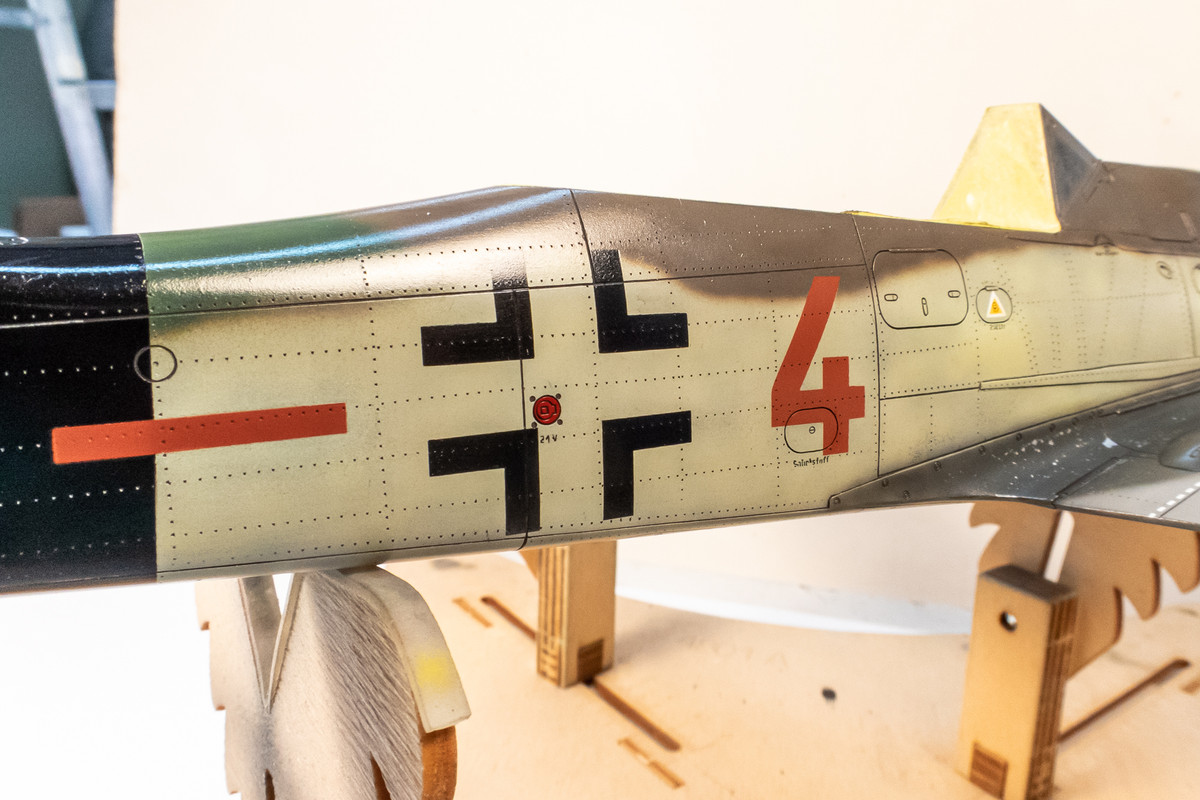
Thanks guys! Slow, sporadic progress during the work week. I'm still in the process of applying the data stencils using the 1ManArmy masks.
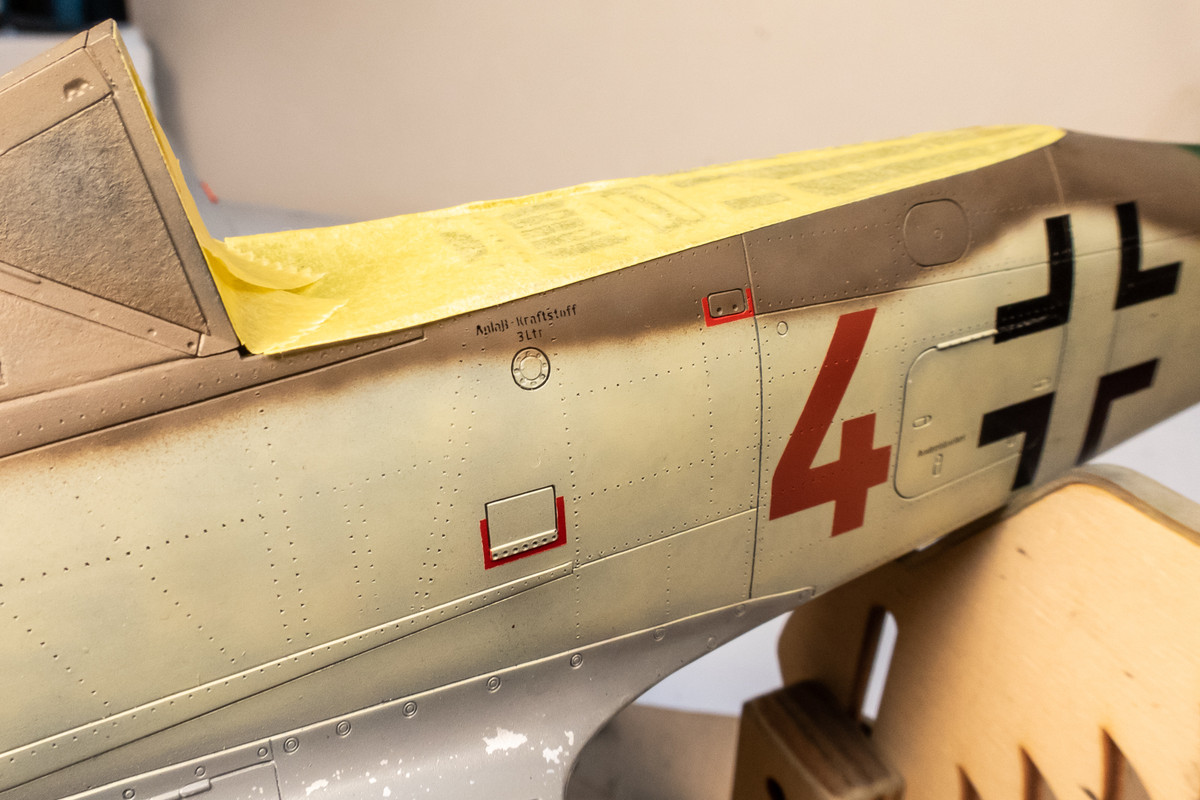

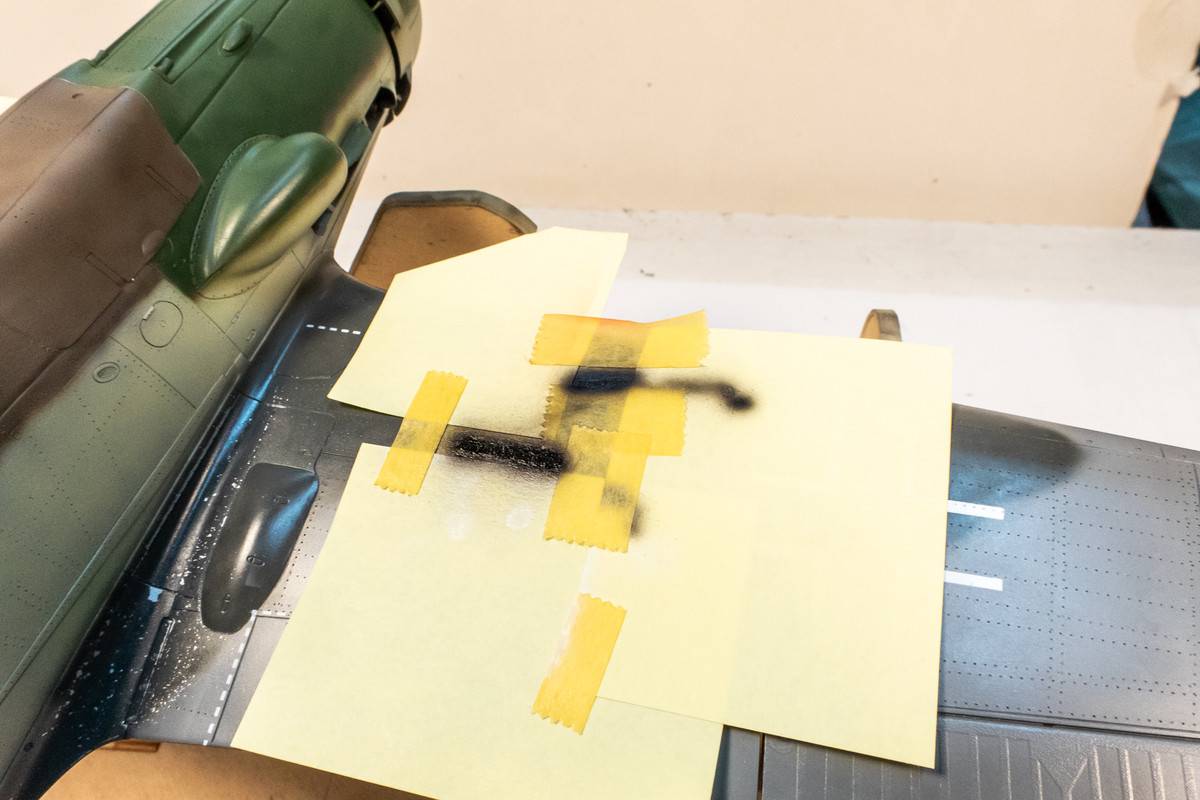
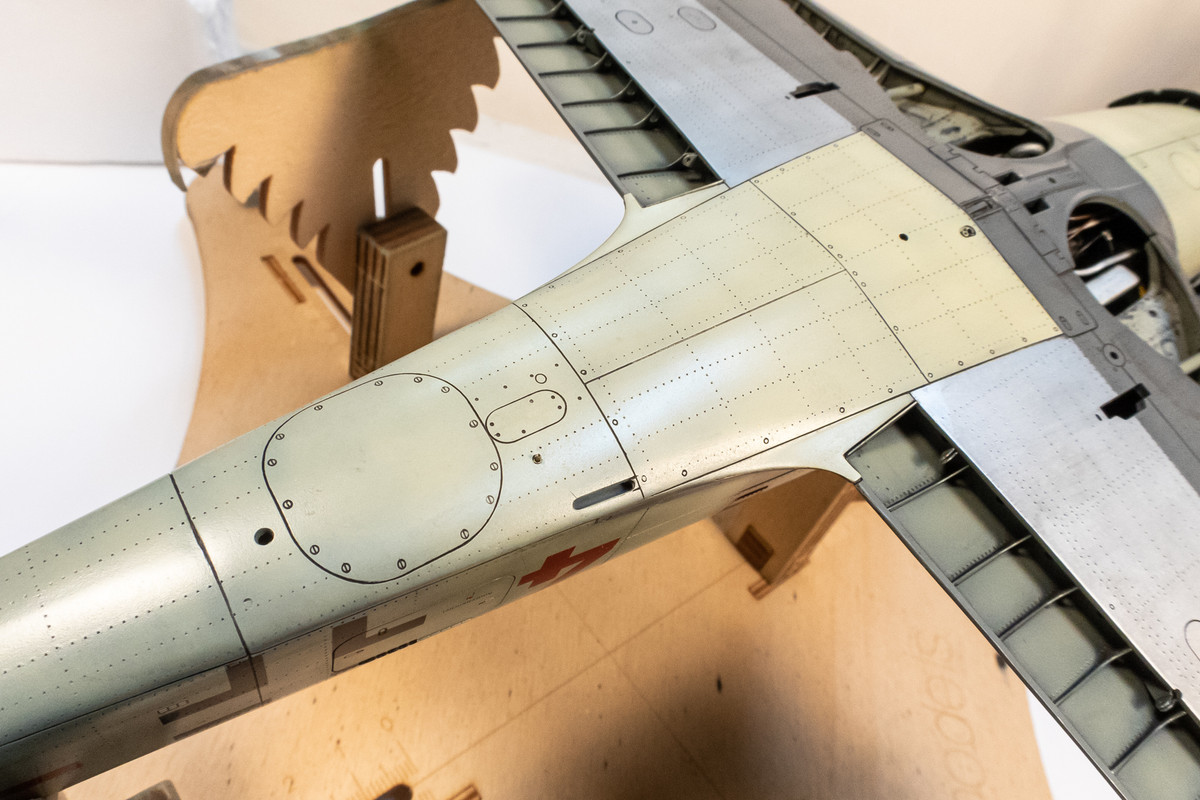
The 3-color fuel triangles needed some thought. I thought it would be difficult to line up the masks since the material isn't transparent. So I decided to cut custom masks for the triangles using the translucent Oramask 810 material.
The large triangles are placed on the fuel port covers and the white is applied. All of the masks are removed after the white is dry.

The smaller triangle masks are carefully placed over the painted white triangles. Since the Oramask is transparent, I can make sure that the borders are even and the yellow is sprayed over the white.
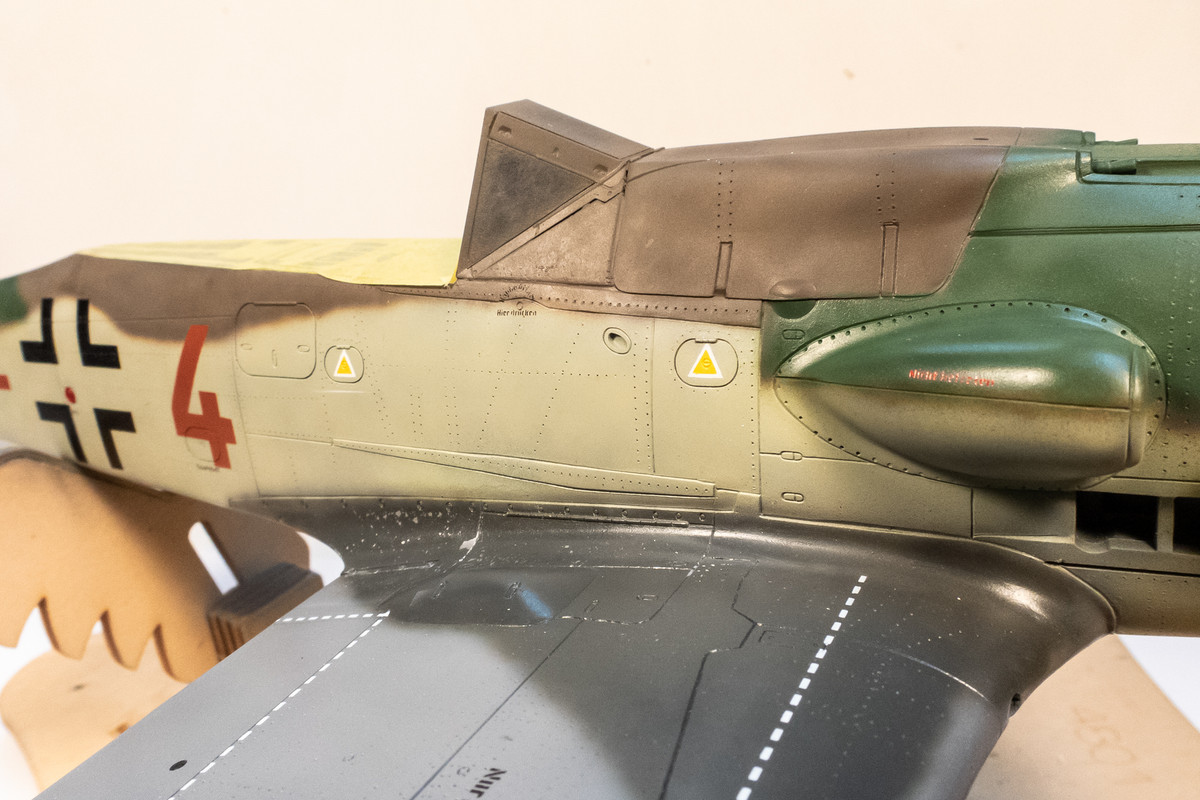
The fine text comes from the 1ManArmy mask. These masks are not transparent so placement is tricky!

That wraps up the painting of the data stencils. There are a few decals that I'll need to apply before I can move to the weathering stage.
The 3-color fuel triangles needed some thought. I thought it would be difficult to line up the masks since the material isn't transparent. So I decided to cut custom masks for the triangles using the translucent Oramask 810 material.
The large triangles are placed on the fuel port covers and the white is applied. All of the masks are removed after the white is dry.
The smaller triangle masks are carefully placed over the painted white triangles. Since the Oramask is transparent, I can make sure that the borders are even and the yellow is sprayed over the white.
The fine text comes from the 1ManArmy mask. These masks are not transparent so placement is tricky!
That wraps up the painting of the data stencils. There are a few decals that I'll need to apply before I can move to the weathering stage.
John aka JKim
-----------<><
-----------<><
-
Medicman71
- Elite Member
- Posts: 9744
- Joined: Mon Apr 07, 2014 9:32 am
- Location: Houston, Tx
Re: Hasegawa 1/32 Fw 190D-9 Brown 4
Those stencils look awesome! I don't think I have the patience to do all those.
Mike
Sponsored by Boeing, Lockheed Martin, Northrop Grumman, Saab, BAE, and Dassault
Sponsored by Boeing, Lockheed Martin, Northrop Grumman, Saab, BAE, and Dassault
Re: Hasegawa 1/32 Fw 190D-9 Brown 4
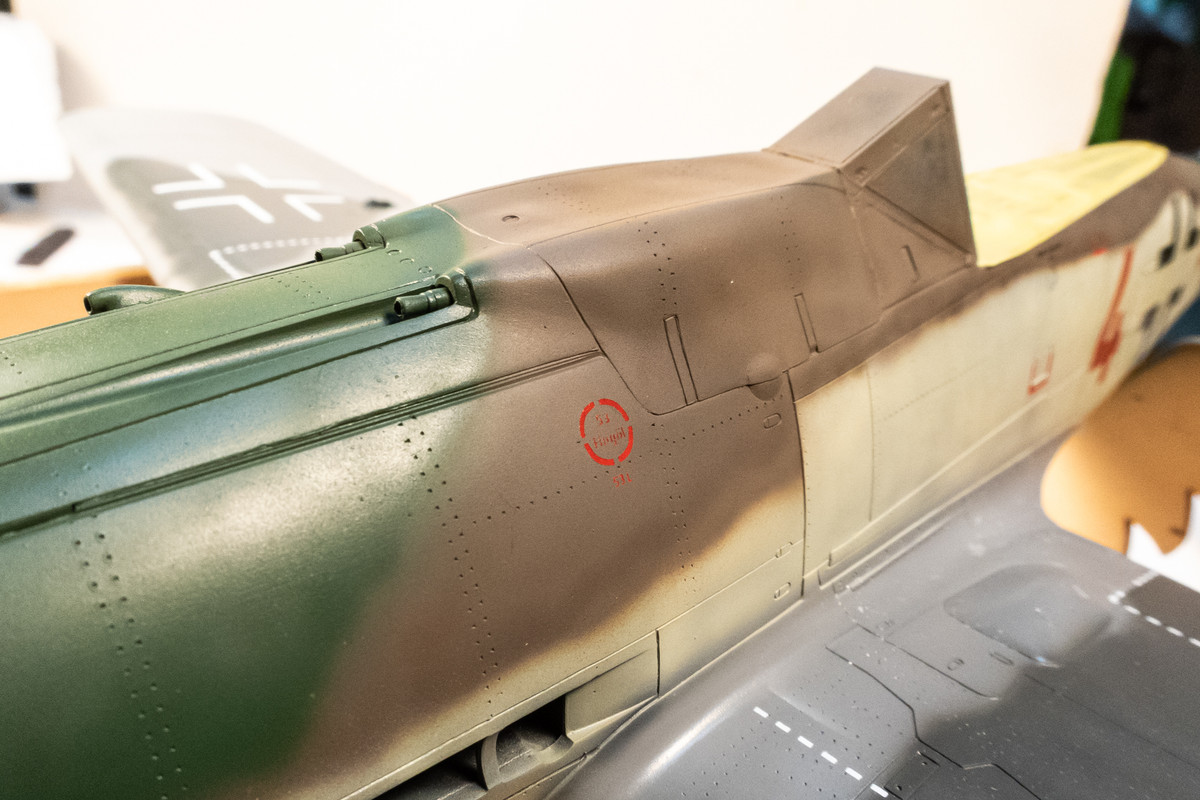
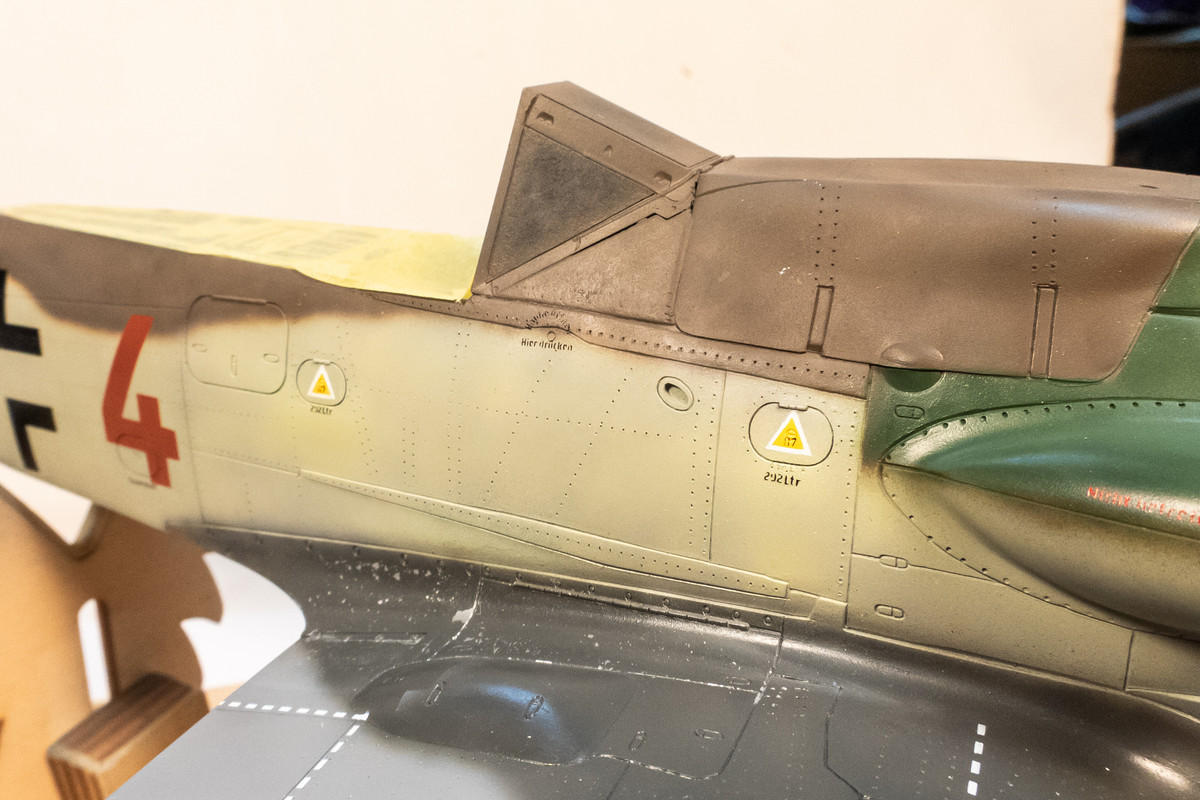
Only two decals were used on the exterior. One was the handpainted glycol stencil on the port side of the engine.
The other was the small rectangular manufacturer plate under the fuselage cross.
The models was given a gloss coat and I prepared three batches of pastel wash (black, dark brown and tan). Very simple... just scrapings from pastel chalks + water + dab of dishwashing soap to help suspend the chalk pigments in the water.
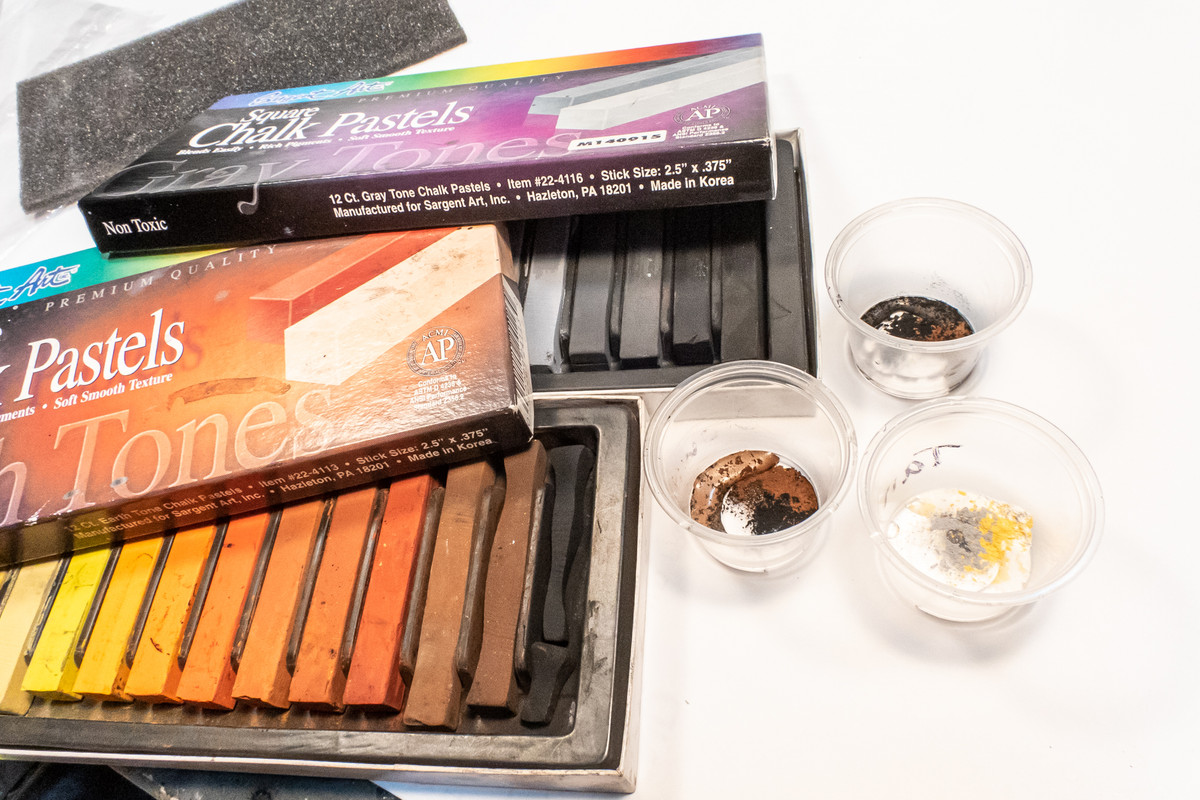
Dark brown will be the primary color that I will use to highlight the rivets and panel lines.

The wash is applied to all of the rivets and panel lines using a paint brush.
After it dries, the excess is wiped off using a clean damp paper towel, leaving the darker pigments in the recesses.
This step is very important in the weathering process as it transforms the holes and grooves of the rivets and panel lines into dots and lines, visually "flattening" the exterior surface.
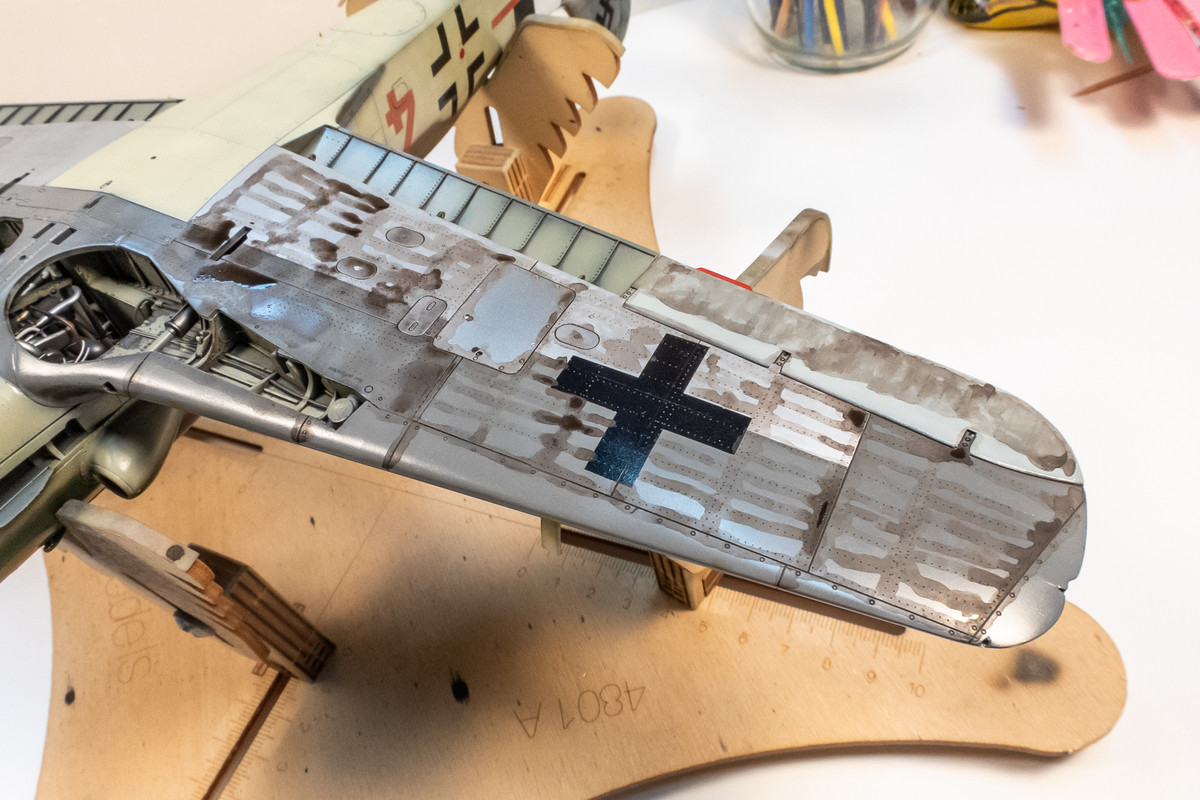
During the pastel wash application, I noticed that a seam near the tail wheel had popped open, requiring attention.
Tamiya Extra Thin cement seeping onto my fingertips made the small repair just a bit bigger.
Spot repairs like this can add to the visual depth of the build if you don't match the paint EXACTLY. This started as an unintentional thing but I started liking the look of the slightly mis-matched paint and this build has many small areas where the paint shade varies.

After the repair, the pastel wash process continues on the top side.


The other was the small rectangular manufacturer plate under the fuselage cross.
The models was given a gloss coat and I prepared three batches of pastel wash (black, dark brown and tan). Very simple... just scrapings from pastel chalks + water + dab of dishwashing soap to help suspend the chalk pigments in the water.
Dark brown will be the primary color that I will use to highlight the rivets and panel lines.
The wash is applied to all of the rivets and panel lines using a paint brush.
After it dries, the excess is wiped off using a clean damp paper towel, leaving the darker pigments in the recesses.
This step is very important in the weathering process as it transforms the holes and grooves of the rivets and panel lines into dots and lines, visually "flattening" the exterior surface.
During the pastel wash application, I noticed that a seam near the tail wheel had popped open, requiring attention.
Tamiya Extra Thin cement seeping onto my fingertips made the small repair just a bit bigger.
Spot repairs like this can add to the visual depth of the build if you don't match the paint EXACTLY. This started as an unintentional thing but I started liking the look of the slightly mis-matched paint and this build has many small areas where the paint shade varies.
After the repair, the pastel wash process continues on the top side.
Last edited by jkim on Sat Oct 29, 2022 10:11 pm, edited 1 time in total.
John aka JKim
-----------<><
-----------<><

Re: Hasegawa 1/32 Fw 190D-9 Brown 4
John,
Outstanding as usual. Beautiful paint work and the stencil masks create amazing realism! Wow!
Outstanding as usual. Beautiful paint work and the stencil masks create amazing realism! Wow!
To make each build less crappy than the last one. Or, put another way, "Better than the last one, not as good as the next one!"..