Seriously that is some fantabulous work John! You take something good and make it great.
1/48 Tamiya F-14A Jolly Rogers
-
Stikpusher

- Moderator
- Posts: 18867
- Joined: Sat Apr 05, 2014 8:37 pm
- Location: Ceti Alpha 5
Re: 1/48 Tamiya F-14A Jolly Rogers
I think that the ID color code mark on the auxiliary hydraulic brake line is 1mm off… 
Seriously that is some fantabulous work John! You take something good and make it great.
Seriously that is some fantabulous work John! You take something good and make it great.
"Surely I have made my meaning plain? I intend to avenge myself upon you, Admiral. I have deprived your ship of power, and when I swing 'round, I intend to deprive you of your life."
FLSM
FLSM

Re: 1/48 Tamiya F-14A Jolly Rogers
Thanks guys! Appreciate the feedback! These modern jets really pack a lot of junk into these wheel wells and although I feel bad that I'm not adding the level of detail that I would consider to be realistic, I gotta take it one step at a time and not be overly ambitious. I want to keep the build moving forward. Maybe I can take a more complete approach next time. Cuz there is ALWAYS a next time.
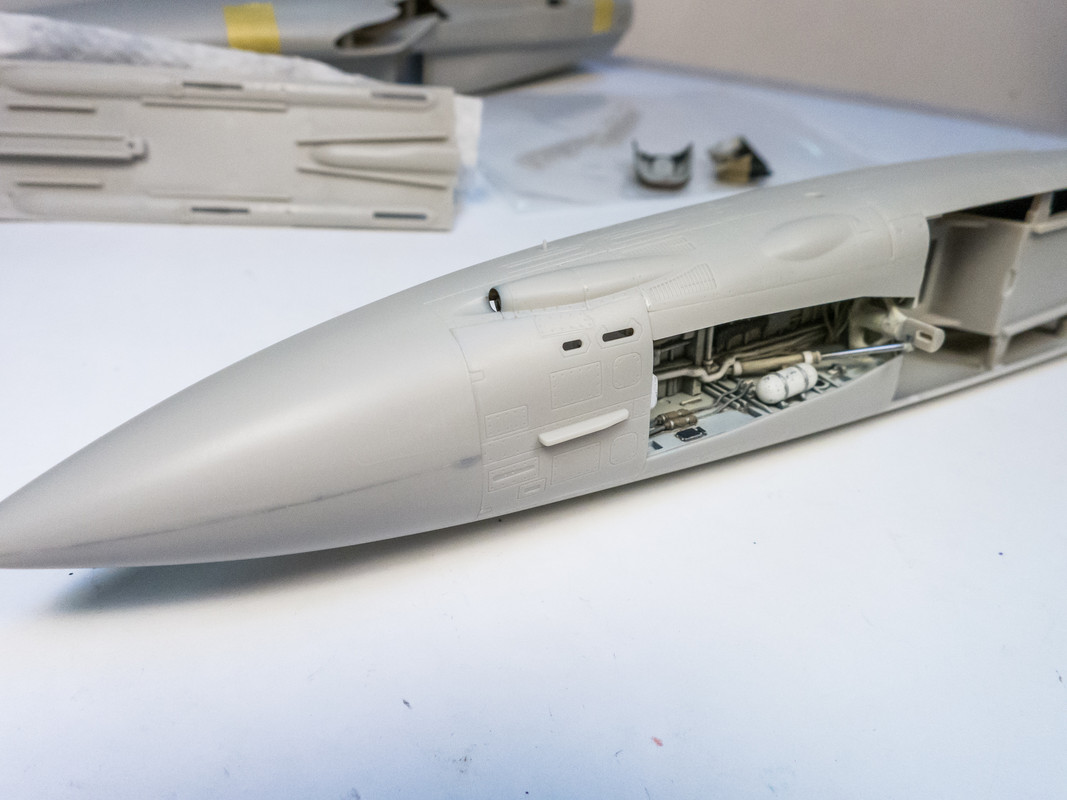
There are a few bits to add before the fuselage halves are glued together. The re-fueling probe will be retracted so the door is glued shut. Fit is good but surprisingly not Tamiya perfect and I may need a tiny bit of filler on that forward seam.
The Vulcan cannon cover fit is perfect.
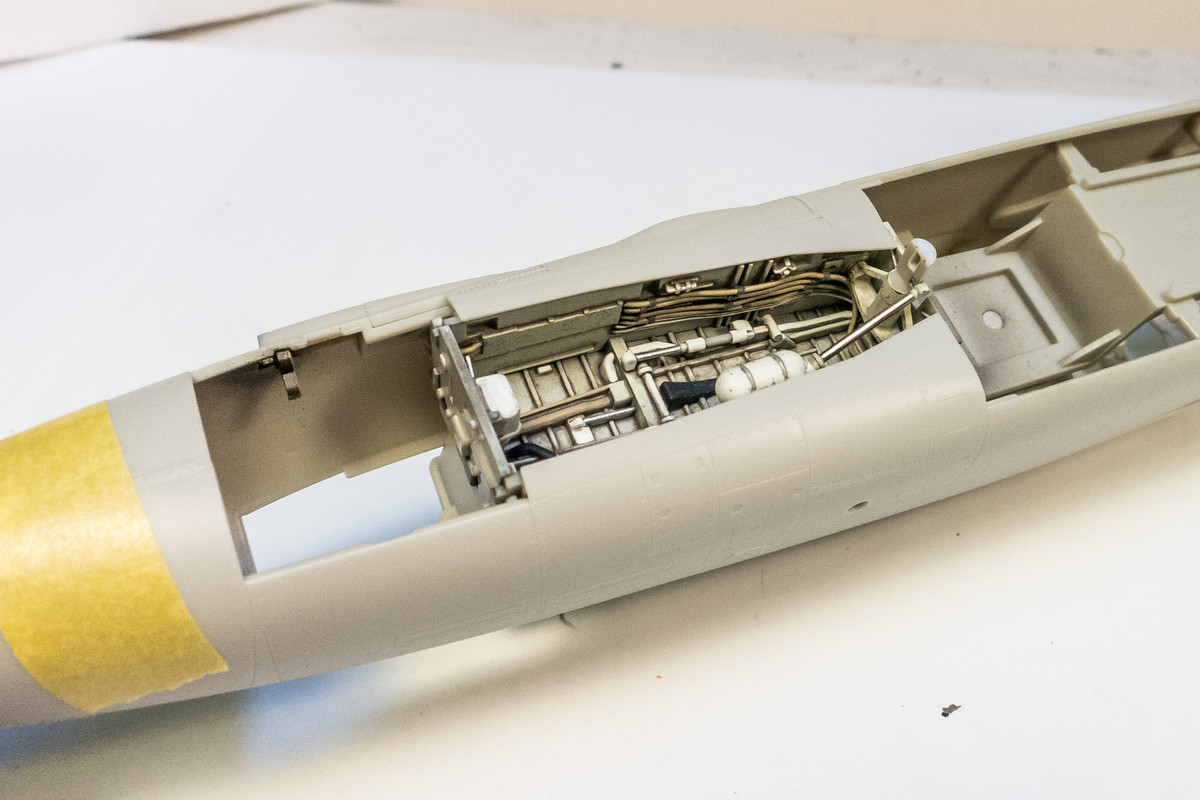
The cockpit tub is glued to the top of the nose wheel well assembly and then located within the starboard fuselage half. Fit is ultra positive with multiple contact points.
The fuselage halves are fused together using Tamiya Extra Thin cement.

A small bead of Mr Surfacer 1000 is used on the seams. If one is very careful in lining up the fuselage halves before they dry, you could probably avoid filler altogether.

The cockpit deck has been painted.
There are a few bits to add before the fuselage halves are glued together. The re-fueling probe will be retracted so the door is glued shut. Fit is good but surprisingly not Tamiya perfect and I may need a tiny bit of filler on that forward seam.
The Vulcan cannon cover fit is perfect.
The cockpit tub is glued to the top of the nose wheel well assembly and then located within the starboard fuselage half. Fit is ultra positive with multiple contact points.
The fuselage halves are fused together using Tamiya Extra Thin cement.
A small bead of Mr Surfacer 1000 is used on the seams. If one is very careful in lining up the fuselage halves before they dry, you could probably avoid filler altogether.
The cockpit deck has been painted.
John aka JKim
-----------<><

-----------<><
-
Stikpusher
- Moderator
- Posts: 18867
- Joined: Sat Apr 05, 2014 8:37 pm
- Location: Ceti Alpha 5
Re: 1/48 Tamiya F-14A Jolly Rogers
You know, you could always build the Tamiya 1/32 F-14 after this one if you feel you can’t get enough detail packed in this one…

"Surely I have made my meaning plain? I intend to avenge myself upon you, Admiral. I have deprived your ship of power, and when I swing 'round, I intend to deprive you of your life."
FLSM
FLSM

Re: 1/48 Tamiya F-14A Jolly Rogers
That gearbay is beautiful! I'm with Carlos get the 1/32 and cram it full
March as one, Don't look back
Odin's sons... Attack!
Unleash hell! Do not repent! Warfare grants us no lament
Let your weapons slash and tear This is no place for fear
Hold the lines! Move as one! In unity our victory's won
Our shields will form a mighty wall
United we shall never fall
Odin's sons... Attack!
Unleash hell! Do not repent! Warfare grants us no lament
Let your weapons slash and tear This is no place for fear
Hold the lines! Move as one! In unity our victory's won
Our shields will form a mighty wall
United we shall never fall
-
jeaton01

- Elite Member
- Posts: 2070
- Joined: Thu Apr 23, 2020 9:20 am
- Location: Northern California
- Contact:
Re: 1/48 Tamiya F-14A Jolly Rogers
The 1/32 Tamiya kit is almost an empty canvas compared to the 1/48 kit. Several generations of Tamiya improvements between the two kits. I say order it today!
-
Medicman71

- Elite Member
- Posts: 9713
- Joined: Mon Apr 07, 2014 9:32 am
- Location: Houston, Tx
Re: 1/48 Tamiya F-14A Jolly Rogers
Very nice John!! You know, with today's modeling technology, you'd think that models companies would mold a one piece nose so we didn't have that seam problem. 
Mike
Sponsored by Boeing, Lockheed Martin, Northrop Grumman, Saab, BAE, and Dassault
Sponsored by Boeing, Lockheed Martin, Northrop Grumman, Saab, BAE, and Dassault
Re: 1/48 Tamiya F-14A Jolly Rogers
Stikpusher wrote:You know, you could always build the Tamiya 1/32 F-14 after this one if you feel you can’t get enough detail packed in this one…
Floki wrote:That gearbay is beautiful! I'm with Carlos get the 1/32 and cram it full
Feel free to tackle that project guys! Not me! A 1/32 F-14 is too big for me to ship so I don't see this making my list of future builds.jeaton01 wrote:The 1/32 Tamiya kit is almost an empty canvas compared to the 1/48 kit. Several generations of Tamiya improvements between the two kits. I say order it today!
I'll take this seam problem any day. The fit is superb and like I mentioned, you could probably avoid putty if you took the time to align the fuselage halves more precisely prior to the glue drying. I was too lazy and found the miniscule step too late and had to bust out the Mr Surfacer. Slide molding a one-piece nose is possible, of course. AMK did it with their F-14D...Medicman71 wrote:Very nice John!! You know, with today's modeling technology, you'd think that models companies would mold a one piece nose so we didn't have that seam problem.

But even a one piece mold will have a mold seams that would need to be sanded.
John aka JKim
-----------<><
-----------<><
Re: 1/48 Tamiya F-14A Jolly Rogers
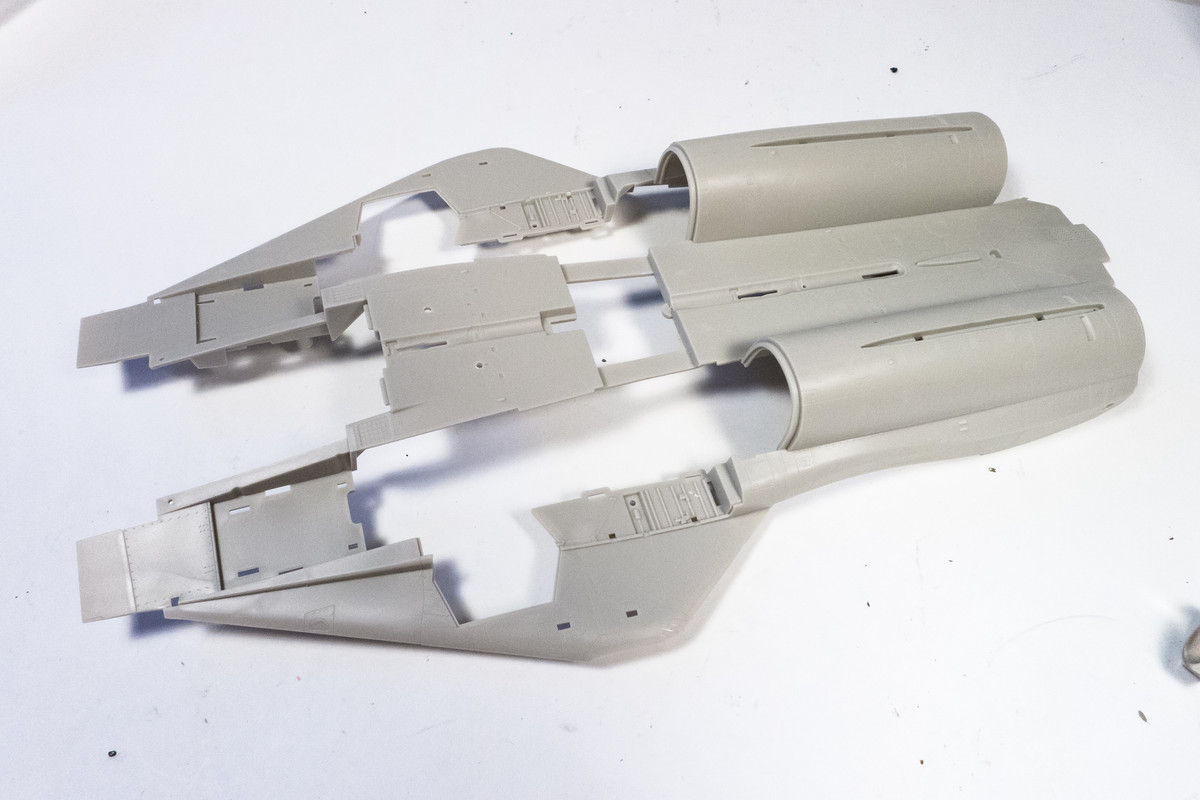
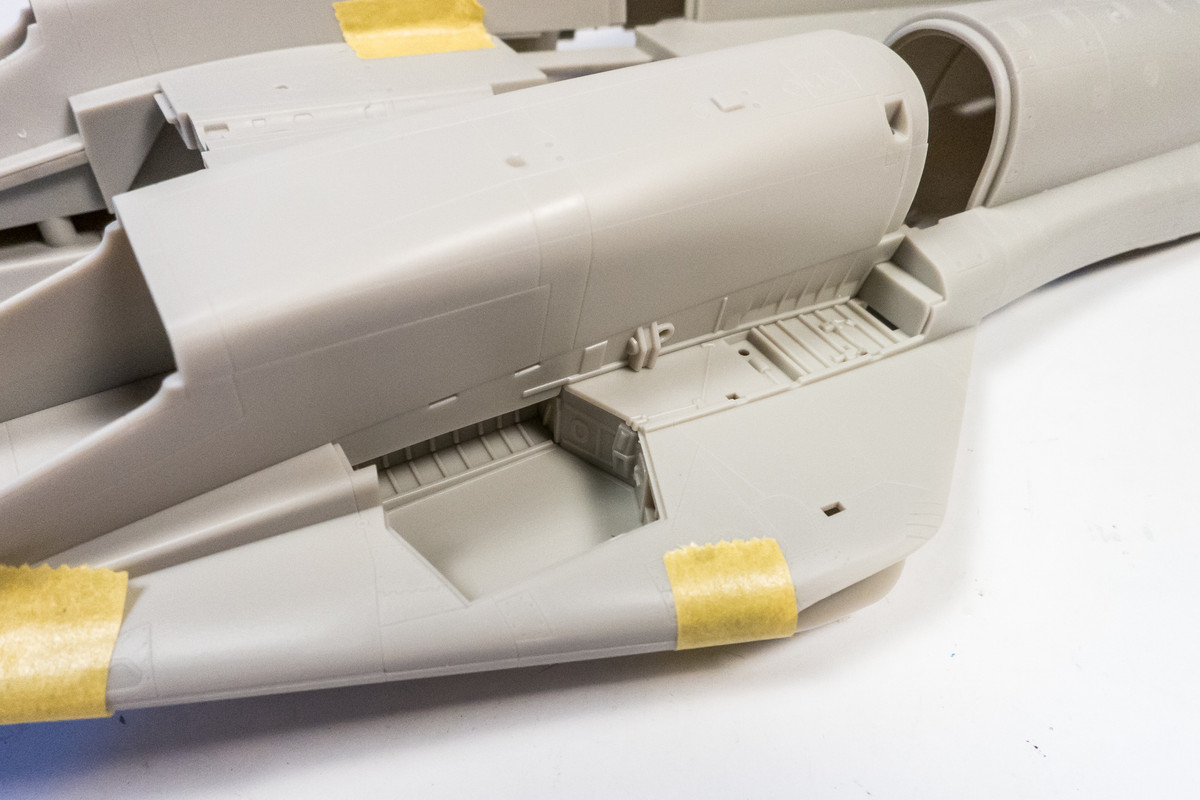
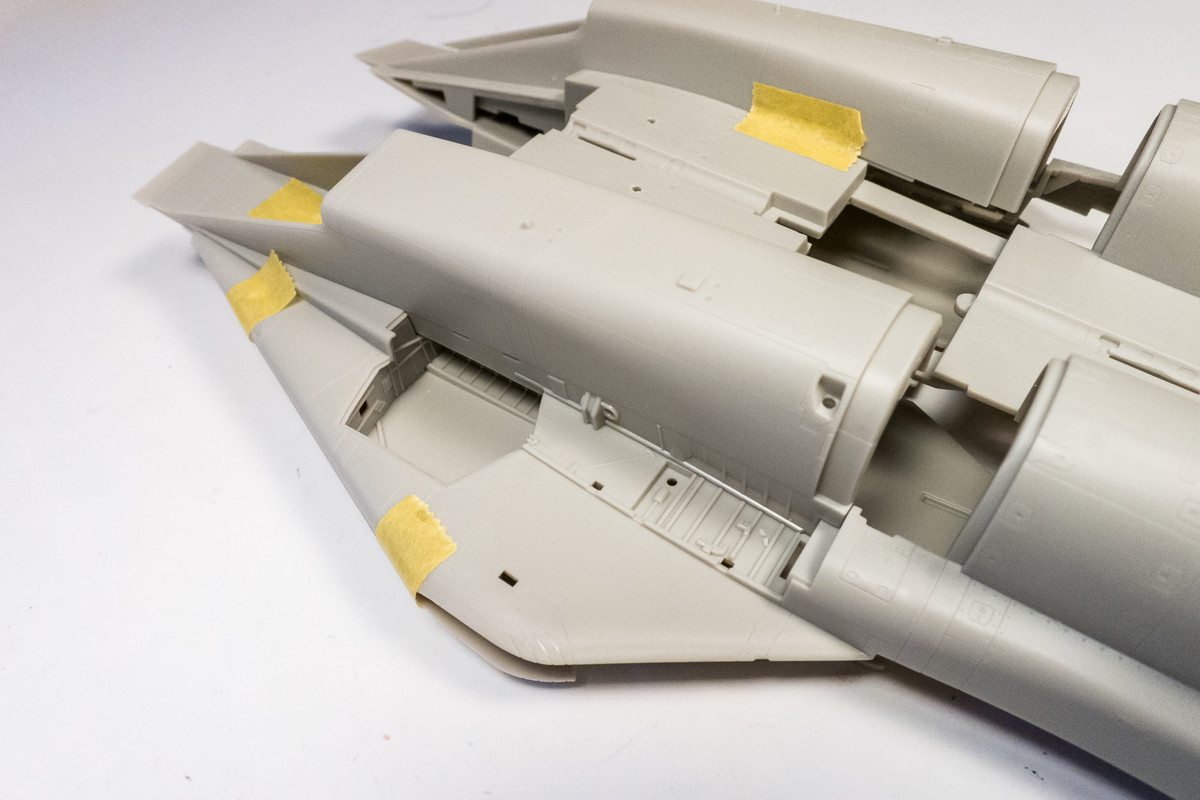
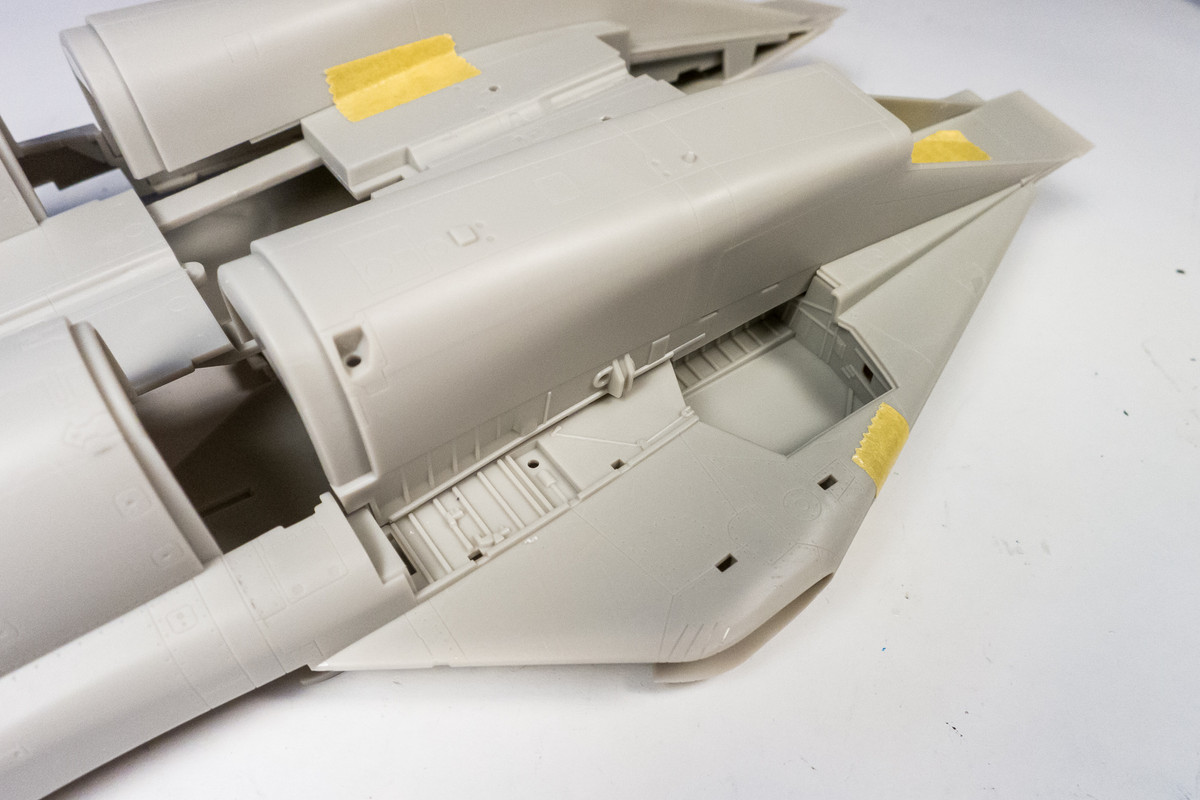
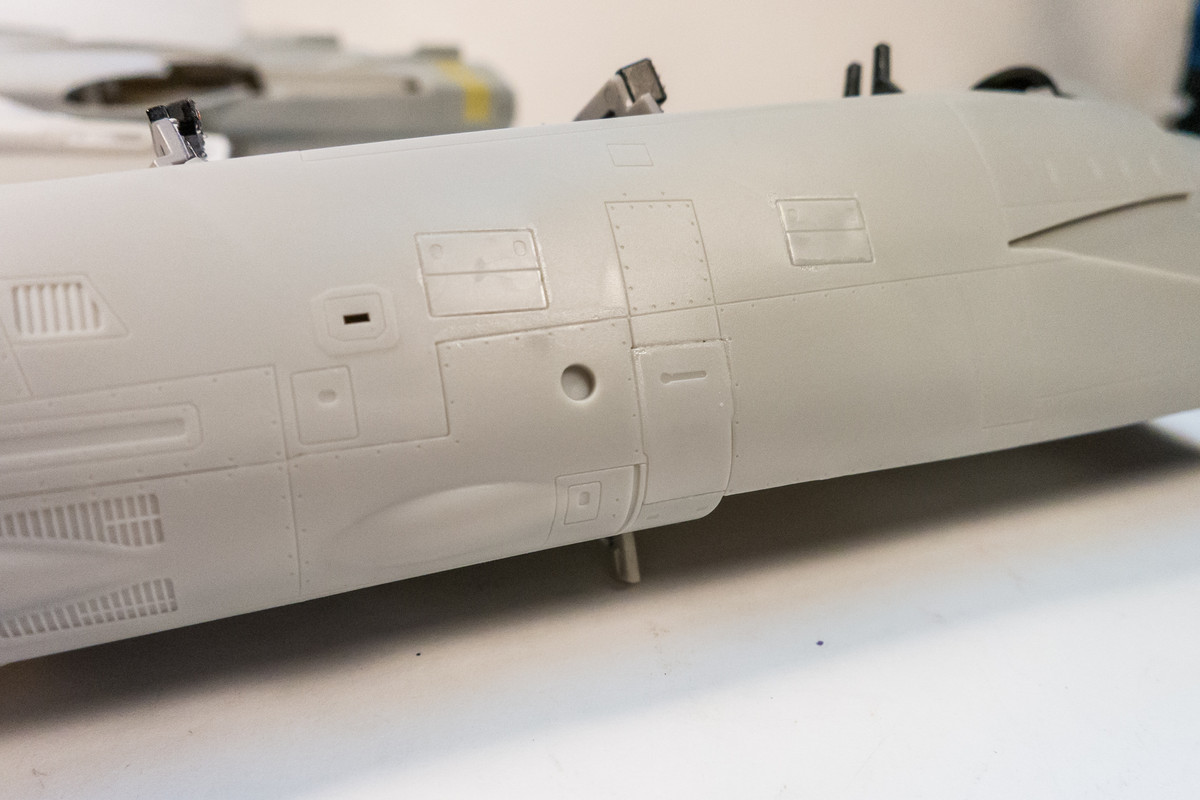
Moving rearward to the central fuselage/wing area, I am starting to think about the main wheel wells and how I would go about adding any detail to them. The nose well was pretty easy since the well was essentially an open-ended box structure. But the surfaces for the main wheel wells are comprised of two distinct levels and spread out over many different parts.
The ceiling of the deeper portion of the wheel wells are on inside of the wing tops.
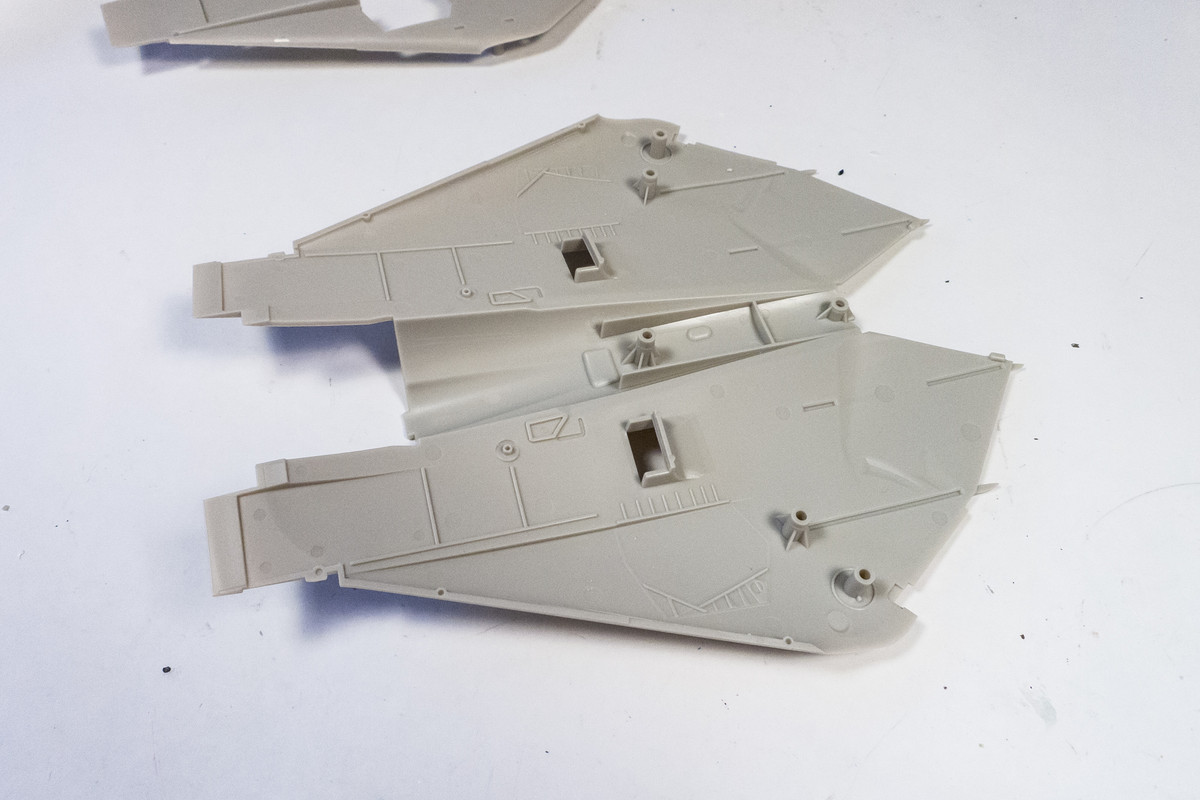
The top of the shallower part of the wells are on the wing bottoms.
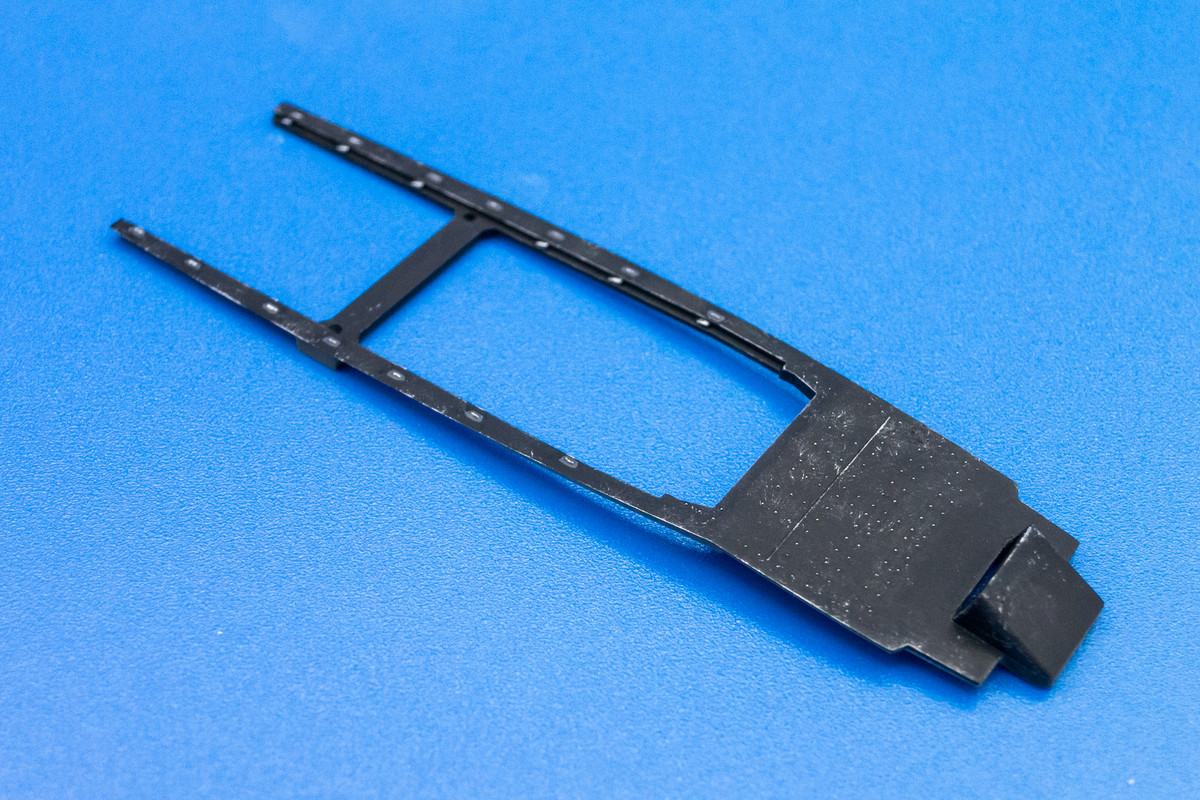
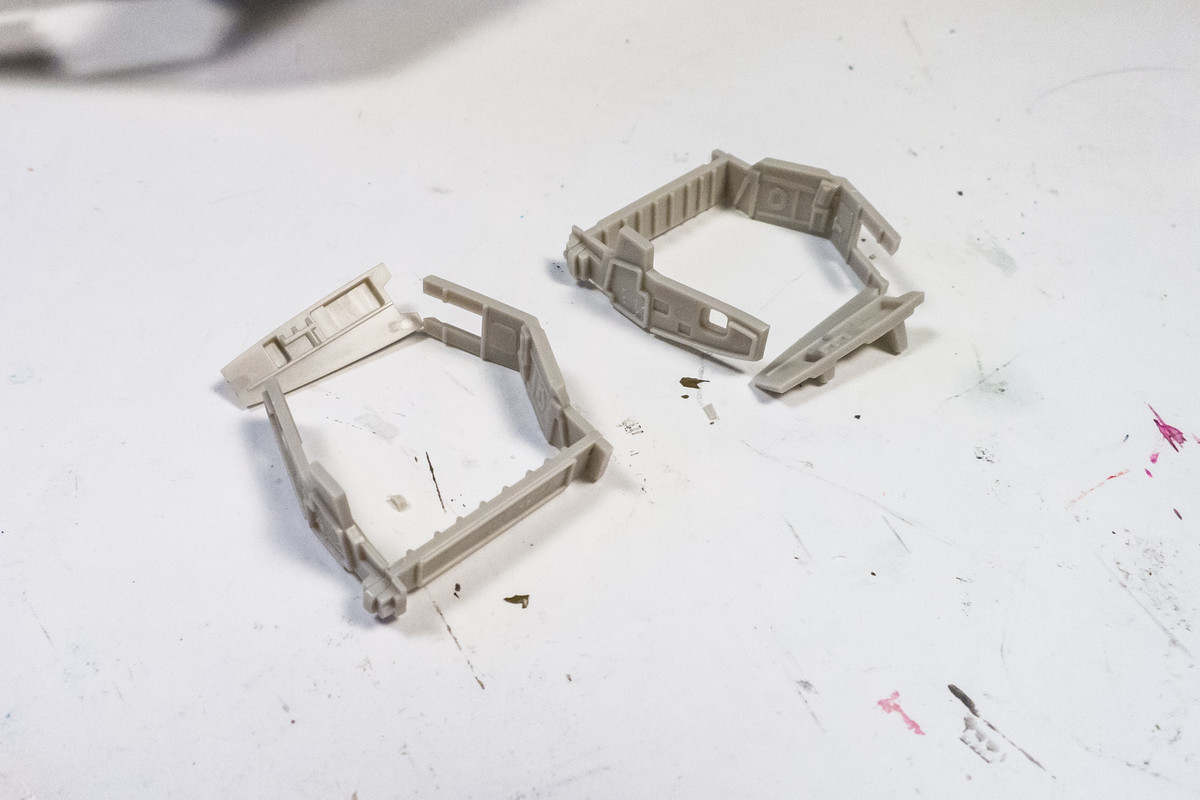
The vertical walls of the deeper portion are made from these parts.
Finally, there is also some sidewall detail on the intakes.
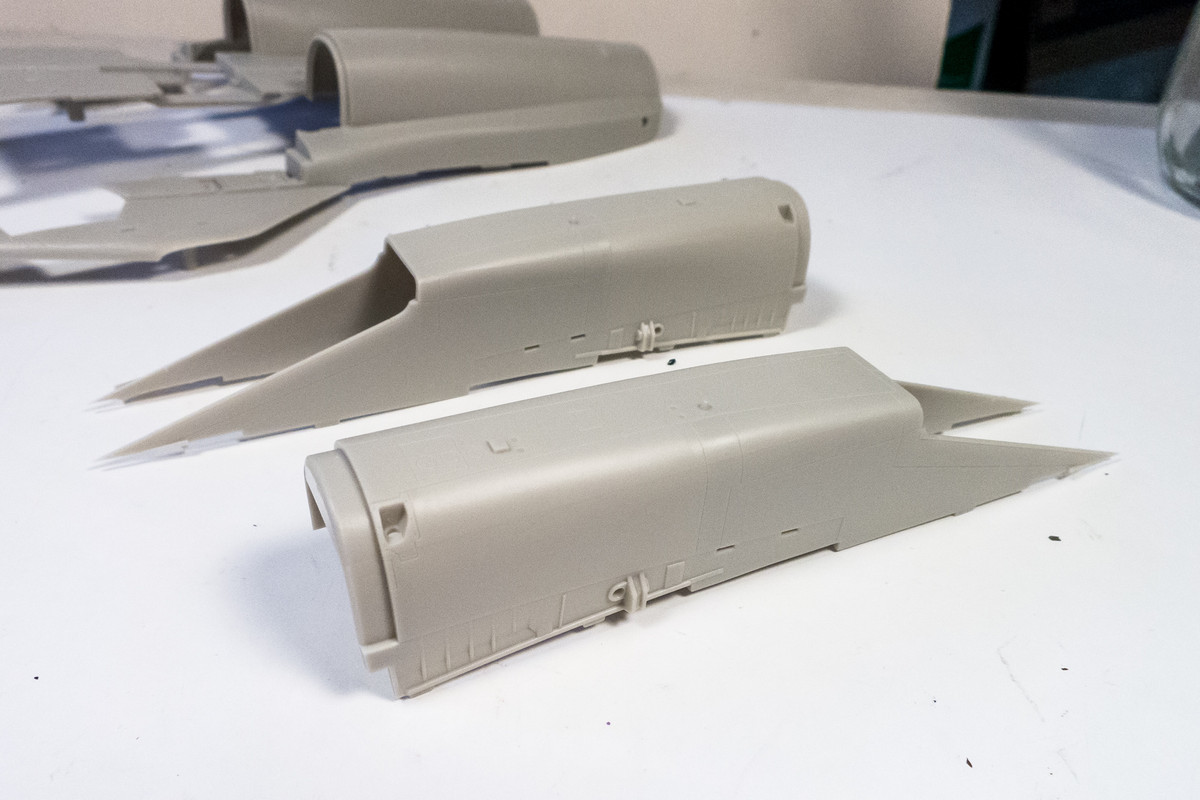
Putting these parts together will give us a better picture of how the wheel wells are configured.

As you can see, the detail in the wells is very sparse and not very convincing. Like the nose wheel well, my intention is too add some detail but won't attempt to capture the actual maze of wiring and cuts.
The ceiling of the deeper portion of the wheel wells are on inside of the wing tops.
The top of the shallower part of the wells are on the wing bottoms.
The vertical walls of the deeper portion are made from these parts.
Finally, there is also some sidewall detail on the intakes.
Putting these parts together will give us a better picture of how the wheel wells are configured.
As you can see, the detail in the wells is very sparse and not very convincing. Like the nose wheel well, my intention is too add some detail but won't attempt to capture the actual maze of wiring and cuts.
John aka JKim
-----------<><
-----------<><
-
Stikpusher
- Moderator
- Posts: 18867
- Joined: Sat Apr 05, 2014 8:37 pm
- Location: Ceti Alpha 5
Re: 1/48 Tamiya F-14A Jolly Rogers
Here’s a shot of a real one to help you plan the add ons…

"Surely I have made my meaning plain? I intend to avenge myself upon you, Admiral. I have deprived your ship of power, and when I swing 'round, I intend to deprive you of your life."
FLSM
FLSM
Re: 1/48 Tamiya F-14A Jolly Rogers
Excellent photo, Carlos! I'll print that one out for reference!
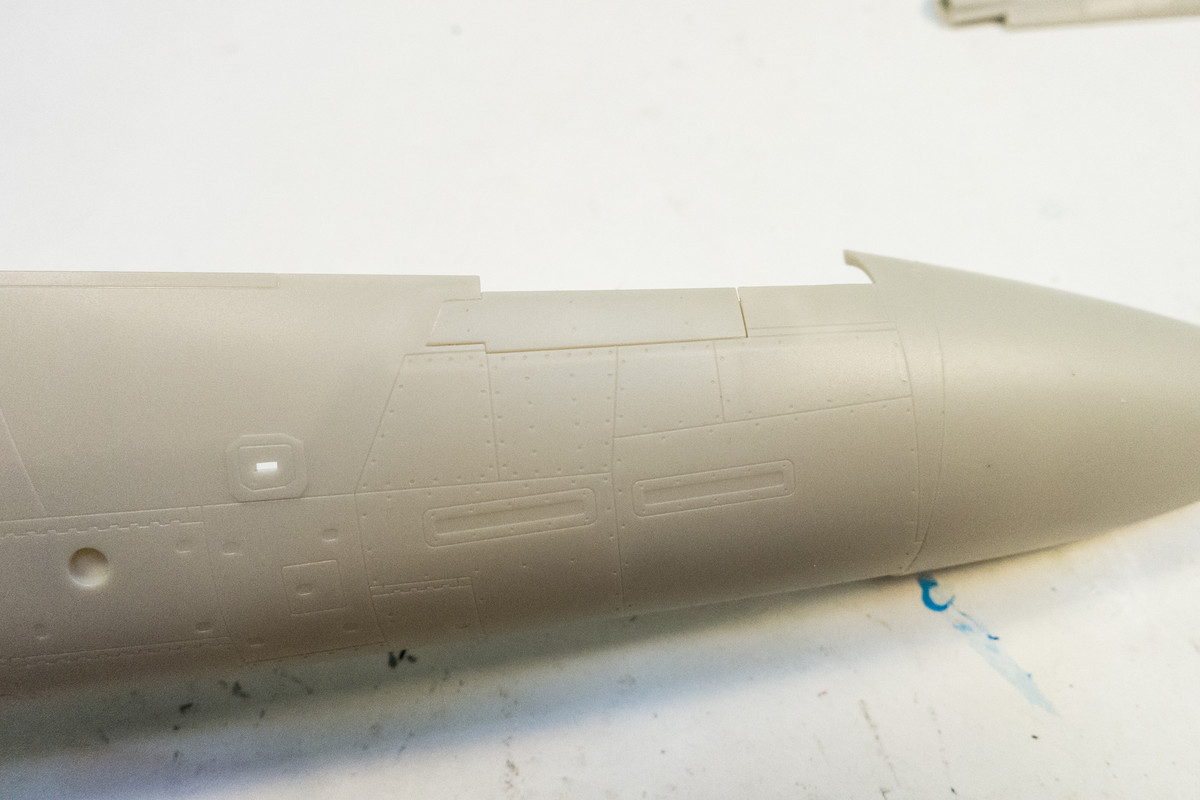
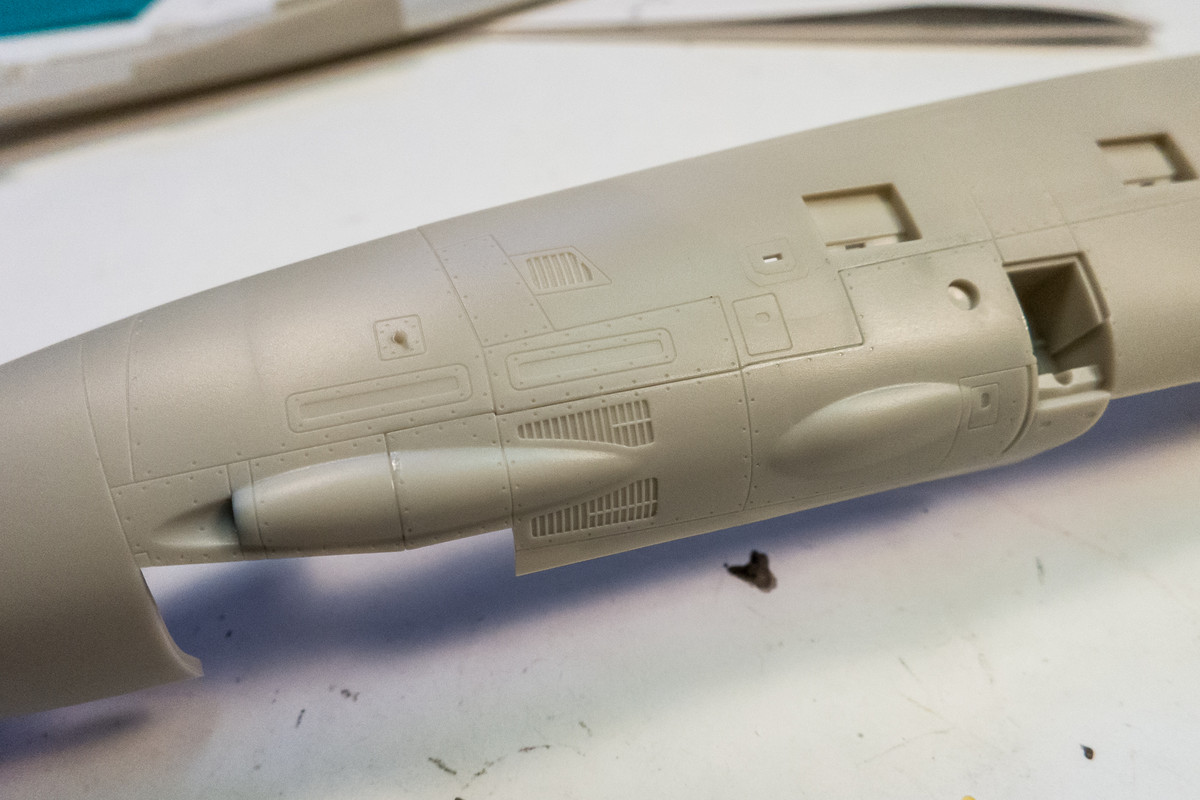
I've elected to glue in the various panels and doors on the nose. Fit has been great so far!
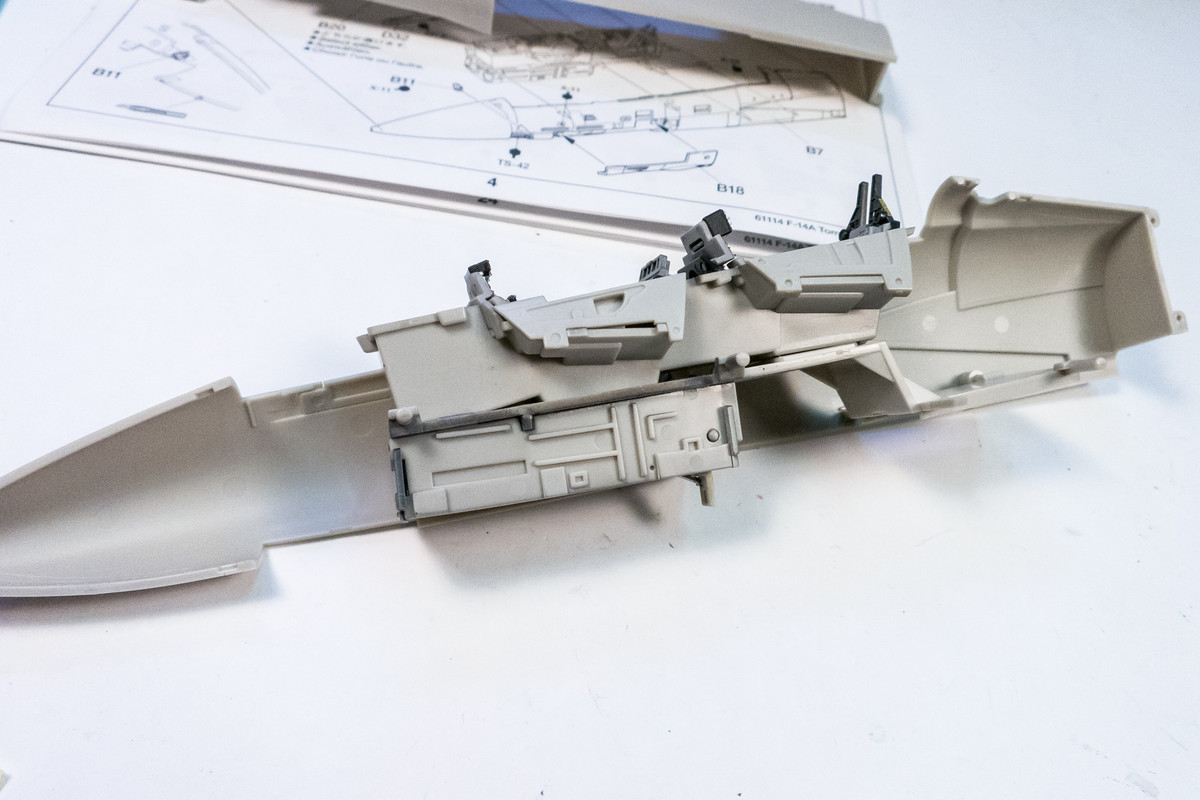
Here's' a look at the forward fuselage with the cockpit sill glued into place. The ejection seats and the instrument panel shrouds have not yet been attached permanently.
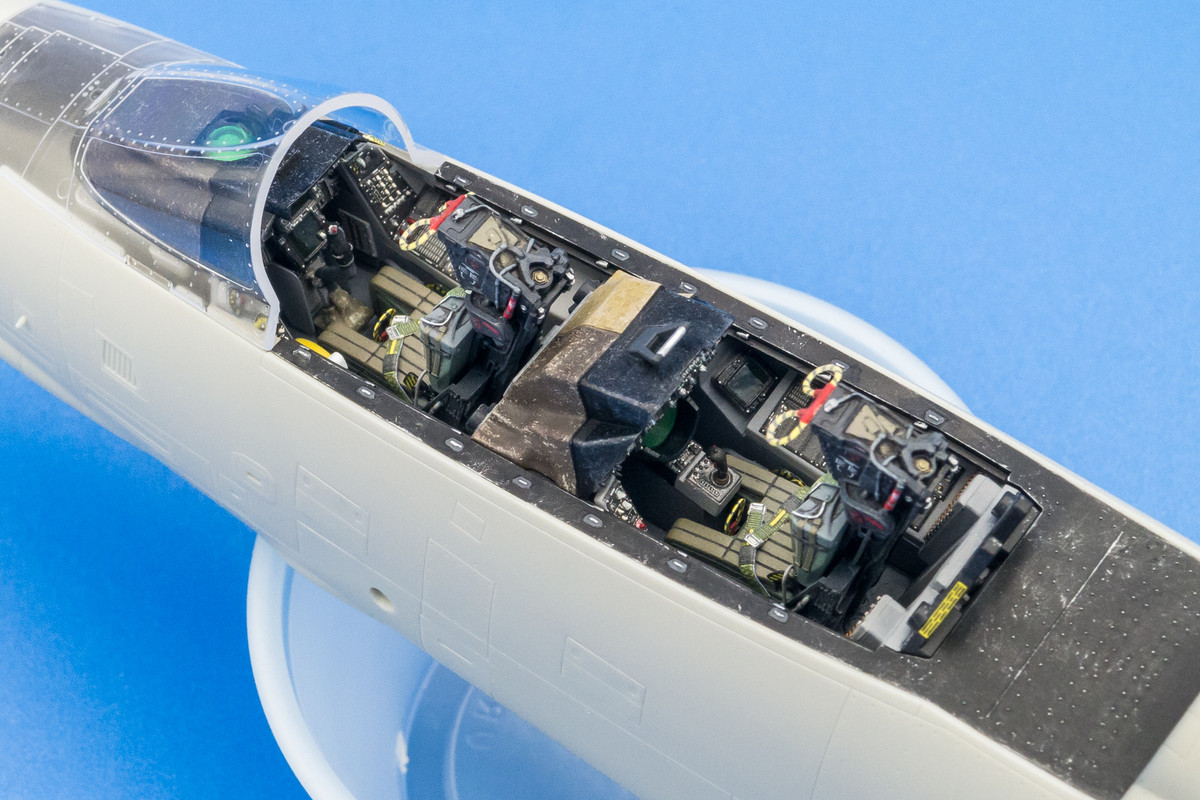
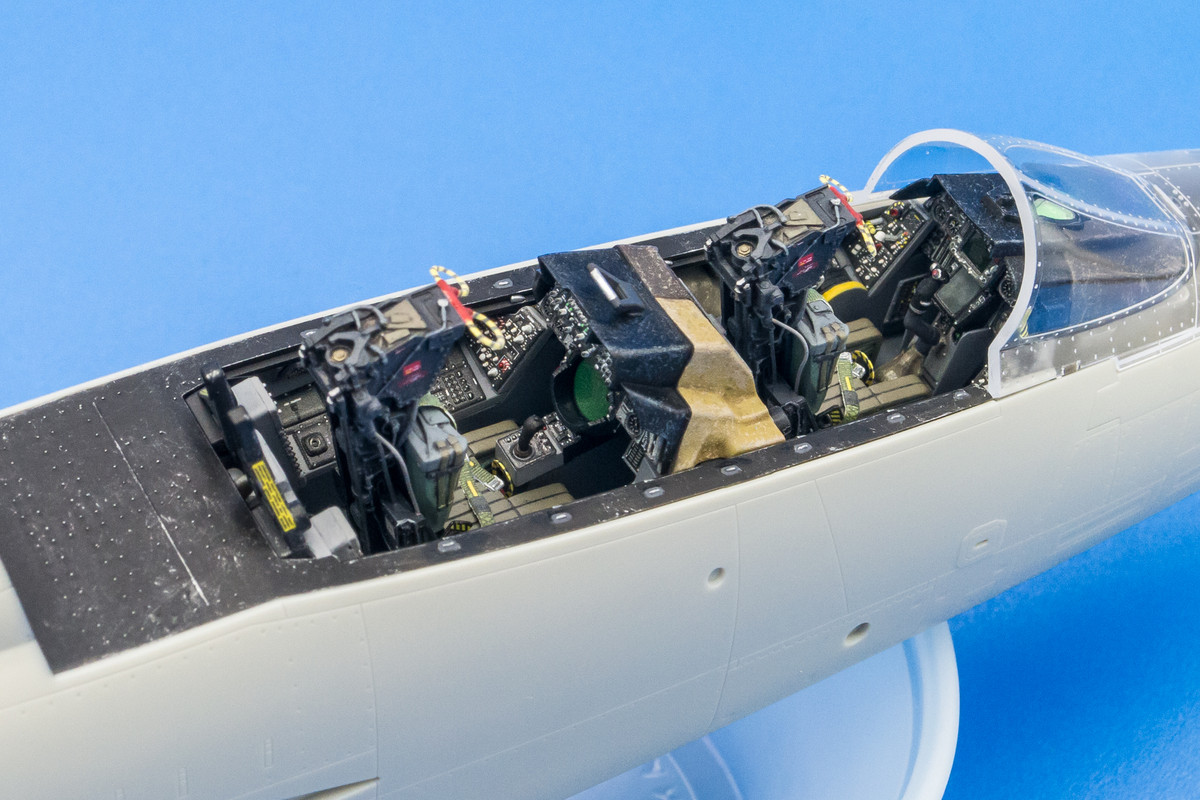
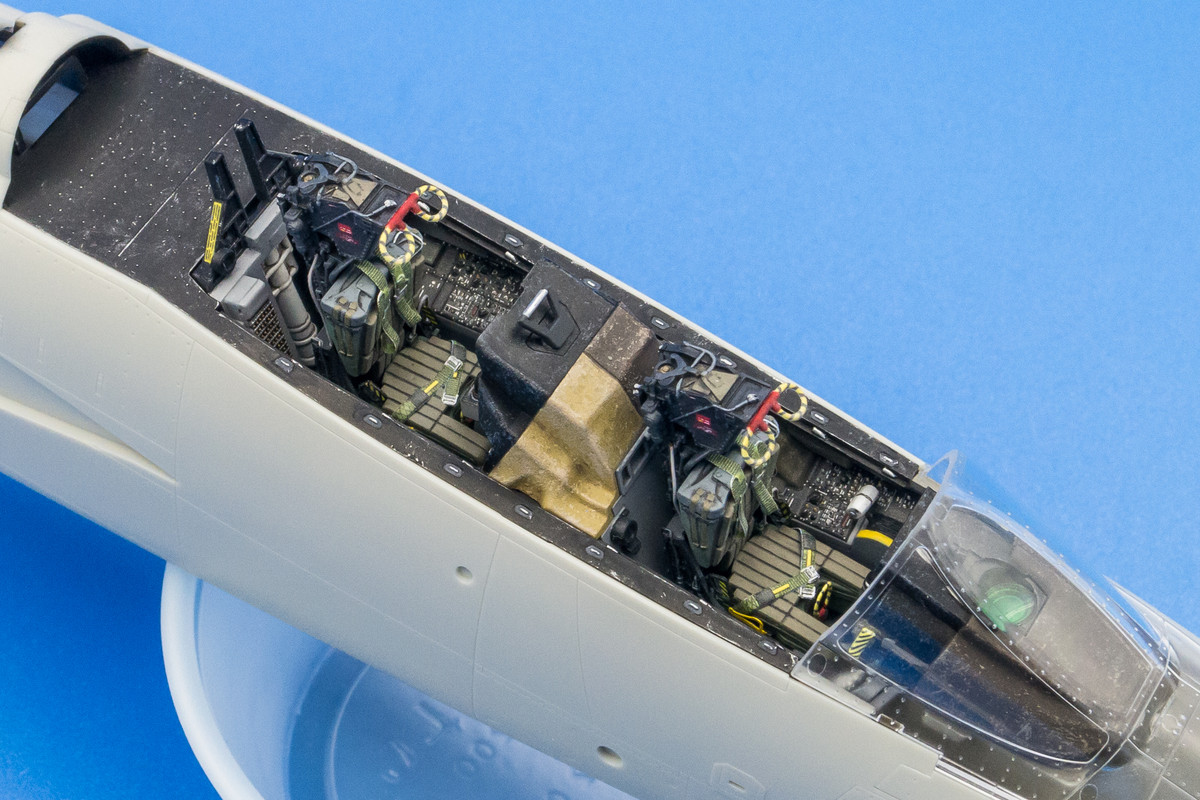
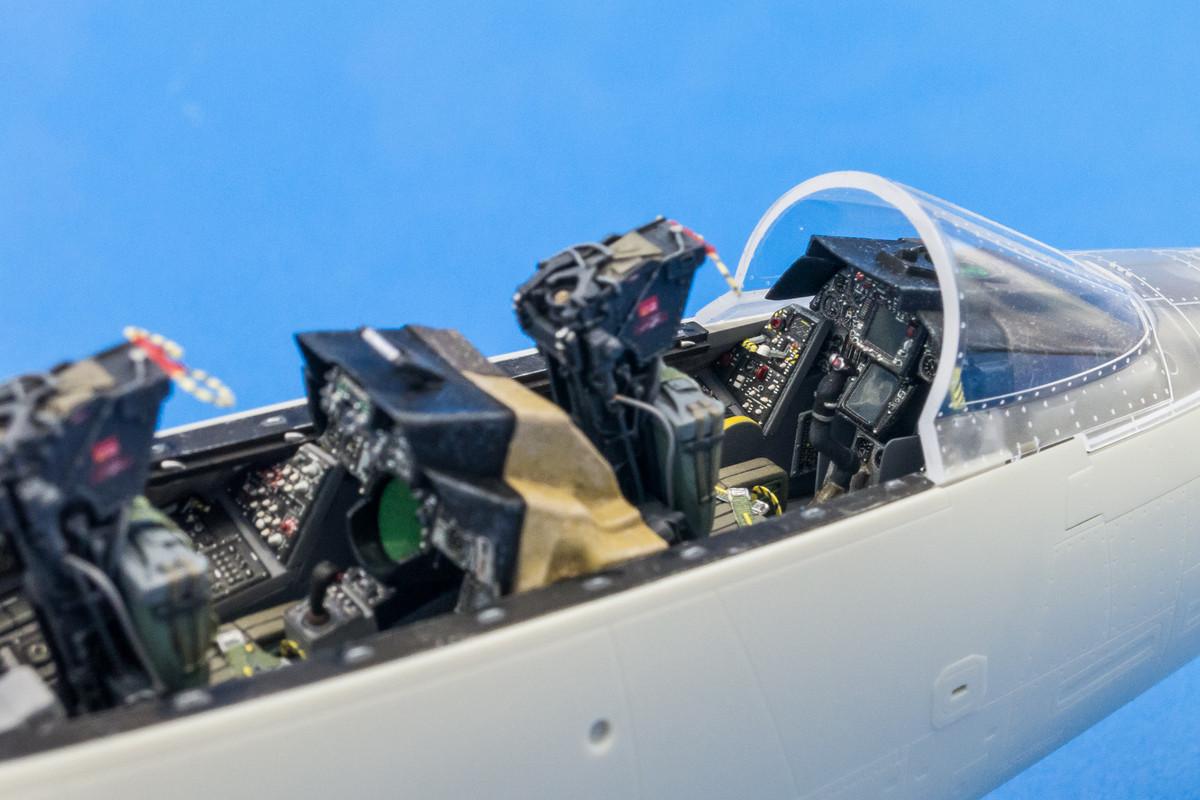
I've elected to glue in the various panels and doors on the nose. Fit has been great so far!
Here's' a look at the forward fuselage with the cockpit sill glued into place. The ejection seats and the instrument panel shrouds have not yet been attached permanently.
John aka JKim
-----------<><
-----------<><