1/32 Meng Me163 Komet

Re: 1/32 Meng Me163 Komet
Nicely molded rocket motor. Can't wait to see what you'll do with it.
When the sun of culture hangs low even dwarfs throw shadows.
-
speedgraflex

- Moderator
- Posts: 9749
- Joined: Fri Feb 10, 2017 11:08 pm
- Location: Santa Monica, California
Re: 1/32 Meng Me163 Komet
Wonderful! I was so hoping you would build the rocket engine, at least as much as needed for the exhaust. Great work shaping the brass, too!!!
Bruce / SPEEDGRAFLEX

Re: 1/32 Meng Me163 Komet
Thanks guys! I hope everyone is having a relaxing weekend!
 I've elected to paint these hidden features in the past but I've decided, as a mojo-building project, that I'd cut out as much unnecessary work as possible.
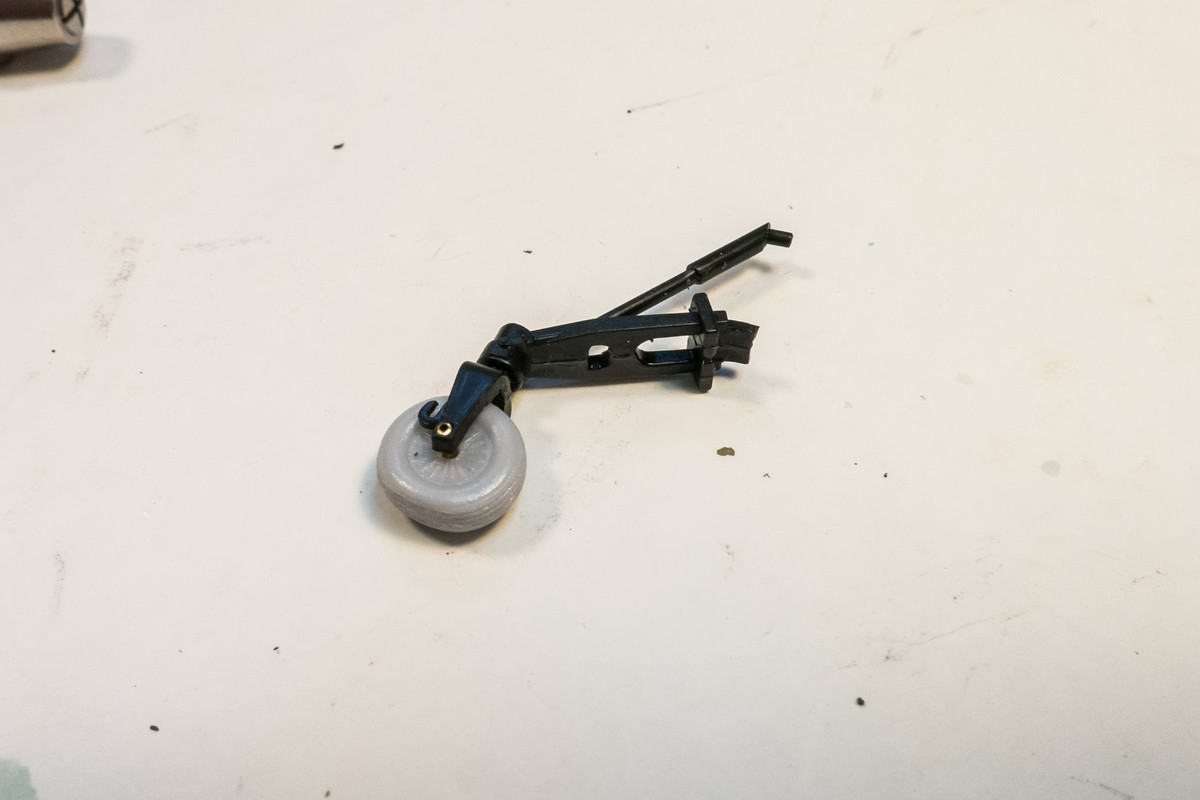
Looking at the resin wheels from DEF Models, I noticed that the wheel axles are a magnitude thicker than the holes in the wheels. I've had bad experiences trying to enlarge existing holes so I thought I'd go a different route this time.
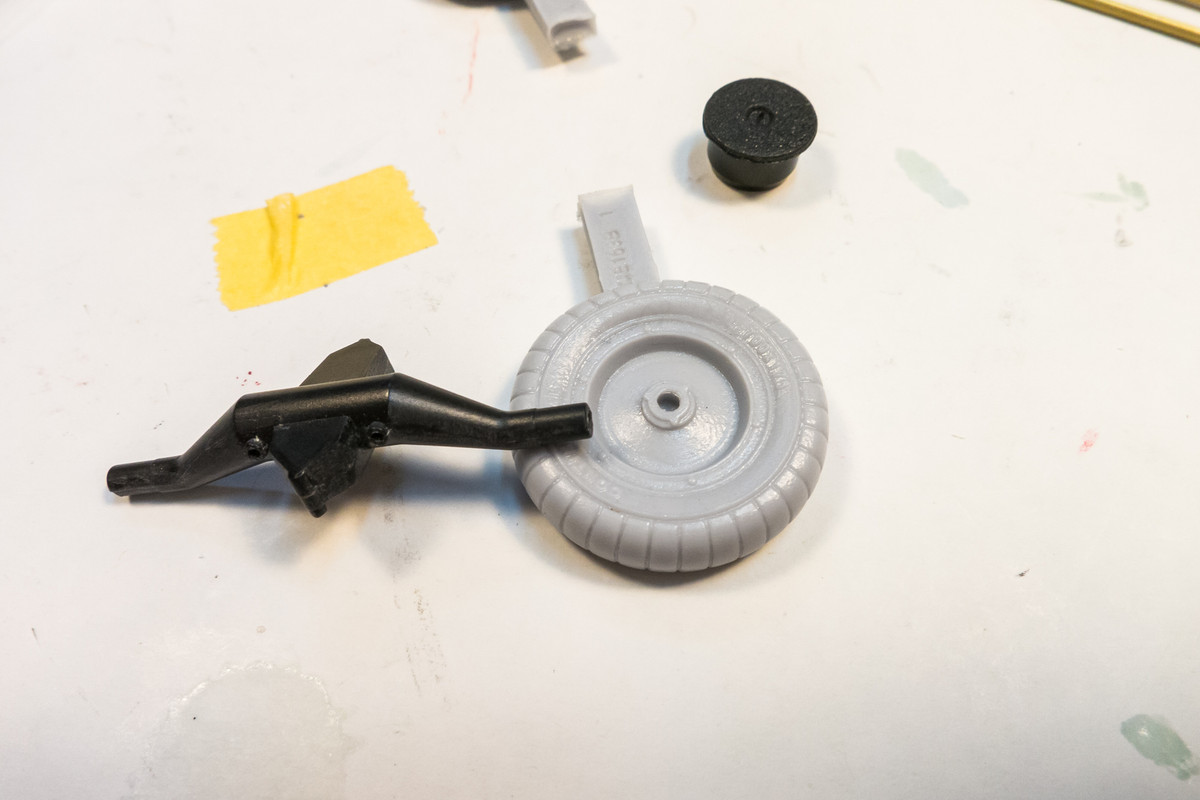
I cut off the thick axles and replaced them with smaller diameter sections of brass tubing.
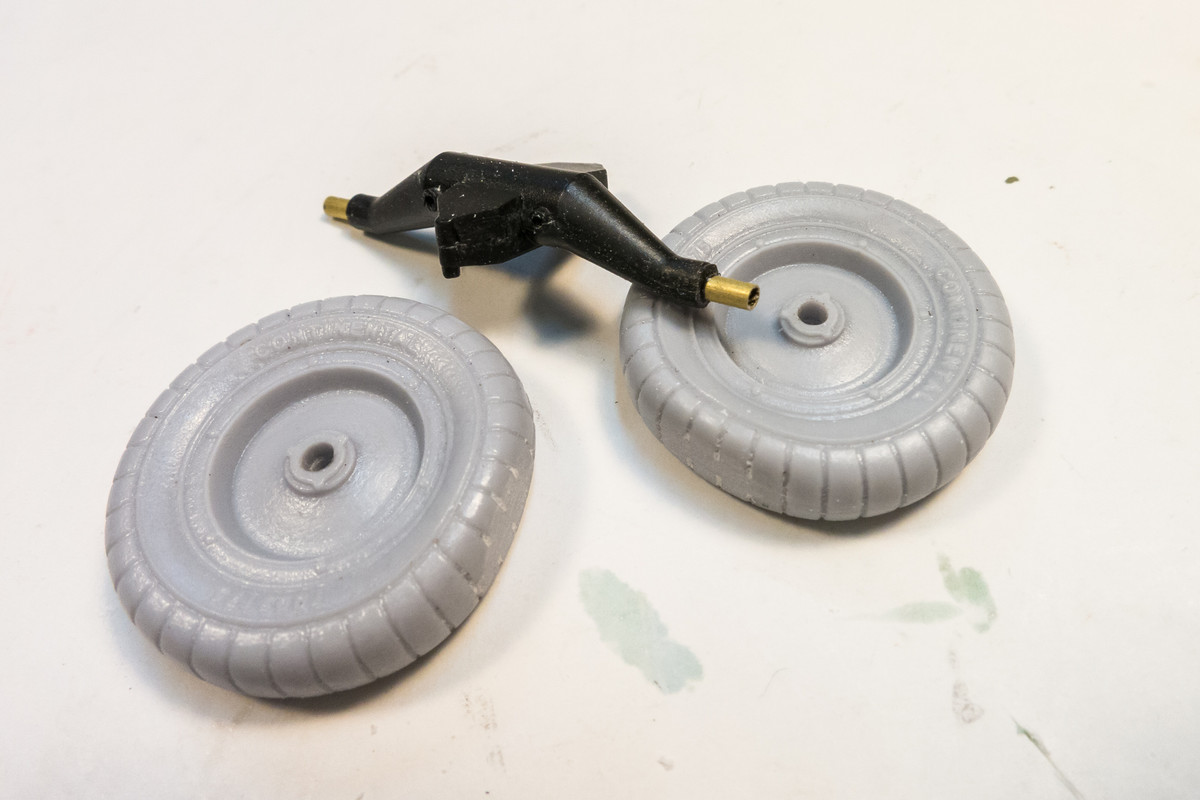
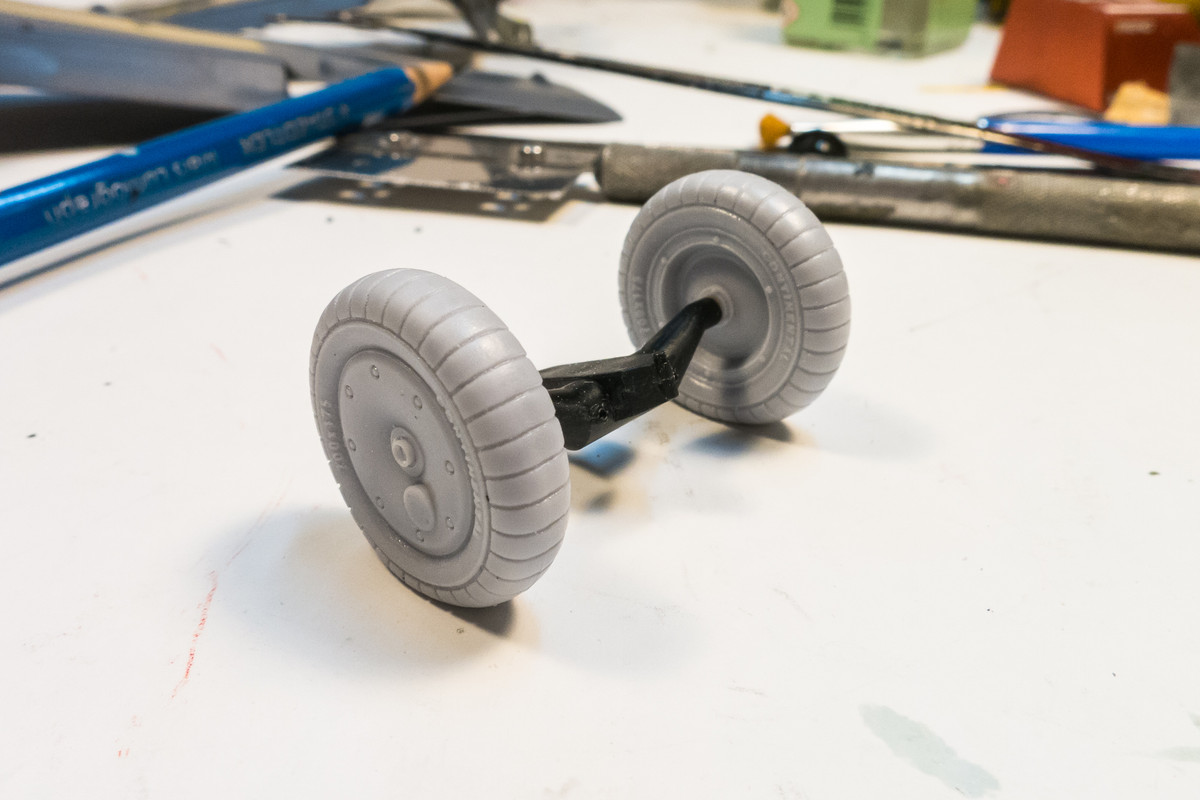
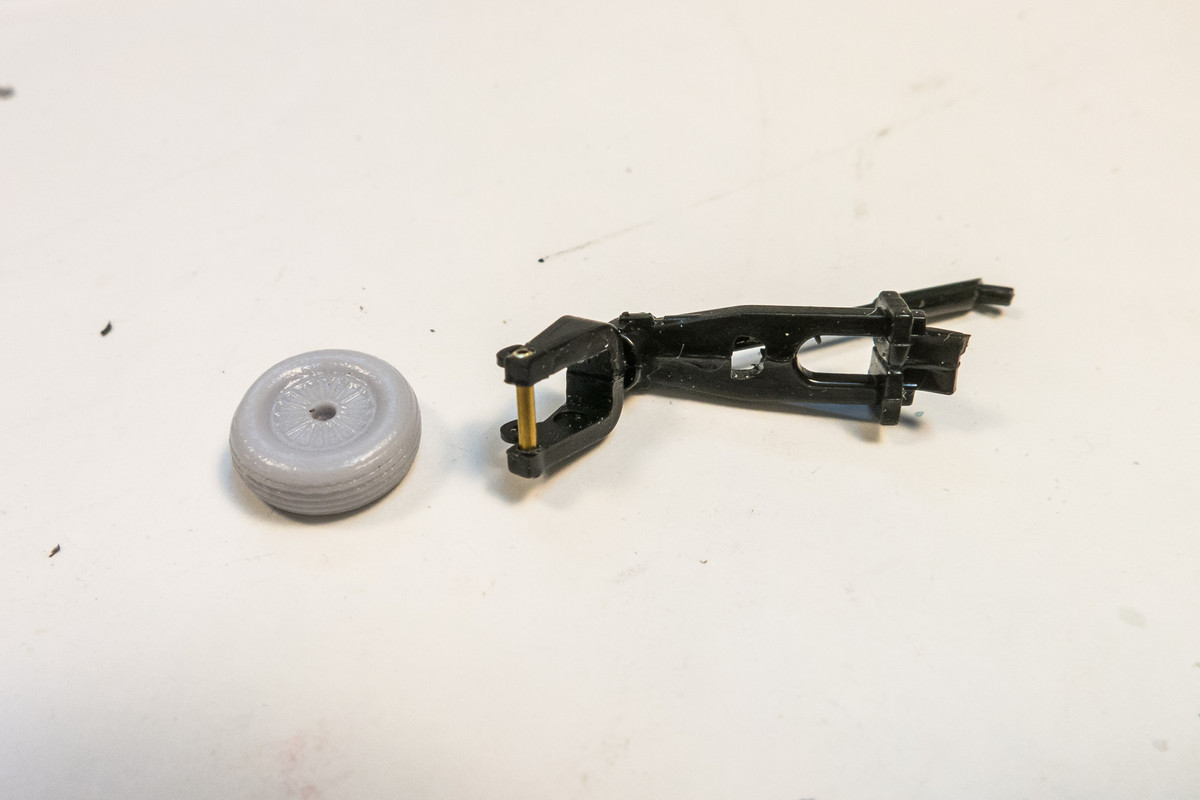
The tail wheel was similarly modified. The mounting pins molded into each side of the tail strut were cut off and a hole drilled through to accept a new axle made of brass tube. This will allow me to paint the strut and wheel separately.
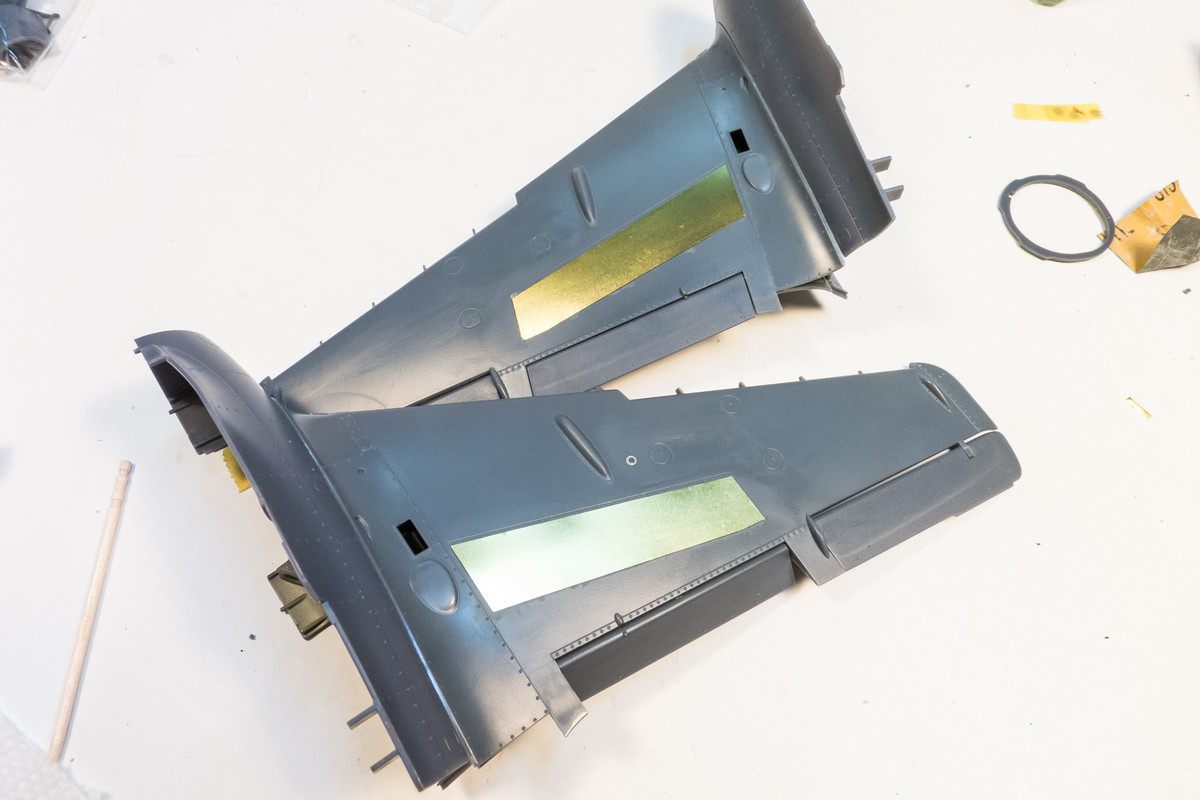
Moving onto the wing/fuselage halves... I've decided to glue in the flaps, which come as part of the kit-supplied brass fret.
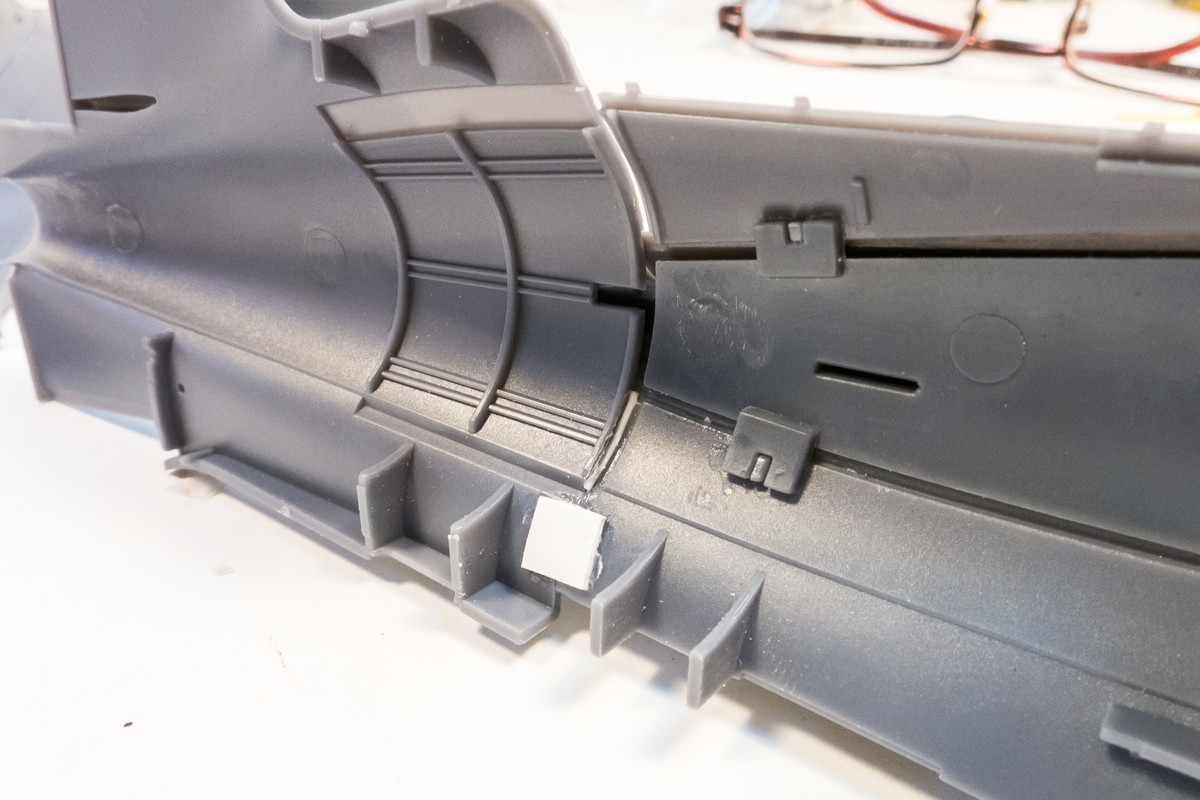
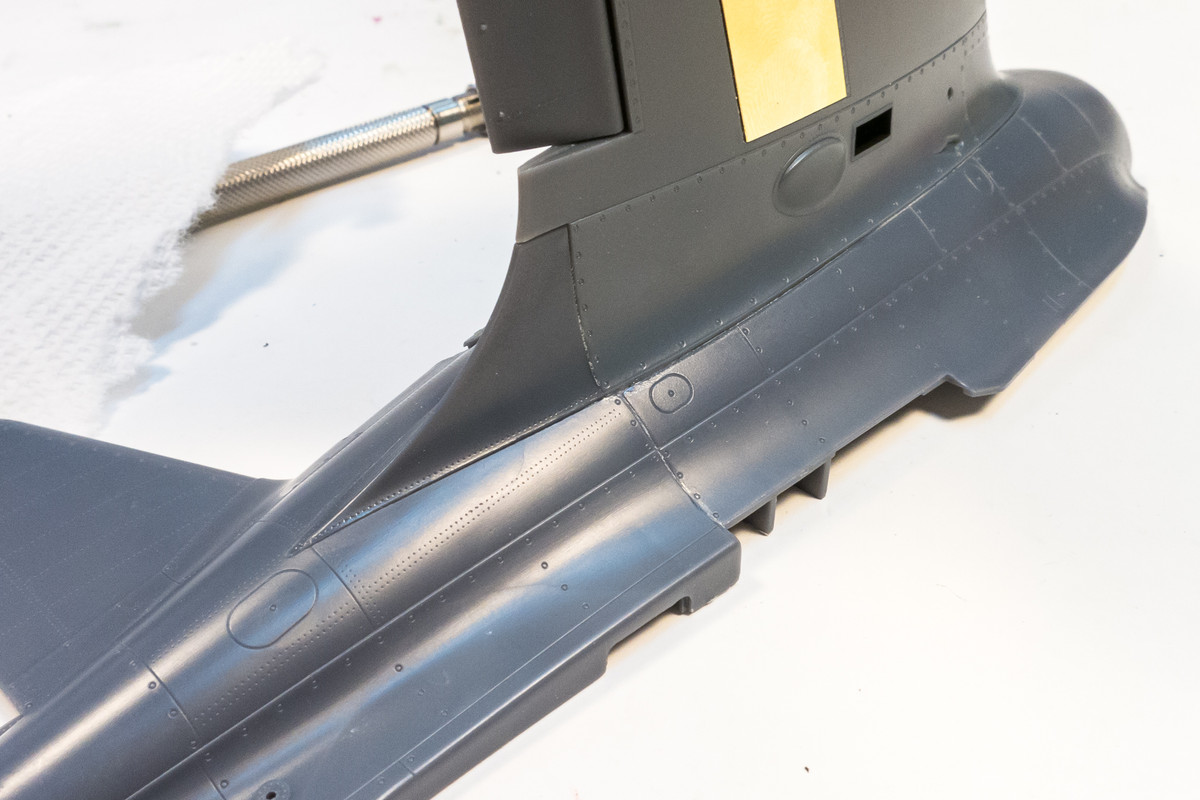
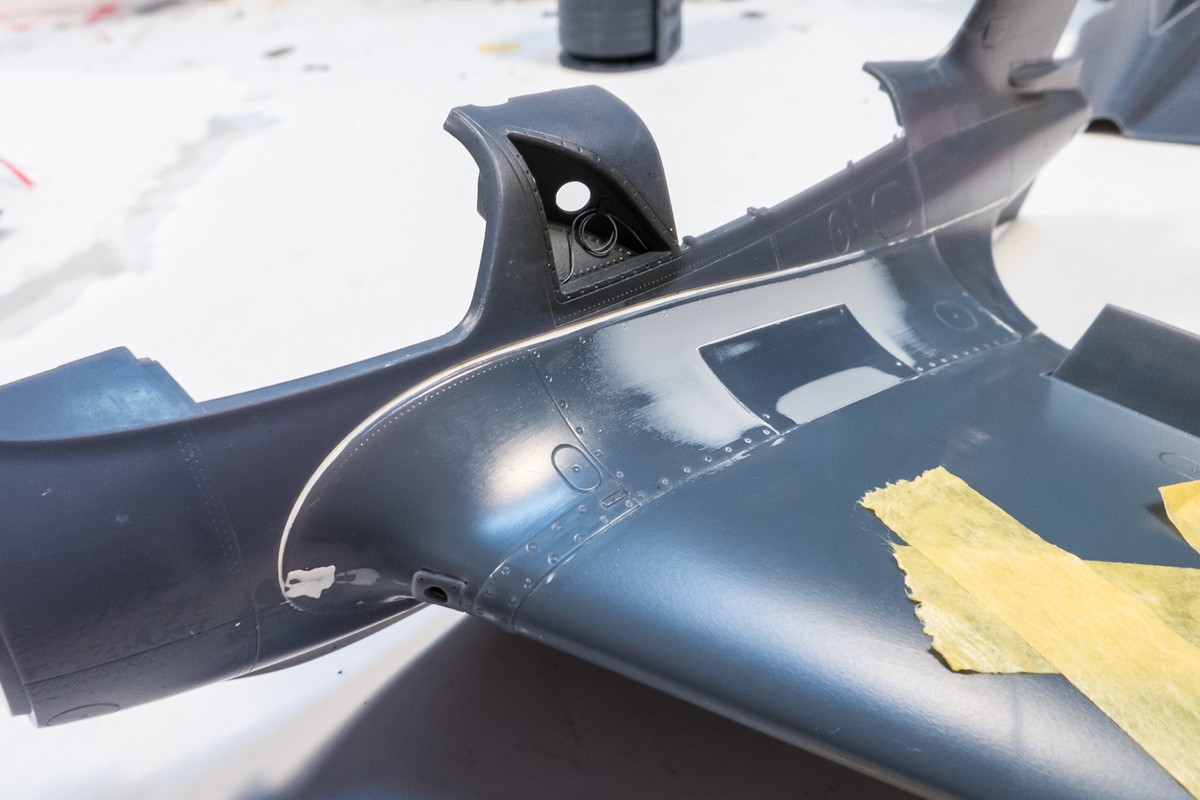
As I've mentioned before, this model is going to be built closed up with no open panels. The kit is designed to have a removable tail section to show off the rocket motor and the kit's construction order is dictated by that feature. However, my deviation gives me flexibility in how I order the build. I've already elected to glue the wings into the fuselage halves to ensure the best possible fit. To this end, I've decided to go ahead and glue in the rear fuselage halves as well. The ability to apply finger pressure from both the outside and inside makes getting a nice tight fit much easier.

A plastic tab and a short piece of stretched sprue are fused into place on the interior side to strengthen the bond. I'm going to let this fully dry before I attempt to glue the joints on the upper side.
Without glue, you can see the resultant gaps on the upper side. These can be easily closed with light finger pressure.
Same deal with the other side.
mostrich wrote:Nicely molded rocket motor. Can't wait to see what you'll do with it.
Sorry to disappoint but THAT is the extent of the work that I'll be doing on the motor since it will not be seen.speedgraflex wrote:Wonderful! I was so hoping you would build the rocket engine, at least as much as needed for the exhaust. Great work shaping the brass, too!!!
Looking at the resin wheels from DEF Models, I noticed that the wheel axles are a magnitude thicker than the holes in the wheels. I've had bad experiences trying to enlarge existing holes so I thought I'd go a different route this time.
I cut off the thick axles and replaced them with smaller diameter sections of brass tubing.
The tail wheel was similarly modified. The mounting pins molded into each side of the tail strut were cut off and a hole drilled through to accept a new axle made of brass tube. This will allow me to paint the strut and wheel separately.
Moving onto the wing/fuselage halves... I've decided to glue in the flaps, which come as part of the kit-supplied brass fret.
As I've mentioned before, this model is going to be built closed up with no open panels. The kit is designed to have a removable tail section to show off the rocket motor and the kit's construction order is dictated by that feature. However, my deviation gives me flexibility in how I order the build. I've already elected to glue the wings into the fuselage halves to ensure the best possible fit. To this end, I've decided to go ahead and glue in the rear fuselage halves as well. The ability to apply finger pressure from both the outside and inside makes getting a nice tight fit much easier.
A plastic tab and a short piece of stretched sprue are fused into place on the interior side to strengthen the bond. I'm going to let this fully dry before I attempt to glue the joints on the upper side.
Without glue, you can see the resultant gaps on the upper side. These can be easily closed with light finger pressure.
Same deal with the other side.
John aka JKim
-----------<><

-----------<><
-
mustang1989

- Moderator
- Posts: 4903
- Joined: Tue Mar 18, 2014 8:35 pm
Re: 1/32 Meng Me163 Komet
This is looking good so far John. Even at 1/32 scale this bird can't take up too much room in the display case.

Re: 1/32 Meng Me163 Komet
Absolutely wonderful to follow this project John!
And the pics, outstanding quality!
- Kari
And the pics, outstanding quality!
- Kari
---
On the bench:
Tamiya F-4B Phantom II 1/48
Kinetic F-16A (new tool) 1/48
https://www.facebook.com/GrundAsk-Scale ... 721218708/
On the bench:
Tamiya F-4B Phantom II 1/48
Kinetic F-16A (new tool) 1/48
https://www.facebook.com/GrundAsk-Scale ... 721218708/
-
Gary Brantley

- Addicted Member
- Posts: 1746
- Joined: Tue Apr 08, 2014 9:40 pm
- Location: Cameron, Texas
Re: 1/32 Meng Me163 Komet
Love the modifications you've done to the wheels/axles John. Duly noted and saved for later!  Thanks.

Re: 1/32 Meng Me163 Komet
Totally agree! They look amazingGary Brantley wrote:Love the modifications you've done to the wheels/axles John. Duly noted and saved for later!
March as one, Don't look back
Odin's sons... Attack!
Unleash hell! Do not repent! Warfare grants us no lament
Let your weapons slash and tear This is no place for fear
Hold the lines! Move as one! In unity our victory's won
Our shields will form a mighty wall
United we shall never fall
Odin's sons... Attack!
Unleash hell! Do not repent! Warfare grants us no lament
Let your weapons slash and tear This is no place for fear
Hold the lines! Move as one! In unity our victory's won
Our shields will form a mighty wall
United we shall never fall
-
BlackSheep214

- Elite Member
- Posts: 10370
- Joined: Sun Apr 06, 2014 8:47 pm
Re: 1/32 Meng Me163 Komet
Wow.... 
“Who controls the skies, controls the fate of this Earth”
Author unknown- 352nd Fighter Group, Blue-Nosed Bastards of Bodney
“Send one plane it’s a sortie; send two planes it’s a flight; send four planes it’s a test of airpower. - Richard Kohn
Author unknown- 352nd Fighter Group, Blue-Nosed Bastards of Bodney
“Send one plane it’s a sortie; send two planes it’s a flight; send four planes it’s a test of airpower. - Richard Kohn
Re: 1/32 Meng Me163 Komet
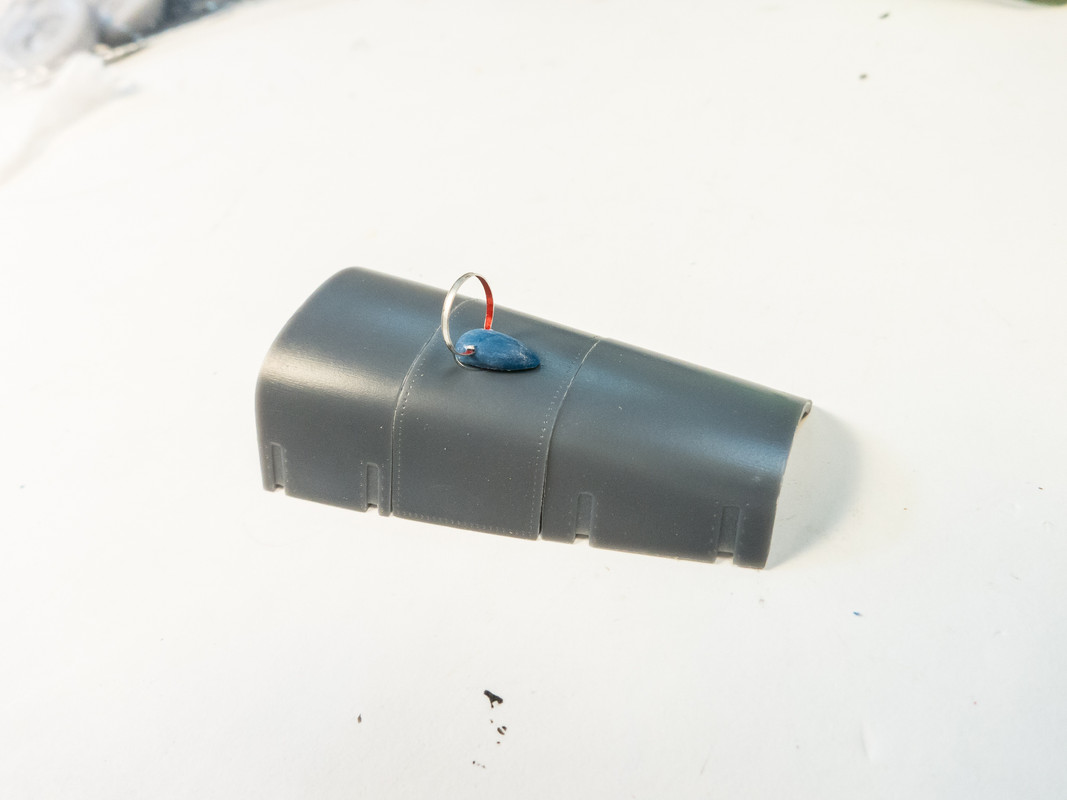
Thanks guys! The aircraft I will be portraying is Yellow 2 shown in the photograph below.
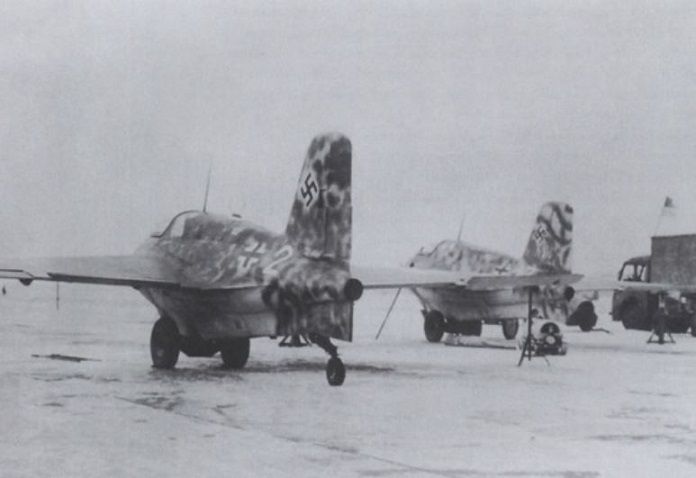
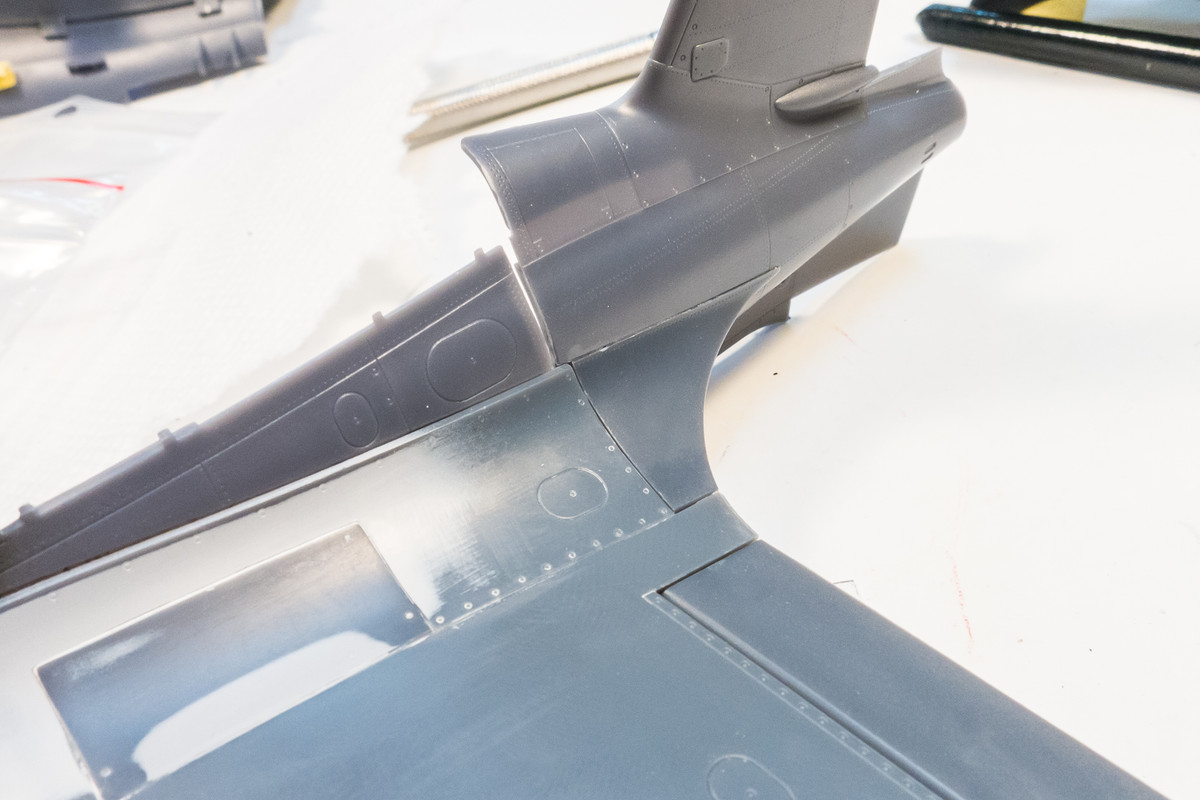
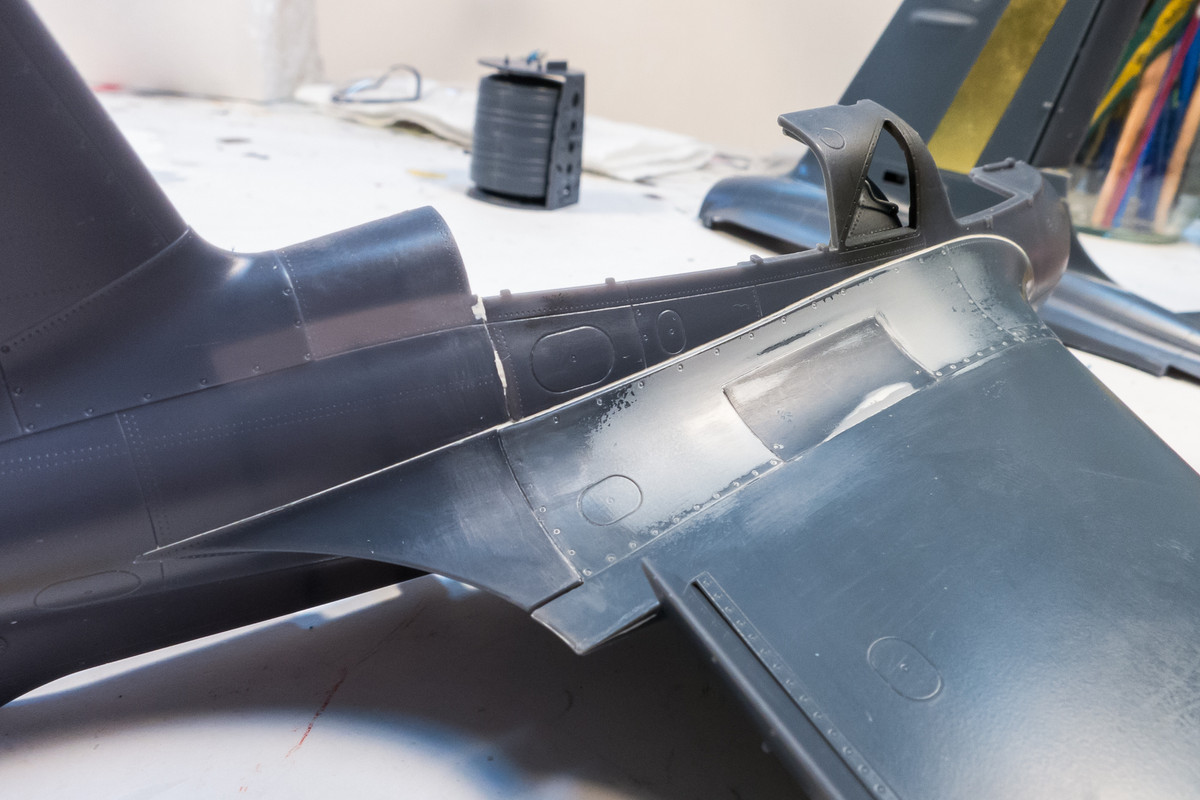
You can see the DF loop antenna on the fuselage spine which the kit does not include. So I had to fashion a base out of a spare plastic part and a loop out of a thin strip cut from an aluminum soda can. Seeing how nicely these three panels fit together, I am tempted to glue them together now and mount them as one piece later!
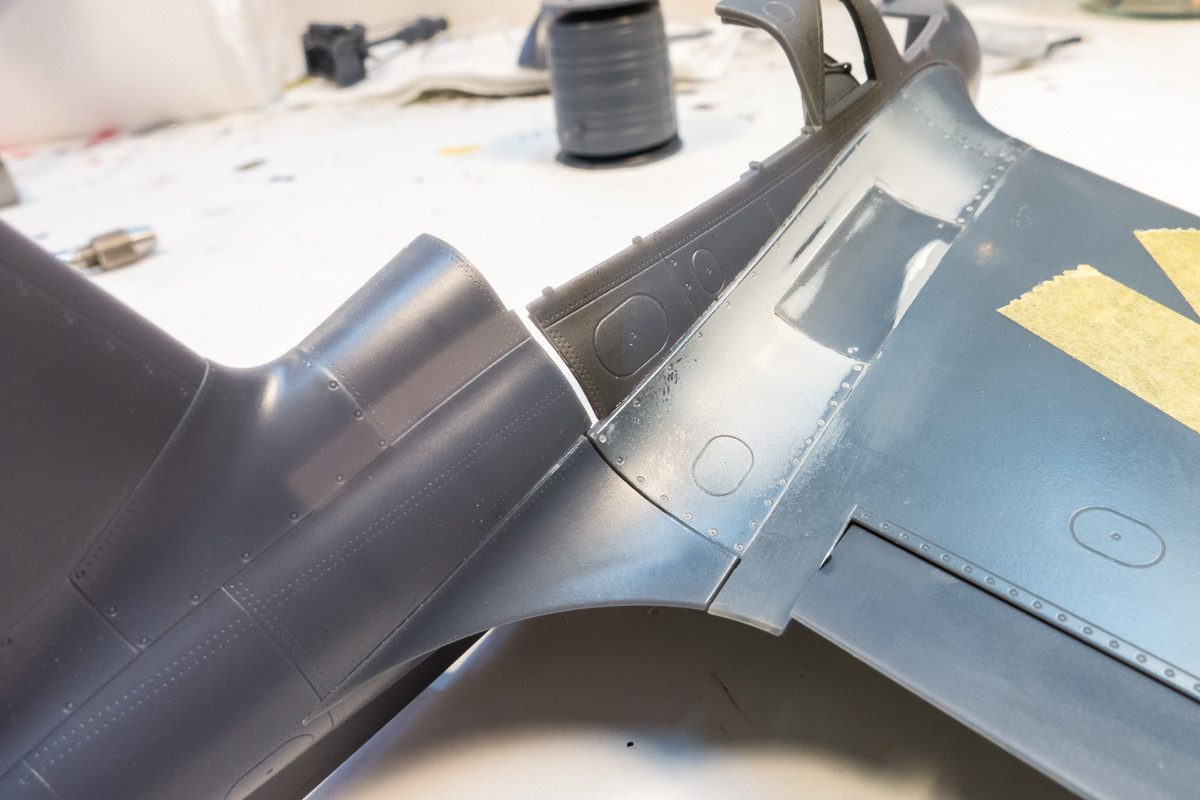
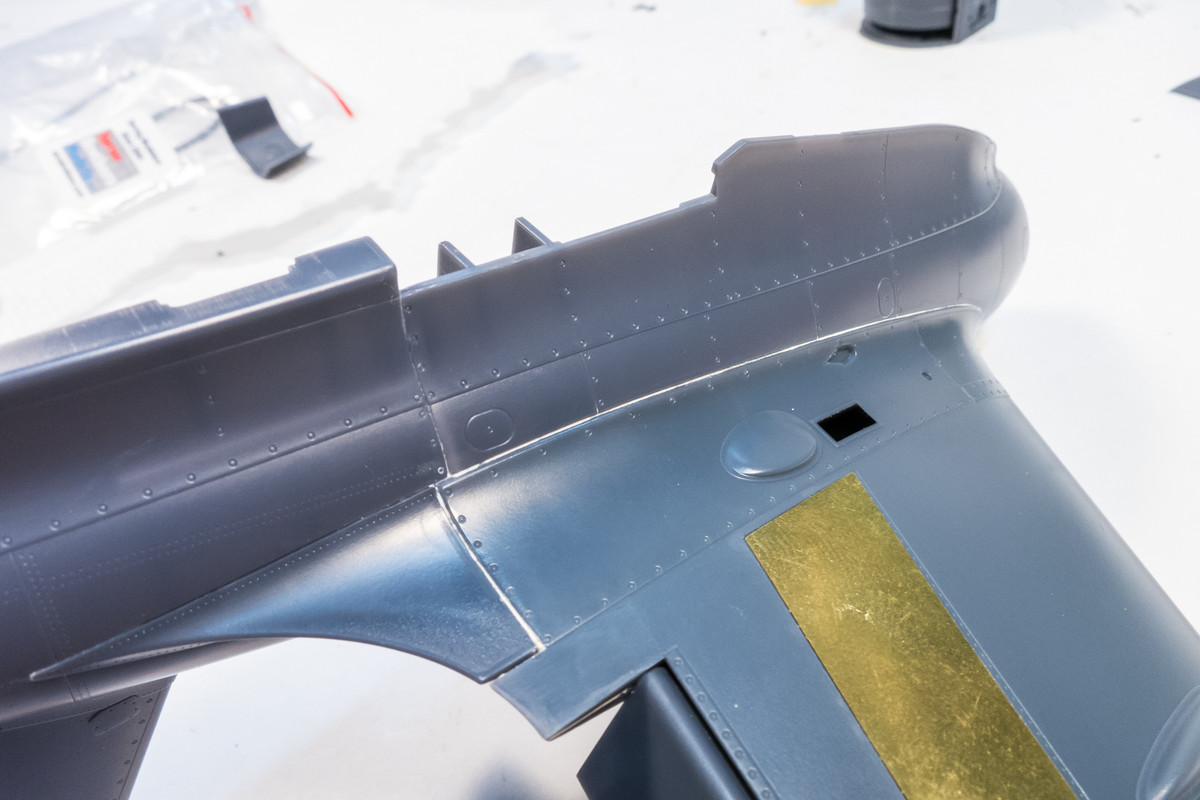
After the rear fuselage halves were attached, I addressed all of the joints using White Milliput. Milliput is great for finishing long glue seams. Prior to curing it is water-soluble so you can use water to smooth and sculpt the stuff. I used a damp cloth gently run along the seam to remove all the excess and leaving a thin bead of Milliput in the joint.

You can see the DF loop antenna on the fuselage spine which the kit does not include. So I had to fashion a base out of a spare plastic part and a loop out of a thin strip cut from an aluminum soda can. Seeing how nicely these three panels fit together, I am tempted to glue them together now and mount them as one piece later!
After the rear fuselage halves were attached, I addressed all of the joints using White Milliput. Milliput is great for finishing long glue seams. Prior to curing it is water-soluble so you can use water to smooth and sculpt the stuff. I used a damp cloth gently run along the seam to remove all the excess and leaving a thin bead of Milliput in the joint.
John aka JKim
-----------<><
-----------<><
-
Stikpusher

- Moderator
- Posts: 18857
- Joined: Sat Apr 05, 2014 8:37 pm
- Location: Ceti Alpha 5
Re: 1/32 Meng Me163 Komet
Looking real good John! I do like how you scratched up that loop antenna.
"Surely I have made my meaning plain? I intend to avenge myself upon you, Admiral. I have deprived your ship of power, and when I swing 'round, I intend to deprive you of your life."
FLSM
FLSM