British Fleet Air Arm Hellcat Mk.I
Re: British Fleet Air Arm Hellcat Mk.I
Nice work so far. Will look forward to seeing more of this.
'I am a Norfolk man and i glory in being so'
On the bench: Revell 1/72nd Type VIIc U-Boat
On the bench: Revell 1/72nd Type VIIc U-Boat
-
BlackSheep214

- Elite Member
- Posts: 10414
- Joined: Sun Apr 06, 2014 8:47 pm
Re: British Fleet Air Arm Hellcat Mk.I
Been fiddling with this a bit the last couple nights. No pics yet but it is a shame some parts you will not see once buttoned up. A waste of glue and possibly paint actually. I'll post pics later tonight.
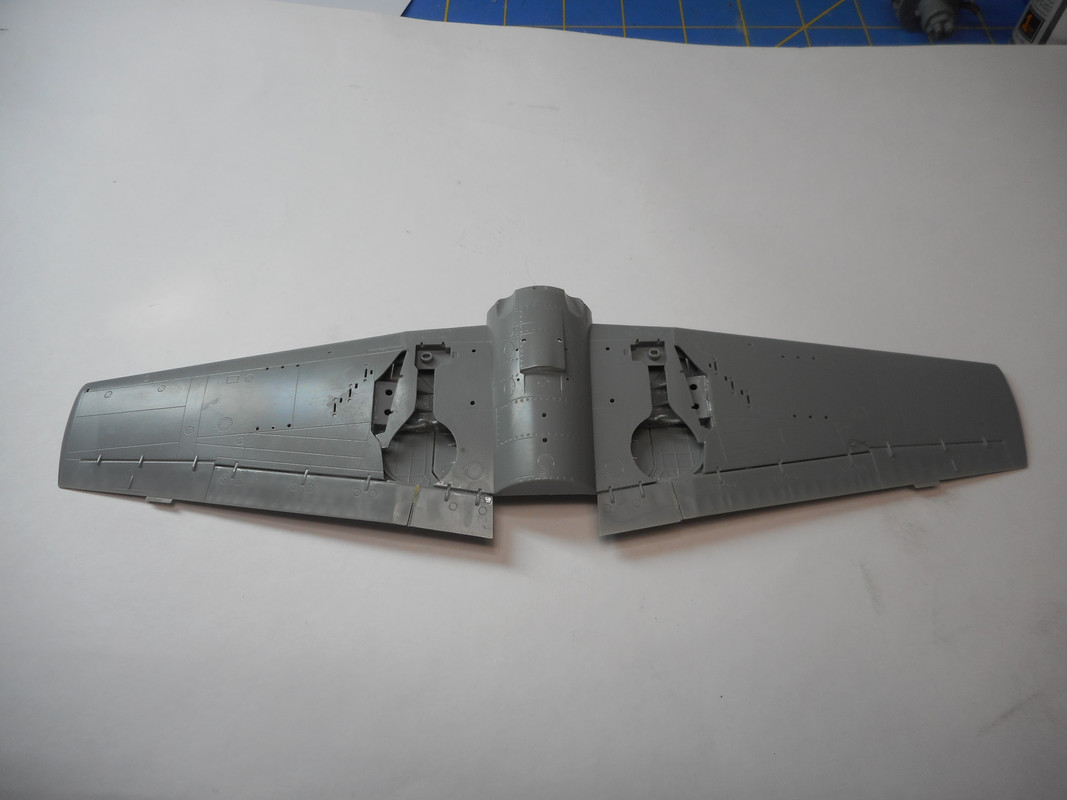
The beauty of this Hobby Boss kit you do have the option to build it with wings folded or extended down. I chose to have wings down but it is a pain to line up correctly to the wing spar.
Paint will commence on the inner parts - wheel well, struts, drop tank, undersides, etc...
The beauty of this Hobby Boss kit you do have the option to build it with wings folded or extended down. I chose to have wings down but it is a pain to line up correctly to the wing spar.
Paint will commence on the inner parts - wheel well, struts, drop tank, undersides, etc...
“Who controls the skies, controls the fate of this Earth”
Author unknown- 352nd Fighter Group, Blue-Nosed Bastards of Bodney
“Send one plane it’s a sortie; send two planes it’s a flight; send four planes it’s a test of airpower. - Richard Kohn
Author unknown- 352nd Fighter Group, Blue-Nosed Bastards of Bodney
“Send one plane it’s a sortie; send two planes it’s a flight; send four planes it’s a test of airpower. - Richard Kohn

-
BlackSheep214
- Elite Member
- Posts: 10414
- Joined: Sun Apr 06, 2014 8:47 pm
Re: British Fleet Air Arm Hellcat Mk.I
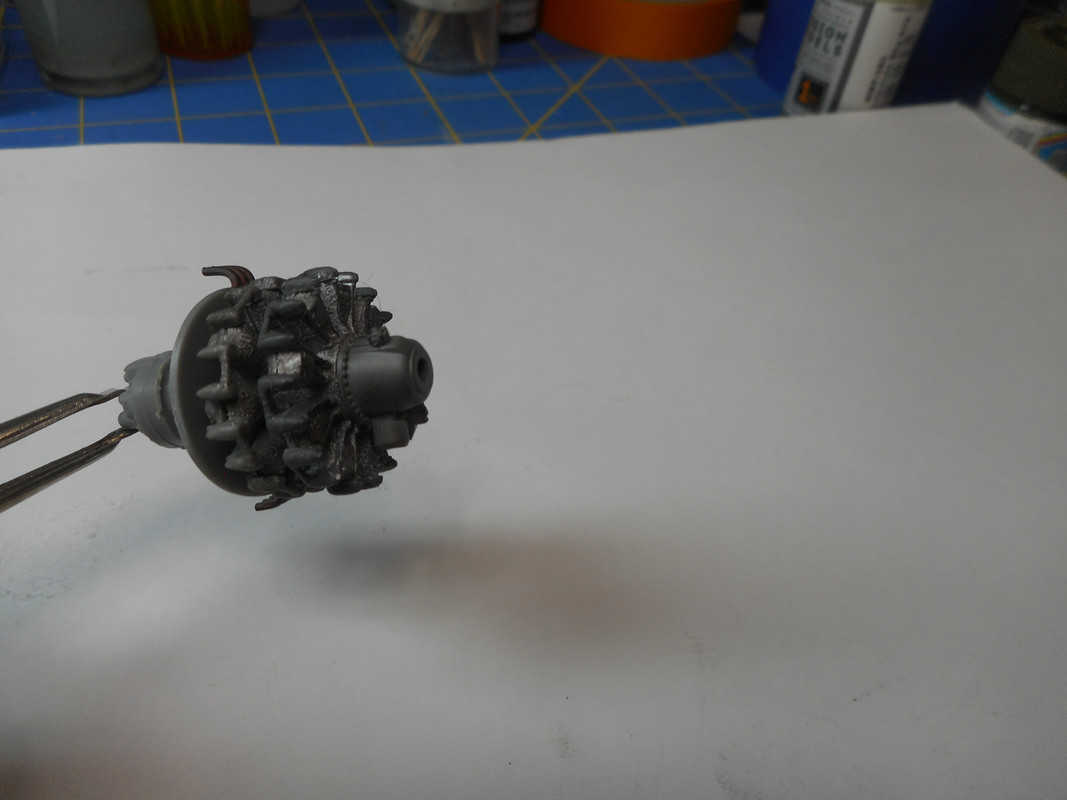
A day off from work due to snowstorm. Snowblowing done, a shower, and return to the bench. Radial engine done....
Exhaust tips painted a combination using Rust and Red Oxide and weathering it with Rust and Black Soot to dirty it up.
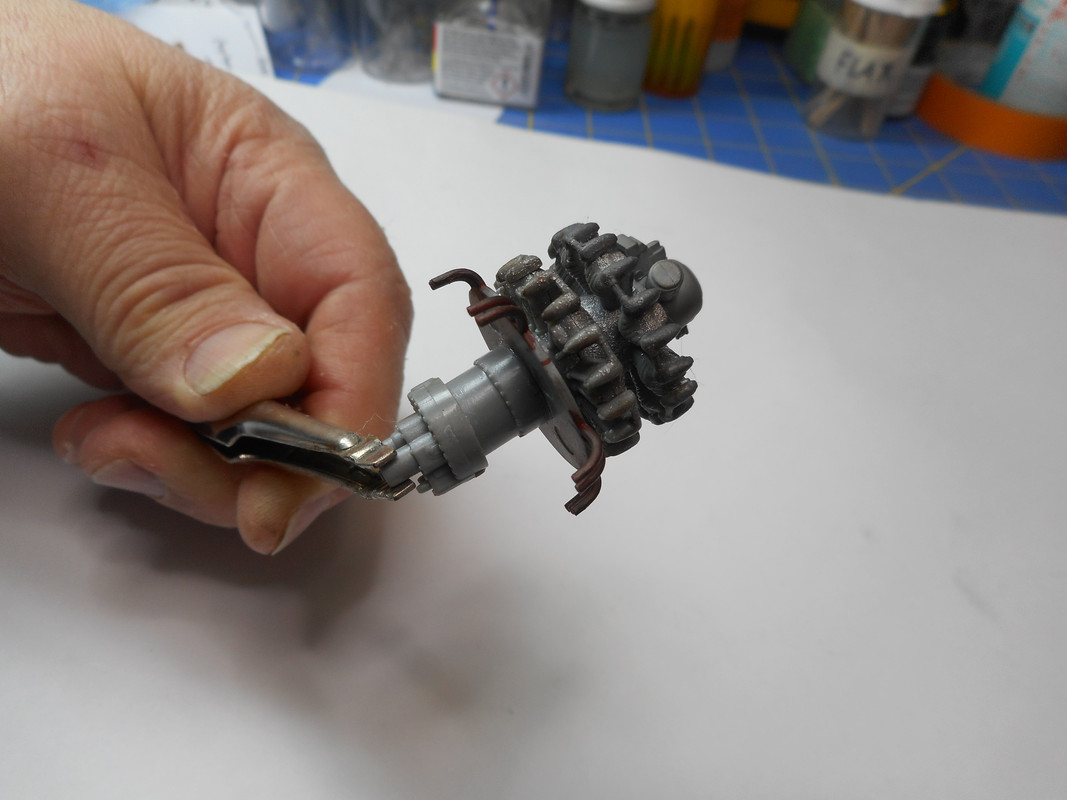
Engine nub painted Neutral Grey, weathered it using Gun Metal powder. Yeah... she looks better.
Cockpit wall painted Interior Green
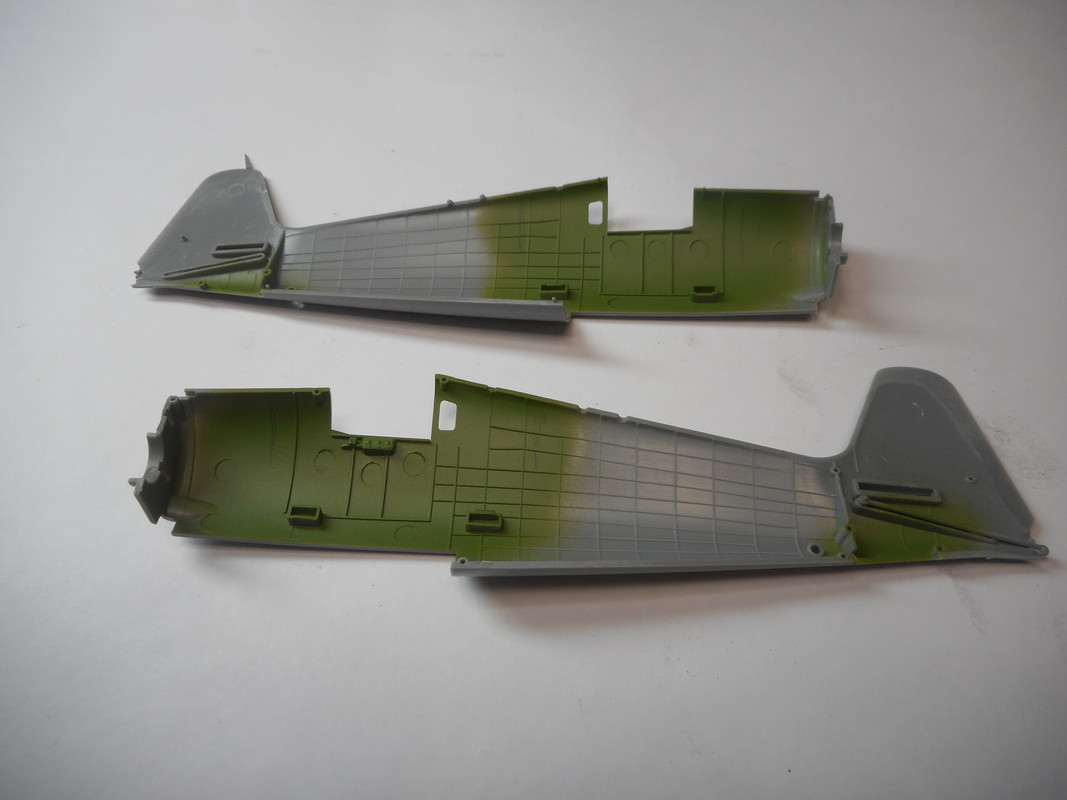
Wings assembled as engaged for flight.
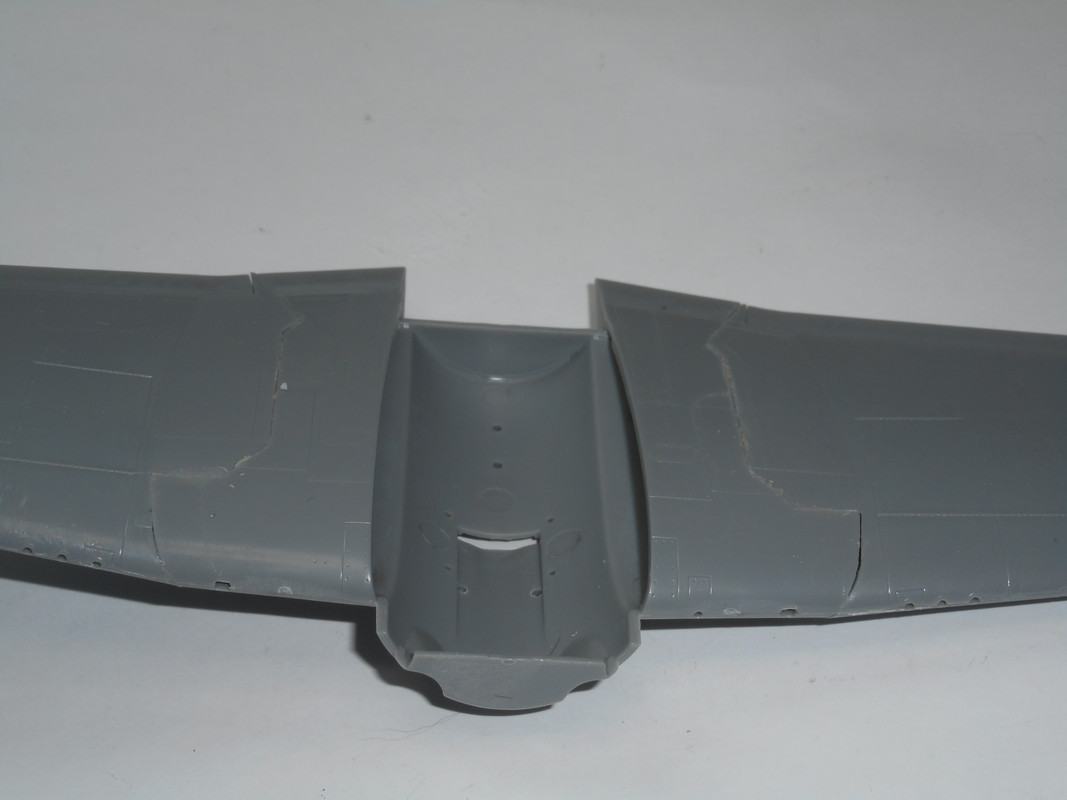
I'll need to fill in this gap soon...
As you may recall I mentioned some parts won't be seen regardless even though the instruction guide says to assemble them. One example is the forward brace wall (unpainted parts) in front of cockpit assembly where the radial engine usually is attached to it.
As you've may have noticed once the fuselage halves are buttoned up, those braces will be up against the front INSIDE the nose area wall. You WILL NOT see them. The assembled radial engine piece will be installed on the OUTSIDE for there are holes to line up the radial engine. Makes no sense why they would go through the trouble of hiding the detailed stuff.
Another example is the tail hook....

I have it glued in as retracted in. I never can understand why Hobby Boss would go through the trouble of manufacturing a whole hook when it could've been molded on the fuselage half.
Granted it has potential to build it extended if one is creating a diorama of the Hellcat coming in on final approach to land on an aircraft carrier.
I have painted the rockets and bombs but awaiting for the paint to dry before weathering and photos.
Exhaust tips painted a combination using Rust and Red Oxide and weathering it with Rust and Black Soot to dirty it up.
Engine nub painted Neutral Grey, weathered it using Gun Metal powder. Yeah... she looks better.
Cockpit wall painted Interior Green
Wings assembled as engaged for flight.
I'll need to fill in this gap soon...
As you may recall I mentioned some parts won't be seen regardless even though the instruction guide says to assemble them. One example is the forward brace wall (unpainted parts) in front of cockpit assembly where the radial engine usually is attached to it.
As you've may have noticed once the fuselage halves are buttoned up, those braces will be up against the front INSIDE the nose area wall. You WILL NOT see them. The assembled radial engine piece will be installed on the OUTSIDE for there are holes to line up the radial engine. Makes no sense why they would go through the trouble of hiding the detailed stuff.
Another example is the tail hook....
I have it glued in as retracted in. I never can understand why Hobby Boss would go through the trouble of manufacturing a whole hook when it could've been molded on the fuselage half.
Granted it has potential to build it extended if one is creating a diorama of the Hellcat coming in on final approach to land on an aircraft carrier.
I have painted the rockets and bombs but awaiting for the paint to dry before weathering and photos.
“Who controls the skies, controls the fate of this Earth”
Author unknown- 352nd Fighter Group, Blue-Nosed Bastards of Bodney
“Send one plane it’s a sortie; send two planes it’s a flight; send four planes it’s a test of airpower. - Richard Kohn
Author unknown- 352nd Fighter Group, Blue-Nosed Bastards of Bodney
“Send one plane it’s a sortie; send two planes it’s a flight; send four planes it’s a test of airpower. - Richard Kohn
-
BlackSheep214
- Elite Member
- Posts: 10414
- Joined: Sun Apr 06, 2014 8:47 pm
Re: British Fleet Air Arm Hellcat Mk.I
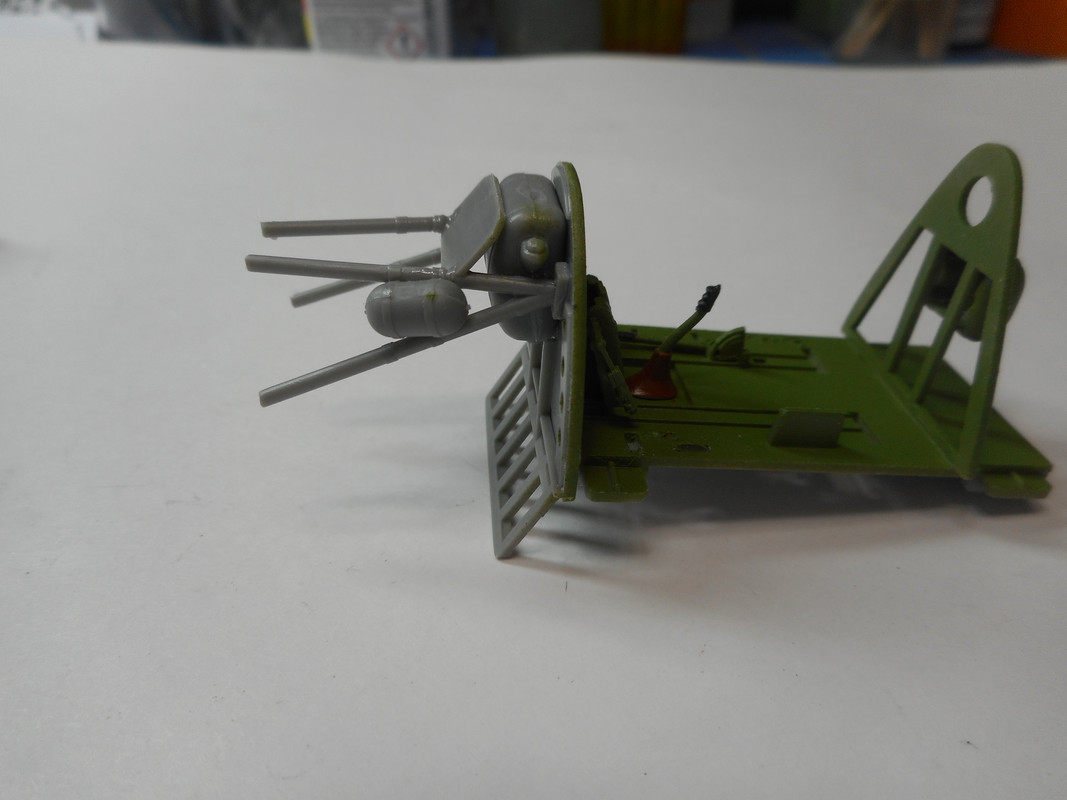
The "office" is done1 I made my own seatbelts since it didn't have any. Regular masking tape and brass wiring for buckles. Is it accurate? No. But it's good enough for me. 
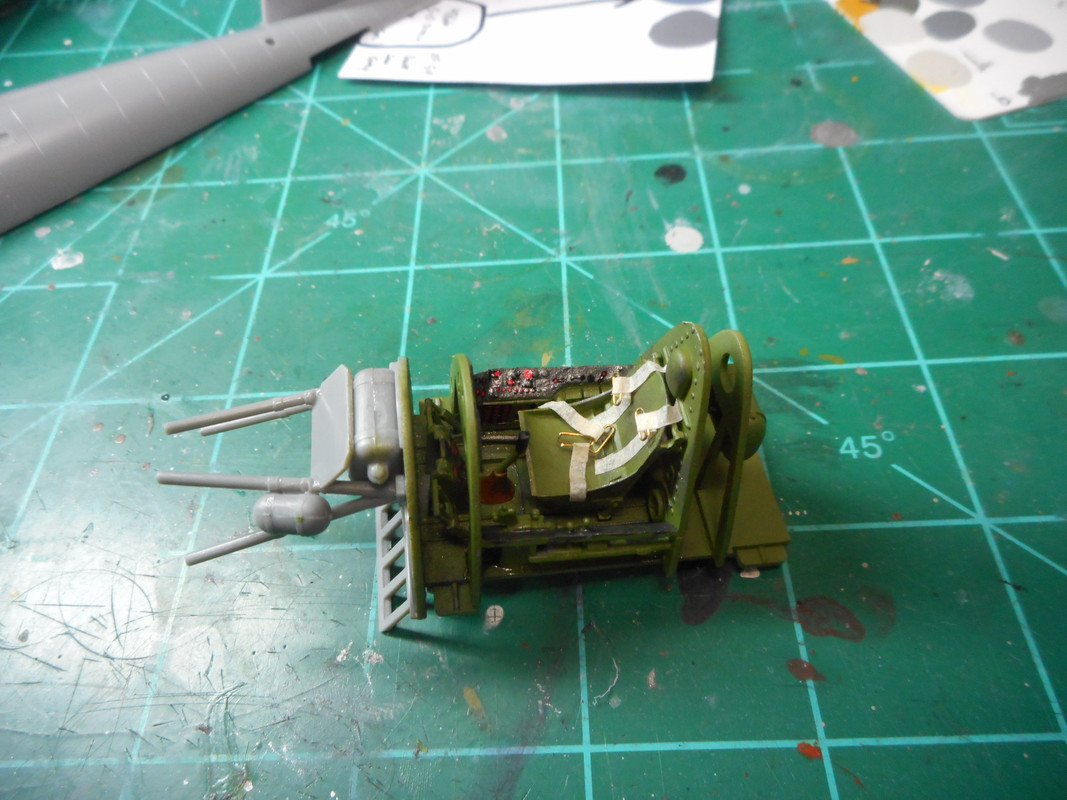
Remember how I mention some detailing will never be seen once buttoned up? Take a look here...
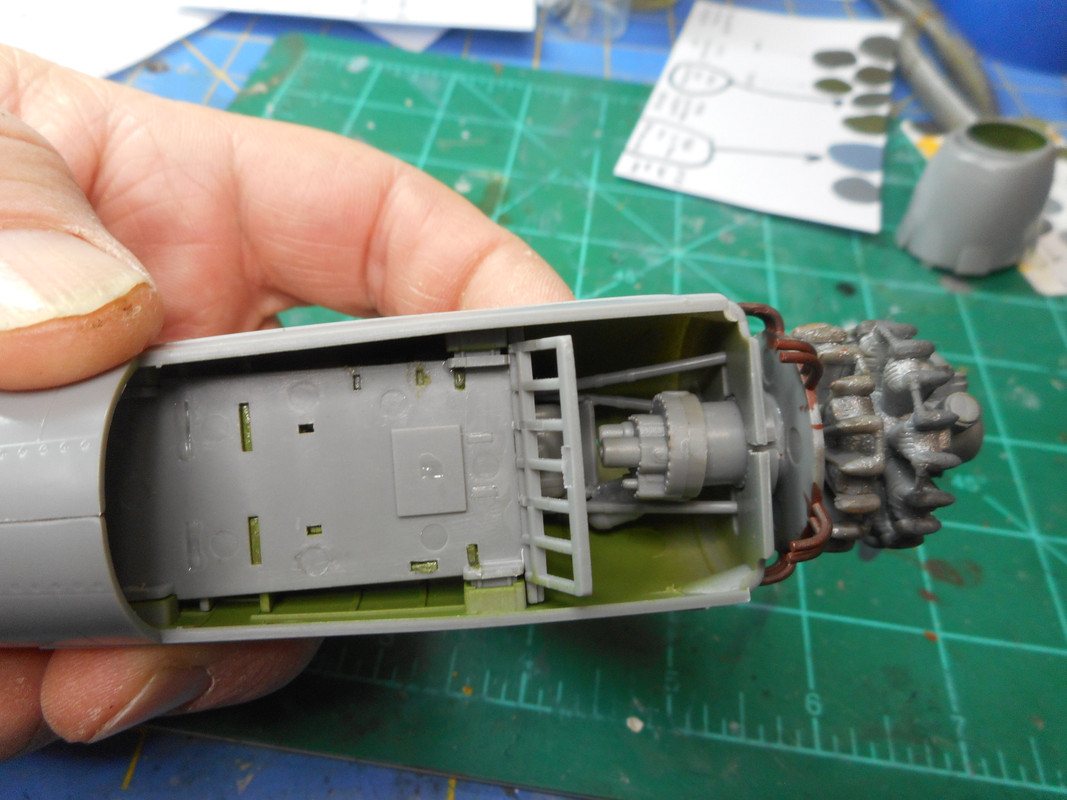
It's sad Hobby Boss went great lengths to detailing more frontal details of the cockpit and framework within inside the cowl that you will not going to see it at all.
Remember how I mention some detailing will never be seen once buttoned up? Take a look here...
It's sad Hobby Boss went great lengths to detailing more frontal details of the cockpit and framework within inside the cowl that you will not going to see it at all.
“Who controls the skies, controls the fate of this Earth”
Author unknown- 352nd Fighter Group, Blue-Nosed Bastards of Bodney
“Send one plane it’s a sortie; send two planes it’s a flight; send four planes it’s a test of airpower. - Richard Kohn
Author unknown- 352nd Fighter Group, Blue-Nosed Bastards of Bodney
“Send one plane it’s a sortie; send two planes it’s a flight; send four planes it’s a test of airpower. - Richard Kohn

Re: British Fleet Air Arm Hellcat Mk.I
Ahh, the Russian gambit! “Boris Goodernuff”. This is coming along quite nicely!
To make each build less crappy than the last one. Or, put another way, "Better than the last one, not as good as the next one!"..
-
BlackSheep214
- Elite Member
- Posts: 10414
- Joined: Sun Apr 06, 2014 8:47 pm
Re: British Fleet Air Arm Hellcat Mk.I
I decided to nip off - or should I say saw off the bulky rear portion end nub of the radial engine. I’m never going to see it once the fuselage is buttoned up. It will be easier to install later after I sling paint for the camo scheme. The cowl will be painted apart from main fuselage since it will have a red band on the front.
“Who controls the skies, controls the fate of this Earth”
Author unknown- 352nd Fighter Group, Blue-Nosed Bastards of Bodney
“Send one plane it’s a sortie; send two planes it’s a flight; send four planes it’s a test of airpower. - Richard Kohn
Author unknown- 352nd Fighter Group, Blue-Nosed Bastards of Bodney
“Send one plane it’s a sortie; send two planes it’s a flight; send four planes it’s a test of airpower. - Richard Kohn
Re: British Fleet Air Arm Hellcat Mk.I
The Hellcat is shaping up nicely! The practice of providing interior detail that will not be seen is very interesting. On one hand, it can be considered a waste. But I don't mind it, PROVIDED that it does not interfere or negatively affect the fit of external parts.
John aka JKim
-----------<><

-----------<><
-
BlackSheep214
- Elite Member
- Posts: 10414
- Joined: Sun Apr 06, 2014 8:47 pm
Re: British Fleet Air Arm Hellcat Mk.I
Thank you. It means a lot to hear this. I bothered me not seeing any seat belts in this bird. They’re not even molded on the seats itself. Kinda similar to riding in the far backseat of a station wagon without seatbelts like we did as kids in the 70s LOL!
I figure... why buy AM seatbelts when I can make my own in a pinch.
A little side note.... I had two choices of Sky for this build, Model Master and Mission Models. Did a swatch samples of each. Both are nice shades but I opted to used Mission Model because the shade of RAF Sky looks a little better than Model Master’s.
This is the first time I used Mission Model paints and I am impressed. I did have a bottle,of their flow improver but when I went to use it, I found the contents inside had hardened due to letting it sit unused for a few years. Never used it. I used their thinner instead. I then experimented and tested the paint - thinner ratio on a mule kit. Once I found the right ratio, I was ready to paint. I gotta tell ya.... I am impressed!
With Model Master acrylics and enamels discontinued, Mission Models (and AK Interactive Real Colors ) will be my replacement paint colors once my Model Master colors are depleted in my stash.
I figure... why buy AM seatbelts when I can make my own in a pinch.
A little side note.... I had two choices of Sky for this build, Model Master and Mission Models. Did a swatch samples of each. Both are nice shades but I opted to used Mission Model because the shade of RAF Sky looks a little better than Model Master’s.
This is the first time I used Mission Model paints and I am impressed. I did have a bottle,of their flow improver but when I went to use it, I found the contents inside had hardened due to letting it sit unused for a few years. Never used it.
With Model Master acrylics and enamels discontinued, Mission Models (and AK Interactive Real Colors
“Who controls the skies, controls the fate of this Earth”
Author unknown- 352nd Fighter Group, Blue-Nosed Bastards of Bodney
“Send one plane it’s a sortie; send two planes it’s a flight; send four planes it’s a test of airpower. - Richard Kohn
Author unknown- 352nd Fighter Group, Blue-Nosed Bastards of Bodney
“Send one plane it’s a sortie; send two planes it’s a flight; send four planes it’s a test of airpower. - Richard Kohn
Re: British Fleet Air Arm Hellcat Mk.I
The seatbelts are a great addition. They are usually high contrast compared to the seat color and so their absence really stands out, in my opinion.
Finding paint to fit your work flow is one of those tricky things that we all experience but rarely talk about in detail. Quality of paint finish is obviously important but I also want consistency and compatibility with the other surface-applied products that I'm using. Right now, I am using Mr Hobby Aqueous and AK Real Colors as my primary paints for exterior finishes and add the Tamiya acrylics for primary colors and other miscellaneous color needs. These three paint lines are very similar to each other and can be thinned with the same thinners. I think I used Mission Models Blue Grey for my Corsair build and found it to be a good quality paint.
Finding paint to fit your work flow is one of those tricky things that we all experience but rarely talk about in detail. Quality of paint finish is obviously important but I also want consistency and compatibility with the other surface-applied products that I'm using. Right now, I am using Mr Hobby Aqueous and AK Real Colors as my primary paints for exterior finishes and add the Tamiya acrylics for primary colors and other miscellaneous color needs. These three paint lines are very similar to each other and can be thinned with the same thinners. I think I used Mission Models Blue Grey for my Corsair build and found it to be a good quality paint.
John aka JKim
-----------<><
-----------<><