Hasegawa 1/32 Fw 190D-9 Brown 4

Re: Hasegawa 1/32 Fw 190D-9 Brown 4
Some great detective work
March as one, Don't look back
Odin's sons... Attack!
Unleash hell! Do not repent! Warfare grants us no lament
Let your weapons slash and tear This is no place for fear
Hold the lines! Move as one! In unity our victory's won
Our shields will form a mighty wall
United we shall never fall
Odin's sons... Attack!
Unleash hell! Do not repent! Warfare grants us no lament
Let your weapons slash and tear This is no place for fear
Hold the lines! Move as one! In unity our victory's won
Our shields will form a mighty wall
United we shall never fall

Re: Hasegawa 1/32 Fw 190D-9 Brown 4
Thanks Carlos. Yeah, I love the Dora but even I can feel the effect of working on too many versions of this same kit. Although I have one more in the stash, this might be my last Hasegawa Dora. And when the Z-M 190D ever materializes, I can jump back in! That's the plan anyway.Stikpusher wrote:Should you change your screen name to Dora 9 John? You are truly becoming a branch factory of Focke Wulf
Everything is coming along wonderfully. Of course you have had a bit of practice on the type…
Thanks Clint. It seemed like an easy enough test. And I was surprised how exact the "4" matched between the model and the photo.Floki wrote:Some great detective work
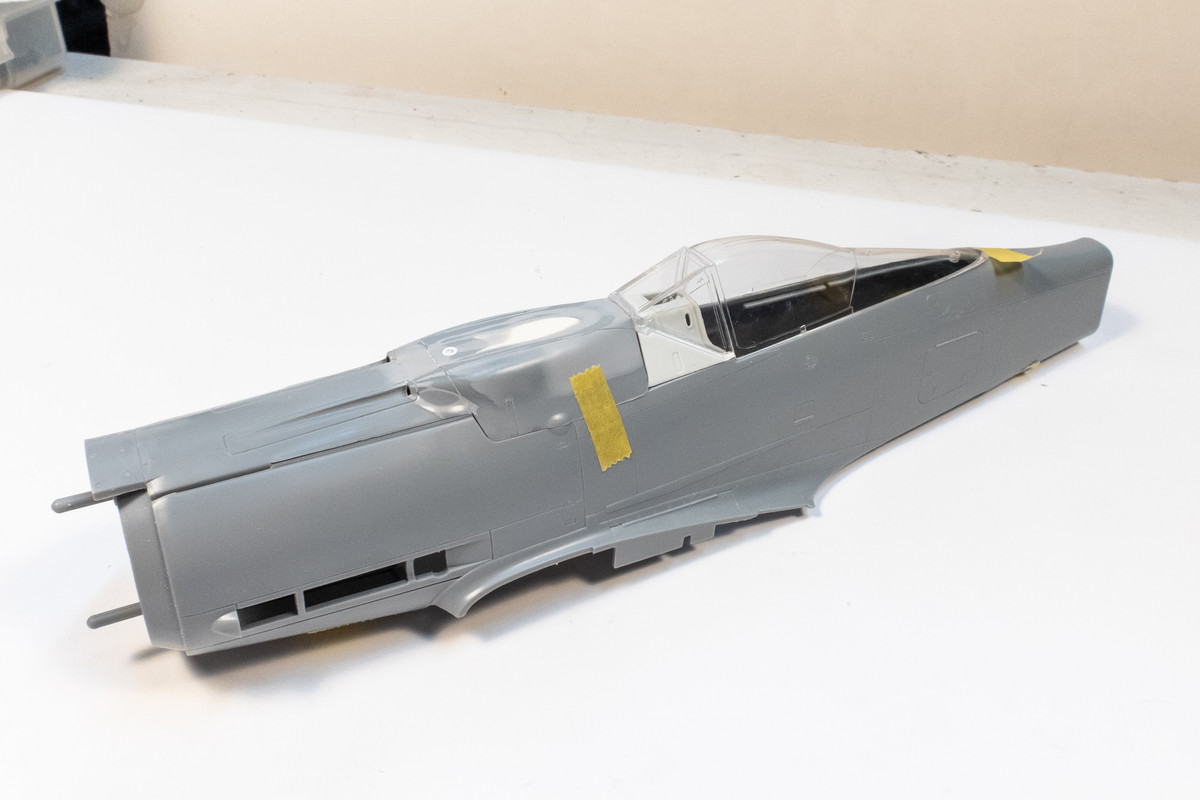
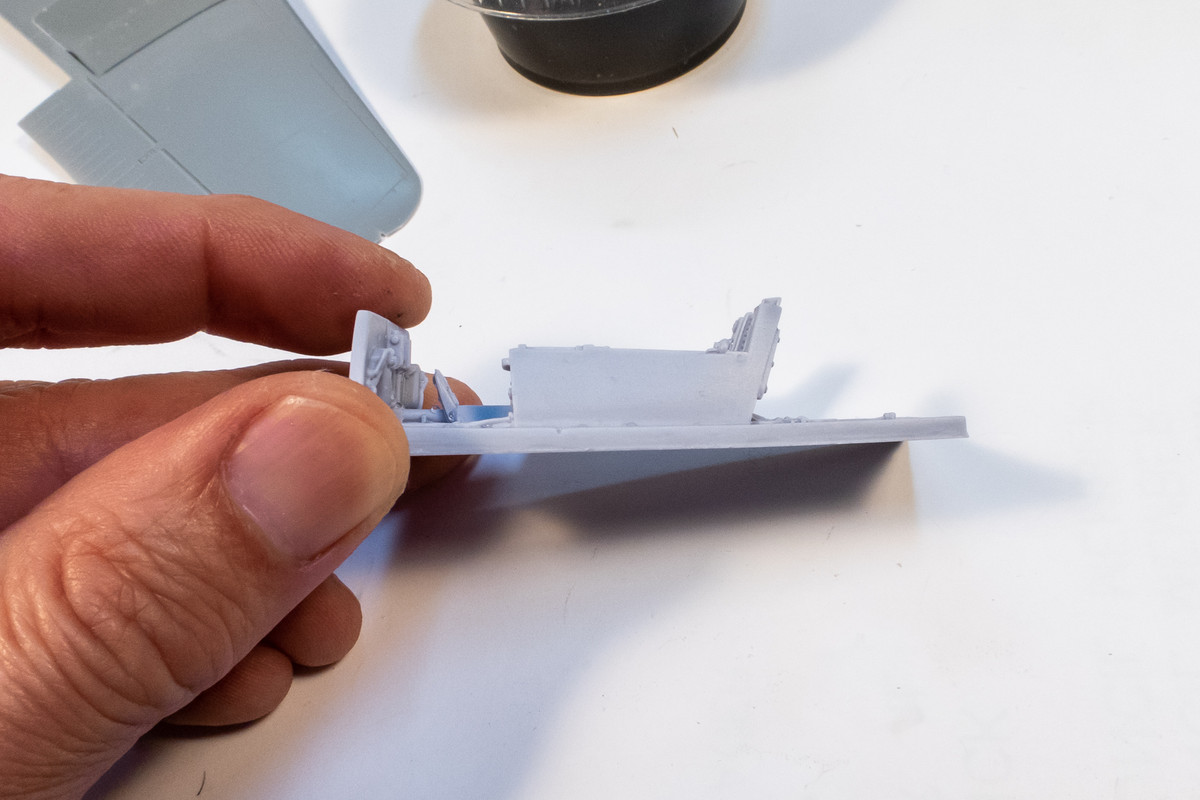
I got lots of little milestones to report on the Dora build. The first step in incorporating the Eagle Editions resin cockpit has been taken. I've cut the triangular piece of real estate in front of the windscreen using a razor saw.
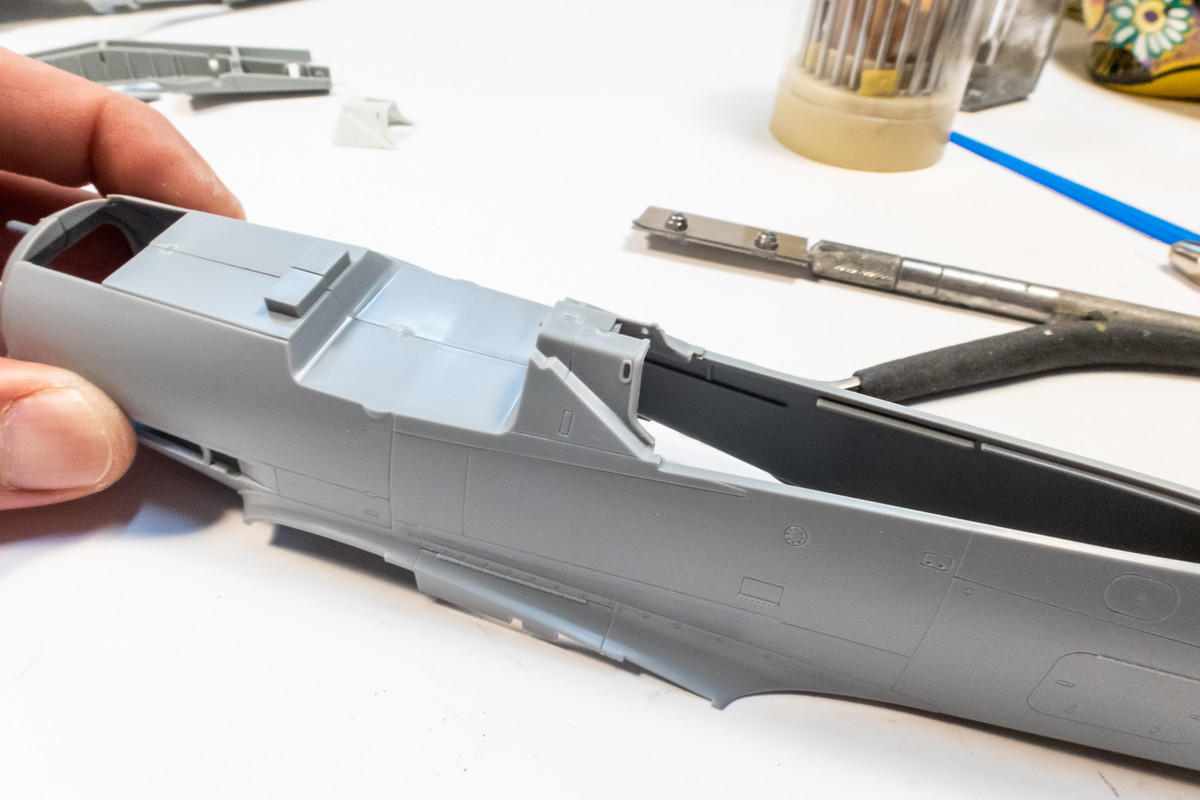
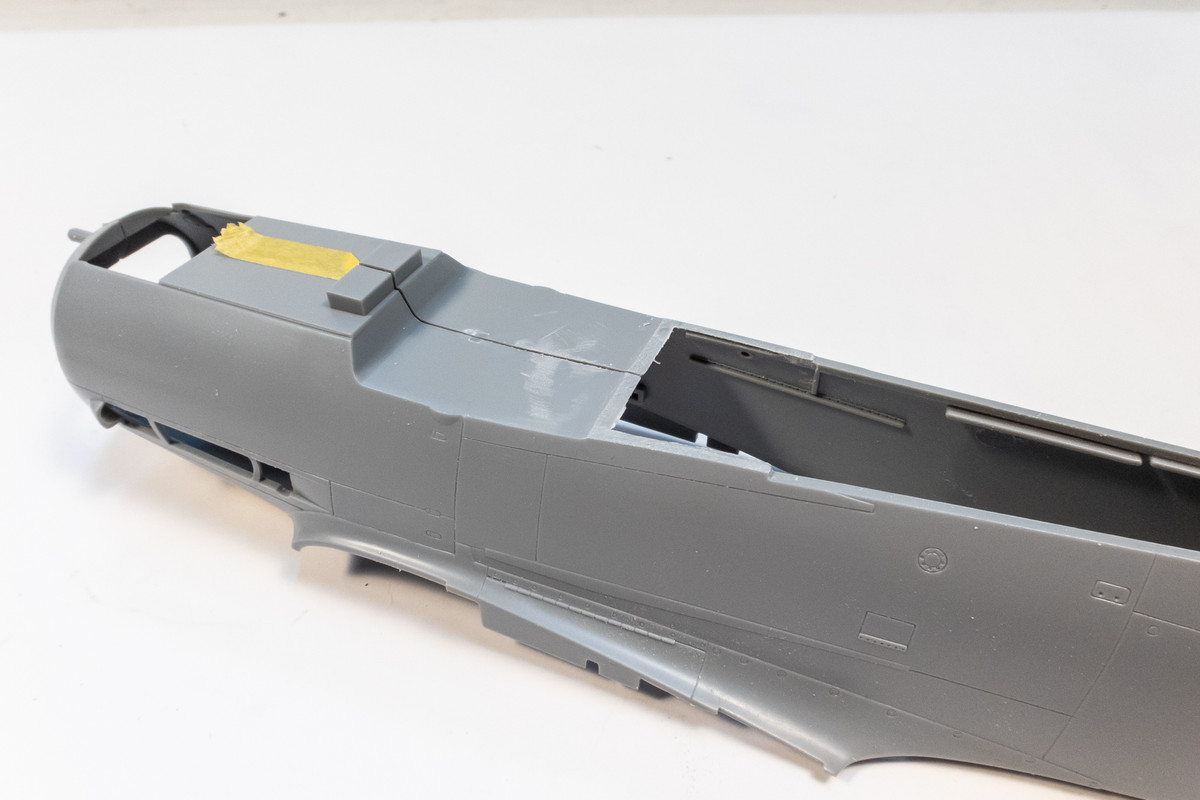
A preliminary check to see how the resin part fits into that space on the fuselage between the gun cowling and windscreen. I'll need to remove the raised detail on the inside of the fuselage sides and do some thinning but I think I will do the riveting first since I don't want to overly stress the thinned portions of the fuselage.
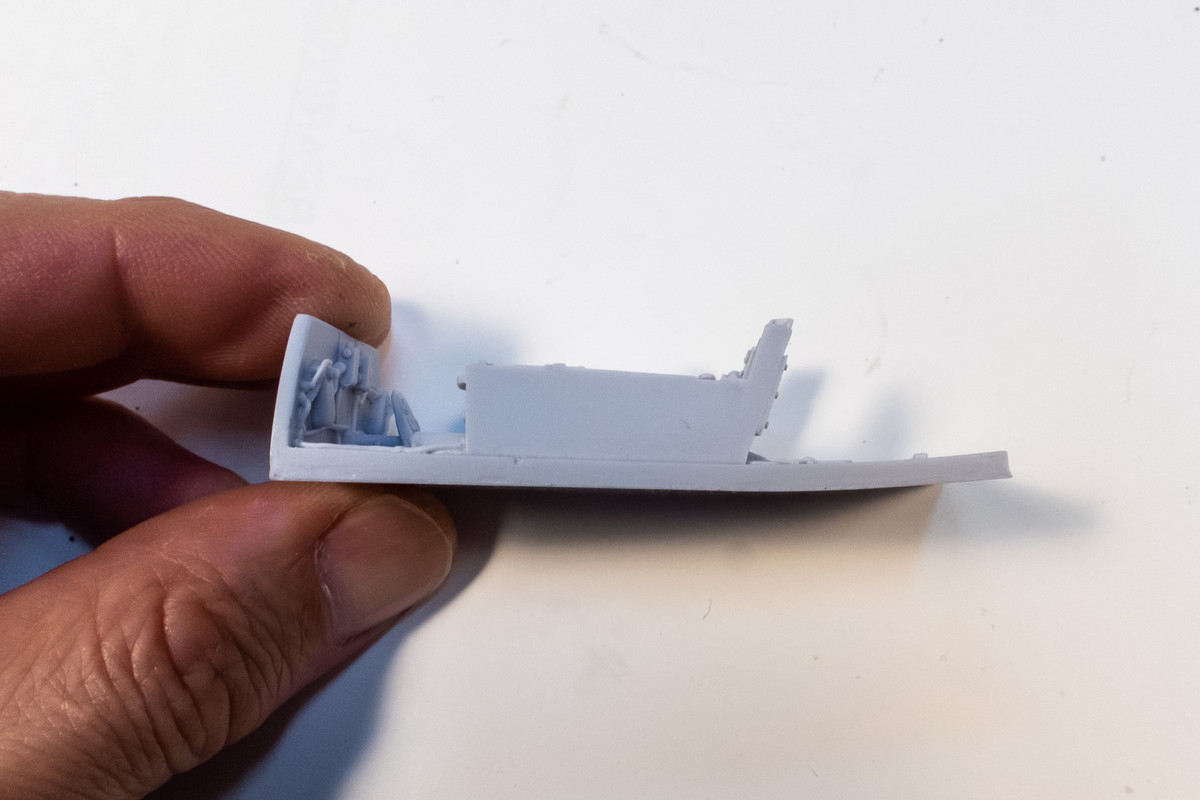
I just noticed that the cockpit tub, which I thought was molded the best out of all the resin components, has a noticeable warp in it. Yes, hot water made it relatively simple to straighten but annoying nonetheless.
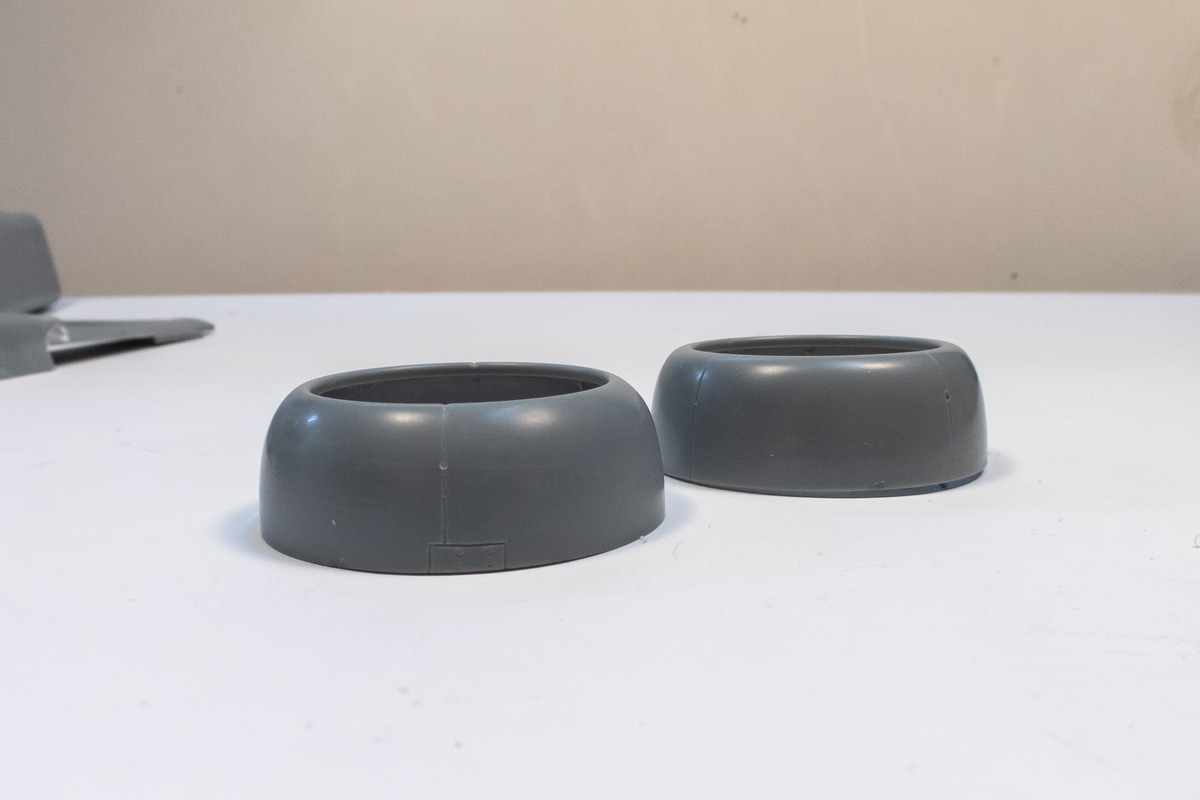
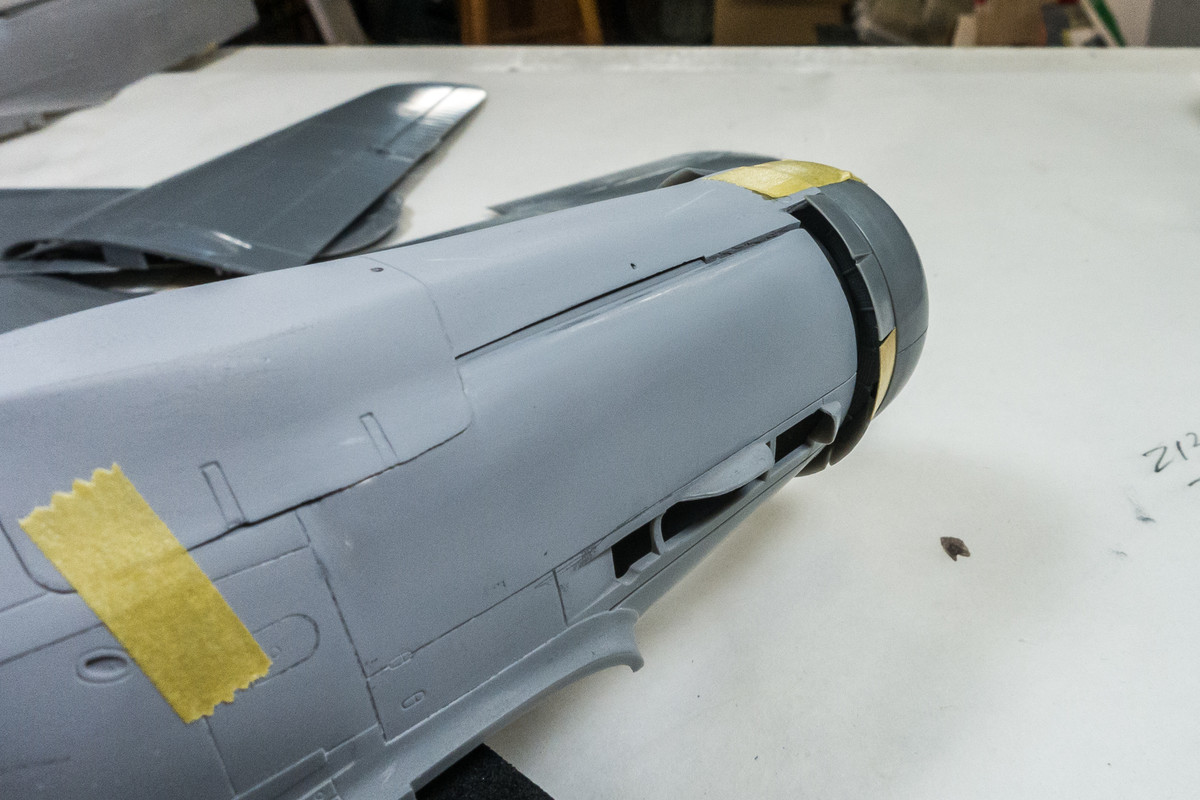
The holes on the face of the radiator cowling were drilled out. There may be a small chance that they will be visible if my plan to have the spinner cap removable turns out. I would've done the two oval openings too but they are directly opposite of the mounting tabs in the back.

I wasn't satisfied with the shape of the radiator cowling itself so I gave it another ride on the rotary tool. I think this perspective shows the modification better. The revised cowling in front has a more aerodynamic and less boxy profile than the kit cowling in the back.
John aka JKim
-----------<><

-----------<><
Re: Hasegawa 1/32 Fw 190D-9 Brown 4
Before I continue, I wanted to point out that most of the things I am doing are in no way required. As a Dora nut and as frequent builder of the Hasegawa 1/32 Fw 190D-9 kits, I've performed little modifications here and there that I think make the build more authentic. The following is a good example of the type of little modification that I'm compelled to do.
This kit shows the foot ladder in the retracted position. If you want to show the ladder extended, the instructions tell you to drill two small holes and glue the ladder into place. And that's probably what most modelers do.
But that is not what it look would like. There would have to be an opening for the ladder to retract into. So I'm adding that opening. Chain-drill a set of holes slightly smaller than the outline of the ladder.
The x-acto is used to connect the holes and smooth out the opening.
The end result. And yes, I added some bolt detail to the end of the ladder. Is it necessary? No. Is it even noticeable? I think so and it is also do-able so I did it.

Some more minor modifications to the wheel well.
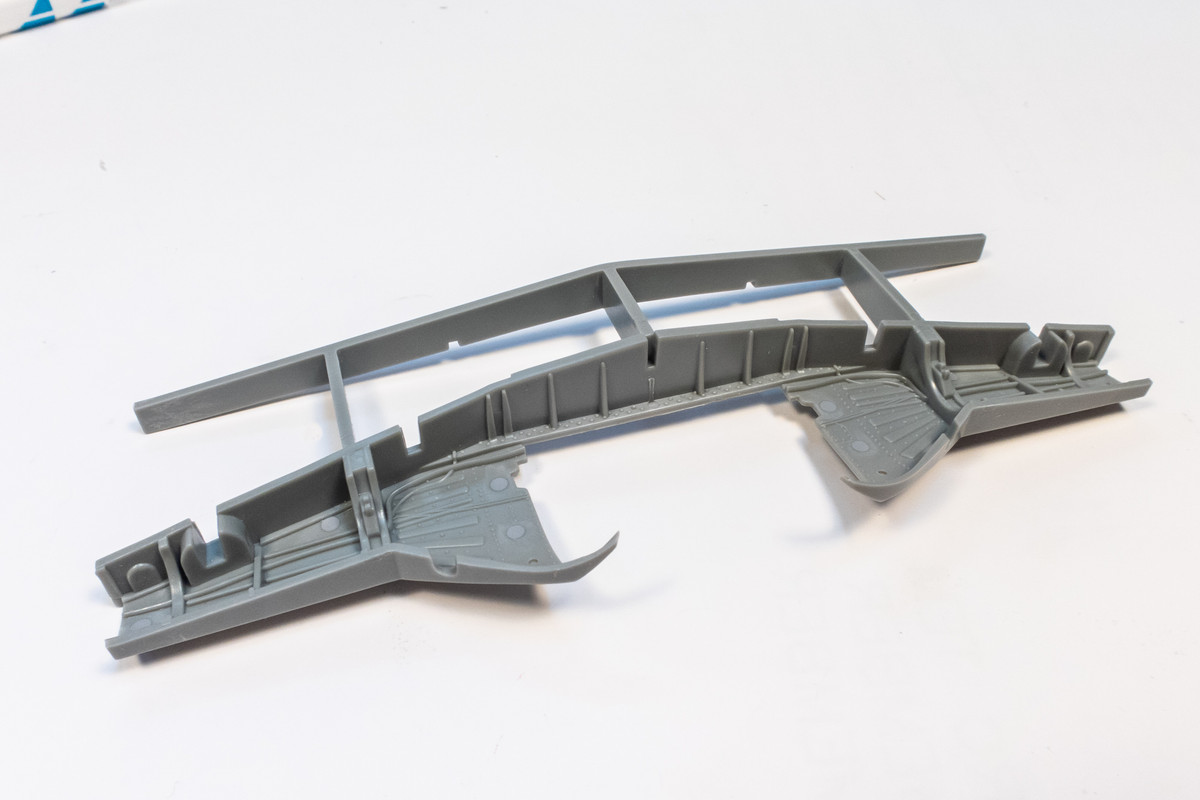
There is a wiring run that runs to the edge of the opening and disappears.
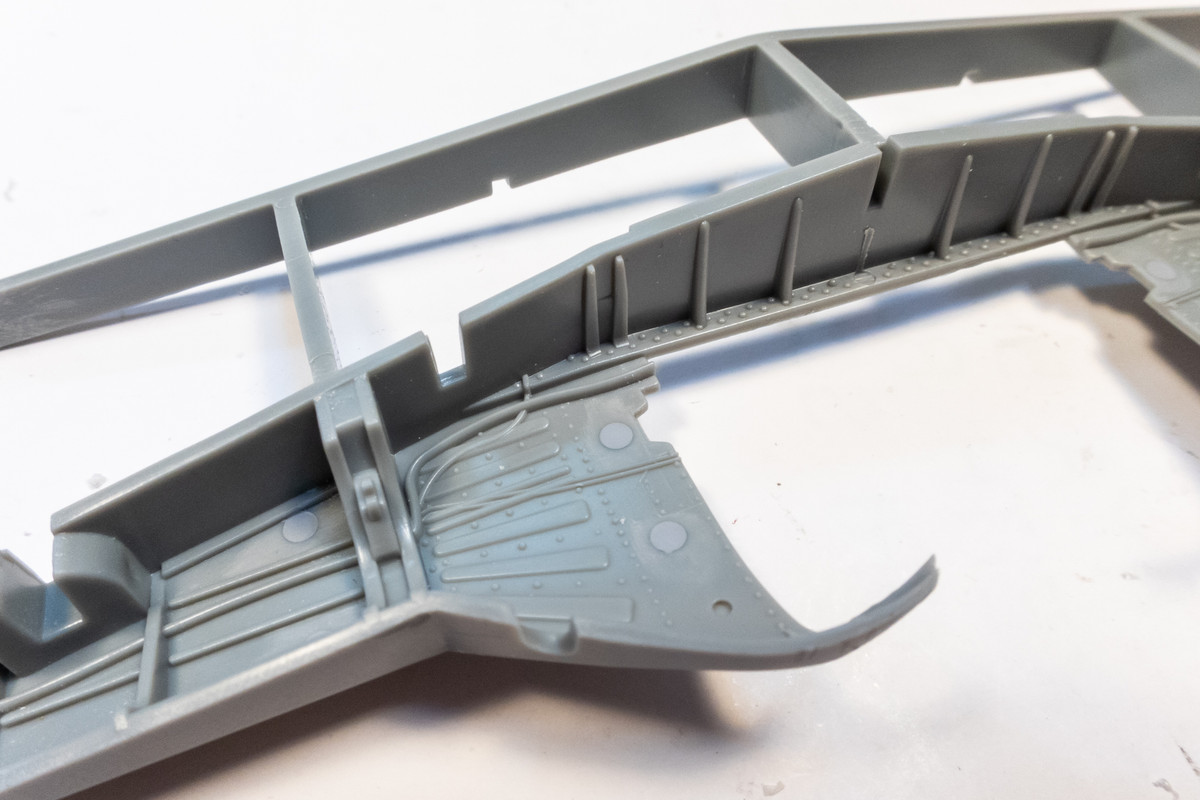
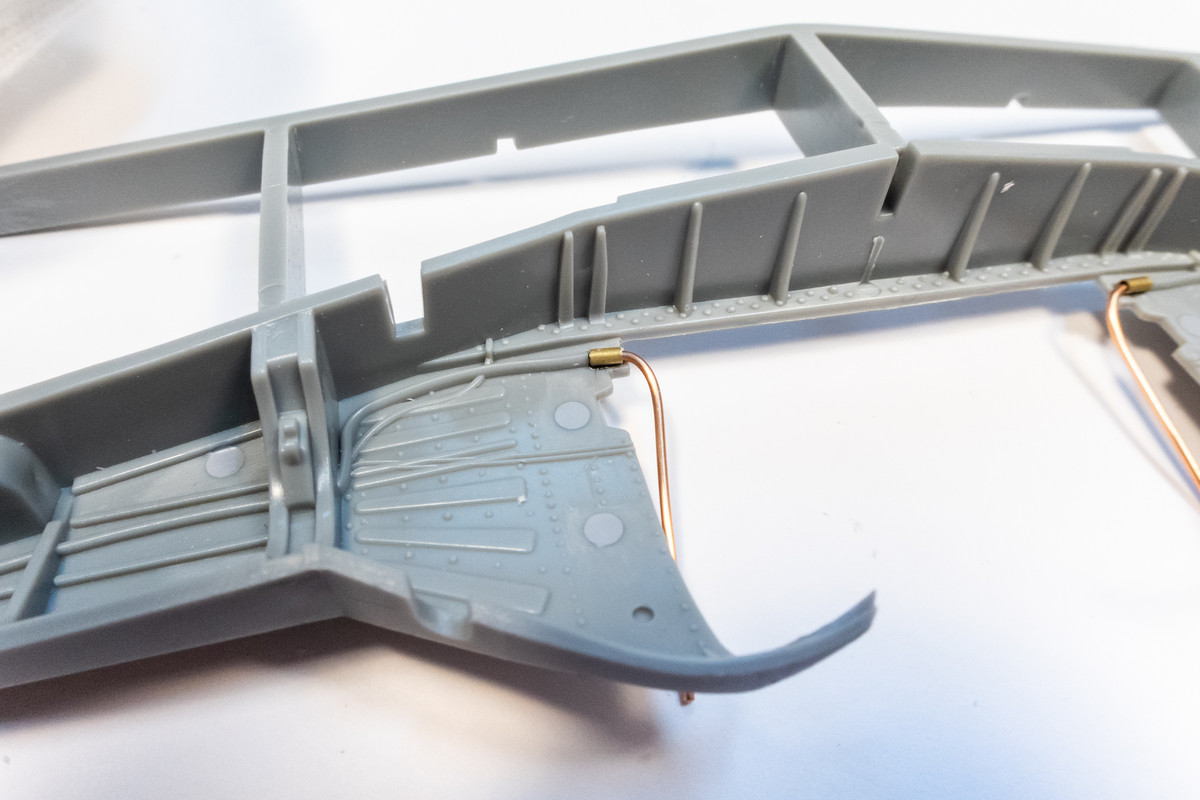
To make that wiring run more plausible, I've cut a portion of it away and placed a section of brass tubing. I can then add the continuation of that wiring run into the engine compartment.
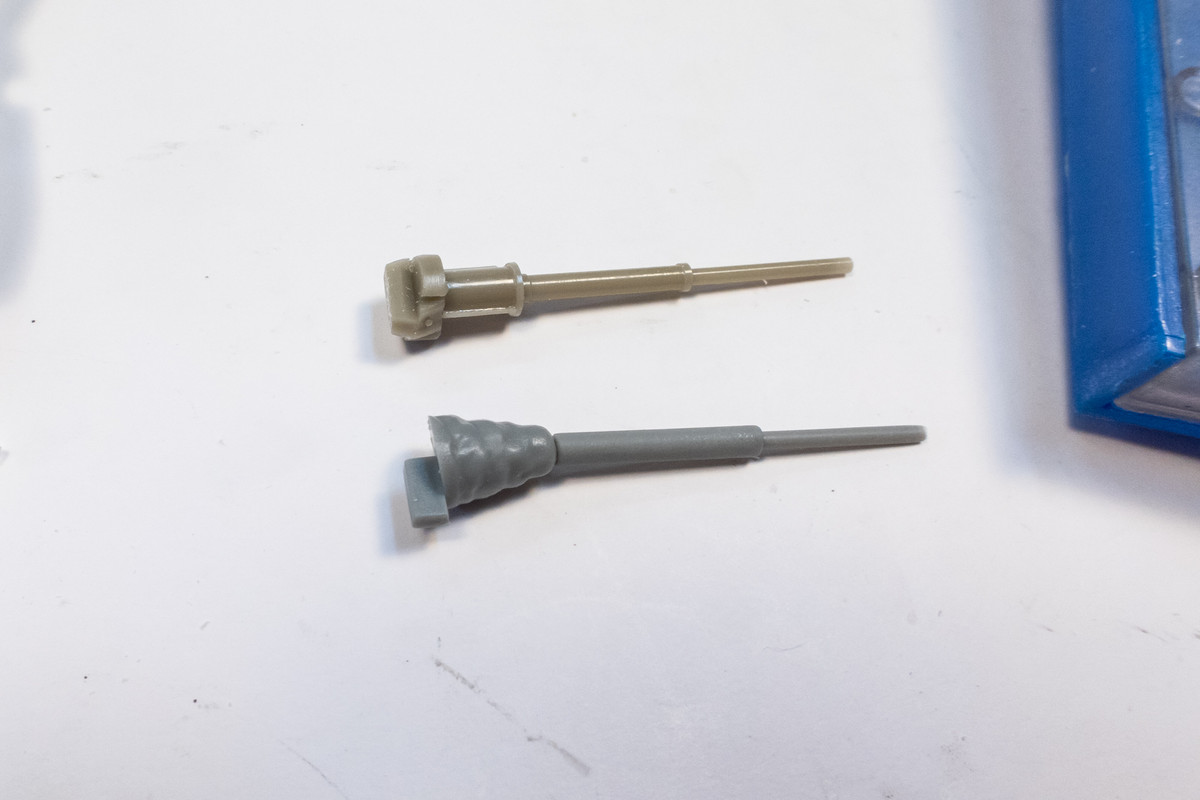
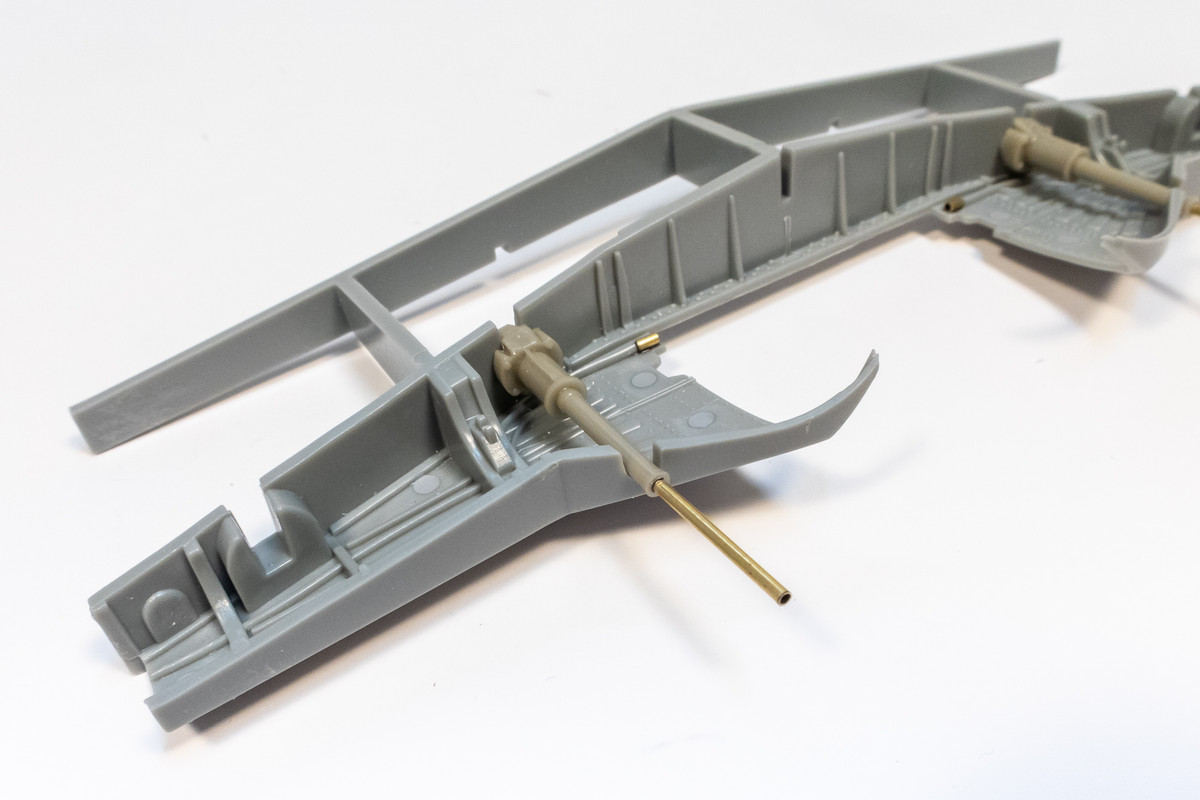
The wing-mounted MG151 cannons are fairly well represented. They are molded straight and with a fairly uniform round cross-section. When the ends are hollowed out, they look pretty good.
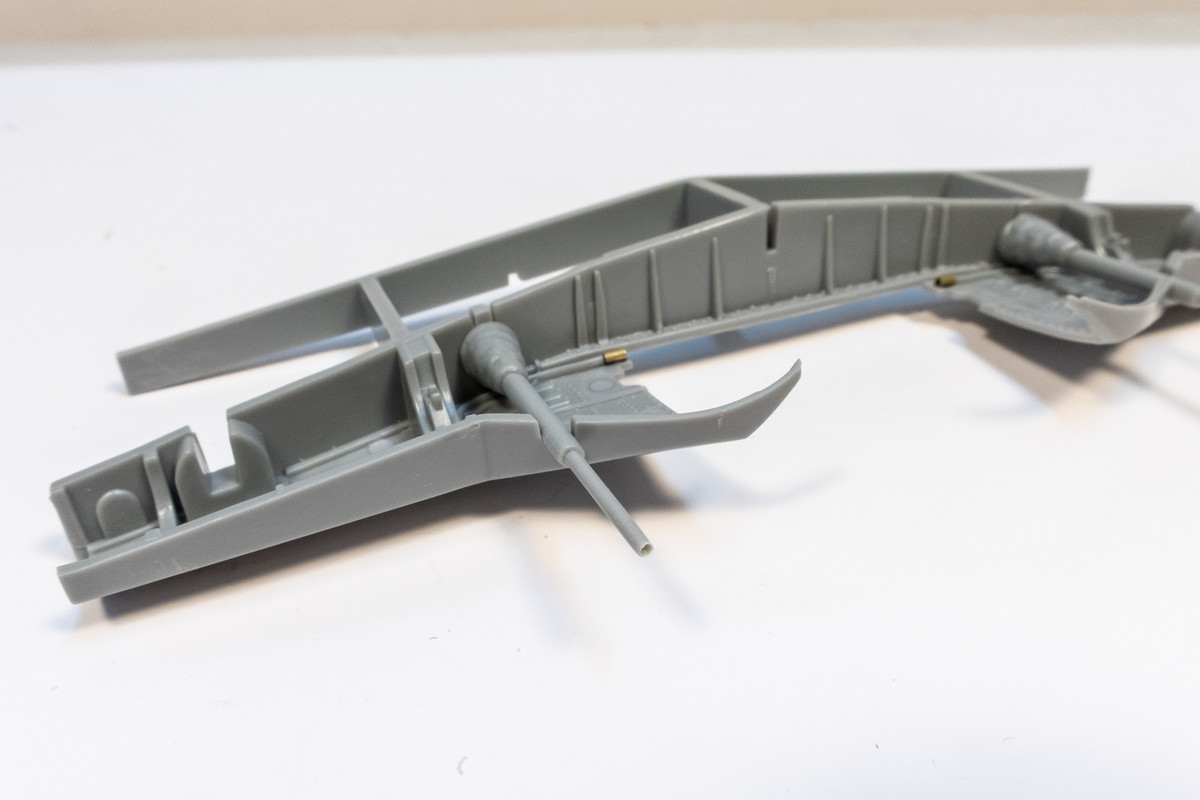
My major issue is with the leather boot at the base of the cannon barrel. Hasegawa incorrectly based this on a restoration condition and is not reflective of Fw190's in service. Luckily, Quickboost makes a nice set of resin gun barrel replacements, of which I will only be using the wing-mounted MG151's. For whatever reason, Quickboost does not list a gun barrel set for the 190D so you'll have to use one marked for the 190A.
The locating tab on the rear will need to be adjusted to match the Hasegawa part. Don't worry about the portion extending past the base but make sure the tab ends in the middle of the base like the Hasegawa part.
A quick verification that the guns fit into the wheel well without issue. Since the gun barrel gets sandwiched between the upper and lower wing parts, you would need to install the guns before that stage.

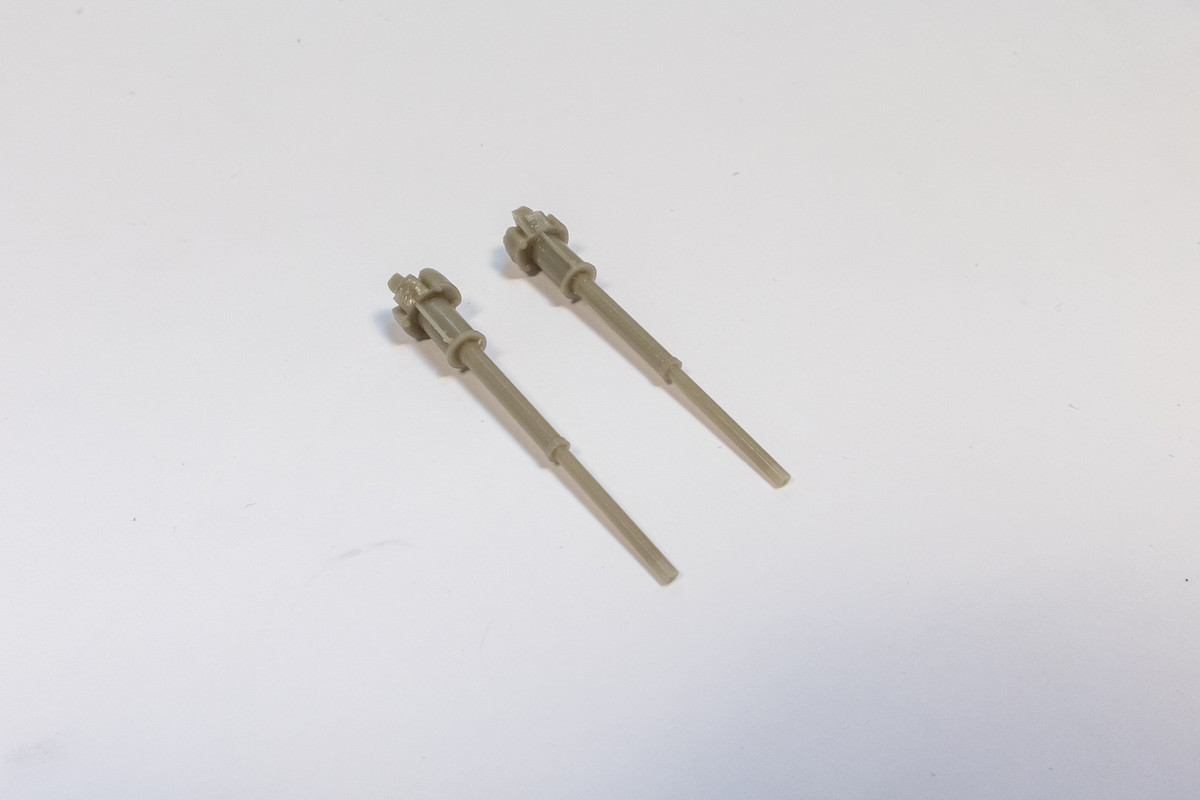
I don't want the barrels in the way when I'm cleaning the leading edge joint and I don't want them to snap off either. So I make one more modification. The resin barrels are cut off from blast tubes. Locating posts made from 0.70mm brass tubing are glued into place at the end of the blast tubes. And new gun barrels are cut from 1.00mm brass tubing.
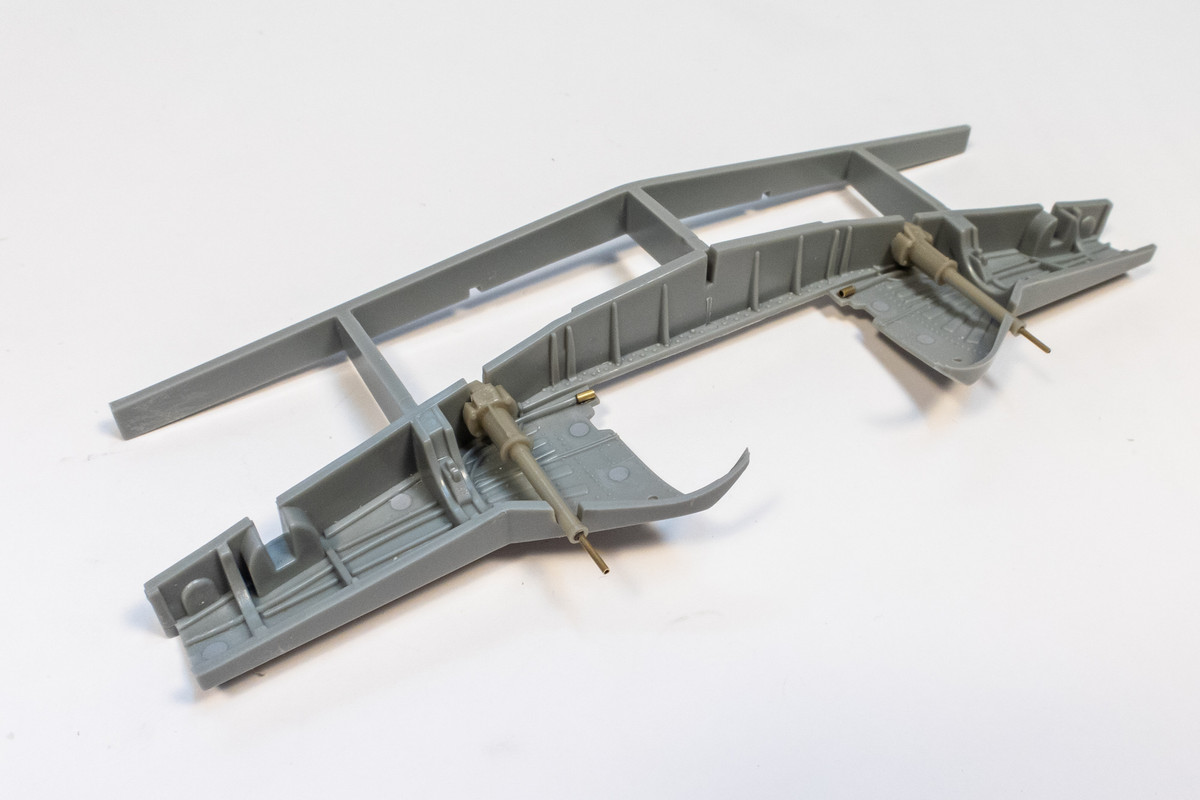
Now the barrels can be attached at the end without getting in the way or getting knocked off.
This kit shows the foot ladder in the retracted position. If you want to show the ladder extended, the instructions tell you to drill two small holes and glue the ladder into place. And that's probably what most modelers do.
But that is not what it look would like. There would have to be an opening for the ladder to retract into. So I'm adding that opening. Chain-drill a set of holes slightly smaller than the outline of the ladder.
The x-acto is used to connect the holes and smooth out the opening.
The end result. And yes, I added some bolt detail to the end of the ladder. Is it necessary? No. Is it even noticeable? I think so and it is also do-able so I did it.
Some more minor modifications to the wheel well.
There is a wiring run that runs to the edge of the opening and disappears.
To make that wiring run more plausible, I've cut a portion of it away and placed a section of brass tubing. I can then add the continuation of that wiring run into the engine compartment.
The wing-mounted MG151 cannons are fairly well represented. They are molded straight and with a fairly uniform round cross-section. When the ends are hollowed out, they look pretty good.
My major issue is with the leather boot at the base of the cannon barrel. Hasegawa incorrectly based this on a restoration condition and is not reflective of Fw190's in service. Luckily, Quickboost makes a nice set of resin gun barrel replacements, of which I will only be using the wing-mounted MG151's. For whatever reason, Quickboost does not list a gun barrel set for the 190D so you'll have to use one marked for the 190A.
The locating tab on the rear will need to be adjusted to match the Hasegawa part. Don't worry about the portion extending past the base but make sure the tab ends in the middle of the base like the Hasegawa part.
A quick verification that the guns fit into the wheel well without issue. Since the gun barrel gets sandwiched between the upper and lower wing parts, you would need to install the guns before that stage.
I don't want the barrels in the way when I'm cleaning the leading edge joint and I don't want them to snap off either. So I make one more modification. The resin barrels are cut off from blast tubes. Locating posts made from 0.70mm brass tubing are glued into place at the end of the blast tubes. And new gun barrels are cut from 1.00mm brass tubing.
Now the barrels can be attached at the end without getting in the way or getting knocked off.
John aka JKim
-----------<><
-----------<><
-
BlackSheep214

- Elite Member
- Posts: 10371
- Joined: Sun Apr 06, 2014 8:47 pm
Re: Hasegawa 1/32 Fw 190D-9 Brown 4
“Who controls the skies, controls the fate of this Earth”
Author unknown- 352nd Fighter Group, Blue-Nosed Bastards of Bodney
“Send one plane it’s a sortie; send two planes it’s a flight; send four planes it’s a test of airpower. - Richard Kohn
Author unknown- 352nd Fighter Group, Blue-Nosed Bastards of Bodney
“Send one plane it’s a sortie; send two planes it’s a flight; send four planes it’s a test of airpower. - Richard Kohn
Re: Hasegawa 1/32 Fw 190D-9 Brown 4
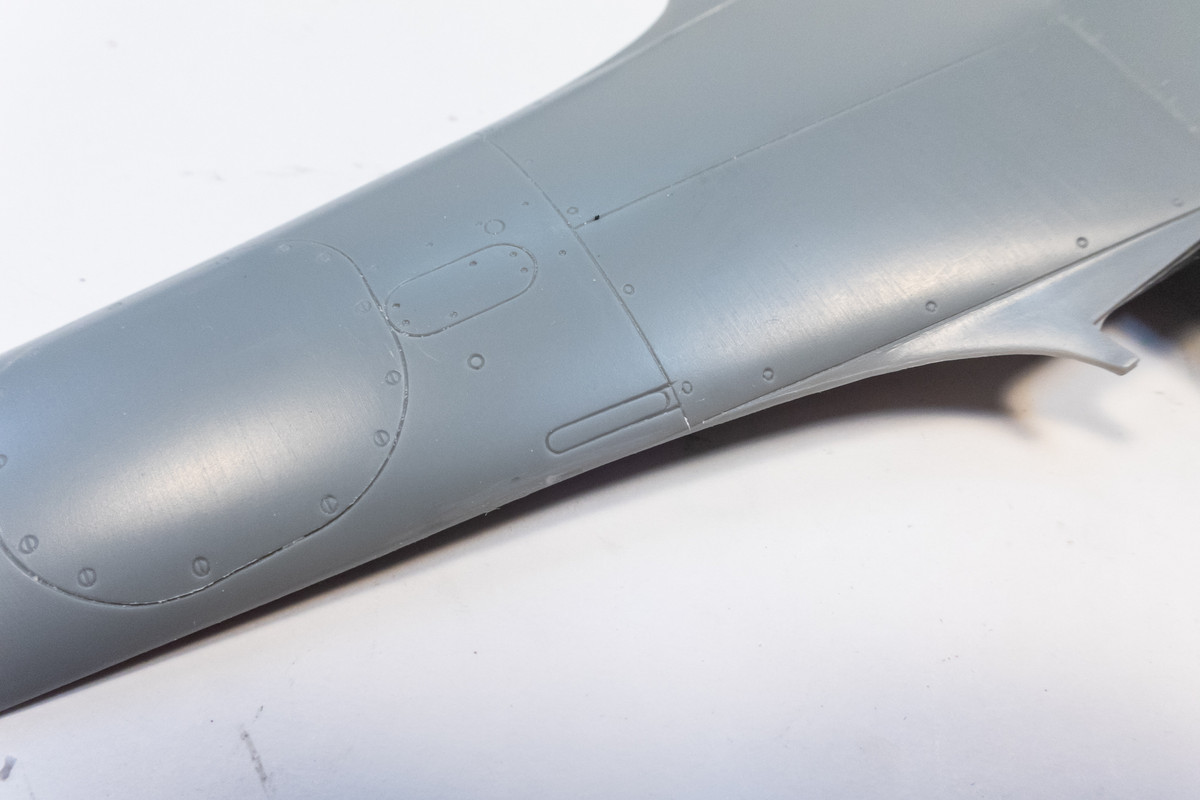
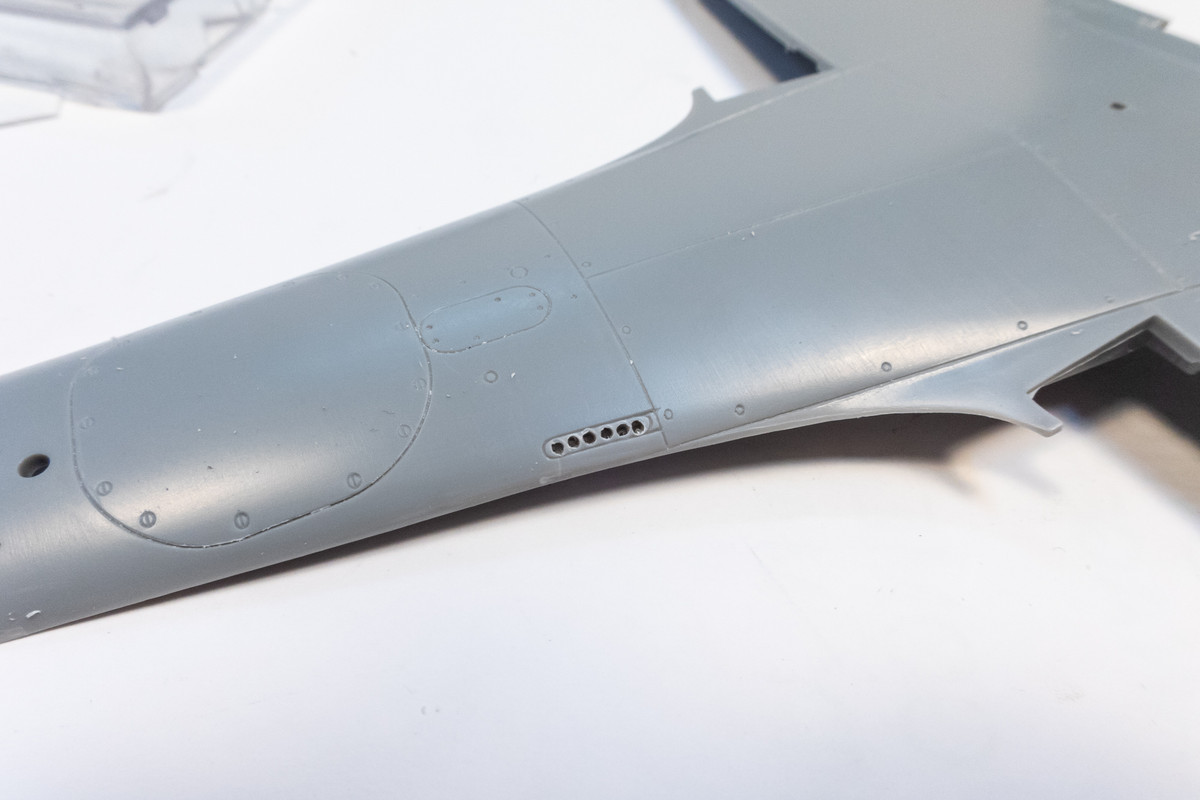
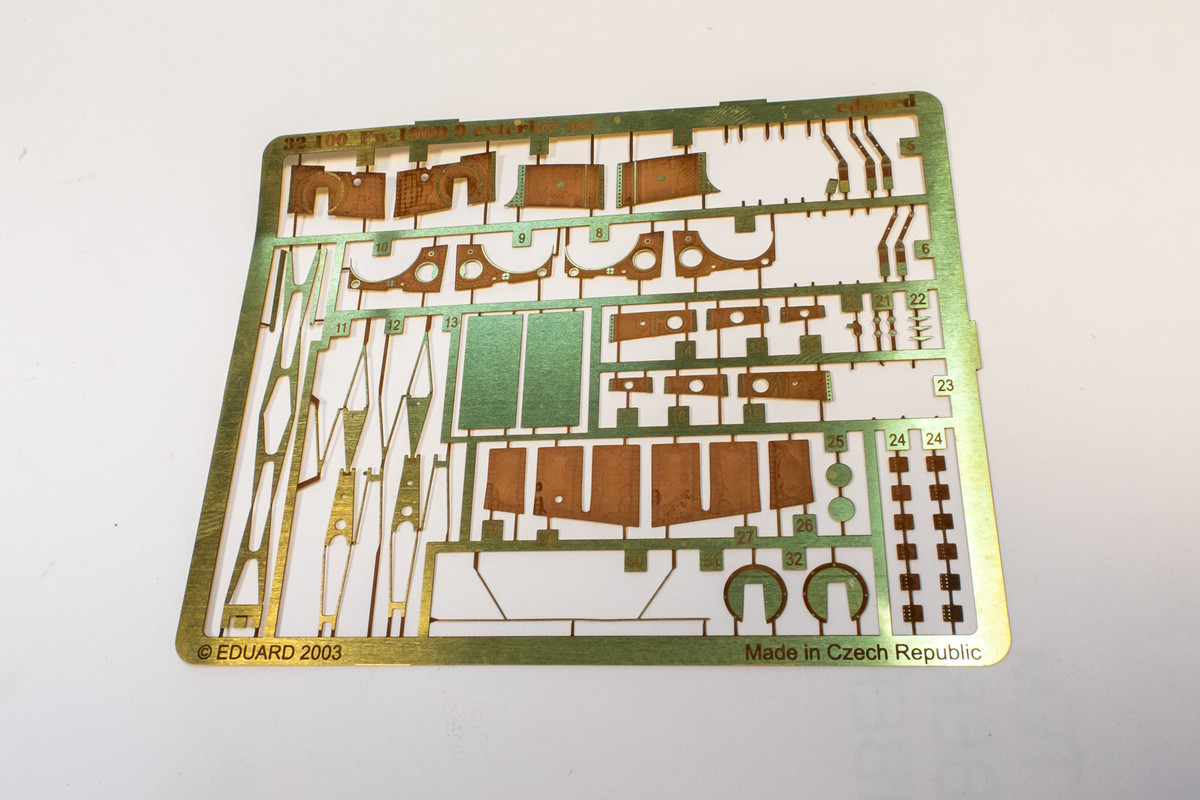
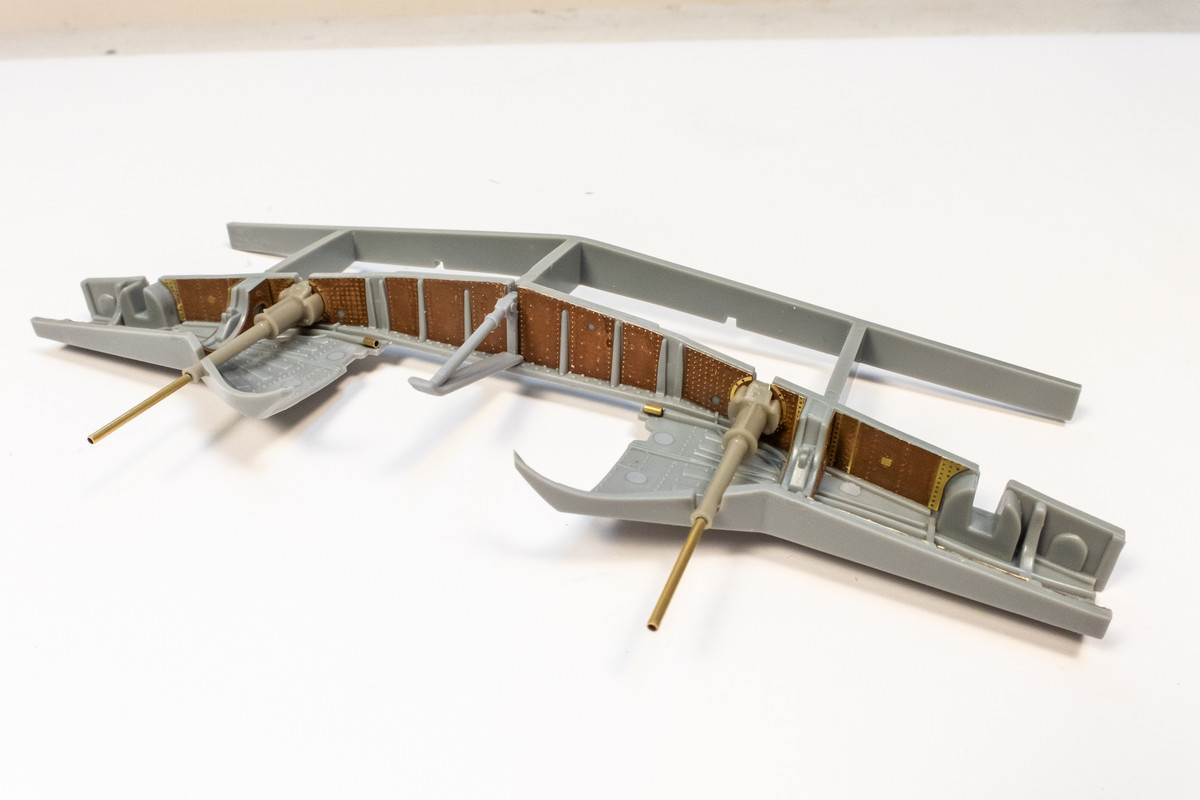
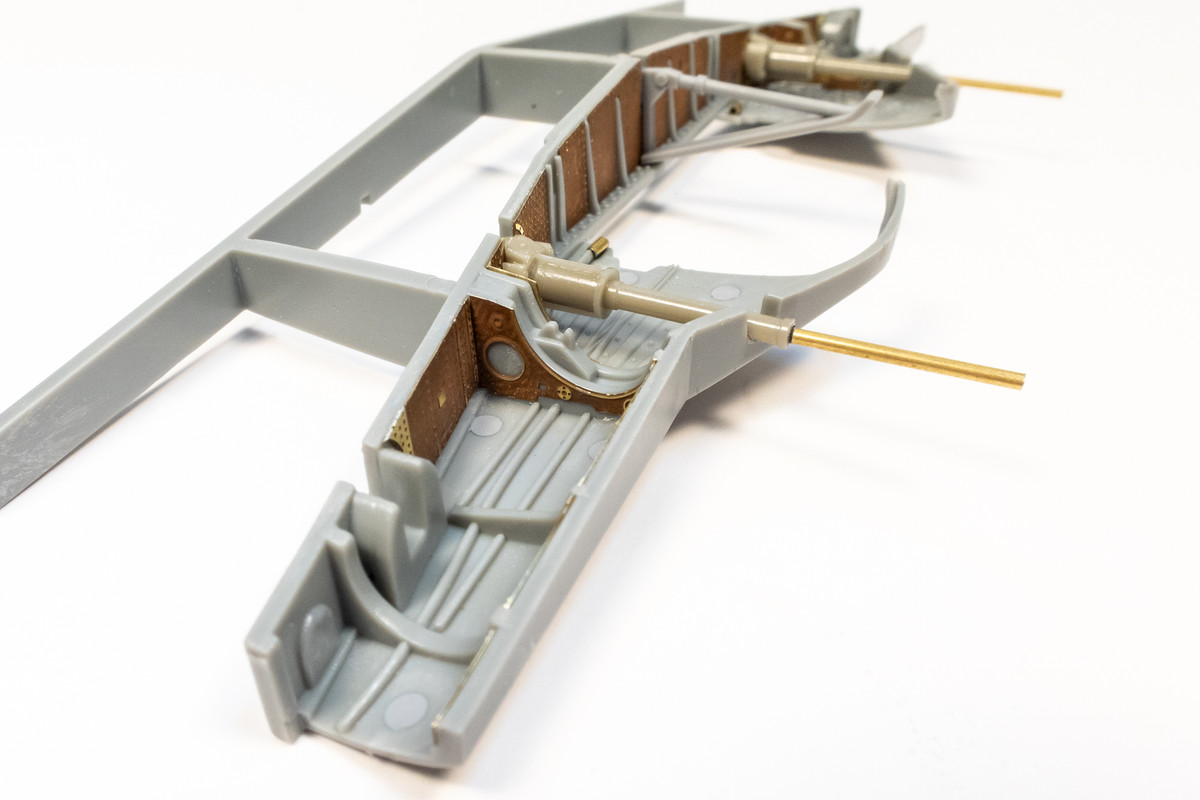
A little more work on the wheel wells. This time I am adding the Eduard Exterior set details. For the best detail, I would recommend the Aires resin wheel wells but this set has some PE panels that dress up the kit wheel wells decently enough.
This was about as straightforward as PE gets. All flat panels... no folding and they all fit with only one issue. I had to trim one the panels to allow the center spar piece to fit properly.

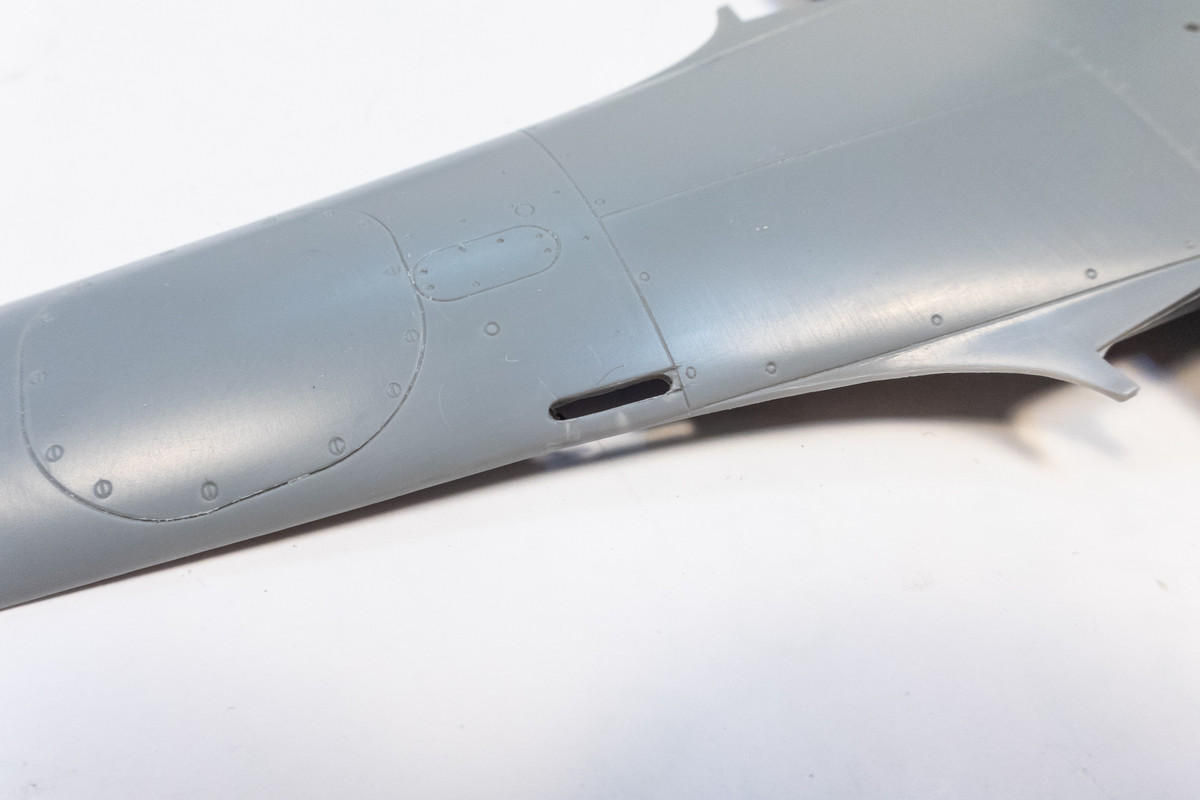
I thought about this panel today and came up with a theory.
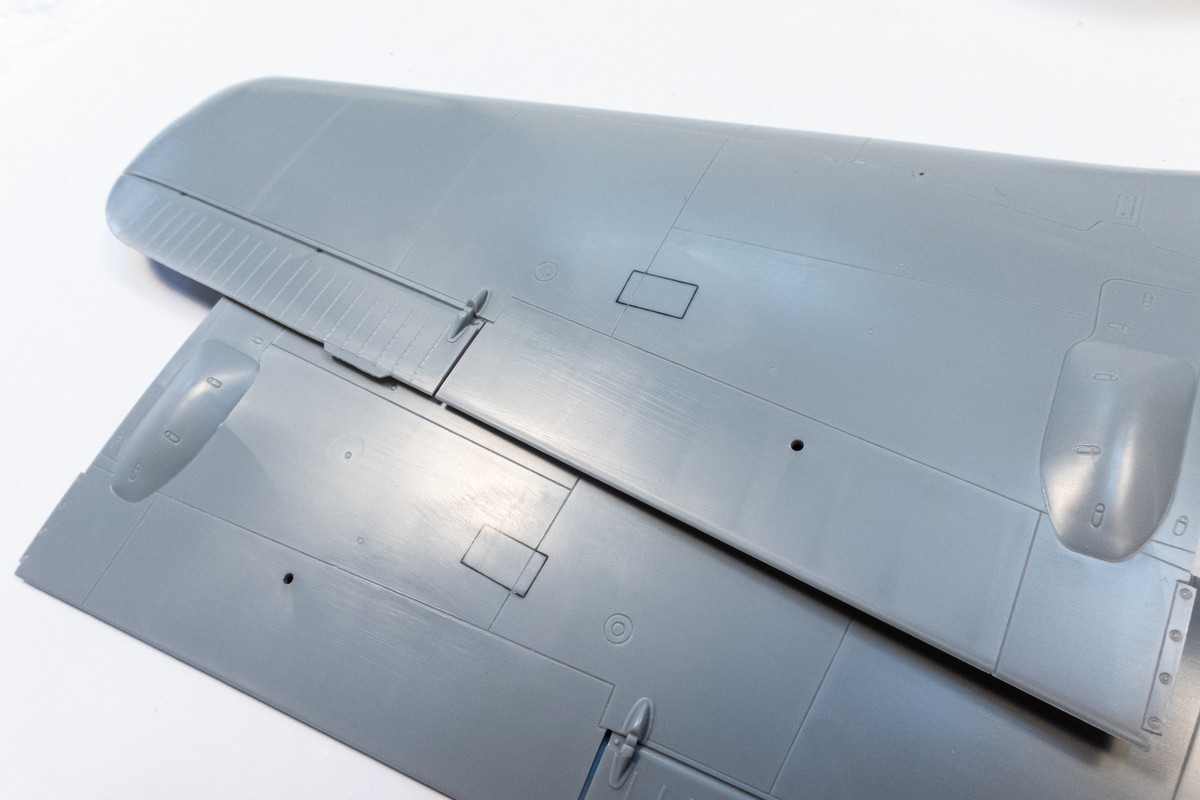
The most well-known surviving D-9 is the National Air and Space Museum Dora (Werk Number 601088). I'm sure many drawings, profiles and models have been based on photos and measurements of this aircraft. But for a long period of time, this Dora was mistakenly matched with the wings of the D-13, which was at Champlin Museum. In Jerry Crandall's Dora Volume 2, there is a clear photo of the port wing of 601088 when it was lumped together with the D-13 fuselage prior to restoration. Like the photo of Brown 4, the panel in question is not present. The wings between the D-9 and the D-13 were finally swapped sometime in 2001.
So my guess is that the panel may have been specific to either the D-13 or that particular D-13 and that the D-9 did not have that panel. Most of the plastic models of the Fw190D-9, including the newest release from IBG, are based on a D-9 that had the wings of a D-13.
This was about as straightforward as PE gets. All flat panels... no folding and they all fit with only one issue. I had to trim one the panels to allow the center spar piece to fit properly.
I thought about this panel today and came up with a theory.
The most well-known surviving D-9 is the National Air and Space Museum Dora (Werk Number 601088). I'm sure many drawings, profiles and models have been based on photos and measurements of this aircraft. But for a long period of time, this Dora was mistakenly matched with the wings of the D-13, which was at Champlin Museum. In Jerry Crandall's Dora Volume 2, there is a clear photo of the port wing of 601088 when it was lumped together with the D-13 fuselage prior to restoration. Like the photo of Brown 4, the panel in question is not present. The wings between the D-9 and the D-13 were finally swapped sometime in 2001.
So my guess is that the panel may have been specific to either the D-13 or that particular D-13 and that the D-9 did not have that panel. Most of the plastic models of the Fw190D-9, including the newest release from IBG, are based on a D-9 that had the wings of a D-13.
John aka JKim
-----------<><
-----------<><
-
mustang1989

- Moderator
- Posts: 4903
- Joined: Tue Mar 18, 2014 8:35 pm
Re: Hasegawa 1/32 Fw 190D-9 Brown 4
How I missed this is a pure mystery......but you can bet I'll have a front row seat to this.
I think I read somewhere that the Germans made full use of their inventory and if they had a spare tail laying around they'd use one on these D-9's. Am I on track with that?
I think I read somewhere that the Germans made full use of their inventory and if they had a spare tail laying around they'd use one on these D-9's. Am I on track with that?
-
BlackSheep214
- Elite Member
- Posts: 10371
- Joined: Sun Apr 06, 2014 8:47 pm
Re: Hasegawa 1/32 Fw 190D-9 Brown 4
I do have a question that’s simply amazes me. How do you thin the cowling flaps? They look perfect to scale. Even 1/48 scale aircraft cowling flaps seems a bit too thick sometimes.
“Who controls the skies, controls the fate of this Earth”
Author unknown- 352nd Fighter Group, Blue-Nosed Bastards of Bodney
“Send one plane it’s a sortie; send two planes it’s a flight; send four planes it’s a test of airpower. - Richard Kohn
Author unknown- 352nd Fighter Group, Blue-Nosed Bastards of Bodney
“Send one plane it’s a sortie; send two planes it’s a flight; send four planes it’s a test of airpower. - Richard Kohn
Re: Hasegawa 1/32 Fw 190D-9 Brown 4
You're doing some amazing work, I'm taking notes for my next Dora build
March as one, Don't look back
Odin's sons... Attack!
Unleash hell! Do not repent! Warfare grants us no lament
Let your weapons slash and tear This is no place for fear
Hold the lines! Move as one! In unity our victory's won
Our shields will form a mighty wall
United we shall never fall
Odin's sons... Attack!
Unleash hell! Do not repent! Warfare grants us no lament
Let your weapons slash and tear This is no place for fear
Hold the lines! Move as one! In unity our victory's won
Our shields will form a mighty wall
United we shall never fall
Re: Hasegawa 1/32 Fw 190D-9 Brown 4
Thank you sir! From what I've read, the plan was to retrofit all D-9's to the Ta-152H tail to consolidate parts production. The war ended before this plan could be put into effect but a small number of D-9's were retrofitted for evaluation.mustang1989 wrote:How I missed this is a pure mystery......but you can bet I'll have a front row seat to this.
I think I read somewhere that the Germans made full use of their inventory and if they had a spare tail laying around they'd use one on these D-9's. Am I on track with that?
The view back into the cowling flaps is limited on this model so you can get by with just thinning the edges. Beveling the edge from the inside using an x-acto blade scraped across the back of the flap. Painting the inside surface of the thinned flap can also help give the impression of thinness. In this case, the result is almost indistinguishable from replacing the entire flap with a thin sheet of brass.BlackSheep214 wrote:I do have a question that’s simply amazes me. How do you thin the cowling flaps? They look perfect to scale. Even 1/48 scale aircraft cowling flaps seems a bit too thick sometimes.
Thanks Clint! I've built up quite a list of modifications for this kit!Floki wrote:You're doing some amazing work, I'm taking notes for my next Dora build
John aka JKim
-----------<><
-----------<><
Re: Hasegawa 1/32 Fw 190D-9 Brown 4
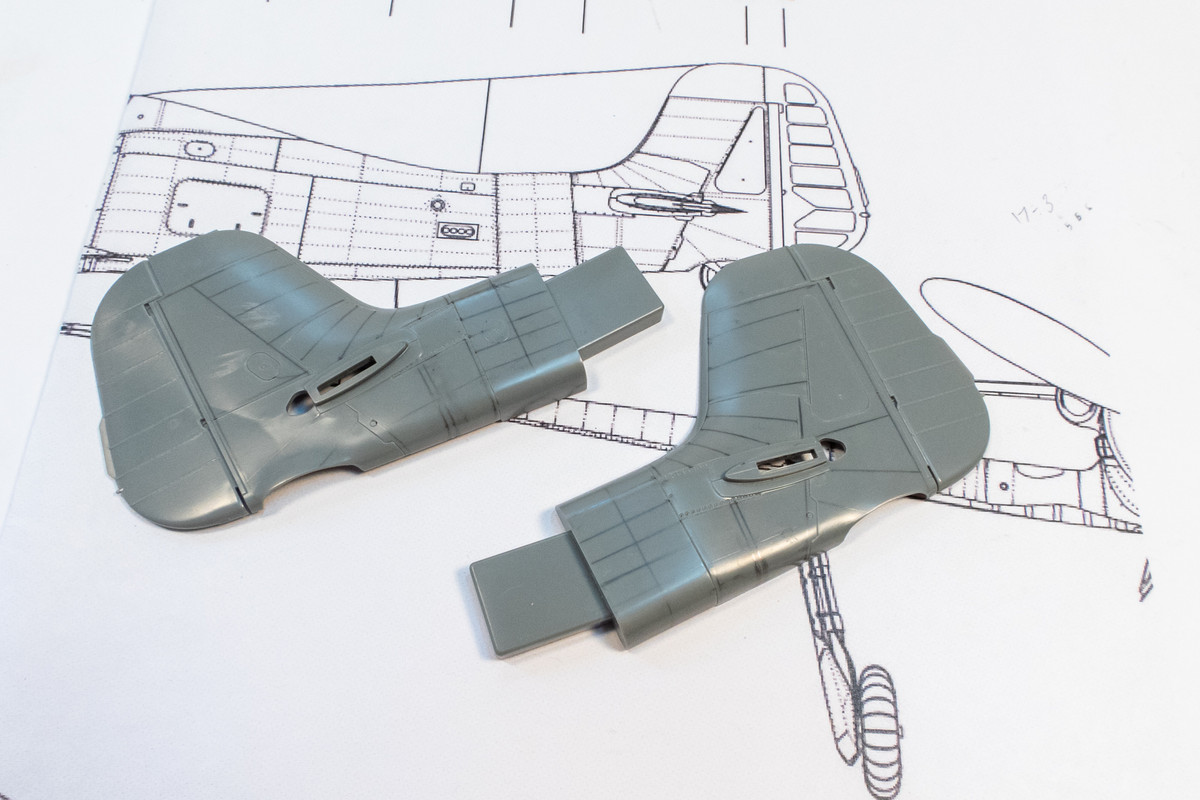
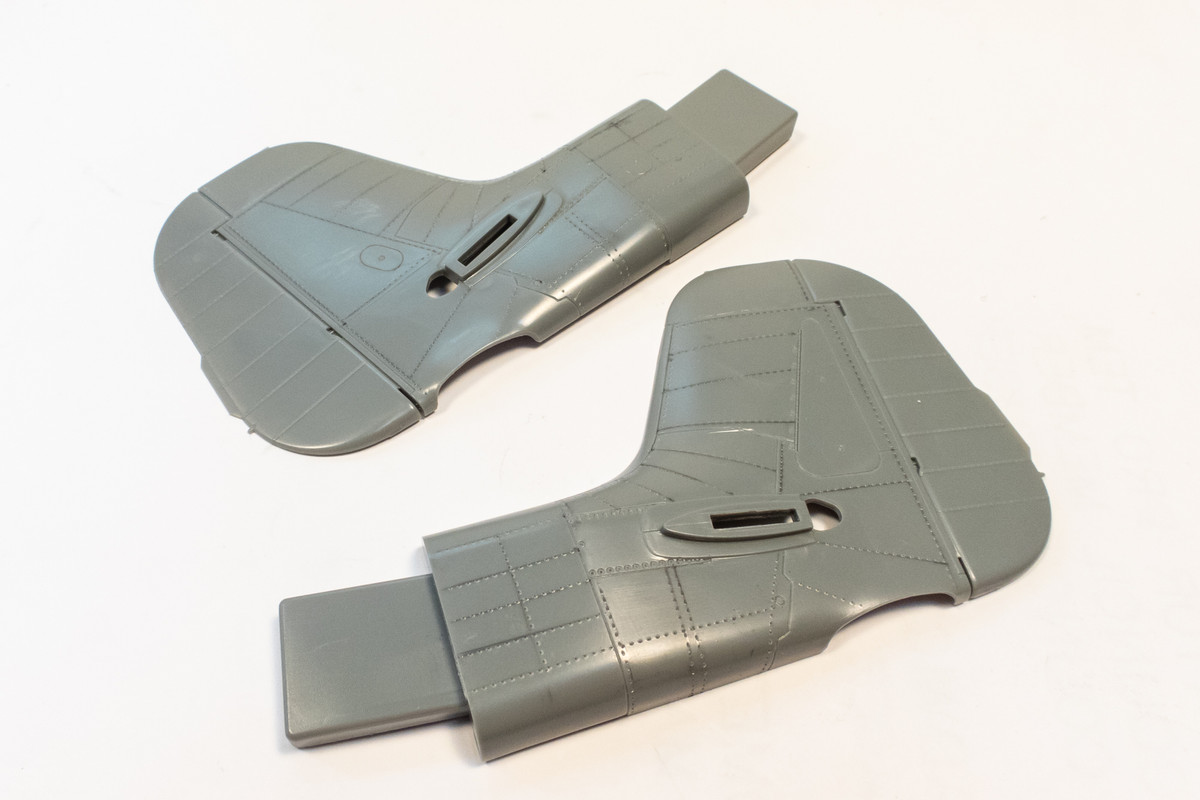
Time for some riveting work. I like to start off on the smaller pieces first to get the hang of it. It's something that you get better at the more you do and if you haven't done it in a while, practicing on the small parts first is a good practice to shake off the rust.
First, I draw the rivet lines using a set of detailed drawings. I'm doing the tail first so the plans are for a Ta-152H-1. I use a soft lead pencil and a flexible clear ruler. I'm not an exact rivet applicator and I usually just eyeball the lines instead of measuring.
Once the lines are drawn, I trace over the lines with a rotary rivet tool. It's like a ponce wheel for sewing but there are several out there manufactured specifically for modeling. For this model, I am using the Galaxy Tools 1.00mm dot pitch tool. One good thing about the Galaxy Tools is that the dot pattern for the large 1.00mm dot pitch tool matches the small 1.00mm tool exactly. If you are using the RB Rivet-R, be aware that the dot pitch of 1.00mm wheel may not match the Mini Rivet-R 1.00 wheel. I use the larger wheel mostly but in tight spaces or around curves, the smaller wheel is handy.
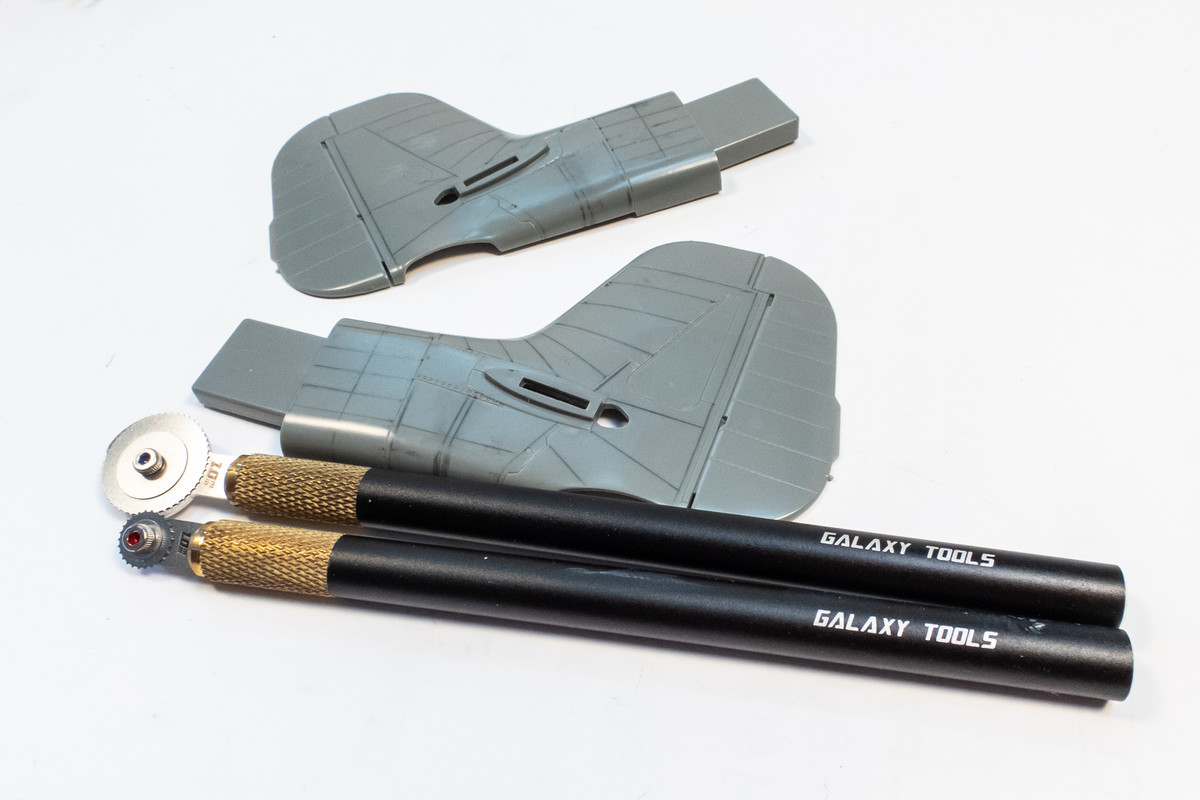
Using constant pressure, the rivet tool is run over each drawn line, producing a row of small holes.
The process leaves a raised mound of plastic around each hole. You can leave this as is but I like to lightly sand away those mounds, leaving just the hole. The effect is cleaner. The part is then treated with a dark pastel wash (in this case black) to highlight the work.
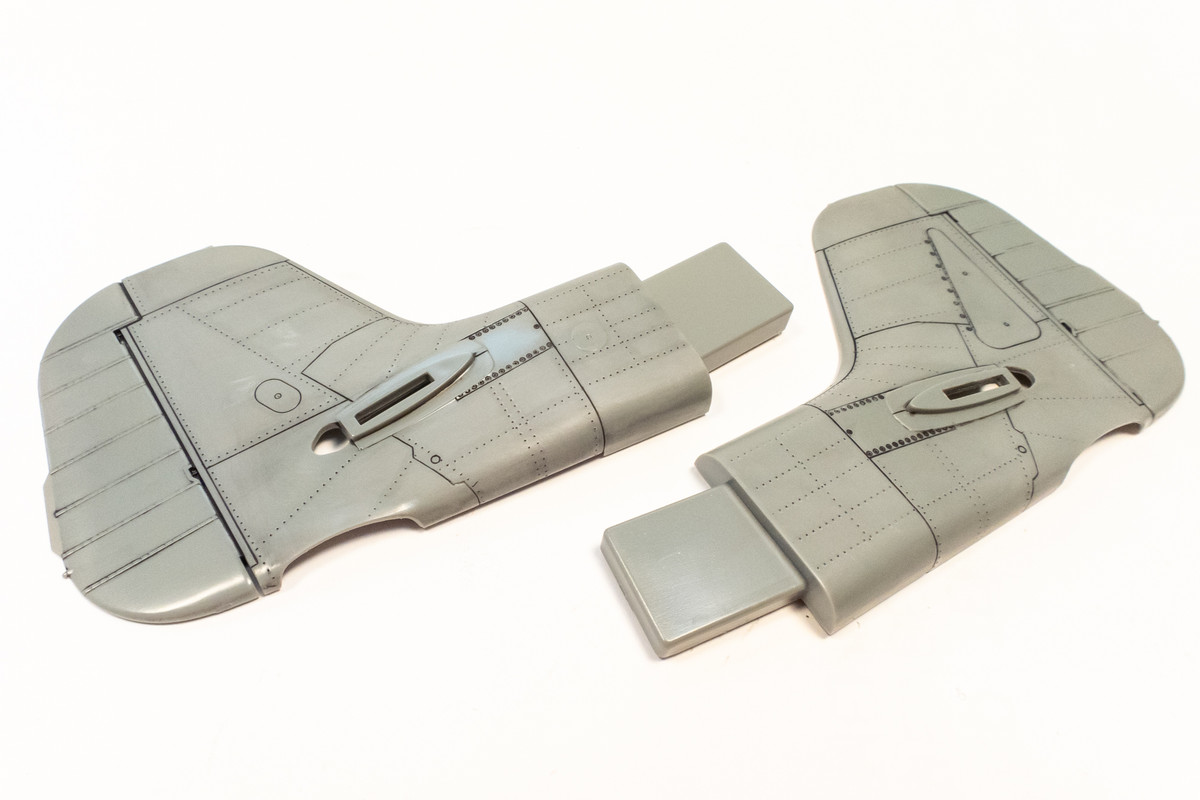
I use this stage to check the panel lines and clean those up as appropriate.
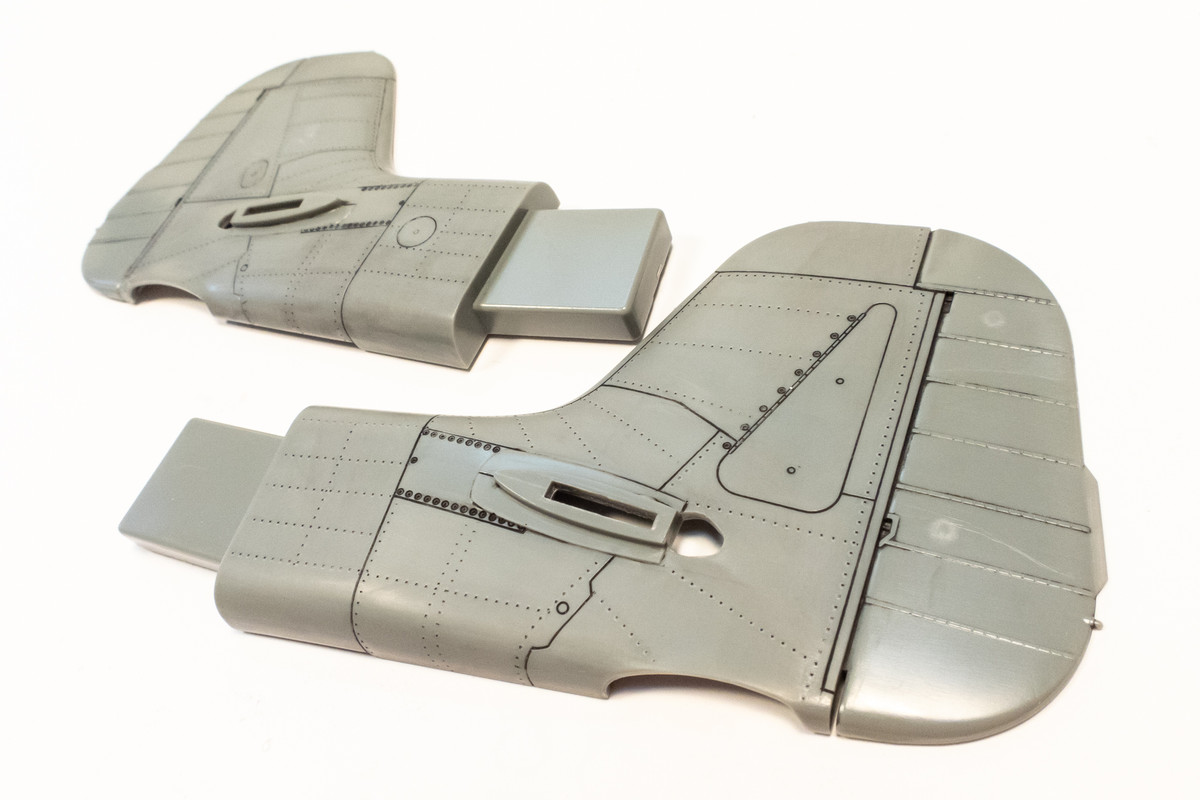
After this process is finished and I'm satisfied with the rivets and panel lines, I'll scrub off as much of the pastel wash as possible. The rivet holes are quite small and may fill up with the multiple layers of paint that are to come.
First, I draw the rivet lines using a set of detailed drawings. I'm doing the tail first so the plans are for a Ta-152H-1. I use a soft lead pencil and a flexible clear ruler. I'm not an exact rivet applicator and I usually just eyeball the lines instead of measuring.
Once the lines are drawn, I trace over the lines with a rotary rivet tool. It's like a ponce wheel for sewing but there are several out there manufactured specifically for modeling. For this model, I am using the Galaxy Tools 1.00mm dot pitch tool. One good thing about the Galaxy Tools is that the dot pattern for the large 1.00mm dot pitch tool matches the small 1.00mm tool exactly. If you are using the RB Rivet-R, be aware that the dot pitch of 1.00mm wheel may not match the Mini Rivet-R 1.00 wheel. I use the larger wheel mostly but in tight spaces or around curves, the smaller wheel is handy.
Using constant pressure, the rivet tool is run over each drawn line, producing a row of small holes.
The process leaves a raised mound of plastic around each hole. You can leave this as is but I like to lightly sand away those mounds, leaving just the hole. The effect is cleaner. The part is then treated with a dark pastel wash (in this case black) to highlight the work.
I use this stage to check the panel lines and clean those up as appropriate.
After this process is finished and I'm satisfied with the rivets and panel lines, I'll scrub off as much of the pastel wash as possible. The rivet holes are quite small and may fill up with the multiple layers of paint that are to come.
John aka JKim
-----------<><
-----------<><