Impressive indeed. I’ll have to check out the site and see what else there is.Stikpusher wrote:Stencil masks… very impressive!
Hasegawa 1/32 Fw 190D-9 Brown 4
-
BlackSheep214

- Elite Member
- Posts: 10414
- Joined: Sun Apr 06, 2014 8:47 pm
Re: Hasegawa 1/32 Fw 190D-9 Brown 4
“Who controls the skies, controls the fate of this Earth”
Author unknown- 352nd Fighter Group, Blue-Nosed Bastards of Bodney
“Send one plane it’s a sortie; send two planes it’s a flight; send four planes it’s a test of airpower. - Richard Kohn
Author unknown- 352nd Fighter Group, Blue-Nosed Bastards of Bodney
“Send one plane it’s a sortie; send two planes it’s a flight; send four planes it’s a test of airpower. - Richard Kohn

Re: Hasegawa 1/32 Fw 190D-9 Brown 4
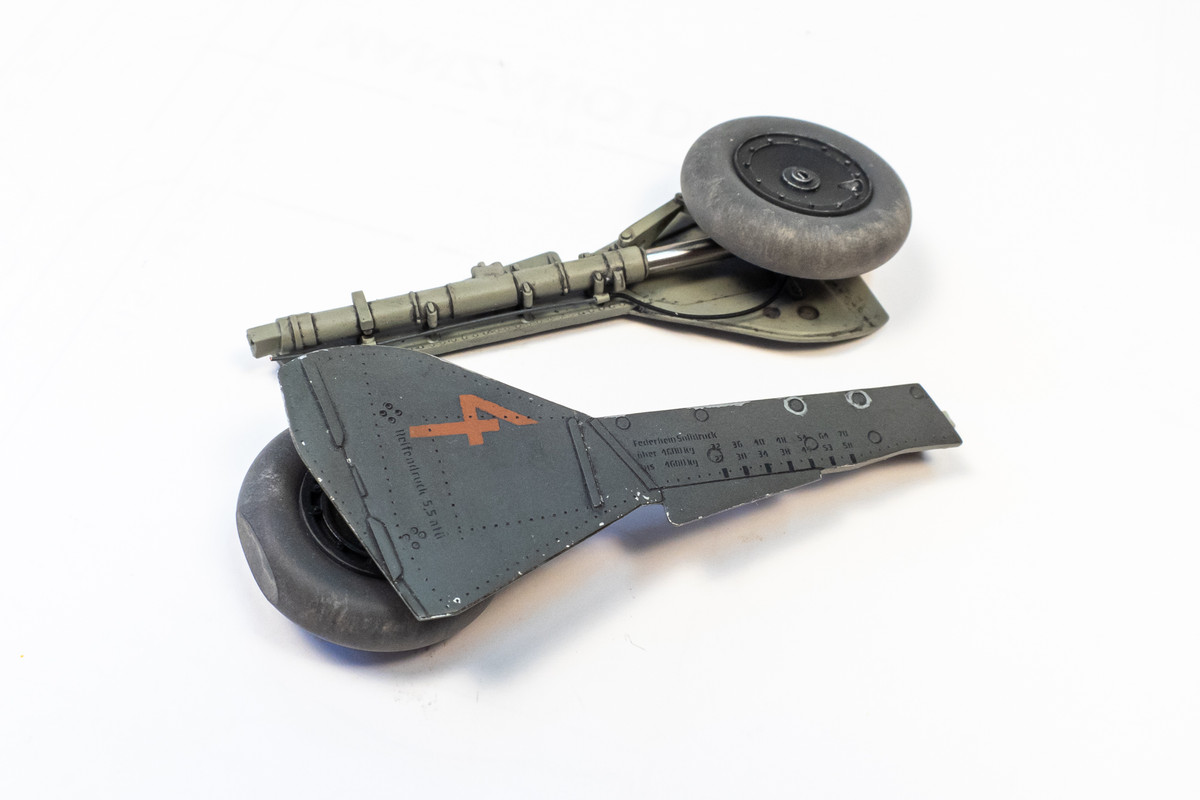
Part Two of painting the exterior of the landing gear covers. A base coat of Tamiya AS-12 decanted into the airbrush was treated with hairspray and covered with RLM 74 Dark Grey (Mr Hobby Aqueous). A stiff paint brush dipped in water was used to disrupt the RLM 74 and cause chipping, mostly around the edges of the covers.
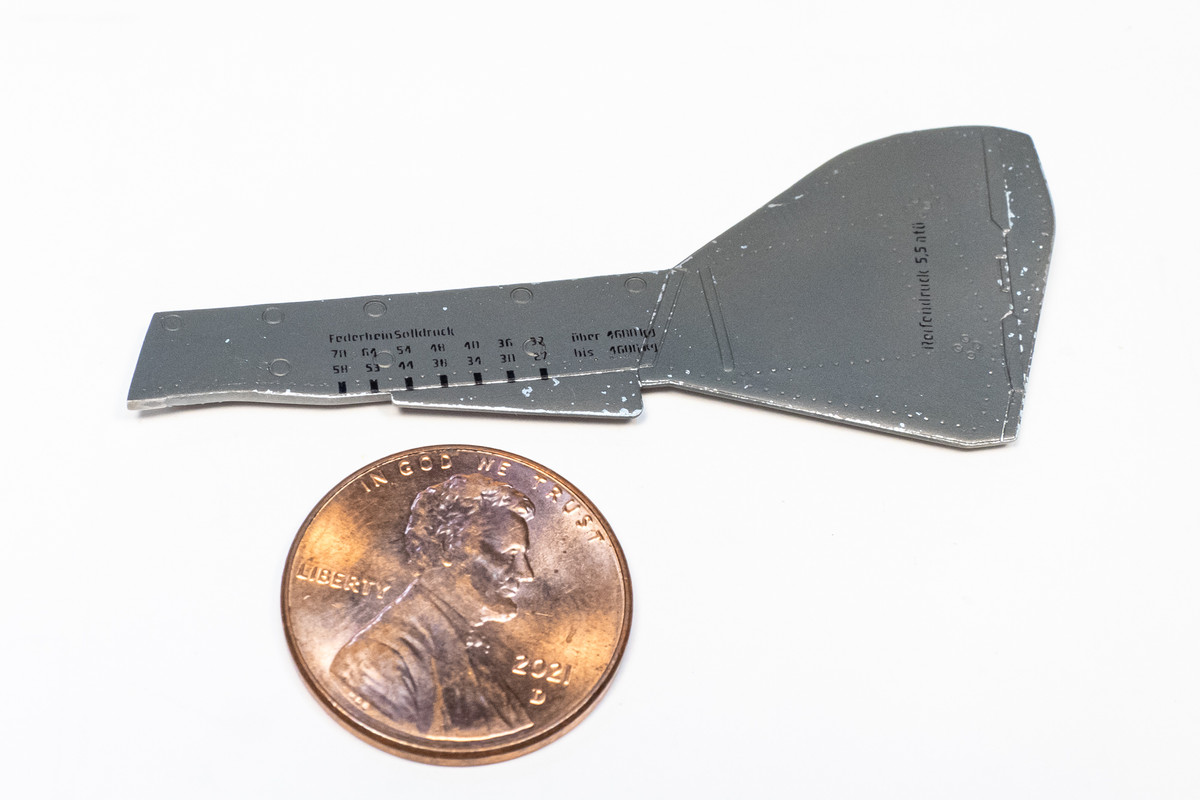
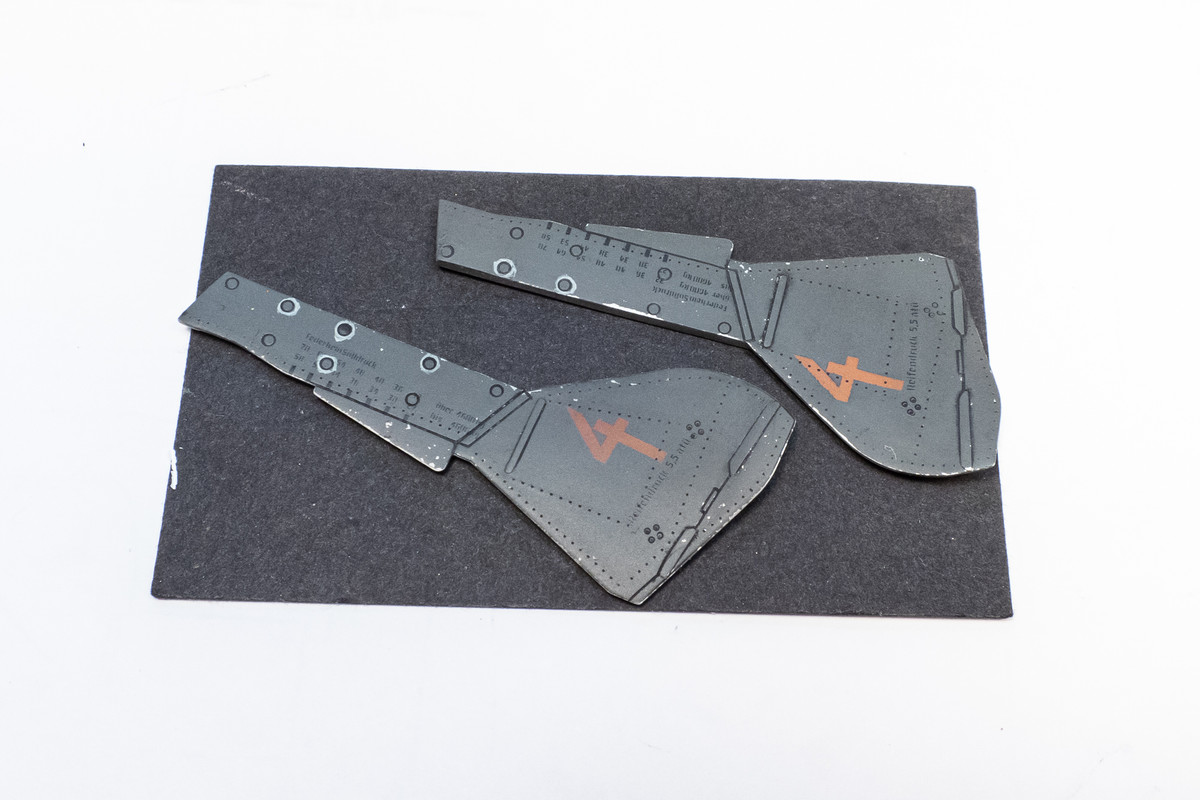
I changed up the order and painted the data stencils next. Compared to a US nickel and penny, you can get a sense of how incredibly fine the text is.
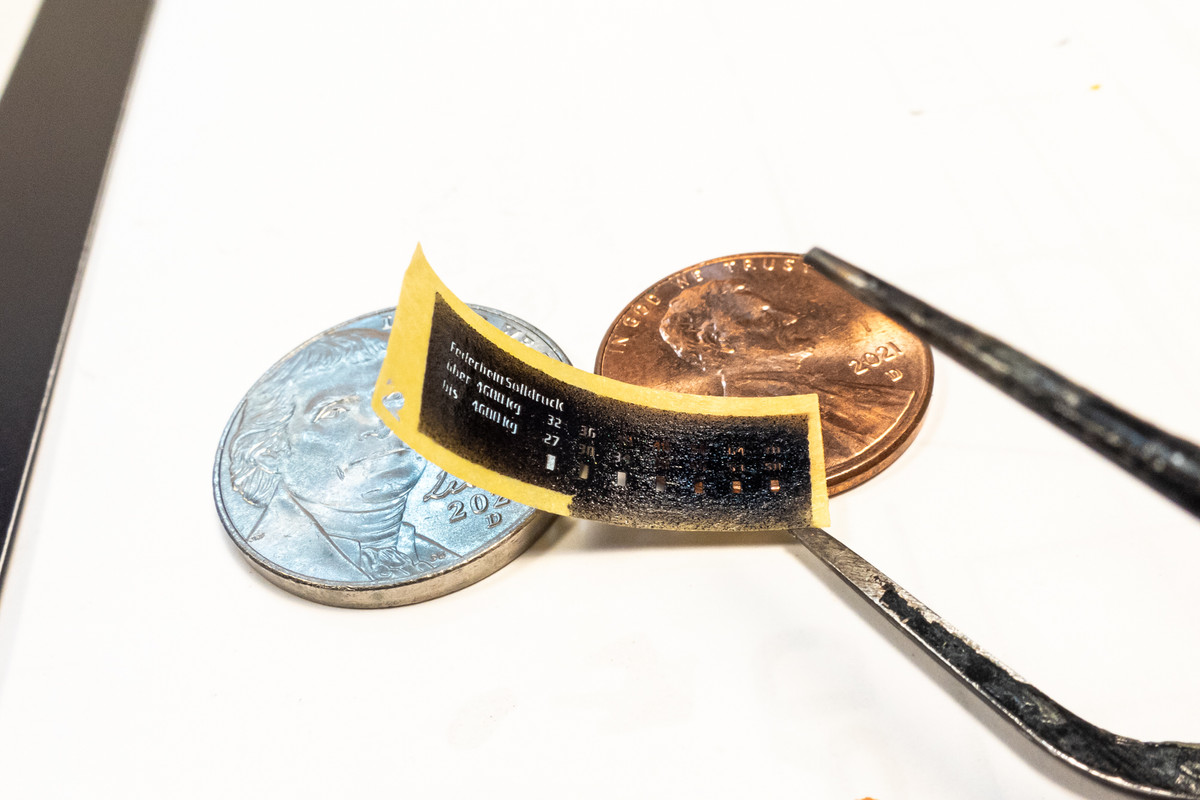
The stencil masks have a lost a bit of their adhesiveness but retained enough to still work well.
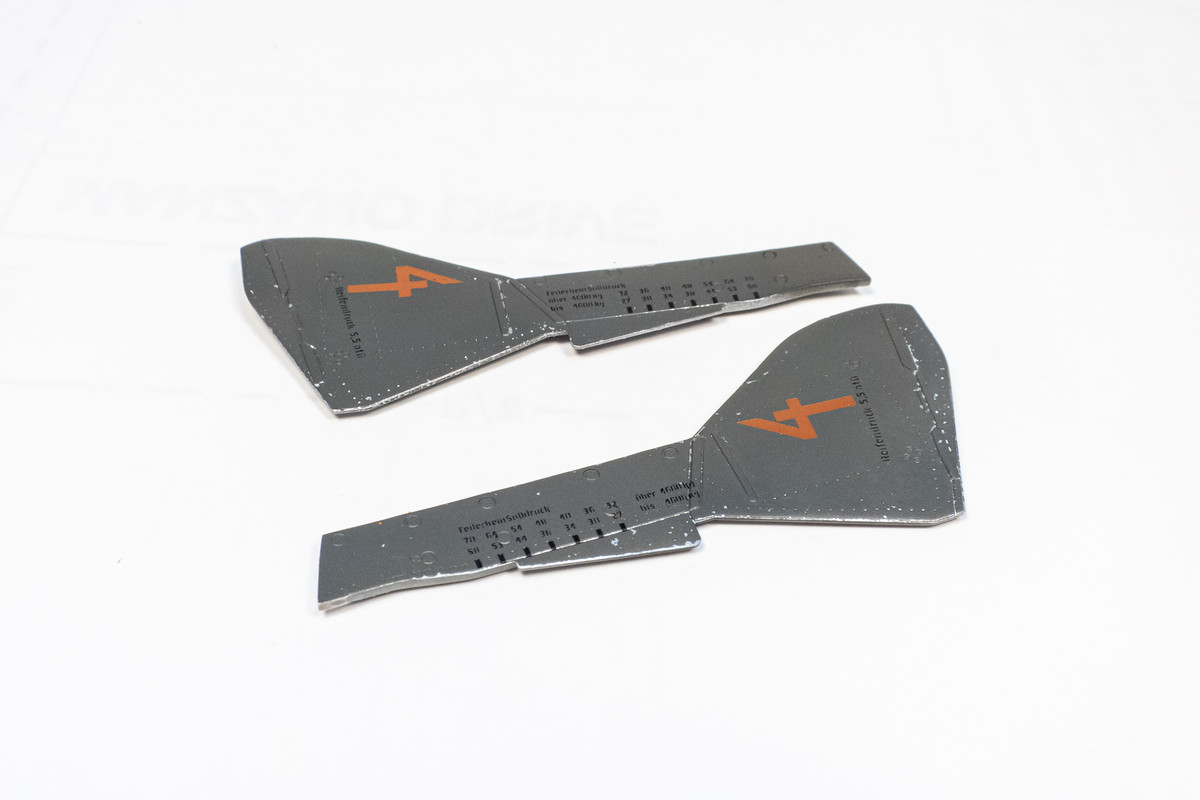
The custom recipe for the brown was mixed and used to paint the "4" via custom cut masks.
The landing gear cover attachment bolts were often in need of repair and many Doras have visible primer applications around these bolts. I replicated this by brush painting rough circles around a few random bolts using RLM 76 Light Blue (Mr Hobby Aqueous). The covers were then sprayed with Alclad Aqua Gloss thinned with 91% iso alcohol instead of Mr Leveling Thinner. A black pastel wash was used to highlight the rivets and panel lines and the gear covers were given a flat coat (Model Master Clear Flat Acryl) to seal the painting.
I changed up the order and painted the data stencils next. Compared to a US nickel and penny, you can get a sense of how incredibly fine the text is.
The stencil masks have a lost a bit of their adhesiveness but retained enough to still work well.
The custom recipe for the brown was mixed and used to paint the "4" via custom cut masks.
The landing gear cover attachment bolts were often in need of repair and many Doras have visible primer applications around these bolts. I replicated this by brush painting rough circles around a few random bolts using RLM 76 Light Blue (Mr Hobby Aqueous). The covers were then sprayed with Alclad Aqua Gloss thinned with 91% iso alcohol instead of Mr Leveling Thinner. A black pastel wash was used to highlight the rivets and panel lines and the gear covers were given a flat coat (Model Master Clear Flat Acryl) to seal the painting.
John aka JKim
-----------<><

-----------<><
-
tempestjohnny
- Elite Member
- Posts: 3347
- Joined: Sat Oct 15, 2016 4:51 am
- Location: Naples. FL
Re: Hasegawa 1/32 Fw 190D-9 Brown 4
The covers look real
Re: Hasegawa 1/32 Fw 190D-9 Brown 4
Thanks Johnny!
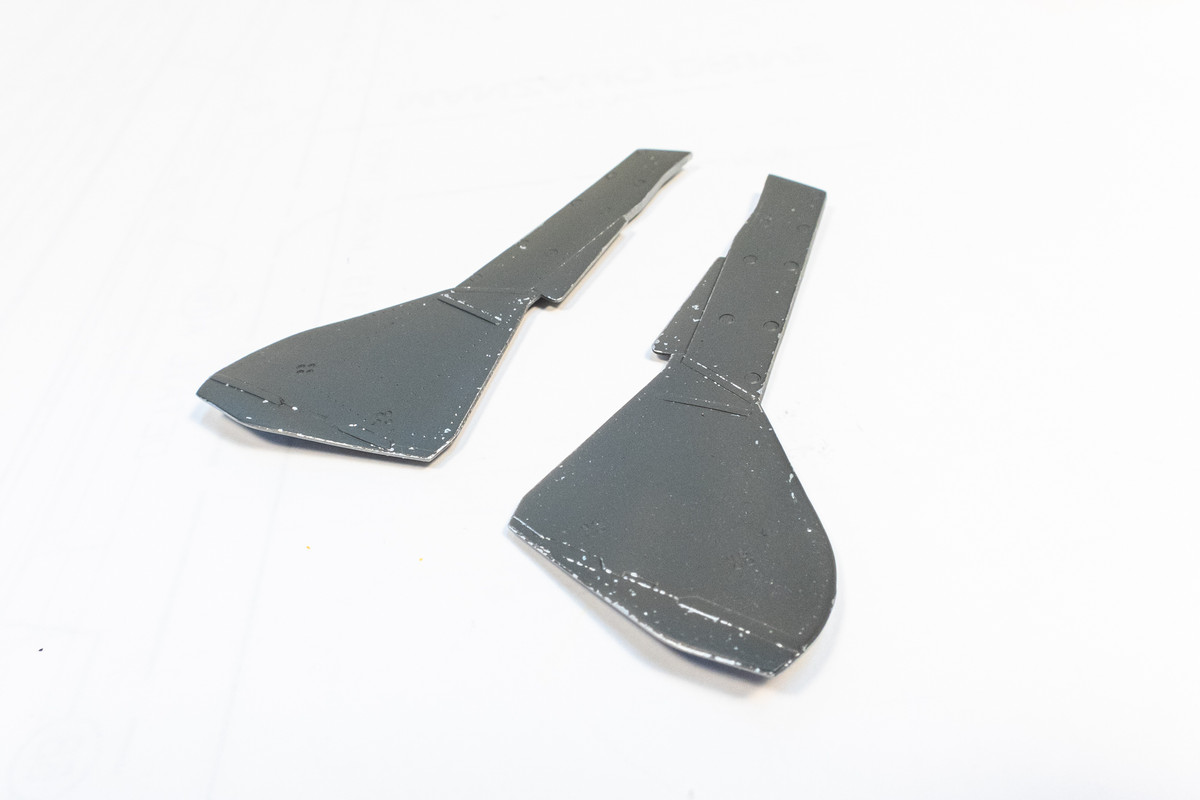
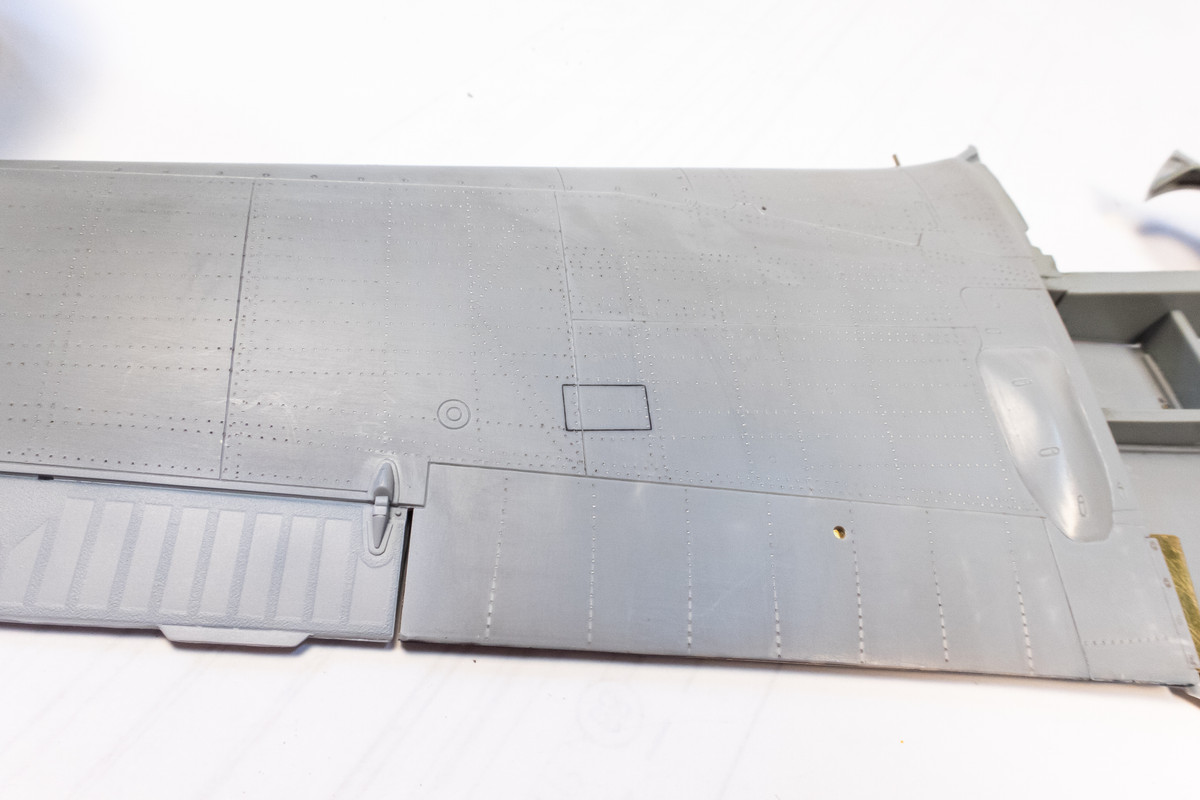
Here's a look at few more fabric-covered control surfaces per Archer's decals covered with primer.
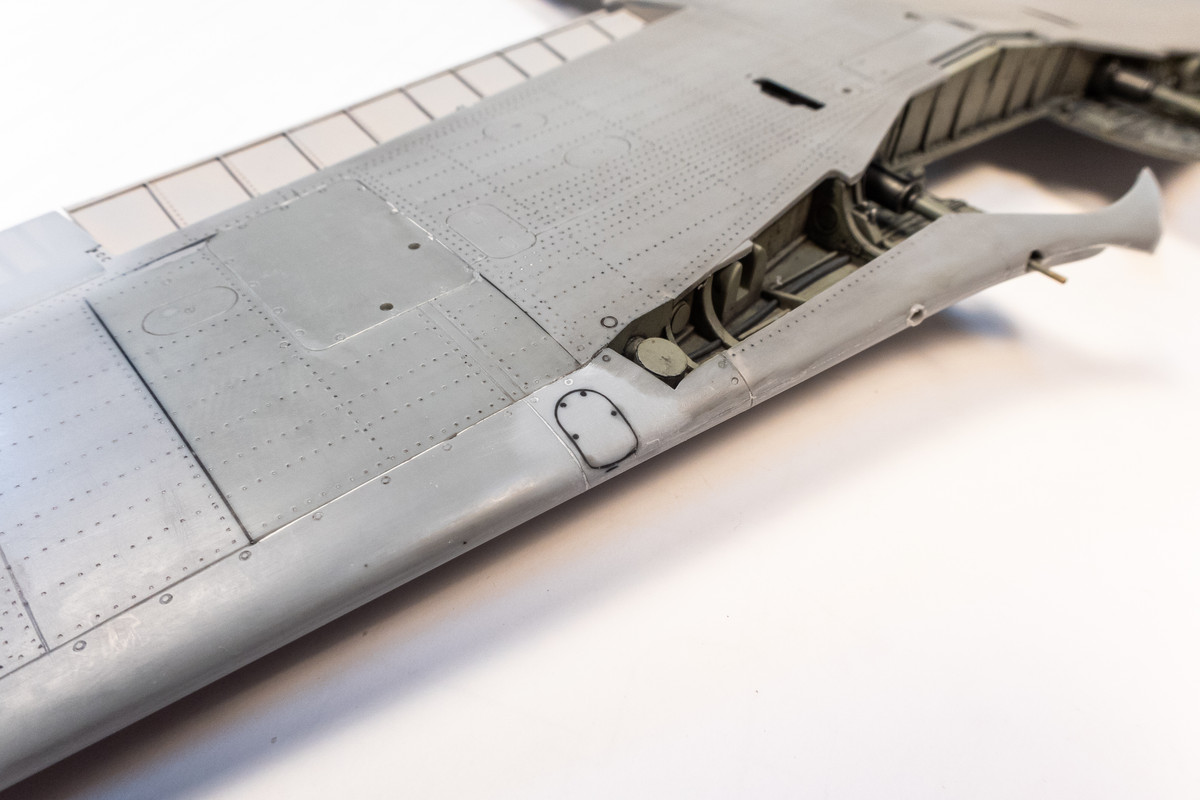
Now that the control surfaces are done, I can move forward toward completing the wings. The Quickboost resin cannon barrels are glued into the wheel well.
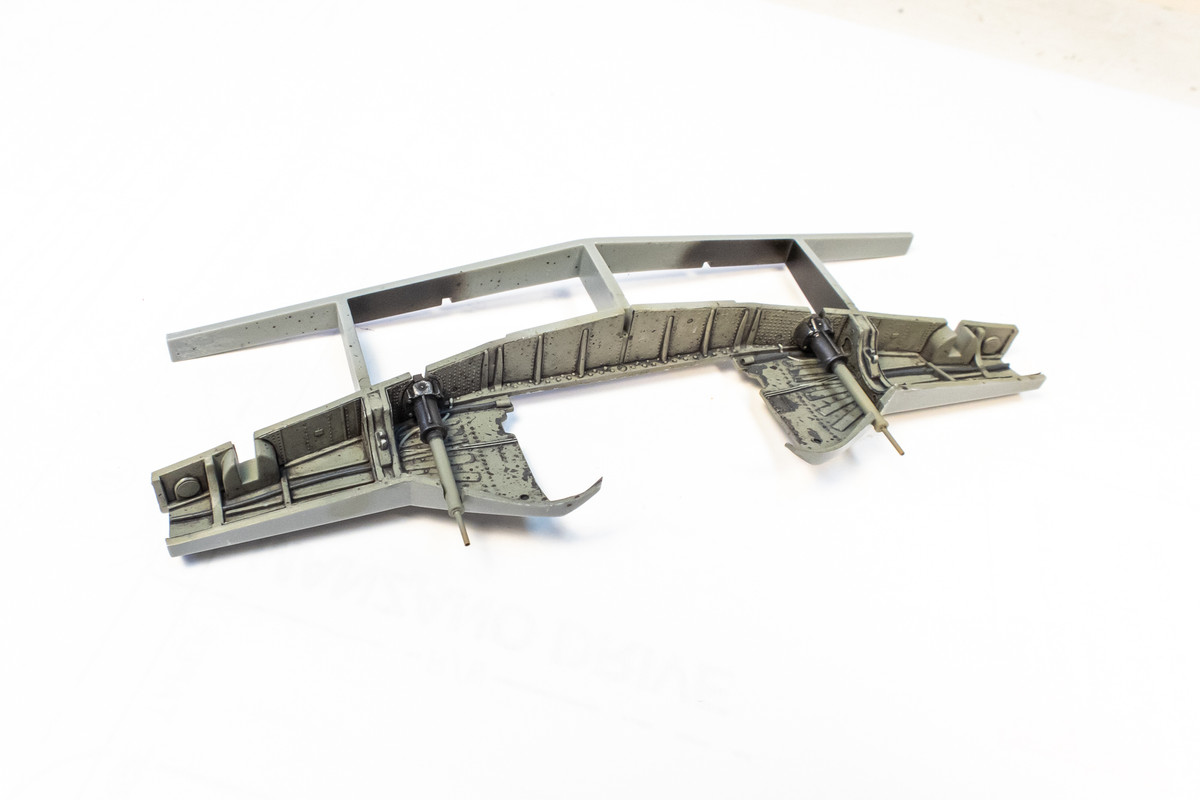
The attachment for the landing gear is molded into the wing bottom so don't forget to paint that to match the rest of the wheel wells.
The wheel well insert is then glued into the wing bottoms using Tamiya Extra Thin cement.
While the glue dries, I've jumped over to the landing gear legs to finish those off. The brake lines, made of copper wire and painted black, are glued into place.
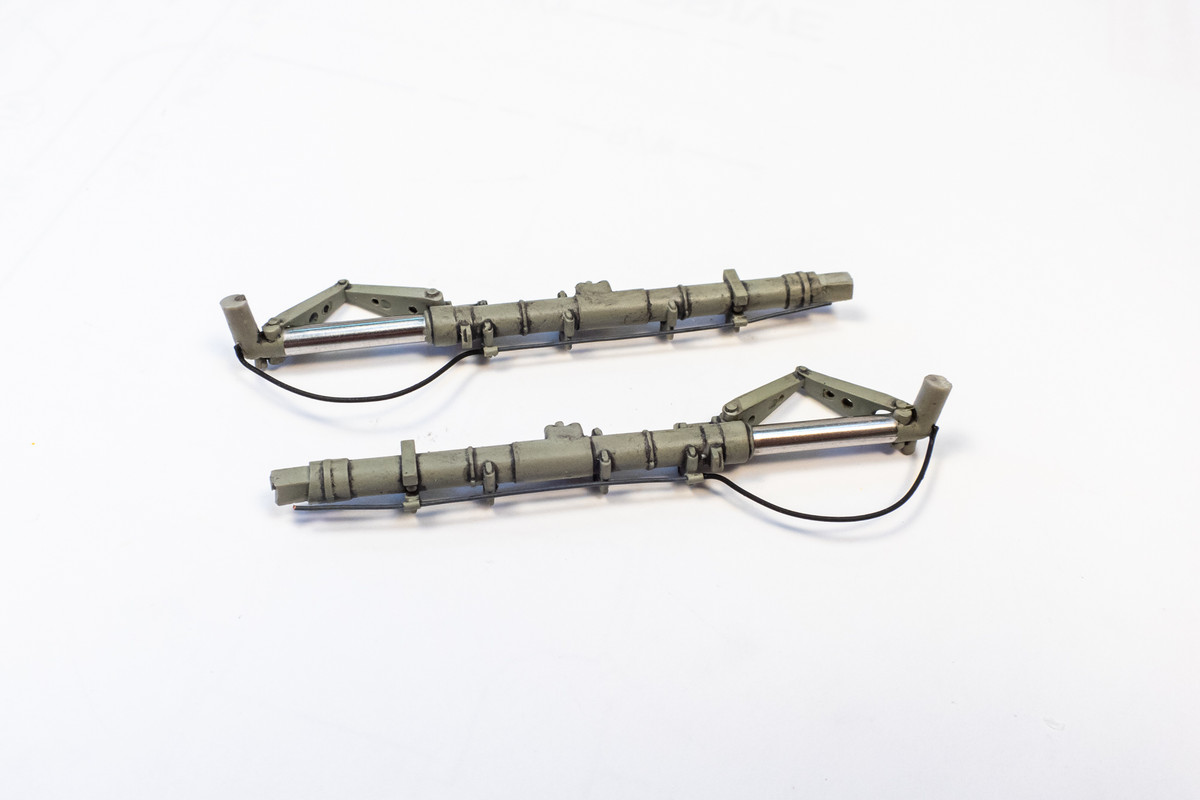
The interior of the landing gear covers were painted in RLM 02 Grey (Mr Hobby Aqueous). The SOW composite legs are glued using CA glue.
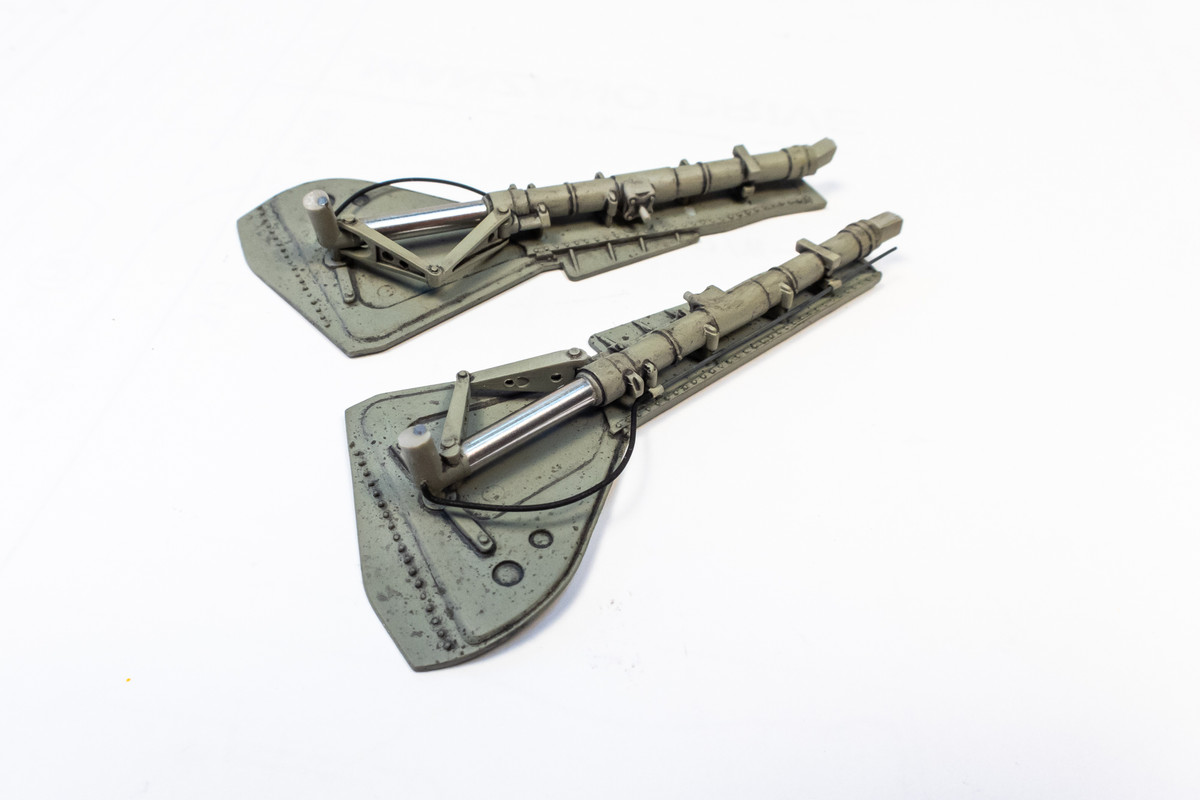
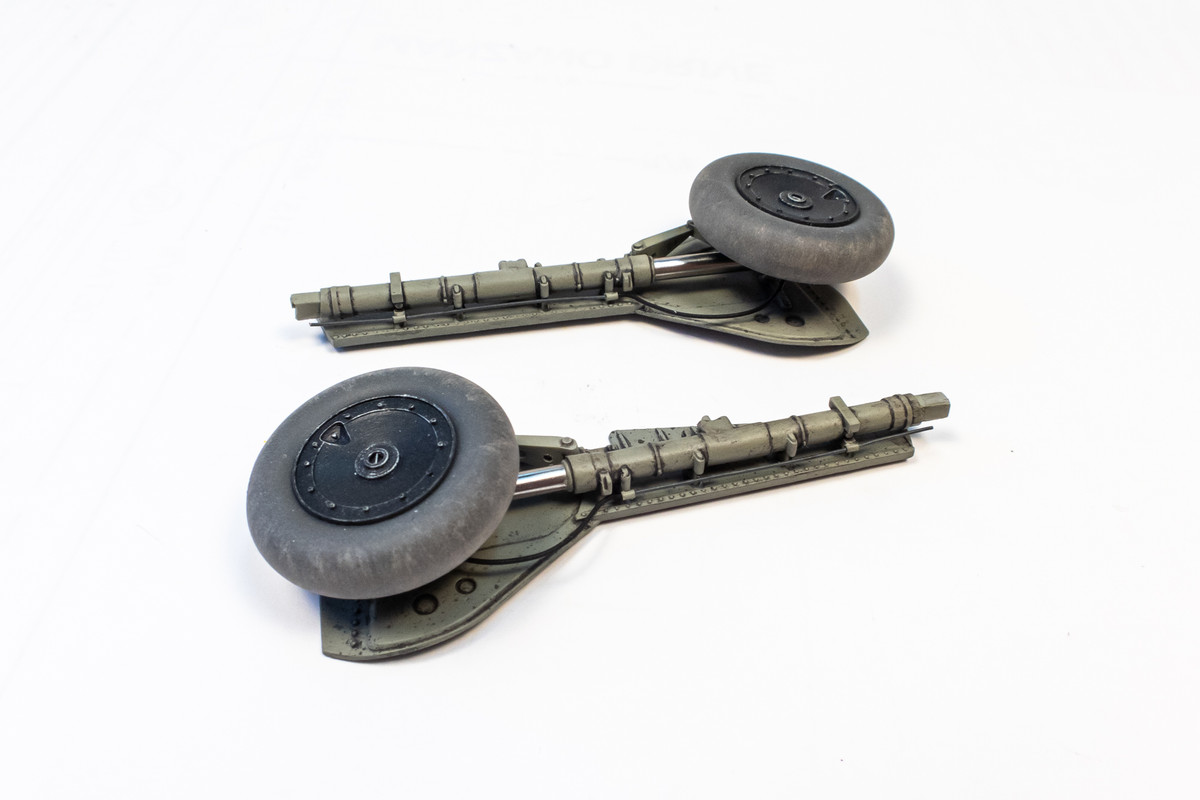
The wheels will not be mounted until after the plane can sit on her own legs so that I can properly orient the flat spots. But here is what the completed landing gear legs look like with the wheels on.
Here's a look at few more fabric-covered control surfaces per Archer's decals covered with primer.
Now that the control surfaces are done, I can move forward toward completing the wings. The Quickboost resin cannon barrels are glued into the wheel well.
The attachment for the landing gear is molded into the wing bottom so don't forget to paint that to match the rest of the wheel wells.
The wheel well insert is then glued into the wing bottoms using Tamiya Extra Thin cement.
While the glue dries, I've jumped over to the landing gear legs to finish those off. The brake lines, made of copper wire and painted black, are glued into place.
The interior of the landing gear covers were painted in RLM 02 Grey (Mr Hobby Aqueous). The SOW composite legs are glued using CA glue.
The wheels will not be mounted until after the plane can sit on her own legs so that I can properly orient the flat spots. But here is what the completed landing gear legs look like with the wheels on.
John aka JKim
-----------<><
-----------<><
Re: Hasegawa 1/32 Fw 190D-9 Brown 4
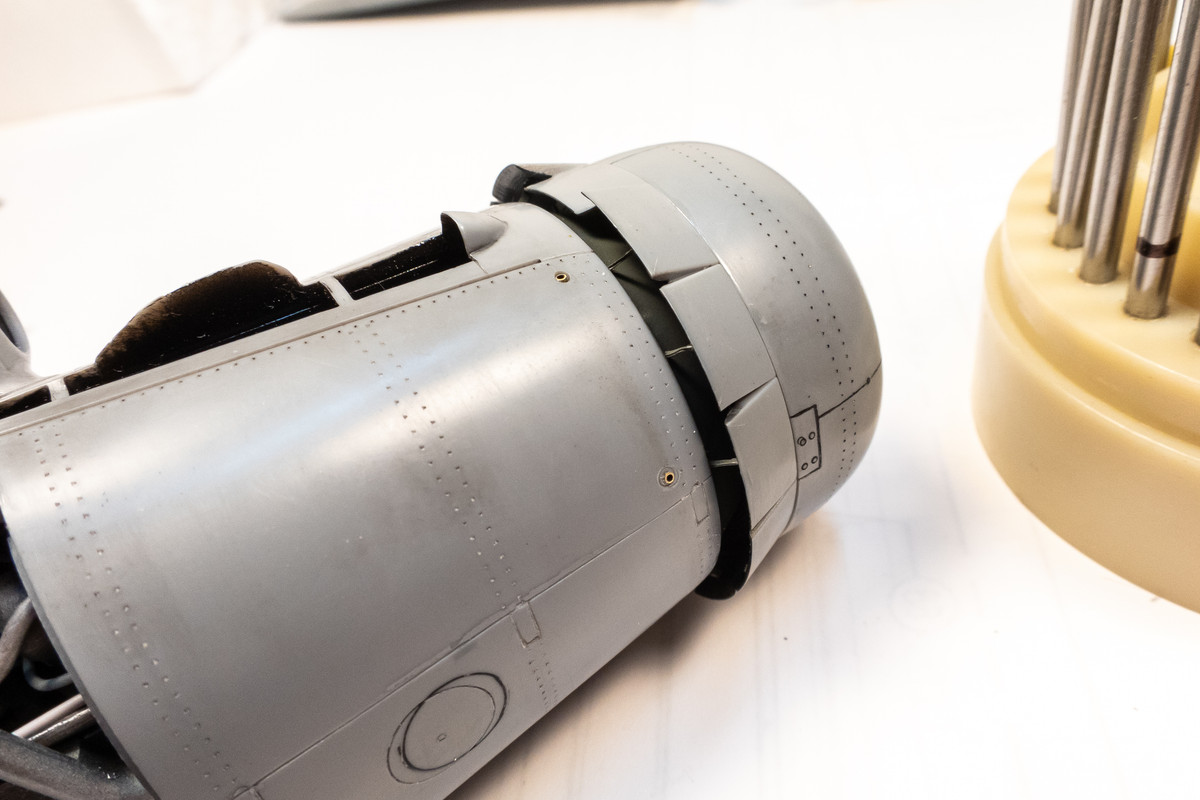
Work continues on Brown 4... I've augmented the coolant and oil overflow ports with brass tubing.
Here is a look at the rudder with the Archer control surface decal applied. This one took the most time and effort since the Ta152H tail is slightly different than the standard 190 and the decal had to be custom cut to fit.

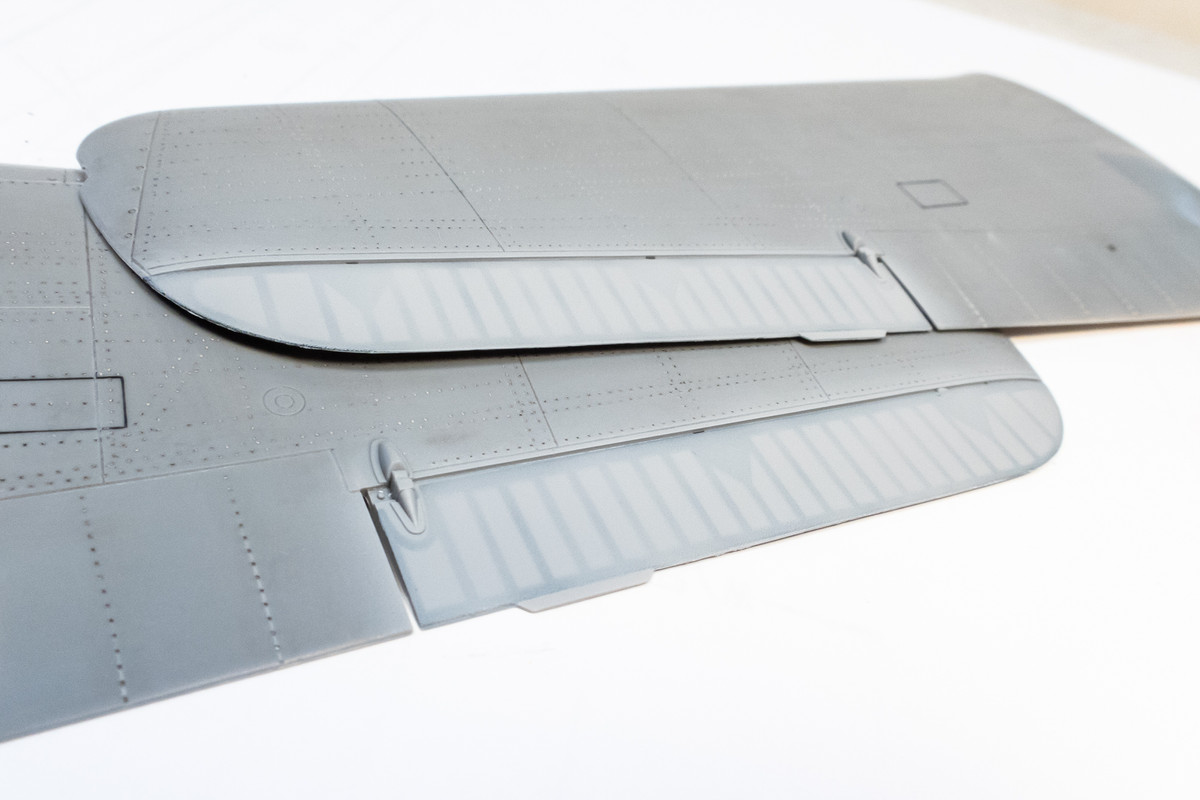
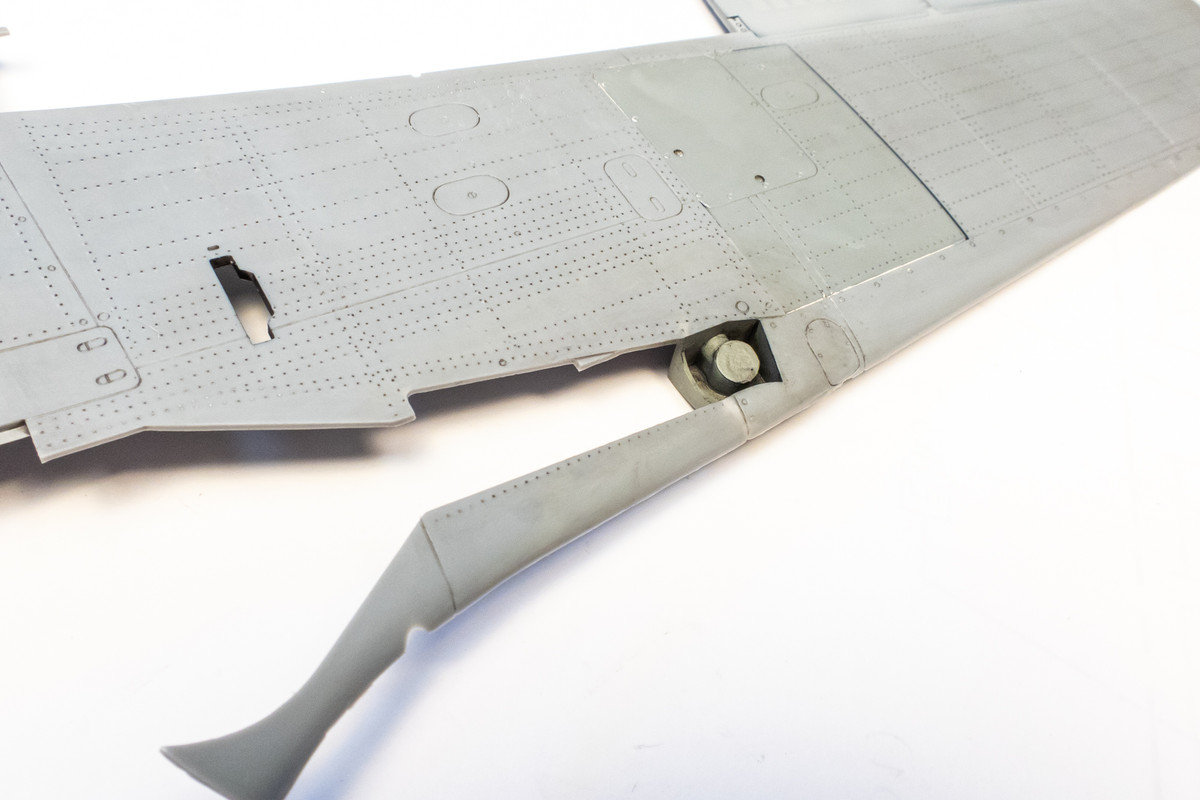
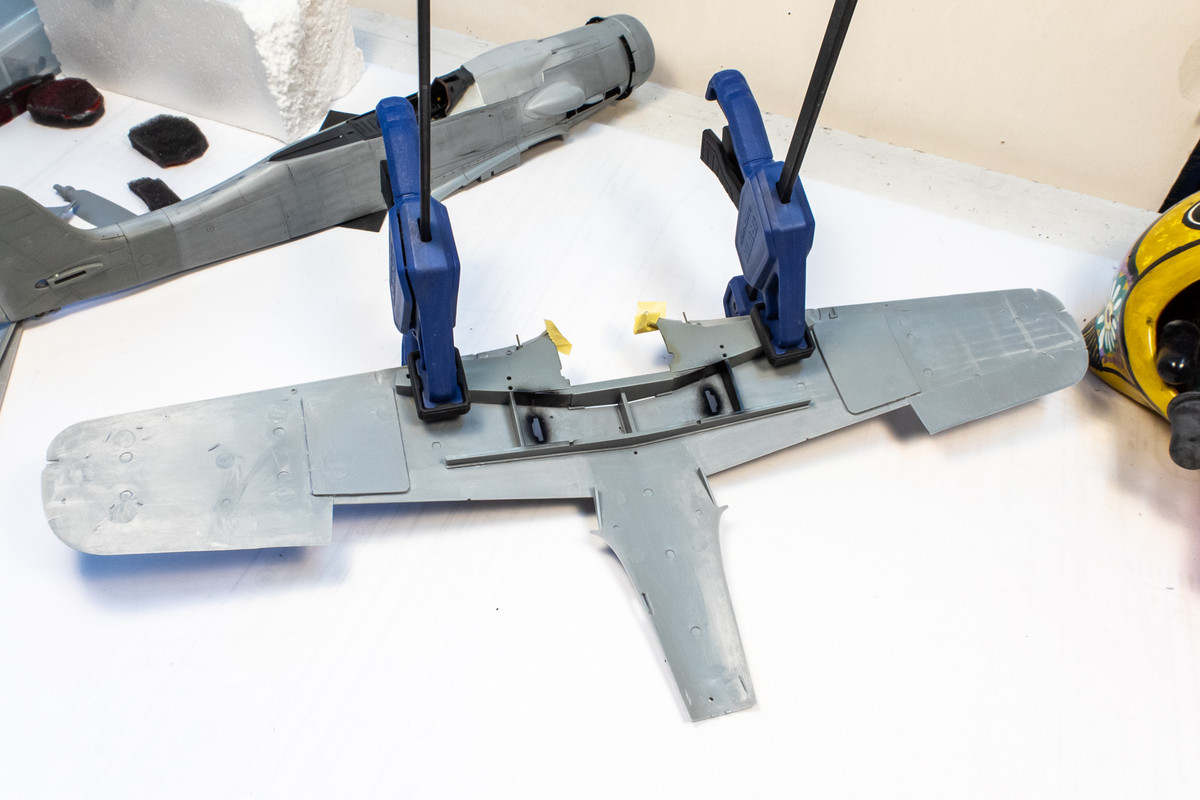
The upper wings have been glued onto the wing bottom. I'll take some time inspecting the glue seam and cleaning it up.
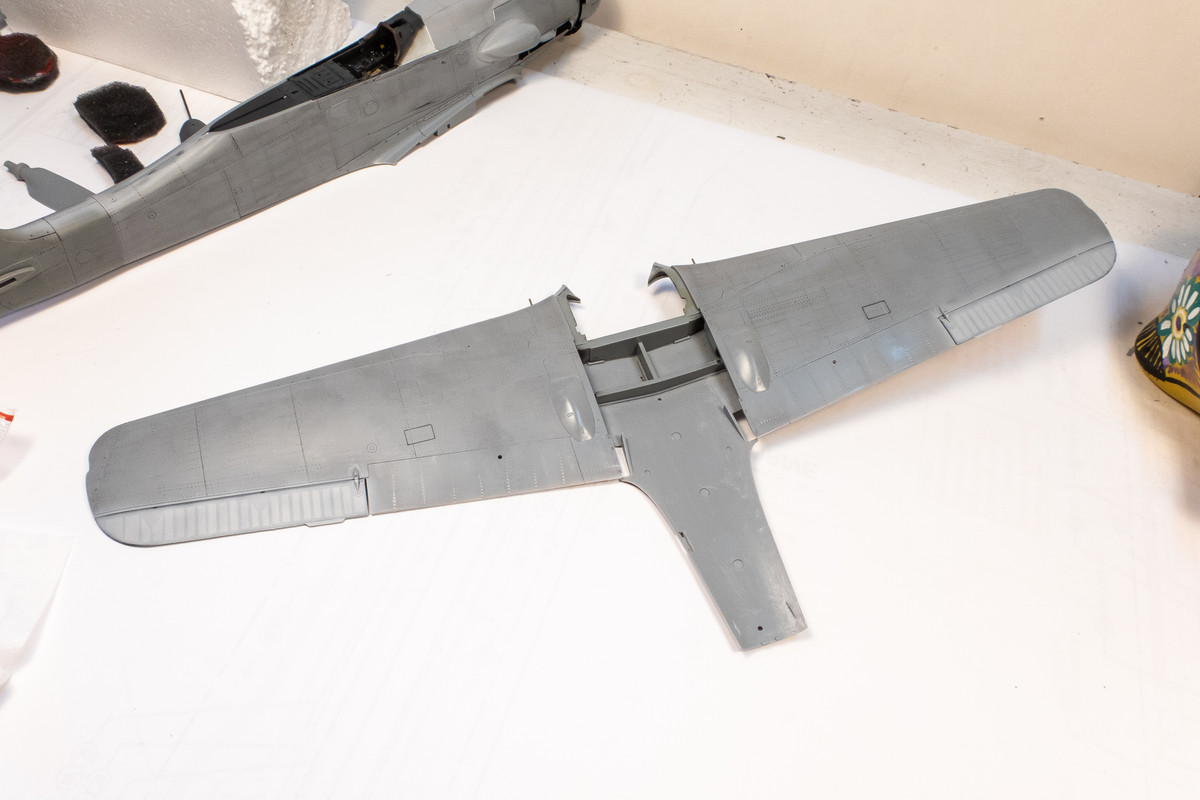
The brass flap bays have been glued into place using CA glue. I'm going to run a bead of black CA glue along the trailing edge since it is both a glued joint and a PE folding edge.

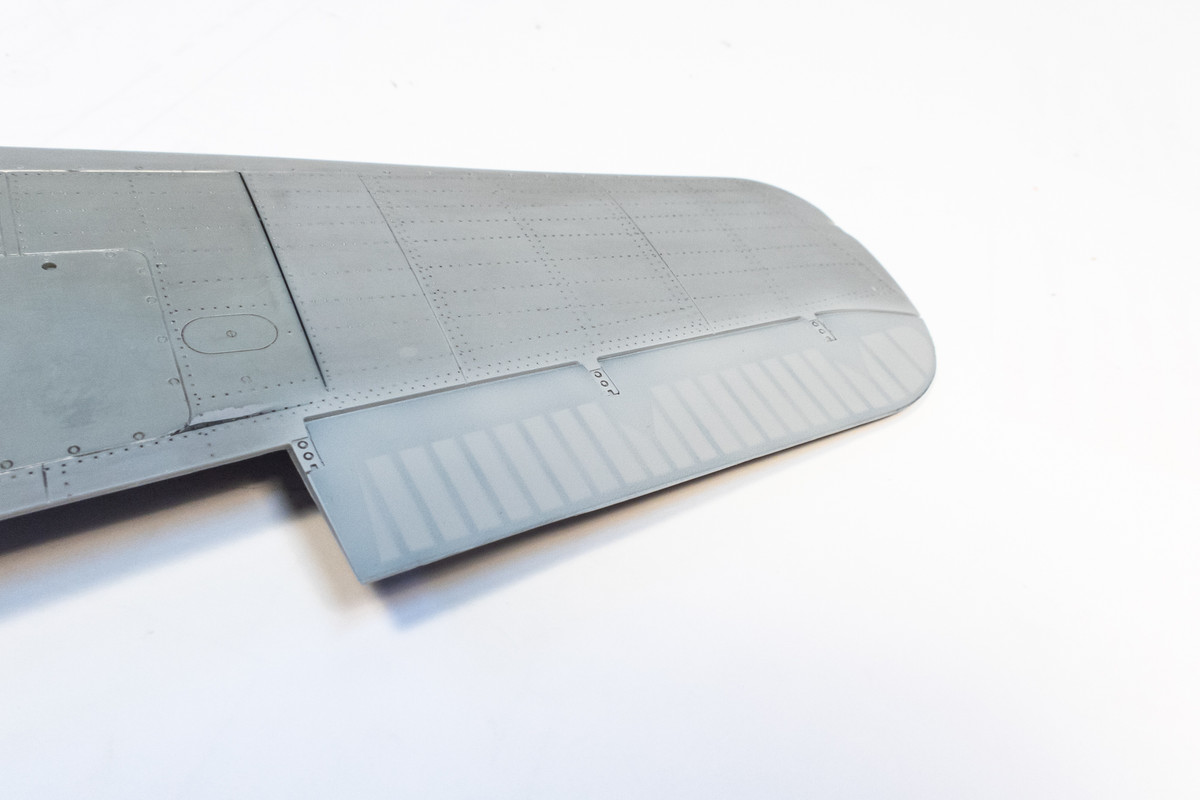
This oval panel just outboard of the landing gear attachment has been filled with black CA glue. From my understanding, this panel indicates a conversion from a 190A, which had an outer wing gun position. Since not D-9's were converted from earlier A-series airframes, this panel is not present on all Doras. I have a decent view of the leading edge of Brown 4's wing and based on that photo, I am removing this panel.
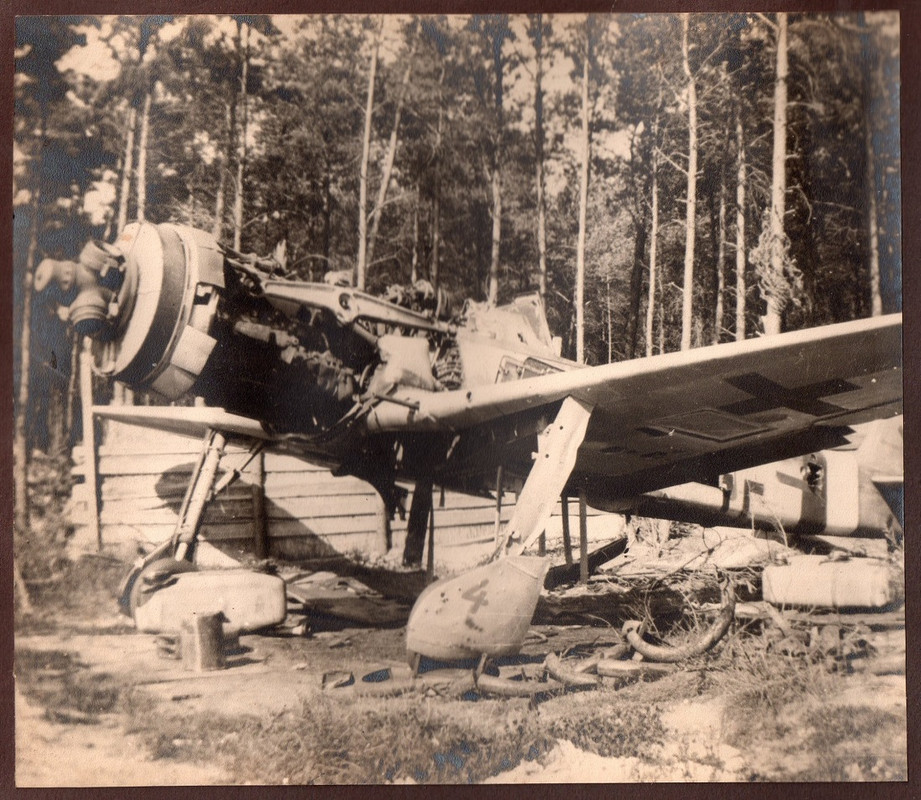
This might be related to the panel that I've removed from the upper wing. My guess is that it is related to a conversion from an 190A wing. Again, I have a reference photo that happens to show that area of the wing and I can see no indication of the panel so it too has been filled with black CA glue.

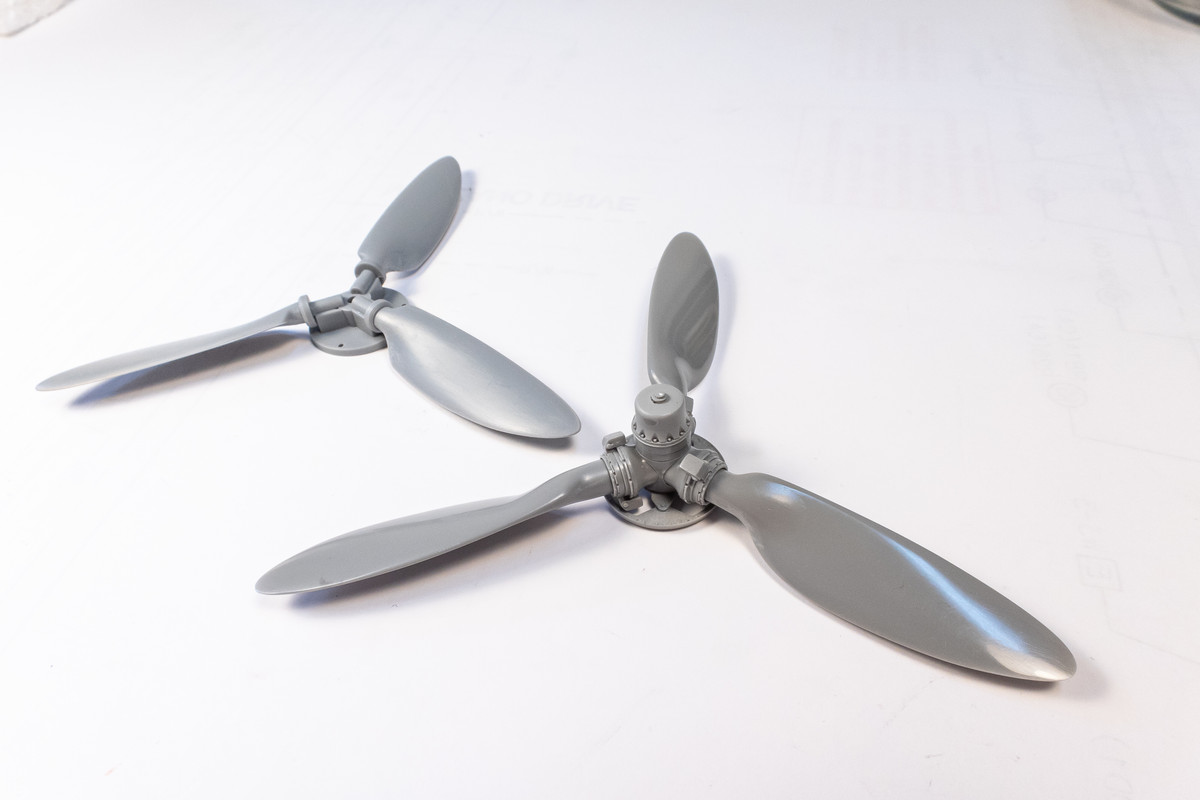
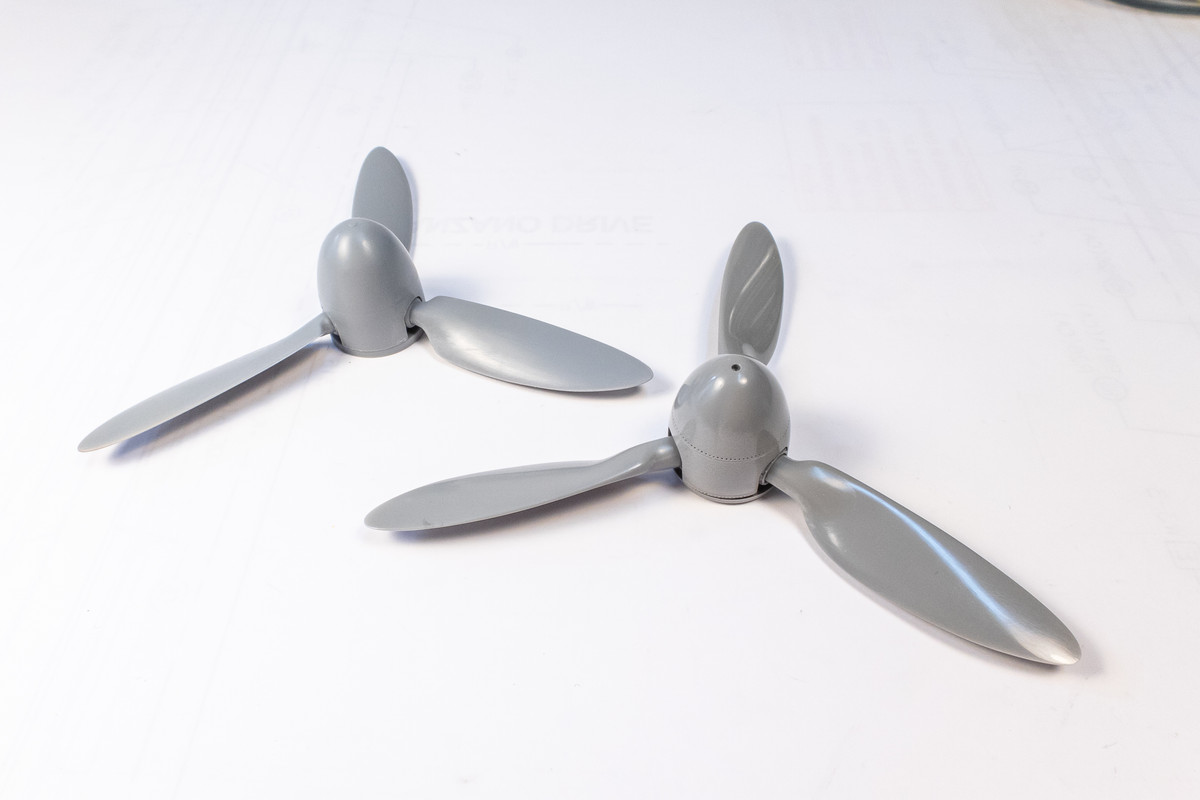
Let's a take a look at the kit prop compared to the resin prop from Henri Daehne. Beyond the subtle shape differences, the resin spinner has a nicely defined panel line around the middle with a row of rivets. The openings for the prop blades is noticeably larger on the HD version as well.
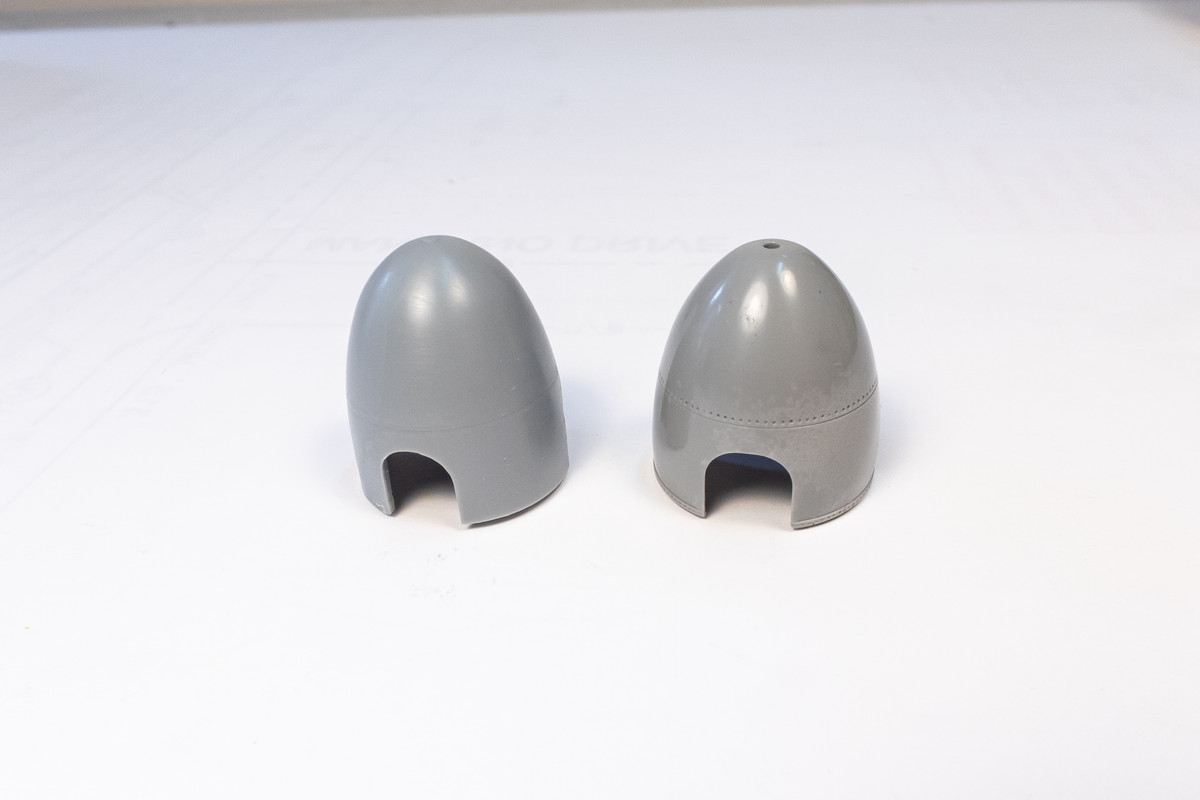
The larger opening is necessary to accommodate the well-detailed prop blade attachment rings, complete with counterweights.. The prop blades shapes are similar but the HD's is "curvier" with a noticeable hump at the base of prop blade.
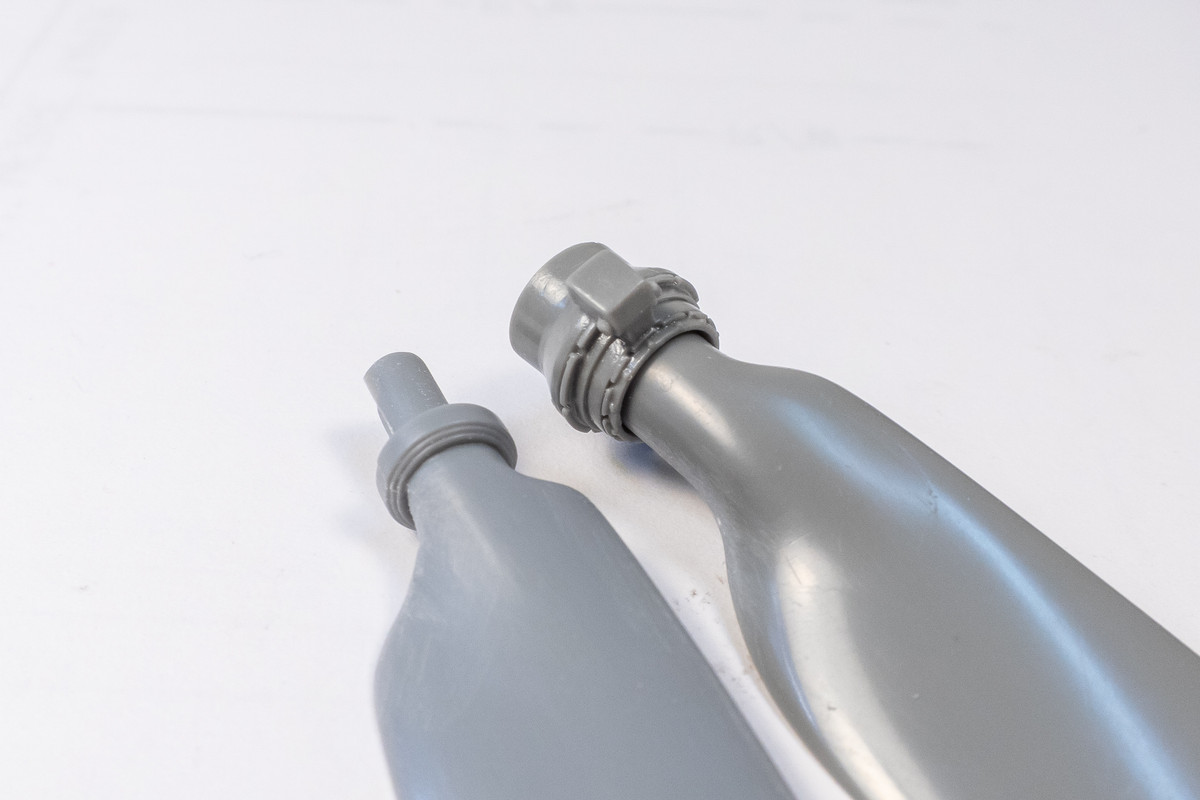
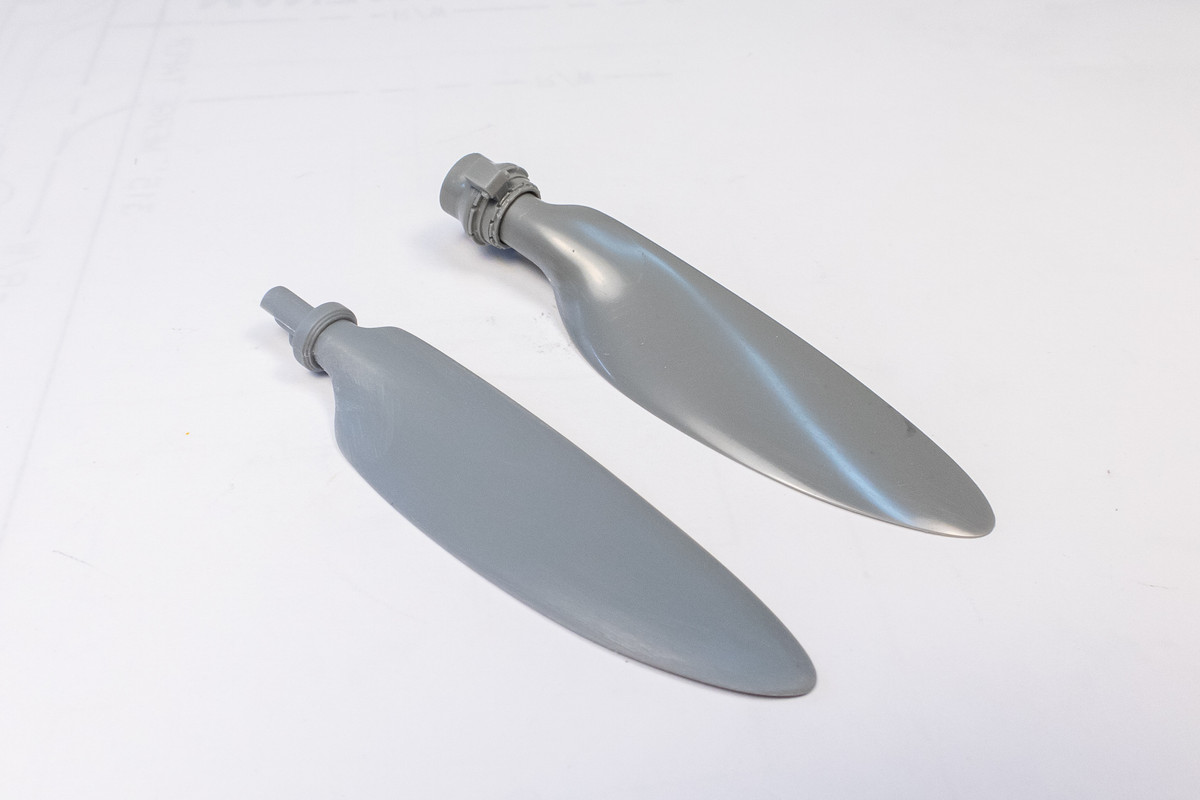
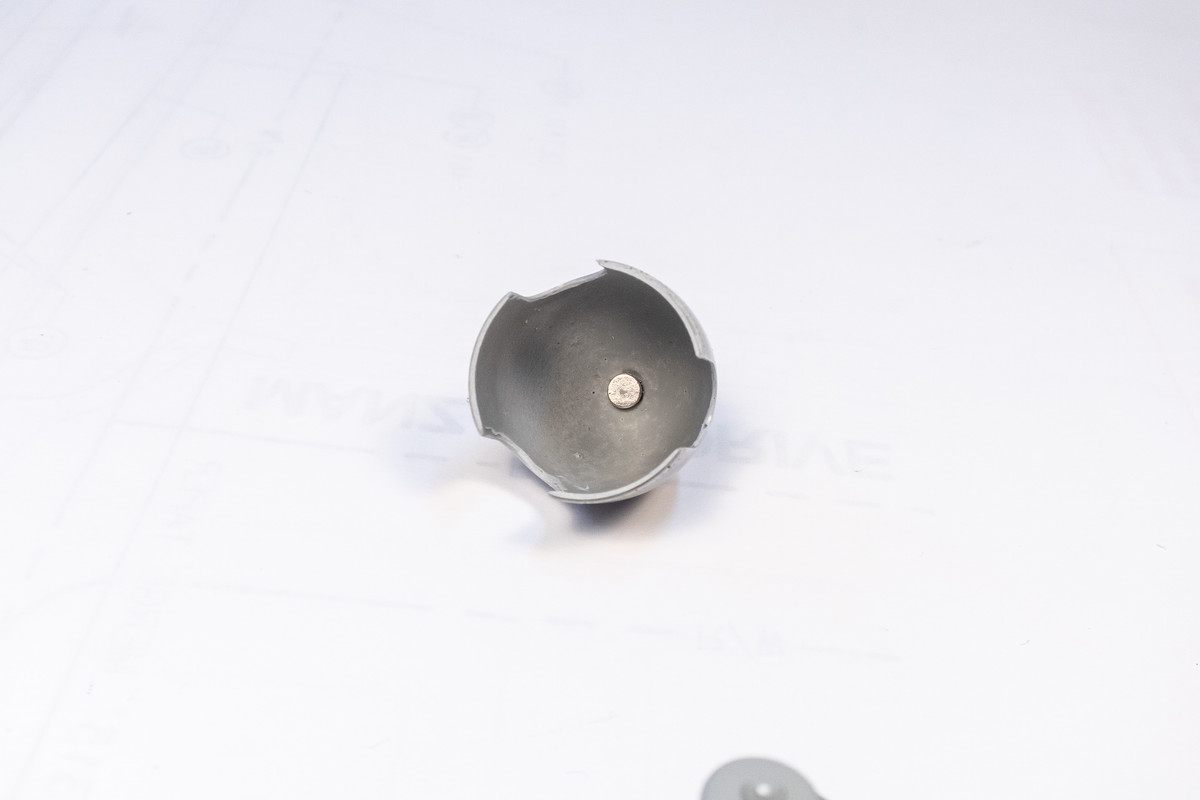
The prop hub and backplate... no comparison between the two! Please note the that I've already modified the hub cover and embedded a tiny magnet within.
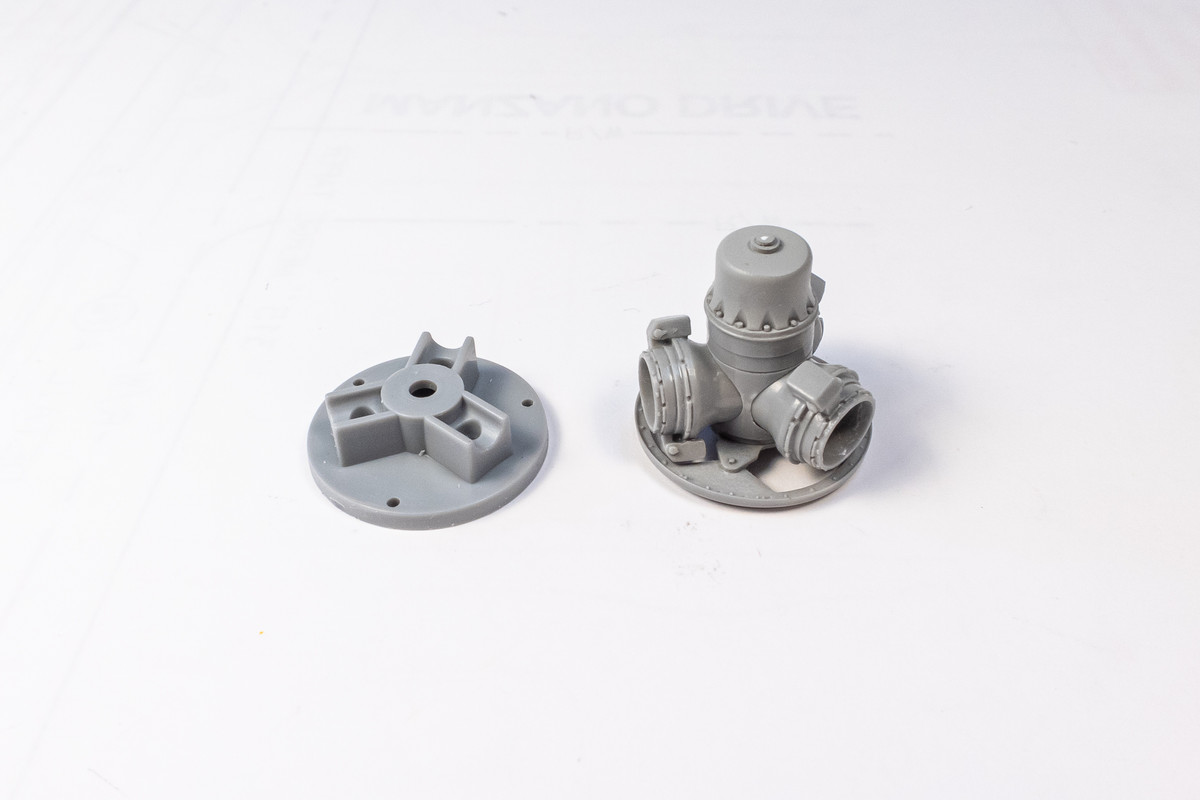
This matches another magnet that I've glued into the spinner cap, allowing the removal of the spinner cap to show the detail underneath.
I always procrastinate with the painting of nice resin parts and HD's resin props are probably the nicest resin I've run across.
Here is a look at the rudder with the Archer control surface decal applied. This one took the most time and effort since the Ta152H tail is slightly different than the standard 190 and the decal had to be custom cut to fit.
The upper wings have been glued onto the wing bottom. I'll take some time inspecting the glue seam and cleaning it up.
The brass flap bays have been glued into place using CA glue. I'm going to run a bead of black CA glue along the trailing edge since it is both a glued joint and a PE folding edge.
This oval panel just outboard of the landing gear attachment has been filled with black CA glue. From my understanding, this panel indicates a conversion from a 190A, which had an outer wing gun position. Since not D-9's were converted from earlier A-series airframes, this panel is not present on all Doras. I have a decent view of the leading edge of Brown 4's wing and based on that photo, I am removing this panel.
This might be related to the panel that I've removed from the upper wing. My guess is that it is related to a conversion from an 190A wing. Again, I have a reference photo that happens to show that area of the wing and I can see no indication of the panel so it too has been filled with black CA glue.
Let's a take a look at the kit prop compared to the resin prop from Henri Daehne. Beyond the subtle shape differences, the resin spinner has a nicely defined panel line around the middle with a row of rivets. The openings for the prop blades is noticeably larger on the HD version as well.
The larger opening is necessary to accommodate the well-detailed prop blade attachment rings, complete with counterweights.. The prop blades shapes are similar but the HD's is "curvier" with a noticeable hump at the base of prop blade.
The prop hub and backplate... no comparison between the two! Please note the that I've already modified the hub cover and embedded a tiny magnet within.
This matches another magnet that I've glued into the spinner cap, allowing the removal of the spinner cap to show the detail underneath.
I always procrastinate with the painting of nice resin parts and HD's resin props are probably the nicest resin I've run across.
John aka JKim
-----------<><
-----------<><
-
tempestjohnny
- Elite Member
- Posts: 3347
- Joined: Sat Oct 15, 2016 4:51 am
- Location: Naples. FL
Re: Hasegawa 1/32 Fw 190D-9 Brown 4
That prop is awesome
-
mustang1989

- Moderator
- Posts: 4903
- Joined: Tue Mar 18, 2014 8:35 pm
Re: Hasegawa 1/32 Fw 190D-9 Brown 4
Yes sir....it sure is.tempestjohnny wrote:That prop is awesome
-
BlackSheep214
- Elite Member
- Posts: 10414
- Joined: Sun Apr 06, 2014 8:47 pm
Re: Hasegawa 1/32 Fw 190D-9 Brown 4
Agreed. But they will spectacular once he paints it.tempestjohnny wrote:That prop is awesome
“Who controls the skies, controls the fate of this Earth”
Author unknown- 352nd Fighter Group, Blue-Nosed Bastards of Bodney
“Send one plane it’s a sortie; send two planes it’s a flight; send four planes it’s a test of airpower. - Richard Kohn
Author unknown- 352nd Fighter Group, Blue-Nosed Bastards of Bodney
“Send one plane it’s a sortie; send two planes it’s a flight; send four planes it’s a test of airpower. - Richard Kohn
Re: Hasegawa 1/32 Fw 190D-9 Brown 4
Yes, the HD props are really awesome. The fit, finish and detail of his products set the bar very high for resin products.
Some more work on Brown 4. I've replaced the wing camera opening with a ring punched from sheet styrene to make it more uniformly circular.

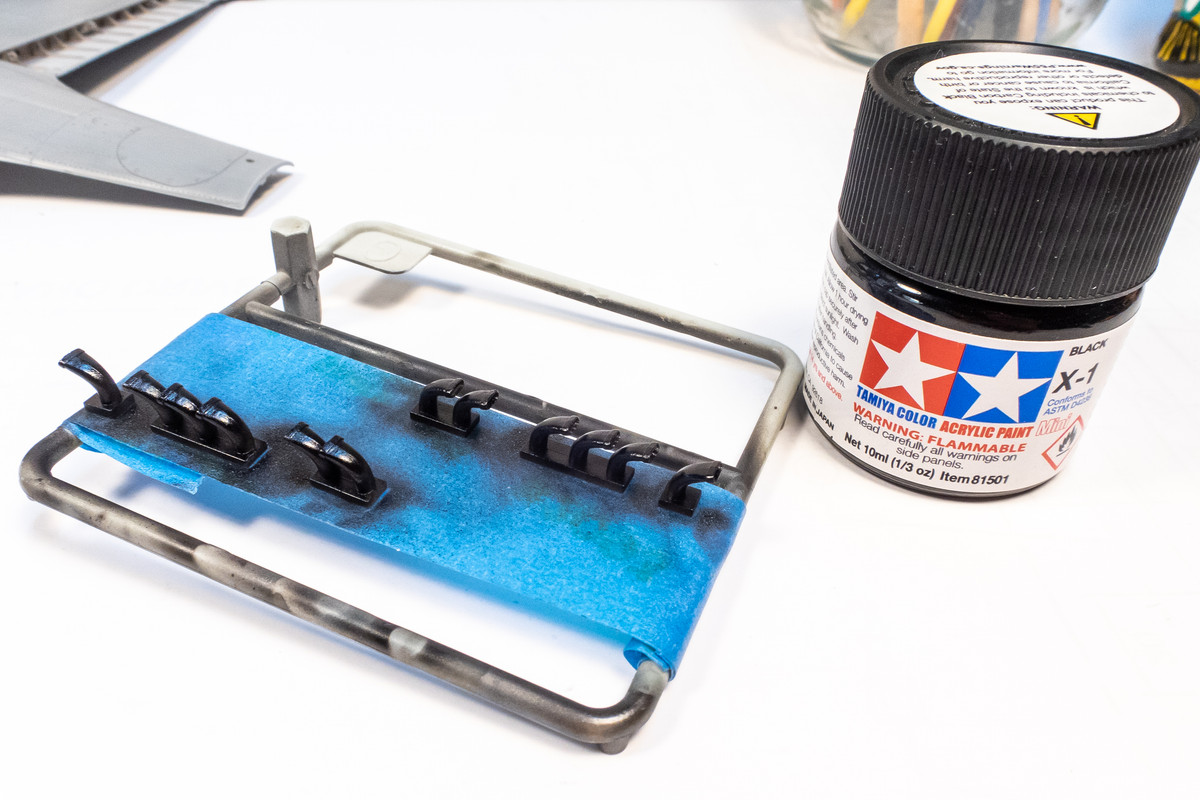
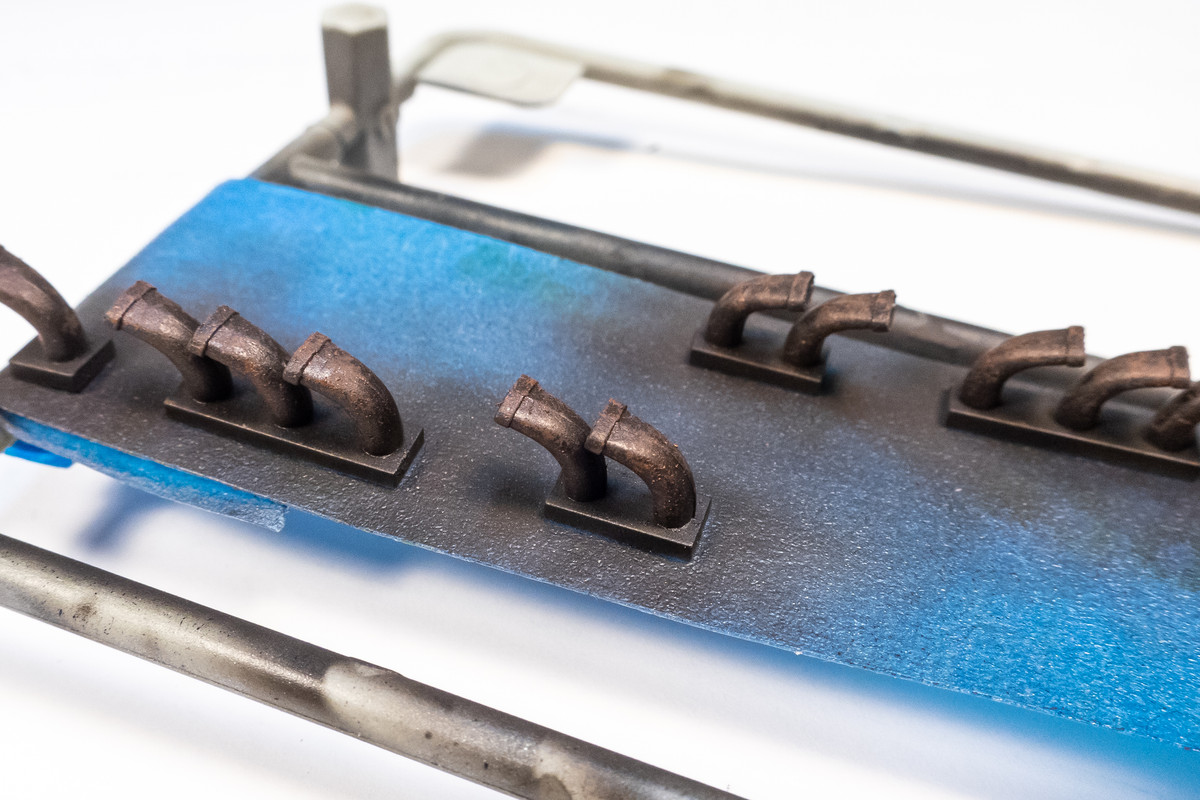
Next, I decided to paint the exhaust pipes. I'm using the kit pieces that I've modified by hollowing out the ends with an x-acto blade.
The exhausts are given a base coat of black.
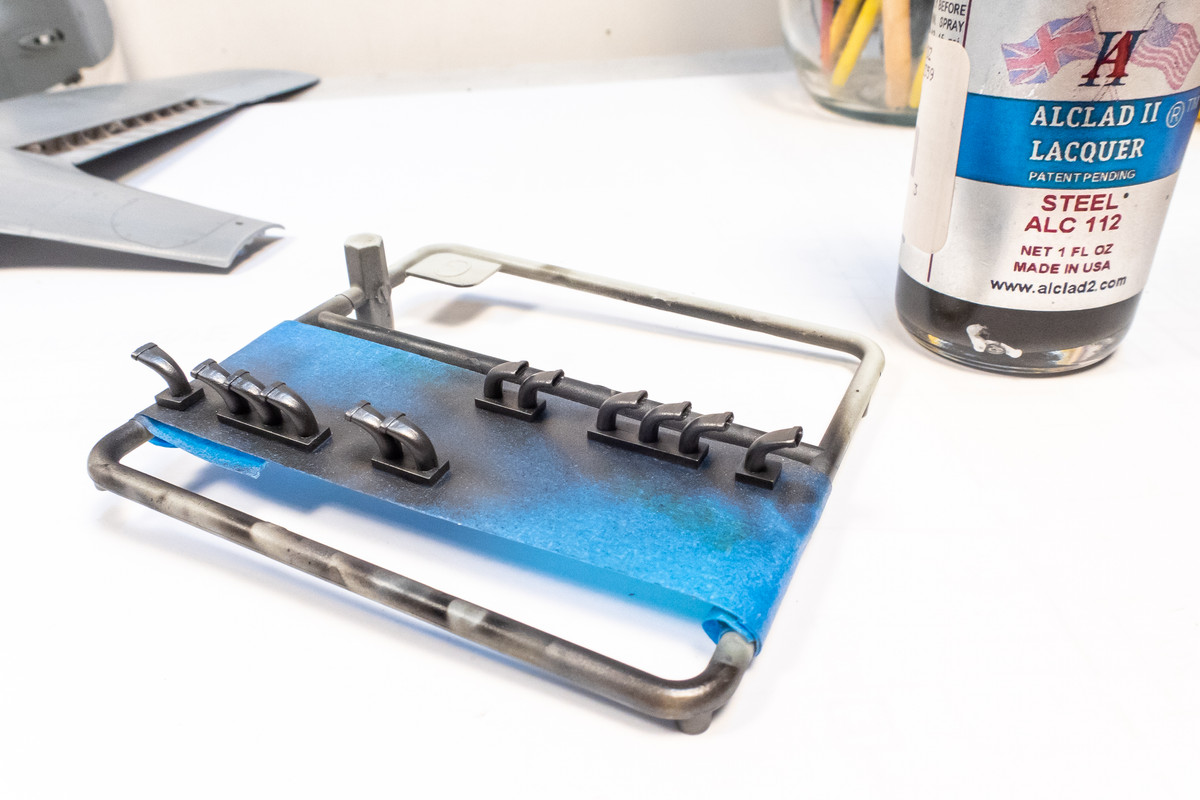
This is followed with a coat of Alclad Steel.
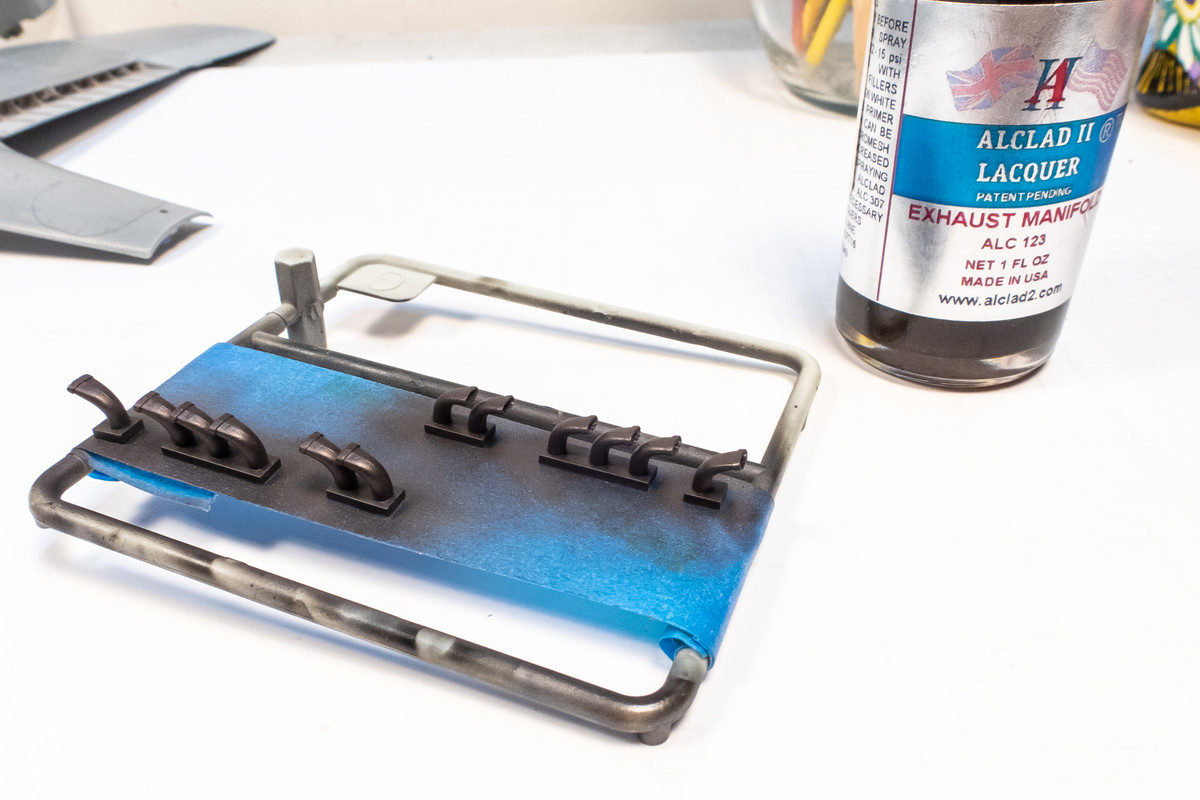
Next is a light coat of Alclad Exhaust Manifold, which gives the exhausts a bronze tint.
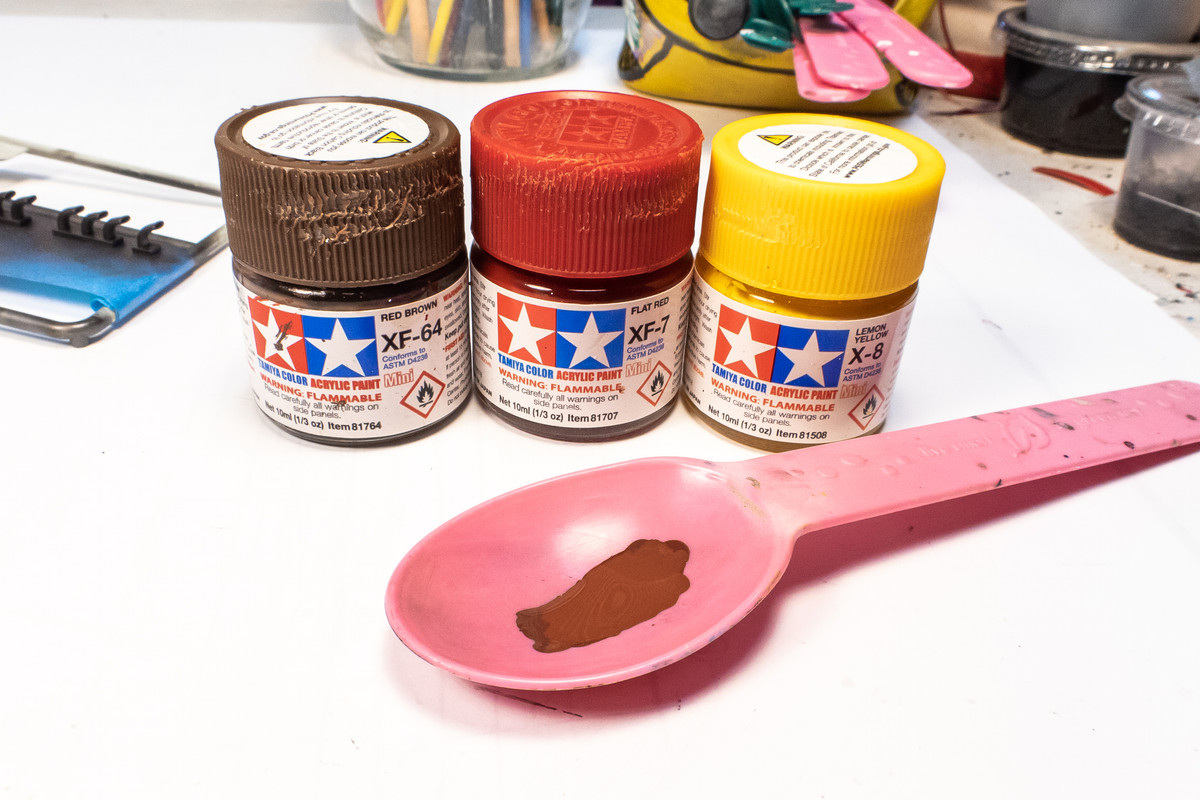
I mix up a rusty brown color using Brown, Red and Yellow. This is dry-brushed onto the exhausts.
It's back to the airbrush for the last step. I spray a thin mix of black into the openings of the exhaust, isolating each individual pipe with a small Post-It.
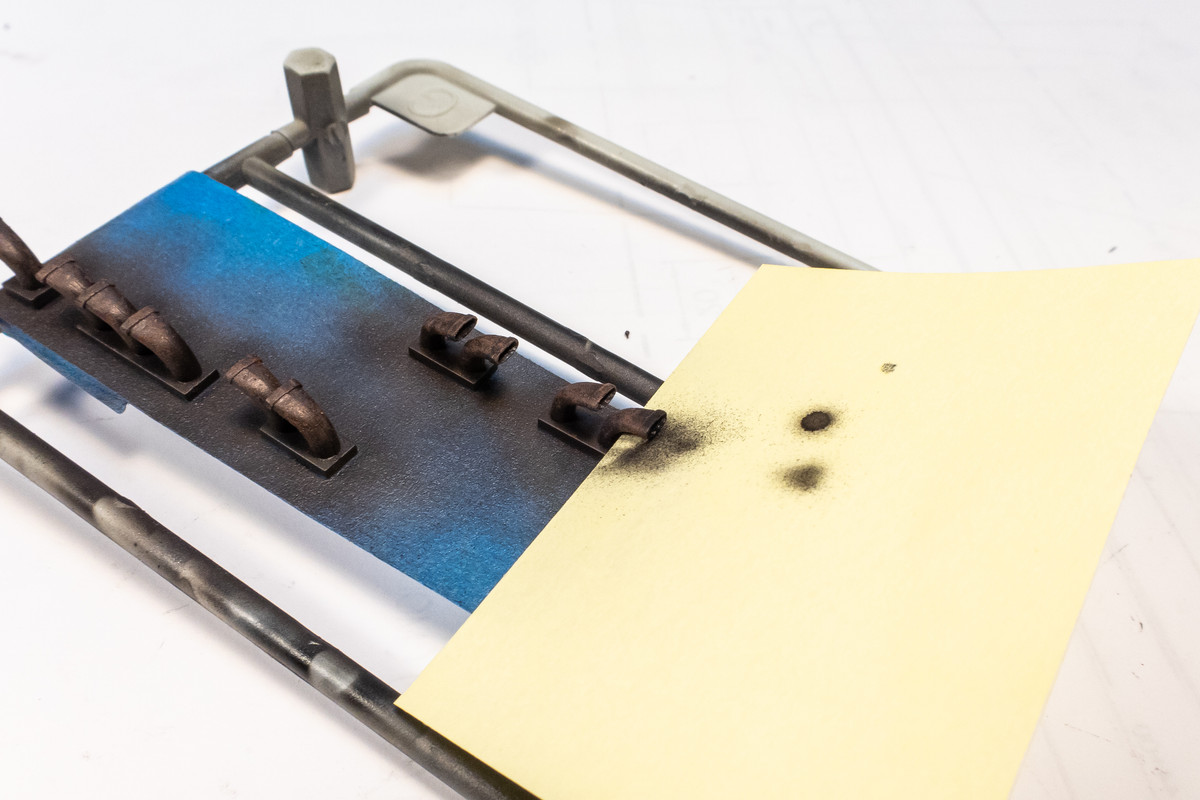
And the exhausts are finished. I'm sure there are other, better ways to paint exhausts but this method is relatively simple and repeatable and yields decent results.
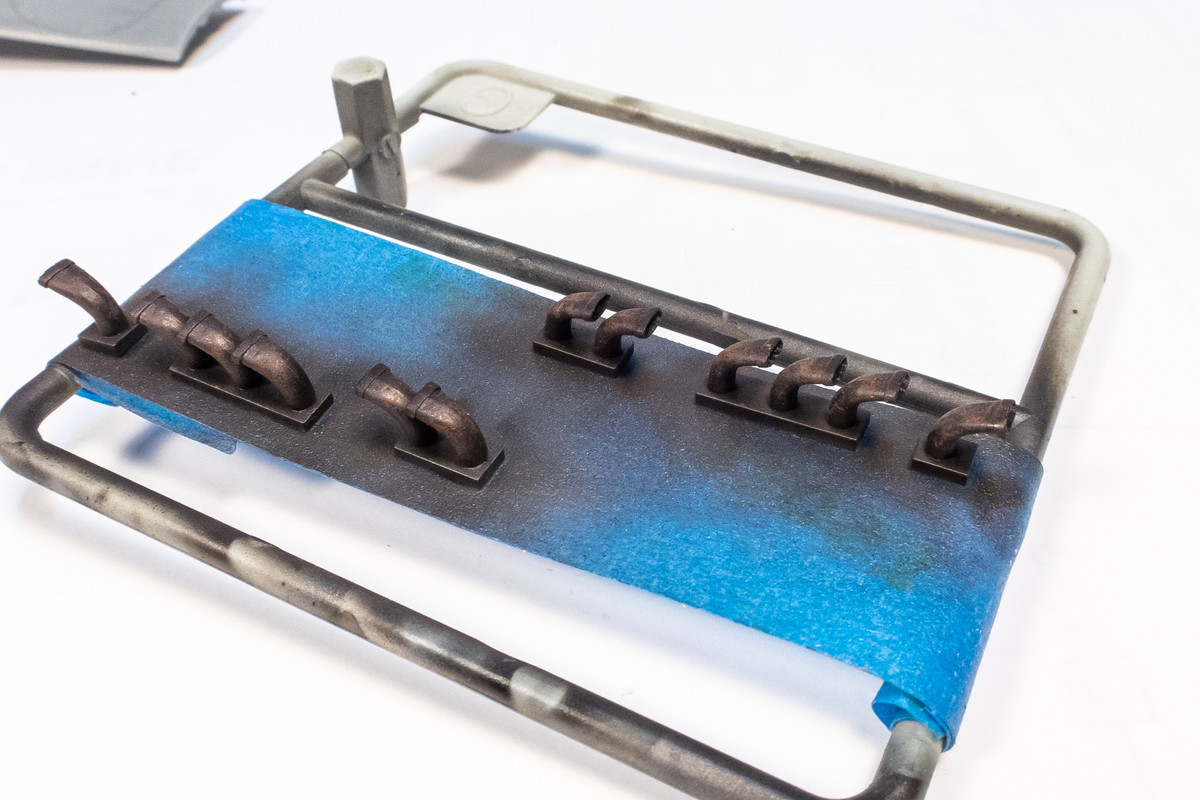
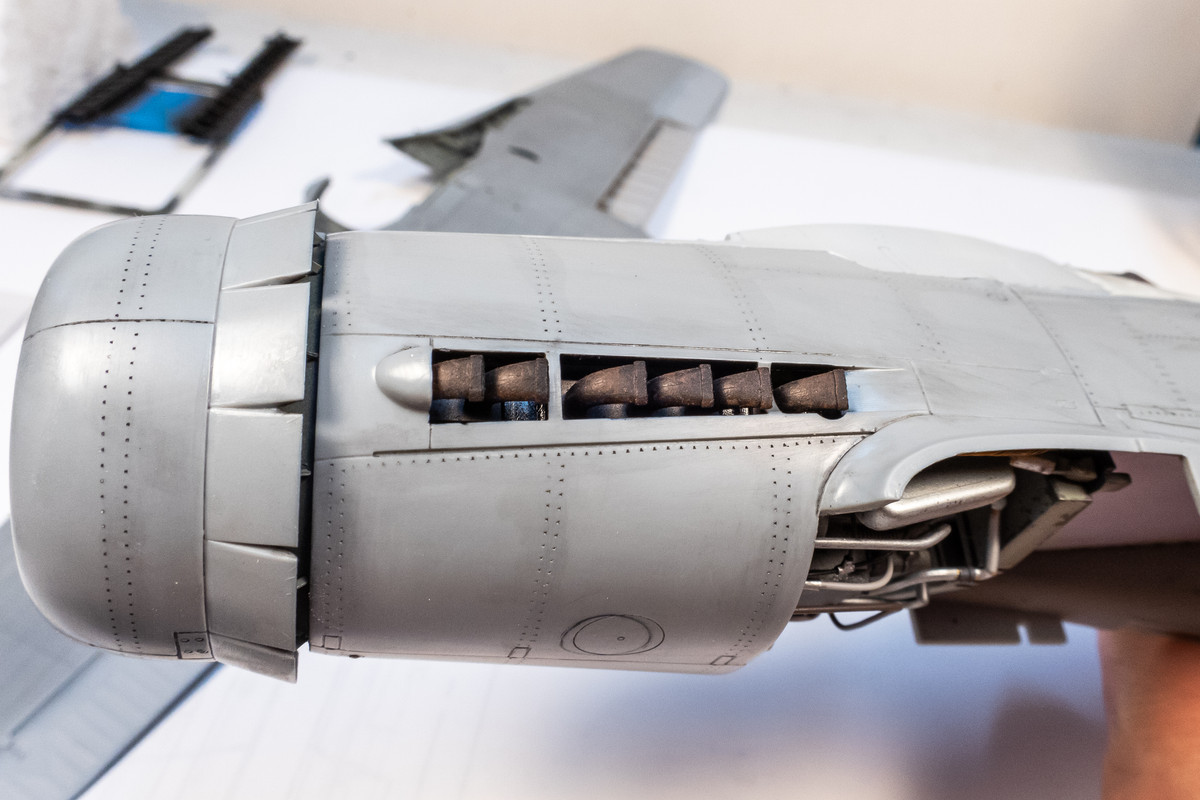
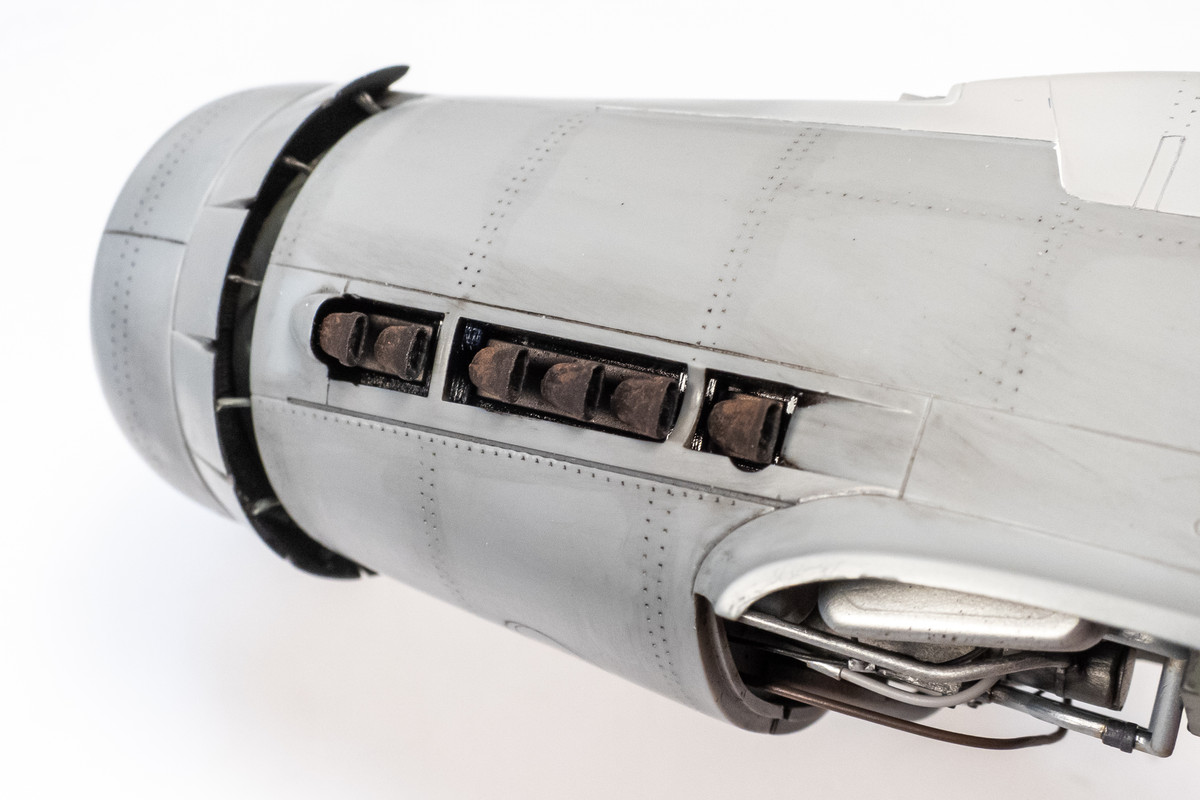
Here's a look at how the exhausts look mounted in the fuselage.
Some more work on Brown 4. I've replaced the wing camera opening with a ring punched from sheet styrene to make it more uniformly circular.
Next, I decided to paint the exhaust pipes. I'm using the kit pieces that I've modified by hollowing out the ends with an x-acto blade.
The exhausts are given a base coat of black.
This is followed with a coat of Alclad Steel.
Next is a light coat of Alclad Exhaust Manifold, which gives the exhausts a bronze tint.
I mix up a rusty brown color using Brown, Red and Yellow. This is dry-brushed onto the exhausts.
It's back to the airbrush for the last step. I spray a thin mix of black into the openings of the exhaust, isolating each individual pipe with a small Post-It.
And the exhausts are finished. I'm sure there are other, better ways to paint exhausts but this method is relatively simple and repeatable and yields decent results.
Here's a look at how the exhausts look mounted in the fuselage.
John aka JKim
-----------<><
-----------<><

Re: Hasegawa 1/32 Fw 190D-9 Brown 4
Exhaust looks beautiful as always
March as one, Don't look back
Odin's sons... Attack!
Unleash hell! Do not repent! Warfare grants us no lament
Let your weapons slash and tear This is no place for fear
Hold the lines! Move as one! In unity our victory's won
Our shields will form a mighty wall
United we shall never fall
Odin's sons... Attack!
Unleash hell! Do not repent! Warfare grants us no lament
Let your weapons slash and tear This is no place for fear
Hold the lines! Move as one! In unity our victory's won
Our shields will form a mighty wall
United we shall never fall