1//32 Hasegawa Ki-61-1 Tei Hien
-
Medicman71

- Elite Member
- Posts: 9698
- Joined: Mon Apr 07, 2014 9:32 am
- Location: Houston, Tx
Re: 1//32 Hasegawa Ki-61-1 Tei Hien
Incredible work as always!
Mike
Sponsored by Boeing, Lockheed Martin, Northrop Grumman, Saab, BAE, and Dassault
Sponsored by Boeing, Lockheed Martin, Northrop Grumman, Saab, BAE, and Dassault

Re: 1//32 Hasegawa Ki-61-1 Tei Hien
Thank you Mike! I appreciate the comment!
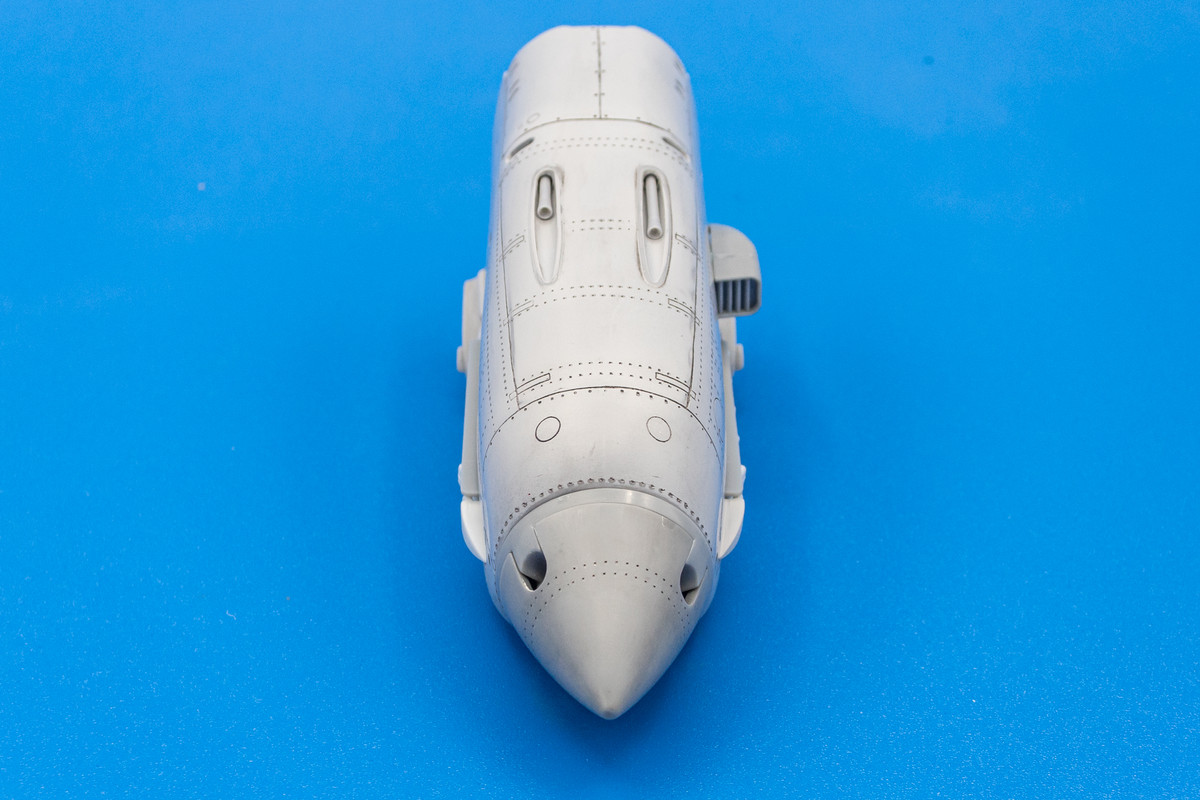
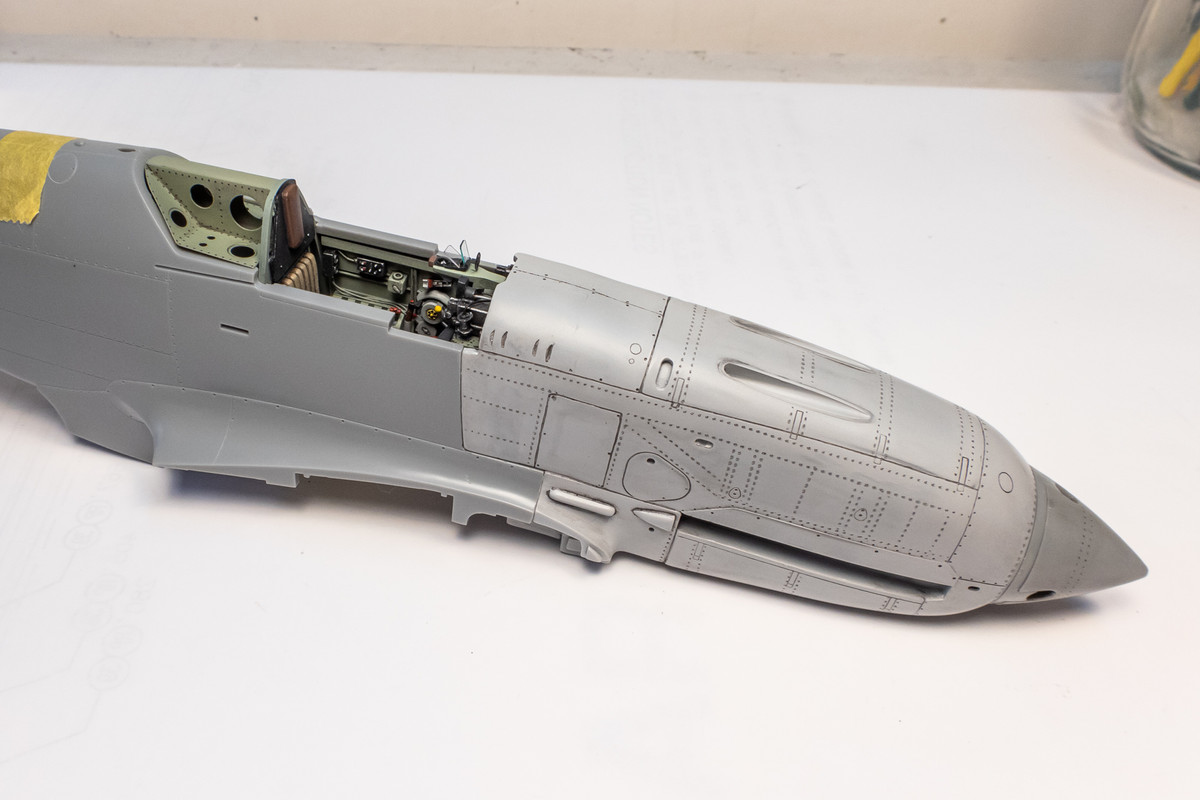
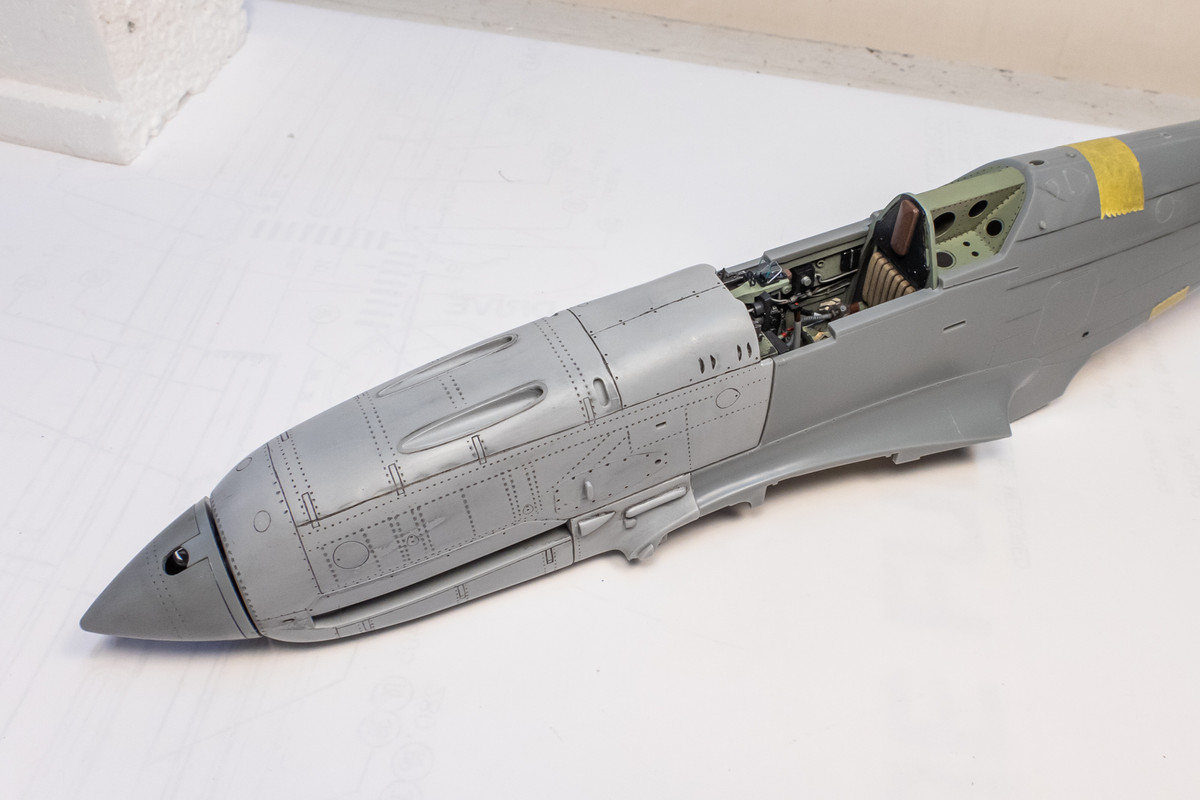
Last time, I was able to confirm that the resin nose would fit onto the surgically altered fuselage pretty well. I spent some more time cleaning up the resin nose including tidying up this circular hatch and mismatched panel line on the bottom.
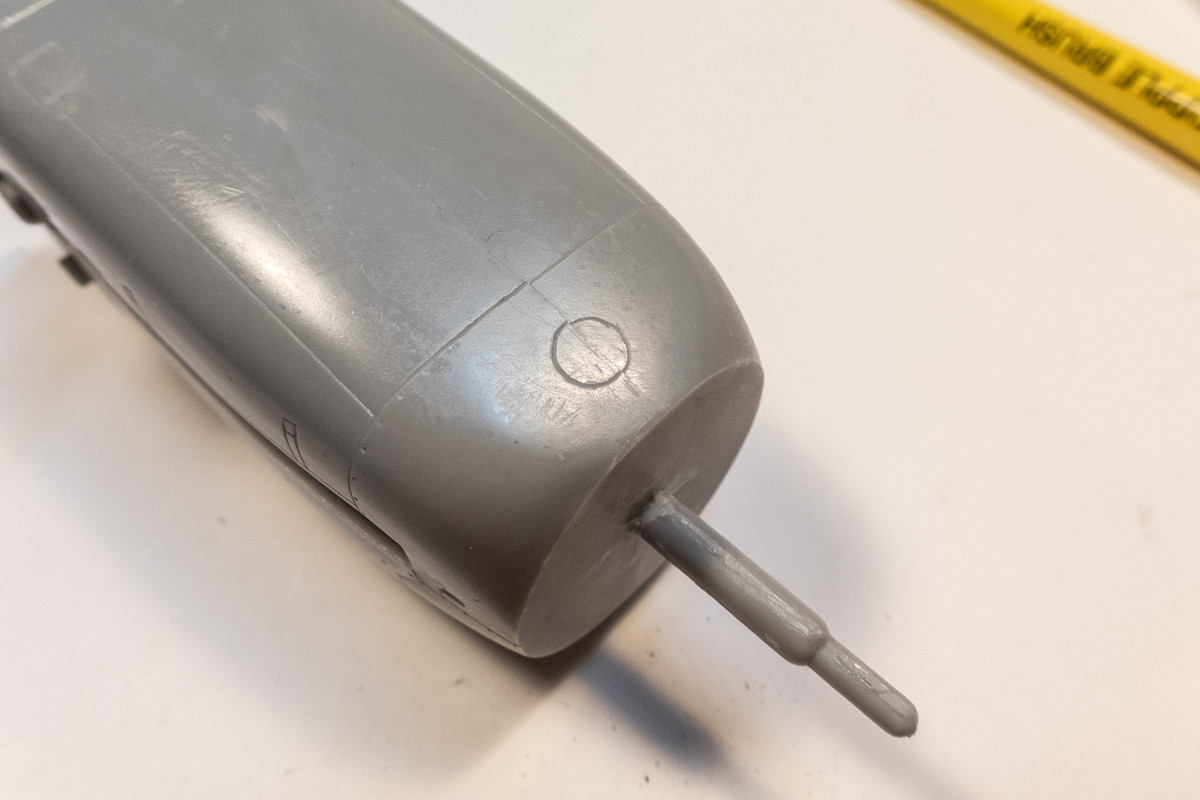
After the adjustments were made, I sprayed the entire nose with Mr Primer Surfacer 1000.
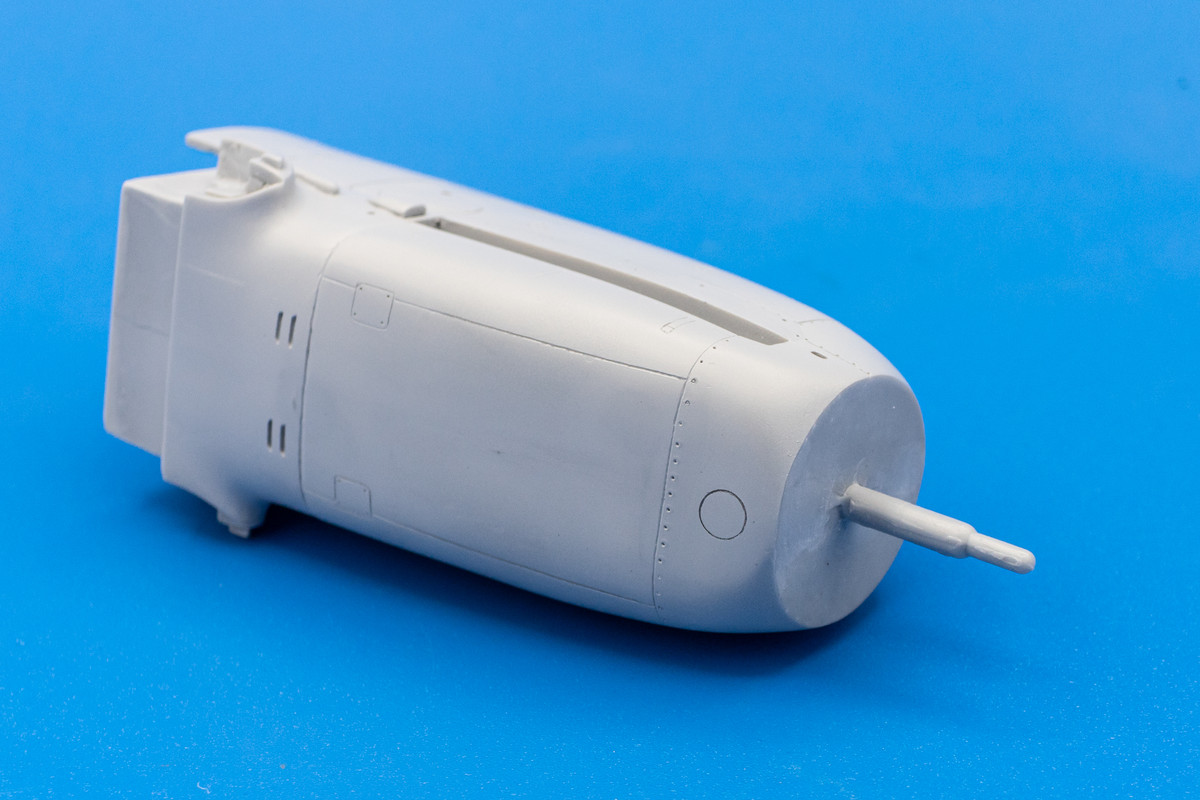
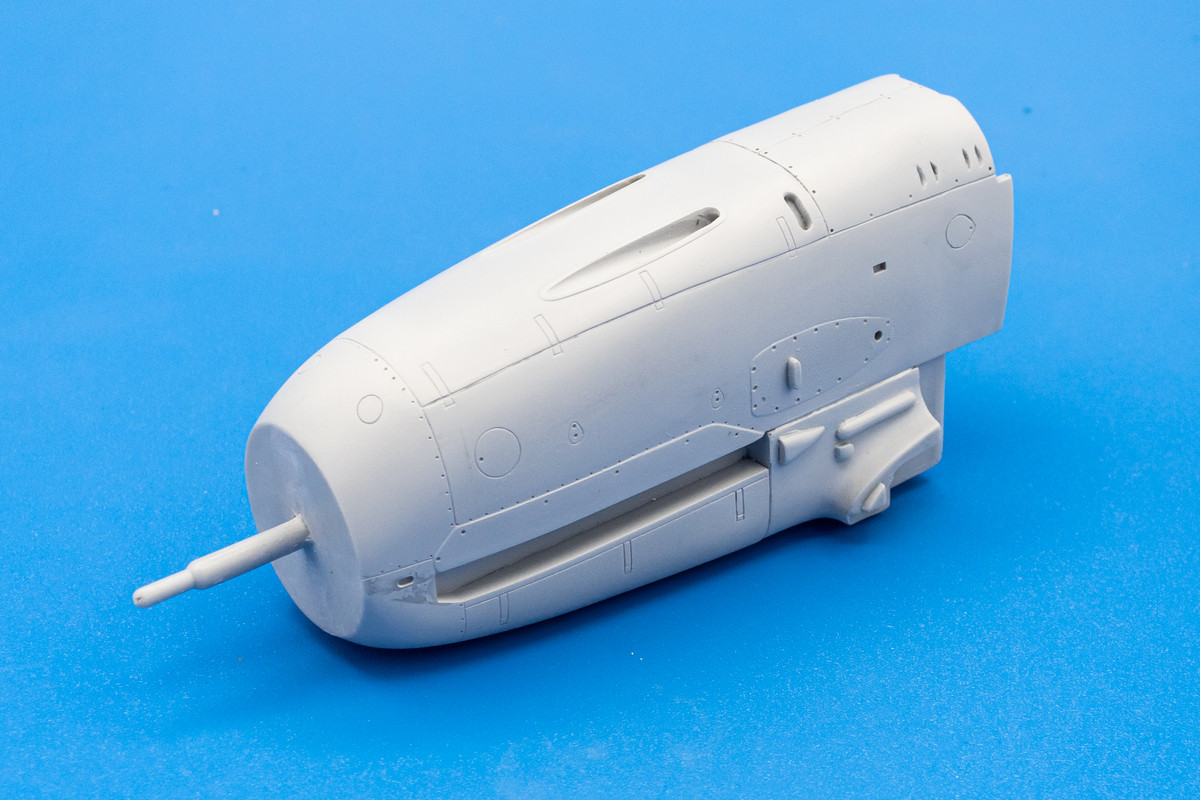
After some deliberation, I've decided to apply rivets onto this model. Using drawings from an older, Japanese-language publication, I sketched the rivet lines onto the resin nose with a soft (4B) leaded pencil.

After the lines are sketched, a rotary rivet tool (Galaxy Tools) is used to puncture rows of small holes into the resin nose to simulate rivets.

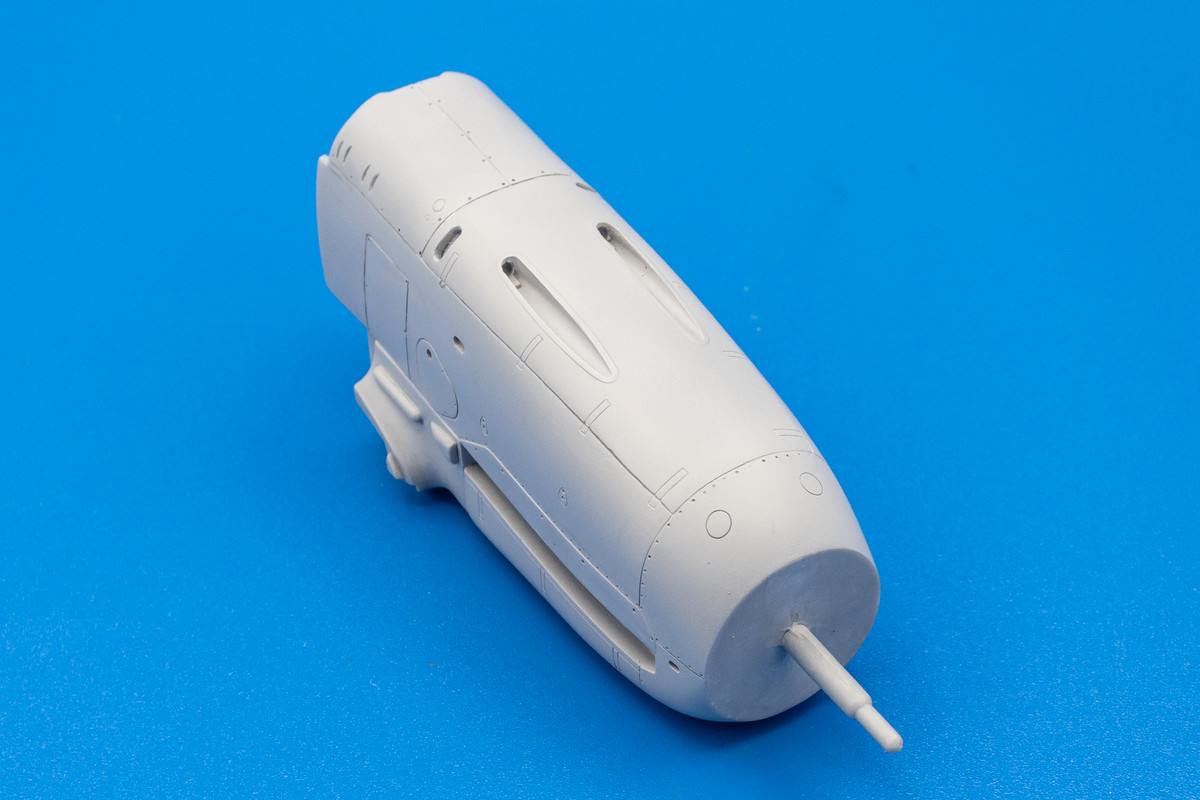
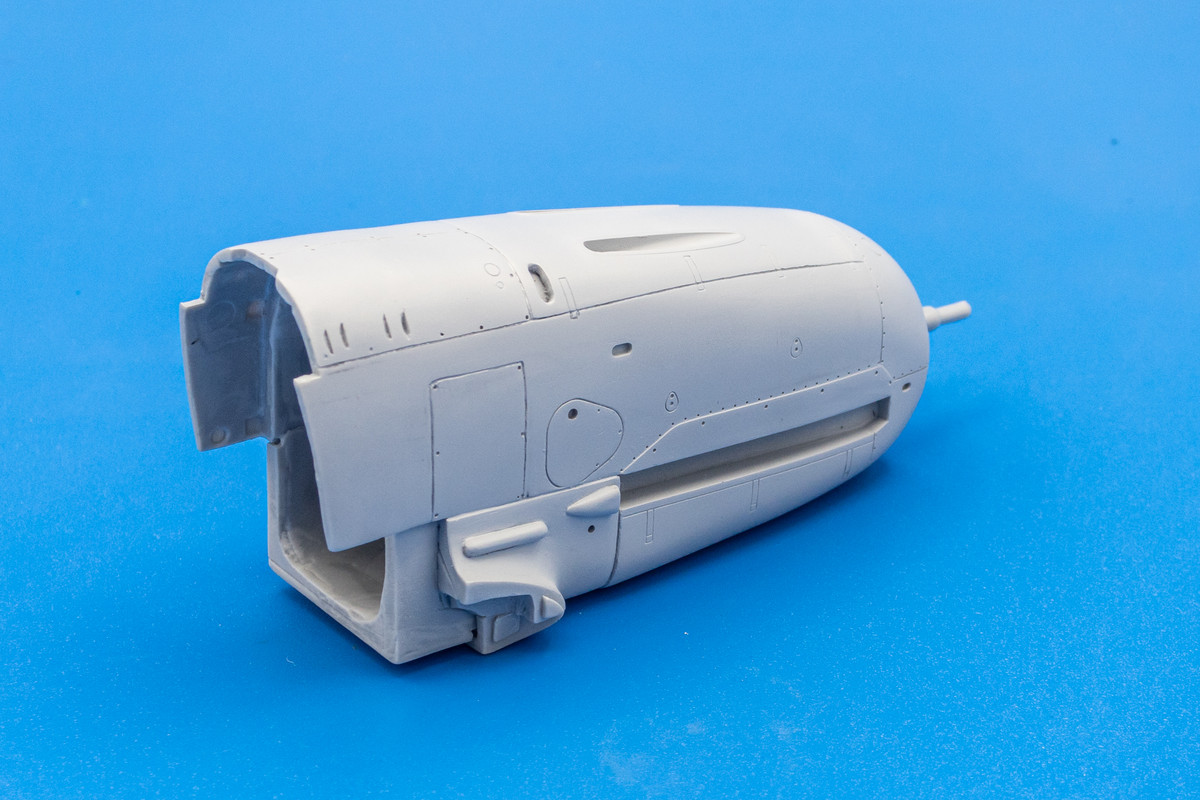
Unlike plastic, the riveting process on the primered resin does not create as big a mound of material around each hole but I still recommend sanding afterwards.

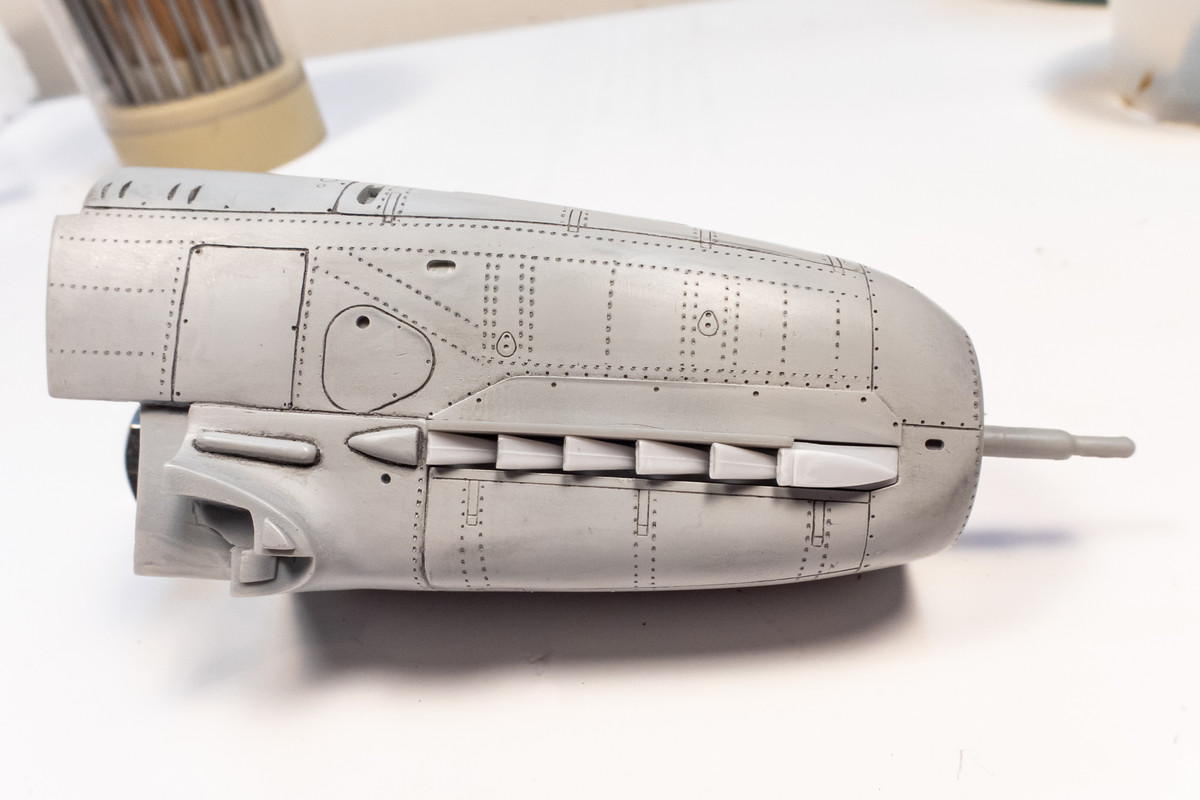
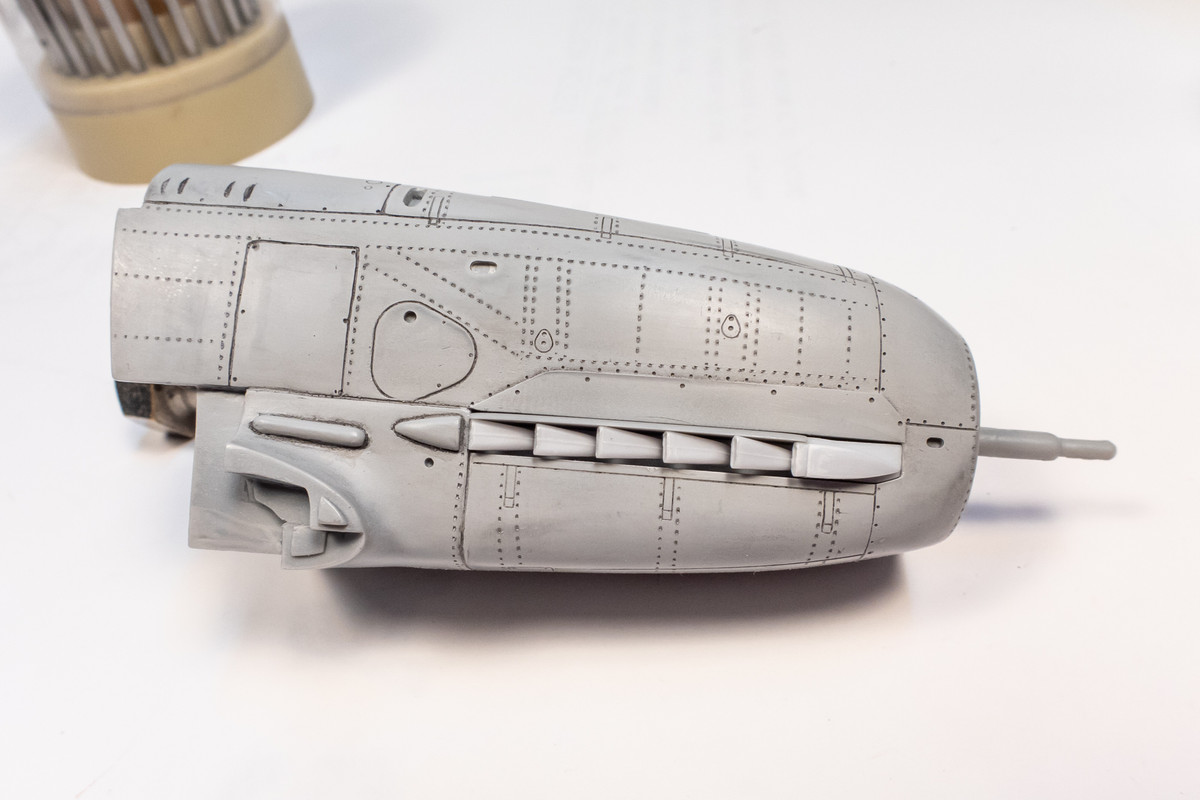
After sanding, I applied a temporary pastel wash to highlight the riveting and other corrective work on the nose. Some of the nose bits like the spinner, the exhausts, the supercharger intake and gun barrels were added temporarily for these photos.
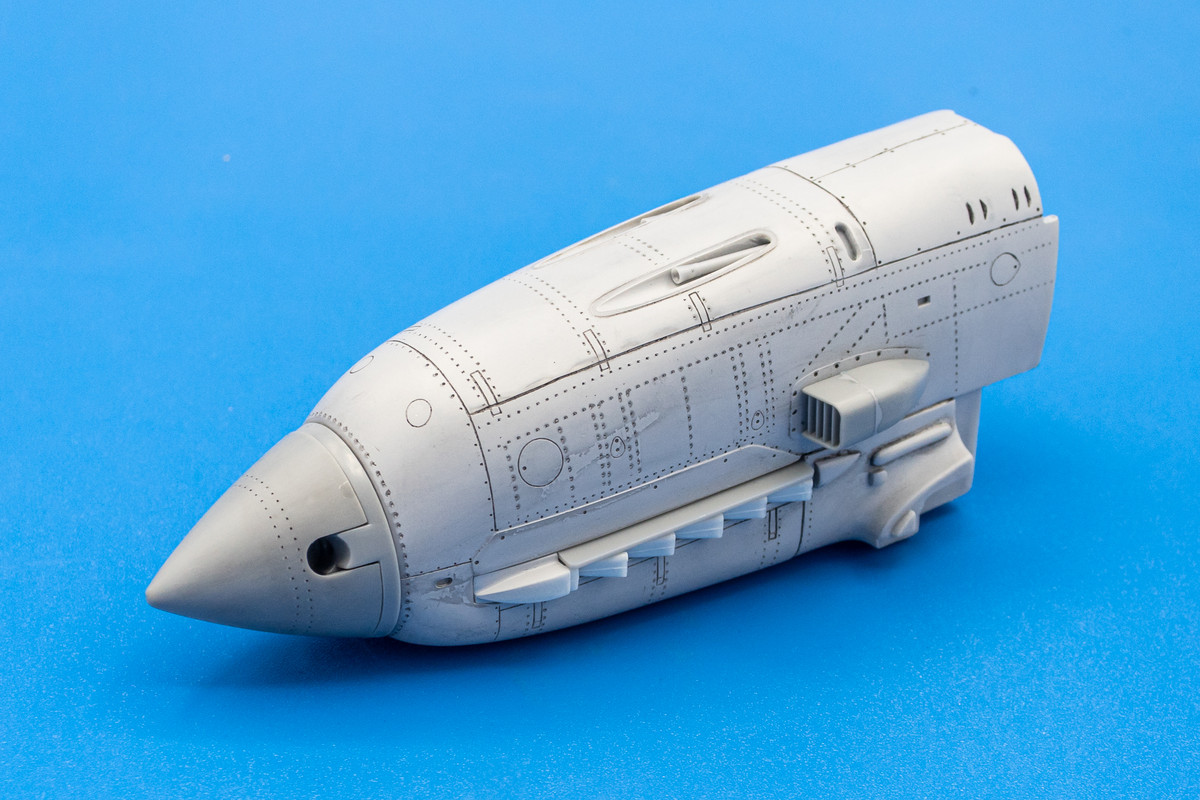
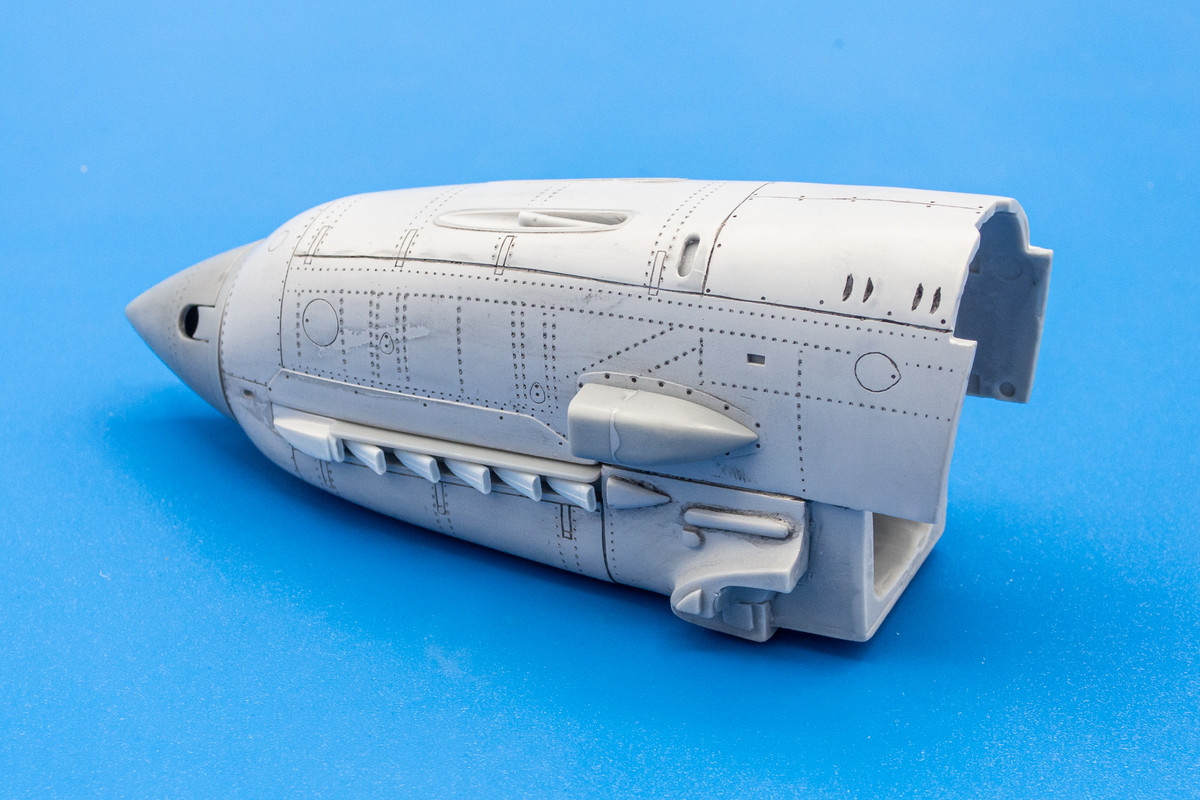
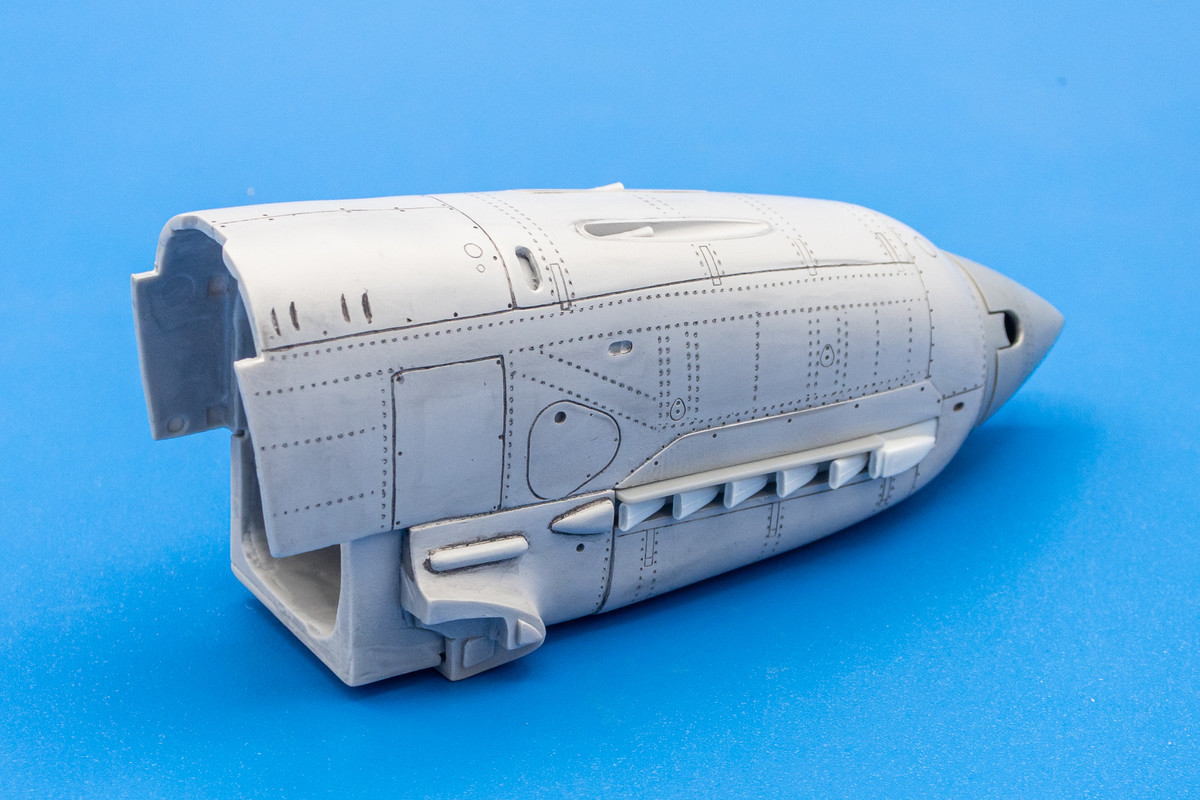
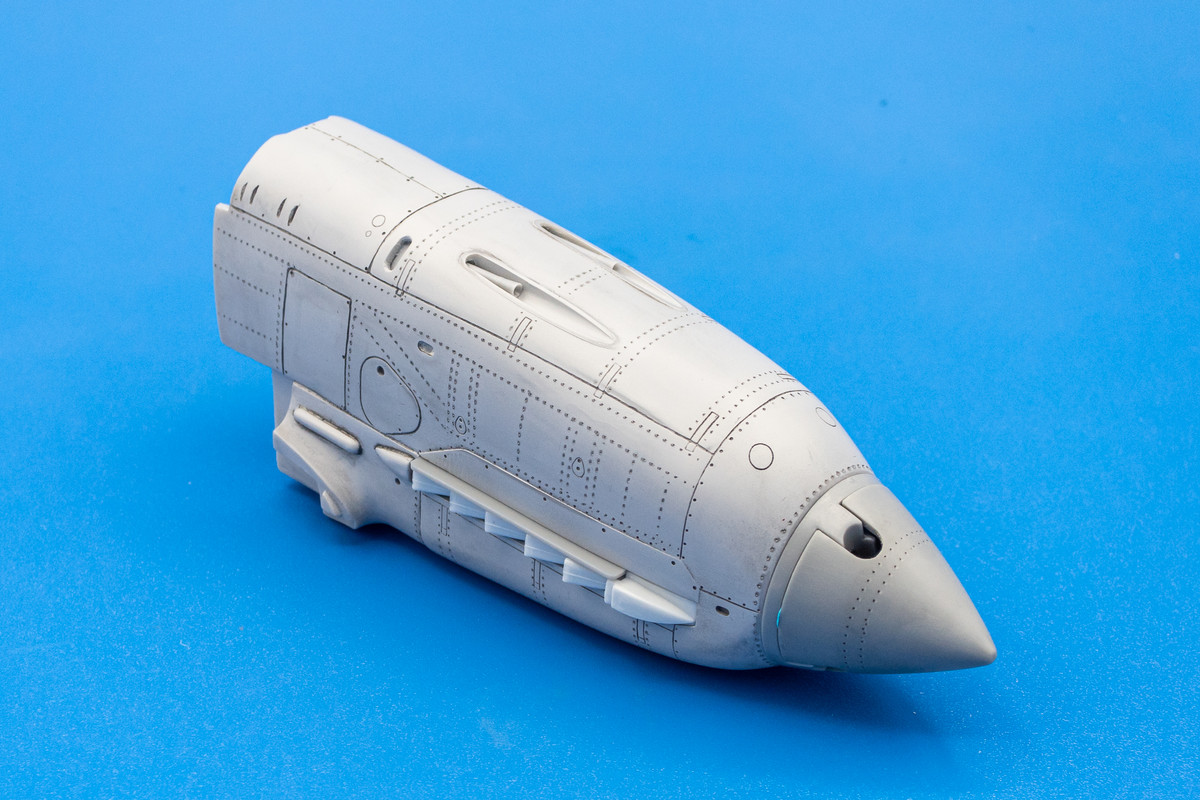

I'm happy with the decision to rivet the Ki-61. I think the nose looks pretty bada$$ now.
Last time, I was able to confirm that the resin nose would fit onto the surgically altered fuselage pretty well. I spent some more time cleaning up the resin nose including tidying up this circular hatch and mismatched panel line on the bottom.
After the adjustments were made, I sprayed the entire nose with Mr Primer Surfacer 1000.
After some deliberation, I've decided to apply rivets onto this model. Using drawings from an older, Japanese-language publication, I sketched the rivet lines onto the resin nose with a soft (4B) leaded pencil.
After the lines are sketched, a rotary rivet tool (Galaxy Tools) is used to puncture rows of small holes into the resin nose to simulate rivets.
Unlike plastic, the riveting process on the primered resin does not create as big a mound of material around each hole but I still recommend sanding afterwards.
After sanding, I applied a temporary pastel wash to highlight the riveting and other corrective work on the nose. Some of the nose bits like the spinner, the exhausts, the supercharger intake and gun barrels were added temporarily for these photos.
I'm happy with the decision to rivet the Ki-61. I think the nose looks pretty bada$$ now.
John aka JKim
-----------<><

-----------<><
-
jeaton01

- Elite Member
- Posts: 2067
- Joined: Thu Apr 23, 2020 9:20 am
- Location: Northern California
- Contact:
Re: 1//32 Hasegawa Ki-61-1 Tei Hien
I wonder if that nose would fit the Revell kit. Looks great.

Re: 1//32 Hasegawa Ki-61-1 Tei Hien
You are correct John it really does look BA
March as one, Don't look back
Odin's sons... Attack!
Unleash hell! Do not repent! Warfare grants us no lament
Let your weapons slash and tear This is no place for fear
Hold the lines! Move as one! In unity our victory's won
Our shields will form a mighty wall
United we shall never fall
Odin's sons... Attack!
Unleash hell! Do not repent! Warfare grants us no lament
Let your weapons slash and tear This is no place for fear
Hold the lines! Move as one! In unity our victory's won
Our shields will form a mighty wall
United we shall never fall

Re: 1//32 Hasegawa Ki-61-1 Tei Hien
Bloody brilliant John!
Stuart Templeton 'I may not be good but I'm slow...'
My blog: https://stuartsscalemodels.blogspot.com/
My blog: https://stuartsscalemodels.blogspot.com/
Re: 1//32 Hasegawa Ki-61-1 Tei Hien
Thanks guys! A bit more work on the Hien to report today.
After fixing and riveting the nose, I decided to thin the edge of the baffles above the exhausts.
Time to start closing up the cockpit. In order to orient the oxygen hose and mask, I have glued the starboard sidewall onto the cockpit floor first. The front and rear bulkheads were put into place temporarily as a fitting template for the sidewall.
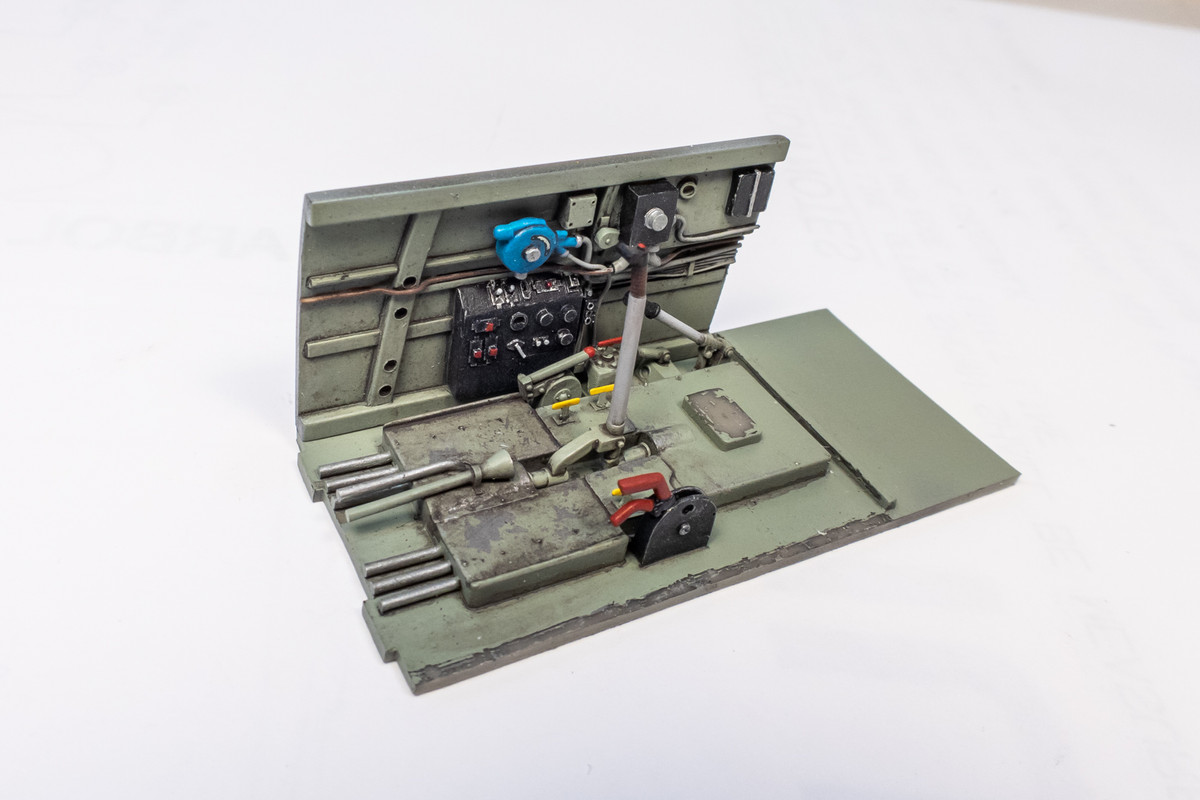
The oxygen hose has been roughly cut to length and posed to fit the mask, which will be placed on the right edge of the seat.
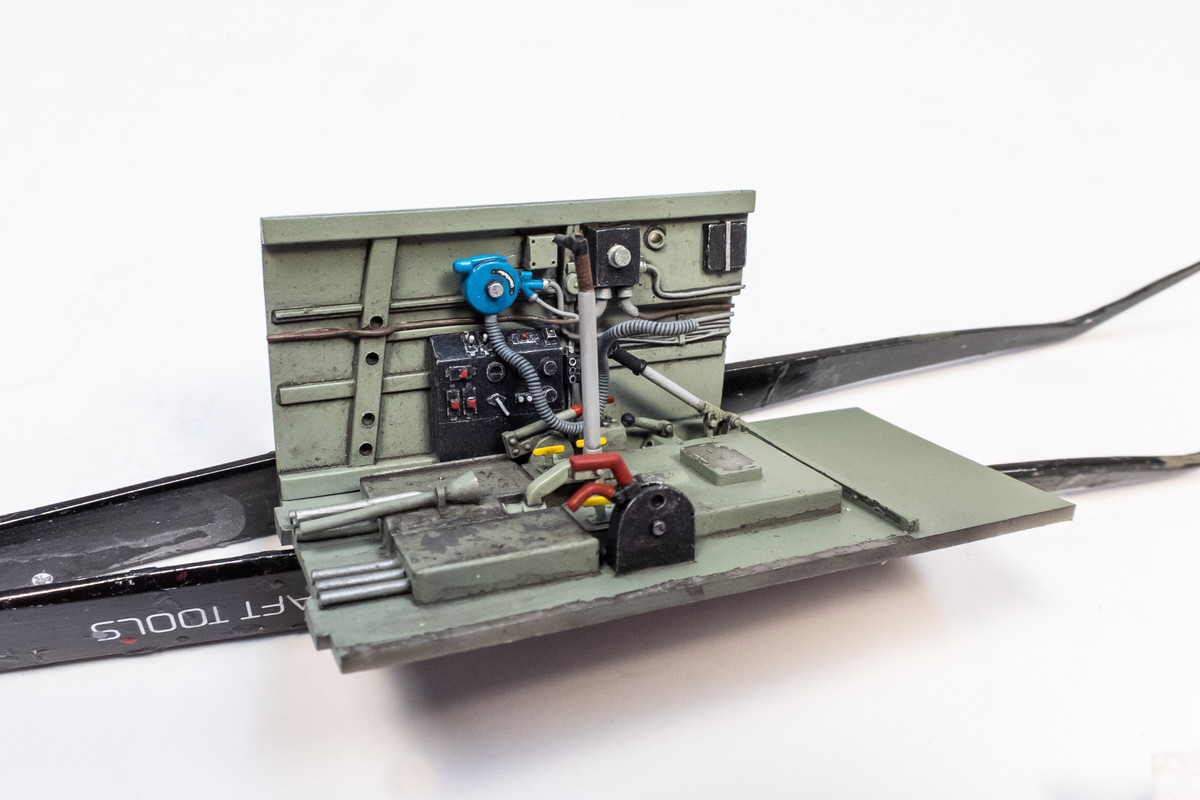
I've added straps to the mask made of strips of aluminum foil and the mask was spot-glued to the right edge of the seat.

The rear bulkhead with the seat was then glued into place onto the cockpit floor. It took some wriggling to get the oxygen hose connected to the mask.
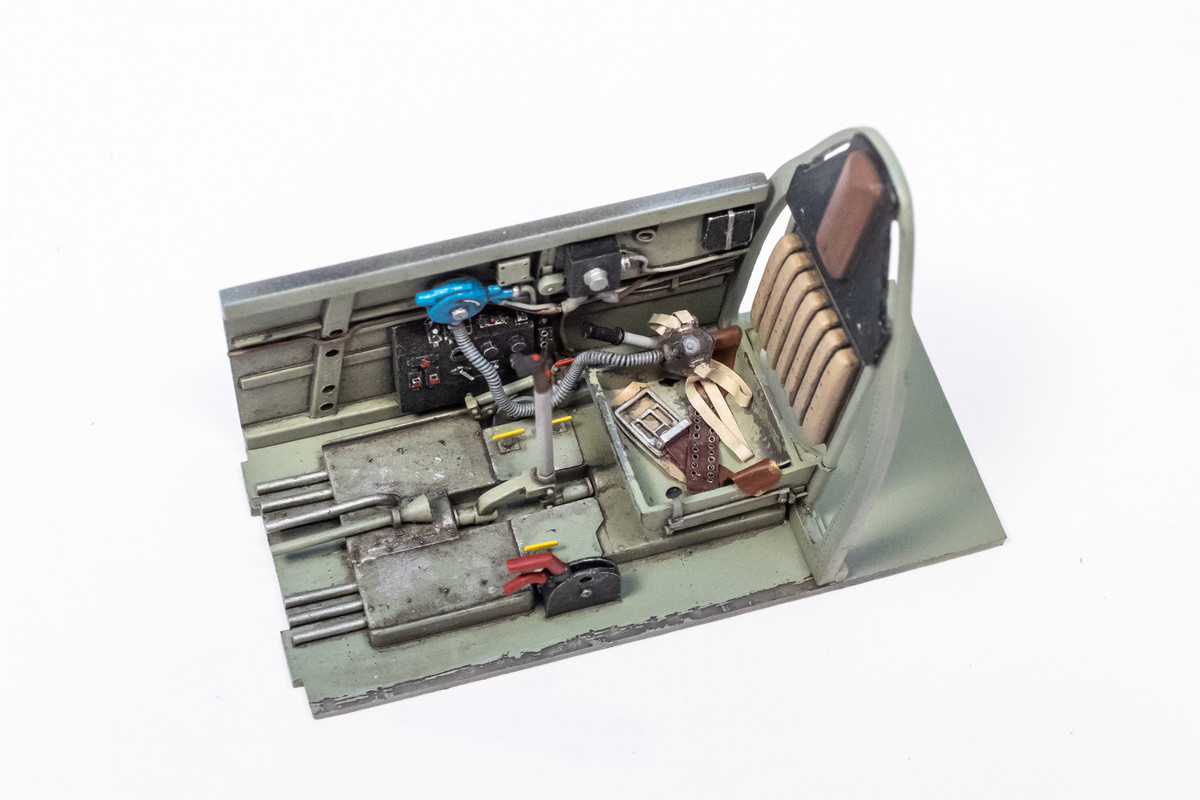
Once that was done, I glued the front bulkhead/instrument panel into place. The Aires cockpit fits very well together with consistent contact around all of the edges. I simply held each part in place with my fingers and seeped thin CA glue into the joints.
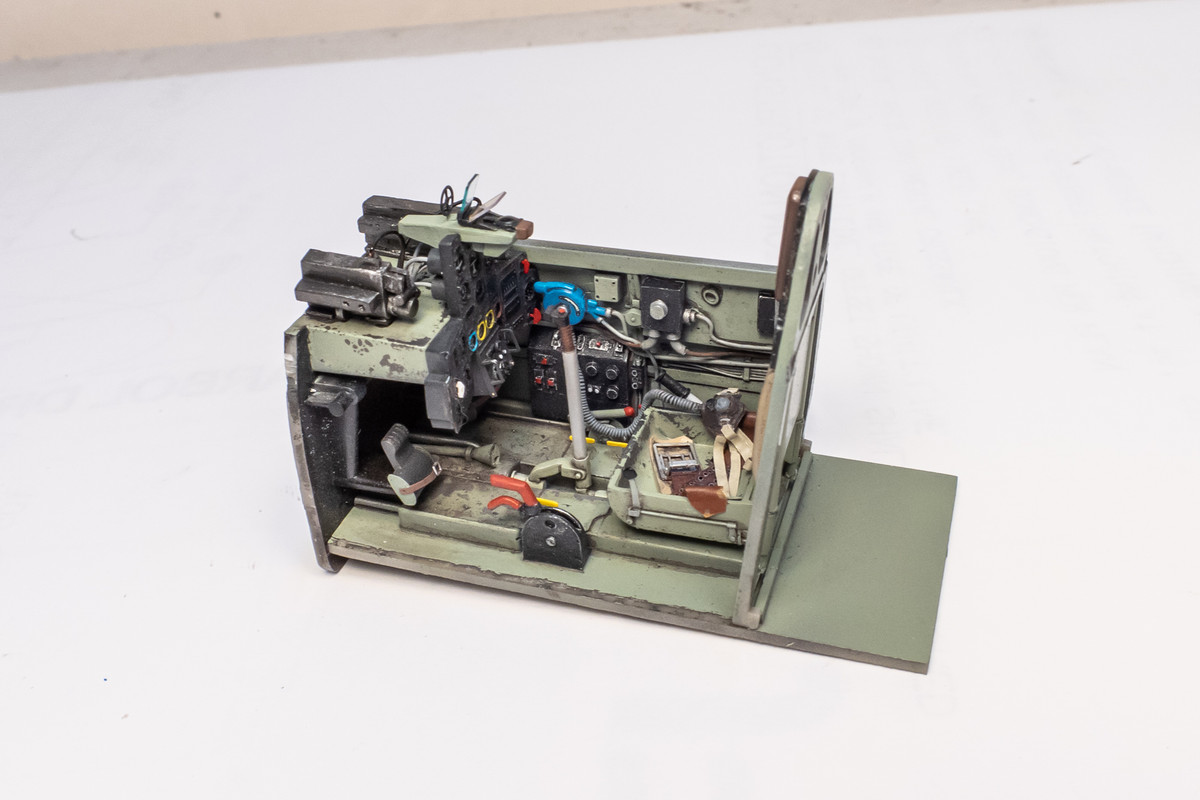
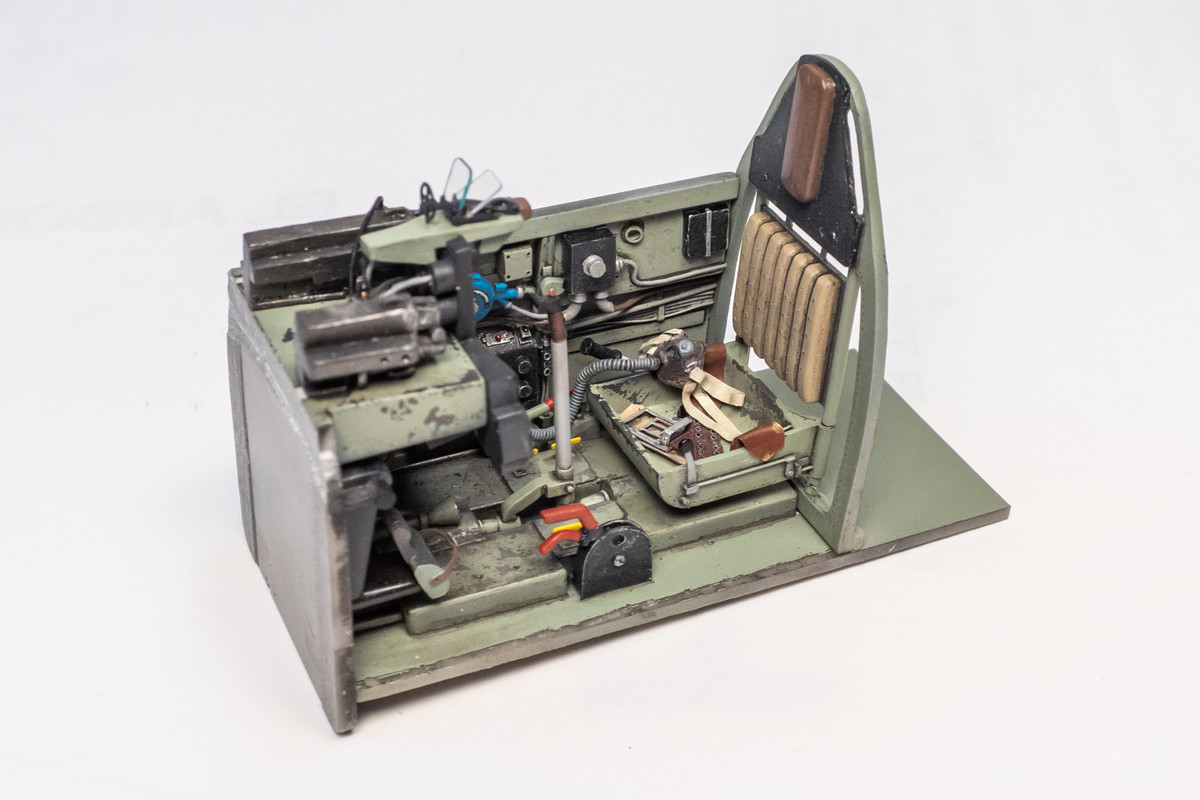
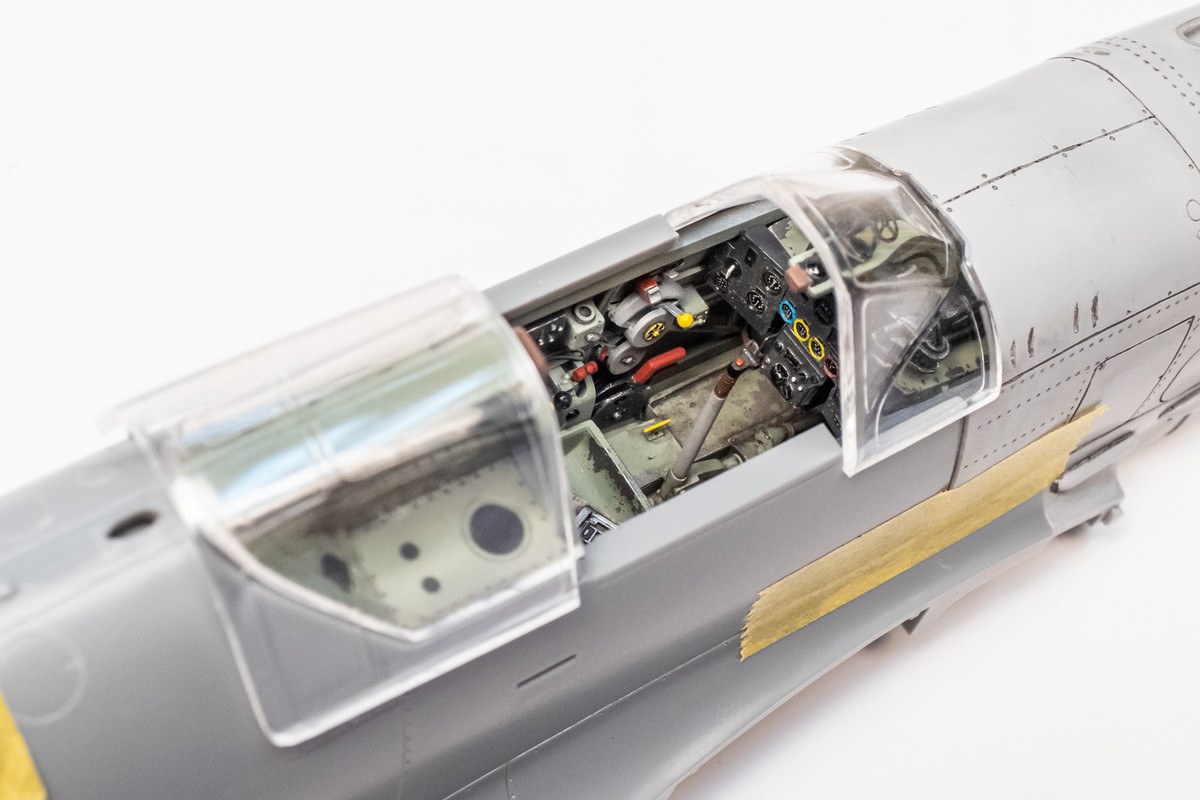
The port sidewall is glued in last. The cockpit is complete!
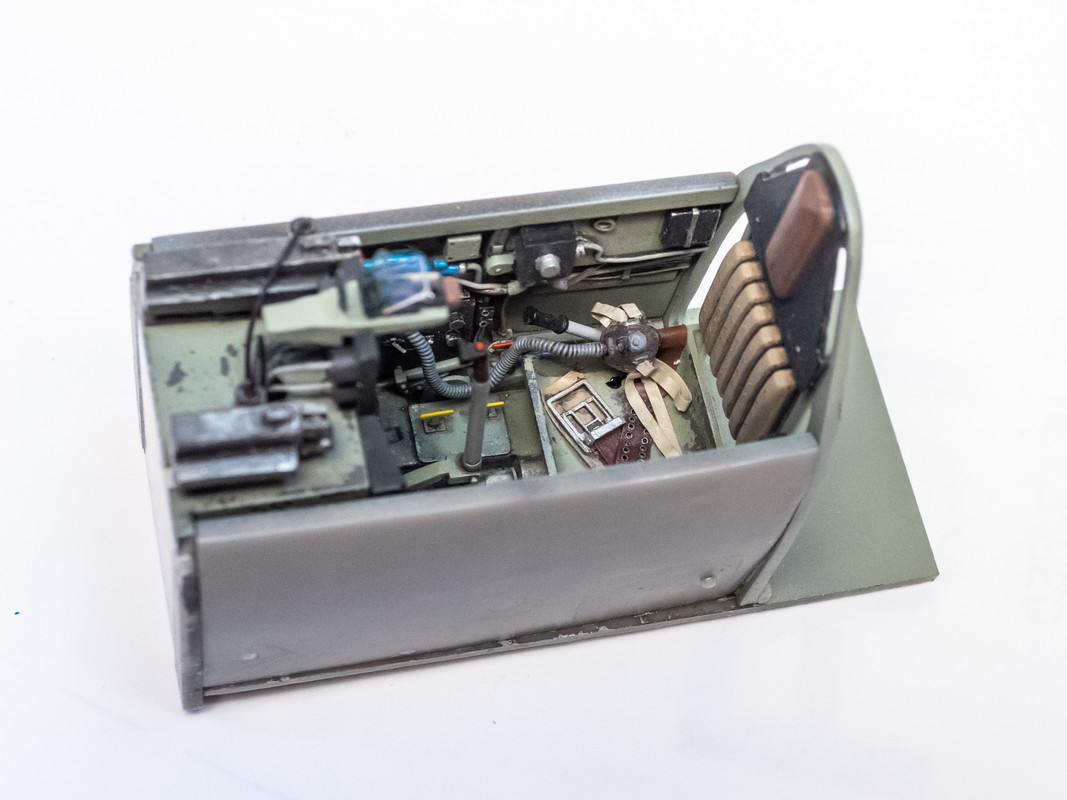
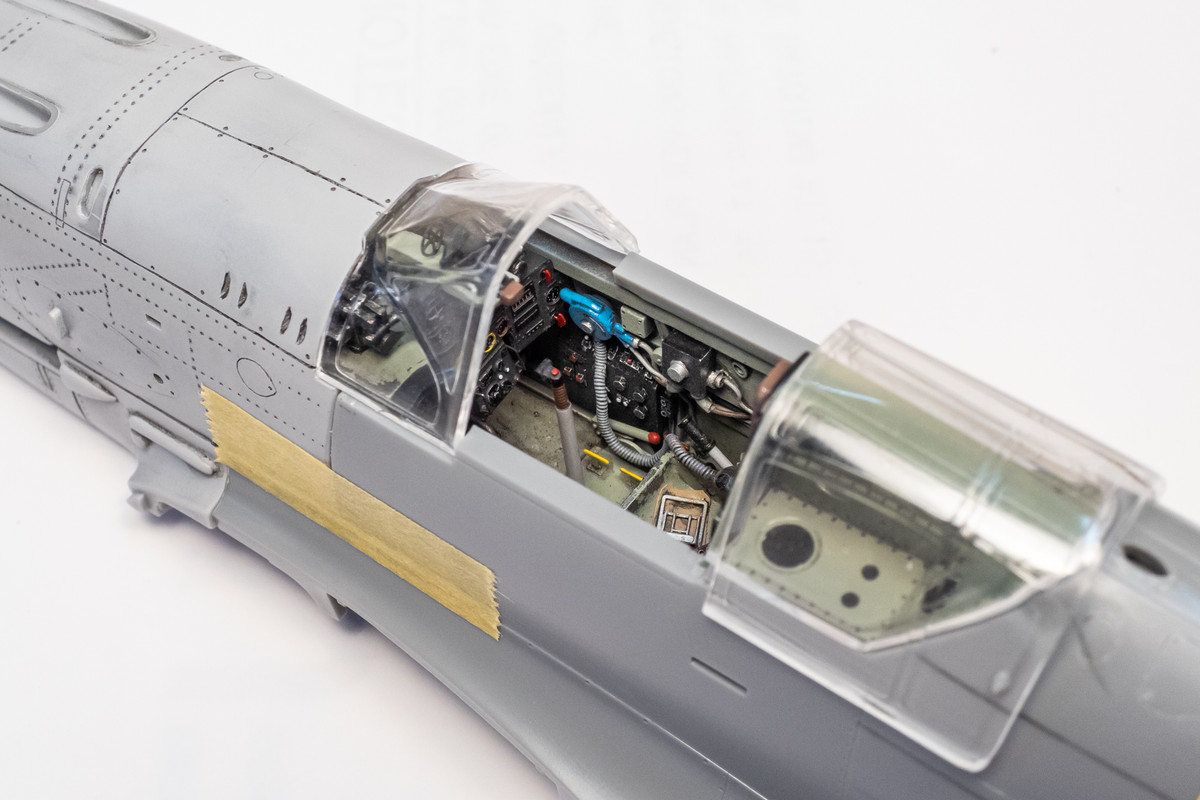
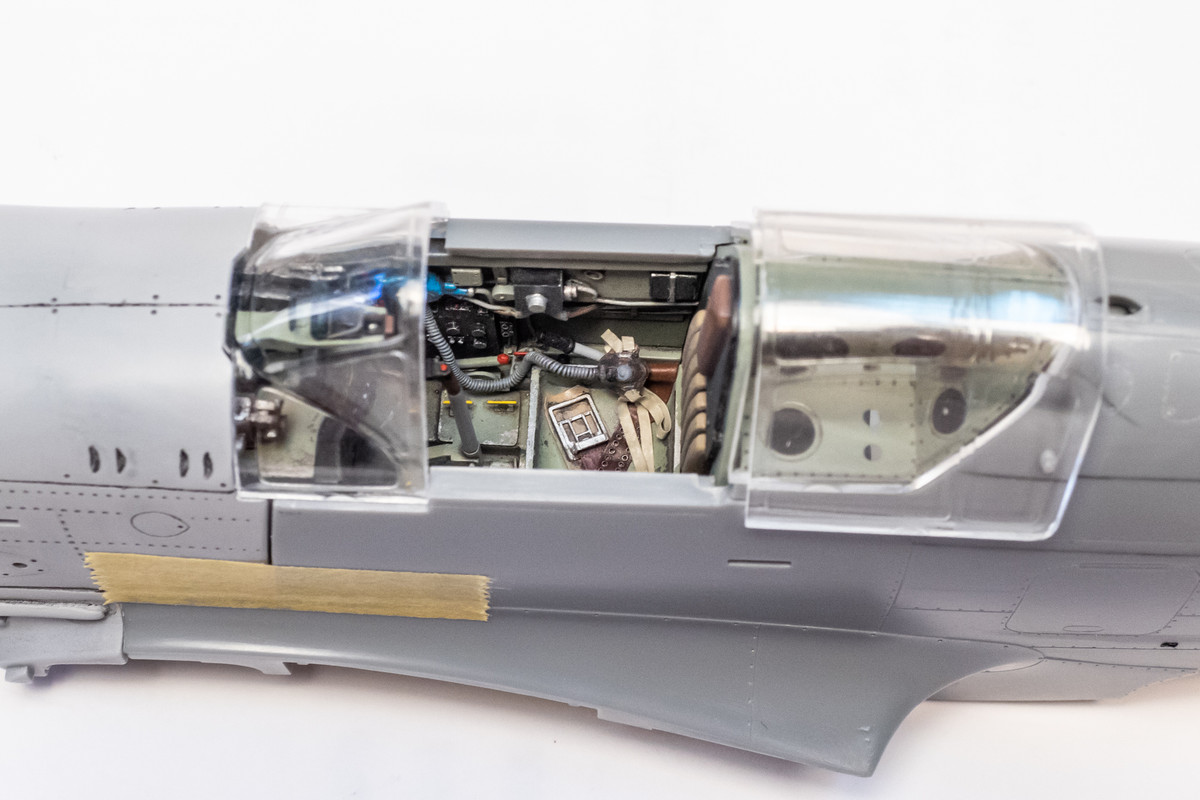
Now I want to check the fit of the resin cockpit into the fuselage. I can now confirm that the Aires resin cockpit for this kit is a drop-in fit without any need for adjustments to the fuselage parts. The forward gun deck of the resin cockpit DOES need to be removed in order for it to work with the Wolfpack resin Tei nose.
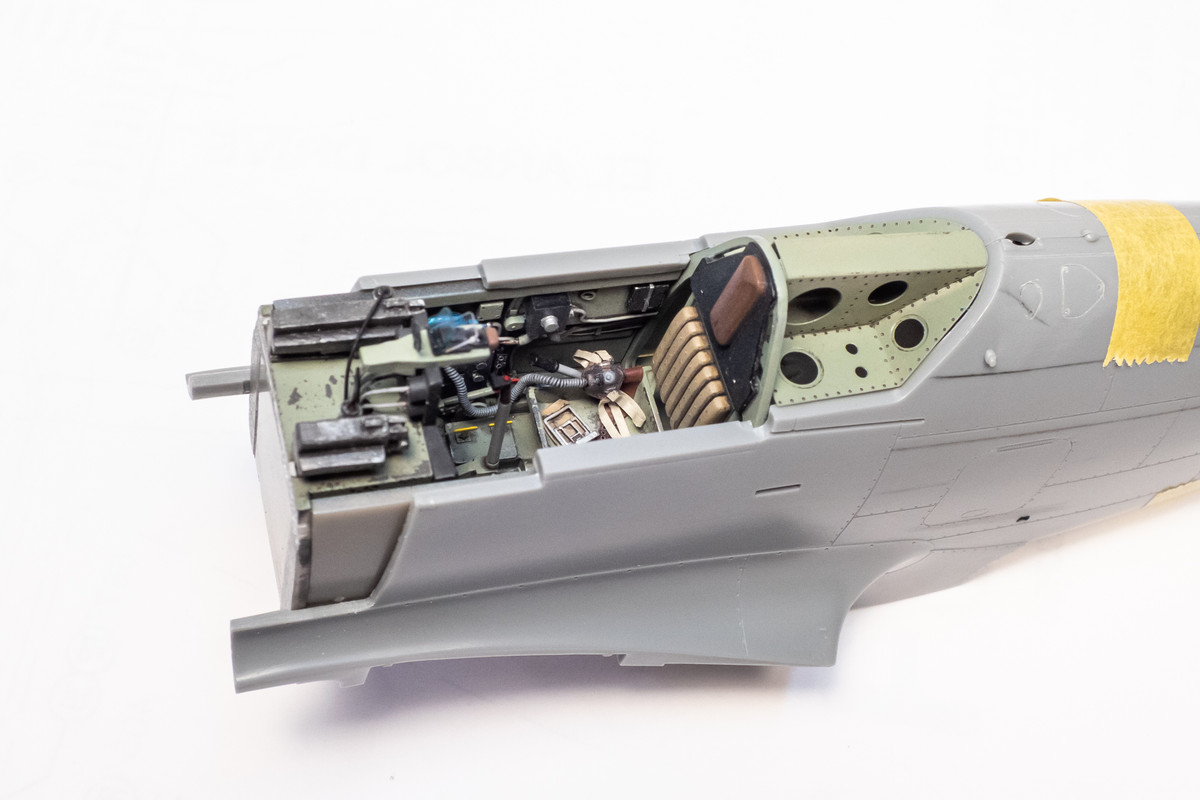

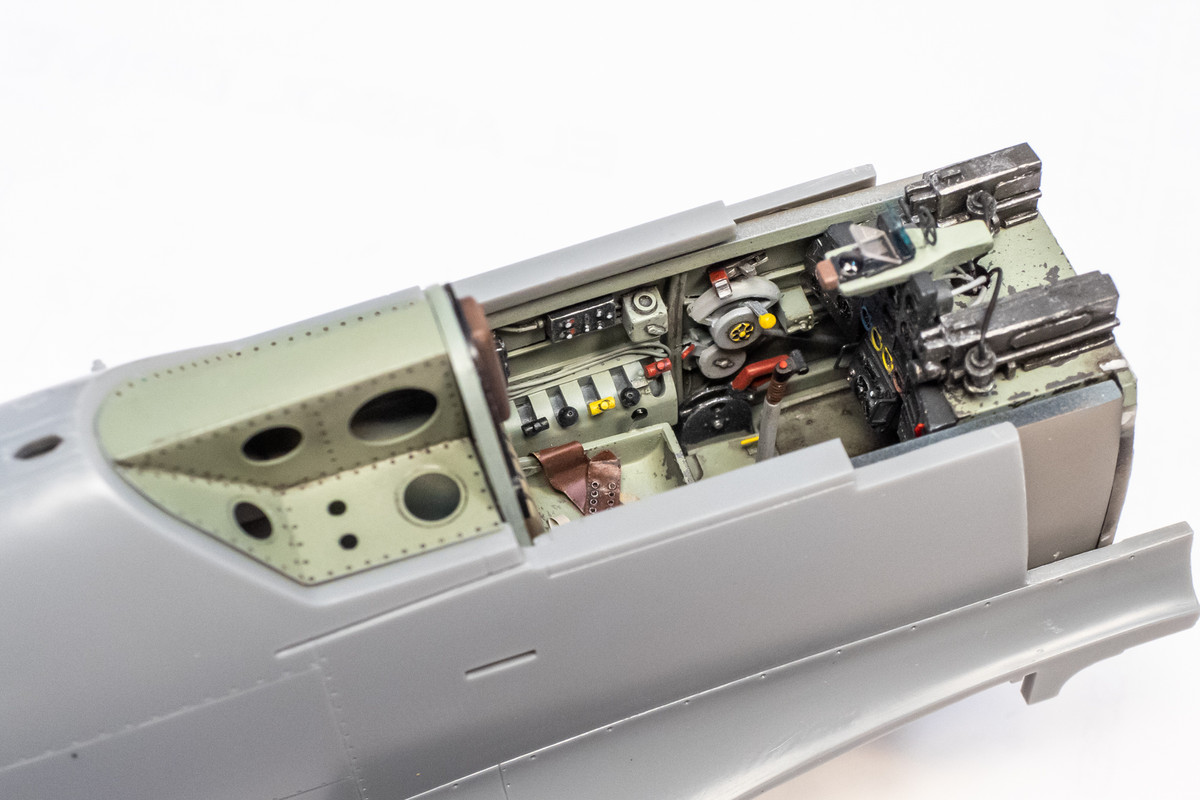
The Wolfpack resin nose is then slipped into place, again confirming the previous dry-fit assessments of a good fit.
I have not decided whether to pose the canopy open or closed. Here is a check of the fit of the open canopy parts.
After fixing and riveting the nose, I decided to thin the edge of the baffles above the exhausts.
Time to start closing up the cockpit. In order to orient the oxygen hose and mask, I have glued the starboard sidewall onto the cockpit floor first. The front and rear bulkheads were put into place temporarily as a fitting template for the sidewall.
The oxygen hose has been roughly cut to length and posed to fit the mask, which will be placed on the right edge of the seat.
I've added straps to the mask made of strips of aluminum foil and the mask was spot-glued to the right edge of the seat.
The rear bulkhead with the seat was then glued into place onto the cockpit floor. It took some wriggling to get the oxygen hose connected to the mask.
Once that was done, I glued the front bulkhead/instrument panel into place. The Aires cockpit fits very well together with consistent contact around all of the edges. I simply held each part in place with my fingers and seeped thin CA glue into the joints.
The port sidewall is glued in last. The cockpit is complete!
Now I want to check the fit of the resin cockpit into the fuselage. I can now confirm that the Aires resin cockpit for this kit is a drop-in fit without any need for adjustments to the fuselage parts. The forward gun deck of the resin cockpit DOES need to be removed in order for it to work with the Wolfpack resin Tei nose.
The Wolfpack resin nose is then slipped into place, again confirming the previous dry-fit assessments of a good fit.
I have not decided whether to pose the canopy open or closed. Here is a check of the fit of the open canopy parts.
John aka JKim
-----------<><
-----------<><
-
BlackSheep214

- Elite Member
- Posts: 10370
- Joined: Sun Apr 06, 2014 8:47 pm
Re: 1//32 Hasegawa Ki-61-1 Tei Hien
Incredible progress. I’m curious on your final decision on the canopy - open or closed.
“Who controls the skies, controls the fate of this Earth”
Author unknown- 352nd Fighter Group, Blue-Nosed Bastards of Bodney
“Send one plane it’s a sortie; send two planes it’s a flight; send four planes it’s a test of airpower. - Richard Kohn
Author unknown- 352nd Fighter Group, Blue-Nosed Bastards of Bodney
“Send one plane it’s a sortie; send two planes it’s a flight; send four planes it’s a test of airpower. - Richard Kohn
Re: 1//32 Hasegawa Ki-61-1 Tei Hien
That cockpit looks excellent, as does your riveting!
Stuart Templeton 'I may not be good but I'm slow...'
My blog: https://stuartsscalemodels.blogspot.com/
My blog: https://stuartsscalemodels.blogspot.com/
-
Gary Brantley

- Addicted Member
- Posts: 1746
- Joined: Tue Apr 08, 2014 9:40 pm
- Location: Cameron, Texas
Re: 1//32 Hasegawa Ki-61-1 Tei Hien
That is a great cockpit John!  Man, I would want to show as much of that as I could-open canopy all the way is my vote!
-
Duke Maddog

- Elite Member
- Posts: 7082
- Joined: Tue Jun 03, 2014 11:22 am
- Location: Rowland Heights, CA
Re: 1//32 Hasegawa Ki-61-1 Tei Hien
I agree with Gary: open it up. There's too much incredible detail to see!
The Duke
Virtuoso of Miniatures
"Do you know what the chain of command is? It's the chain I get and beat you with 'till you understand who's in ruttin' command!"
-Jayne Cobb, Firefly Episode 2 "The Train Job"
We are modelers - the same in spirit, in hunger to insanely buy newly released kits, hustlers in hiding our stash from our better halves and experts in using garbage as replacements for after-market parts.