Thanks guys! The mask idea was almost a bust during the cutting prcoess as my sprue cutters slipped and cut into the mask. I stopped the cut immediately, dropped some Tamiya Extra Thin cement into the gouge, kinda rolled it around my finger tips and threw it into the model box. Luckily, it was salvageable.
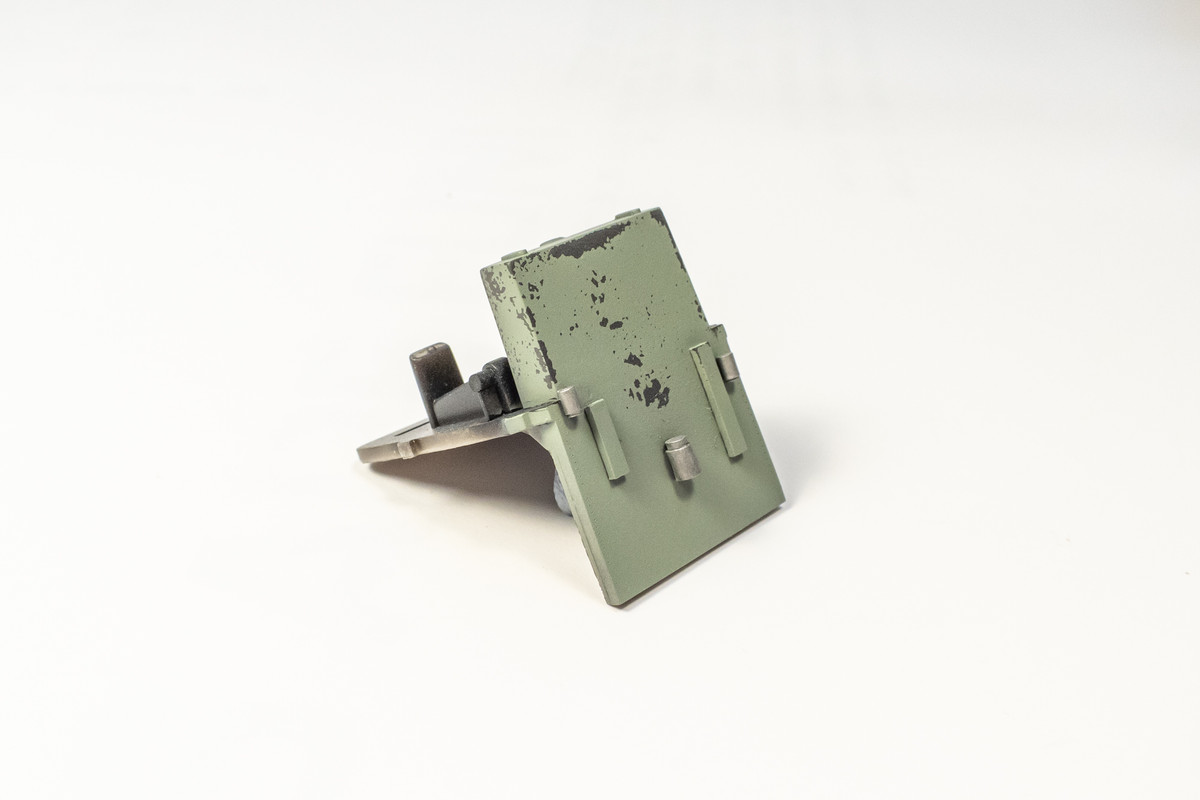
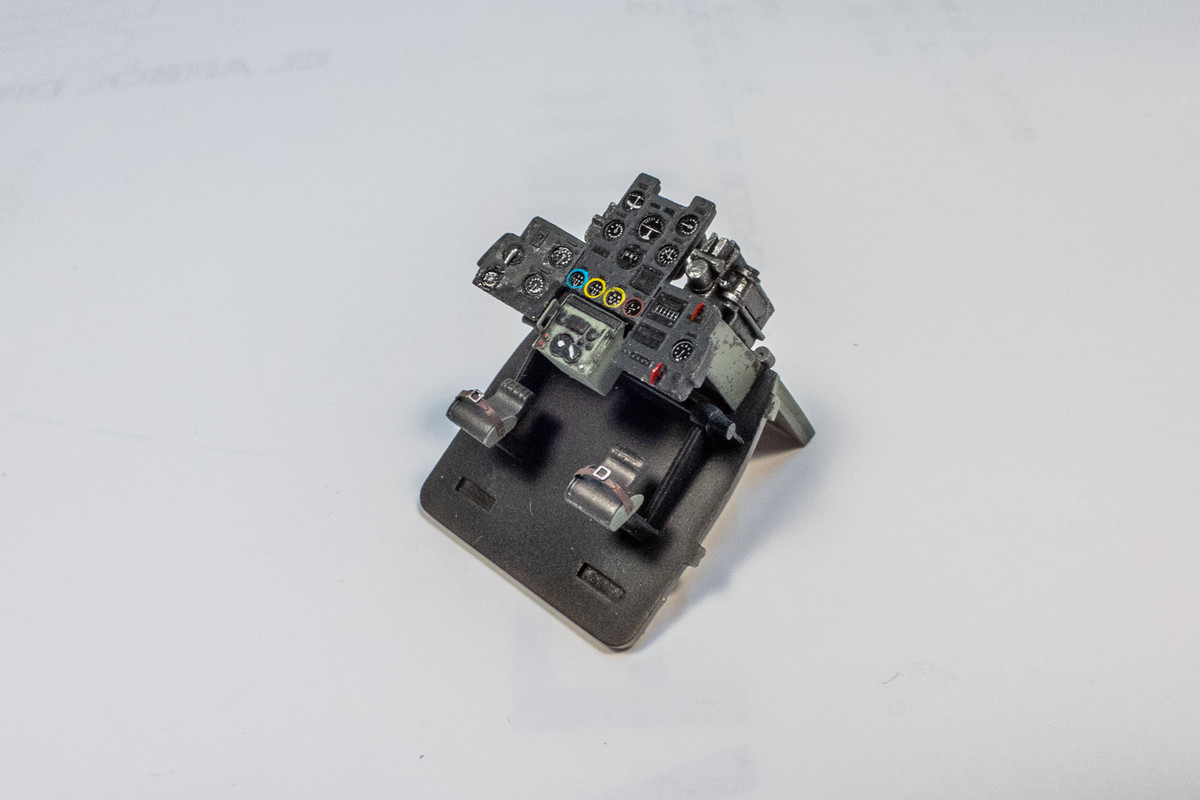
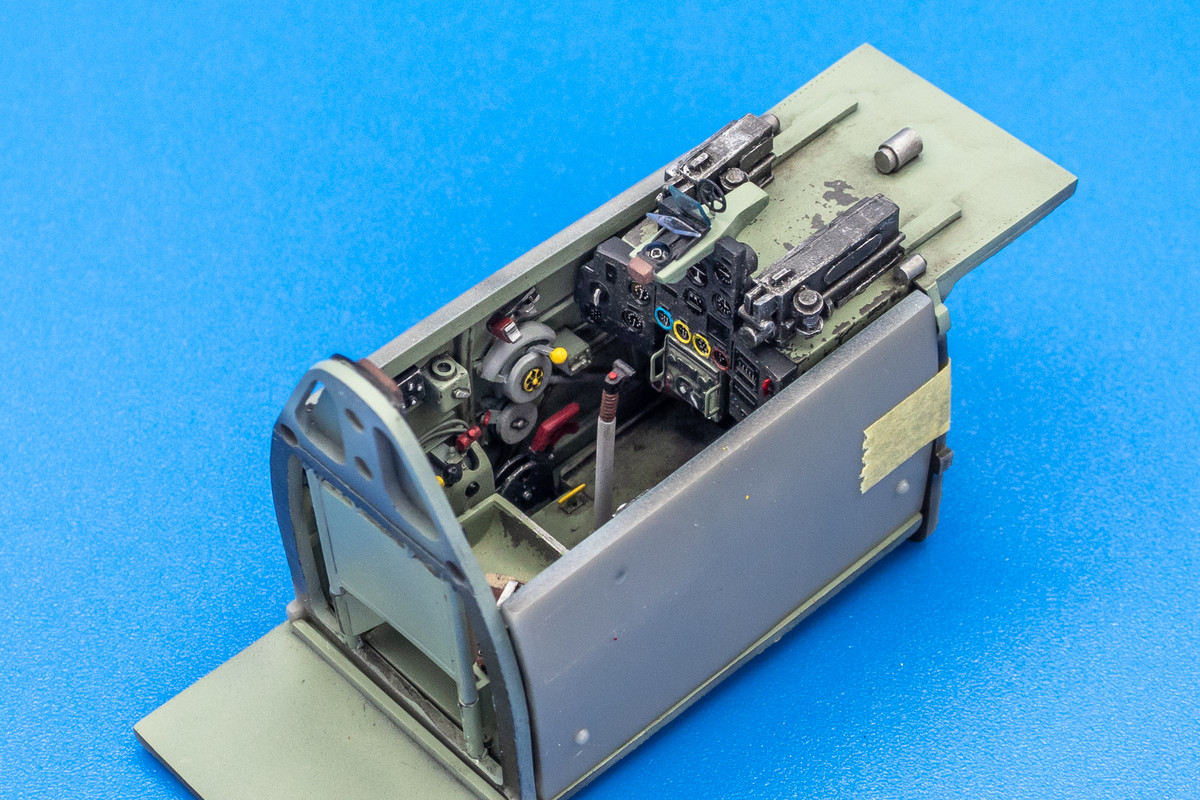
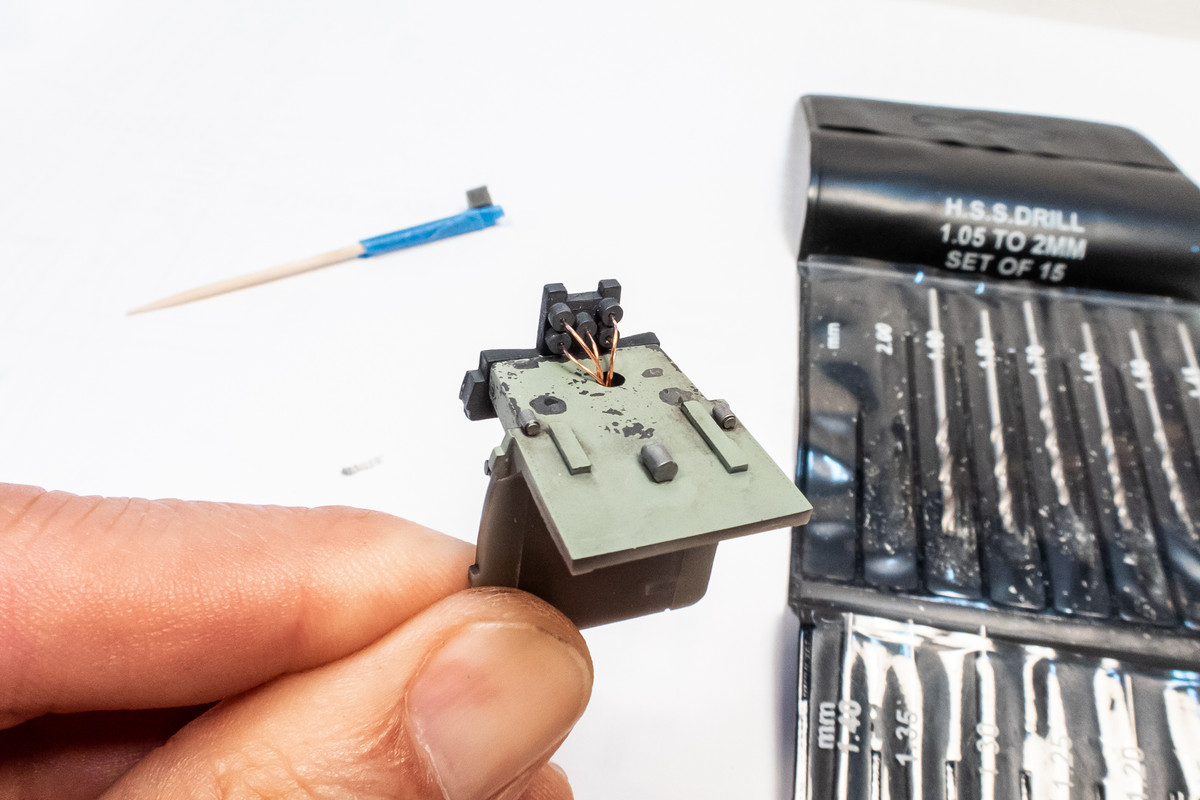
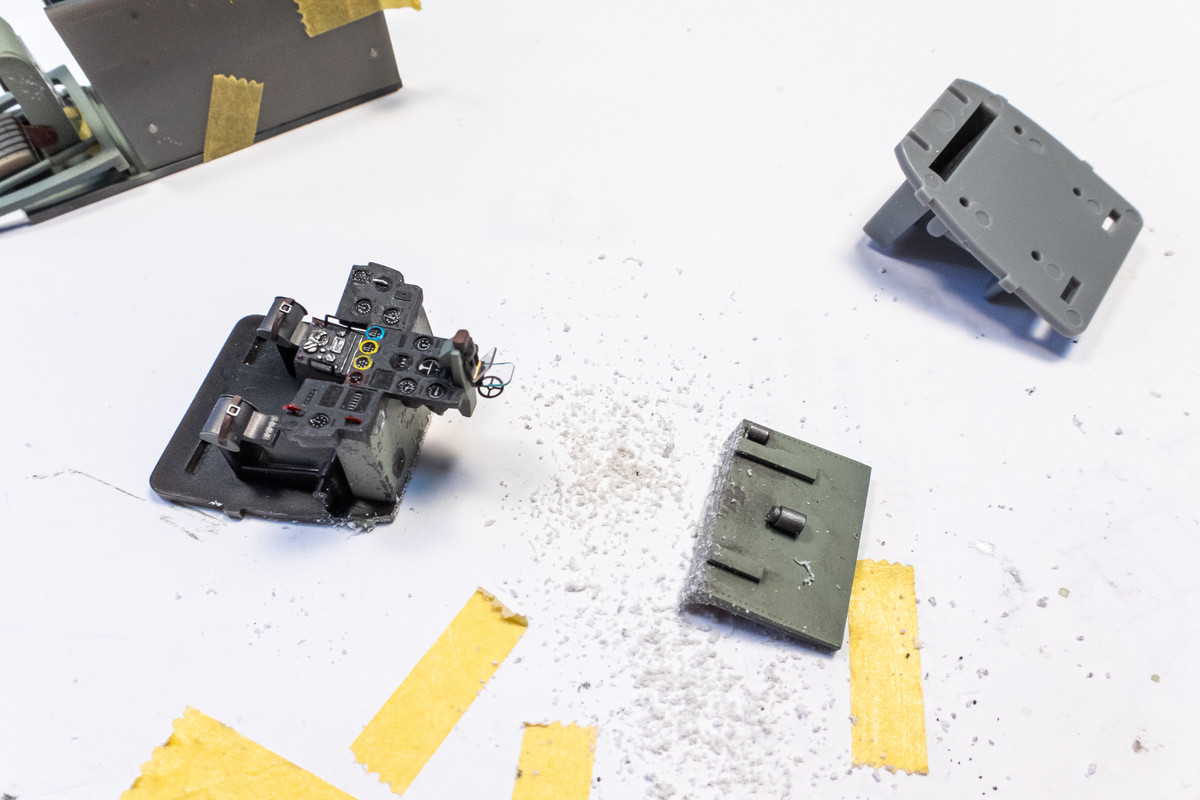
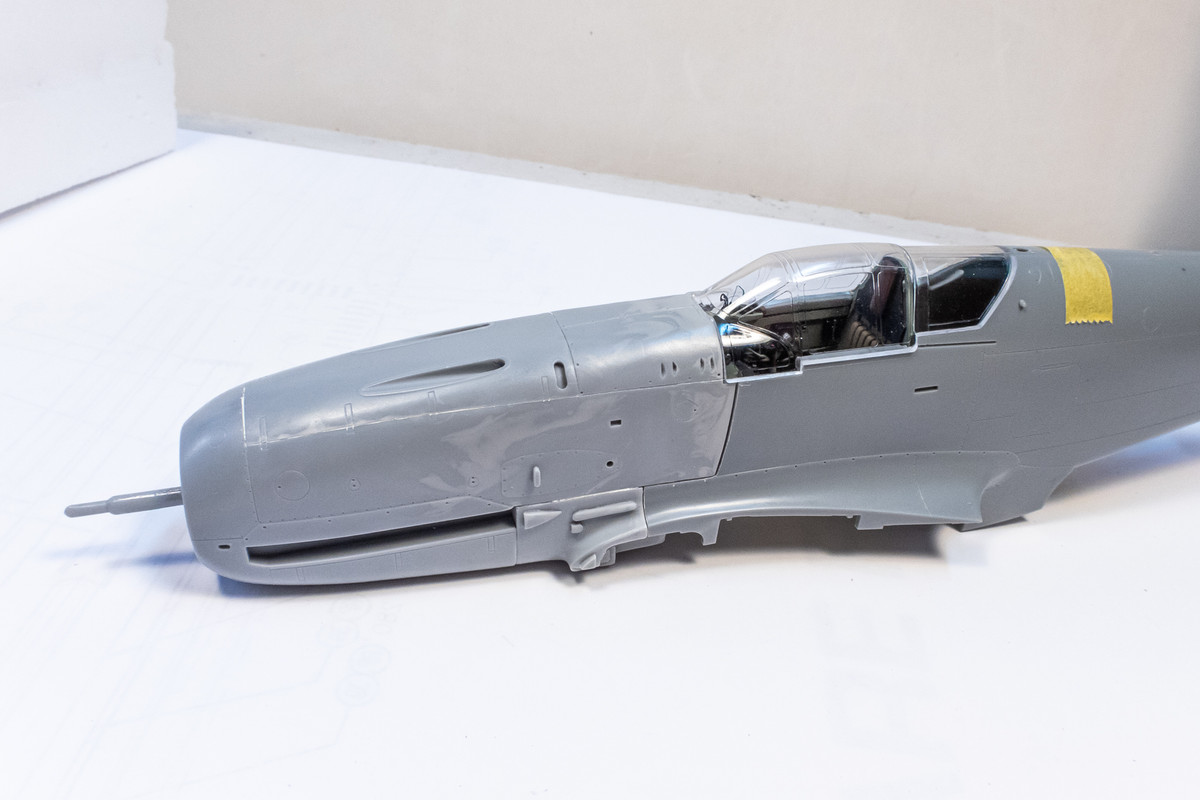
The cockpit painting has started. I started very small and painted three small levers and installed them on the instrument panel. You can't see it here but I took the time to putty the top edges of the panel to hide the obvious joint between the photoetch face and the resin backing.
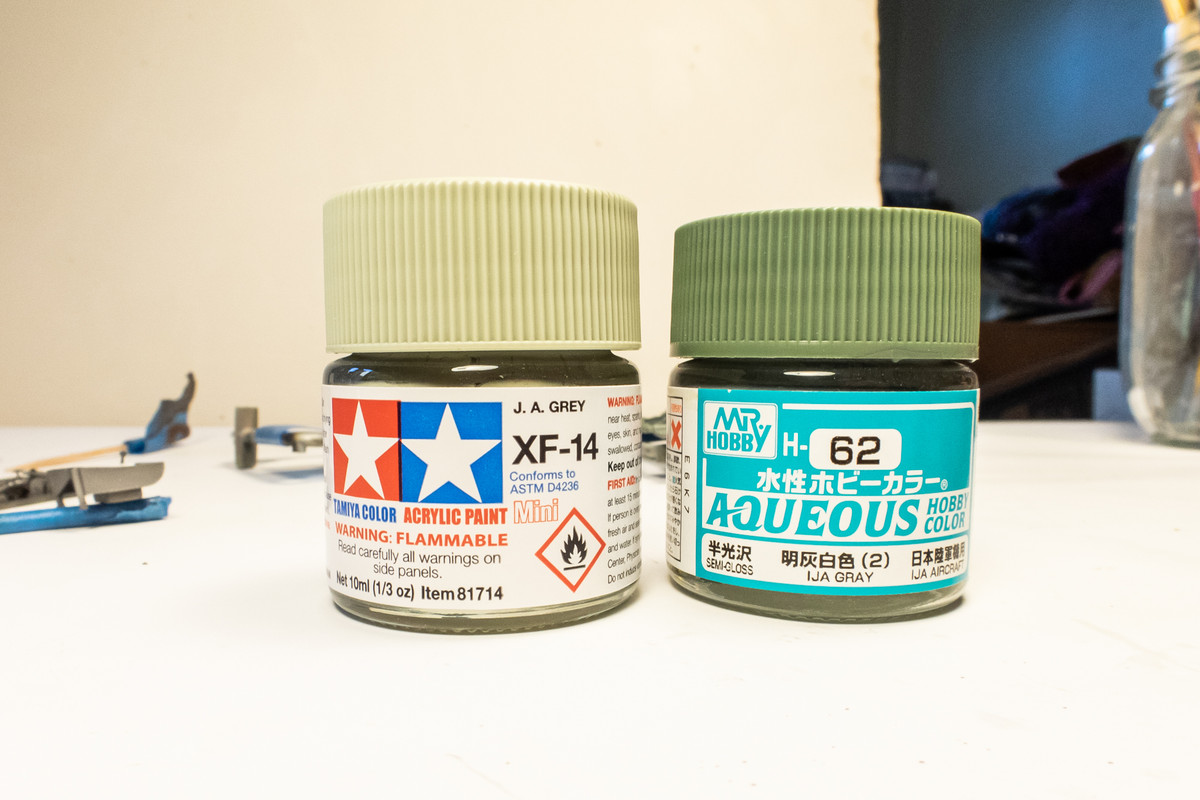
My knowledge of Japanese WW2 aircraft is very minimal. Colors on these aircraft is not straightforward and I'm relying on information that I was able to mine from the internet, right or wrong. My research pointed to what I think is a credible source named Nick Millman. He writes the blog "Aviation of Japan" and has some very in-depth and interesting color analyses of WW2 Japanese aircraft, inside and out. On the subject of the interior color of the Ki-61, I found some recommendations by Mr. Millman in 2017 which, in essence, said to avoid the sandy brown (RLM 79) convention that many modelers assume is valid and go with grey-green. Mr Color C128 (IJA Grey Green) or Mr Hobby Aqueous H62 (IJA Grey) preferable over Tamiya XF-14 (IJA Grey). But my first choice was AK Real Colors RC328 (Hai-ryokushoku Grey Green). AK Real Colors was recently introduced and Mr. Millman was involved in the development of some colors (presumably the Japanese WW2 stuff) so I started with this color. I don't know if there is variability in batches but this color looked very cool, almost bluish grey. Didn't like it.
After spraying some samples of Mr Hobby Aqueous H62 and Tamiya XF-14, I settled on a 1:1 mixture of the two.
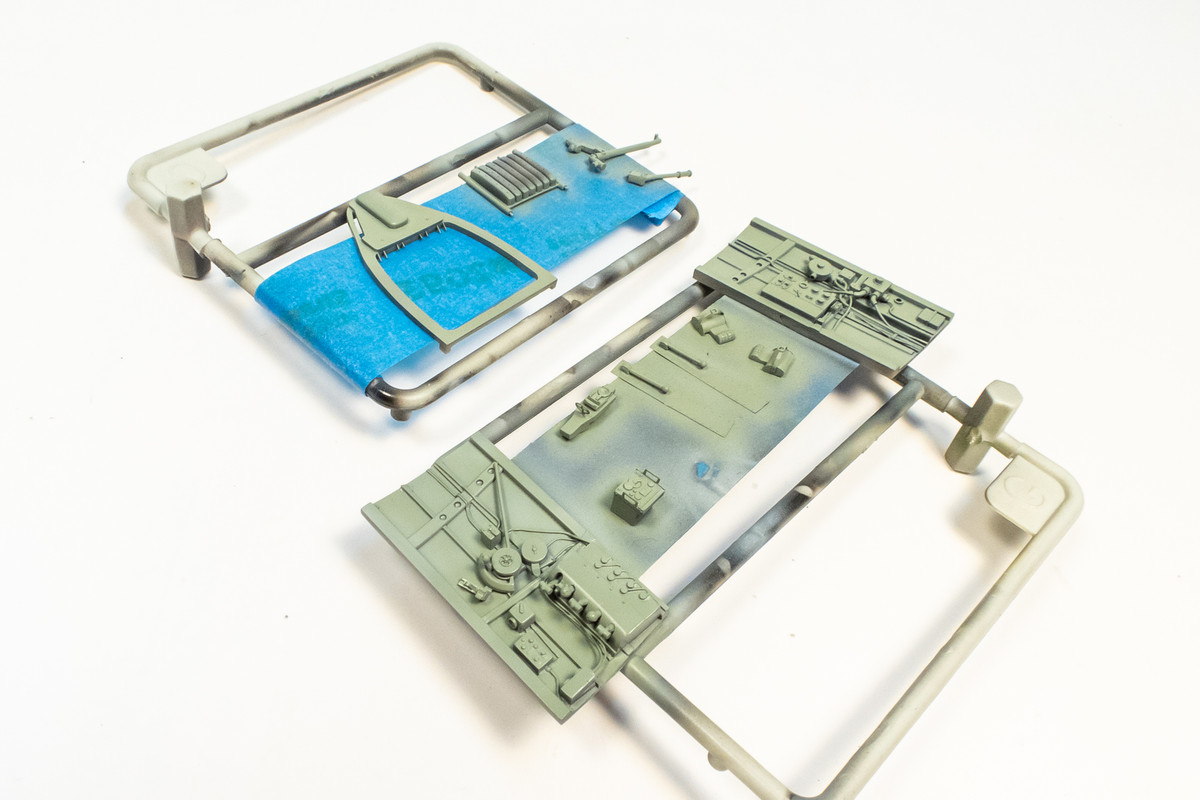
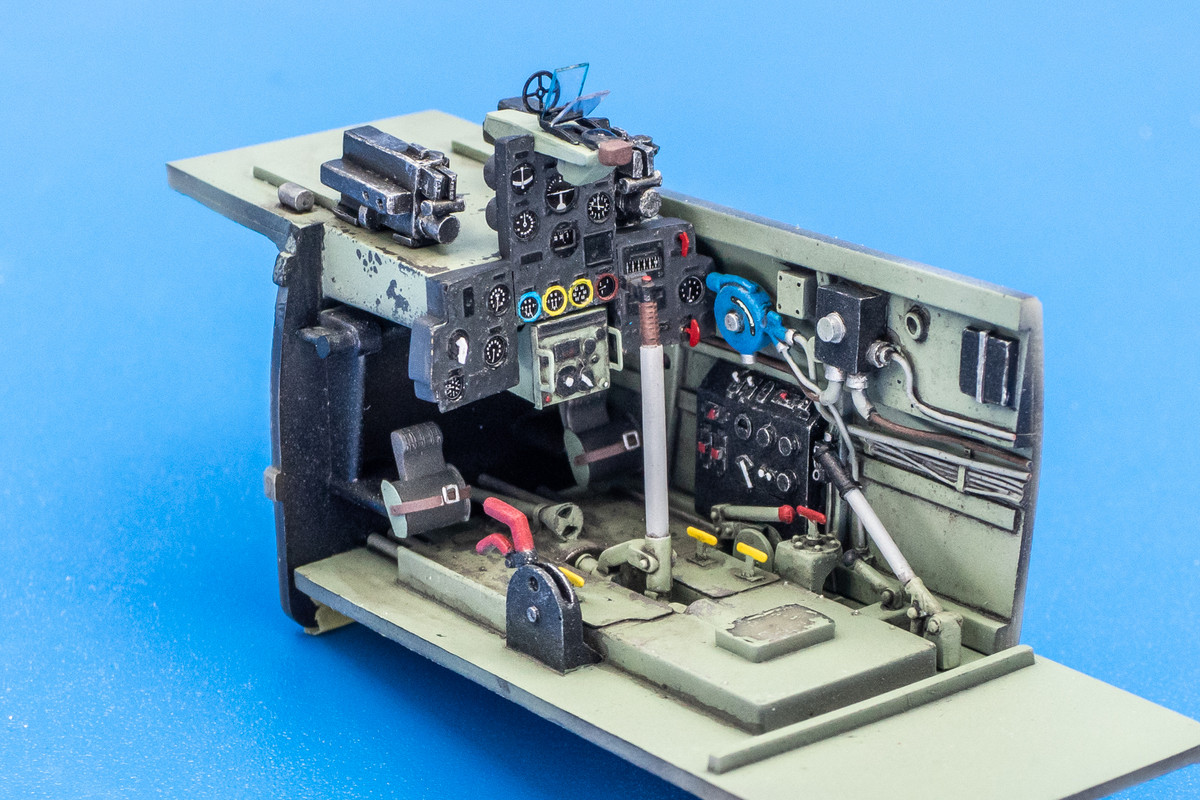
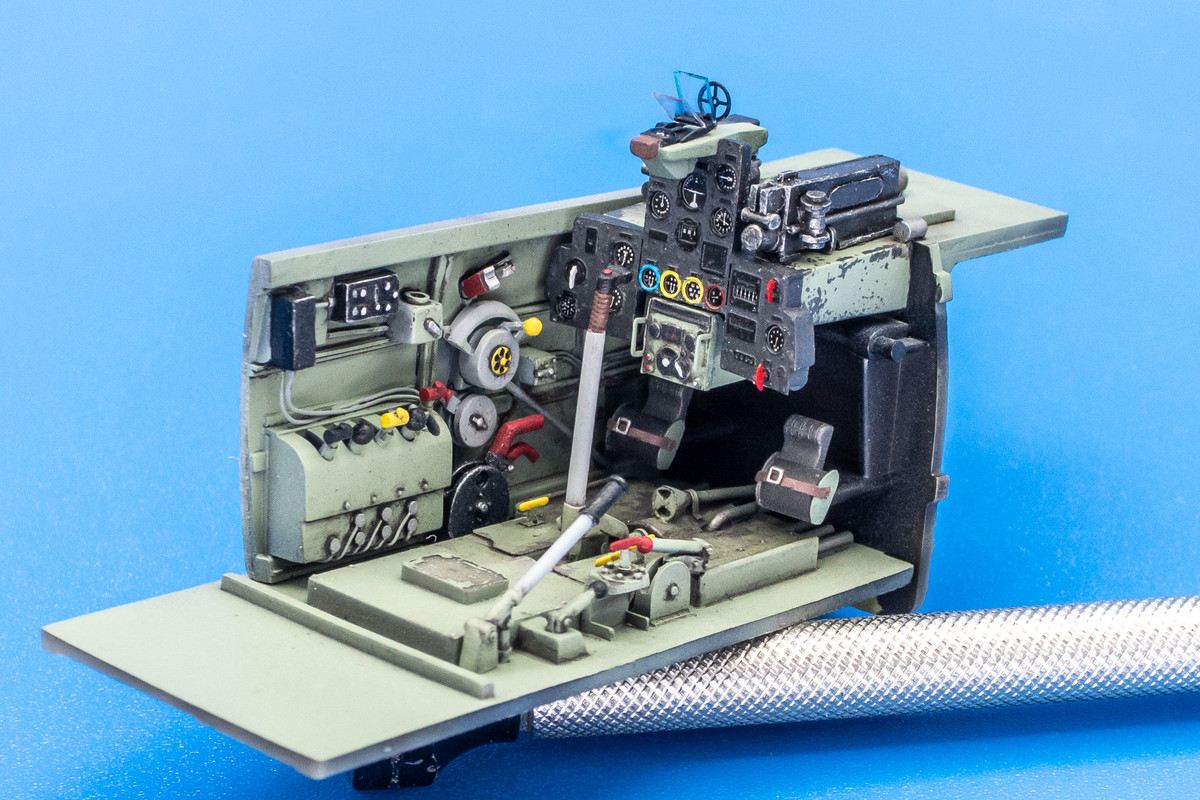
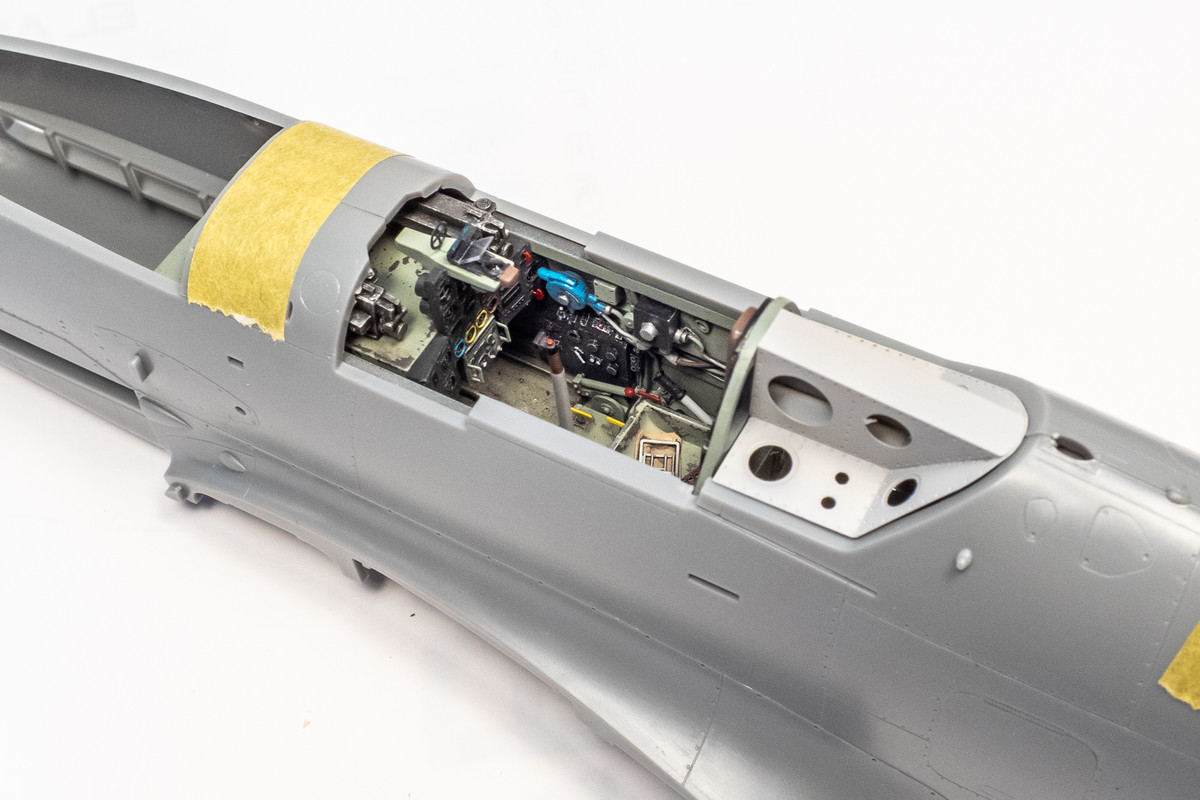
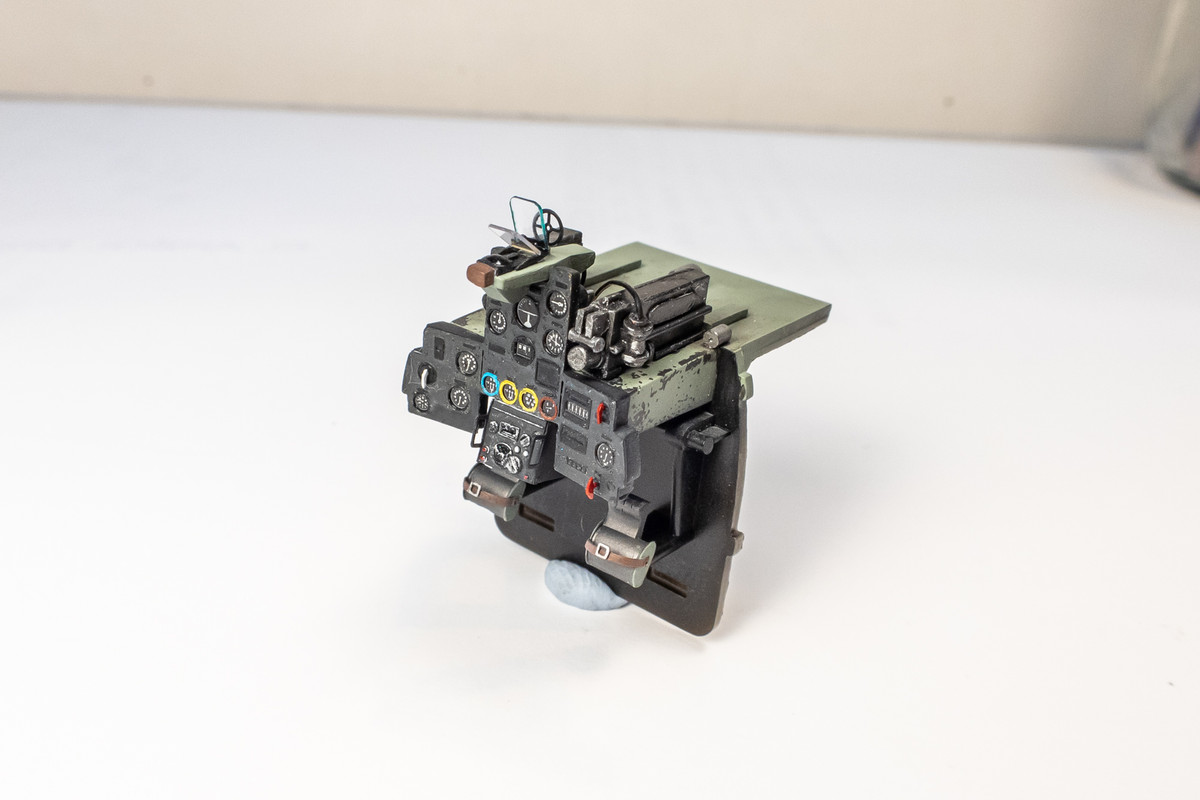
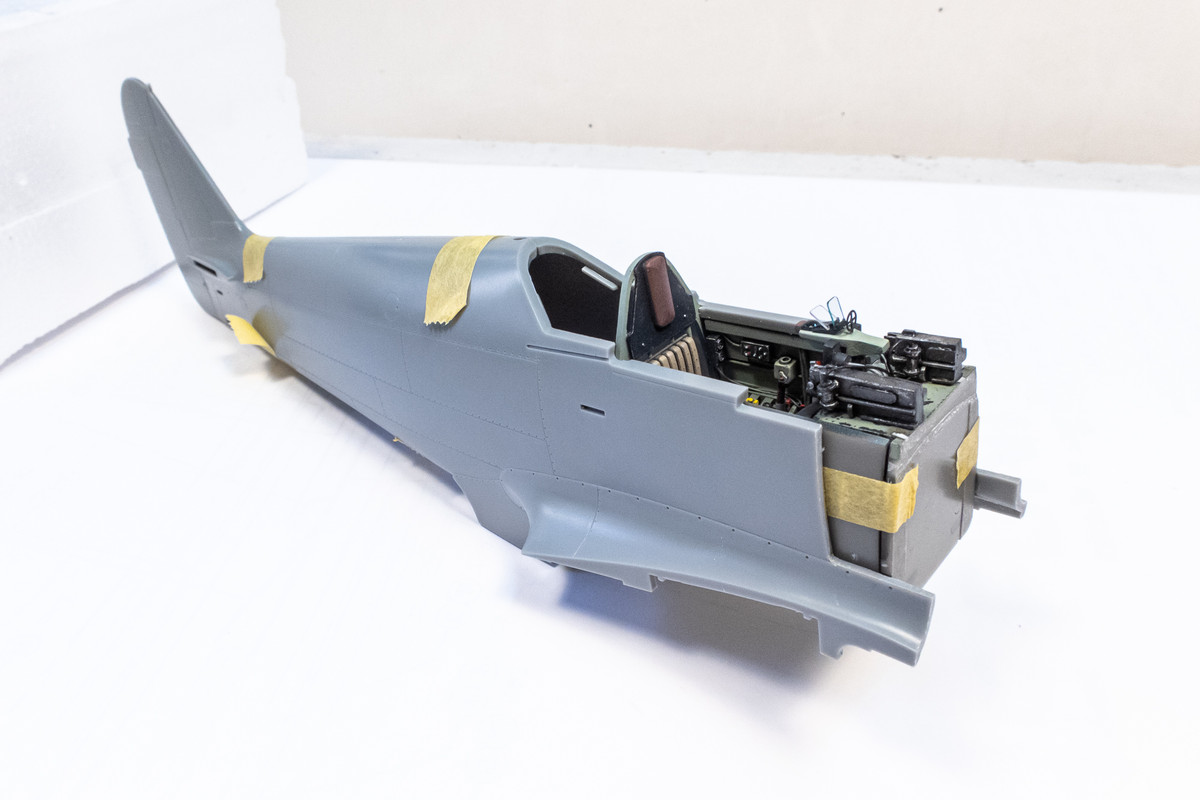
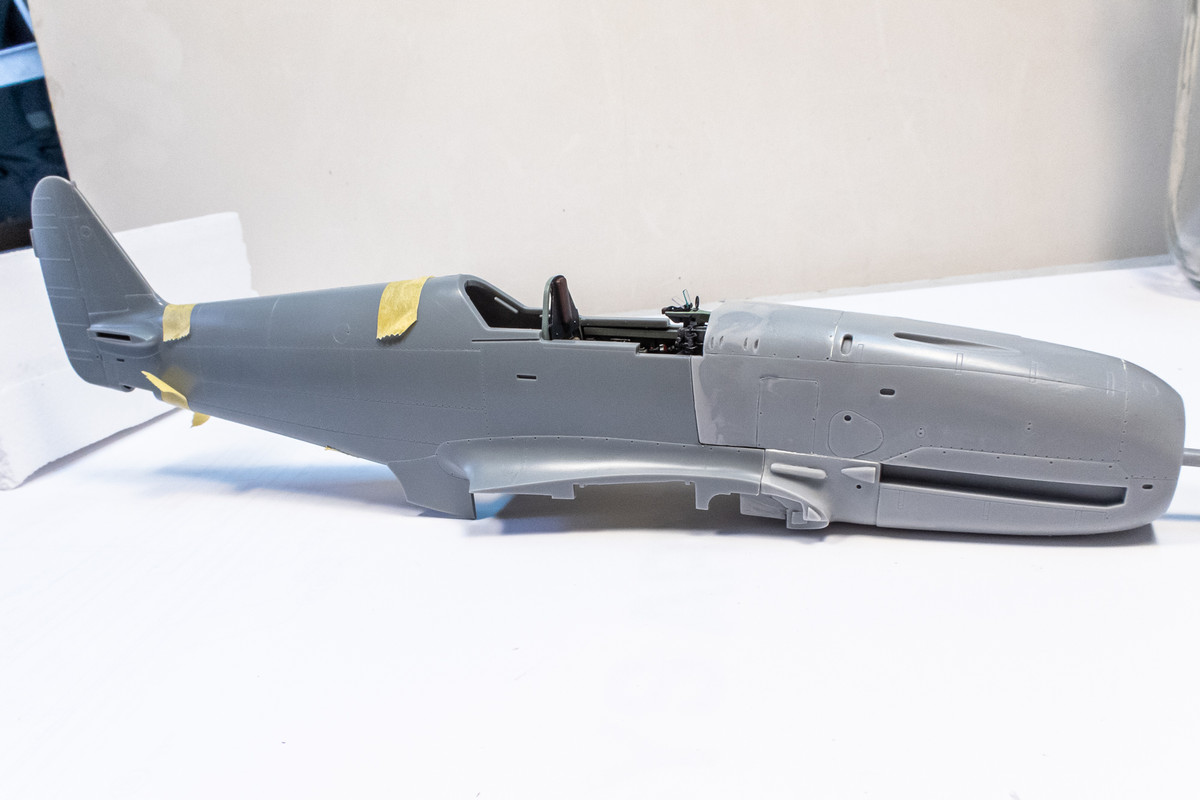
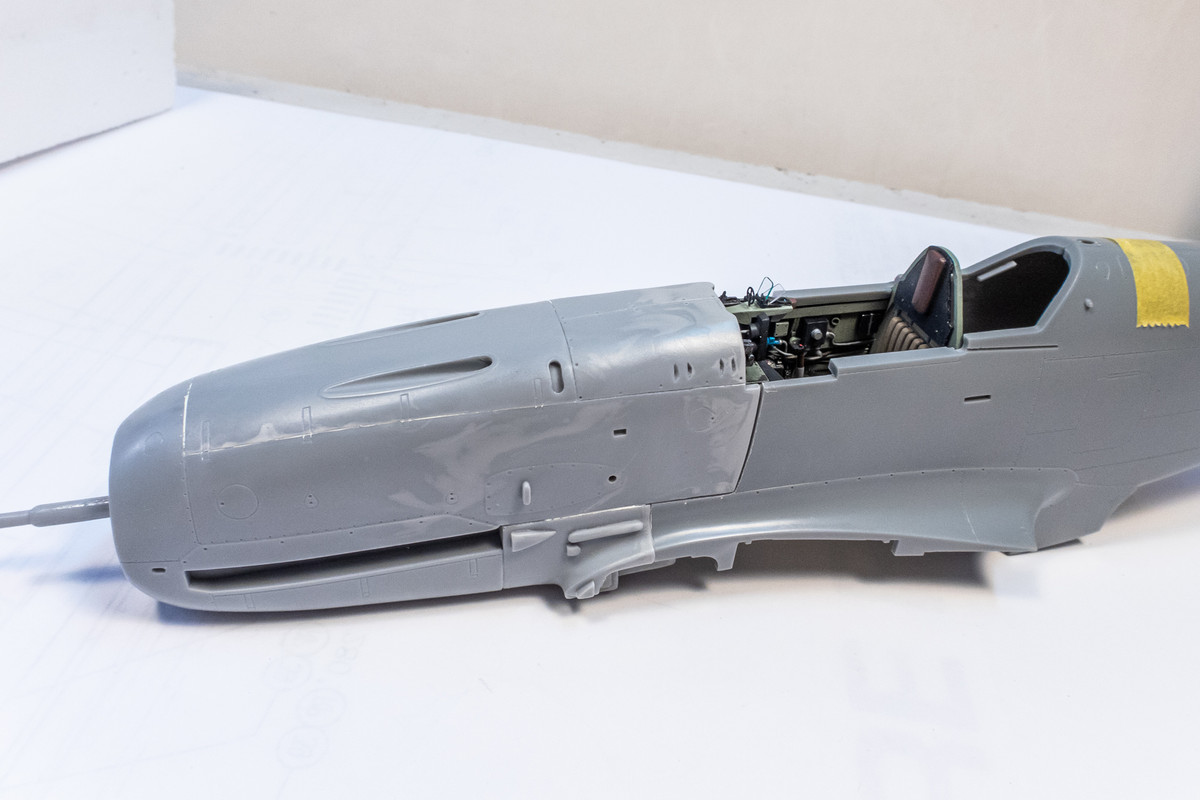
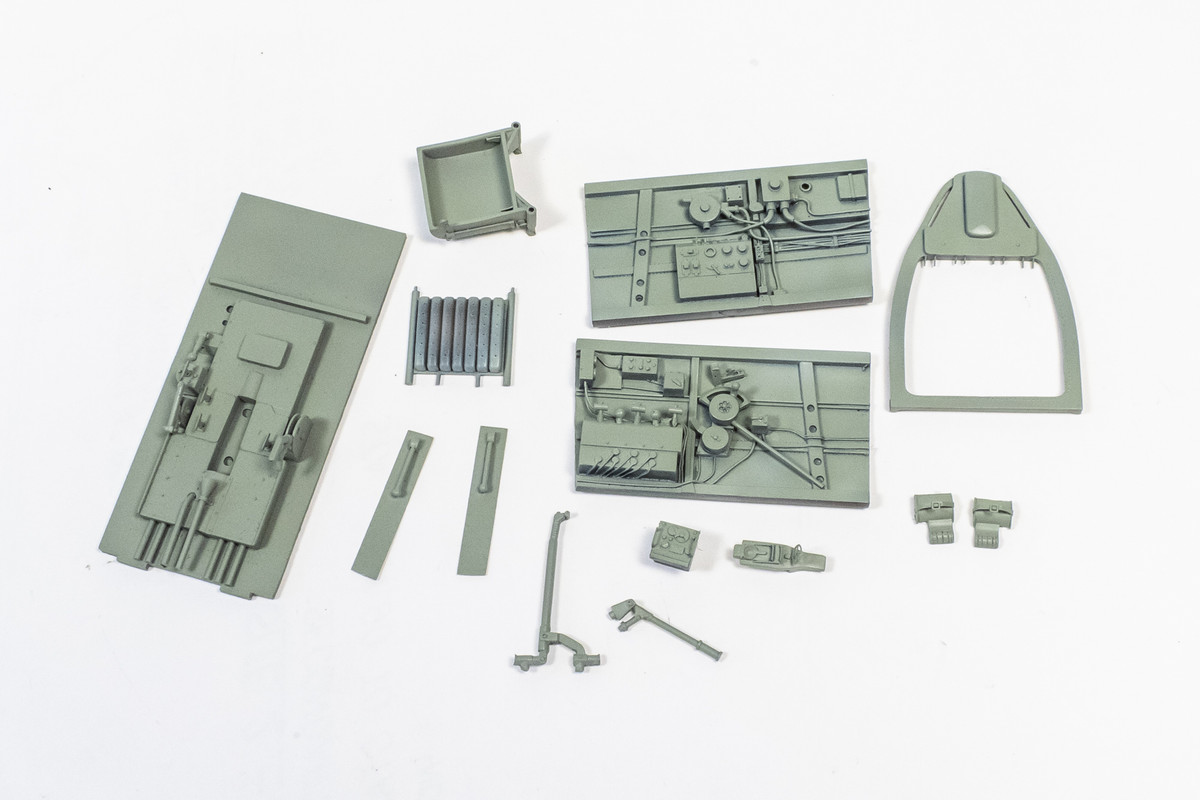
After the base color is established, I start doing the detail painting of the cockpit. I'm very random when it comes to this and jump all around the place with the detail painting. Just whatever jumps out at me or if I see something in my references that I want to replicate. Slowly but surely, things get done.
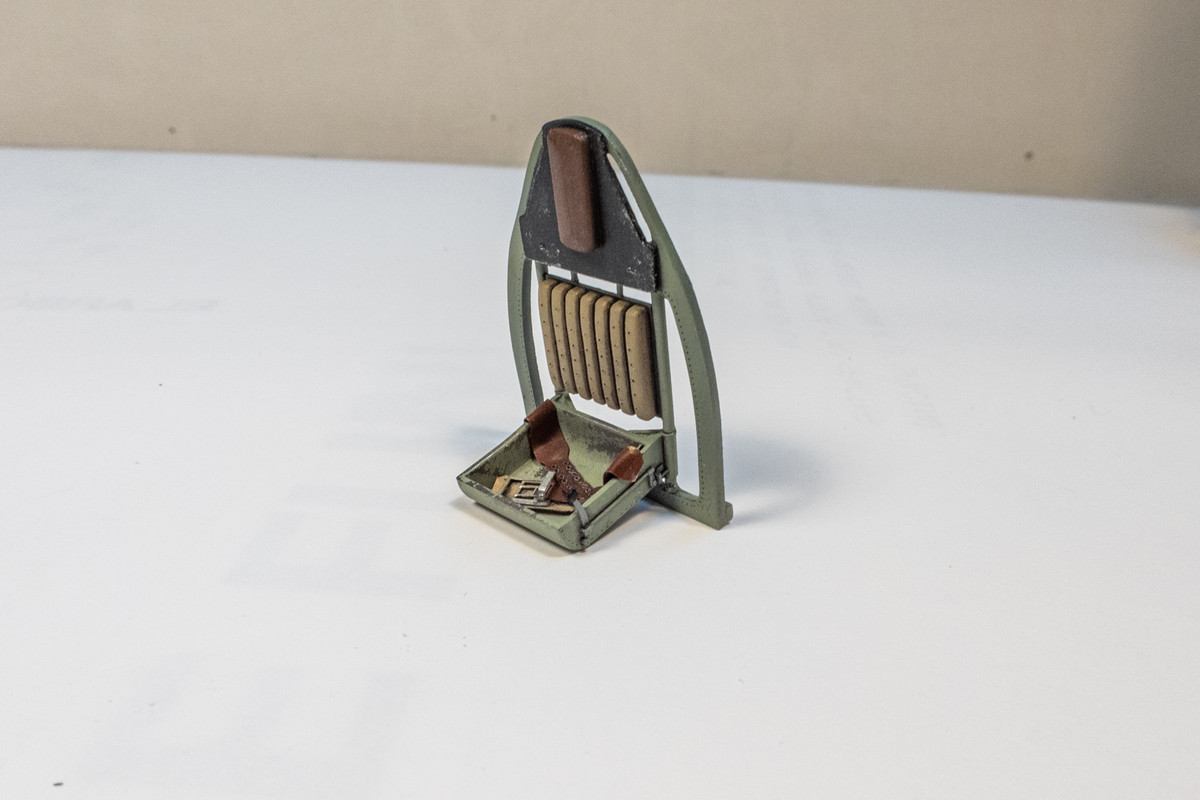
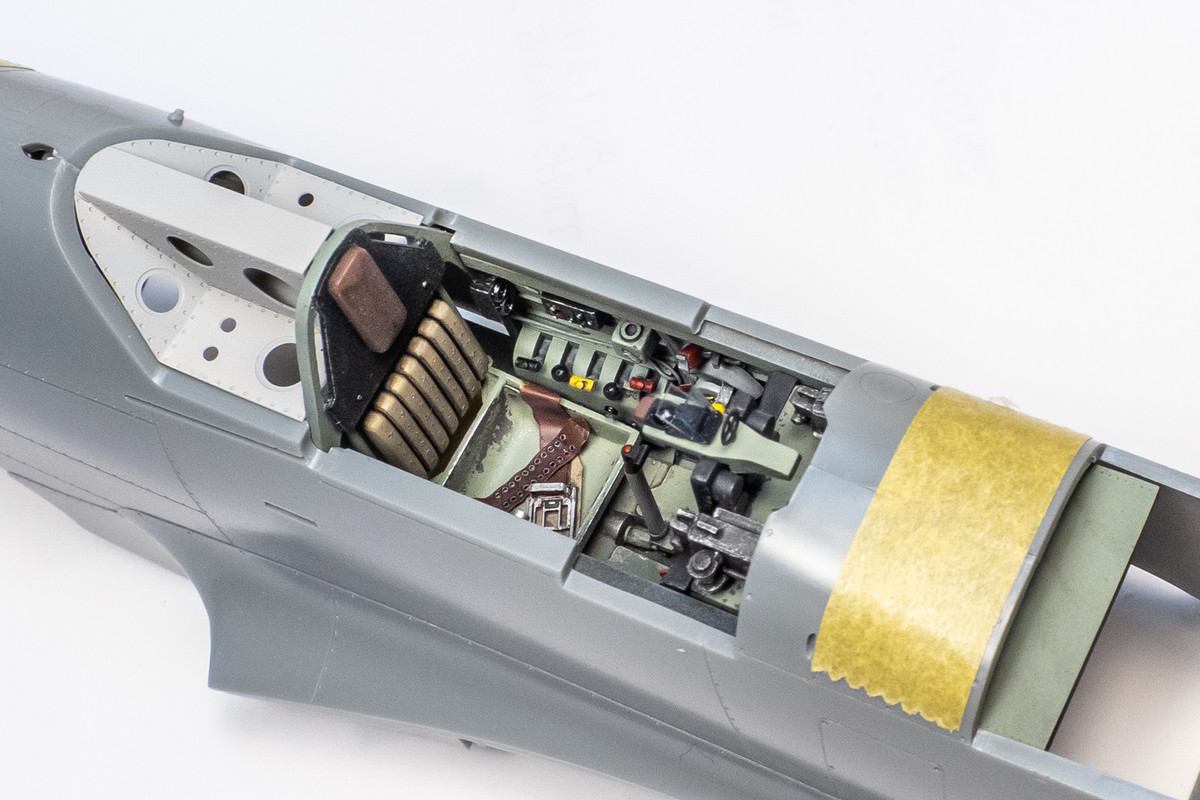
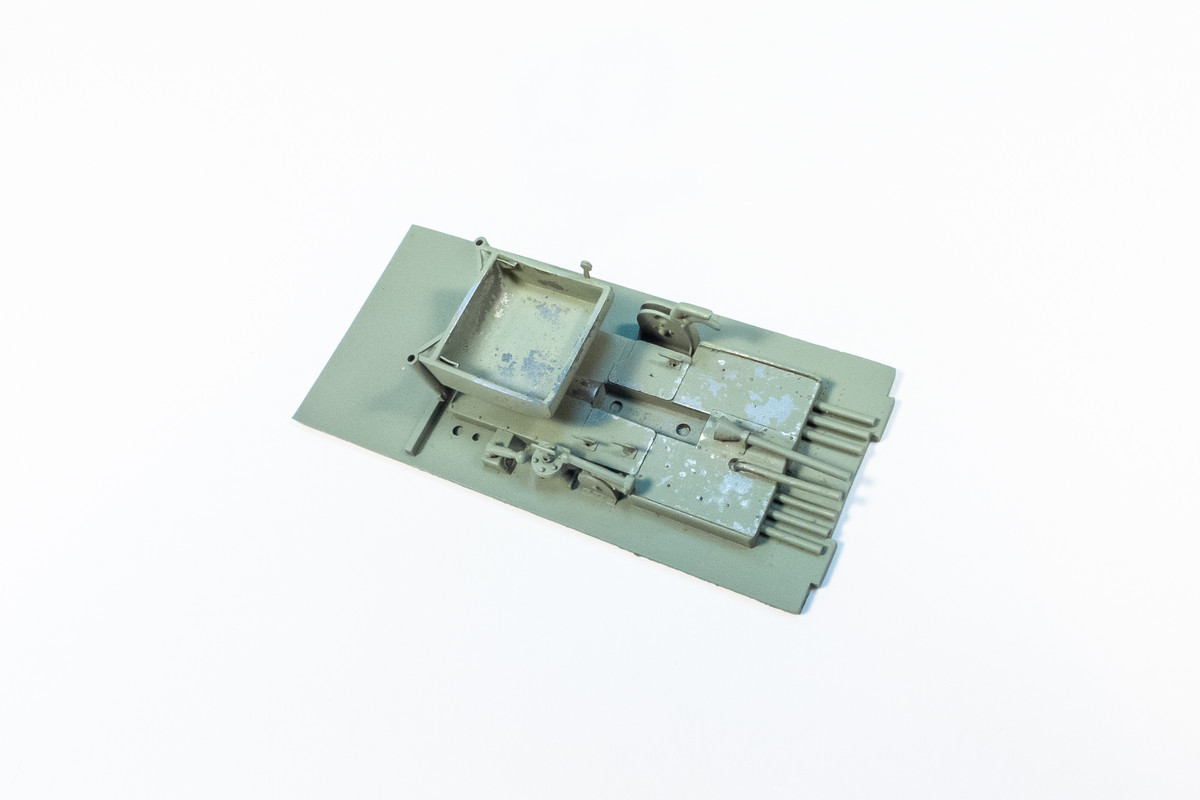
The cockpit floor and seat got a slightly different treatment and a metal color was laid down prior the Grey-Green to incorporate some hairspray chipping.
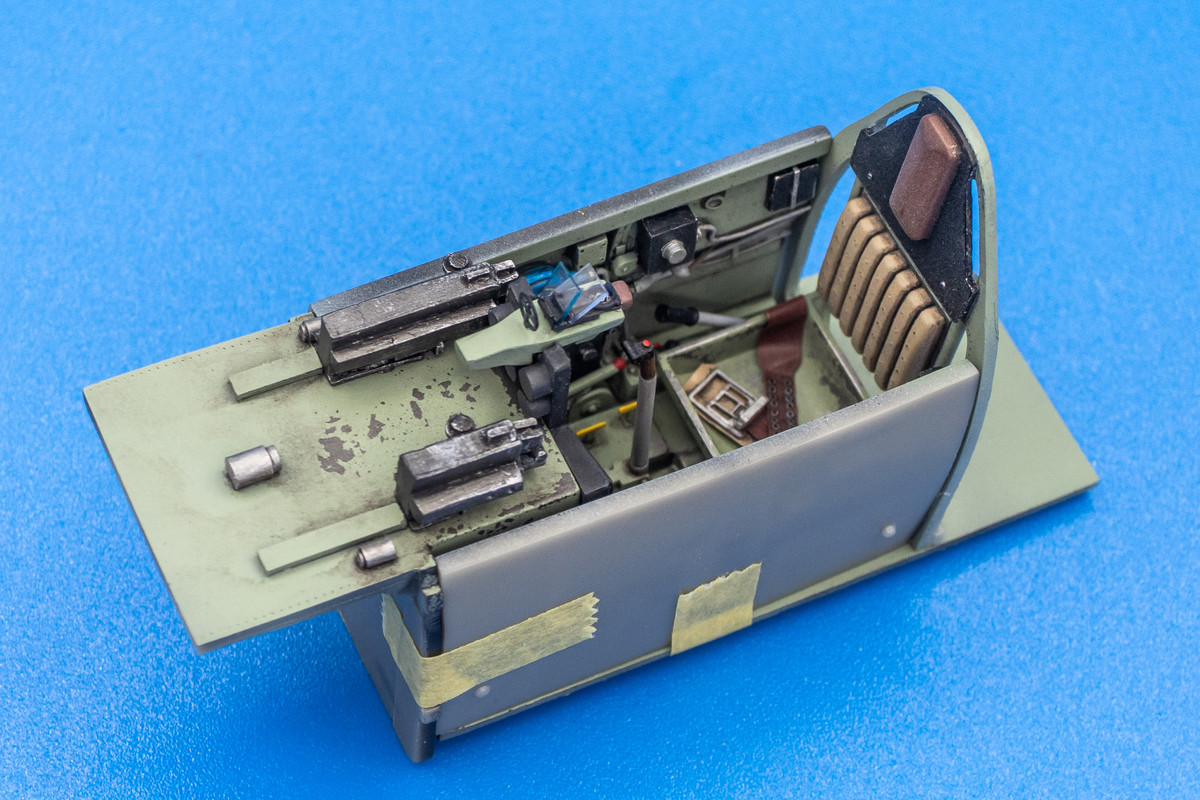
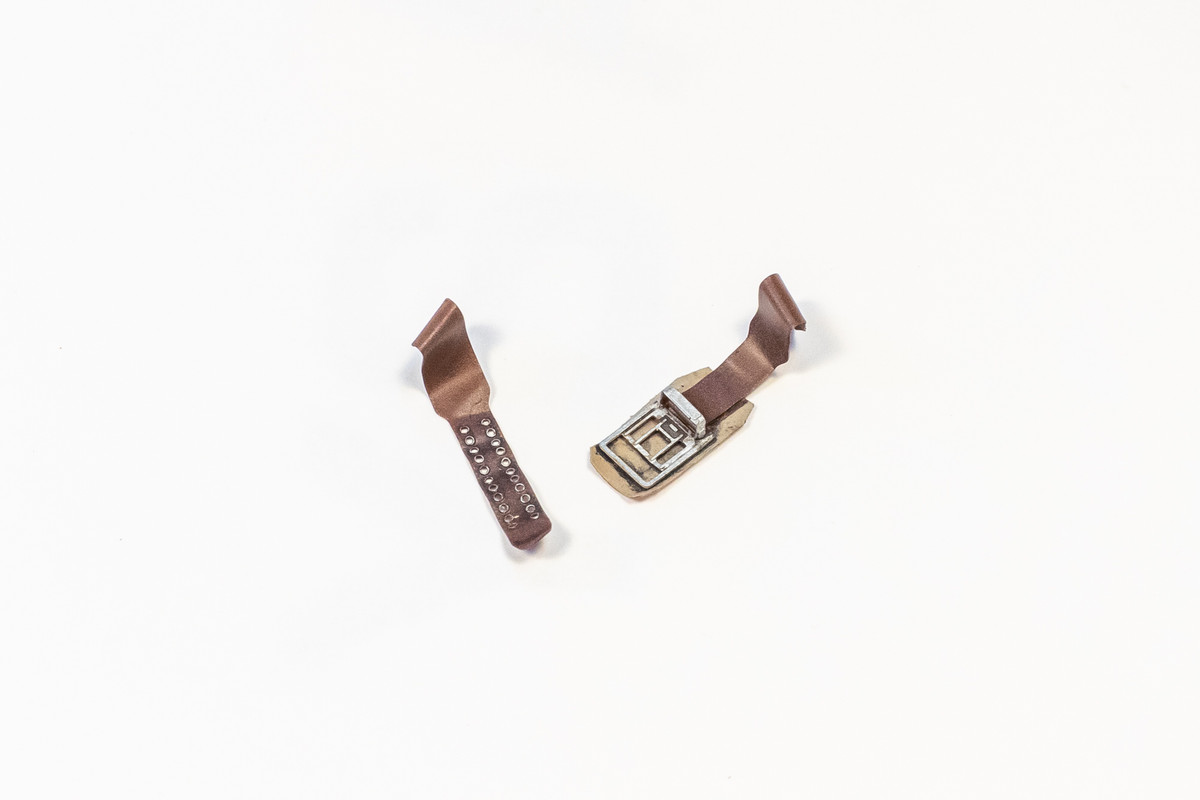
The photoetch lap harnesses hold a pose nicely, so I'm able to paint them apart from the seat.
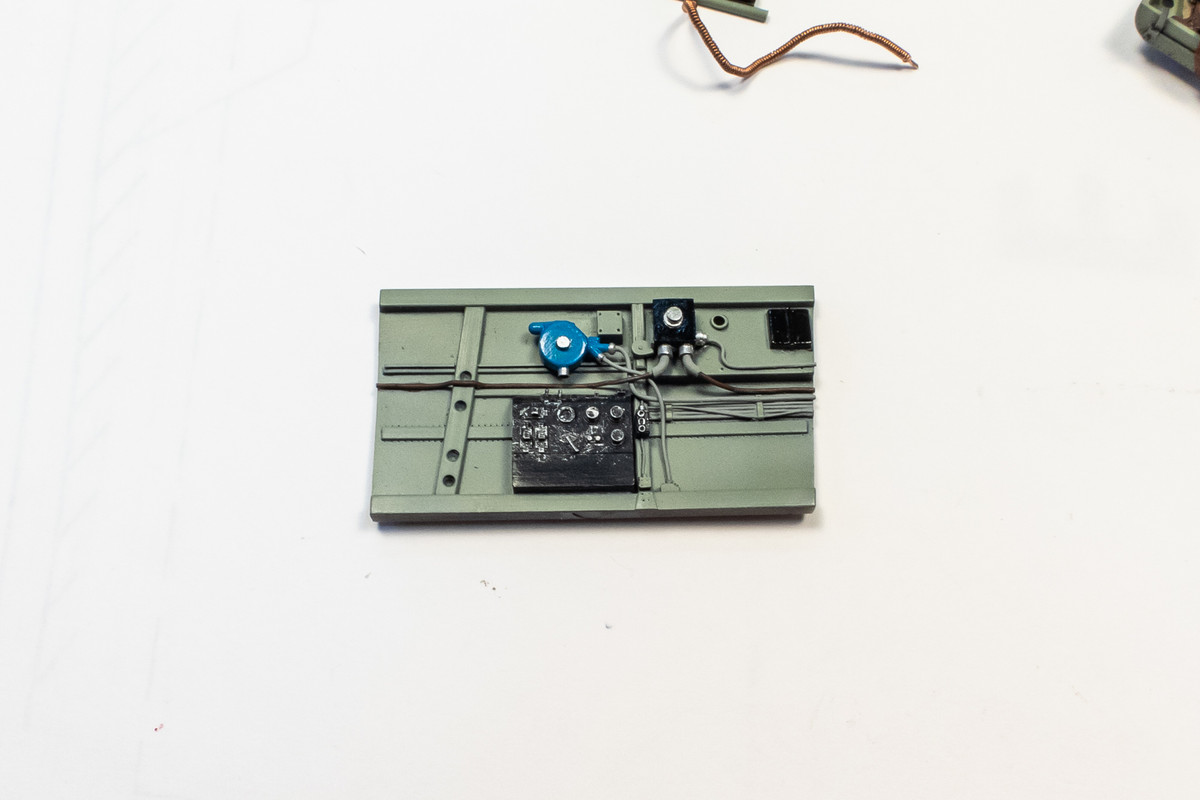
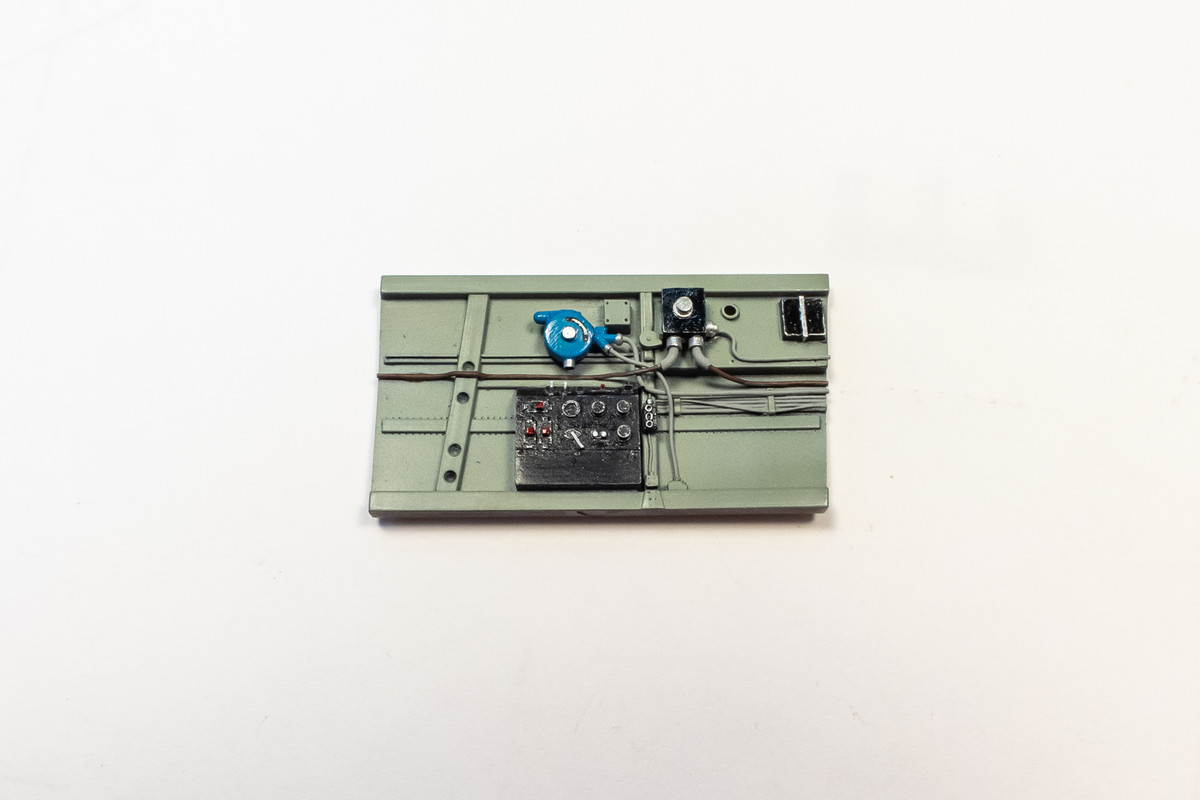
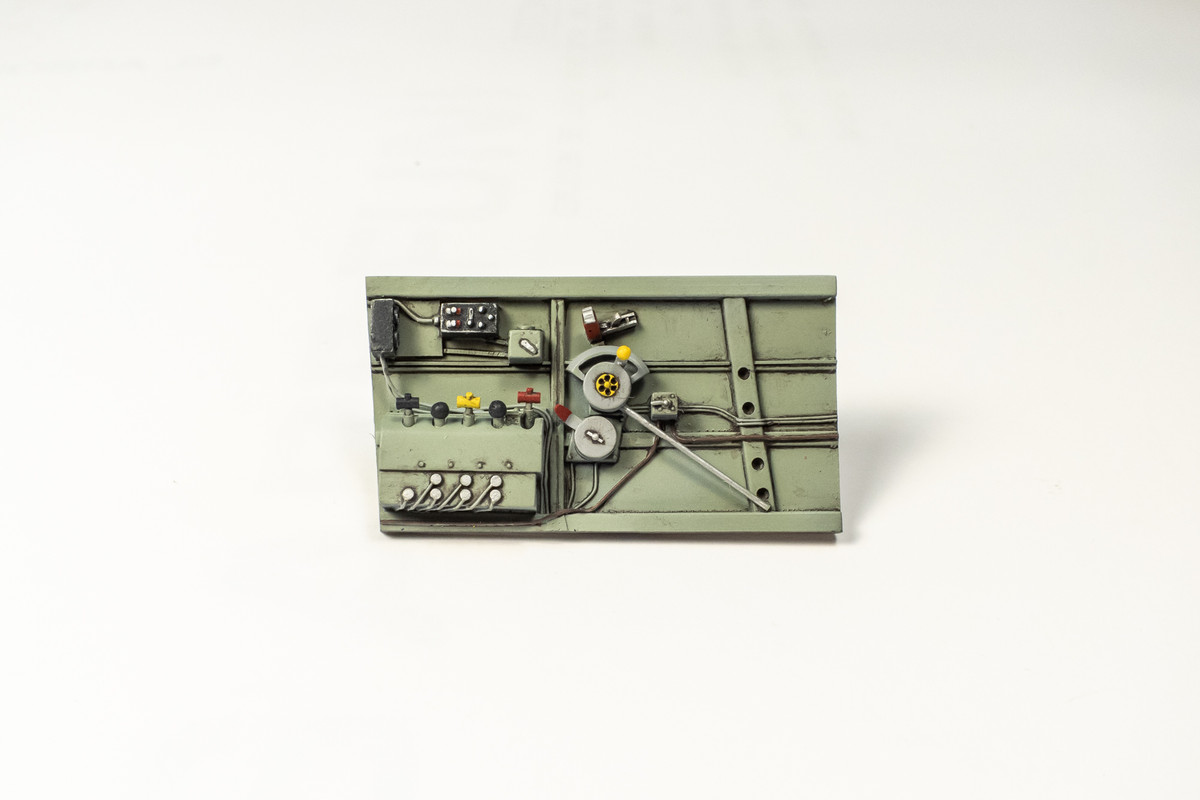
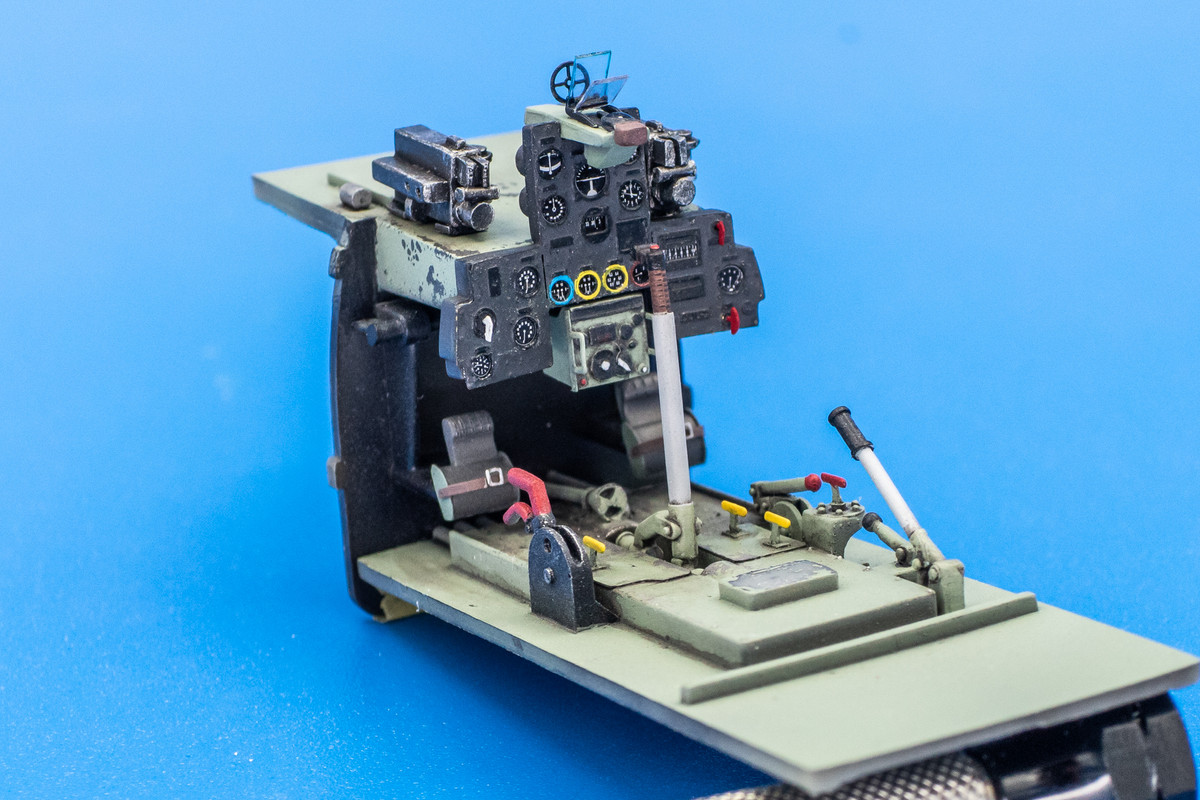
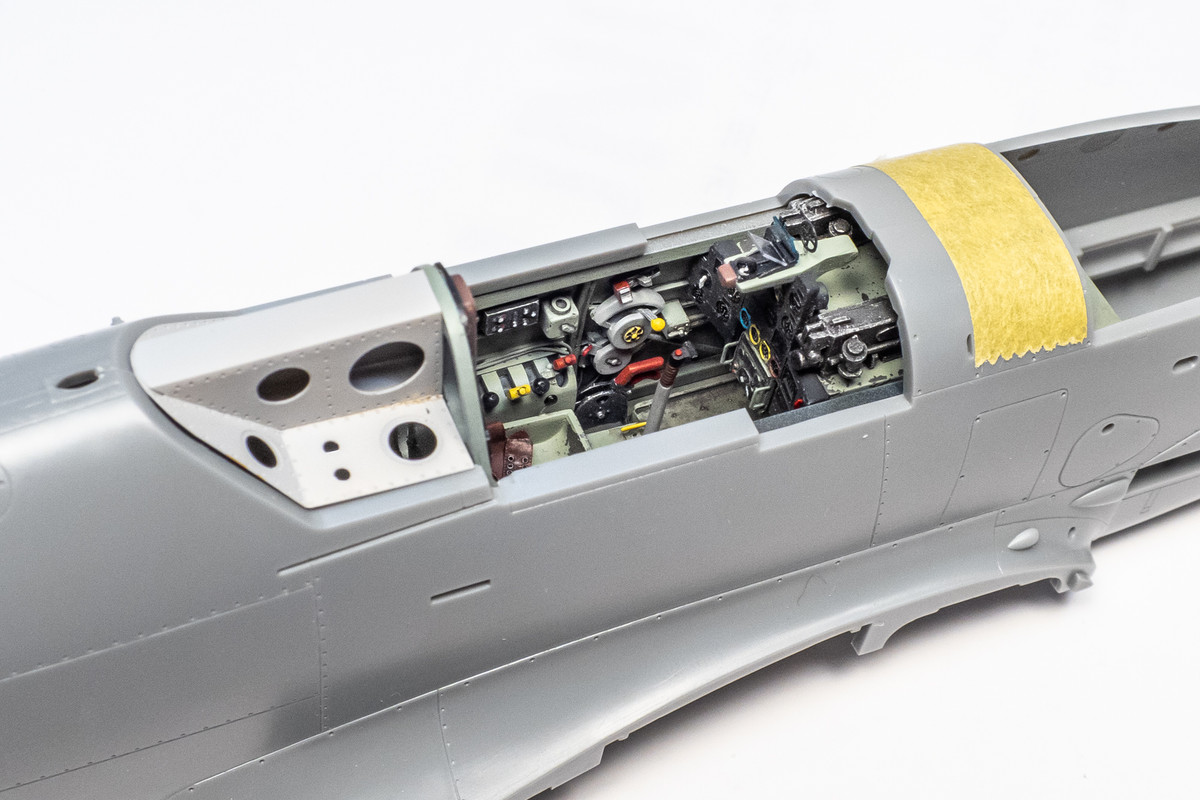
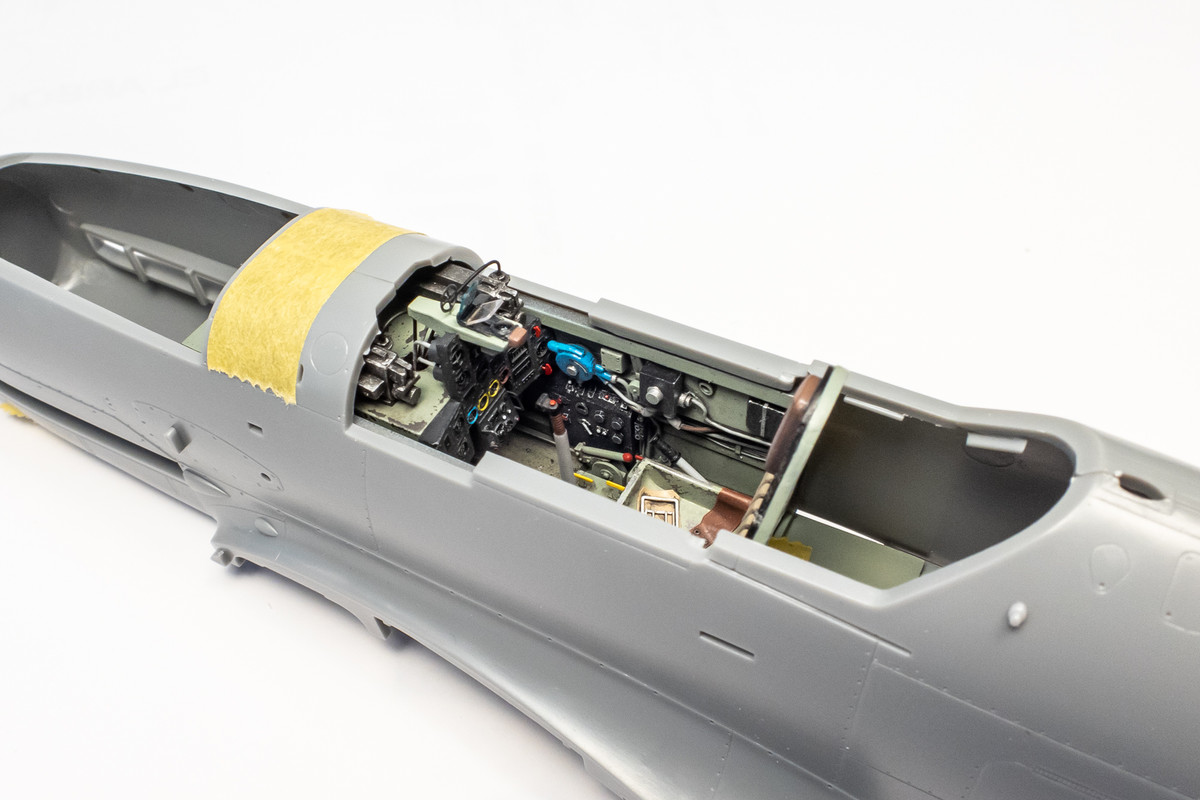
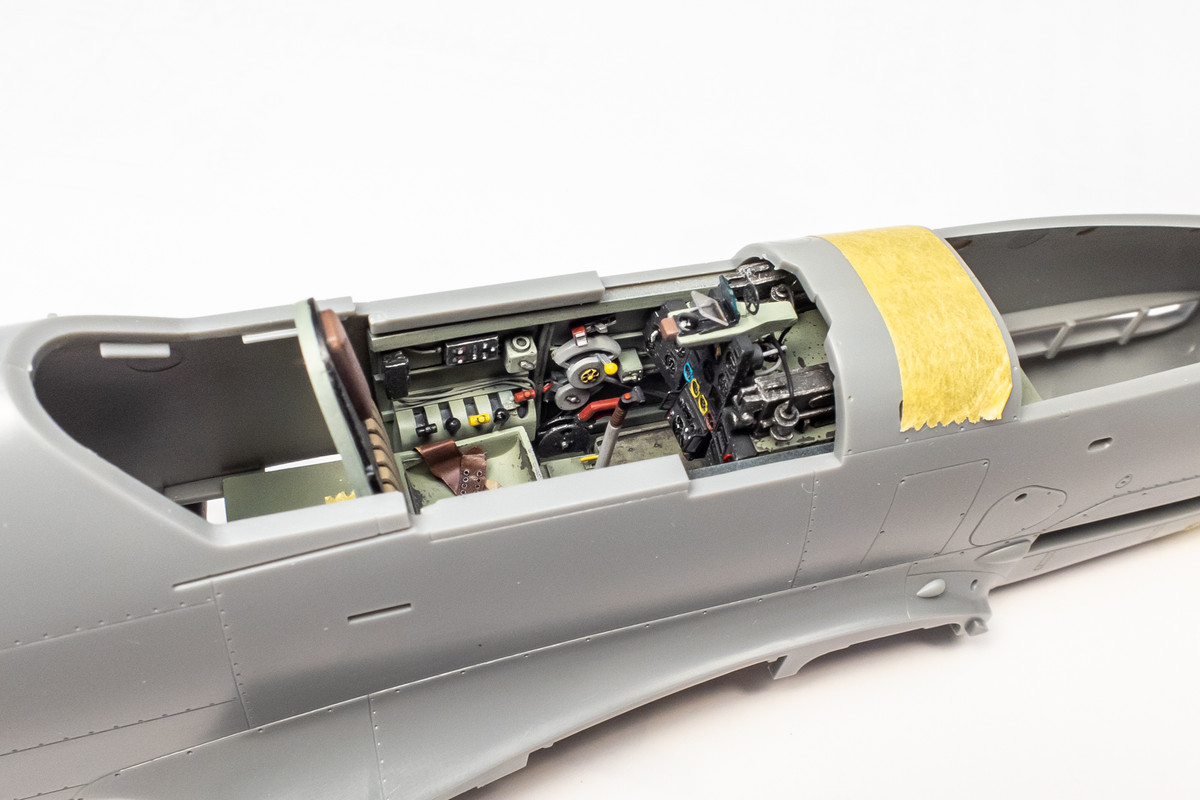
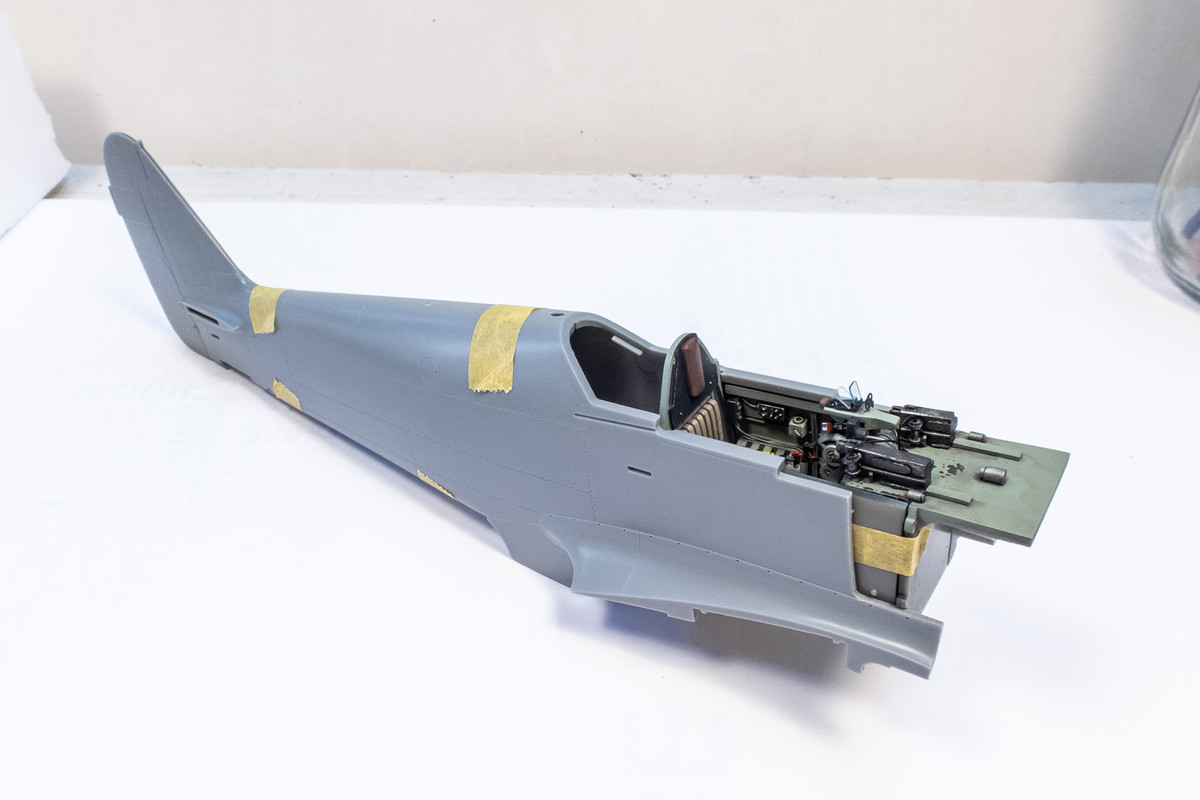
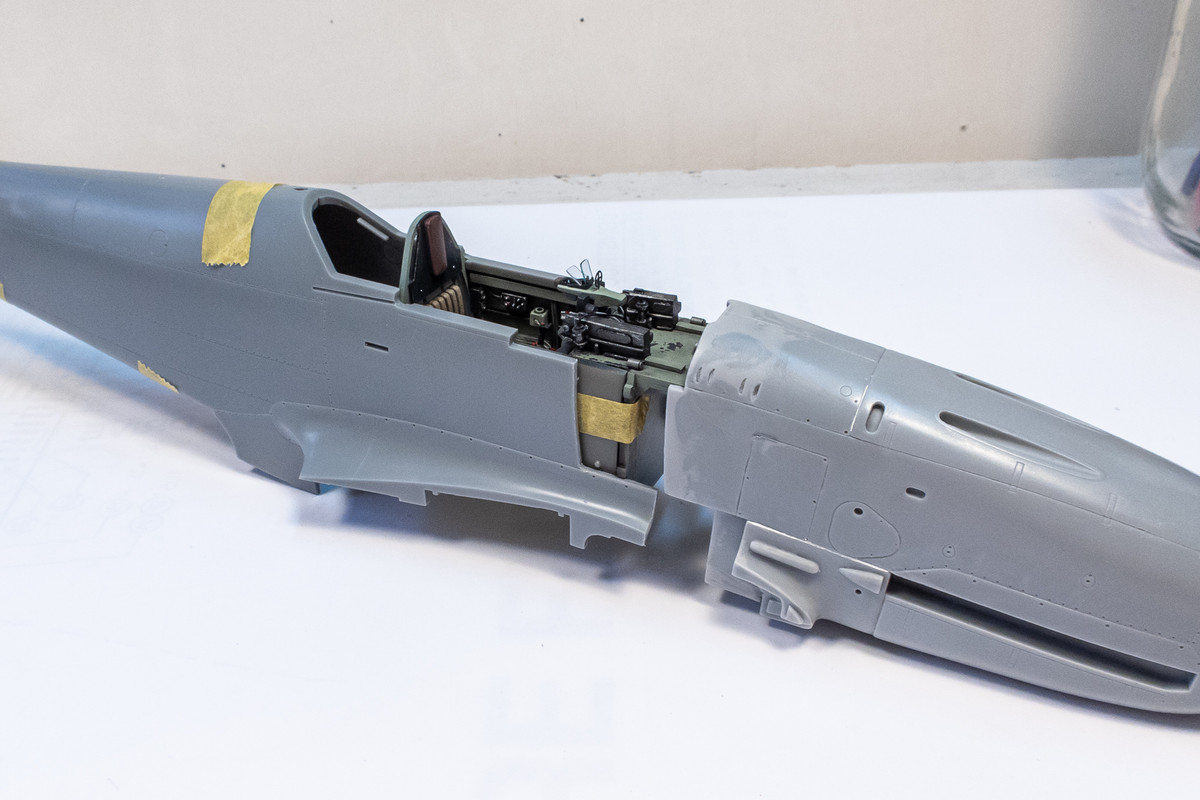
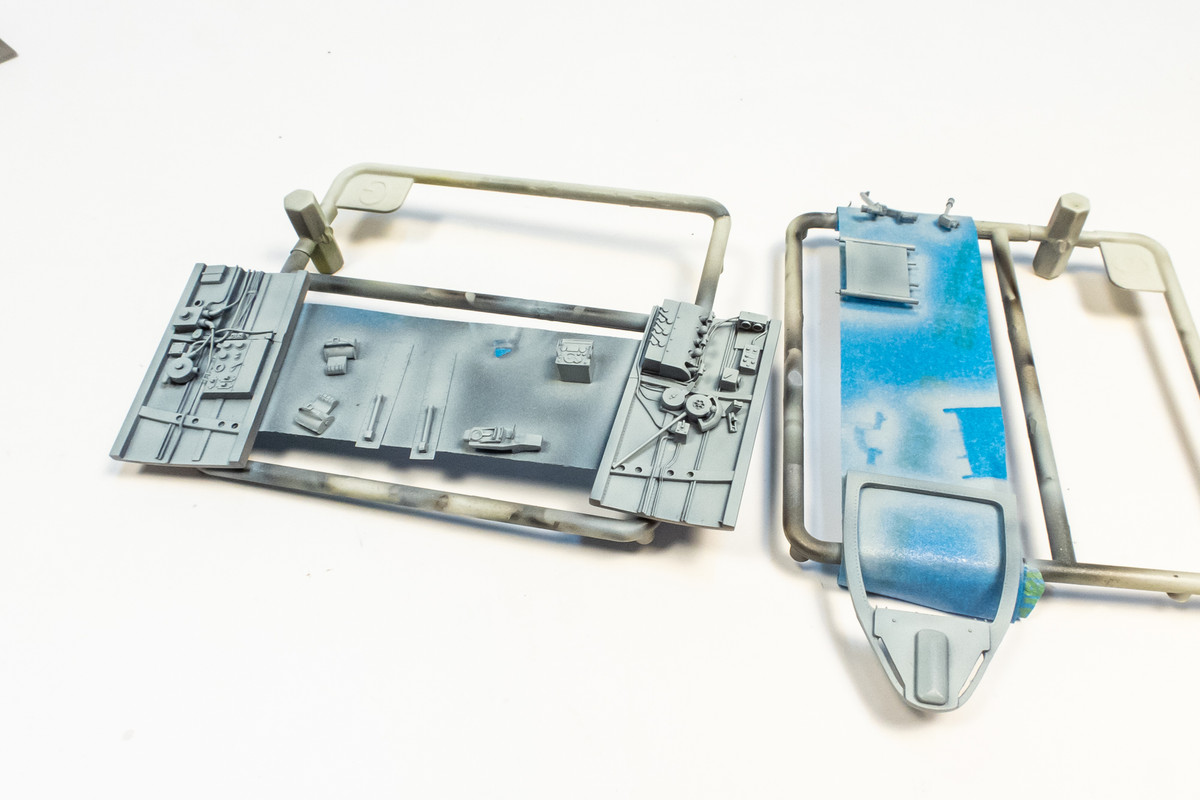
Here are the side panels with some details picked out by brush painting.
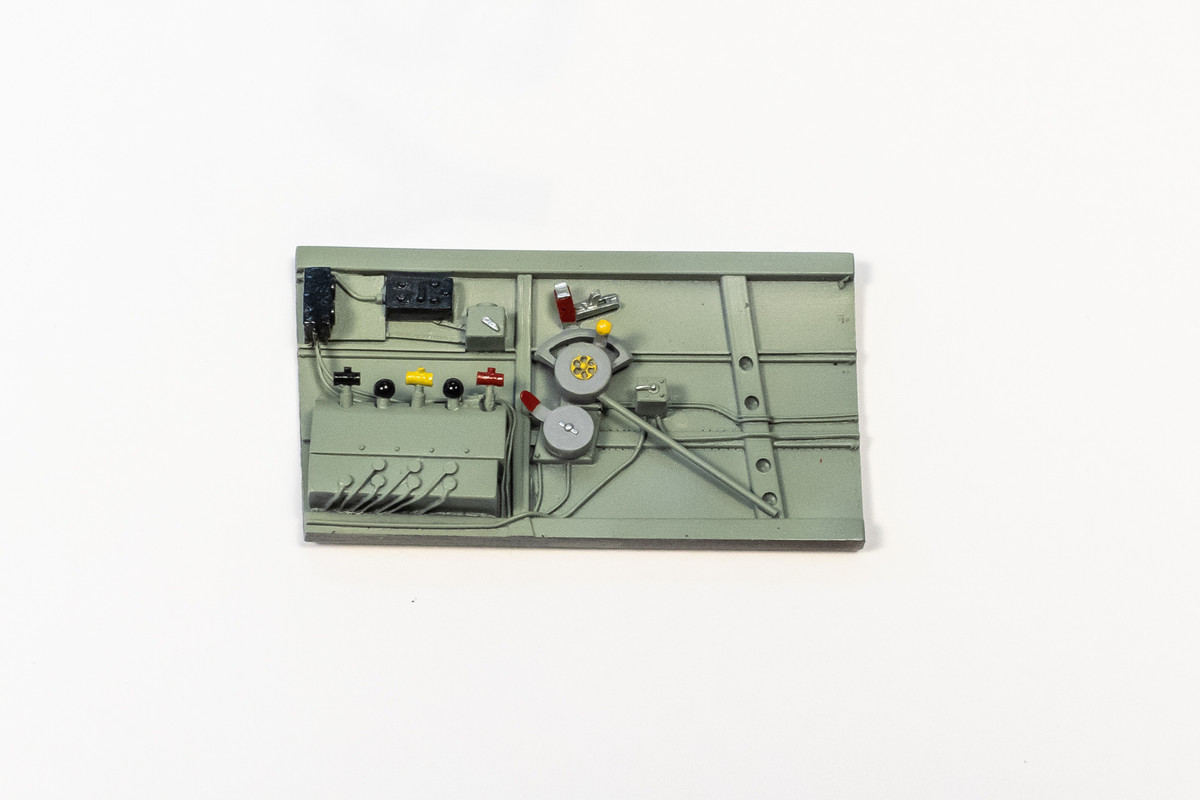
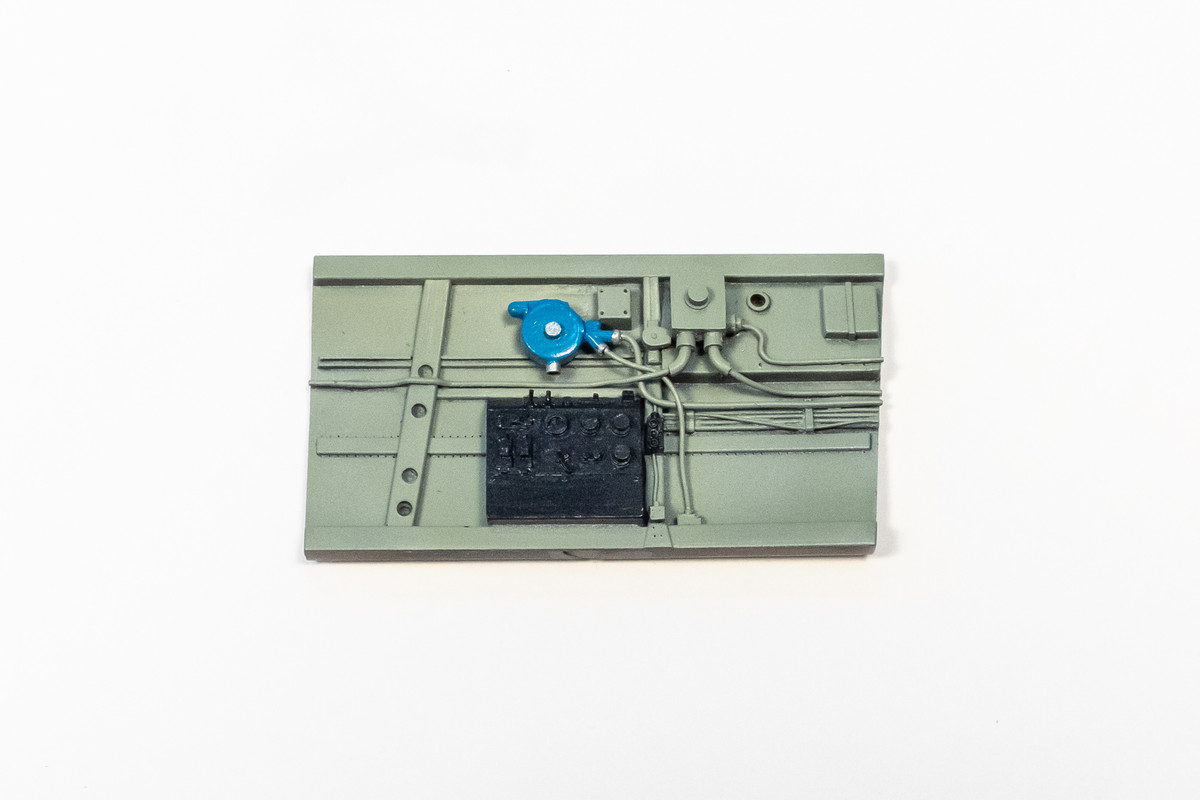
Some more progress on the side panels. The floor is a bit further along and has received a brown pastel wash.
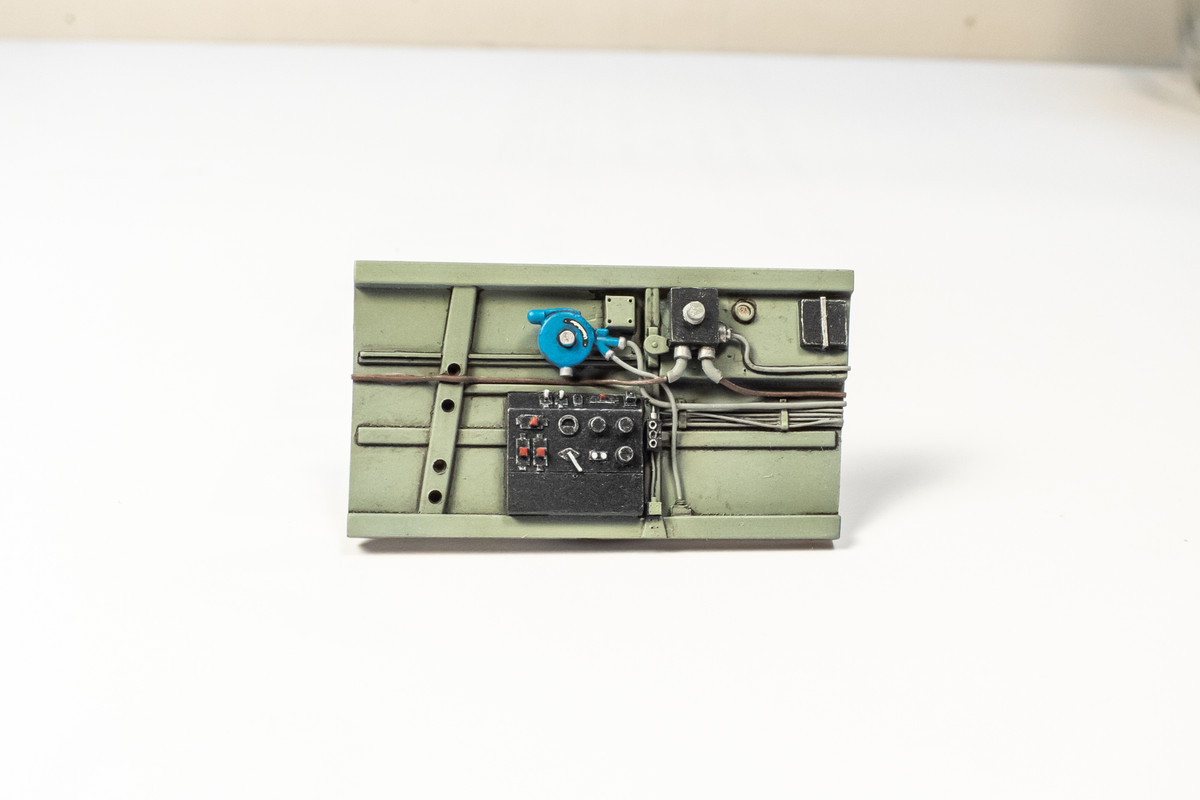
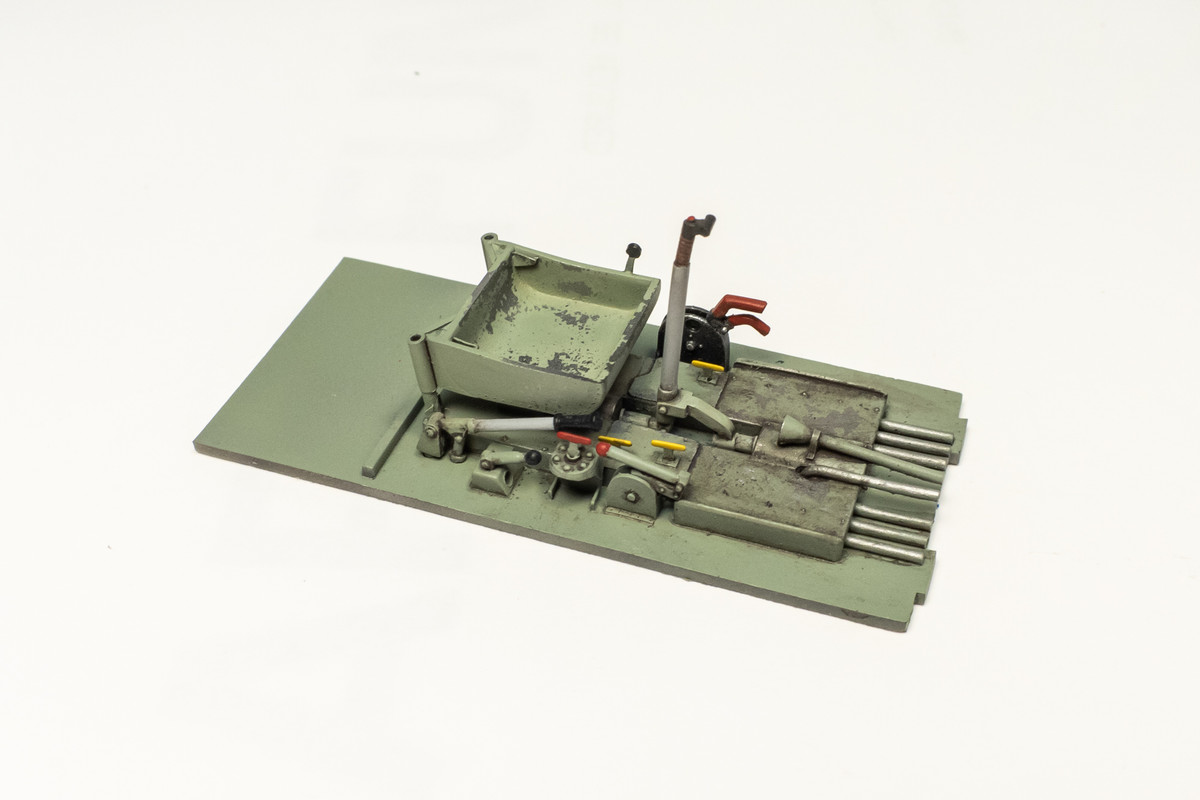
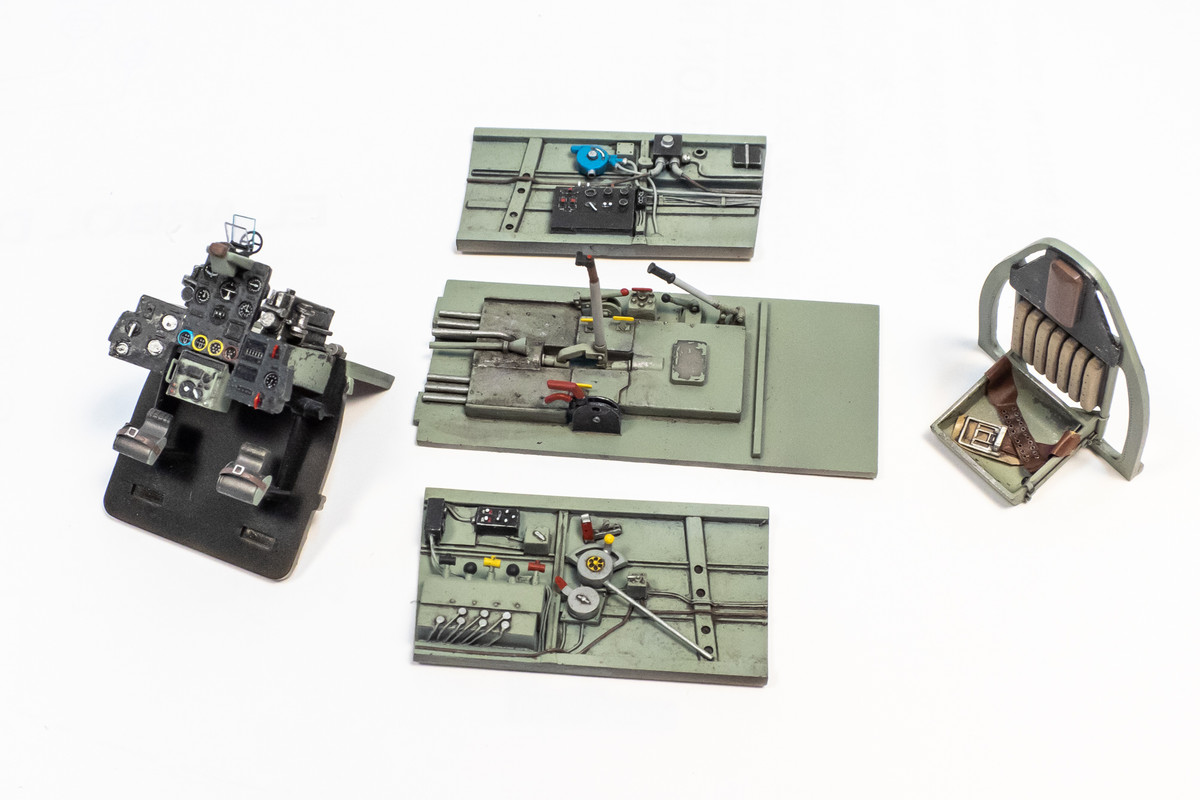
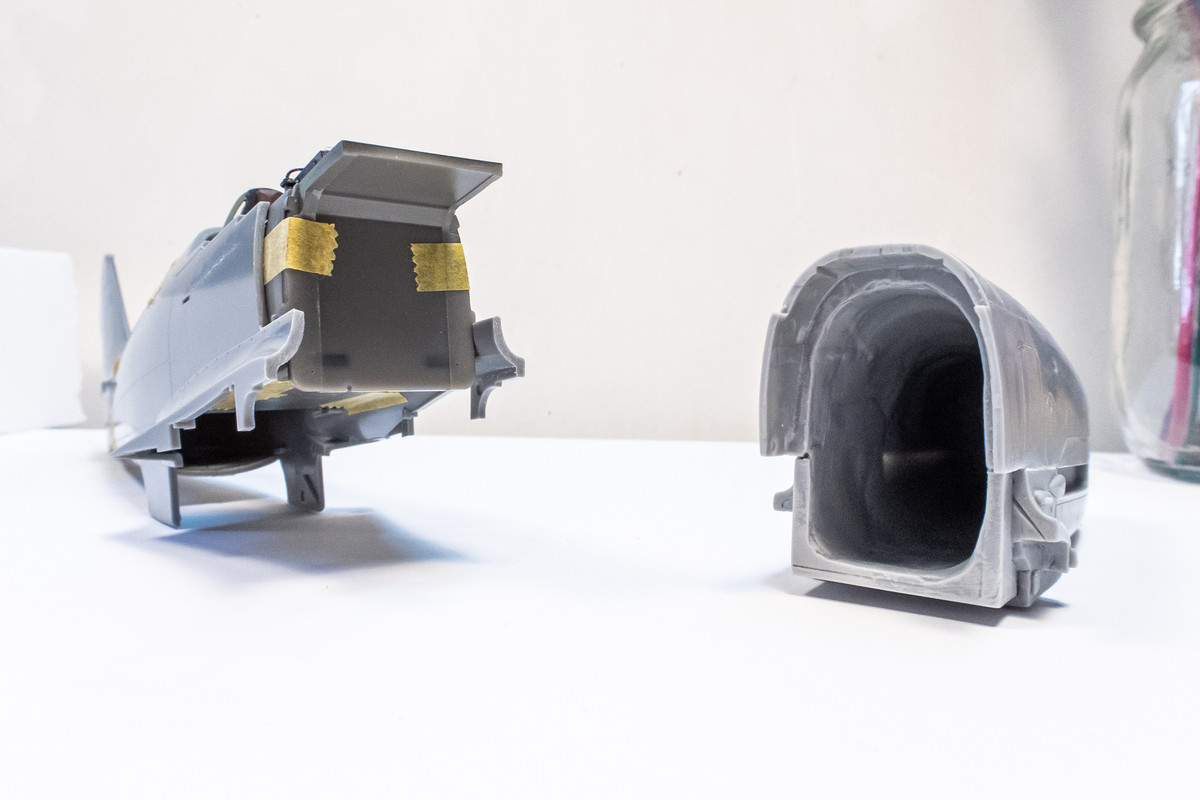
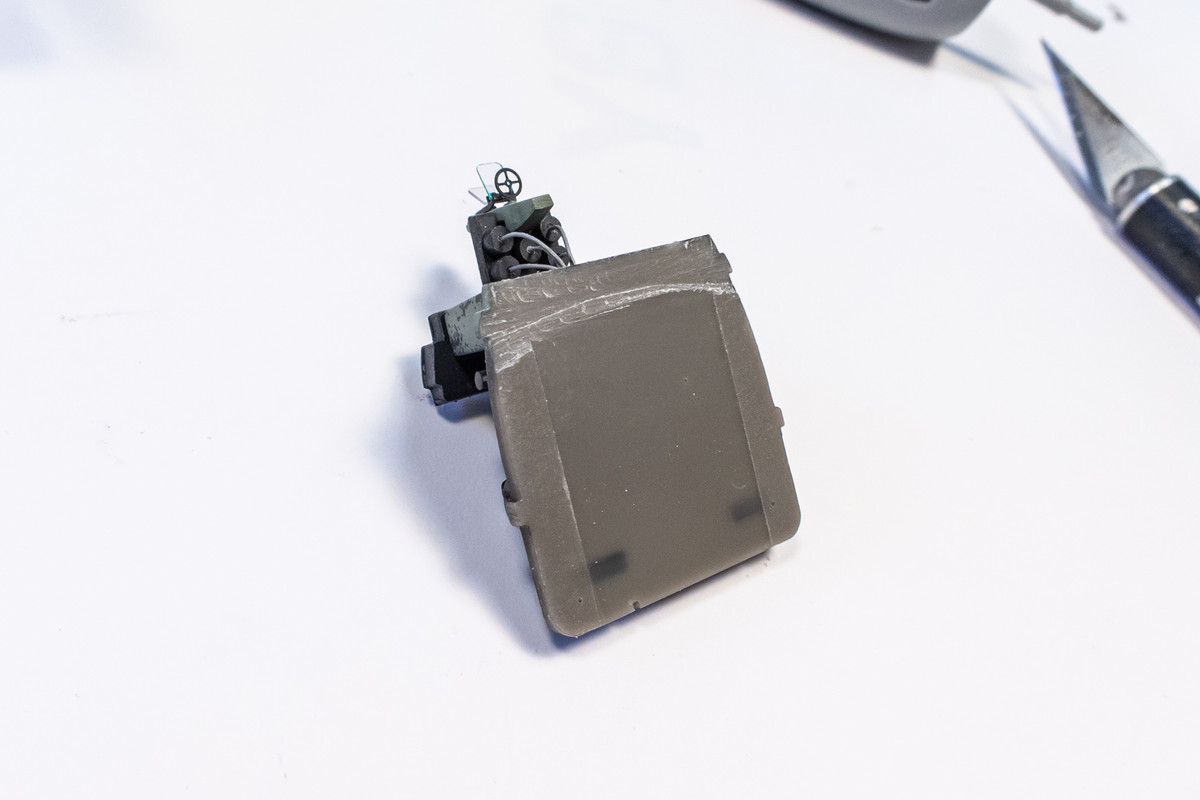
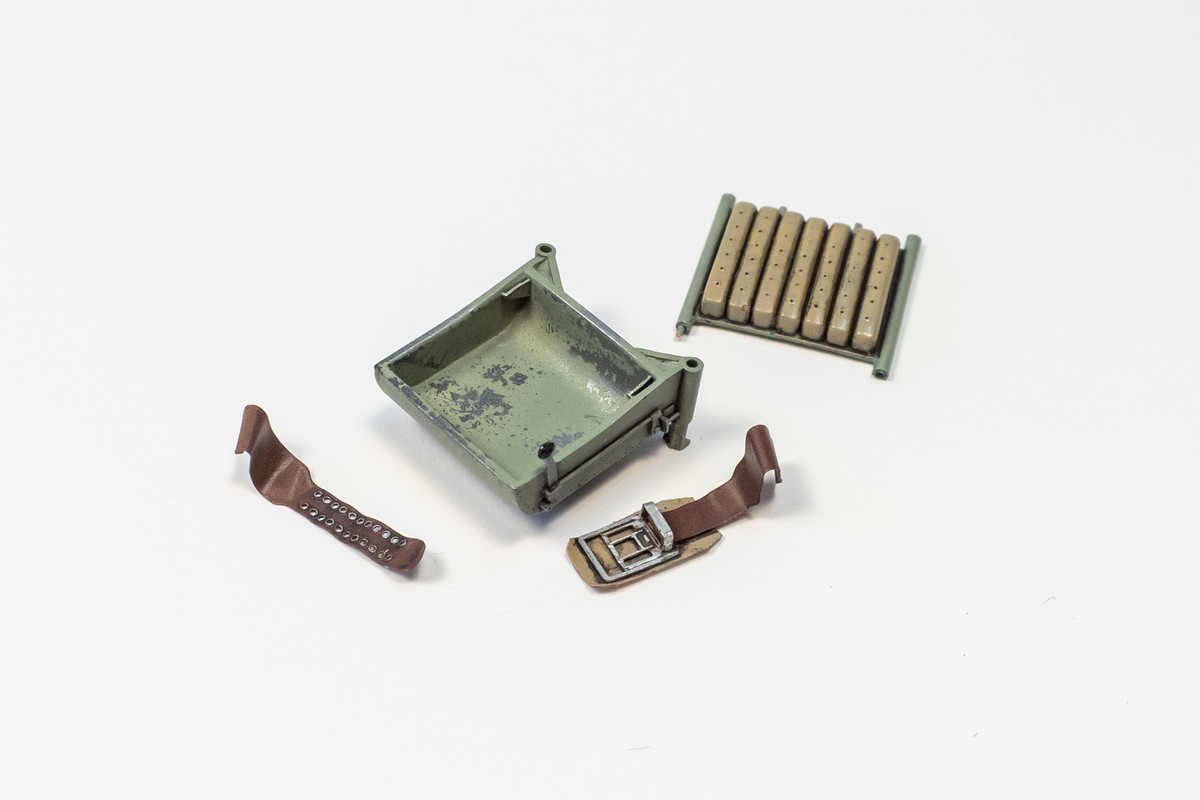
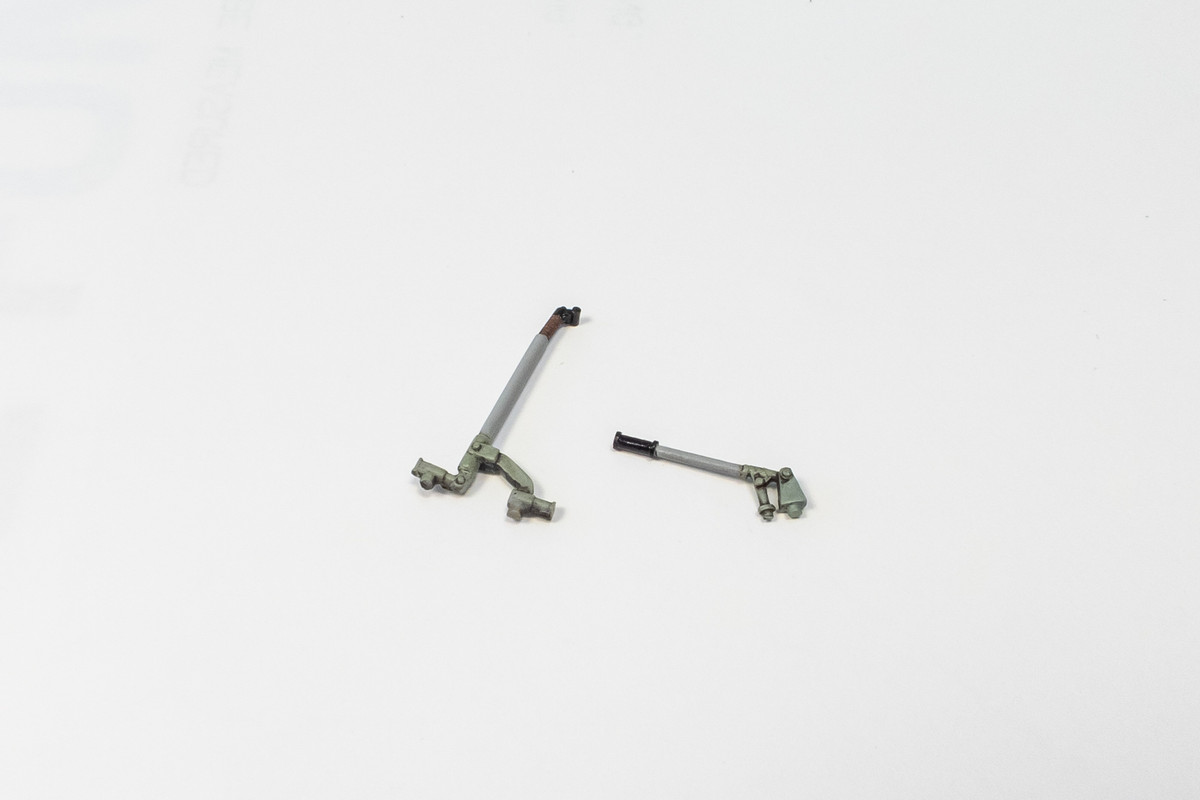
Other cockpit components at various stages in the painting/weathering process.
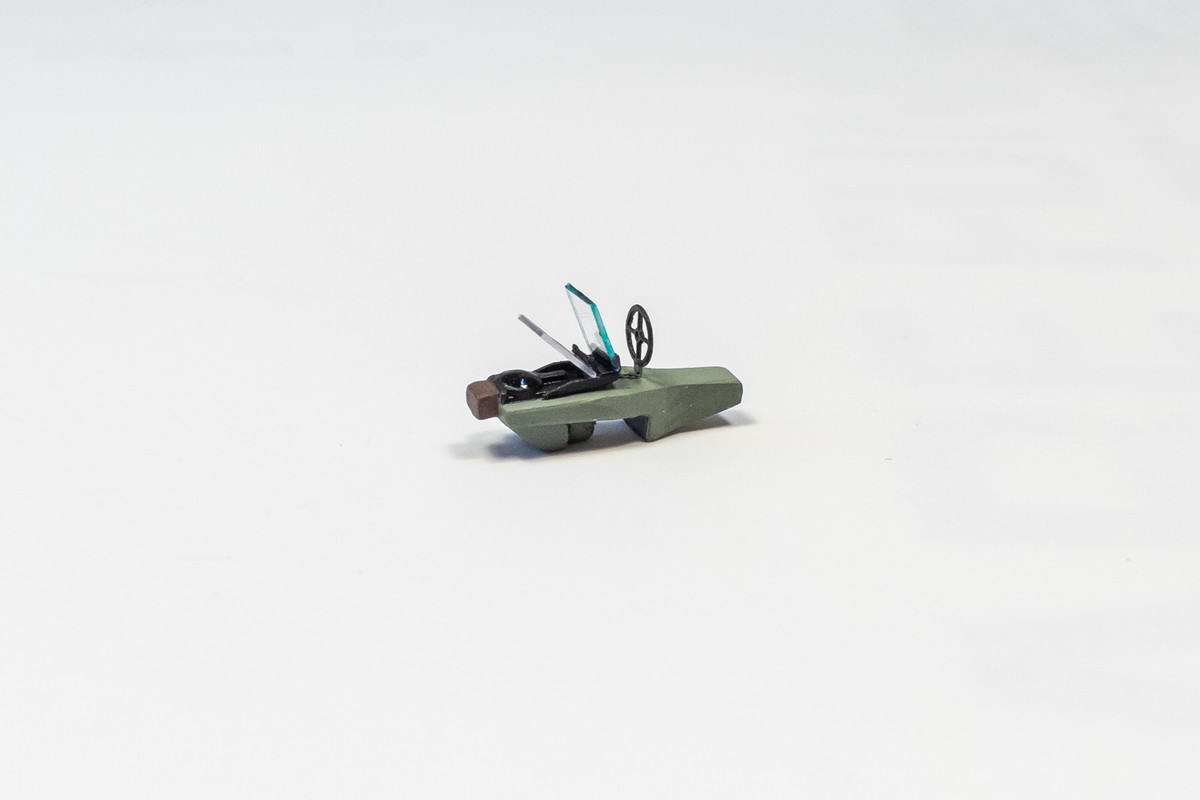
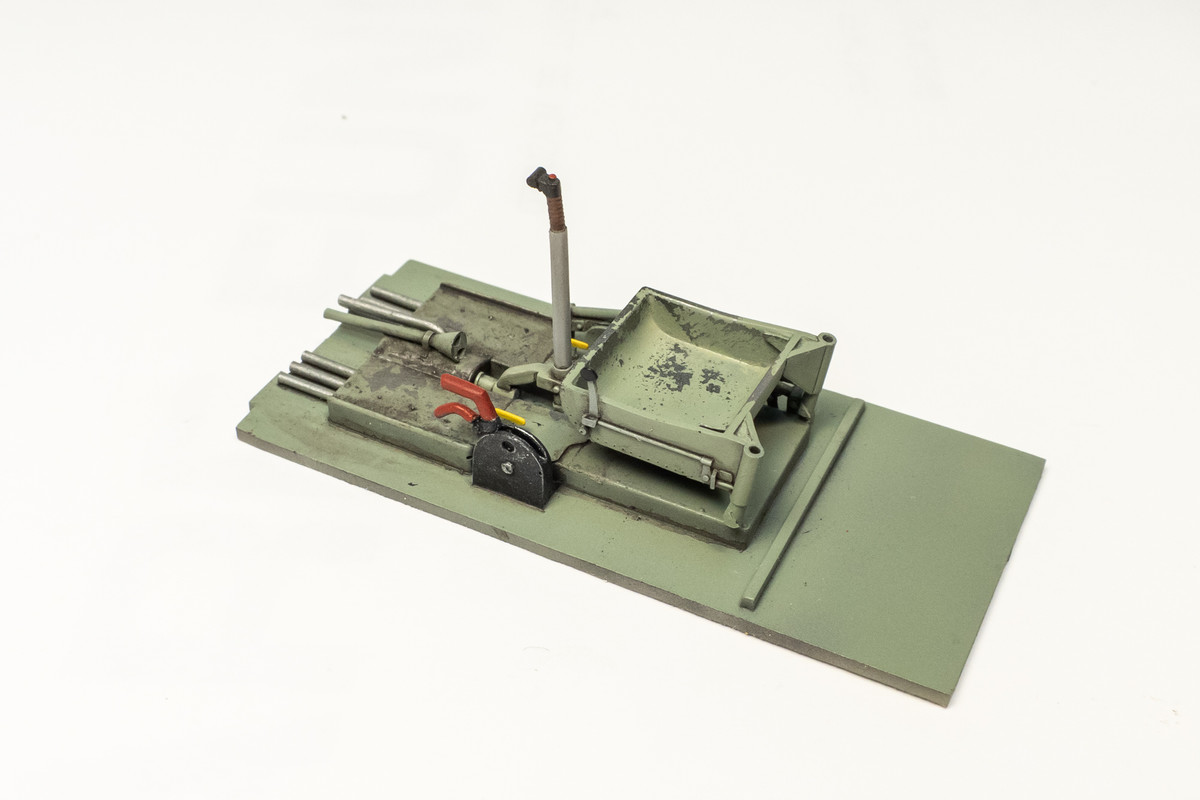
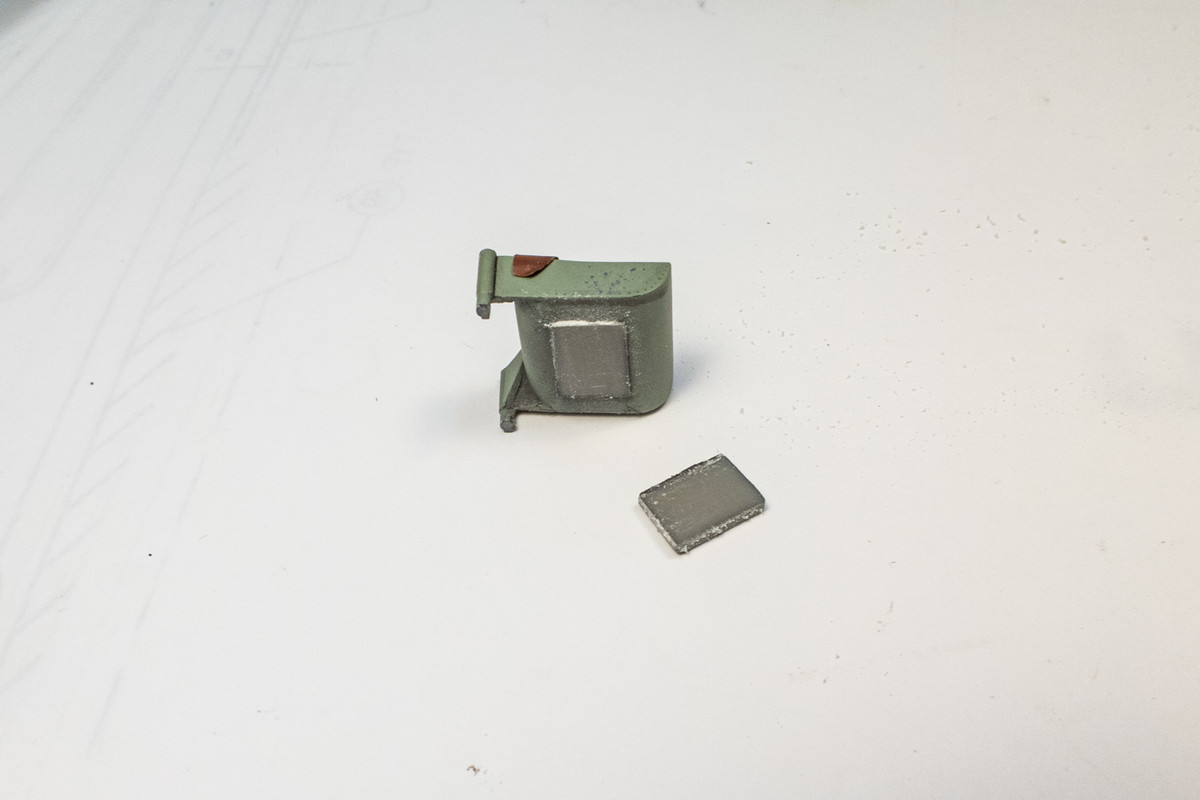
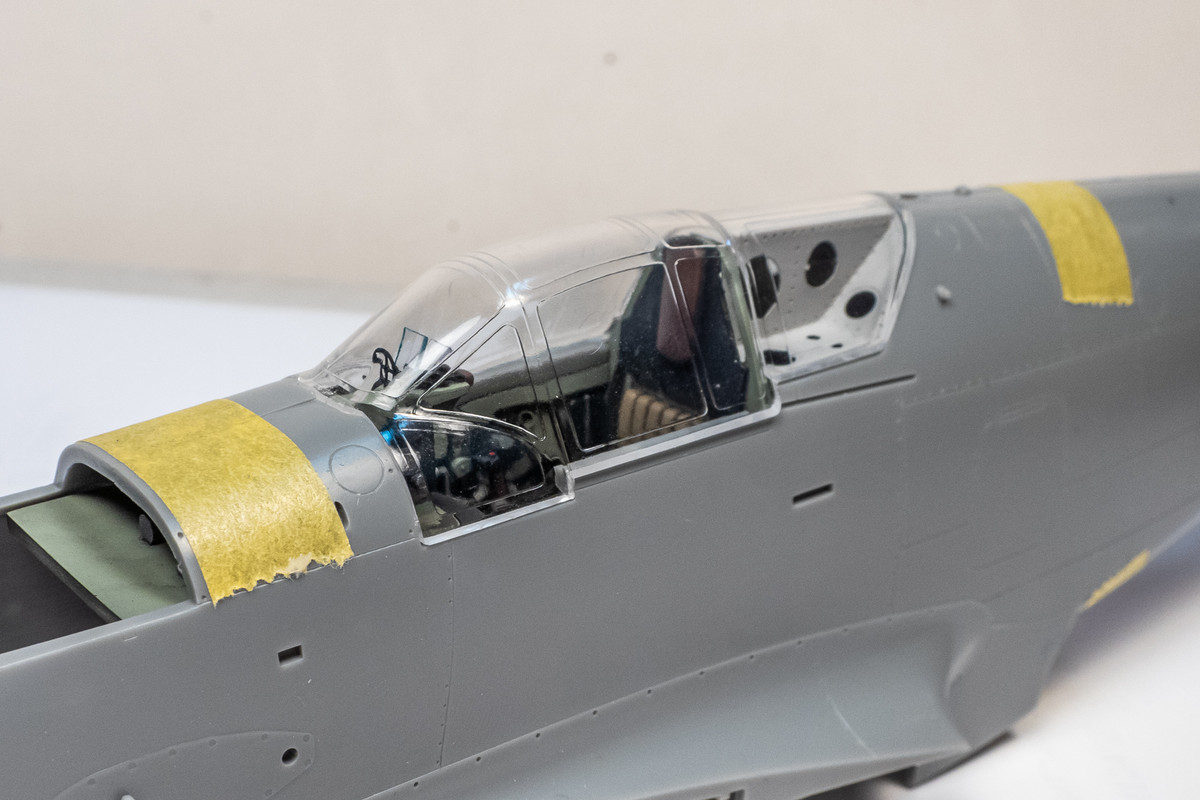
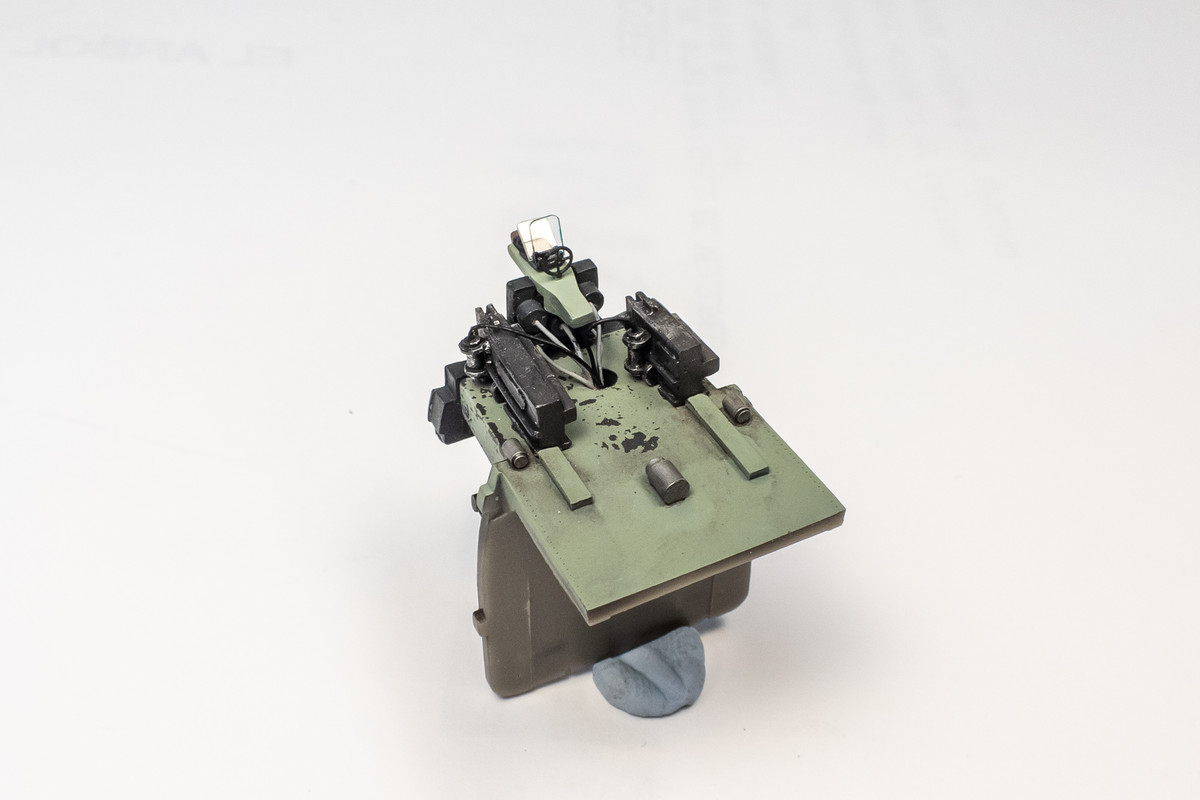
After painting, the gun sight received a flat coat and a drop of UV-activated clear epoxy to serve as the optical element. The glass reflectors are cut from clear acetate and the edge of the rear reflector is enhanced with clear blue-green to give the appearance of thick glass.
1//32 Hasegawa Ki-61-1 Tei Hien
Re: 1//32 Hasegawa Ki-61-1 Tei Hien
John aka JKim
-----------<><
-----------<><
Re: 1//32 Hasegawa Ki-61-1 Tei Hien
The big black box on the starboard side panel gave me a bit of pause. It has very shallow raised details which are hard to pick out with detail painting. I looked at the kit-supplied decal and it simply outlined the raised detail in white, which I didn't think would be very convincing and also would not match the rest of the cockpit. So I decided to use some dry-brushing. I like to use dry-brushing to show wear but I'm not really a fan of using it as a primary method of highlighting detail. I'd rather pick out details carefully by brush painting and then highlight them later with a wash. But there are situations like this where dry-brushing can come in handy. First using Testor Silver on a very dry brush, I try to pick up as much edge detail as I can. This will put the silver in places where you don't want but that is ok.
After the silver, I go back with black and using both dry-brush and wet-brush techniques, I carefully remove the silver from the non-edge areas. It is an iterative technique, going from silver to black to silver again, reducing the errant silver marks and getting a cleaner presentation. White and red details are added to the buttons.
After the black box is finished, the starboard panel is given a gloss coat and a dark brown pastel wash. A flat coat seals the completely painted panel.
The painting of the port side wall is finished too.
The two side walls will be weathered before I start assembling the cockpit components. The front bulkhead also serves as the gun deck and I've chipped the deck using hairspray.
The floor is the furthest along and weathering has been completed by applying a brown pastel wash on the flat coat.
John aka JKim
-----------<><
-----------<><
Re: 1//32 Hasegawa Ki-61-1 Tei Hien
I have started gluing together the cockpit components. Here is the front bulkhead with the gun bodies, instrument panel and foot pedals attached.
The seat can attach directly and securely to the rear bulkhead so I sawed off the raised block on the bottom of seat so that it wouldn't interfere with the seat position.
John aka JKim
-----------<><
-----------<><
Re: 1//32 Hasegawa Ki-61-1 Tei Hien
John, outstanding and such detail! You are a wizard!
To make each build less crappy than the last one. Or, put another way, "Better than the last one, not as good as the next one!"..
- Stikpusher
- Moderator
- Posts: 18880
- Joined: Sat Apr 05, 2014 8:37 pm
- Location: Ceti Alpha 5
Re: 1//32 Hasegawa Ki-61-1 Tei Hien
Lovely detail work!
"Surely I have made my meaning plain? I intend to avenge myself upon you, Admiral. I have deprived your ship of power, and when I swing 'round, I intend to deprive you of your life."
FLSM
FLSM
Re: 1//32 Hasegawa Ki-61-1 Tei Hien
Thank you, Lyle and Carlos!
Let's cobble together the cockpit components and see what the assembled cockpit looks like.
Things get a bit claustrophobic once all four walls are put into place.
Checking to see how the resin cockpit fits into the fuselage sides. Let's keep in mind that I have not introduced the resin nose yet so that might affect things later.
Gunsight clearance seems ok with the canopy in place.
Cockpit is not quite finished. Looking at these photos has raised some small flags that I want to explore before I call it done.
John aka JKim
-----------<><
-----------<><
- Stikpusher
- Moderator
- Posts: 18880
- Joined: Sat Apr 05, 2014 8:37 pm
- Location: Ceti Alpha 5
Re: 1//32 Hasegawa Ki-61-1 Tei Hien
John that color in there looks really good. Is there any chance that you could link that blog article that recommends IJA Green over the Sandy Brown color that most model companies suggest for Kawasaki fighters?
"Surely I have made my meaning plain? I intend to avenge myself upon you, Admiral. I have deprived your ship of power, and when I swing 'round, I intend to deprive you of your life."
FLSM
FLSM
Re: 1//32 Hasegawa Ki-61-1 Tei Hien
The quote that I've based my color choice on was a discussion on Ki-61 interior colors at Britmodeller.com...Stikpusher wrote:John that color in there looks really good. Is there any chance that you could link that blog article that recommends IJA Green over the Sandy Brown color that most model companies suggest for Kawasaki fighters?
https://www.britmodeller.com/forums/ind ... or-colour/
I then referenced his blog for discussion on the IJA grey-green (hai-ryokushoku) color to get a feel for what it might look like...Nick Millman wrote: For a pre-factory painted nmf Ki-61 the interior paint was not stable and you could use either a dull khaki like FS 33440 or the standard IJA grey-green exterior colour or a mix of both together - for the grey-green Gunze's Mr Color 128 or Hobby Color H62 is preferable to the Tamiya XF-14. Whichever you choose wheel wells and the inner faces of the undercarriage doors should be painted the same colour as the cockpit interior.
http://www.aviationofjapan.com/2008/03/ ... art-1.html
http://www.aviationofjapan.com/2008/03/ ... art-2.html
Like I said, I didn't like a few things that were apparent upon looking at the latest pics of the cockpit. For one, with the canopy in place, it looked like the back of the instrument panel would be visible so I thought some attempt at putting some wiring there would be appropriate. I also didn't like the color of the central box located right below the main instrument panel. The four main components of the cockpit have not been glued together yet so here they are in their separated state.
I couldn't get the instrument panel off of the front bulkhead so I worked around it. First, I drilled a big hole through the gun deck. I then drilled holes in the instrument casings behind the instrument panel and routed some copper wiring from the back of the instruments to the hole in the deck.
Here is a look at the revised panel. The center box has been painted to match the instrument panel. I re-did the reflector glass on the gun sight. The corners of the reflector glass are now rounded instead of sharp. And for good measure, I added some wiring from the gun bodies.
Small details that will probably go unnoticed individually but I am a strong believer in the sum of the added details making for a better model.
John aka JKim
-----------<><
-----------<><
- Stikpusher
- Moderator
- Posts: 18880
- Joined: Sat Apr 05, 2014 8:37 pm
- Location: Ceti Alpha 5
Re: 1//32 Hasegawa Ki-61-1 Tei Hien
Literally, the gray green makes sense. Every other Japanese aircraft used some shade of green or gray. So the Khaki or sand seems way out of place. Thanks for the links John.
"Surely I have made my meaning plain? I intend to avenge myself upon you, Admiral. I have deprived your ship of power, and when I swing 'round, I intend to deprive you of your life."
FLSM
FLSM
Re: 1//32 Hasegawa Ki-61-1 Tei Hien
Ok.. so the cockpit is pretty much complete now that I've made those last revisions. But I alluded to the resin nose, which still has not been fitted yet. It probably would've been smarter to have addressed the surgery required to fit the resin nose at the beginning before doing all of the cockpit painting. But sometimes we get lucky with the order and, now, looking back in hindsight, I think I dodged a few bullets.
Here is the Wolfpack resin nose to convert the Hien from a Hei to a Tei. It's slightly longer than the kit nose but not as long as Ki-61 II nose, which I think is the sleekest of all Hiens. Not having made any decision regarding riveting, it has not been worked on except to smooth out the mold joint along the bottom.
I decided to attack the cutting of the kit fuselage in several stages instead of trying get the stair-step cuts in one try. The first one would go completely through the fuselage, well away from the final edge so I opted to use the big blade.
The ultimate cut line is marked in pencil and the big blade cut so nicely, I continued to use it.
I've still left some wriggle room between the cut edge and the ultimate edge and that will be taken care of by careful sanding.
The initial test fit of the resin nose was very positive. Looks great!
The cockpit is re-inserted back into the fuselage for the next test fit. Looks like trouble.
That extended deck in front is NOT going to fit!
You can see here the mistake I made in not test fitting the resin cockpit components with the resin nose much earlier. Compared to the kit part, the front deck forward of the bulkhead needs to be removed. It would've been quite simple prior to painting and assembly but now it becomes a very delicate operation. The guns are temporarily removed but the IP stays put because it is glued on solidly.
Before re-mounting the guns, the four tabs on the side of the bulkhead were scraped off. Very lucky to have performed the removal without even knocking off one of the delicate reflector glass pieces!
The cockpit now has a much better chance to fit. Crossing my fingers that the gun bodies will clear.
Success!
Even the canopy seems to fit ok!
John aka JKim
-----------<><
-----------<><