42nd Highland Infantry Regiment "Black Watch" at the Battle

Here is the place to show off the progress on your figurines and dioramas.
User avatar
SteveSki
Advanced Member
Posts: 284
Joined: Mon Jun 13, 2022 11:13 am
Location: NE Wash, USA

Sphinx, Wreath and Letter Definition

Post by SteveSki »

This is just a quick update on the smaller details and minor adjustments to the lettering. The left side of this flag is complete for the time being. I know the lettering and other features appear rather bright right now, but they will be toned down later.

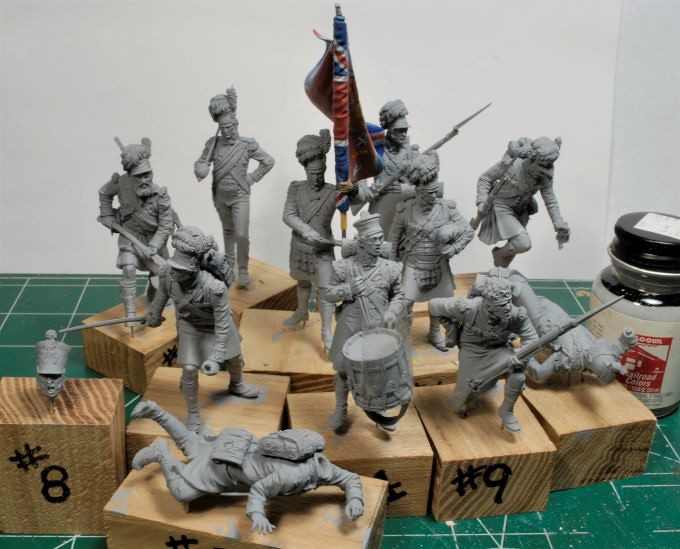
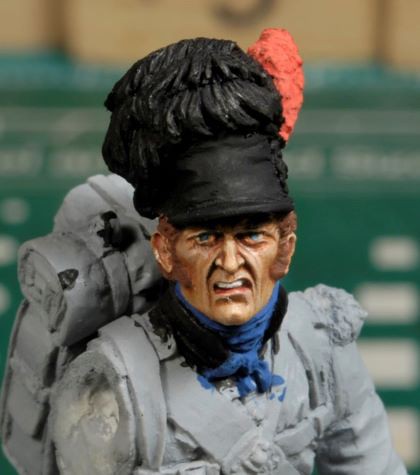
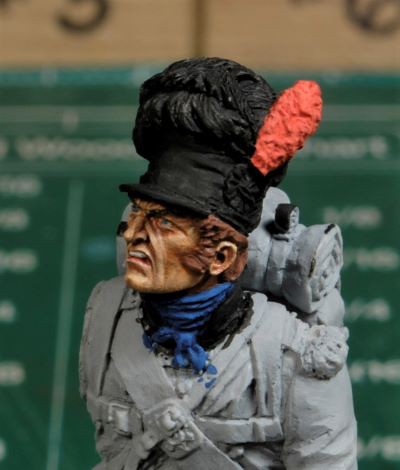
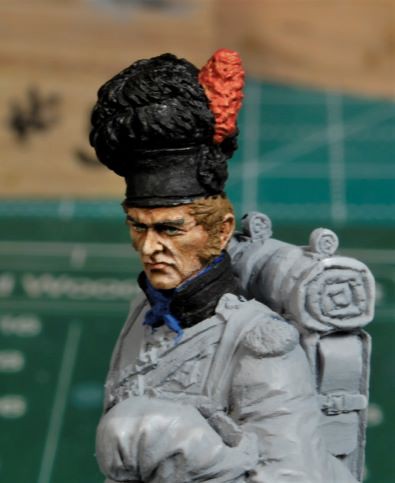
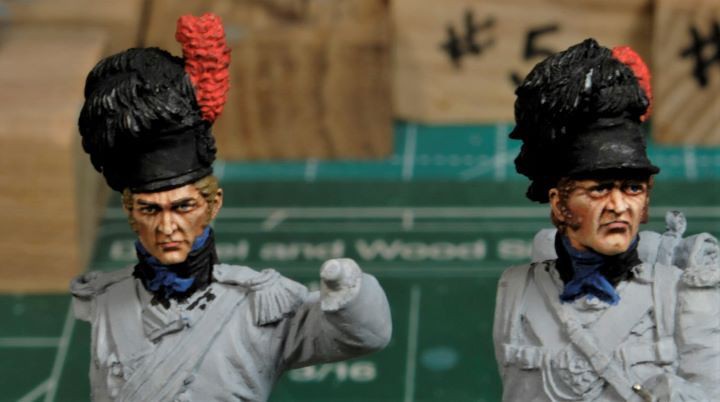
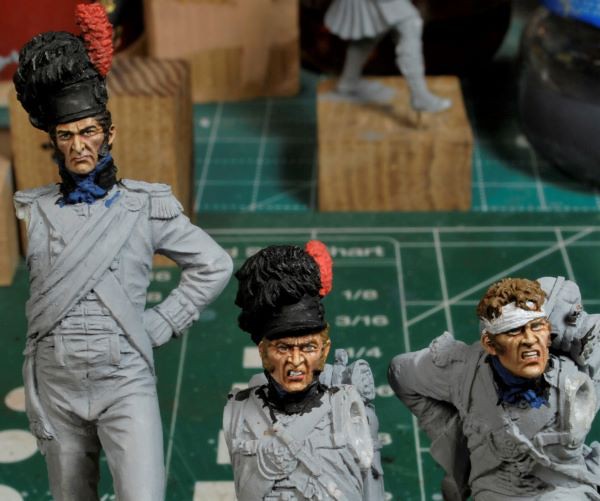
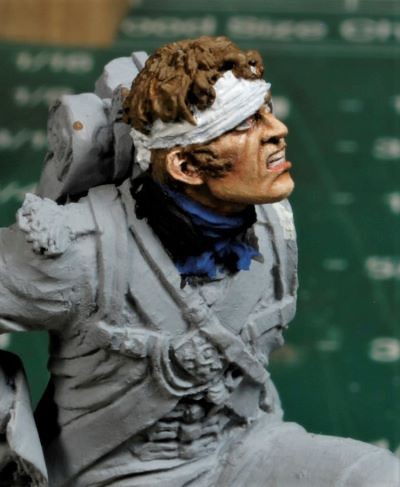
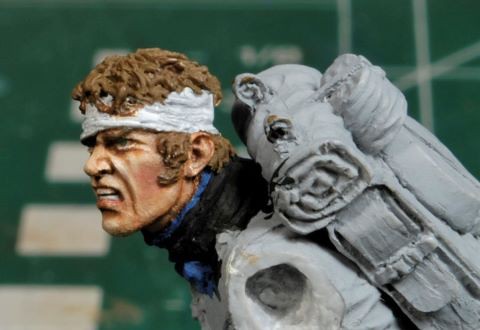
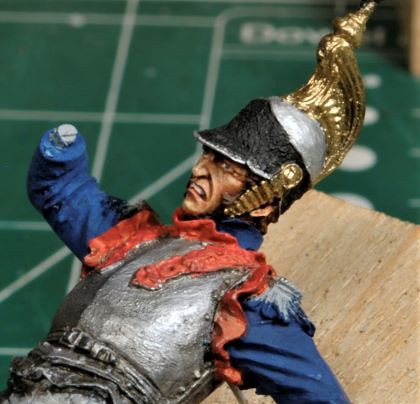
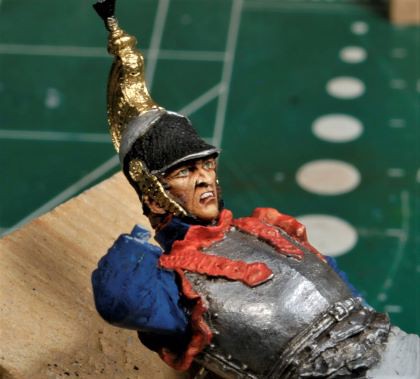
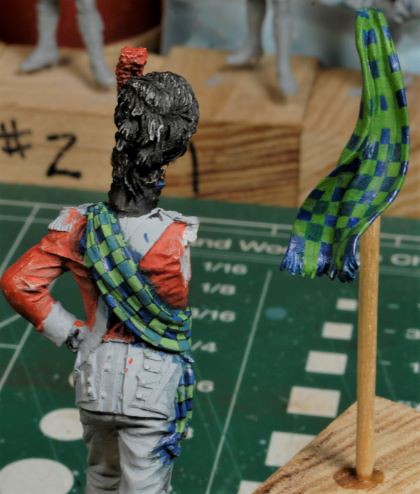
The AK Gold was a royal pain to work with. Not only are the fumes toxic, but the paint dries faster than I’d like it too. With such a small amount of paint on the brush workability time was too short. My 3M respirator filter is really difficult to work around, the filter impedes the brush when working that close. So, acrylic tones in the golden yellow range became the logical solution. I went over the leaves and other details with oils as well for more tonal definition. I will continue cleaning the remainder of the figures until this sets up for a few days, then work the right side of this flag.

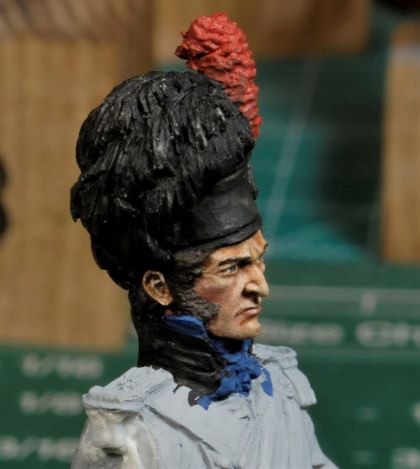
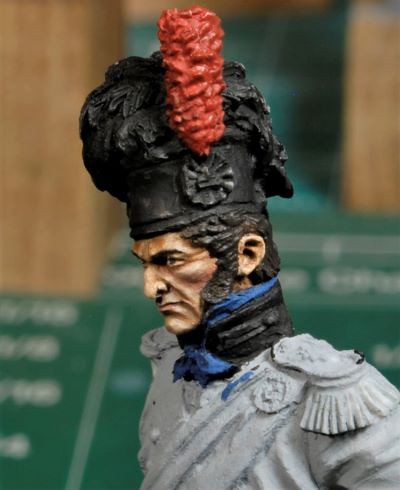
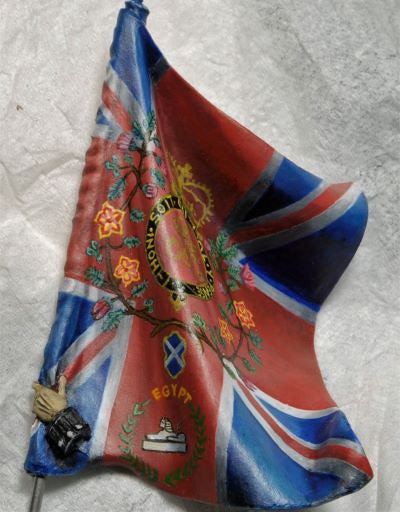
Quick note: The sphinx and white “X” within the blue emblem were shaded with oils to coincide with the existing shadows in the appropriate places.

Image
Image

Thanks for watching. Cheers, Ski.
User avatar
SteveSki
Advanced Member
Posts: 284
Joined: Mon Jun 13, 2022 11:13 am
Location: NE Wash, USA

Primed And Ready To Go!

Post by SteveSki »

Over the last week I’ve been cleaning up the rest of the figures and getting a primer coat on them using Floquils Primer Gray. I’ve been using this Floquil primer for decades, so when I heard the news back in 2013, if I remember correctly, that Testors was going to discontinue its Floquil and Polly S line of paints I hit every hobby store I could to snag the last few bottles of this primer. I have three brand new bottles from that scavenger hunt, so I recon I’m good to go since my last bottle has lasted for years. Like anything else in this hobby, we always hate to see good lines go away, Floquil being one of them.

I prefer this primer over any other primer I’ve tried in the past because it’s easy to control with a brush as long as it hasn’t started to dry out. Trying to airbrush these little guys would have only created a build-up in all the wrong places and ruin the incredible detail. This primer is actually pretty thin straight from the bottle anyway.

Since I really don’t fancy fabricating broken parts or fighting tight spots when painting, some of the arms and gear will be removed when I start to paint the tartans and other fine details. Somewhere in the process I’ll get back to finishing the flag. I’m already rummaging through my odd chunks of wood in the shop for something that has character for this base.

I had my mind set on a gorgeous piece of drift wood that has been hanging out in the shop for the past 20 years only to be over ruled by my wife. She still has something in mind for that chunk, so I’m still looking, HA! Actually, that chunk of drift wood had some incredible details that would have accented this set of figures nicely, but it aint’ worth the tussle later, if ya get my “drift”, HA!

Here’s the entire crew ready for the brush.

Image

Ok, back to work, we are running out of time, cause Spring is coming up fast. More to follow soon.

Cheers, Ski.
Give Blood, Play Rugby, cause everyone knows football is for wimps!

Image
User avatar
SteveSki
Advanced Member
Posts: 284
Joined: Mon Jun 13, 2022 11:13 am
Location: NE Wash, USA

Let’s Face It!

Post by SteveSki »

Having not done 54mm, or 1/35th scale for that matter, in over ten years I don’t think I’m too far off. Let’s face it, this is the first time I’ve ever, ever painted eyes in this scale. I was going to place in a pupil, but decided against it. In this scale I think it’s a bit over the top and you’d only notice them in photos, not the actual figure presented before you in a vignette.

Naturally the face looks shiny and will dull as the oils set up, no worries. I did notice this face is a bit on the “tan” side of the tone spectrum, but he’s going to be on the ground in this vignette, so I will leave it as is. I’ve still got a bit of touch up to do on this face, teeth, ears, etc., but for now I’ll set this one aside and work the other ten.

Also, you will note the eye you see on the left is not exactly as the right. I had to trim some of the resin and clean up the eye lid a bit to make more room. It was very tight quarters in there, to say the least, so I got it as close as it’s going to get this go round.

Image
Image
Image

So far, I’m happy with this face, I’ve only washed it off once, so that’s a good thing. And, as you can imagine, with spring coming up fast I’ve got fruit trees to trim and everything else that goes with this time of year. This is crashing my momentum. Happens every year, oh well, I’ll keep going as long as I can.

Thanks for watching. Cheers, Ski.
Give Blood, Play Rugby, cause everyone knows football is for wimps!

Image
User avatar
SteveSki
Advanced Member
Posts: 284
Joined: Mon Jun 13, 2022 11:13 am
Location: NE Wash, USA

Bag Piper Face Work

Post by SteveSki »

One thing I’ve noticed since getting back to this smaller scale is the fact that if I didn’t have super small brushes and a decent pair of readers I’d be in trouble. I’ve been able to get some seriously small details taken care of without too much difficulty. So, when time comes to get back to them big boys, Large Scale figures, I won’t have any excuses for overlooking any minute details, none whatsoever.

Moving right along, the Bag Piper’s face is pretty much set for now. There are a few areas I will adjust, but for right now I’ll let him set up. These eyes are so big I just may have to put pupils in, or maybe not. These are super close-up pics, so it looks a bit odd right now.

Image
Image
Image

Ok, nine more to go before we tackle those kilts. Cheers, Ski.
Give Blood, Play Rugby, cause everyone knows football is for wimps!

Image
User avatar
SteveSki
Advanced Member
Posts: 284
Joined: Mon Jun 13, 2022 11:13 am
Location: NE Wash, USA

Head #3 and Clean Up on Bag Piper

Post by SteveSki »

Figure #3 was a lot more fun than the last two. Reason being, I’m in the slot and I see improvements in the skin tones and blending. This is the main reason I prefer to keep the momentum going when doing a set of faces. I don’t have to go back and relearn whatever sequence and techniques were followed in the past. I know, it sounds strange, but this Sport is seasonal for me, can’t get around that.

I’ll do any touch-ups in the next few days after the oils set up, but I think #3 is good to go for now.

Image
Image
Image

The Bag Piper needed a bit of reworking, especially that cauliflower left ear. I caught that after taking the initial photos. The nice thing about this resin set is that the resin is not super stiff and can be reworked easily. I also went back over the left eye and reduced the size of the iris, but now the right eye looks too big, HA! I’ll get to that one eventually as well.

Image
Image

Outside work has already started, so I’m trying to keep the momentum going as long as I can, wish me luck.

Thanks for watching and more to follow. Cheers, Ski.
Give Blood, Play Rugby, cause everyone knows football is for wimps!

Image
User avatar
SteveSki
Advanced Member
Posts: 284
Joined: Mon Jun 13, 2022 11:13 am
Location: NE Wash, USA

Dynamic Duo

Post by SteveSki »

The standard bearer and one of the riflemen have been painted over the past week as time permitted. The standard bearer’s eye sockets had to be cleaned out and refilled with Tester’s tube putty. Fortunately, the resin is soft enough to work small areas without destroying larger sections. This is my third time reshaping a set of eyes, but it’s not a big deal. These figures are incredibly well detailed, but even then, some areas like the eye sockets may need a bit of clean-up after the primer coat, much easier to identify.

Image

It took me awhile to get the correct tones around the rifleman’s eyes, he was giving me a hard time, lol. I may do a little more touch-up, but for now, he’s ok. The standard bearer was a smooth process, no major issues.

Image
Image
Image
Image

As long as I can sneak into the bunker at least a few days a week, I should be getting to the tartans in short order.

Thanks for watching. Cheers, Ski.
Give Blood, Play Rugby, cause everyone knows football is for wimps!

Image
User avatar
SteveSki
Advanced Member
Posts: 284
Joined: Mon Jun 13, 2022 11:13 am
Location: NE Wash, USA

Dynamic Trio

Post by SteveSki »

Here’s the next set of faces done within the last week. The weather has been cold and sometimes wet, with snow flurries, if you can imagine that, in April, HA! T’sall good, I’m taking advantage of the down time and working these figures. This really is a fun set to work with. Kudos to Vladimir, once again.

Image

I really like how the standing figure came out; he’s got that dark almost Burgundy color tone to his hair which makes his features more prominent. The wounded figure was pretty straight forward and fun to paint, but the snarling chap leaning forward was a real bear. His facial features weren’t cooperating as well as the others. I recon it’s just a state of mind when dealing with so many faces to paint, you’re bound to get one or two that will give you a hard time. When in doubt, Ruck Over, Bby!

Image Image
Image Image
Image Image

As mentioned before, these will be set aside while I work the last three figures; Hatched man, Baby Face Drummer Boy, and the fallen French horse rider with body armor. I’m sure someone will correct my description of the horse rider, cause right now I forgot what he’s called, HA! No worries, steady ar she goes.

Thanks for watchin. Cheers, Ski.
Give Blood, Play Rugby, cause everyone knows football is for wimps!

Image
User avatar
SteveSki
Advanced Member
Posts: 284
Joined: Mon Jun 13, 2022 11:13 am
Location: NE Wash, USA

Hatchet Man, French Cuirassier, and Baby Face Drummer Boy

Post by SteveSki »

The last three faces are almost done, baby face Drummer Boy being the slacker in this final set. I was fighting the good fight yesterday only to scrub his face with an oven cleaner bath. He too was not cooperating. No worries, I’ll get him done in short order.

Image

The French Cuirassier was a fun one to paint. He doesn’t have any overly exaggerated features, so it was smooth sailing with this guy. I went ahead and painted much of the surrounding armor and fluff just to get it out of the way and to get a perspective of what it would look like further in the process.

Image Image

Hatchet Man was a bit more of a challenge due to his sharp features around the nose and mustache; it was tight quarters around the mouth, etc. I had started with this figure in the very beginning, but had to scrub him as well. This time around it was a much easier run. He’s now good to go and like the French Cuirassier he too has been set aside to dry completely. The pics may be a bit fuzzy.

Image Image

I’ll work Baby Face this week and get him completed. His super light skin tone threw me off for a bit, but I can see where I was drifting from the main objective, so he’ll be dialed in shortly.

More to follow and thanks for watching. Cheers, Ski.
Give Blood, Play Rugby, cause everyone knows football is for wimps!

Image
User avatar
SteveSki
Advanced Member
Posts: 284
Joined: Mon Jun 13, 2022 11:13 am
Location: NE Wash, USA

Class Photos

Post by SteveSki »

Here we have the entire crew, all eleven faces done minus a few touch-ups. It took a bit longer than expected, but now it’s time to review each face in detail. For the most part, I think they came out acceptable enough to continue on to the next stage.

Image

Baby Face Drummer Boy is done for now. His left eye looks like someone socked him a good one, but that will be feathered out. These photos really bring out the errors in blaring color, lol. After a few attempts with dismal results, I decided to just let er rip and paint his face like all the rest. Without prominent features like the others, I improvised to give the face just a little more character. I tried not to overdo it, but I think he’ll do just fine.

Looking closer at the eyes I see there needs to be more definition at the lower eye lid areas, they’re too washed out and not defined worth a hoot. When the oils are completely dry, I’ll go back with a very thin line and correct that and maybe whiten them a bit as well.

Image
Image Image

After this face dries for a few days, I’ll go back and check each face for needed corrections. Feathering, or filtering, with oils is not too difficult and helps correct most areas of concern. Just make sure you don’t get carried away with too much thinner. The layer you are trying to adjust may become too thin and actually rub off. It’s a delicate operation and I have had issues in the past.

The hat checkered section is up next. Now that is gonna to be a hoot. This will really test my “straight line” abilities. We’ll see soon enough. Thanks for watching.

Cheers, Ski.
Give Blood, Play Rugby, cause everyone knows football is for wimps!

Image
User avatar
SteveSki
Advanced Member
Posts: 284
Joined: Mon Jun 13, 2022 11:13 am
Location: NE Wash, USA

Battle of the Tartans

Post by SteveSki »

After working the tartan pattern for a few days, yes, a few days, I have finally arrived at a pattern and color scheme that will work. As you all know, I am “NOT” an acrylic fan other than undercoating, so this was more than just a real hoot. Several attempts at filters came to abysmal failure, so back to the drawing board. This is the fourth attempt, so it stays! Of course, I will work in the lines that crisscross the pattern, but they won’t be accurate, the 0000 brushes and thinned acrylic are not cooperating enough to take on that fight. Whatever I do here has to be repeated for all the tartans/kilts that are in this bunch.

Image
Image

The portion of the tartan that is posted on the right is much closer to the actual pattern required, but I prefer the pattern painted on the Officer.

More to follow and thanks for watching. Cheers, Ski.
Give Blood, Play Rugby, cause everyone knows football is for wimps!

Image
Post Reply

Return to “Work In Progress: Figures and Dios”