
Excellent stuff Mark!
I'm so glad you got that Norseman back together.
Maddog Manufacturing Open in 2021
Re: Maddog Manufacturing Open in 2021
Stuart Templeton 'I may not be good but I'm slow...'
My blog: https://stuartsscalemodels.blogspot.com/
My blog: https://stuartsscalemodels.blogspot.com/
-
Ceaser_Sa1ad

- Master Member
- Posts: 851
- Joined: Tue Aug 31, 2021 1:23 pm
- Location: Ontario
Re: Maddog Manufacturing Open in 2021
That Norseman looks really cool! What kit is that? I may have to get one...
Looking good man
Looking good man
"In this galaxy there's a mathematical probability of three million Earth type planets. And in all of the universe, three million million galaxies like this. And in all of that... and perhaps more... only one of each of us." - McCoy
-
Duke Maddog

- Elite Member
- Posts: 7088
- Joined: Tue Jun 03, 2014 11:22 am
- Location: Rowland Heights, CA
Re: Maddog Manufacturing Open in 2021
Thank you Stuart! I'm hoping it stays together as I paint the yellow on it. Yellow over white... what was I thinking? 

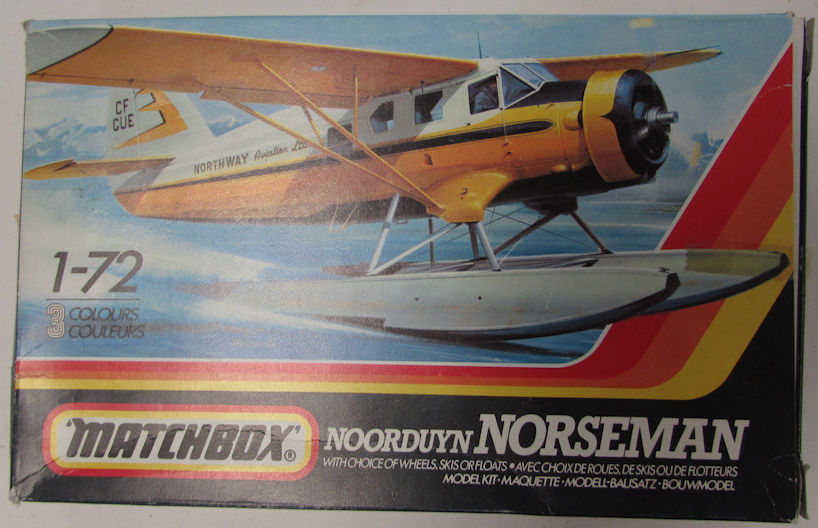
Thank you Declan! Glad to see you stop in! The Norseman is the old Matchbox kit:
Now to bring some of these over the finish line!
Thank you Declan! Glad to see you stop in! The Norseman is the old Matchbox kit:
Now to bring some of these over the finish line!
The Duke
Virtuoso of Miniatures
"Do you know what the chain of command is? It's the chain I get and beat you with 'till you understand who's in ruttin' command!"
-Jayne Cobb, Firefly Episode 2 "The Train Job"
We are modelers - the same in spirit, in hunger to insanely buy newly released kits, hustlers in hiding our stash from our better halves and experts in using garbage as replacements for after-market parts.
Re: Maddog Manufacturing Open in 2021
Mark, I was under the impression white was a good undercoat for yellow, is that not the case (never having tried it)? I agree though - both those colours are a PITA!Duke Maddog wrote:Thank you Stuart! I'm hoping it stays together as I paint the yellow on it. Yellow over white... what was I thinking?
NOSTALGIA!!!!!!!!Duke Maddog wrote:
I love Matchbox boxes
Stuart Templeton 'I may not be good but I'm slow...'
My blog: https://stuartsscalemodels.blogspot.com/
My blog: https://stuartsscalemodels.blogspot.com/
-
Stikpusher

- Moderator
- Posts: 18863
- Joined: Sat Apr 05, 2014 8:37 pm
- Location: Ceti Alpha 5
Re: Maddog Manufacturing Open in 2021
I’ve used white under yellow and it turned out just fine. Airbrushed of course. Yellow is a real beeyatch to brush paint. It shows more streaking than any other color. No matter what the brand is. Must be something with the pigments. Another option for an undercoat under yellow is yellow zinc chromate, a great yellow primer.
"Surely I have made my meaning plain? I intend to avenge myself upon you, Admiral. I have deprived your ship of power, and when I swing 'round, I intend to deprive you of your life."
FLSM
FLSM
Re: Maddog Manufacturing Open in 2021
Yep! Brush painting yellow is a PITA! Lots and lots of coats, with maybe a coat of ink over the top to richen the colour!
Stuart Templeton 'I may not be good but I'm slow...'
My blog: https://stuartsscalemodels.blogspot.com/
My blog: https://stuartsscalemodels.blogspot.com/
-
Duke Maddog
- Elite Member
- Posts: 7088
- Joined: Tue Jun 03, 2014 11:22 am
- Location: Rowland Heights, CA
Re: Maddog Manufacturing Open in 2021
Yes, I'm in total agreement that the white is a perfect basecoat for yellow. I'm just oping I can get it masked and sprayed well.
The Duke
Virtuoso of Miniatures
"Do you know what the chain of command is? It's the chain I get and beat you with 'till you understand who's in ruttin' command!"
-Jayne Cobb, Firefly Episode 2 "The Train Job"
We are modelers - the same in spirit, in hunger to insanely buy newly released kits, hustlers in hiding our stash from our better halves and experts in using garbage as replacements for after-market parts.
Virtuoso of Miniatures
"Do you know what the chain of command is? It's the chain I get and beat you with 'till you understand who's in ruttin' command!"
-Jayne Cobb, Firefly Episode 2 "The Train Job"
We are modelers - the same in spirit, in hunger to insanely buy newly released kits, hustlers in hiding our stash from our better halves and experts in using garbage as replacements for after-market parts.
-
Ceaser_Sa1ad
- Master Member
- Posts: 851
- Joined: Tue Aug 31, 2021 1:23 pm
- Location: Ontario
Re: Maddog Manufacturing Open in 2021
I watched someone make the Mining Guild tie fighter. If you don't know what that is, it is a yellow tie fighter. But he had a great way to do yellow which I think is worth noting. He bases his yellow in tamiya dark yellow. That serves as a shadow while also being easier to paint on. I will find the video so you can get a better idea what I am talking about.
https://finescale.com/videos/how-to-vid ... hter-video
https://finescale.com/videos/how-to-vid ... hter-video
"In this galaxy there's a mathematical probability of three million Earth type planets. And in all of the universe, three million million galaxies like this. And in all of that... and perhaps more... only one of each of us." - McCoy
-
Duke Maddog
- Elite Member
- Posts: 7088
- Joined: Tue Jun 03, 2014 11:22 am
- Location: Rowland Heights, CA
Re: Maddog Manufacturing Open in 2021
That does sound like a good idea.However, I already have the Norseman white so I'll just paint over that. The more coats I put on, the more possibilities for something to screw up.
Right now I'm just trying to clean and organize the workbench and hobby room so I can jump start my mojo again...
Right now I'm just trying to clean and organize the workbench and hobby room so I can jump start my mojo again...
The Duke
Virtuoso of Miniatures
"Do you know what the chain of command is? It's the chain I get and beat you with 'till you understand who's in ruttin' command!"
-Jayne Cobb, Firefly Episode 2 "The Train Job"
We are modelers - the same in spirit, in hunger to insanely buy newly released kits, hustlers in hiding our stash from our better halves and experts in using garbage as replacements for after-market parts.
Virtuoso of Miniatures
"Do you know what the chain of command is? It's the chain I get and beat you with 'till you understand who's in ruttin' command!"
-Jayne Cobb, Firefly Episode 2 "The Train Job"
We are modelers - the same in spirit, in hunger to insanely buy newly released kits, hustlers in hiding our stash from our better halves and experts in using garbage as replacements for after-market parts.
-
Duke Maddog
- Elite Member
- Posts: 7088
- Joined: Tue Jun 03, 2014 11:22 am
- Location: Rowland Heights, CA
Re: Maddog Manufacturing Open in 2021
Despite the serious beating my mojo took this past couple weeks, I was able to make some good progress on a number of kits and started a couple more, one of which is a commission build. More on that later. Lets start this latest tour in the Hanger again. All aboard the trams now and remember to keep you hands and feet inside the trams at all times...
Having gotten the Revell Aircraft of Desert Storm set, I decided to start the one plane I didn't start back when I first had this set,. the A-6 Intruder. Later I'll start the F-117 from this set to replace the one that was stolen. For now, this is what I got done...
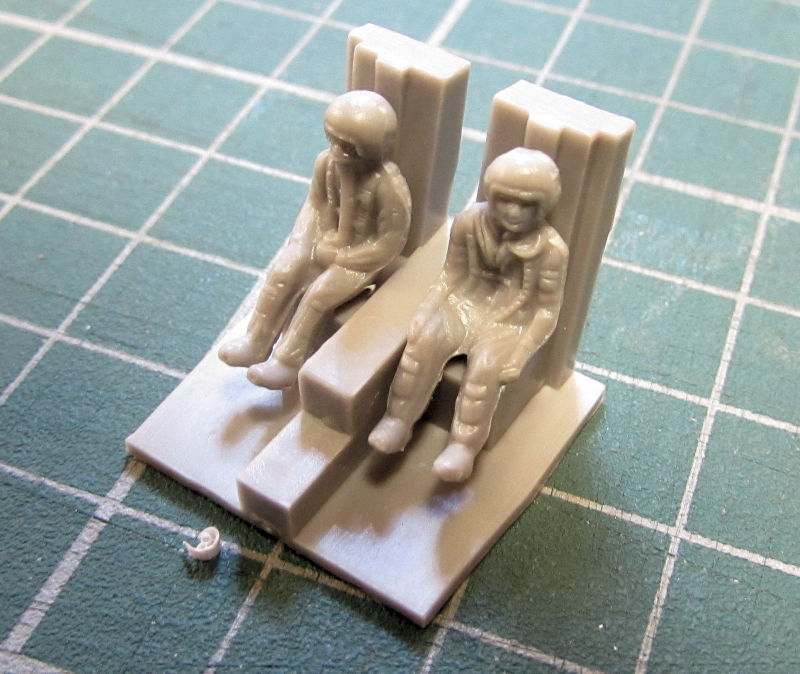
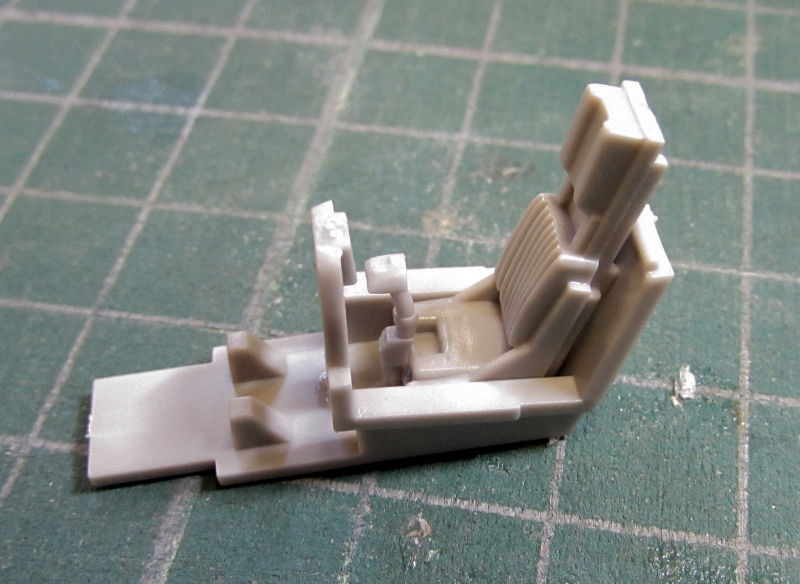
First was the basic cockpit. It is very basic so I added the pilots to give something to look at. Here is Mutt and Jeff sitting in their seats now waiting for the rest of the plane to get built::
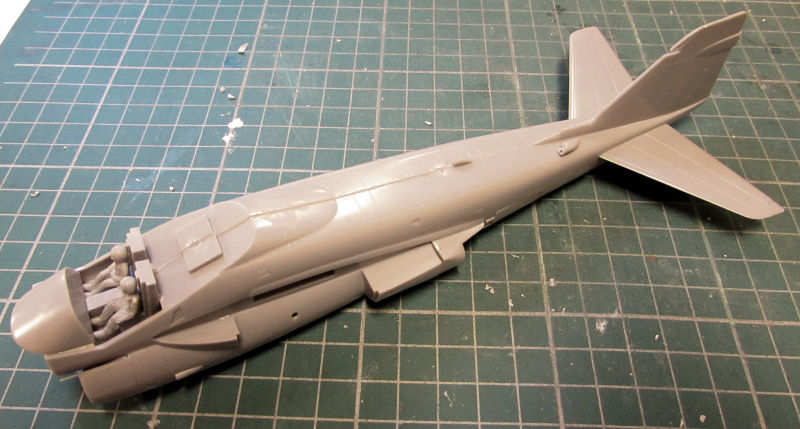
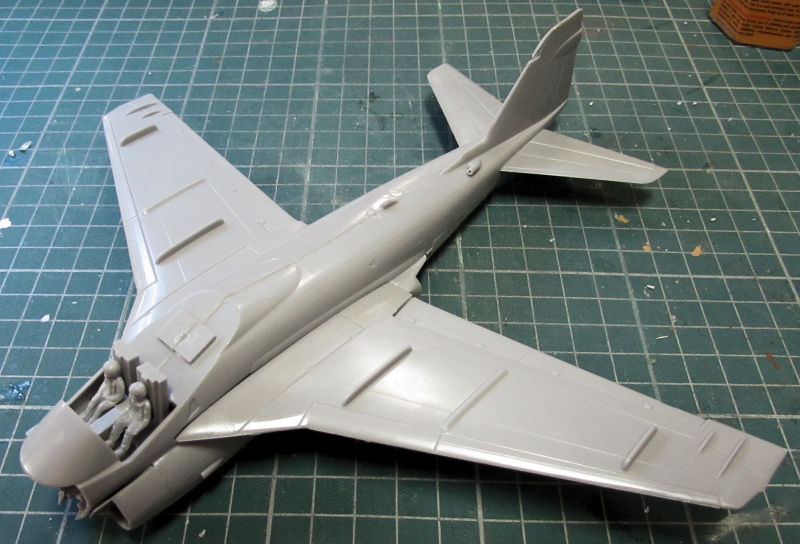
Next I assembled the fuselage around them. Fortunately the nose cone gets to be left off till later so I can add sufficient weight in the nose area. I had also added the engine intakes and the tail feathers:
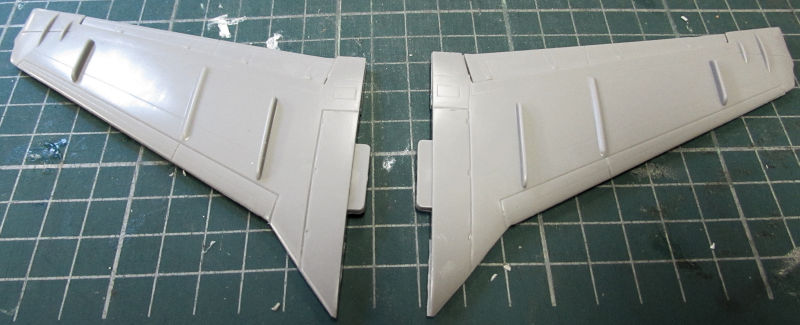
After that I assembled the two wings:
Here it is all mocked up ready for sanding and filling:
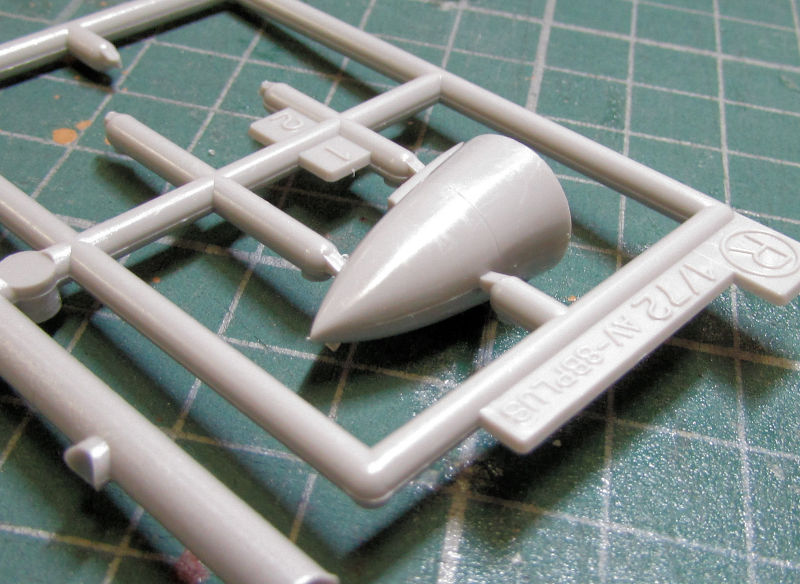
And in this part of the hanger we have an aircraft I'm building for a Group Build on another Forums called the "Cherry Poppers" Group Build, or, "what have you never, ever built before?" Well, I'd never done a Marine Corps AV-B Harrier so this bird is started as well. Again, we start with the cockpit:
Then I went through the kit, assembling all the parts that had been molded in two halves such as...
the nose cone:
...the gun pods too, and while I was at it, I added the panels to the underside of the part to the right:
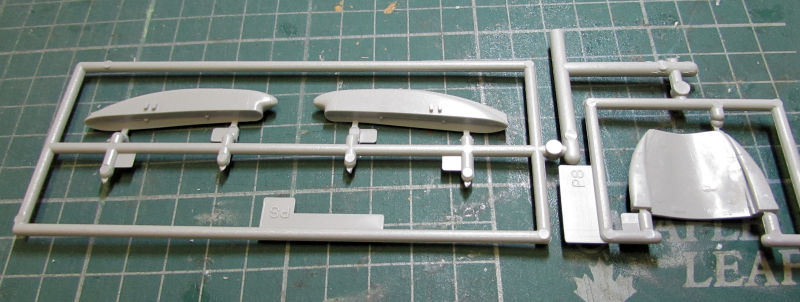
... the engine nozzles and drop tanks, even though I expect I'll be leaving those tanks off:
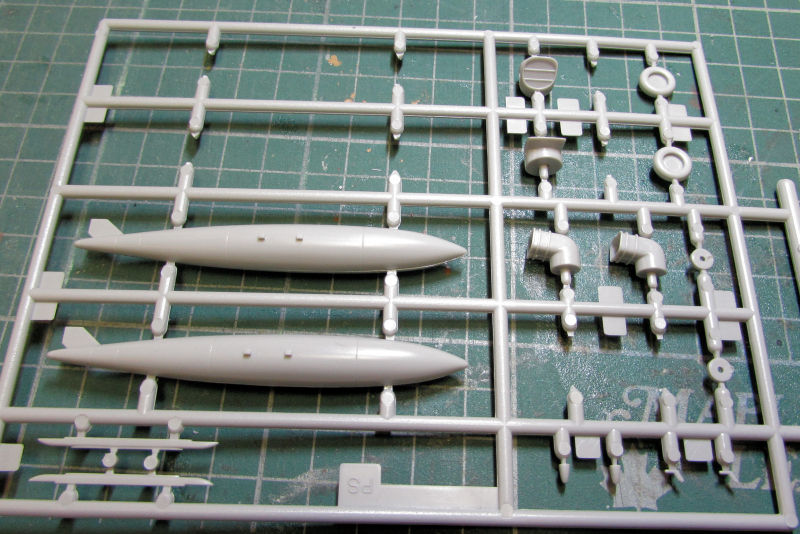
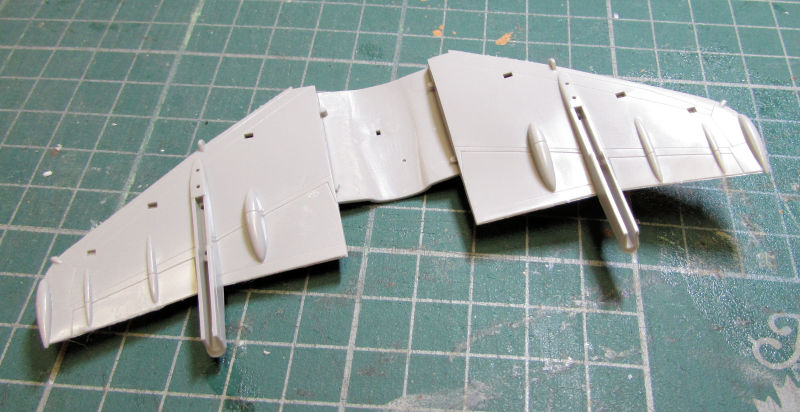
...and the wings:
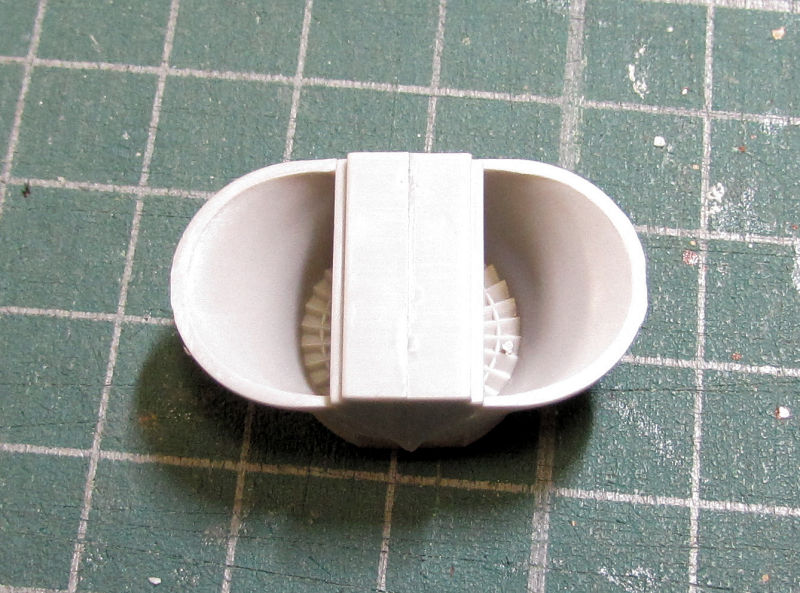
After that I built the engine intake interior:
Finally, I added the engine intakes, blast panels and flare dispenser to each side of the fuselage so there's less to add later on:

That's as far as I got on these aircraft.
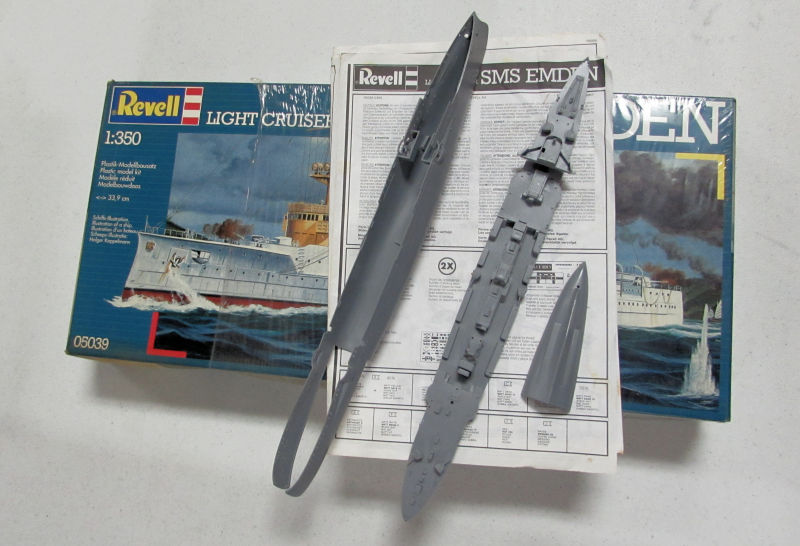
Moving on to my shipyards, I started a commission build for a friend who's always wanted one built. It is this Revell SMS Emden kit:
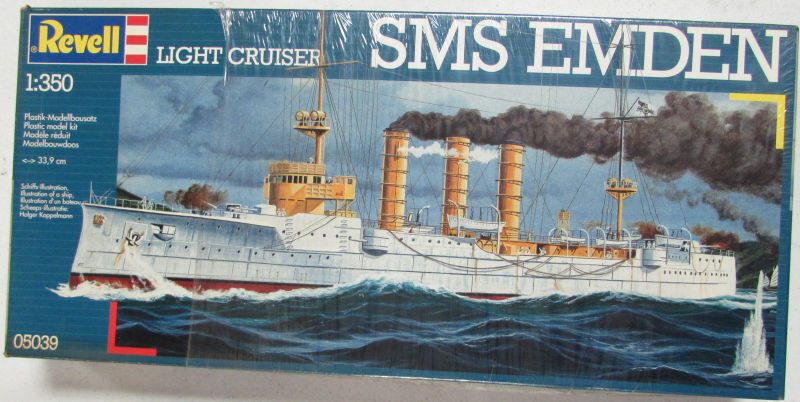
He got it from a friend's apartment when the guy passed away and he paid me with a Revell S-100 Schnellboot. So, naturallly I got started on it for him, laying down the keel and building the main deck and superstructure parts:
You can see that the hull was warped; what you can't see is how badly it was warped! That took some careful finessing on the main hull as well as the rear part that was molded in two separate parts(?!)
Here is how it looked when I finally got it finessed into place:
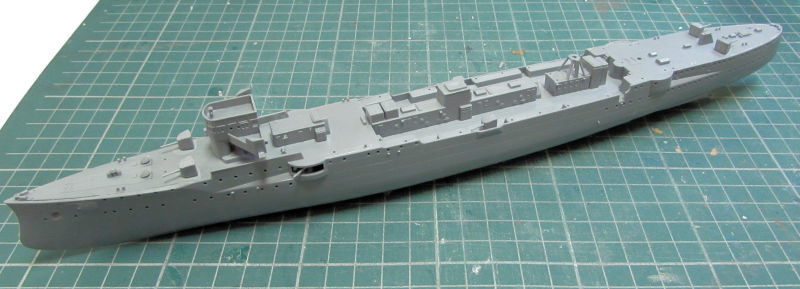
Later I'll add more detail parts and then get started on painting it. He wants it done in the pre-war white and 'gold' paint job.
Now the tour will continue in the Motor Pool workshop where a number of new projects got started and old projects got a little more work done on them.
I'll start with a kit that has been frying my eggs for months now, possibly even a year or two! I finally found some hooks to replace the one that had pinged off into oblivion. So, I pulled this Shelf Queen down and added the hooks to it:
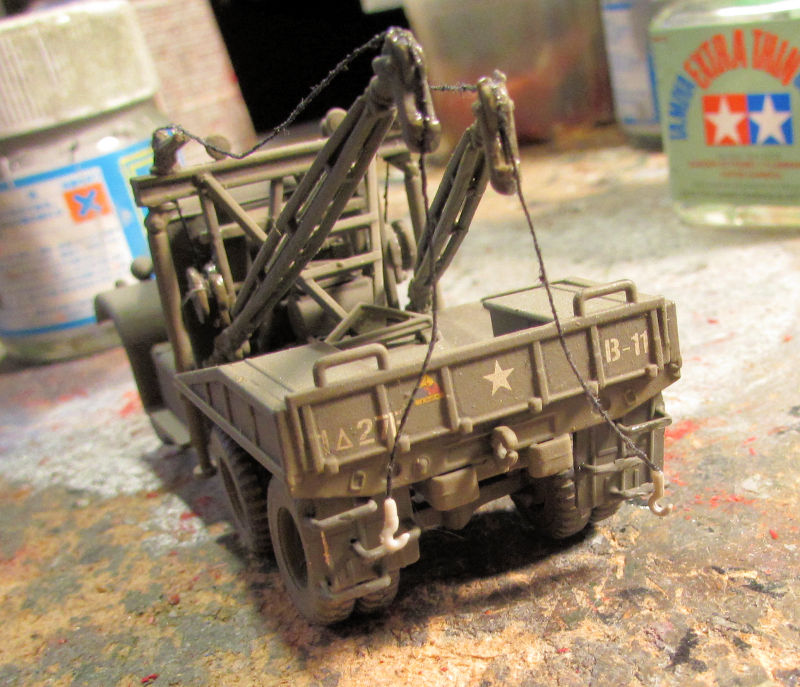
Later when they were painted, I hooked them onto those steps there. After that, I saw that in the process of moving this stupid thing around, the front fender had broken off and disappeared:
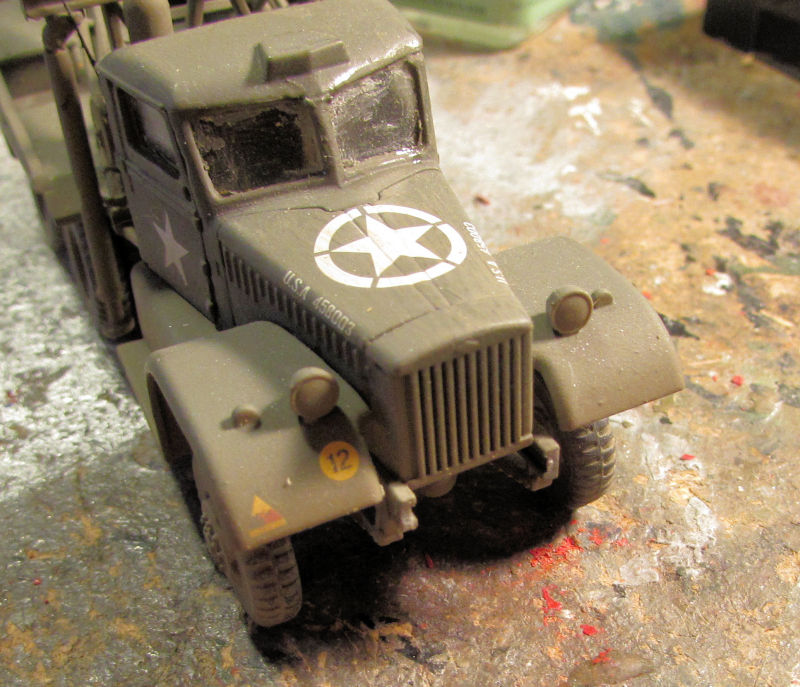
I search for a few hours and finally got so fed up with this that I found an old M-3 Halftrack and snipped the front fender off it and added it to the front of this beastie! It ain't accurate, but it's DONE!!
Moving on, I continued with another kit that had been burning my eggs as well. This Galaxy Models M-ATV got all of the plastic detail parts on the body that I felt I could add that wouldn't be broken off during handling:
There's still a few more parts that go on that, but I'm gonna install the windows first, then paint it after masking the windows, and then I'll add the last pieces.
Meanwhile, as that was drying, I assembled the machine gun 'turret' that goes on the top of this truck. sans machine gun. That will go on last after painting too:
Here it is all mocked up:
Another annoying little project that had been beating up the mojo was this Italian B1T Centauro. The small rods that were supposed to hold the outer turret shields were short shot. I finally pulled out a small rod of styrene, cut it to length and also bent the ones that needed it and added them to the turret. Afterward, I added the shields while the glue was still soft so I could position them properly:
I wasn't as successful as I'd hoped, but at least they are on. I might adjust them later if I get a mind to.
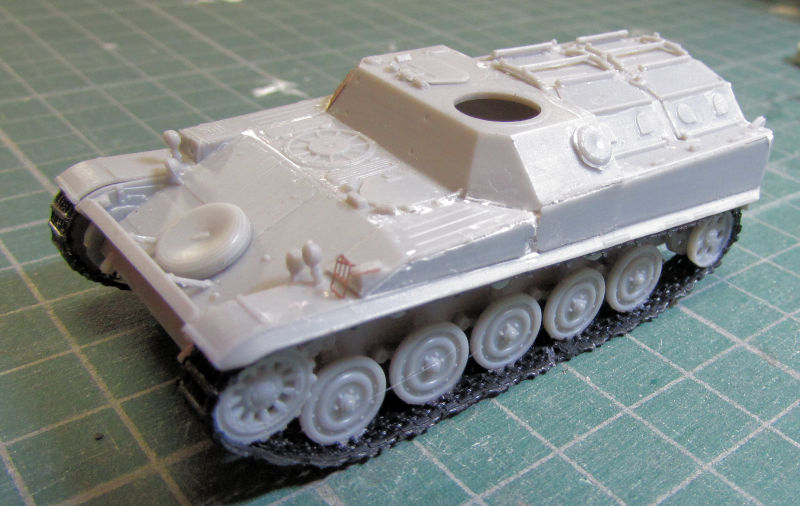
My little French AMX APC was also bothering me so I pulled it out and added the tracks. I also started adding the photo etch parts to this until I tried to bend the headlight guards into shape. The thing was so delicate that it tore! This little beats is NOT getting headlight guards!
I'm thinking that this is ready for paint now, then I can assemble the machine gun turret and add it later:
My friend Harmon had been asking me to build my Aerosans for the Treasure Train game we are planning to do so I got another one assembled:
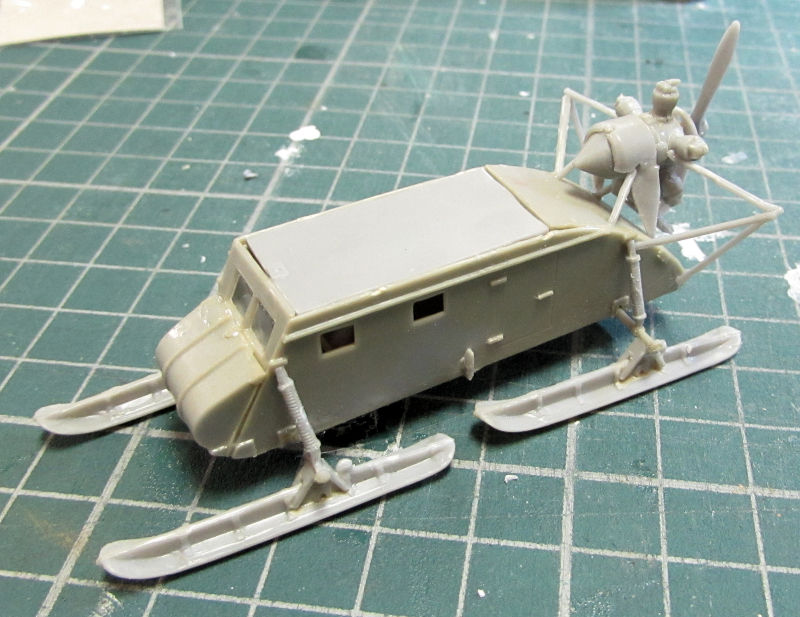
That had been started by another person who'd offered to help but later got wrapped up with other projects and couldn't continue. So I'll be filling the gaps and later on I'll paint this white.
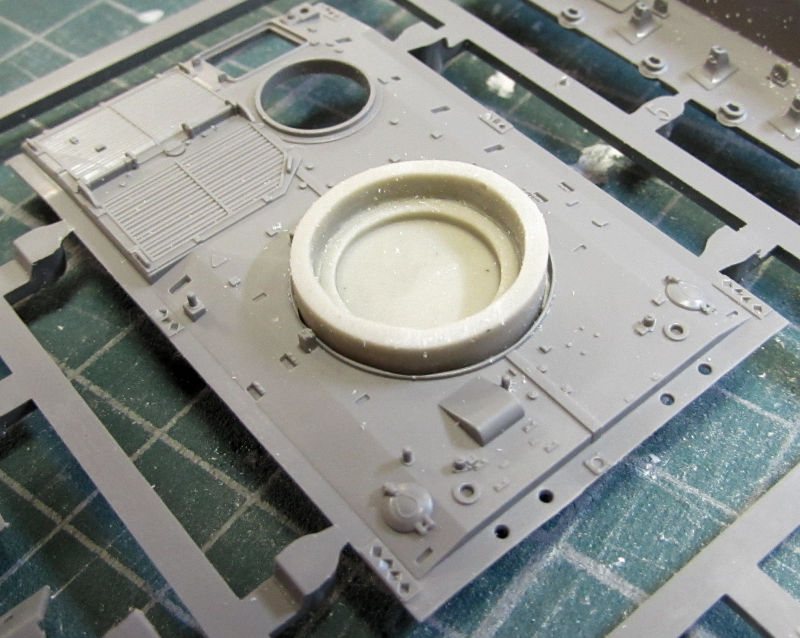
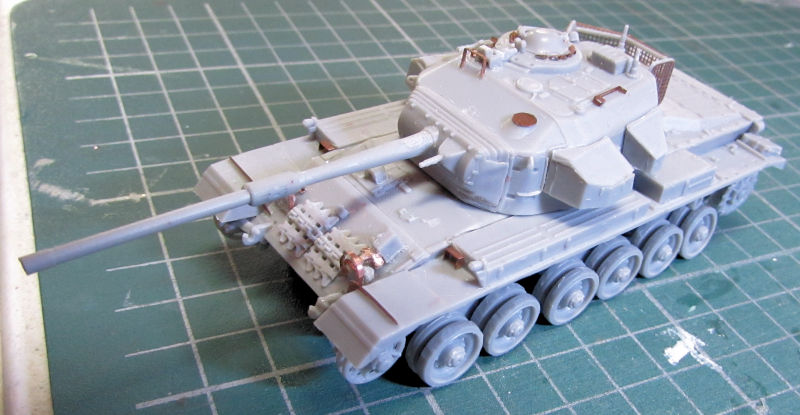
Finally I got to a couple models that started to be fun! This first one is the FV-432 with the Rarden 30mm gun turret on it. I started the resin turret conversion part first, adding the smoke dischargers and the metal barrel:
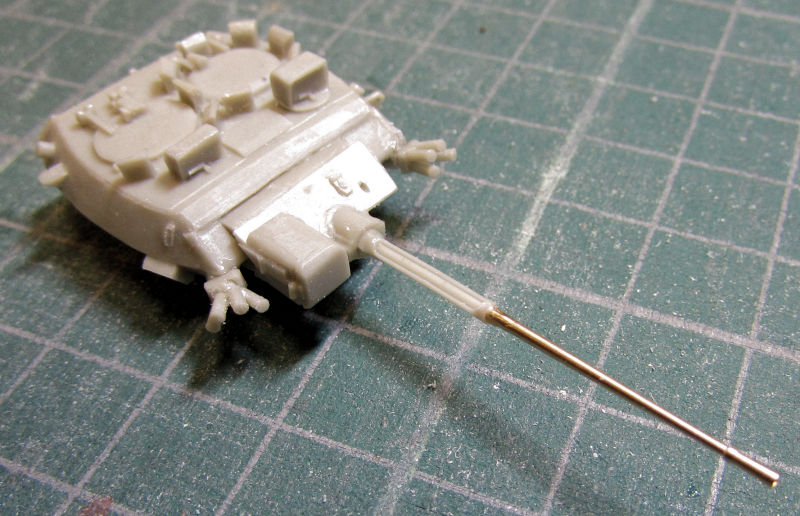
Afterward I added the new raised turret ring to it that was also in the conversion kit. It seemed a bit too high so I added some thin strips to bring it down a bit. I used the pour stub to glue it into place:
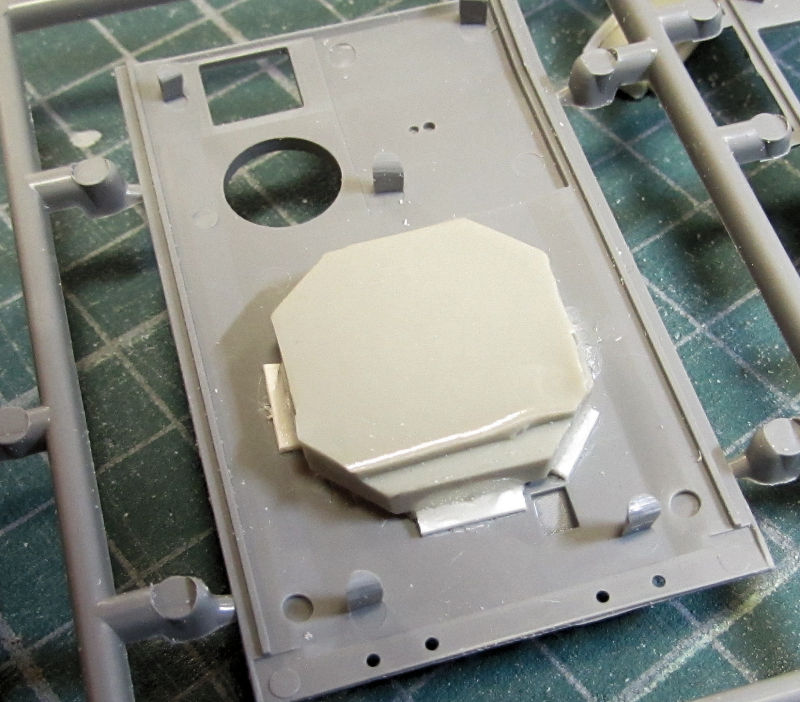
It did look better with the reduced height:
Later on, I assembled the whole hull and dry fit the turret to it:
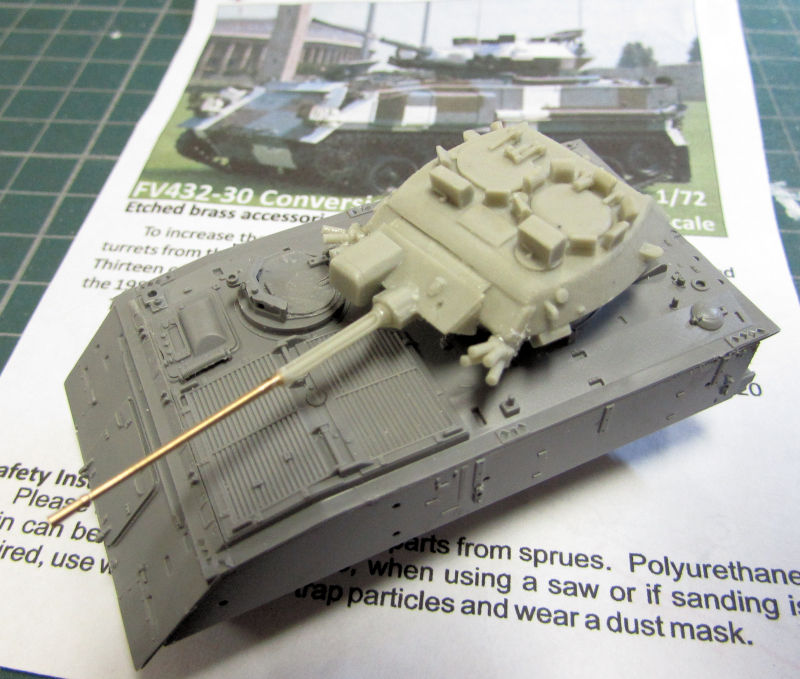
There's more to do, but this is already looking cool!
Finally, I got more done on my Israeli Sho't Kal Alef that had been taking longer than I wanted it to. First I added all the last plastic parts to it that wouldn't break off during handling:
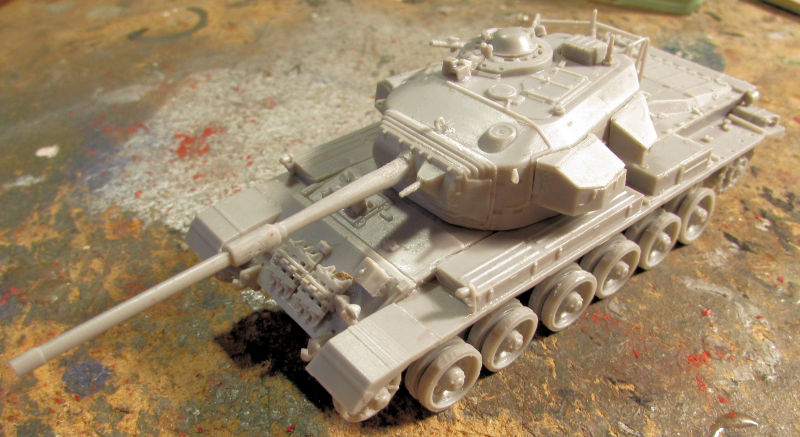
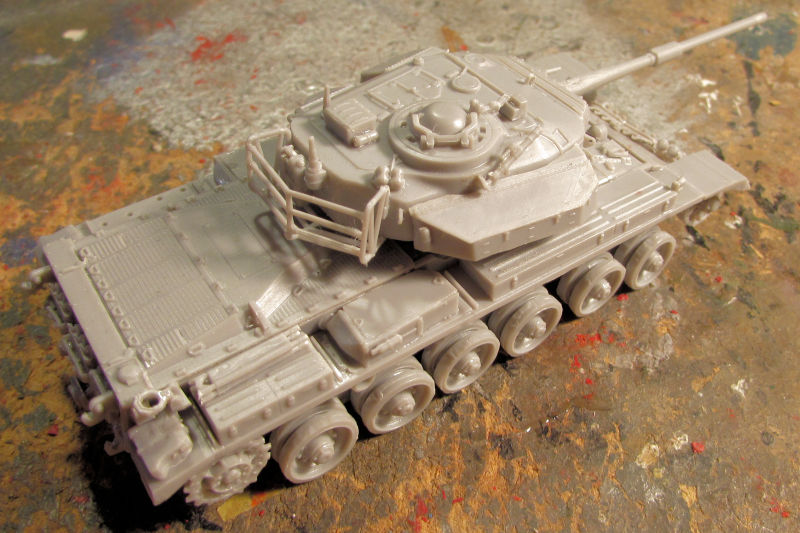
Later on, I added all the photo etch to this tank:
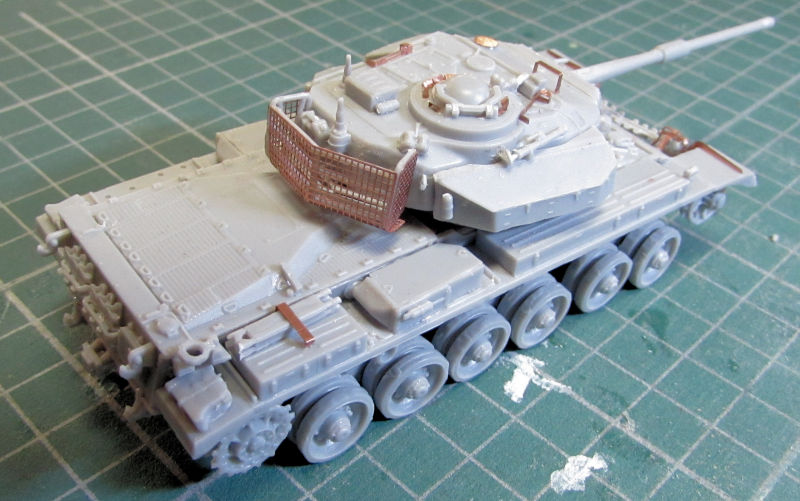
Now that beastie is ready for paint! I can't wait!
And that completes today's tour of Maddog Manufacturing! I hope you enjoyed it. Thanks all for coming in, comments are always welcome.
Having gotten the Revell Aircraft of Desert Storm set, I decided to start the one plane I didn't start back when I first had this set,. the A-6 Intruder. Later I'll start the F-117 from this set to replace the one that was stolen. For now, this is what I got done...
First was the basic cockpit. It is very basic so I added the pilots to give something to look at. Here is Mutt and Jeff sitting in their seats now waiting for the rest of the plane to get built::
Next I assembled the fuselage around them. Fortunately the nose cone gets to be left off till later so I can add sufficient weight in the nose area. I had also added the engine intakes and the tail feathers:
After that I assembled the two wings:
Here it is all mocked up ready for sanding and filling:
And in this part of the hanger we have an aircraft I'm building for a Group Build on another Forums called the "Cherry Poppers" Group Build, or, "what have you never, ever built before?" Well, I'd never done a Marine Corps AV-B Harrier so this bird is started as well. Again, we start with the cockpit:
Then I went through the kit, assembling all the parts that had been molded in two halves such as...
the nose cone:
...the gun pods too, and while I was at it, I added the panels to the underside of the part to the right:
... the engine nozzles and drop tanks, even though I expect I'll be leaving those tanks off:
...and the wings:
After that I built the engine intake interior:
Finally, I added the engine intakes, blast panels and flare dispenser to each side of the fuselage so there's less to add later on:
That's as far as I got on these aircraft.
Moving on to my shipyards, I started a commission build for a friend who's always wanted one built. It is this Revell SMS Emden kit:
He got it from a friend's apartment when the guy passed away and he paid me with a Revell S-100 Schnellboot. So, naturallly I got started on it for him, laying down the keel and building the main deck and superstructure parts:
You can see that the hull was warped; what you can't see is how badly it was warped! That took some careful finessing on the main hull as well as the rear part that was molded in two separate parts(?!)
Here is how it looked when I finally got it finessed into place:
Later I'll add more detail parts and then get started on painting it. He wants it done in the pre-war white and 'gold' paint job.
Now the tour will continue in the Motor Pool workshop where a number of new projects got started and old projects got a little more work done on them.
I'll start with a kit that has been frying my eggs for months now, possibly even a year or two! I finally found some hooks to replace the one that had pinged off into oblivion. So, I pulled this Shelf Queen down and added the hooks to it:
Later when they were painted, I hooked them onto those steps there. After that, I saw that in the process of moving this stupid thing around, the front fender had broken off and disappeared:
I search for a few hours and finally got so fed up with this that I found an old M-3 Halftrack and snipped the front fender off it and added it to the front of this beastie! It ain't accurate, but it's DONE!!
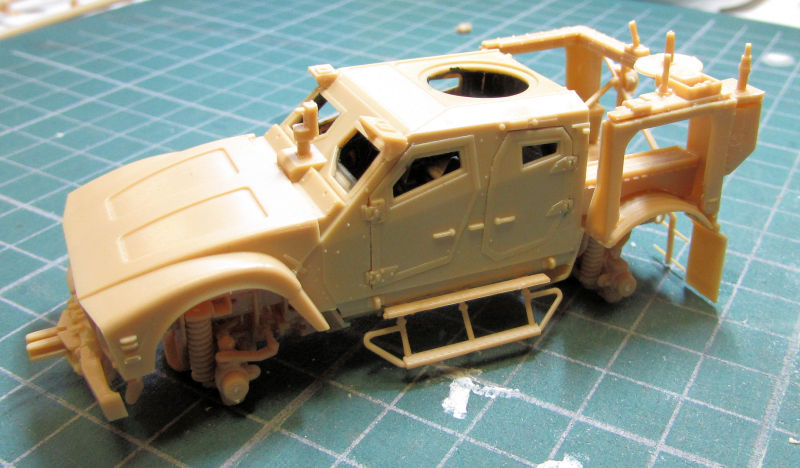
Moving on, I continued with another kit that had been burning my eggs as well. This Galaxy Models M-ATV got all of the plastic detail parts on the body that I felt I could add that wouldn't be broken off during handling:
There's still a few more parts that go on that, but I'm gonna install the windows first, then paint it after masking the windows, and then I'll add the last pieces.
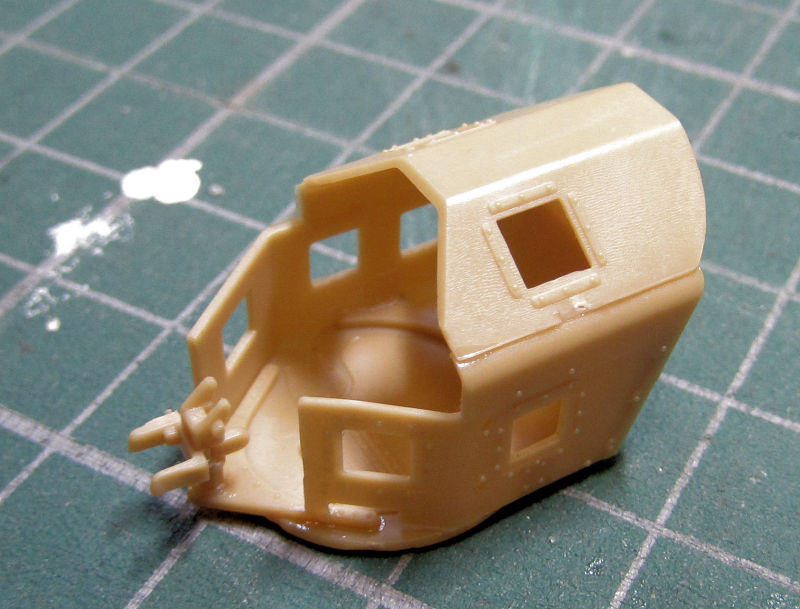
Meanwhile, as that was drying, I assembled the machine gun 'turret' that goes on the top of this truck. sans machine gun. That will go on last after painting too:
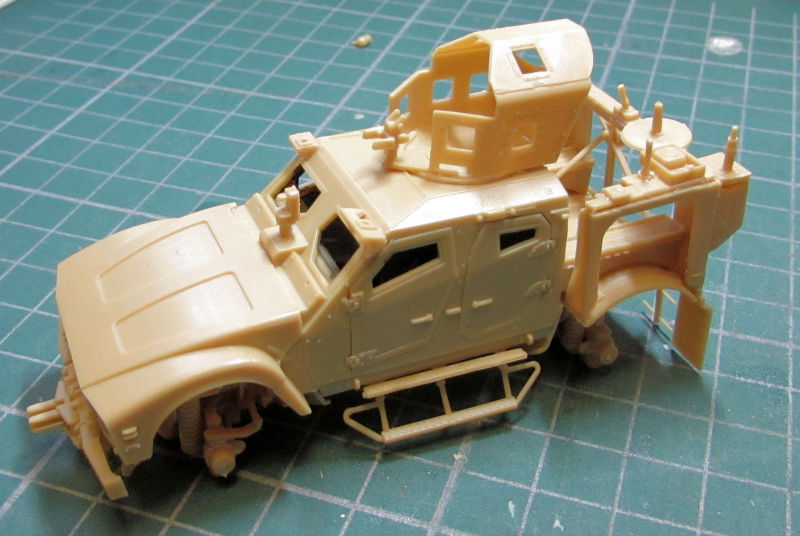
Here it is all mocked up:
Another annoying little project that had been beating up the mojo was this Italian B1T Centauro. The small rods that were supposed to hold the outer turret shields were short shot. I finally pulled out a small rod of styrene, cut it to length and also bent the ones that needed it and added them to the turret. Afterward, I added the shields while the glue was still soft so I could position them properly:
I wasn't as successful as I'd hoped, but at least they are on. I might adjust them later if I get a mind to.
My little French AMX APC was also bothering me so I pulled it out and added the tracks. I also started adding the photo etch parts to this until I tried to bend the headlight guards into shape. The thing was so delicate that it tore! This little beats is NOT getting headlight guards!
I'm thinking that this is ready for paint now, then I can assemble the machine gun turret and add it later:
My friend Harmon had been asking me to build my Aerosans for the Treasure Train game we are planning to do so I got another one assembled:
That had been started by another person who'd offered to help but later got wrapped up with other projects and couldn't continue. So I'll be filling the gaps and later on I'll paint this white.
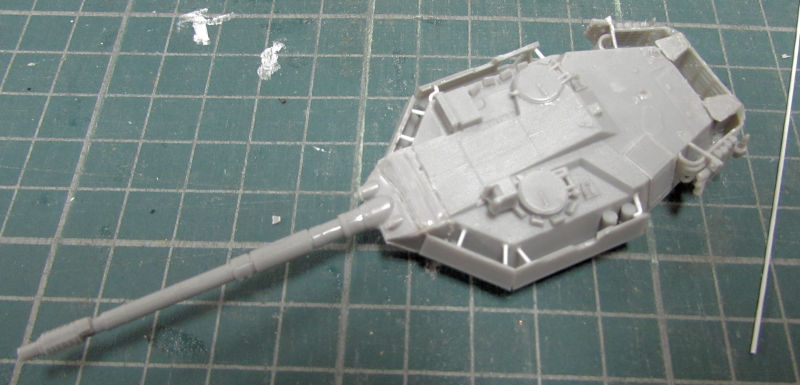
Finally I got to a couple models that started to be fun! This first one is the FV-432 with the Rarden 30mm gun turret on it. I started the resin turret conversion part first, adding the smoke dischargers and the metal barrel:
Afterward I added the new raised turret ring to it that was also in the conversion kit. It seemed a bit too high so I added some thin strips to bring it down a bit. I used the pour stub to glue it into place:
It did look better with the reduced height:
Later on, I assembled the whole hull and dry fit the turret to it:
There's more to do, but this is already looking cool!
Finally, I got more done on my Israeli Sho't Kal Alef that had been taking longer than I wanted it to. First I added all the last plastic parts to it that wouldn't break off during handling:
Later on, I added all the photo etch to this tank:
Now that beastie is ready for paint! I can't wait!
And that completes today's tour of Maddog Manufacturing! I hope you enjoyed it. Thanks all for coming in, comments are always welcome.
The Duke
Virtuoso of Miniatures
"Do you know what the chain of command is? It's the chain I get and beat you with 'till you understand who's in ruttin' command!"
-Jayne Cobb, Firefly Episode 2 "The Train Job"
We are modelers - the same in spirit, in hunger to insanely buy newly released kits, hustlers in hiding our stash from our better halves and experts in using garbage as replacements for after-market parts.
Virtuoso of Miniatures
"Do you know what the chain of command is? It's the chain I get and beat you with 'till you understand who's in ruttin' command!"
-Jayne Cobb, Firefly Episode 2 "The Train Job"
We are modelers - the same in spirit, in hunger to insanely buy newly released kits, hustlers in hiding our stash from our better halves and experts in using garbage as replacements for after-market parts.