1/32 Hasegawa Fw 190D-13 Yellow 10

Post your work in progress of your aircraft builds in here.
User avatar
jkim
Elite Member
Posts: 4073
Joined: Mon Apr 10, 2017 4:03 pm

Re: 1/32 Hasegawa Fw 190D-13 Yellow 10

Post by jkim »

Floki wrote:That had to be hard to wipe all that work you put into the landing gear. If anyone but him would of said it then I would of just left it.
It wasn't too bad. I should've checked my references more carefully... can't deny the reference photos. After the paint was stripped, I took some extra time to scribe the delineations on the landing gear legs to allow them to hold a wash better. I figured if I was going to re-do them, I would make them better somehow.

Here are the radiator pieces. I had a couple of Eduard 190D-9 Exterior details sets, which will largely go unused since most of included items are for wheel wells, which have been superseded by the Aires resin set. But... there are some actuating arms for the radiator cowling flaps that I was able to use so you can see them in the photo.
Image
Image

The radiator cowling pieces have been glued into place. I've also added the little scoop on top of the engine cowling. The opening of the scoop was "scooped" out using an x-acto blade.
Image
Image
Image
John aka JKim
-----------<><
Image
User avatar
jkim
Elite Member
Posts: 4073
Joined: Mon Apr 10, 2017 4:03 pm

Re: 1/32 Hasegawa Fw 190D-13 Yellow 10

Post by jkim »

Working on the resin prop by Henri Daehne. Some of the finest resin out there!
Image

The prop hub detail is amazing but unfortunately it will be permanently covered by the spinner at the end. If it weren't for the cannon barrel, I would've been able to use magnets and make the prop spinner removable, which I've done on a D-9 build.
Image
Image

A few poses of the HD prop in place.
Image
Image
Image

The prop spiral was painted using a custom mask traced from the spiral on the Eagle Editions decal set for Yellow 10.
Image
Image
Image

The spinner has some characteristic staining on the back half due to leaks from the cannon system. I'll have to figure out how to replicate that but for now, a dark brown wash to highlight the details.
Image

The prop blades have been painted but not yet weathered. I could not detect any paint chipping on the reference photos of Yellow 10, so I'll probably do a couple rounds of salt fading to impart some wear on these blades.
Image
John aka JKim
-----------<><
Image
User avatar
Floki
Elite Member
Posts: 3548
Joined: Wed Dec 12, 2018 2:23 am
Location: Muncie, Indiana

Re: 1/32 Hasegawa Fw 190D-13 Yellow 10

Post by Floki »

A beautiful looking prop! Really is some great looking resin! Great job on the spiral. It looks like the gun barrel holds the spinner in place really well if you was wanting to keep it removable.
March as one, Don't look back
Odin's sons... Attack!
Unleash hell! Do not repent! Warfare grants us no lament
Let your weapons slash and tear This is no place for fear
Hold the lines! Move as one! In unity our victory's won
Our shields will form a mighty wall
United we shall never fall
User avatar
Medicman71
Elite Member
Posts: 11095
Joined: Mon Apr 07, 2014 9:32 am
Location: Houston, Tx

Re: 1/32 Hasegawa Fw 190D-13 Yellow 10

Post by Medicman71 »

Just incredible! The painting on the spinner looks awesome!
Mike

Sponsored by Boeing, Lockheed Martin, Northrop Grumman, Saab, BAE, and Dassault
User avatar
jkim
Elite Member
Posts: 4073
Joined: Mon Apr 10, 2017 4:03 pm

Re: 1/32 Hasegawa Fw 190D-13 Yellow 10

Post by jkim »

Thanks guys!
Floki wrote:A beautiful looking prop! Really is some great looking resin! Great job on the spiral. It looks like the gun barrel holds the spinner in place really well if you was wanting to keep it removable.
Nope. The spinner will have to be permanently attached to the backplate... it just doesn't have enough friction to hold together without glue. And the gun barrel is painted brass, which is highly susceptible to the paint scratching off.

The prop blades were treated to a few rounds of salt fading. I am very cautious with this technique because it looks pretty strange when it is overdone. So I tend to wisp on very thin light grays and tans and sometimes I find that the effect is not even visible. If the effect is a little too heavy, I can dial it back by gently rubbing some micromesh on it.
Image

Here are the prop blades after 3 salt fading attempts. The effect is pretty subtle and these photos represent my attempt to maximize the visibility of it. In some angles, you can hardly see it.
Image
Image
Image

Some initial attempts at staining the prop spinner. This is just playing with pastel staining on a matte paint surface. I'll probably try to layer some more discrete stains, maybe with oils. And yes, I did a salt fade on the spinner too.
Image
Image

Playing around with different light configurations to get another perspective on the spinner.
Image
Image

A peek of the assembled prop mounted onto the fuselage.
Image
John aka JKim
-----------<><
Image
User avatar
Stuart
Elite Member
Posts: 11526
Joined: Sun Apr 06, 2014 1:06 pm
Location: North Wales

Re: 1/32 Hasegawa Fw 190D-13 Yellow 10

Post by Stuart »

Simply stunning work on that prop assembly and the undercarriage John :shoutout: :shoutout: :shoutout:
Stuart Templeton 'I may not be good but I'm slow...'
User avatar
Duke Maddog
Elite Member
Posts: 7580
Joined: Tue Jun 03, 2014 11:22 am
Location: Rowland Heights, CA

Re: 1/32 Hasegawa Fw 190D-13 Yellow 10

Post by Duke Maddog »

Man, I've been following this quite extensively but not posting because I'm constantly overwhelmed beyond words. I feel so inadequate, simply building my models, painting them and shooting a weathering color on them with my airbrush...

This is so over the top..... :bow: :bow: :bow: :bow: :bow:
The Duke
Virtuoso of Miniatures

"Do you know what the chain of command is? It's the chain I get and beat you with 'till you understand who's in ruttin' command!"
-Jayne Cobb, Firefly Episode 2 "The Train Job"

We are modelers - the same in spirit, in hunger to insanely buy newly released kits, hustlers in hiding our stash from our better halves and experts in using garbage as replacements for after-market parts.
User avatar
Stikpusher
Moderator
Posts: 20865
Joined: Sat Apr 05, 2014 8:37 pm
Location: Ceti Alpha 5

Re: 1/32 Hasegawa Fw 190D-13 Yellow 10

Post by Stikpusher »

Beautiful! :shoutout: The green spiral spinner is a nice change from the usual black green or black.
"Surely I have made my meaning plain? I intend to avenge myself upon you, Admiral. I have deprived your ship of power, and when I swing 'round, I intend to deprive you of your life."

FLSM
User avatar
mustang1989
Moderator
Posts: 4988
Joined: Tue Mar 18, 2014 8:35 pm

Re: 1/32 Hasegawa Fw 190D-13 Yellow 10

Post by mustang1989 »

John I really don't know what all to say about the work that you're putting into this build. I certainly admire all that you're doing not only on a modeling / technique level but also on an accuracy level. This has got to be one of the best D-9 examples I've ever seen built up and you're not even done yet.
User avatar
jkim
Elite Member
Posts: 4073
Joined: Mon Apr 10, 2017 4:03 pm

Re: 1/32 Hasegawa Fw 190D-13 Yellow 10

Post by jkim »

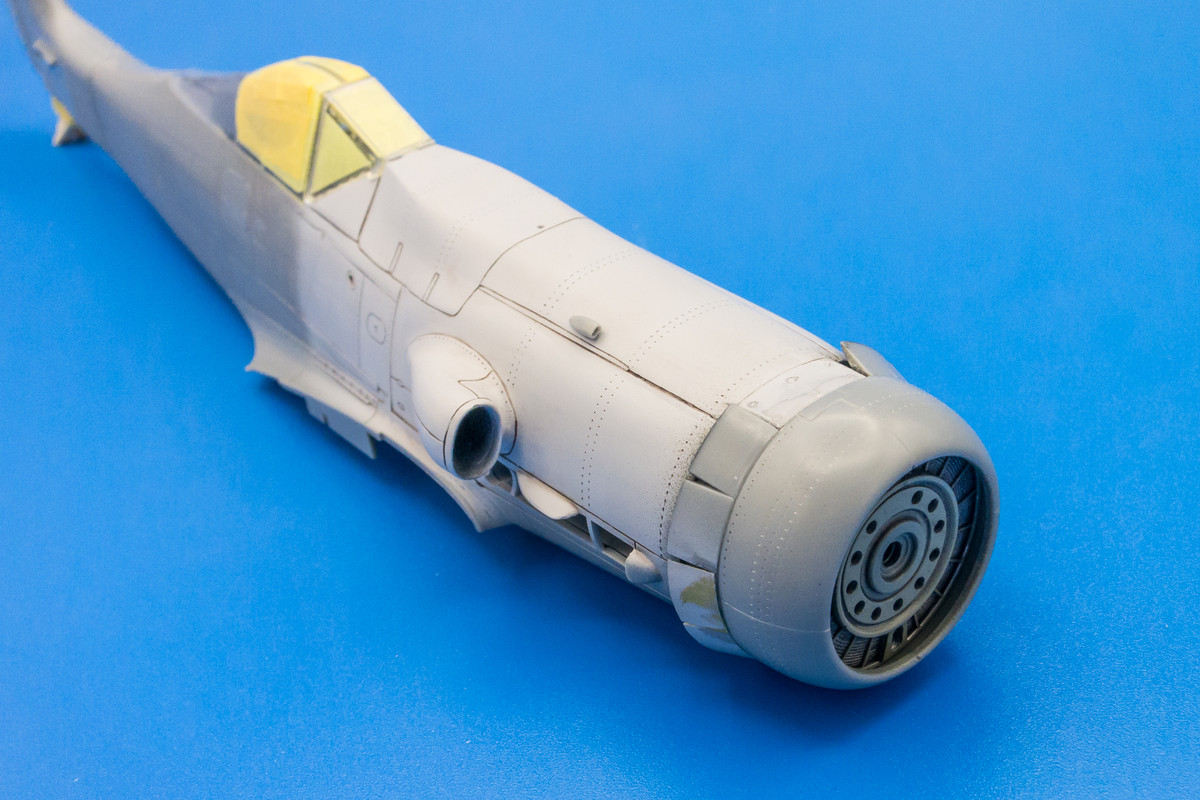
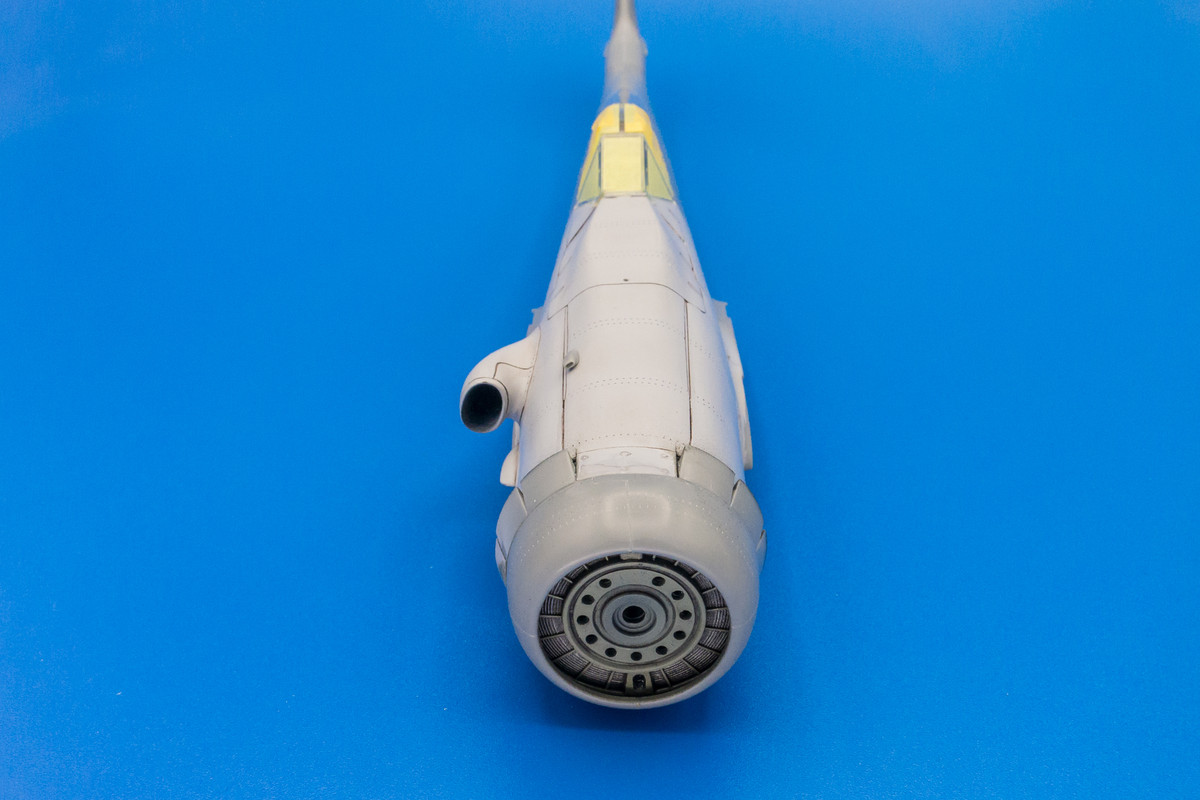
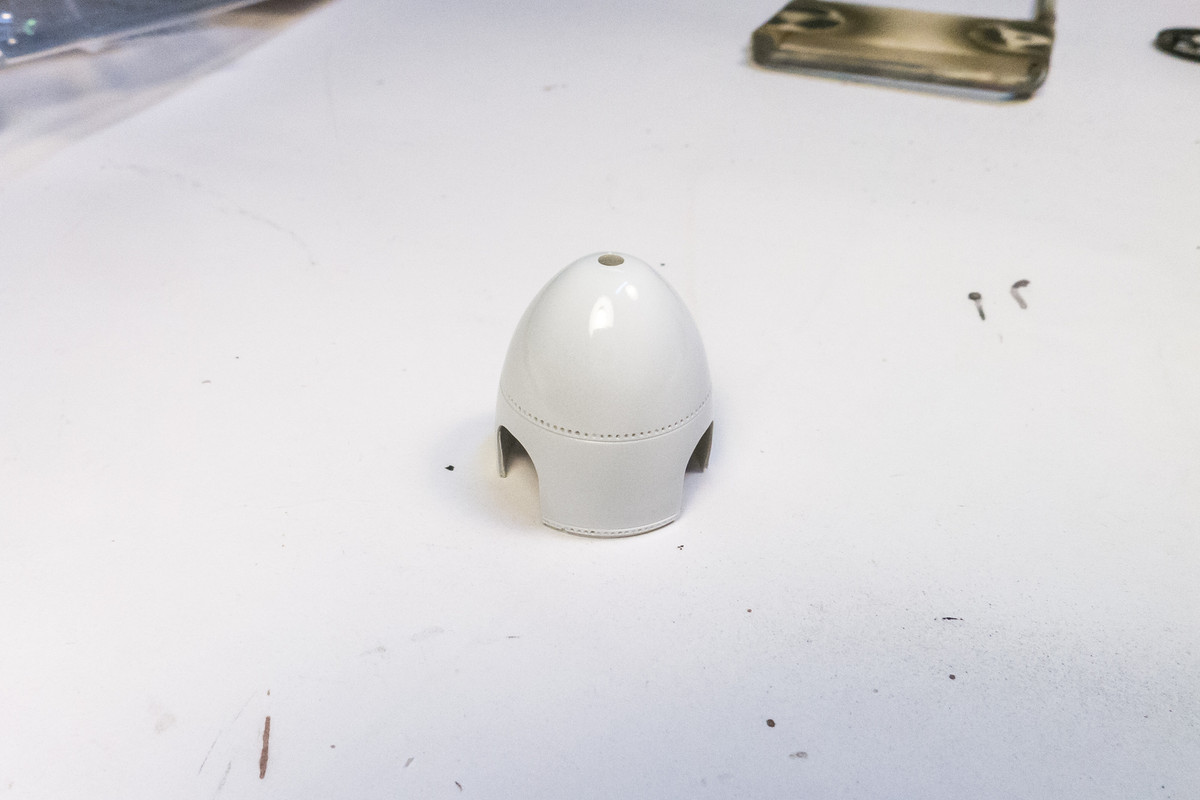
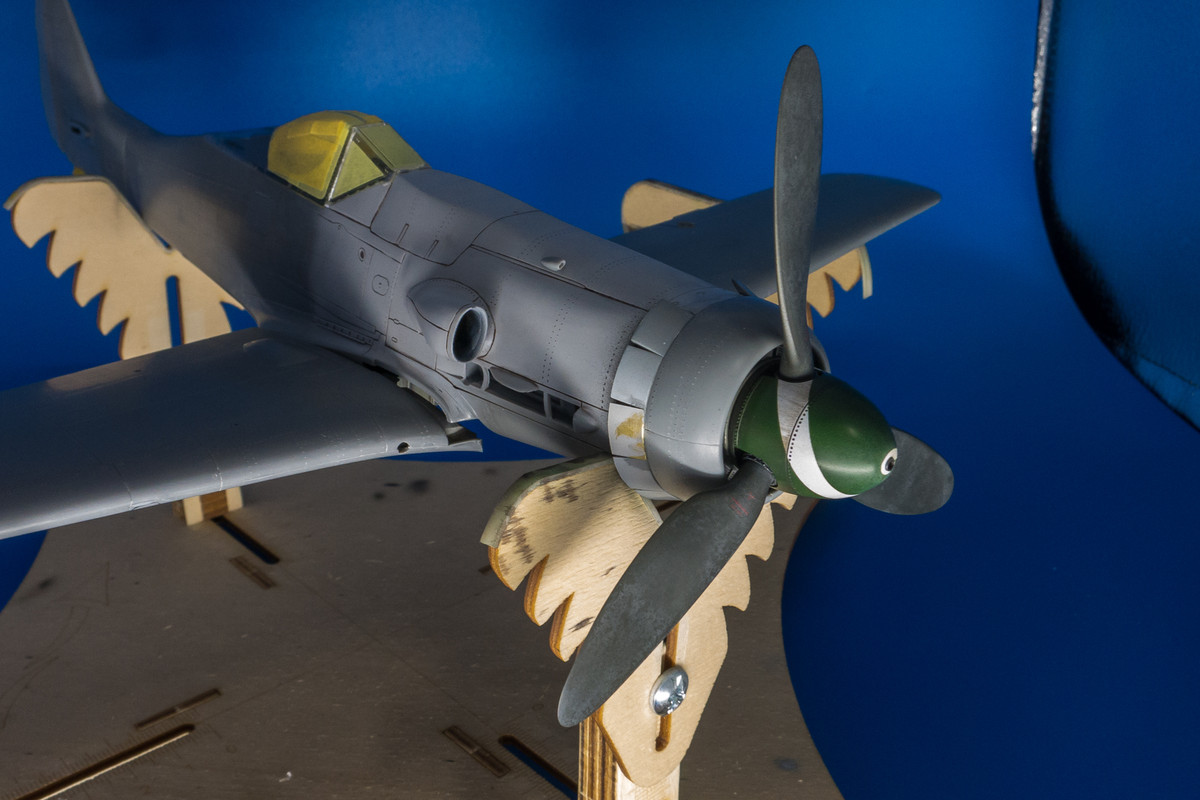
Thanks guys! I'm really enjoying this build. It's a mix of familiar and strange. It's a Dora, which I've done many but it's a D-13, which makes it unique and different in many ways. The 190D has always been a favorite of mine, even in childhood, so I feel especially motivated to do my best even when going through (essentially) the same cockpit and engine stuff 4-5 times now.

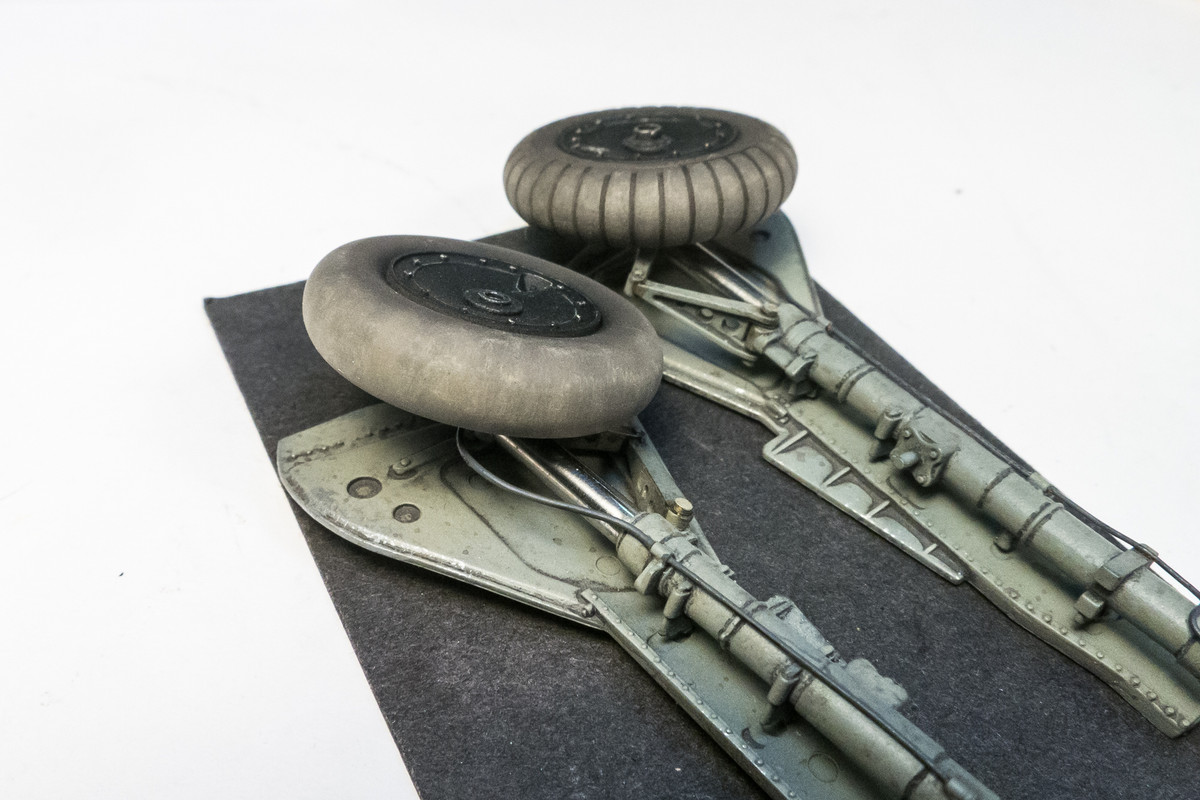
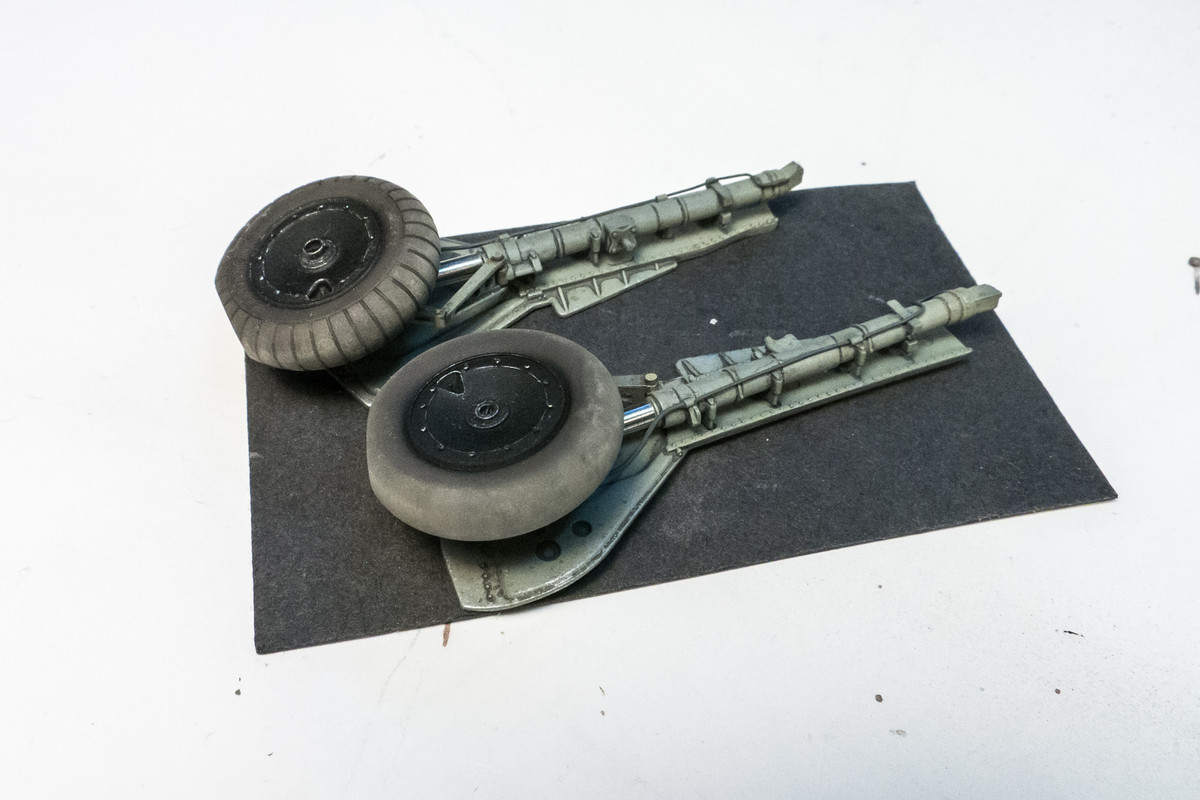
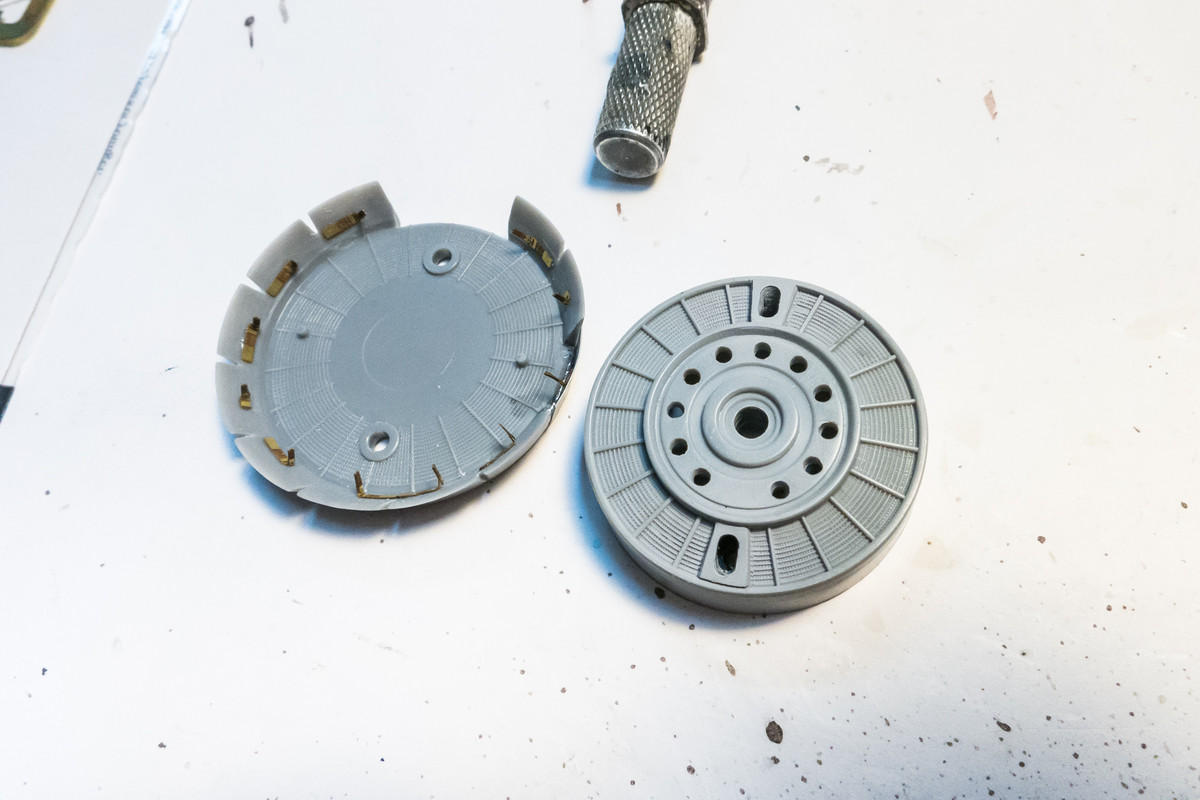
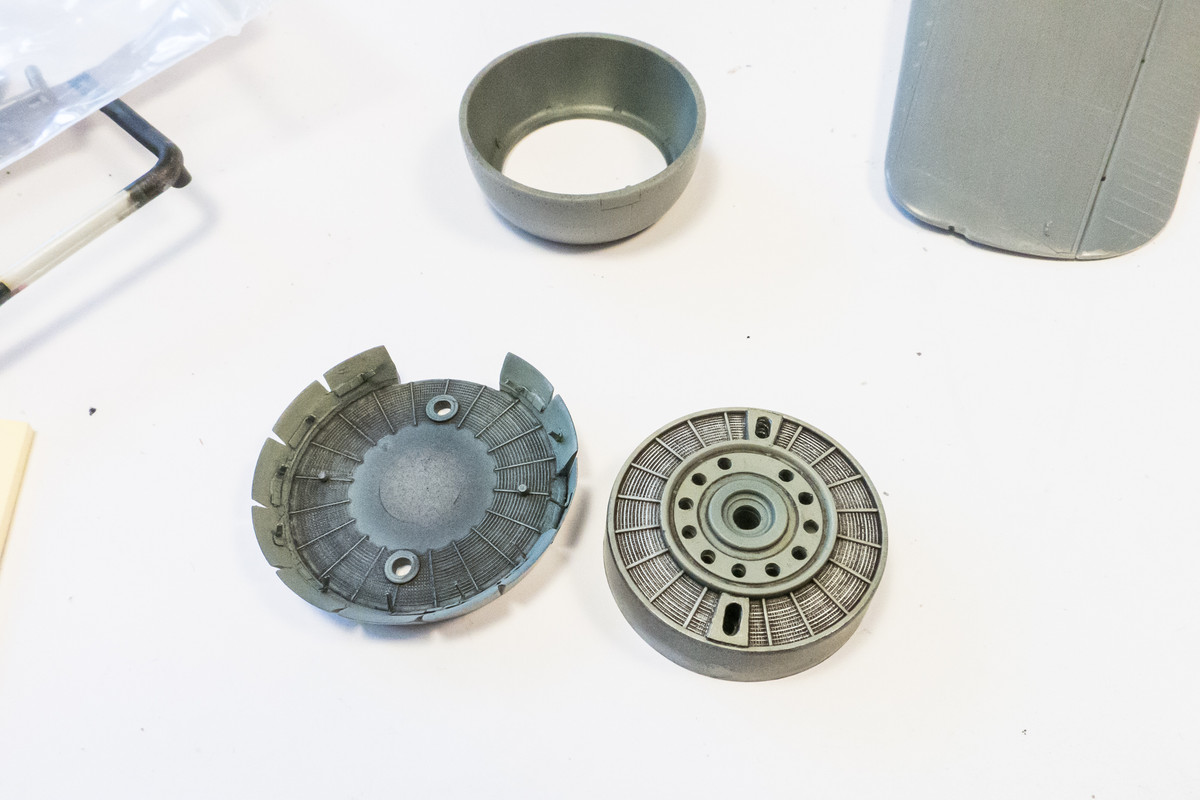
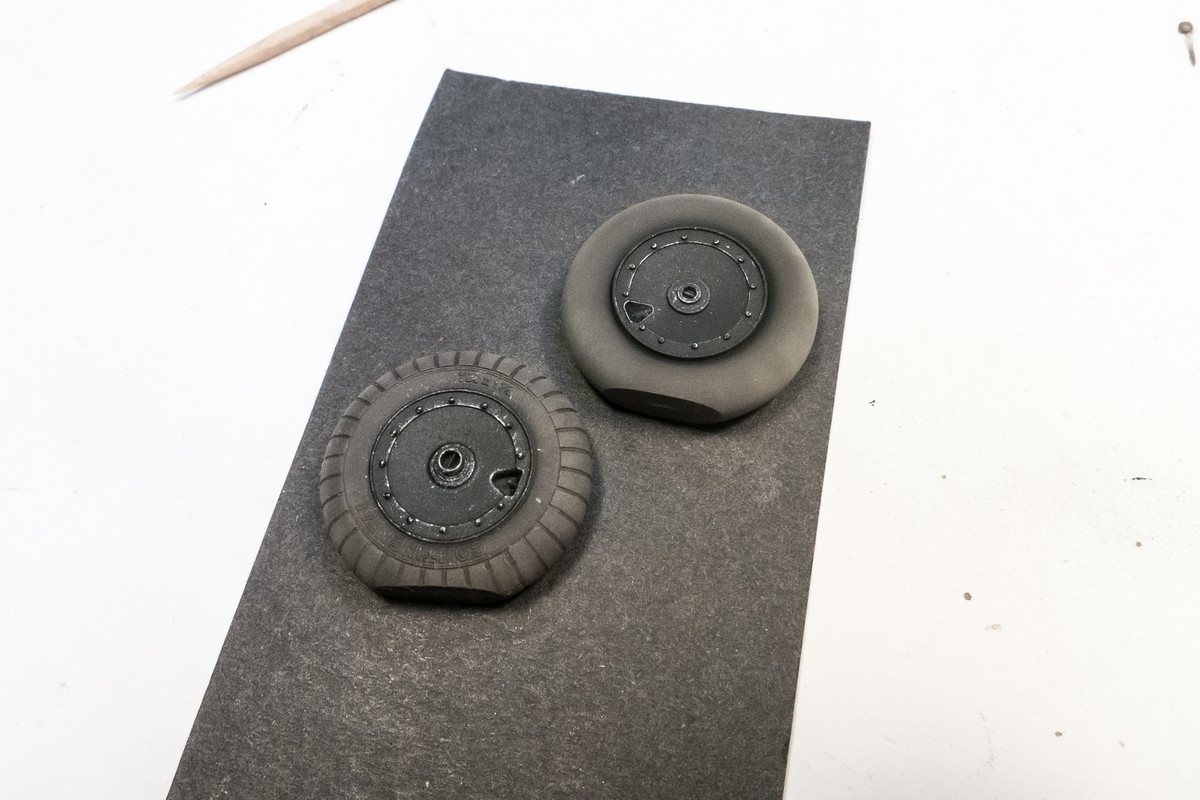
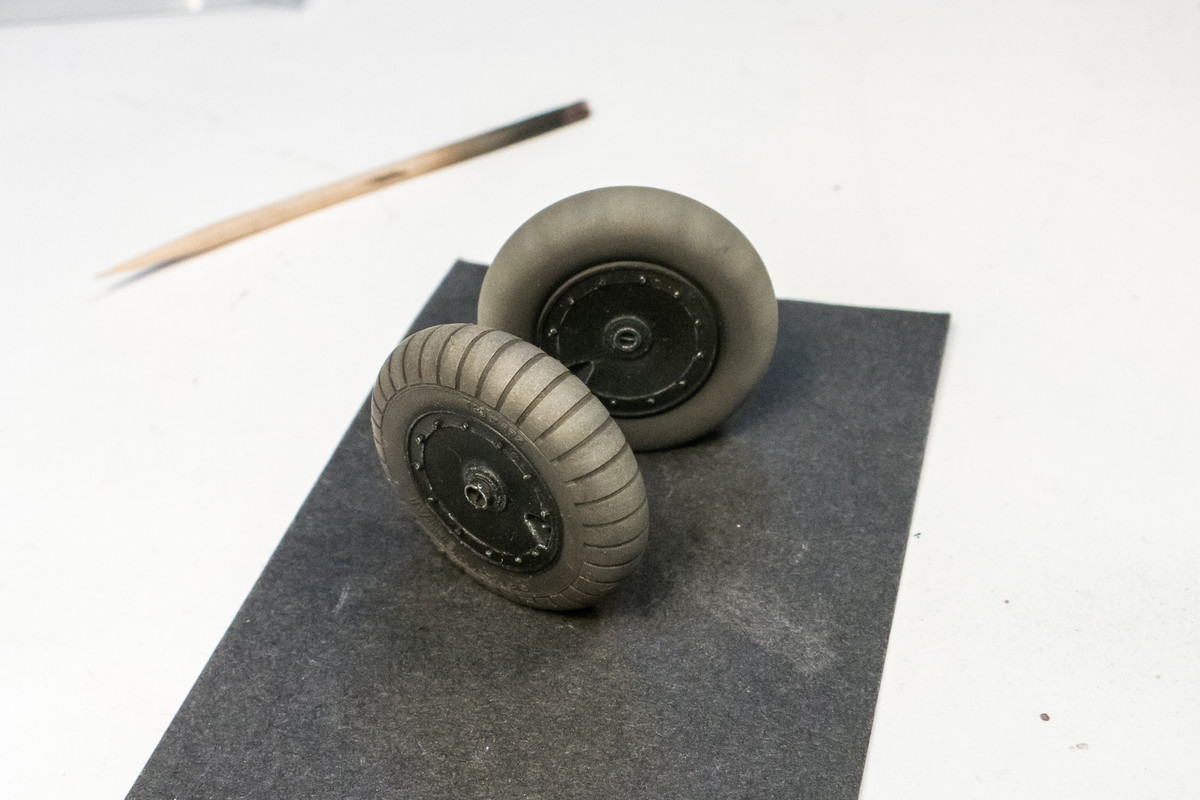
The wheels have been painted. No, they do not match! Photographs of Yellow 10 at capture clearly show that the plane had both the smooth and treaded tires. I used one of the kit wheels for the smooth version and a Barracuda resin wheel for the treaded one. Hub detail is a slightly different but close enough not to stand out. As for painting, I like to use a dark brown on the rubber tires. Mostly to contrast with the black metal wheel discs but I guess real rubber can have that tinge of brown to it. I've lightened the wear surfaces with a tan color but I've always been dissatisfied with the paint effects up to this point... it's just too smooth and airbrush-like.
Image
Image

On the last few builds, I've been developing a technique to impart some smaller, more hard-edged staining to the tires. I'm sure other people have done this but I've never seen it described or named. So I'm gonna pretend I invented it and call it "pastel staining". What I'm doing is using the propensity for a liquid pastel wash to spread out and create tide stains on matte surfaces. Using a light-colored, tannish wash that I've mixed up from pastel chalks, I put small dots of the wash along the center of the tires. Capillary action draws out the dot of fluid onto a bigger area, dragging with it the fine chalk dust and creating irregular tide marks.
Image

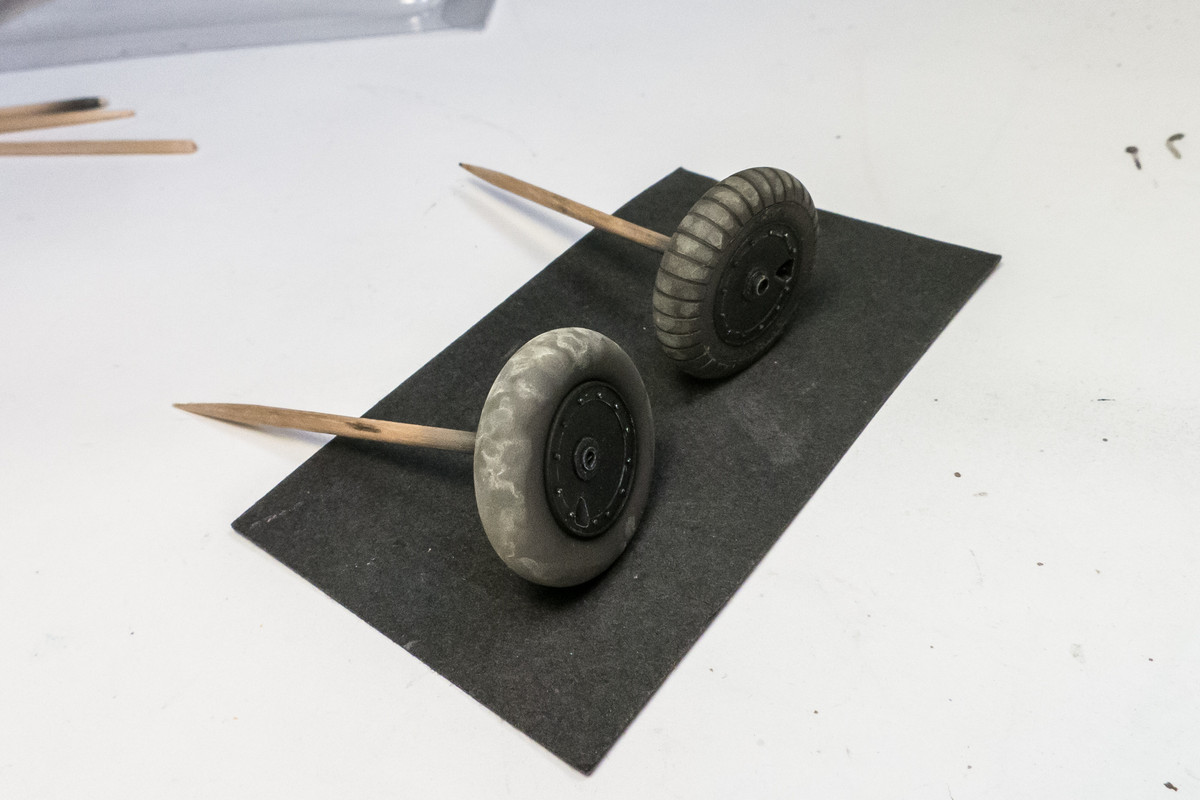
Using a slightly dampened piece of paper towel, the stained areas are carefully wiped off, usually from side to side perpendicular to how the tire rolls to transition the stains from the contact area onto the tire sidewalls. The trick here is to use a light stroke to smooth and smear the wash without completely removing it.
Image

The pattern is repeated until I've achieved a layered set of random stains that looks semi-convincing.
Image
Image

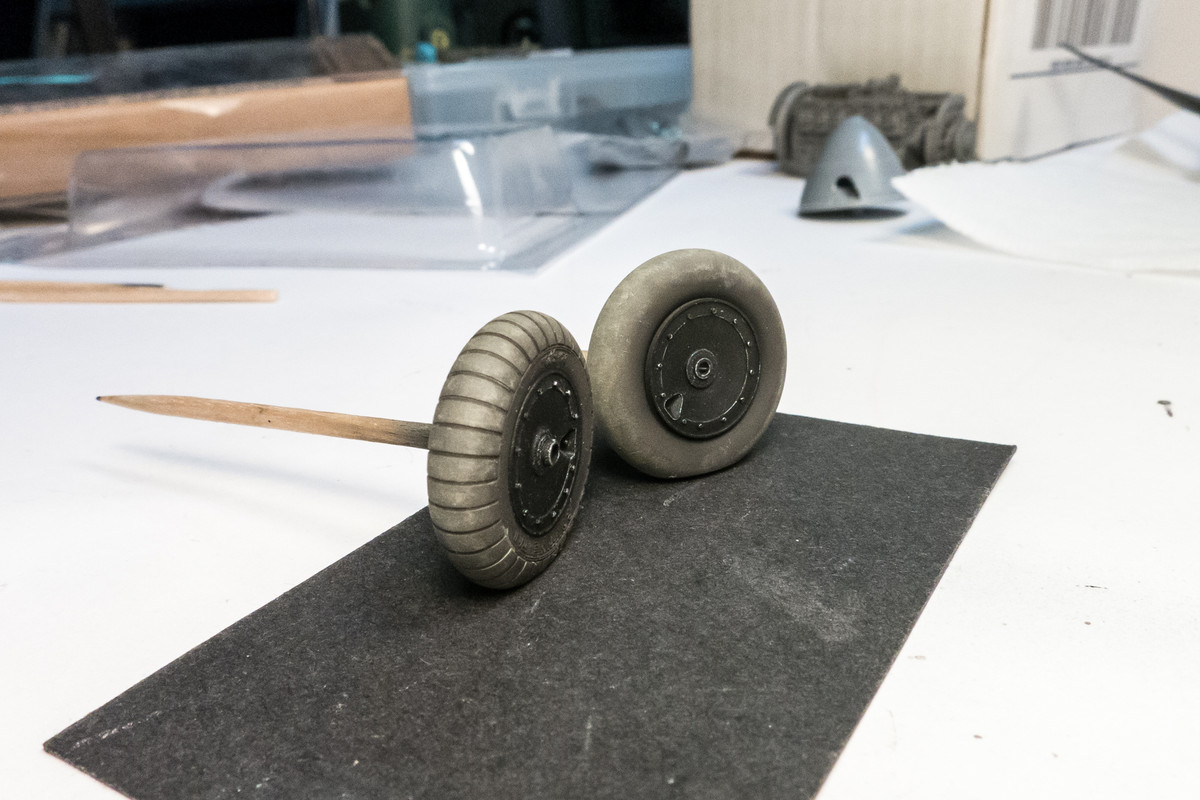
To seal the deal, I spray a light coat of clear matte (Model Master Acryl Clear Flat), making sure the matte goes on "dry".
Image
Image
Image
John aka JKim
-----------<><
Image
Post Reply

Return to “Aircraft Work in Progress”