
Nothing to add regarding previous comments, except that nice to see more Japanese subjects on SPAM!
- Kari
1//32 Hasegawa Ki-61-1 Tei Hien
Re: 1//32 Hasegawa Ki-61-1 Tei Hien
---
On the bench:
Tamiya F-4B Phantom II 1/48
Kinetic F-16A (new tool) 1/48
https://www.facebook.com/GrundAsk-Scale ... 721218708/
On the bench:
Tamiya F-4B Phantom II 1/48
Kinetic F-16A (new tool) 1/48
https://www.facebook.com/GrundAsk-Scale ... 721218708/
-
tempestjohnny
- Elite Member
- Posts: 3348
- Joined: Sat Oct 15, 2016 4:51 am
- Location: Naples. FL
Re: 1//32 Hasegawa Ki-61-1 Tei Hien
Definitely watching this one

Re: 1//32 Hasegawa Ki-61-1 Tei Hien
Thanks for the comments guys!
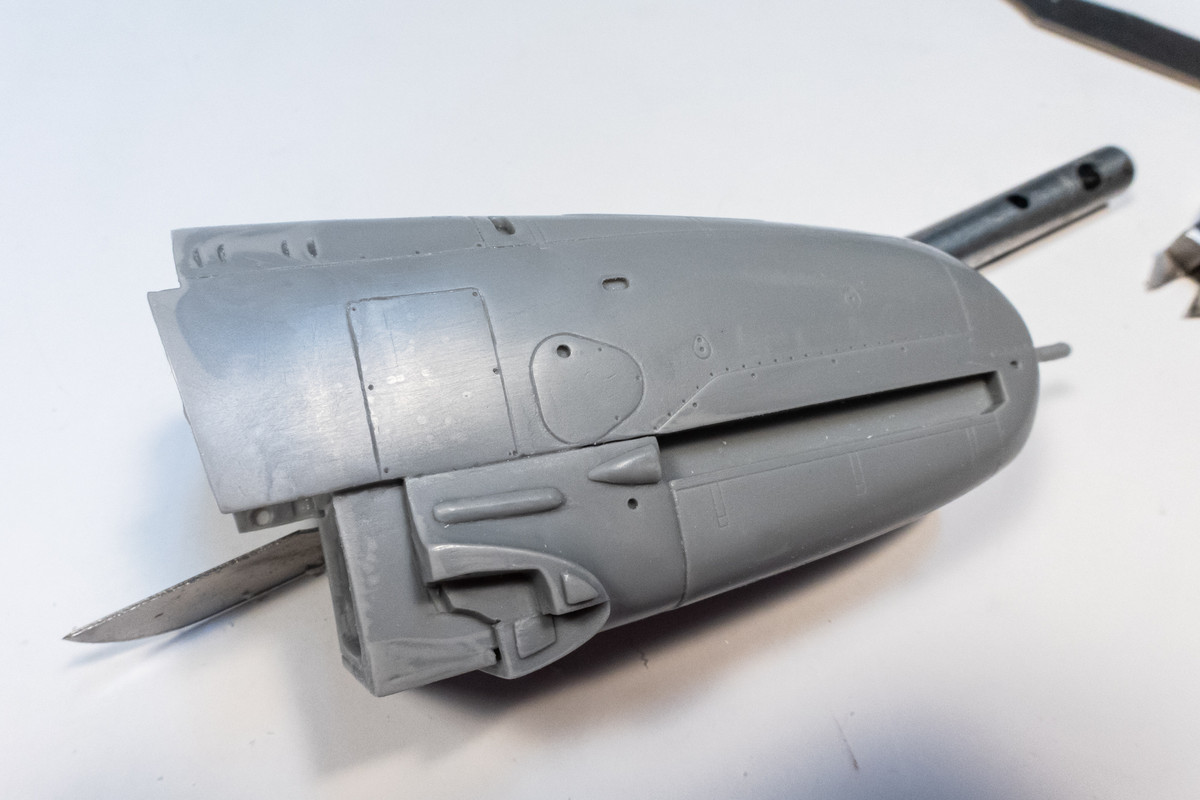
Using a rocket from an eggplane kit, I fashioned a pair of replacement bulges for the wing gun covers. Not an exact match but close enough!
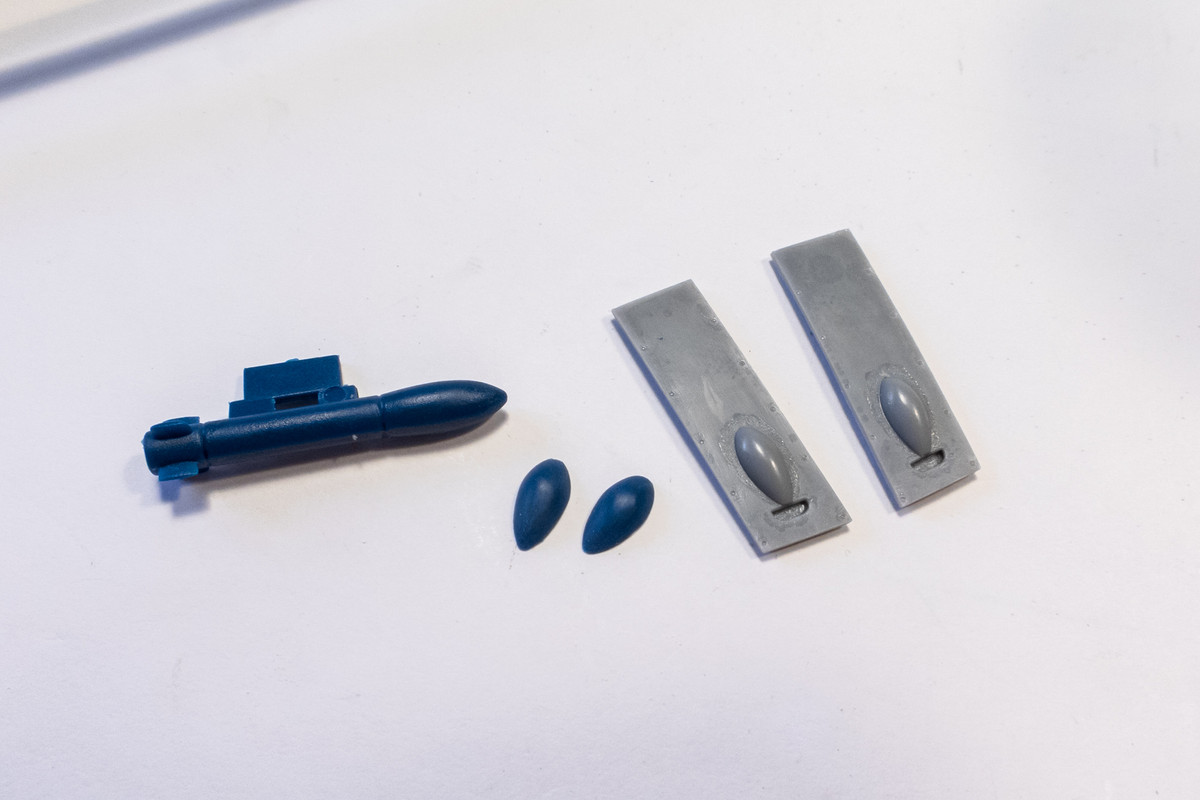
The bulges on the kit gun cover were sanded away. I cannot replicate the exact shape of the hand hole behind the bulge but I can do an oval hole by chain drilling.
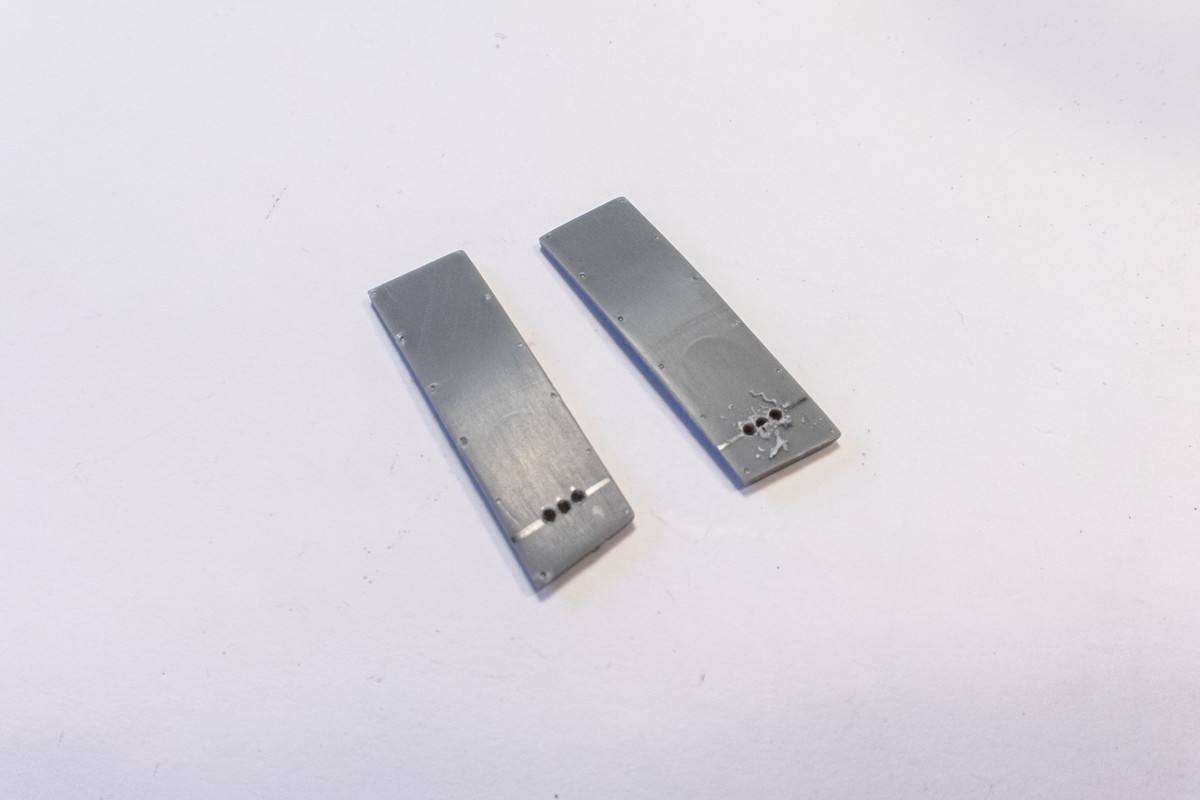
Here is what the modified kit gun covers look like.
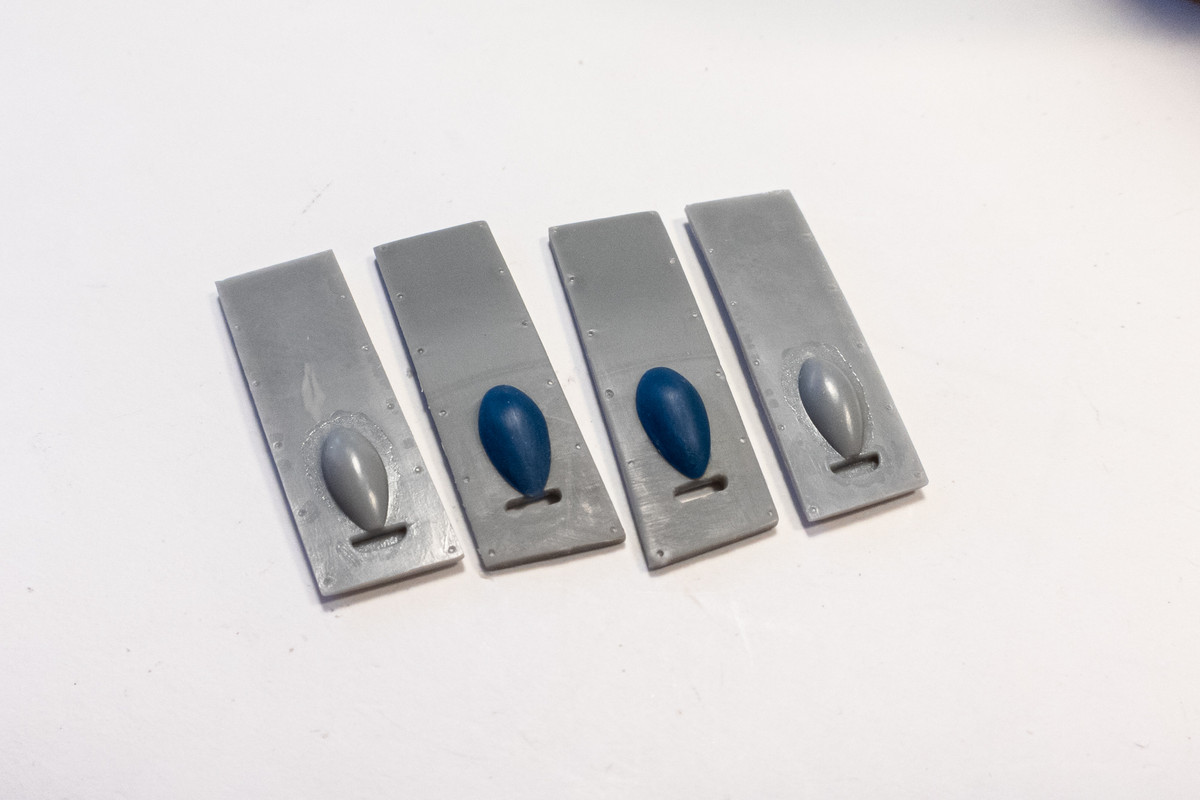
The previous post's photos didn't show it but the resin covers were not only too short but not wide enough. I think going this route will get me the best fit with the least amount of fill work. There is also a panel line on the upper wing that needs to be filled, which I've done with black CA glue.

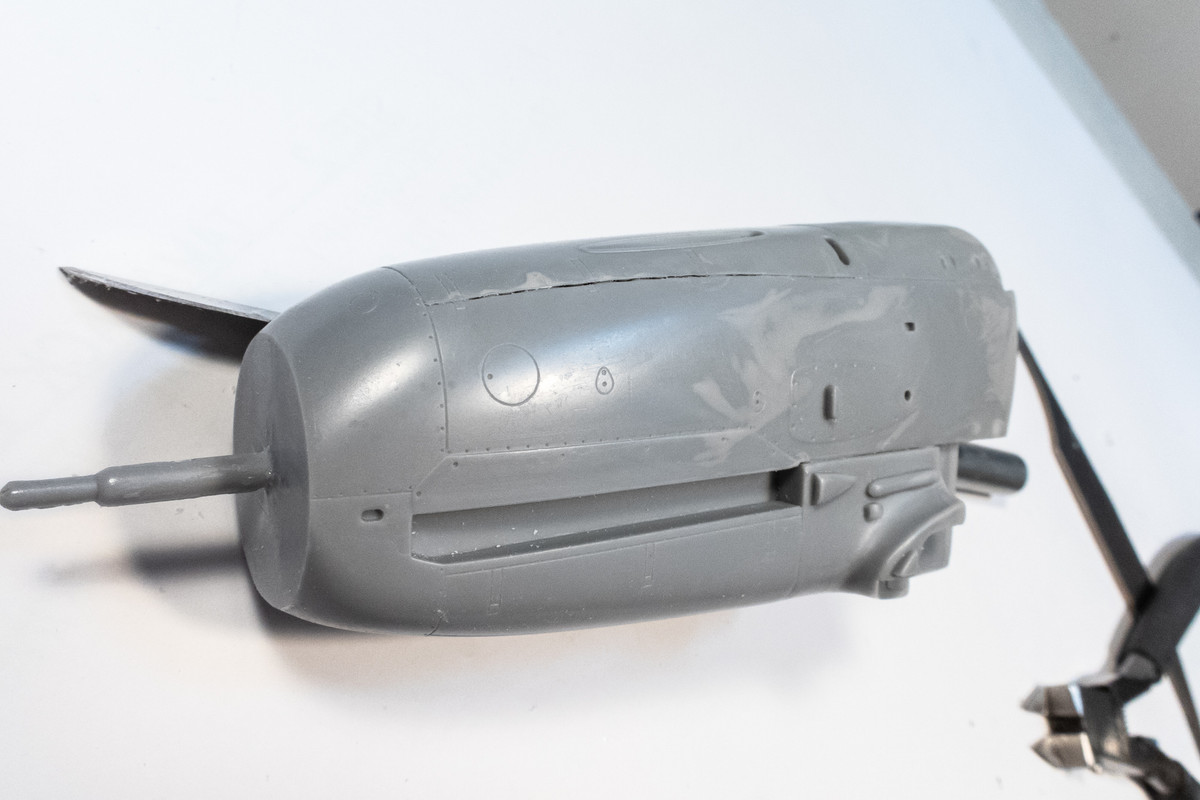
Time to remove the casting block from the resin nose.
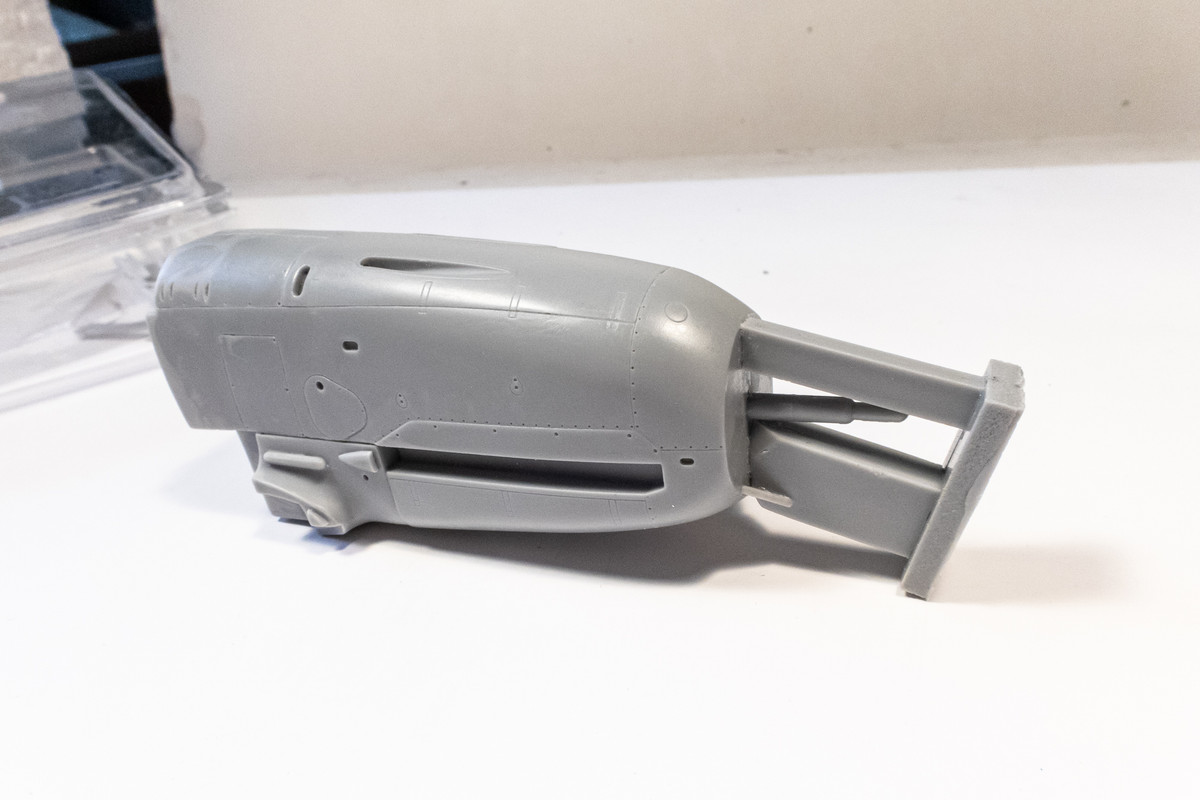
I used the big razor saw to get me to this point. It's always better to remove too little than too much.

I scraped and sanded the excess.
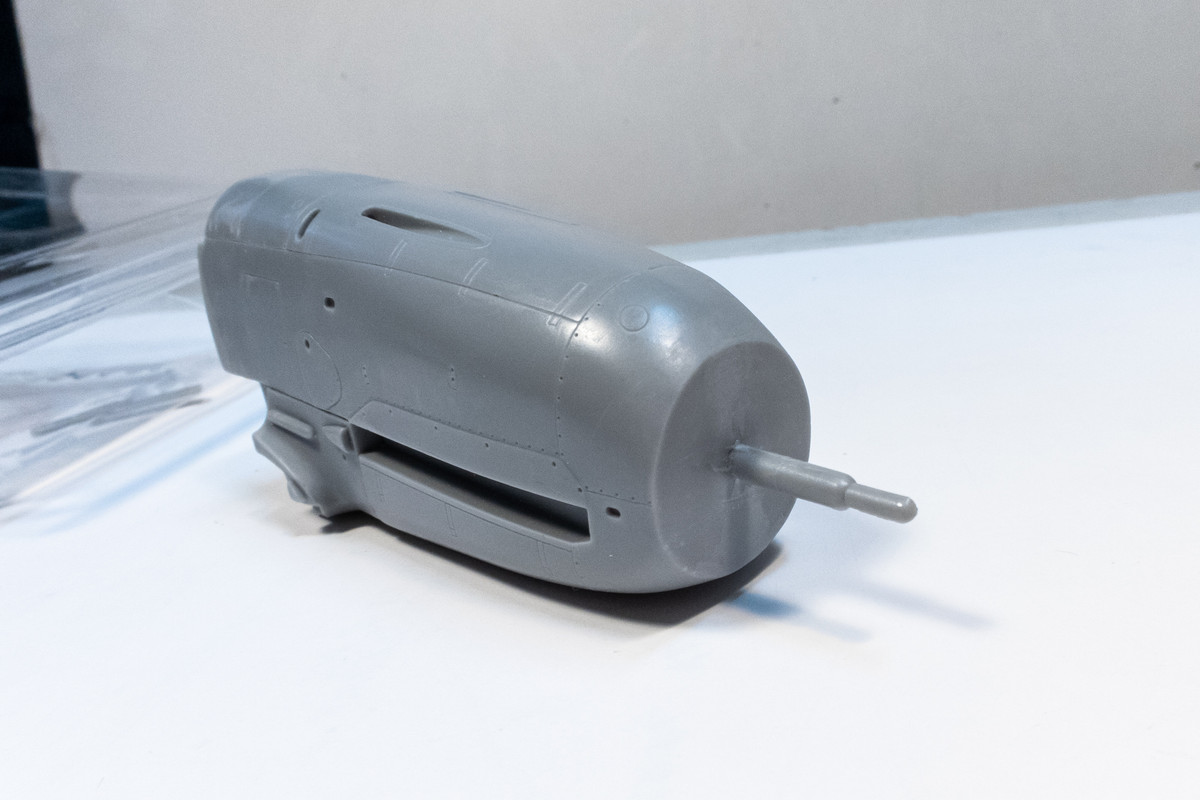
A quick check to make sure the spinner/backplate sit flush on the nose.
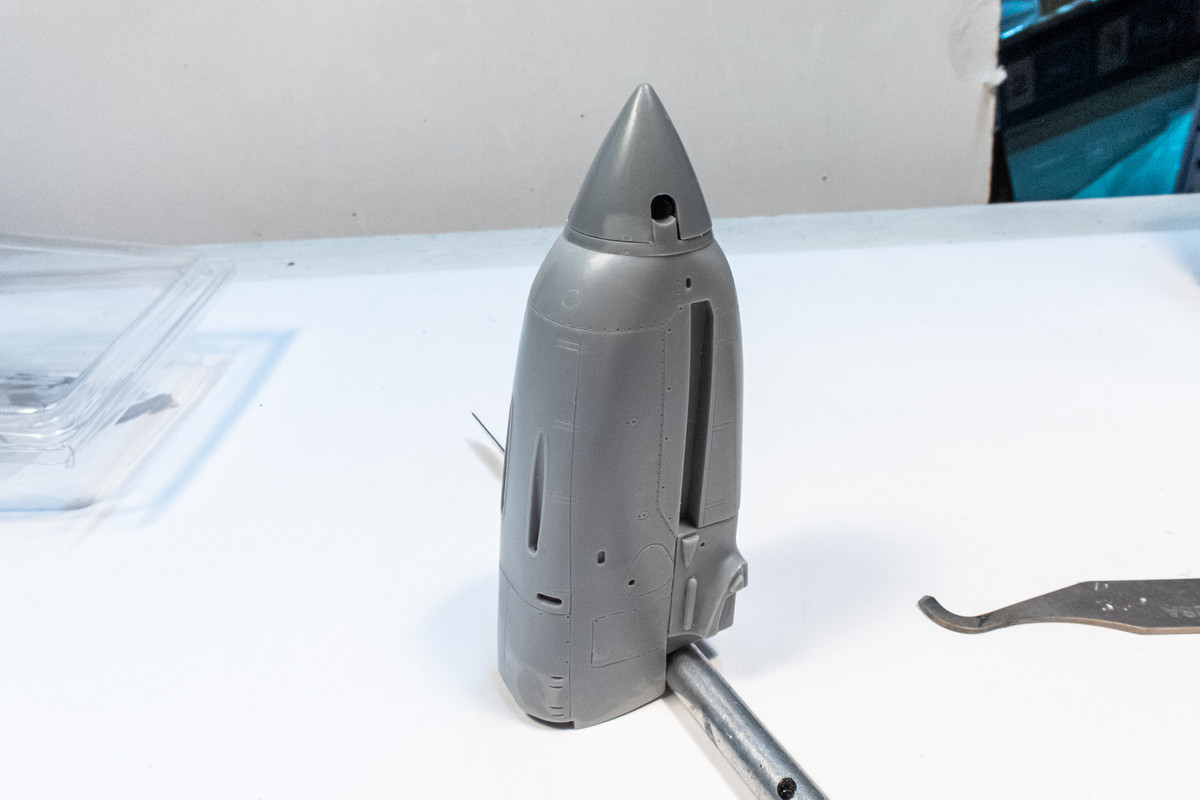
There are some noticeable gaps and sloppy panel lines on the resin nose that I want to address before it is attached so I'm going to first fill the visible gaps with white Milliput.
Using a rocket from an eggplane kit, I fashioned a pair of replacement bulges for the wing gun covers. Not an exact match but close enough!
The bulges on the kit gun cover were sanded away. I cannot replicate the exact shape of the hand hole behind the bulge but I can do an oval hole by chain drilling.
Here is what the modified kit gun covers look like.
The previous post's photos didn't show it but the resin covers were not only too short but not wide enough. I think going this route will get me the best fit with the least amount of fill work. There is also a panel line on the upper wing that needs to be filled, which I've done with black CA glue.
Time to remove the casting block from the resin nose.
I used the big razor saw to get me to this point. It's always better to remove too little than too much.
I scraped and sanded the excess.
A quick check to make sure the spinner/backplate sit flush on the nose.
There are some noticeable gaps and sloppy panel lines on the resin nose that I want to address before it is attached so I'm going to first fill the visible gaps with white Milliput.
John aka JKim
-----------<><

-----------<><
Re: 1//32 Hasegawa Ki-61-1 Tei Hien
Brilliant idea - solution - execution !!jkim wrote: Using a rocket from an eggplane kit, I fashioned a pair of replacement bulges for the wing gun covers. Not an exact match but close enough!
- Kari
---
On the bench:
Tamiya F-4B Phantom II 1/48
Kinetic F-16A (new tool) 1/48
https://www.facebook.com/GrundAsk-Scale ... 721218708/
On the bench:
Tamiya F-4B Phantom II 1/48
Kinetic F-16A (new tool) 1/48
https://www.facebook.com/GrundAsk-Scale ... 721218708/
-
Stikpusher

- Moderator
- Posts: 18880
- Joined: Sat Apr 05, 2014 8:37 pm
- Location: Ceti Alpha 5
Re: 1//32 Hasegawa Ki-61-1 Tei Hien
Agreed! Thinking outside the box… or in this case egg…KSaarni wrote: Brilliant idea - solution - execution !!
- Kari
"Surely I have made my meaning plain? I intend to avenge myself upon you, Admiral. I have deprived your ship of power, and when I swing 'round, I intend to deprive you of your life."
FLSM
FLSM


Re: 1//32 Hasegawa Ki-61-1 Tei Hien
Wow! This looks like it's going to be a very nice canvas to apply you painting skill too John - looking forward to seeing it come together.
Stuart Templeton 'I may not be good but I'm slow...'
My blog: https://stuartsscalemodels.blogspot.com/
My blog: https://stuartsscalemodels.blogspot.com/
-
BlackSheep214

- Elite Member
- Posts: 10424
- Joined: Sun Apr 06, 2014 8:47 pm
Re: 1//32 Hasegawa Ki-61-1 Tei Hien
“Who controls the skies, controls the fate of this Earth”
Author unknown- 352nd Fighter Group, Blue-Nosed Bastards of Bodney
“Send one plane it’s a sortie; send two planes it’s a flight; send four planes it’s a test of airpower. - Richard Kohn
Author unknown- 352nd Fighter Group, Blue-Nosed Bastards of Bodney
“Send one plane it’s a sortie; send two planes it’s a flight; send four planes it’s a test of airpower. - Richard Kohn
Re: 1//32 Hasegawa Ki-61-1 Tei Hien
Thanks guys!
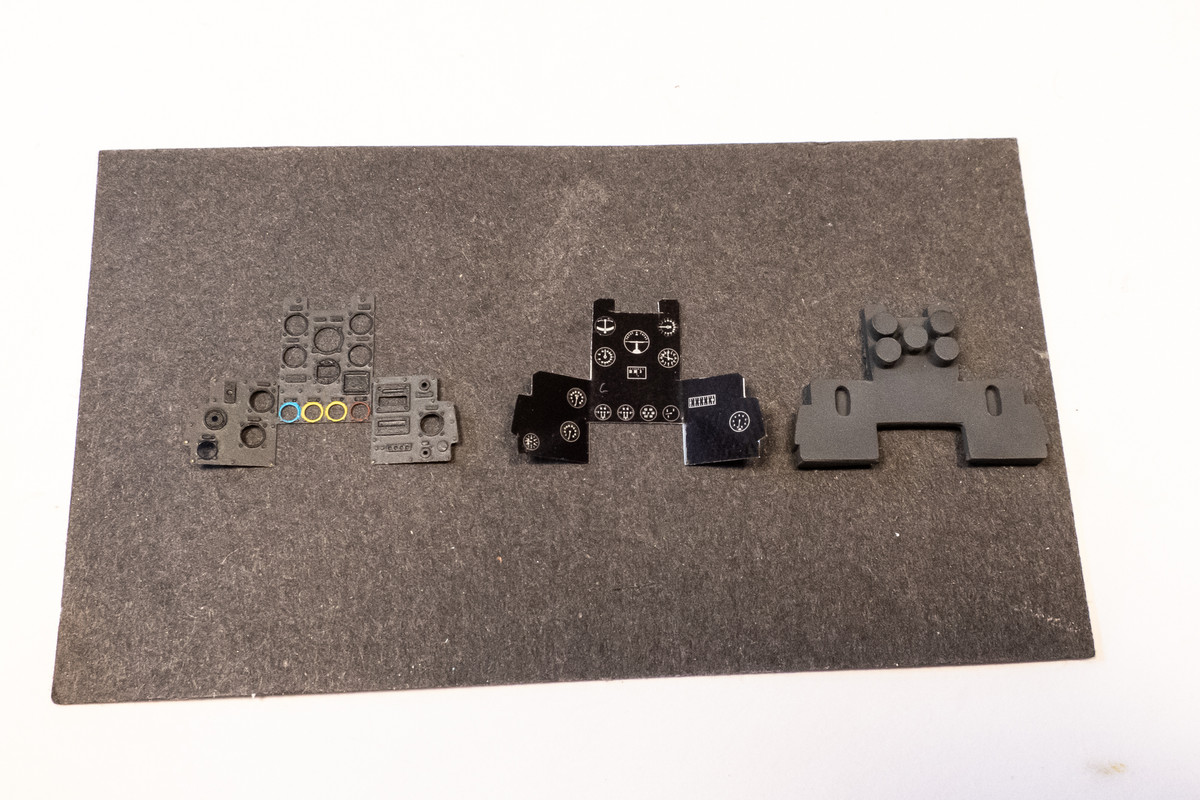
Here is the three-part instrument panel consisting of the photoetched face, the clear acetate with printed gauge details and the instrument panel backing in resin.
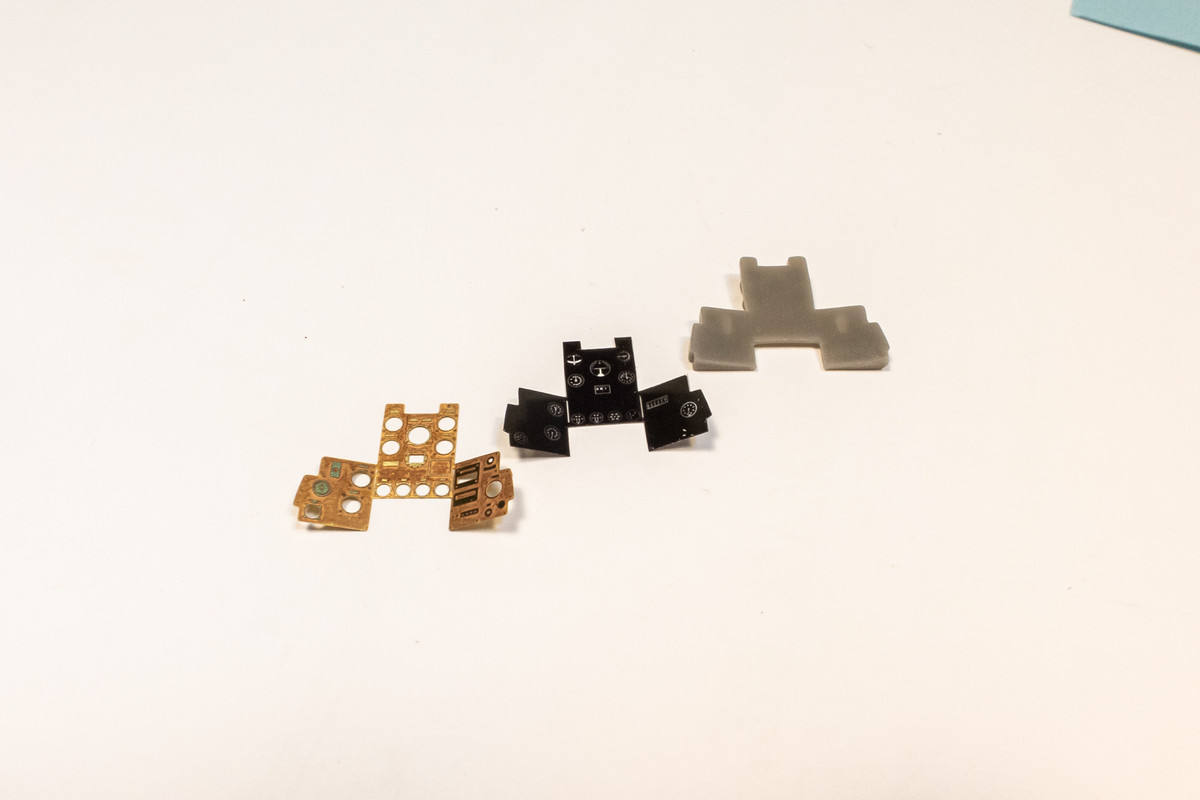
The photoetch face and resin backing are painted in a very dark grey. Arguably, these should be black but I wanted a little bit of contrast on the instrument panel. The back of the acetate is sprayed white to bring out the instrument details.
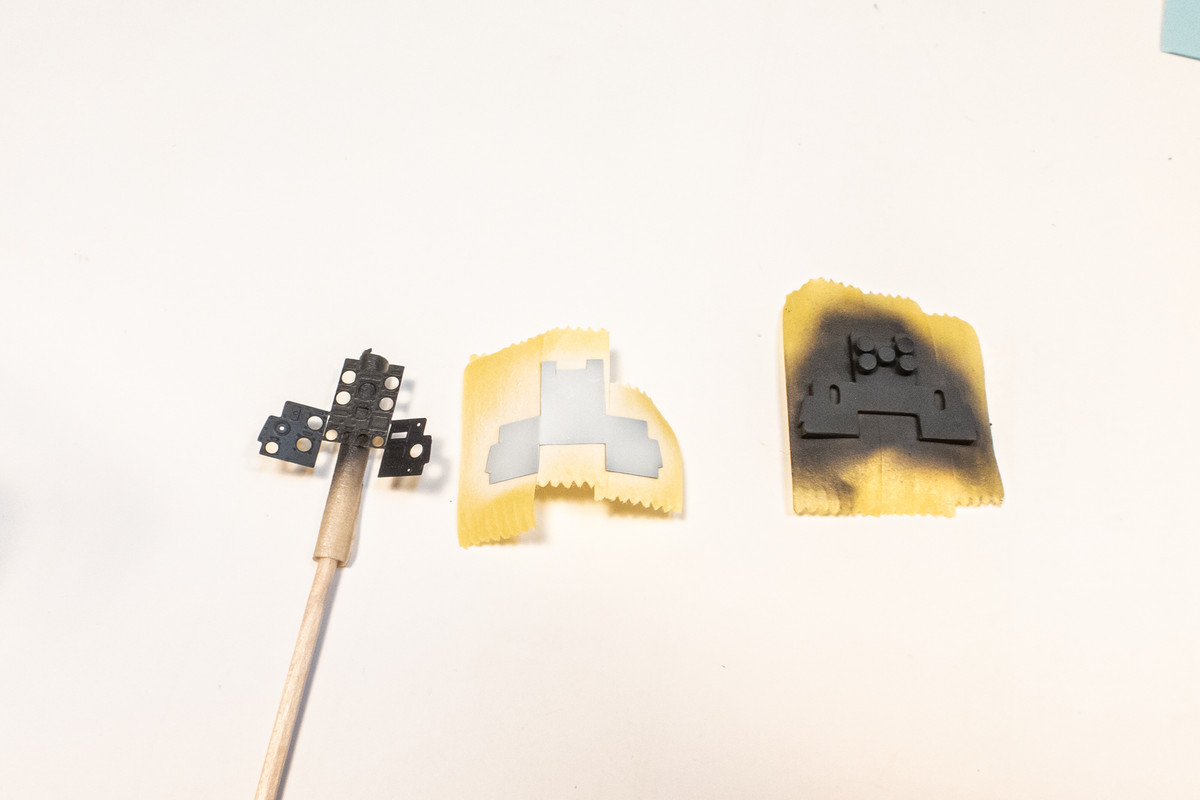
Here are the three painted components before assembly. The photoetch face has some details highlighted... black instrument faces and blue, yellow and red instrument rings on the bottom row.
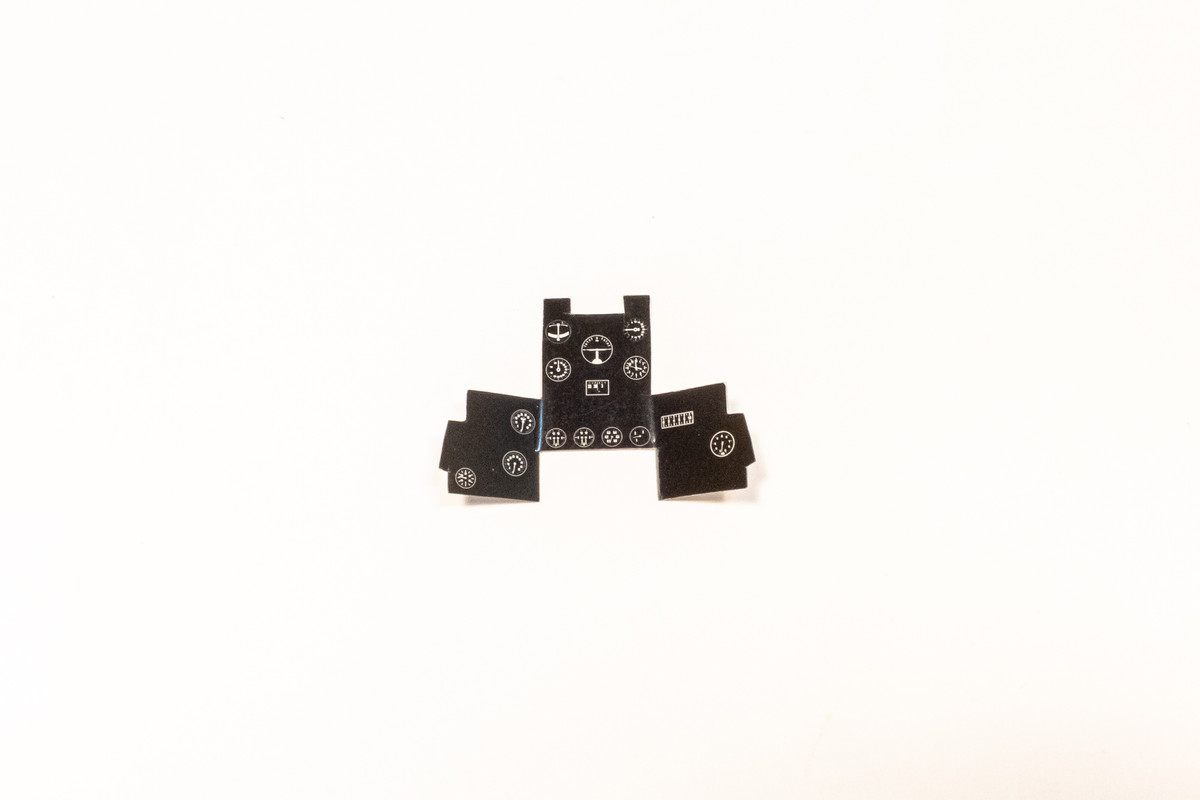
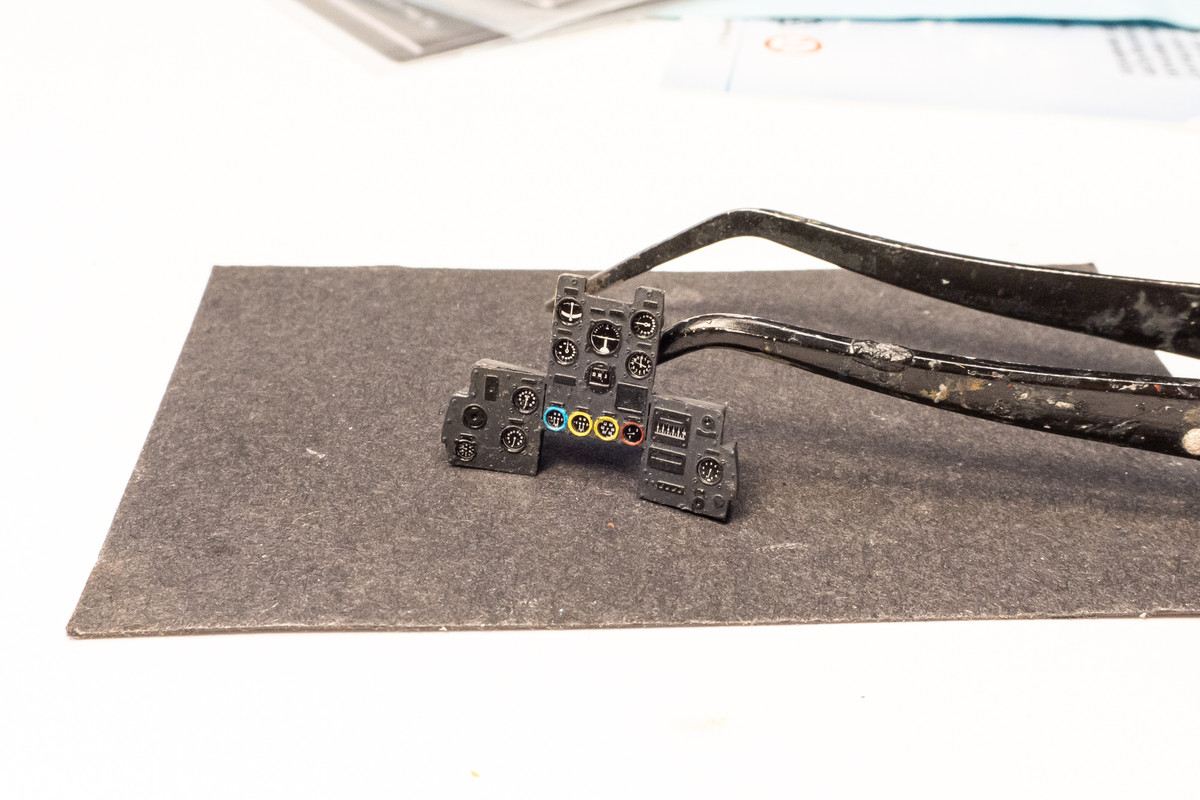
And here is the panel after it has been assembled. I attached the acetate to the photoetch face using Future. This was then attached to the resin backing using PVA card glue.
I'm going into a slight holding pattern now as I'm waiting for some paints to arrive. Most modelers opt to paint the interior of the Ki-61 as a sandy brown but I am going use a grey-green (Mr Hobby Aqueous H-62 IJA Grey) instead upon the recommendation of Nick Millman, who runs the Aviation of Japan blog site and seems pretty knowledgeable.
Eggsactly!keavdog wrote:egg-cellent idea!
Here is the three-part instrument panel consisting of the photoetched face, the clear acetate with printed gauge details and the instrument panel backing in resin.
The photoetch face and resin backing are painted in a very dark grey. Arguably, these should be black but I wanted a little bit of contrast on the instrument panel. The back of the acetate is sprayed white to bring out the instrument details.
Here are the three painted components before assembly. The photoetch face has some details highlighted... black instrument faces and blue, yellow and red instrument rings on the bottom row.
And here is the panel after it has been assembled. I attached the acetate to the photoetch face using Future. This was then attached to the resin backing using PVA card glue.
I'm going into a slight holding pattern now as I'm waiting for some paints to arrive. Most modelers opt to paint the interior of the Ki-61 as a sandy brown but I am going use a grey-green (Mr Hobby Aqueous H-62 IJA Grey) instead upon the recommendation of Nick Millman, who runs the Aviation of Japan blog site and seems pretty knowledgeable.
John aka JKim
-----------<><
-----------<><
-
scorpiomikey

- Addicted Member
- Posts: 1097
- Joined: Sat Apr 05, 2014 11:44 pm
- Location: Christchurch, NZ
Re: 1//32 Hasegawa Ki-61-1 Tei Hien
Damn dude. Nice work.
Would a small half round file help get the half moon hand holds at all?
Your IP's always make me feel inadequate I wish i was that good.
Would a small half round file help get the half moon hand holds at all?
Your IP's always make me feel inadequate
You can learn all the math in the 'Verse, but you take a boat in the air that you don't love, she'll shake you off just as sure as the turning of the worlds. Love keeps her in the air when she oughta fall down, tells you she's hurtin' 'fore she keens. Makes her a home.