After another busy Hobby Day weekend, it's time for another tour! We have a bit more to see again this time. All aboard the trams for the next tour as we had on over to our first stop in the Hangar....
Here in the Hangar, we start with the A-400 in this first bay. About all that was done was sand down the rough filler around the joints between the wings and the fuselage. Once the weather is dry enough to fire up the airbrush, we'll be getting that re-painted:
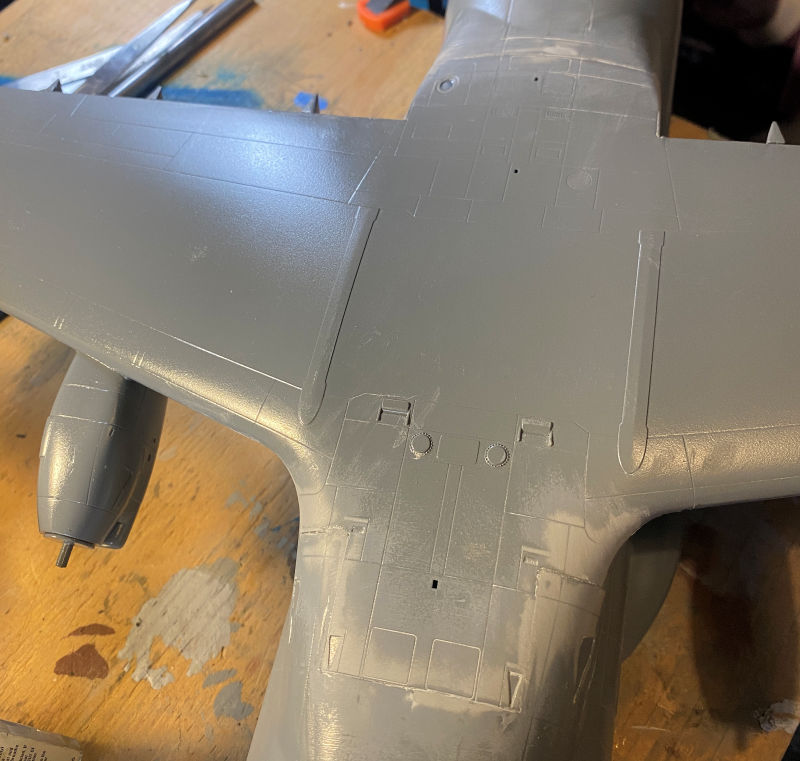
After that, we decided to get a small head start by adding the decals to the tail:
If I have a tight enough fit on that tail, I might just leave the tail unglued for ease of transport. We'll see...
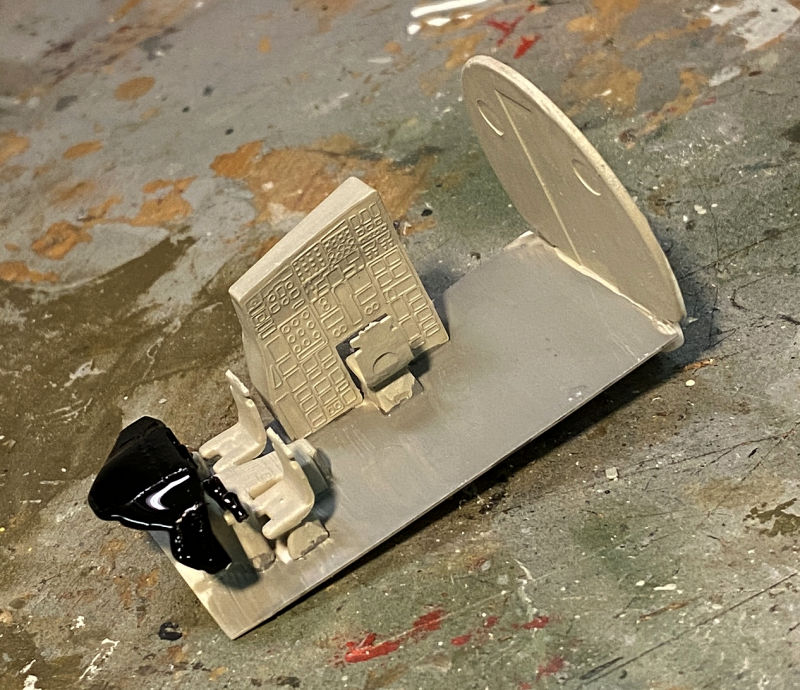
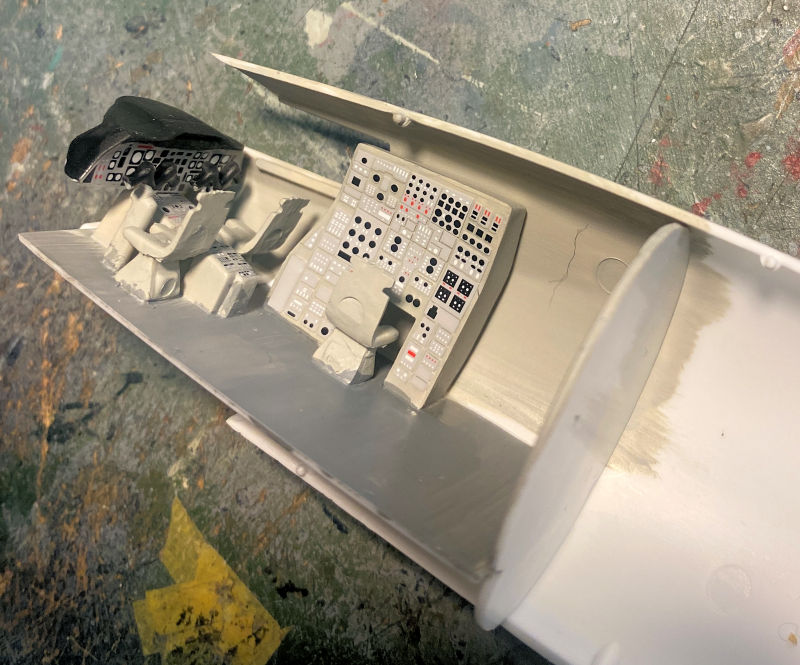
Moving on to the next bay, additional work was done on the Concorde. We got the front office painted up and ready for decals:
After that was the attempt to assemble the moving outer canopy after having masked it off for painting:
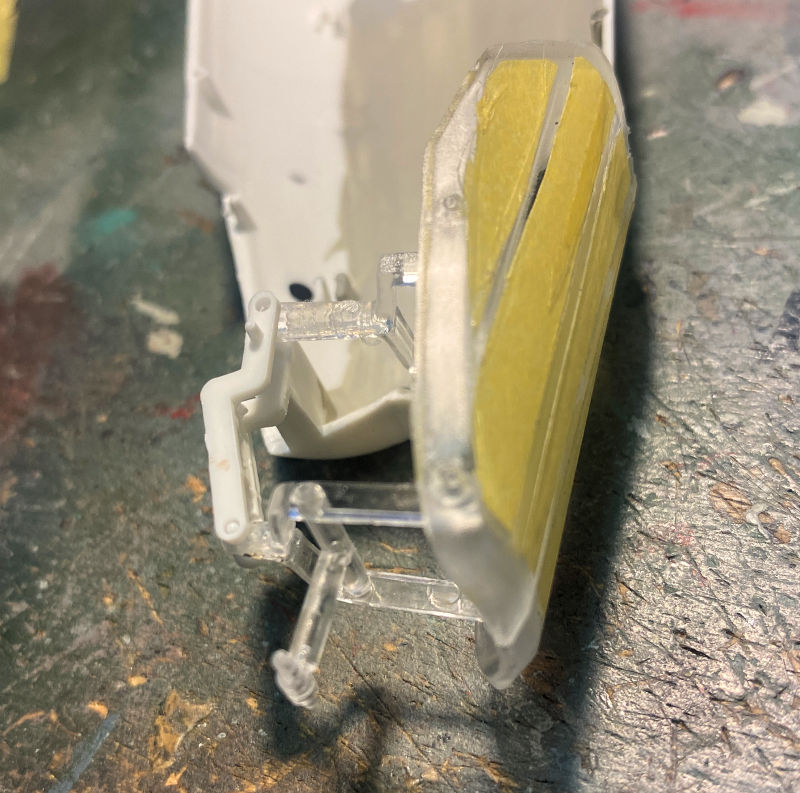
While we were burnishing down the tape on this, it snapped right down the middle! I was incredulous and furious since there was no reason for it to happen. We added more clear parts cement to hold it together after installing it on the moving brackets. Hopefully it holds.
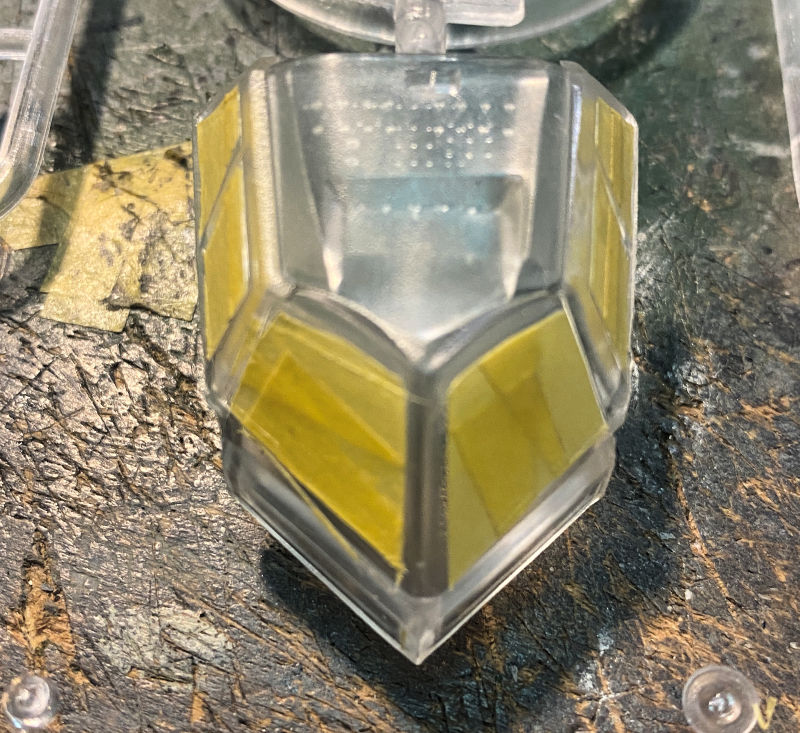
While that was drying, we also masked off the inner canopy to have that ready for paint as well:
Once the canopy was masked, we added the decals to the cockpit and cemented it into the other half of the nose assembly:
Finally, an attempt was made to build the engine nacelles:
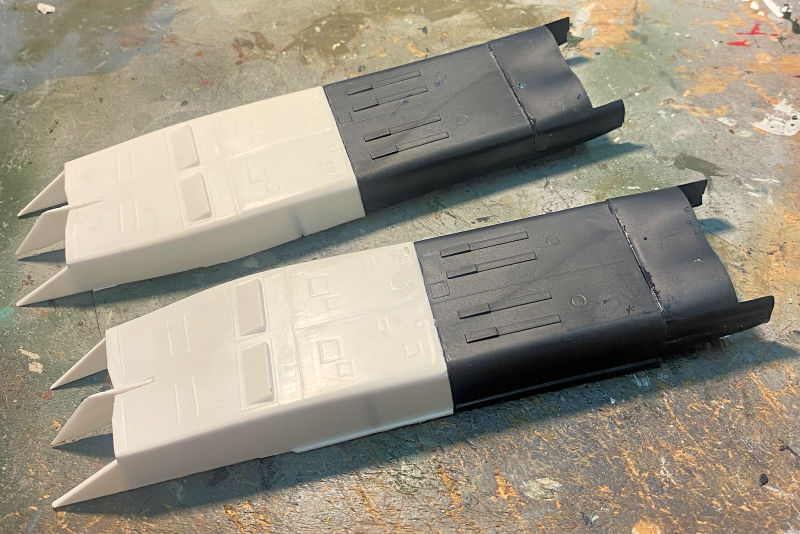
There's still a few more parts to add to that, then there is the putty and sanding needed to smooth that out.
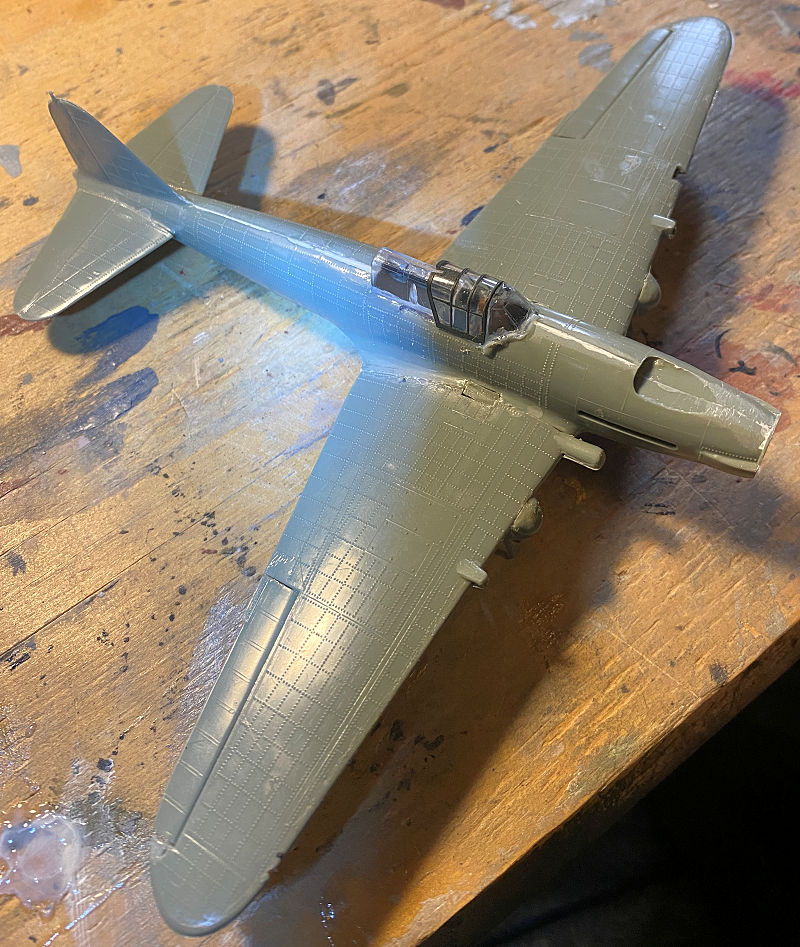
In the next bay, we have this Russian Shtormovik which needed the clear parts added. However, the main canopy slide fell down and disappeared so we dug into the spares box to find something else that would serve. It may not be accurate, but it sure looks better:
And since we were adding clear parts, we also added the canopy and windscreen to the F-5B in the next bay after painting the pilot:
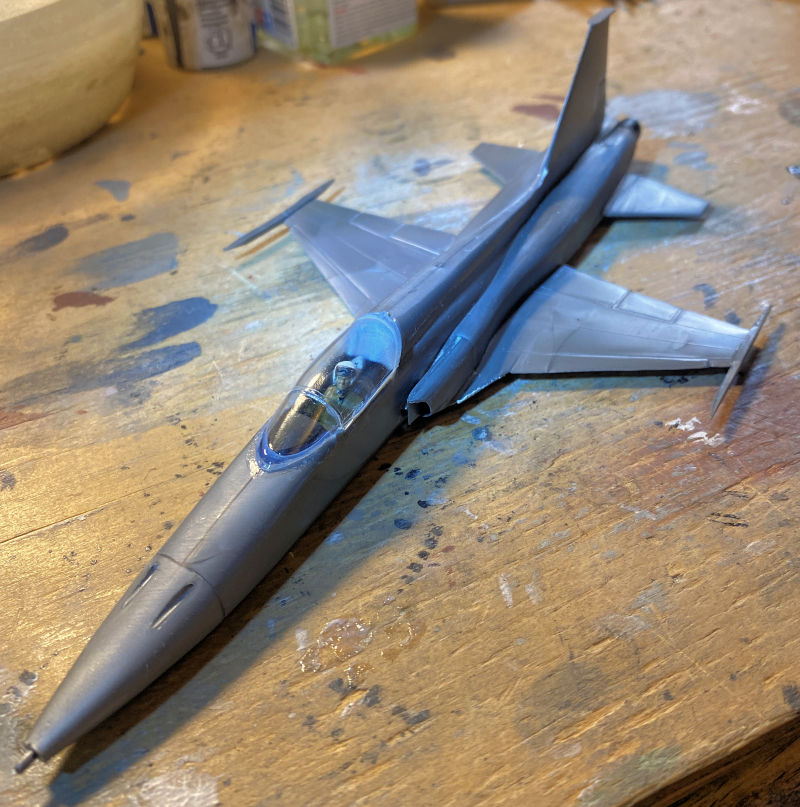
That canopy and windscreen was eventually masked off to paint this little plane. And yes Carlos, this will be an Imperial Iranian plane as that is the decal option provided.
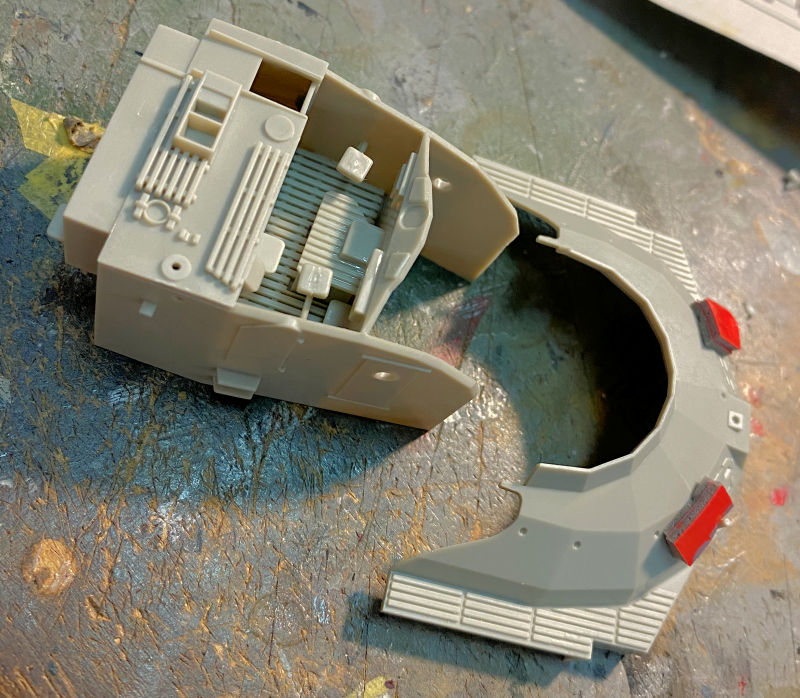
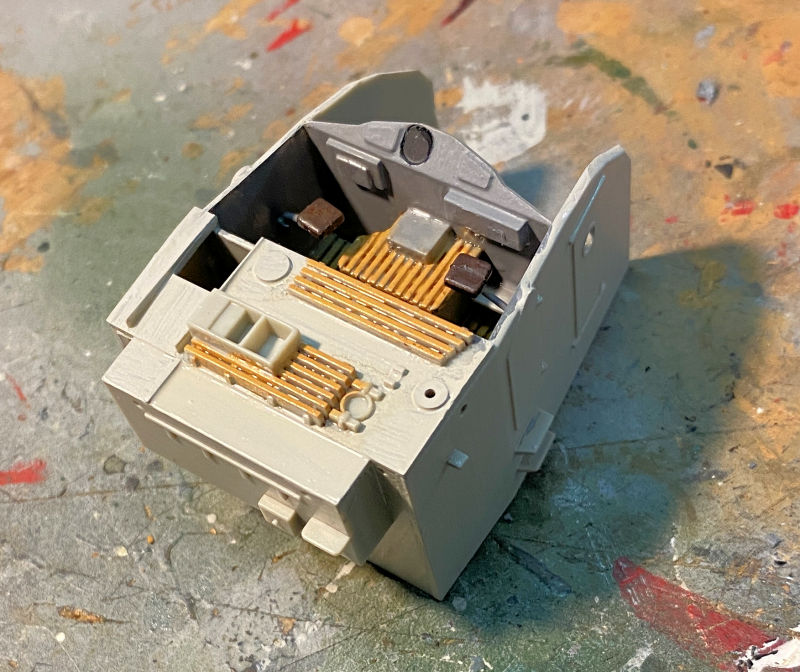
In this last bay we have more work done on the Bear. The cockpit was assembled and later painted:
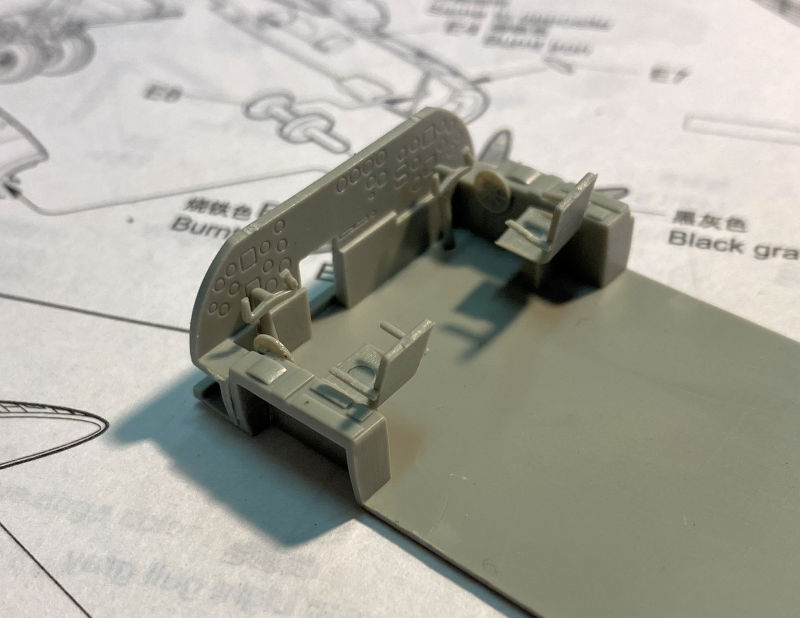
I can't help but feel like that cockpit is 'wrong'. The pilot seats look way underscale and they are so far apart, but not much will be seen through the windscreen so I'm not going to worry about it. We moved on and assembled the inner nacelles and main landing gear:
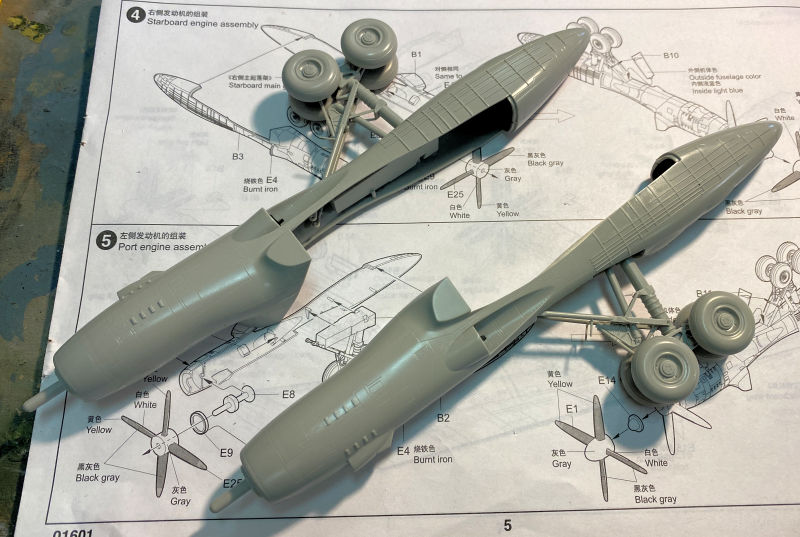
The fit was still a small bit rough, but there was at least a lot of places to add glue to hold them together. Here they are dry fit to the wings:
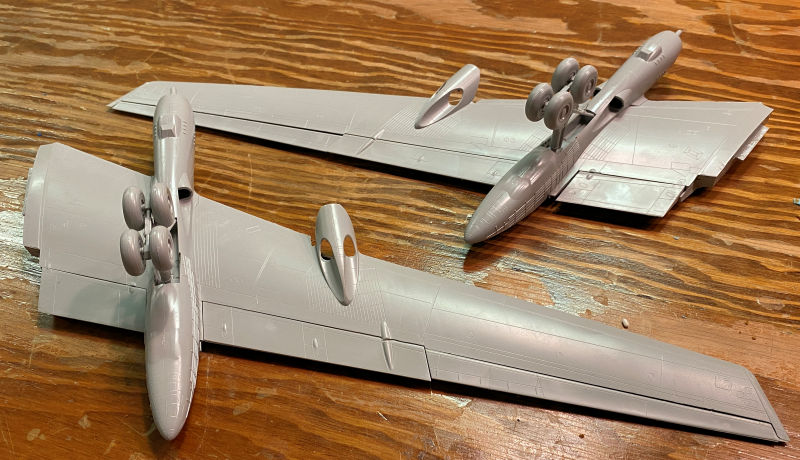
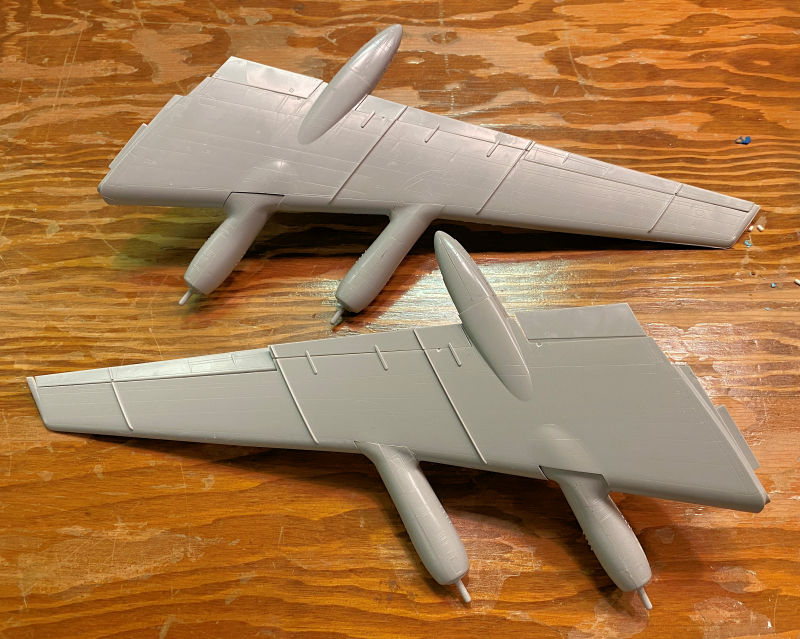
After seeing that above, I figured , why not? and we did the outer nacelles too. Once again, they are all just dry fit in place:
That is about all we got done in the Hangar, it's now time to move on to the next stop on our tour.
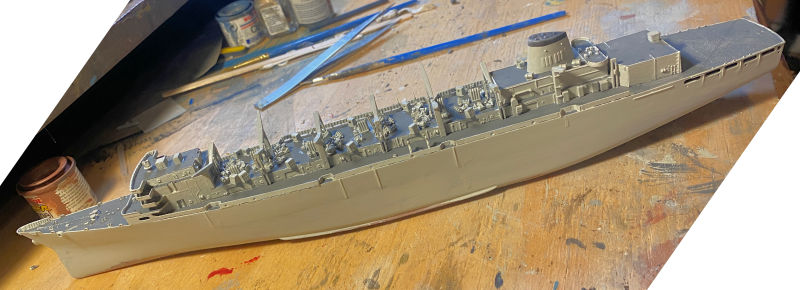
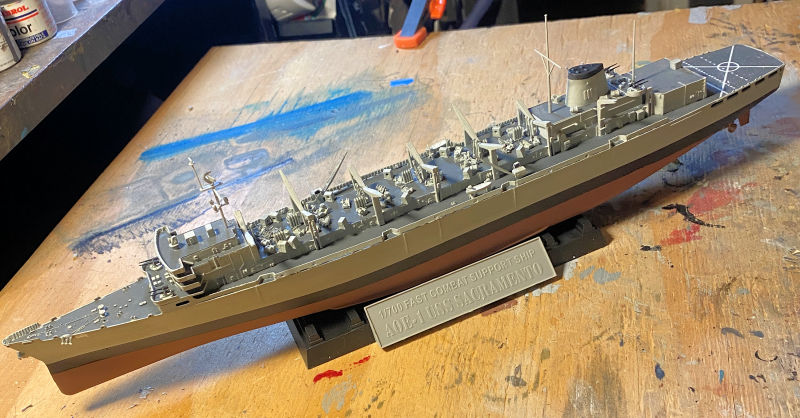
Here in the Shipyards, we got quite a bit done. Starting in slipway one here, we had to make some changes to the USS Sacramento. In checking on this ship, I realized the boot stripe was too thin. I also noticed too many steps and loose seams on the hull. Using thin strip styrene and thick putty, we repaired the hull; and started repainting it. First was the grey upper section:
We then masked off the grey and painted the black boot stripe; this time making it much thicker:
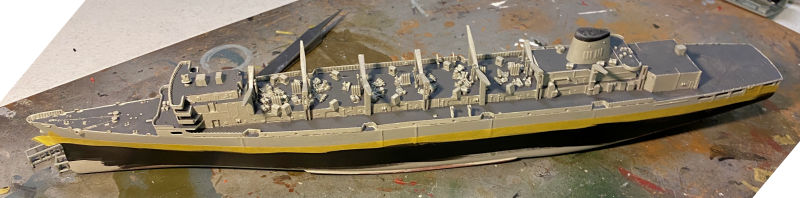
Later that was masked off and the bottom hull was painted the hull red. Once everything was dry, the masking came off and we had our new hull:
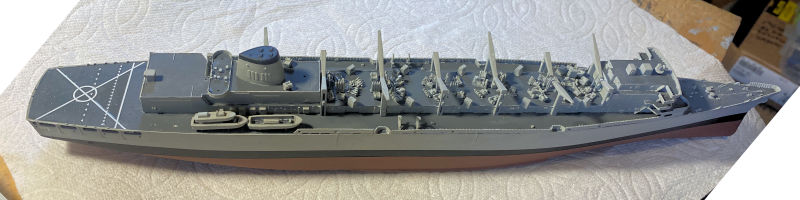
Once that was done, most all the extra detail parts were added to the ship:
All that's left now are the photo etch parts and the cargo helicopters, the forklift (yes, they provide a 1/700 scale forklift with this ship!) and this ship will be ready for launching...
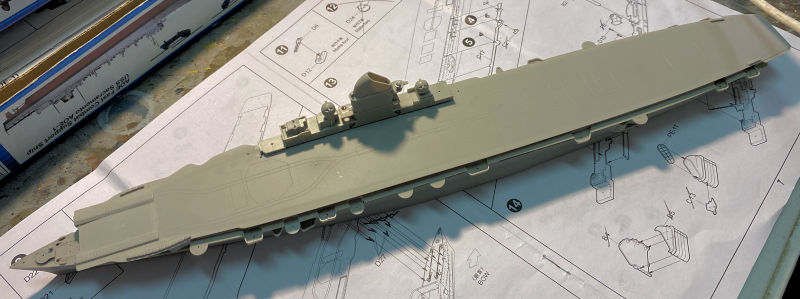
Meanwhile in this next slipway, we laid down the keel for the DKM Peter Strasser, the second proposed aircraft carrier for the German Navy. Why am I starting a ship that never existed? Well, they did lay down the keel to this ship and even built it up almost to the flight deck so it is still a viable ship to add to my navy in my opinion. It's not like any sketch on a paper napkin like so much of the wild German armor that so many companies are making into models.
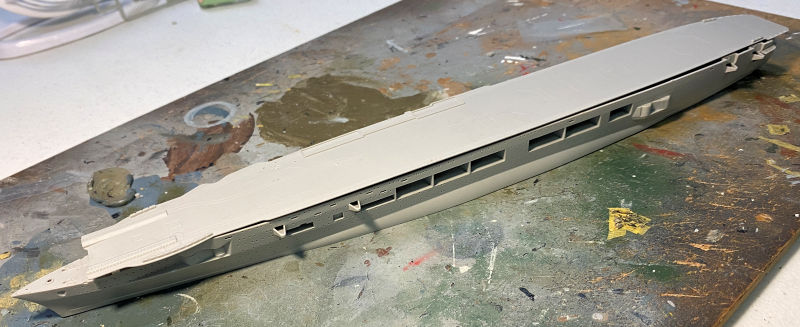
Speaking of building it up to the flight deck, that is where we were after the first day. The flight deck is just placed on top:
Later all the side sponsons were added as well as some other details:
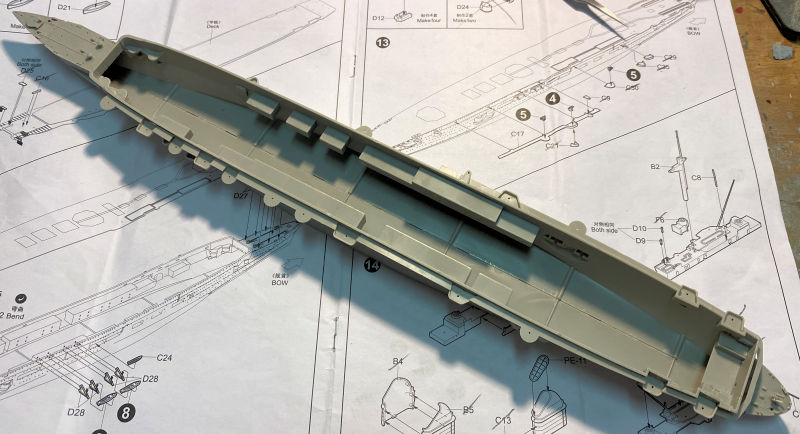
Most of the island was then built up, minus the tall and delicate masts:
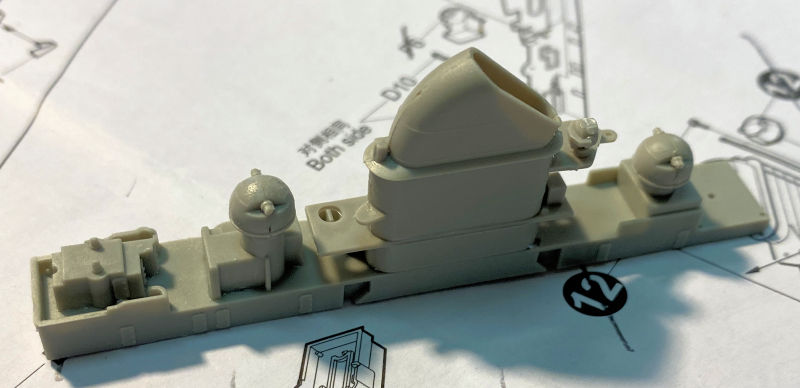
Here it is all mocked up to see how much more needs to be done before painting can start:
Moving on to the next slipway, we laid the keel for another German ship. Actually this time it's a boat, the German S-100 Schnellboot. This went together fast and easy. We started with the bridge:
You an see the armored shell that goes on the front of this. Later the upper deck was added to the hull:

This is one long boat! Some preliminary deck painting was done on the wooden sections of the decks and additional details were painted on the bridge:

Finally the fore deck and other additional details were added, in preparation for painting this beastie:
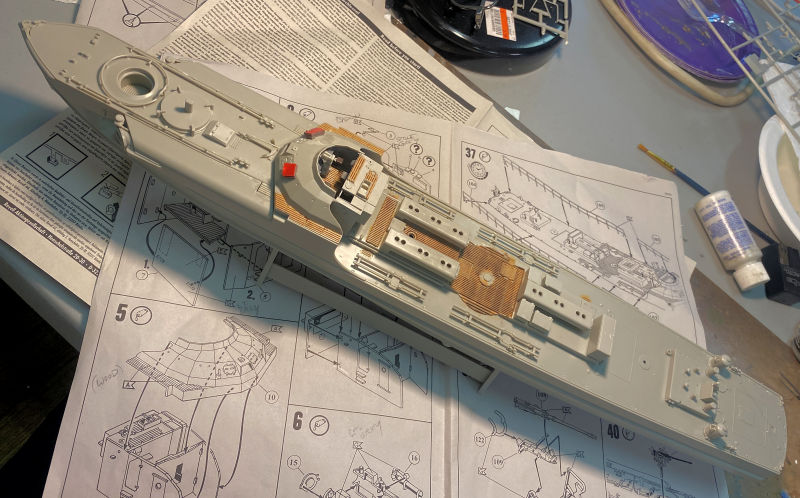
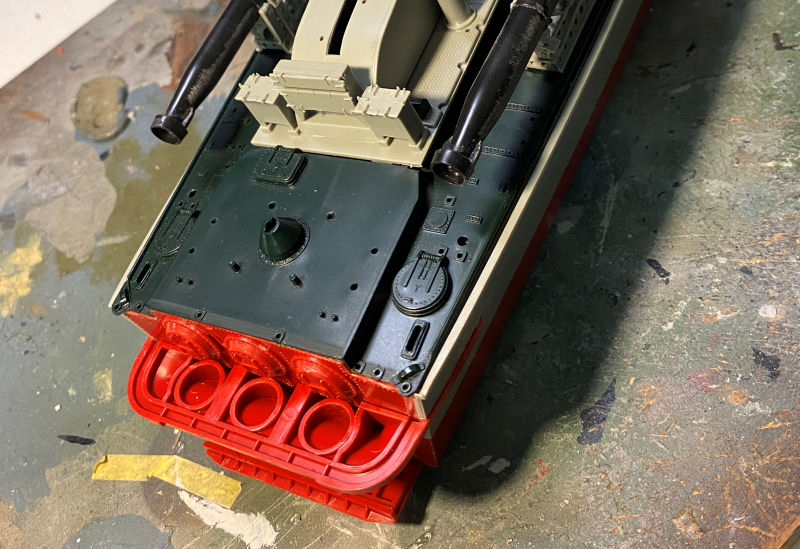
In this next slipway, we continued working on the Vospers Perkasa MTB, building the torpedo carriages, dry fitting the torpedoes to them and then dry fitting them to the deck. Additional small parts were added and the whole thing was mocked up to see how it is coming along:
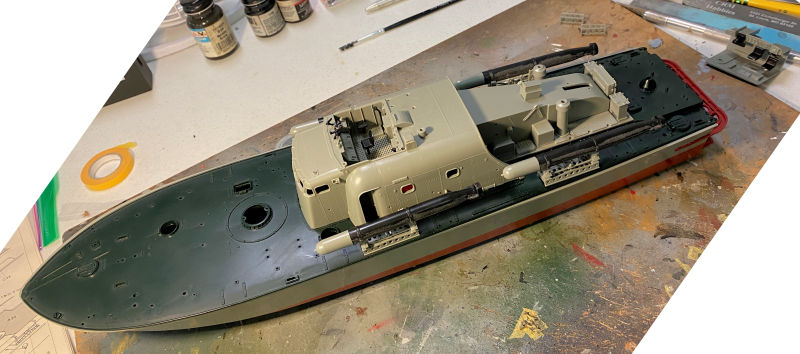
We also built up the structure on the stern:
While all that was drying, we turned to the guns, getting them assembled. First came the 20mm cannon:
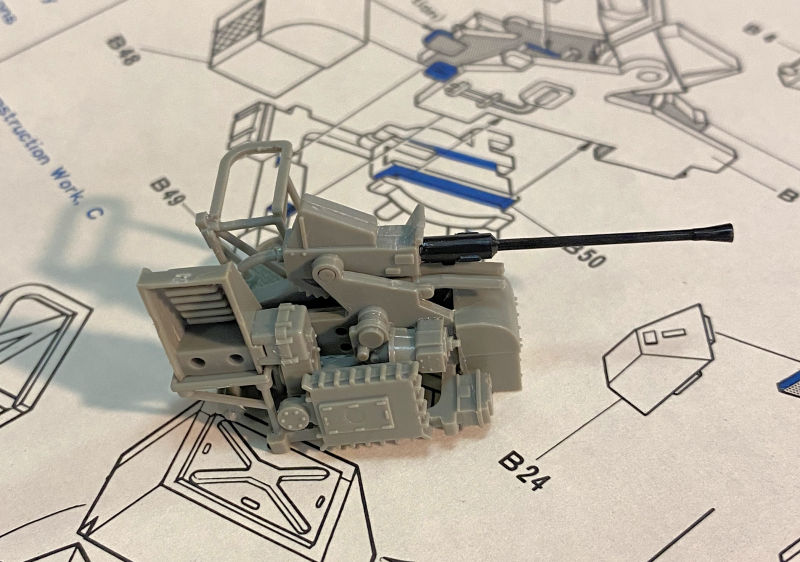
There is one sub assembly missing from that gun. It is a box that has to be closed up with the lid. Well, we found the lid, but no box, so that whole sub assembly is not on there. Moving on, we did the twin machine guns, a much easier yet more delicate assembly:
We got all the parts on that one at least!
That completes the tour of the Shipyards, now on to the Motor Pool....
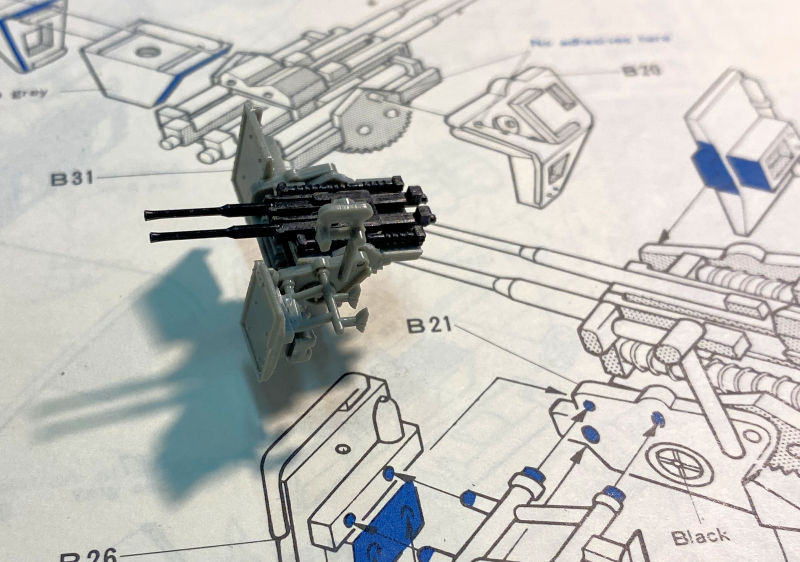
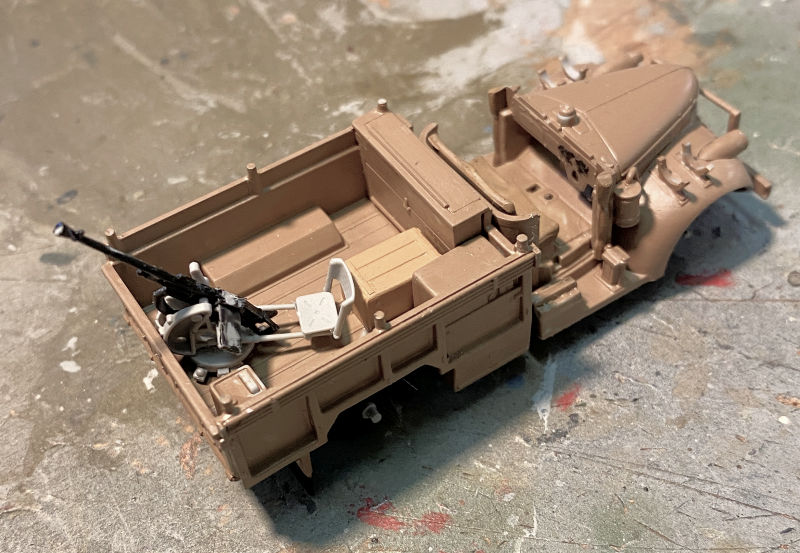
Not much was done in the Motor Pool, but we did make a little progress on this LRDG truck, building the gun and adding all the body parts to the chassis:
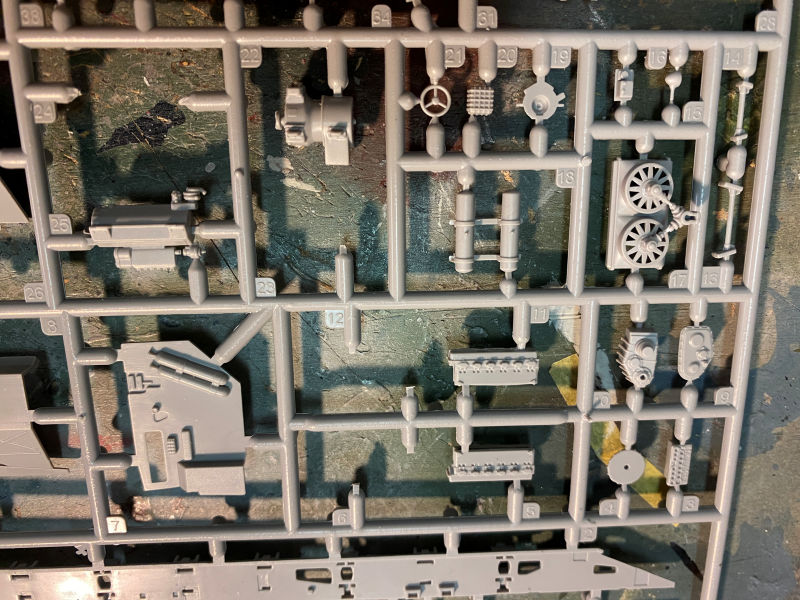
Moving on to the next bay, we started the engine for the next Russian SCUD, this time the SCUD C:
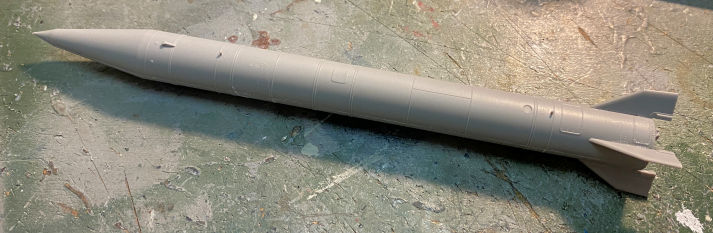
It might be hard to make out as all the little sub assemblies were kept on the sprues where possible. While that was drying he SCUD missile itself was built:
Finally, in this last bay against the back wall, we commenced assembling the track runs for the P-1000 Ratte. Yes, it is a complete fabrication I know, but this huge 1/72 scale model is being built because I want to make it into a carrying case for all my new armor I build and take to shows. Here's what we got assembled so far:
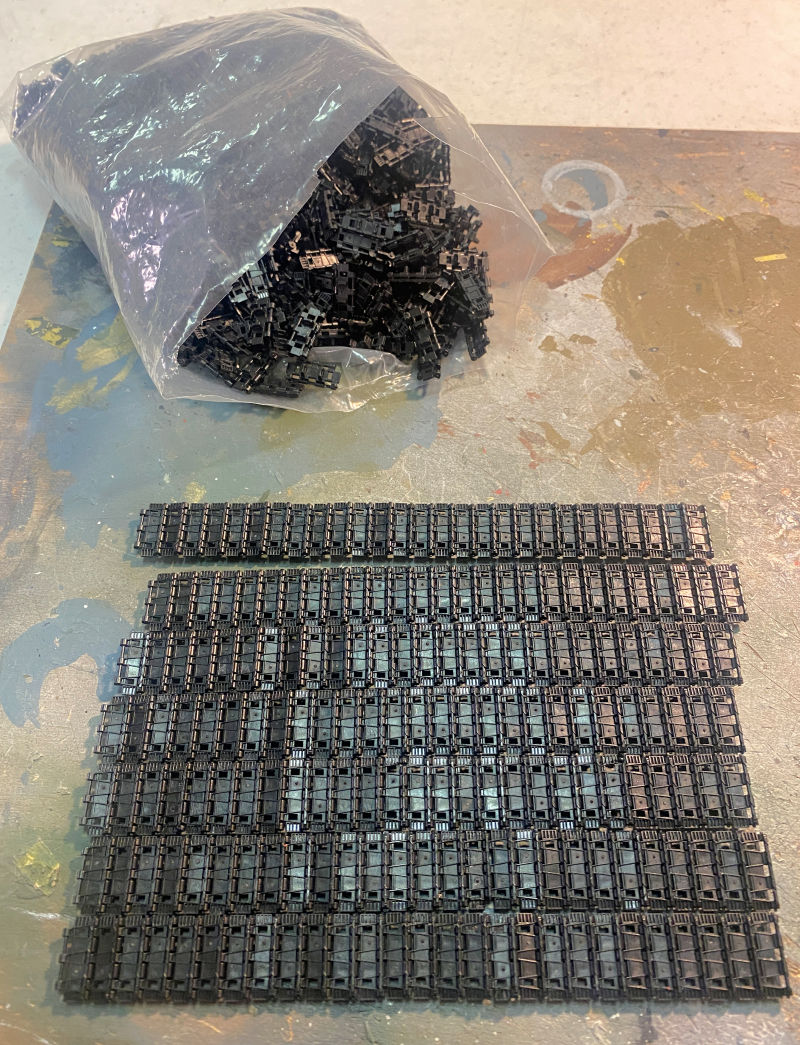
Yes, they do snap together and are fully workable. I occasionally run into short shot track links but there seems to be enough to make up for that.
Now that completes our latest tour of Maddog Manufacturing, we appreciate your interest and welcome all comments. Thank you again for stopping in.

All are gonna be good, but seeing that LRDG truck put a big smile on my face.