Ok Mark… go get some rest now…
Maddog Manufacturing 2023 Grand Reopening!
-
Stikpusher

- Moderator
- Posts: 18900
- Joined: Sat Apr 05, 2014 8:37 pm
- Location: Ceti Alpha 5
Re: Maddog Manufacturing 2023 Grand Reopening!
Ok Mark… go get some rest now…
"Surely I have made my meaning plain? I intend to avenge myself upon you, Admiral. I have deprived your ship of power, and when I swing 'round, I intend to deprive you of your life."
FLSM
FLSM
-
Medicman71

- Elite Member
- Posts: 9744
- Joined: Mon Apr 07, 2014 9:32 am
- Location: Houston, Tx
Re: Maddog Manufacturing 2023 Grand Reopening!
Holy crap that's a lot of builds! And they're all awesome!! 
Mike
Sponsored by Boeing, Lockheed Martin, Northrop Grumman, Saab, BAE, and Dassault
Sponsored by Boeing, Lockheed Martin, Northrop Grumman, Saab, BAE, and Dassault

Re: Maddog Manufacturing 2023 Grand Reopening!
Lot's of work Mark. I've been tempted on that C-54. Is it the 1/72 Revell kit? I have read that that's a pretty complicated kit so I may do the Minicraft 1/144.
Thanks,
John
John
-
BlackSheep214

- Elite Member
- Posts: 10447
- Joined: Sun Apr 06, 2014 8:47 pm
Re: Maddog Manufacturing 2023 Grand Reopening!
Mark has been awful busy these days. Great stuff.
“Who controls the skies, controls the fate of this Earth”
Author unknown- 352nd Fighter Group, Blue-Nosed Bastards of Bodney
“Send one plane it’s a sortie; send two planes it’s a flight; send four planes it’s a test of airpower. - Richard Kohn
Author unknown- 352nd Fighter Group, Blue-Nosed Bastards of Bodney
“Send one plane it’s a sortie; send two planes it’s a flight; send four planes it’s a test of airpower. - Richard Kohn
-
jeaton01

- Elite Member
- Posts: 2076
- Joined: Thu Apr 23, 2020 9:20 am
- Location: Northern California
- Contact:
Re: Maddog Manufacturing 2023 Grand Reopening!
I'm getting dizzy here!
-
Duke Maddog

- Elite Member
- Posts: 7099
- Joined: Tue Jun 03, 2014 11:22 am
- Location: Rowland Heights, CA
Re: Maddog Manufacturing 2023 Grand Reopening!
LOL! Thanks guys! Yes, it is quite a lot of work.
Stuart, thanks! There's even more going on too that didn't get shown here.....
Carlos, I'll get a little rest when I go to work.
Thank you Mike! I do hope to get something finished soon!
Thank you John! Yes, this is the Revell C-54. It was actually bought for me for my birthday one year. I finally got around to starting it and still stalled. It is a pretty complicated build, but I simplified things a little by not even building the interior; except for the cockpit detail. That was kinda fun to do.
The engines have far too many parts in my opinion and are tough to complete, but they do look good. I'm hoping for more progress on this soon.
Thank you Steve! Yeah, just trying to stay busy to preserve my insanity!
Thank you John! You and me both!
The Duke
Virtuoso of Miniatures
"Do you know what the chain of command is? It's the chain I get and beat you with 'till you understand who's in ruttin' command!"
-Jayne Cobb, Firefly Episode 2 "The Train Job"
We are modelers - the same in spirit, in hunger to insanely buy newly released kits, hustlers in hiding our stash from our better halves and experts in using garbage as replacements for after-market parts.
-
Duke Maddog
- Elite Member
- Posts: 7099
- Joined: Tue Jun 03, 2014 11:22 am
- Location: Rowland Heights, CA
Re: Maddog Manufacturing 2023 Grand Reopening!
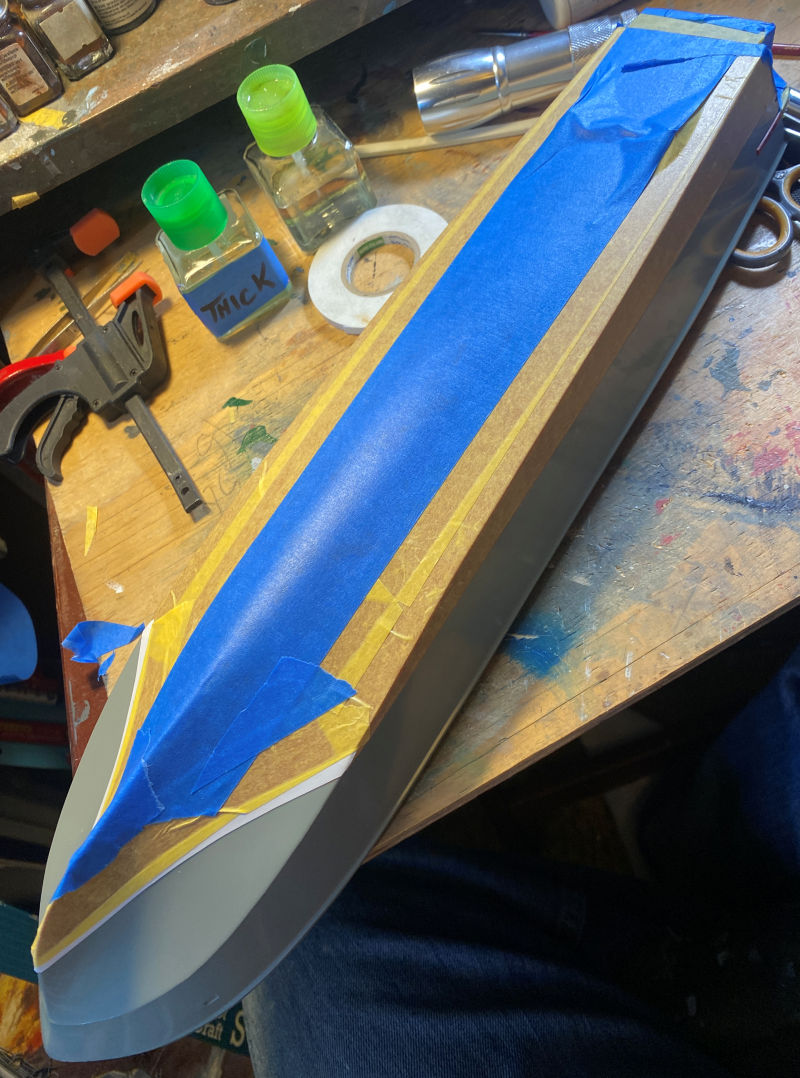
Here's a small update, not quite a full tour; more like an 'open house'. First of all in the shipyards we laid the keel for the USS Shangri-La:
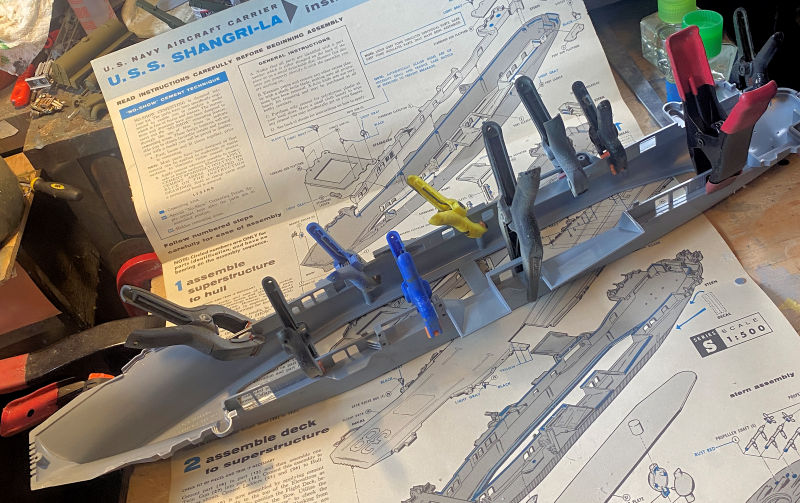
You can see she required quite a bit of persuasion....
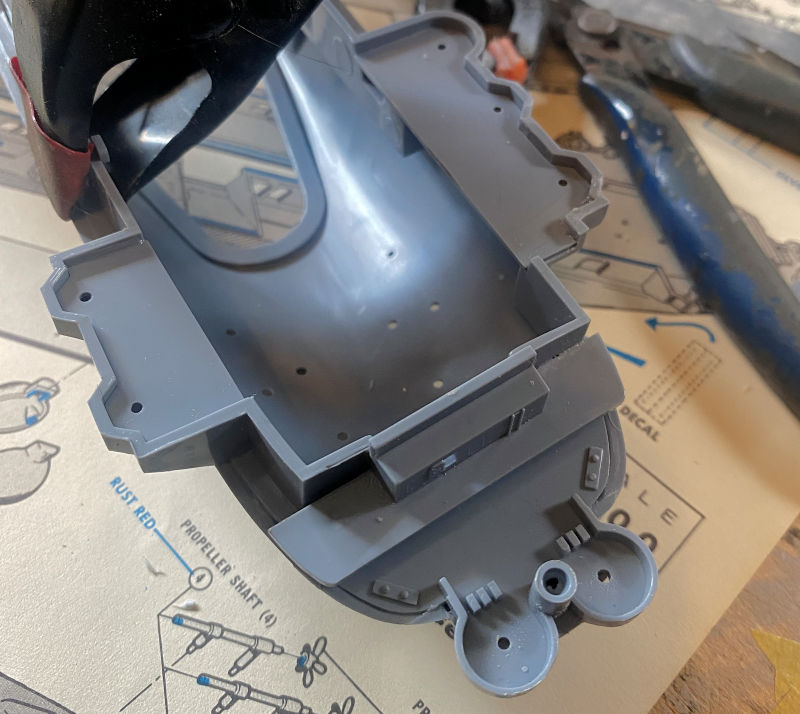
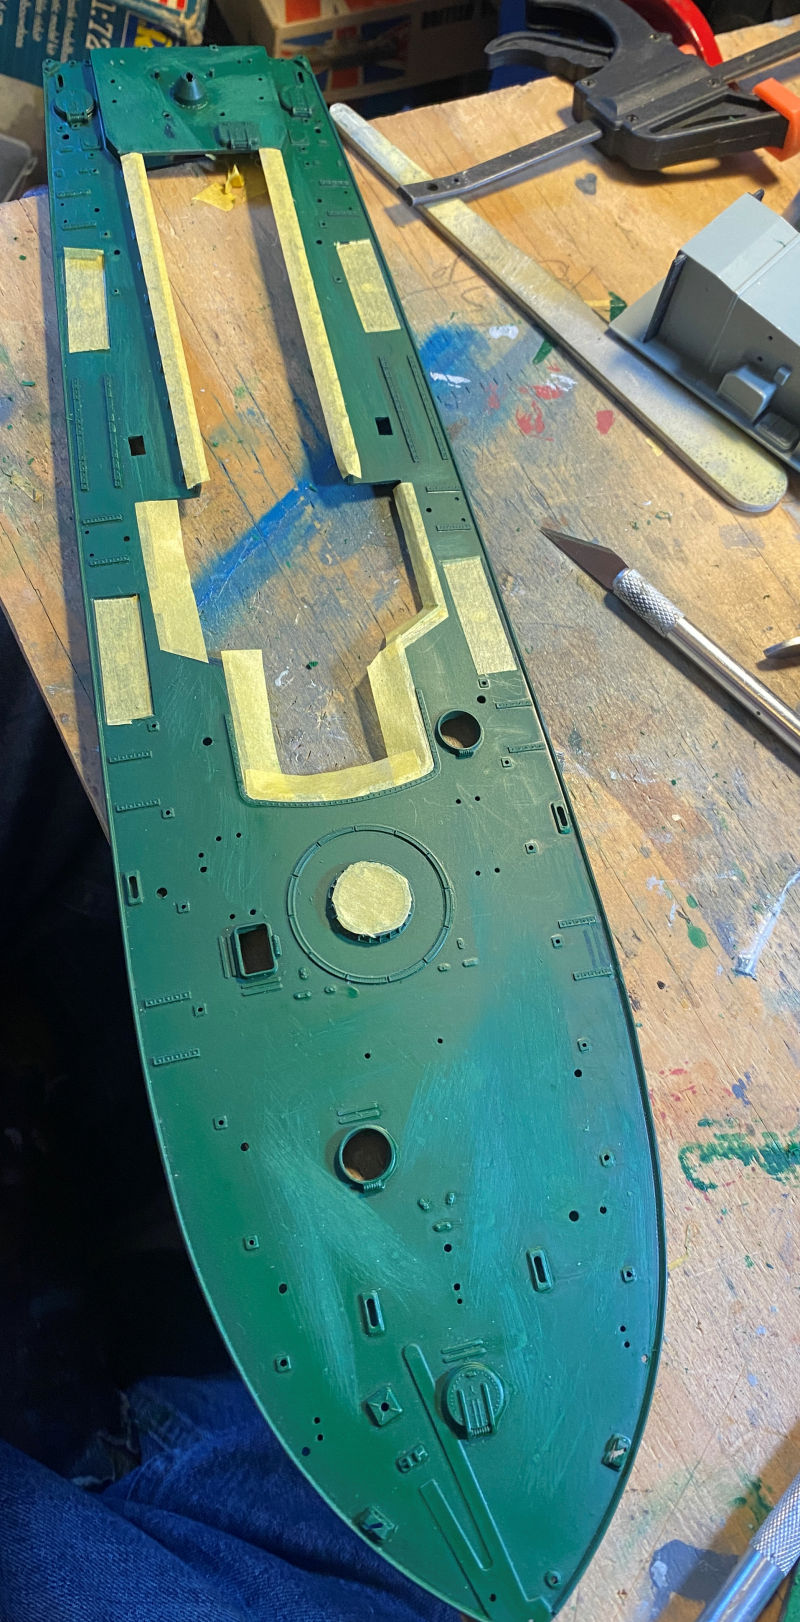
To help that dry better in place, we also built up the bow and stern sections:
Bow:
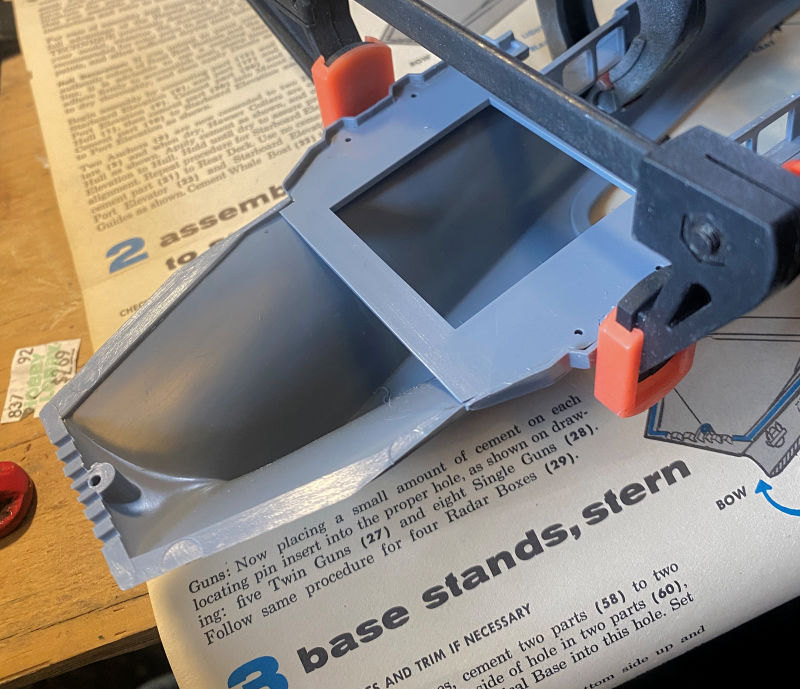
Stern:
Now over here in the Motor Pool, we assembled all but the cab on the Russian Ural 4320, and weathered it:
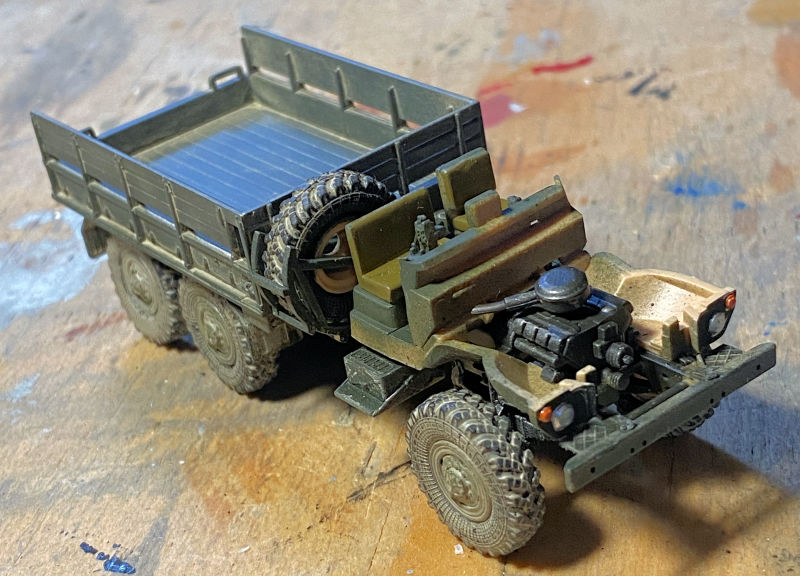
Once the windows get added to the cab we'll be able to install it and then final weathering will bring it over the finish line.
Finally, we prepped the Canadian TC for acceptance of his new command of the Churchill AVRE:

You'll see him next driving his tank out to the staging area for delivery to my Canadian Army.
Thank you all for attending my open house, comments are always welcome.
You can see she required quite a bit of persuasion....
To help that dry better in place, we also built up the bow and stern sections:
Bow:
Stern:
Now over here in the Motor Pool, we assembled all but the cab on the Russian Ural 4320, and weathered it:
Once the windows get added to the cab we'll be able to install it and then final weathering will bring it over the finish line.
Finally, we prepped the Canadian TC for acceptance of his new command of the Churchill AVRE:
You'll see him next driving his tank out to the staging area for delivery to my Canadian Army.
Thank you all for attending my open house, comments are always welcome.
The Duke
Virtuoso of Miniatures
"Do you know what the chain of command is? It's the chain I get and beat you with 'till you understand who's in ruttin' command!"
-Jayne Cobb, Firefly Episode 2 "The Train Job"
We are modelers - the same in spirit, in hunger to insanely buy newly released kits, hustlers in hiding our stash from our better halves and experts in using garbage as replacements for after-market parts.
Virtuoso of Miniatures
"Do you know what the chain of command is? It's the chain I get and beat you with 'till you understand who's in ruttin' command!"
-Jayne Cobb, Firefly Episode 2 "The Train Job"
We are modelers - the same in spirit, in hunger to insanely buy newly released kits, hustlers in hiding our stash from our better halves and experts in using garbage as replacements for after-market parts.

Re: Maddog Manufacturing 2023 Grand Reopening!
Great work all around as ever Mark - looking forward to seeing that TC painted up.
Stuart Templeton 'I may not be good but I'm slow...'
My blog: https://stuartsscalemodels.blogspot.com/
My blog: https://stuartsscalemodels.blogspot.com/
-
Duke Maddog
- Elite Member
- Posts: 7099
- Joined: Tue Jun 03, 2014 11:22 am
- Location: Rowland Heights, CA
Re: Maddog Manufacturing 2023 Grand Reopening!
Here is the latest tour of Maddog Manufacturing. First, we'll show you some of the renovations being done to help improve things. This has been a long time coming. So, all aboard the trams and remember to keep hands and feet inside; especially now with all the renovation construction debris everywhere...
This is what was done first, rendering the 'plant' unusable for a while. This is the one side of the room where my workbench and staging area are:
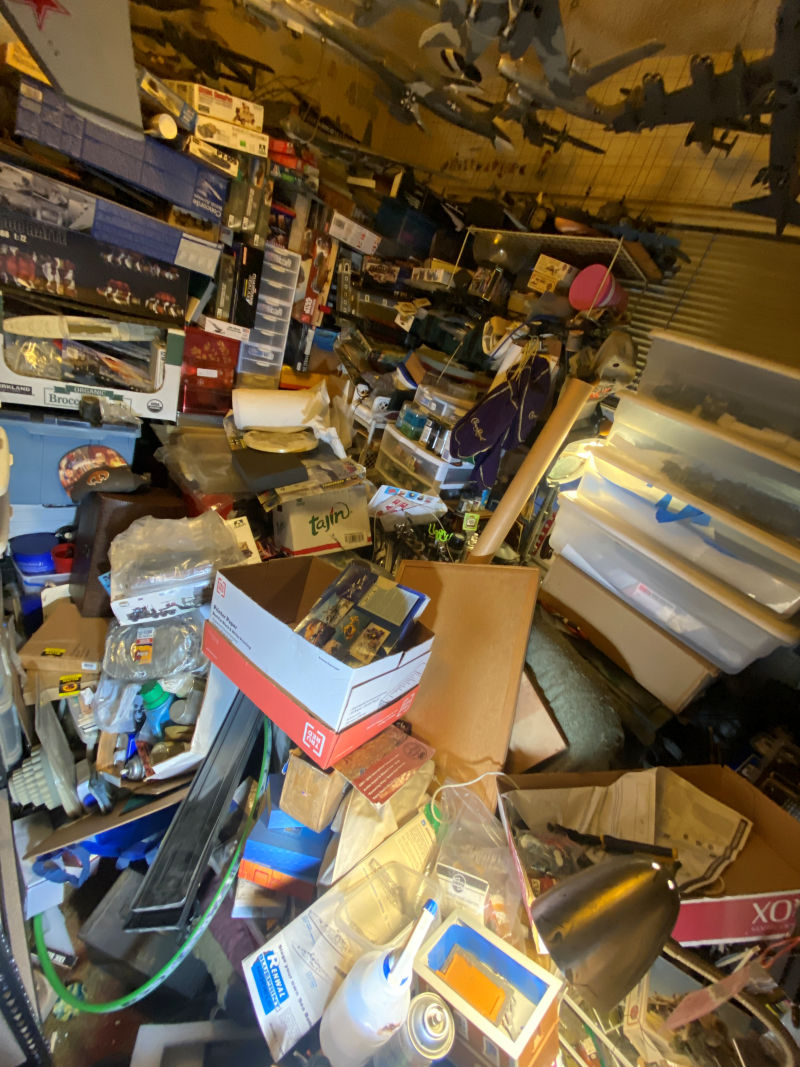
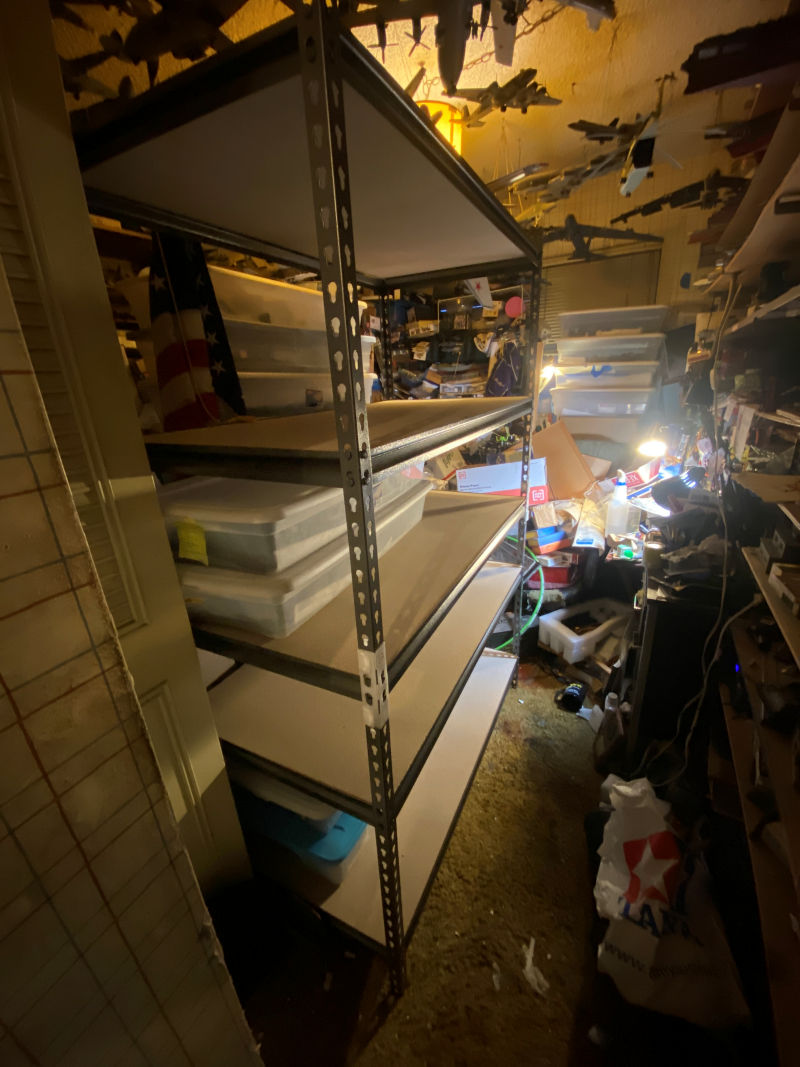
The reason for this? Right here. I have some new shelves that will be holding so many things in a far more organized manner. This is the view from the door. You can see half of my armor tubs already in place along with a few other things; some of which will not stay there:
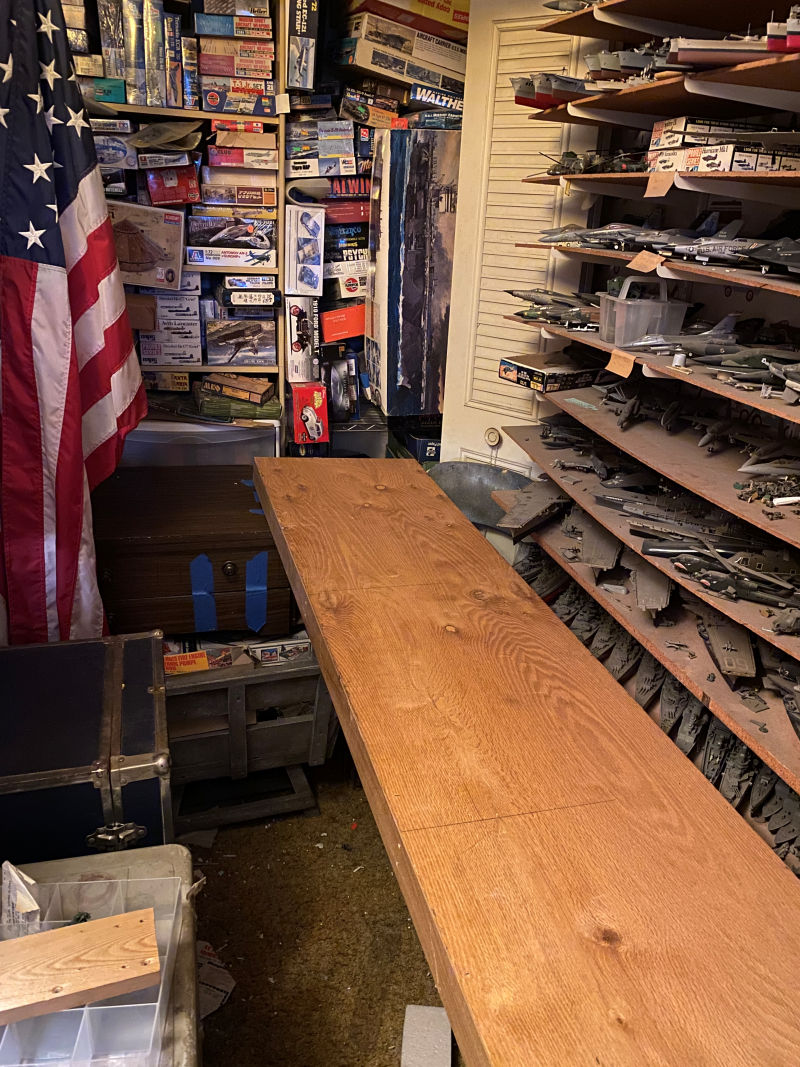
Later on, I re-positioned my wife's sewing cabinet (after removing her sewing machine) into a new position to hold more model kits in a more organized manner. I also added a long shelf along the side in front of my model shelves for the purpose of holding even more model kits. This is on the opposite side of the new shelves facing the closet:
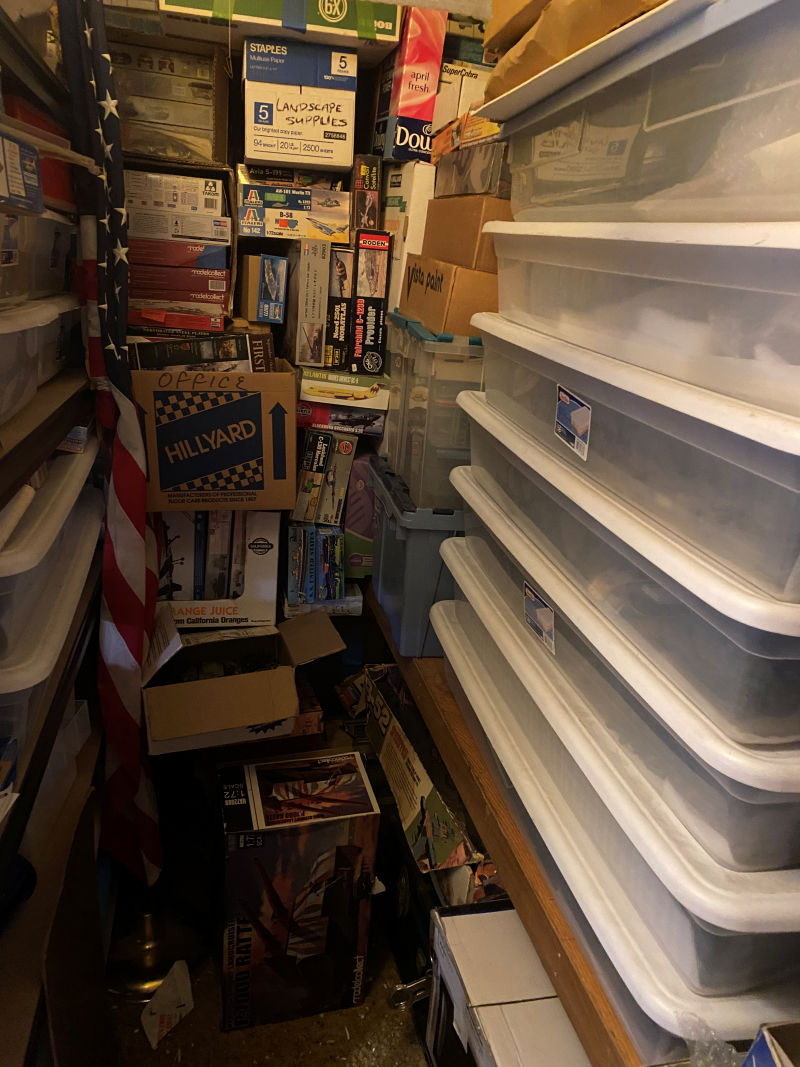
Then I placed the remaining armor tubs on the one side of the long shelf board, along with some open boxes of models under construction. Using sturdy display boxes from Costco, I filled them with more models kits to organize them better, as well as a couple boxes of smaller in-progress models. The plastic totes behind the armor tubs are holding many, many parts that I will need to sort out and organize later:
That was two days of work.I still have to clear the workbench and the chair I use as well as some of the rest of that side of the room before I can use it again. Until then, here is what we got done in between the two renovation days and at our weekly Monday Hobby Nights.
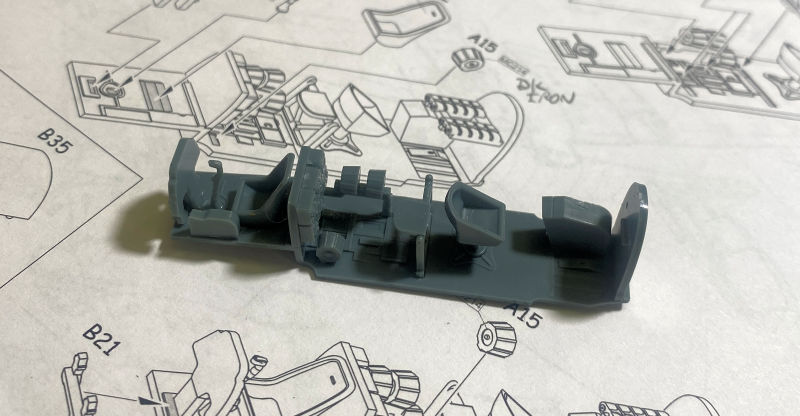
Starting in the Hangar we can show the start of a new aircraft this is part of a mini group build on another boards. This is the Eduard Weekend Edition of the Me-110. Naturally, we started with the interior and cockpit:
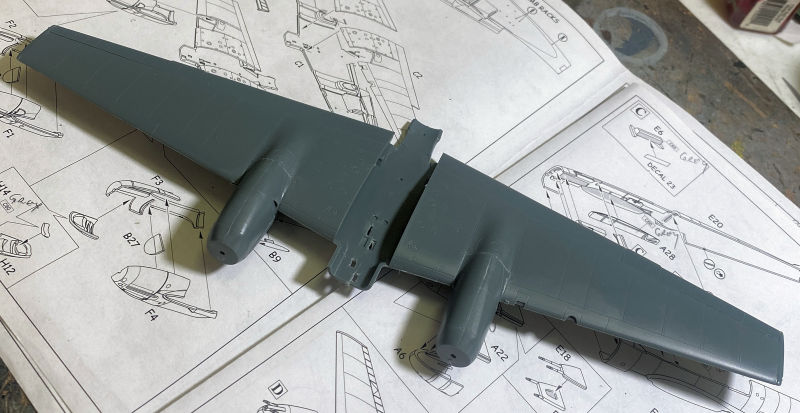
Then the wings and engine nacelles were built up:
We then decided to place the interior inside the wing cavity for fun:
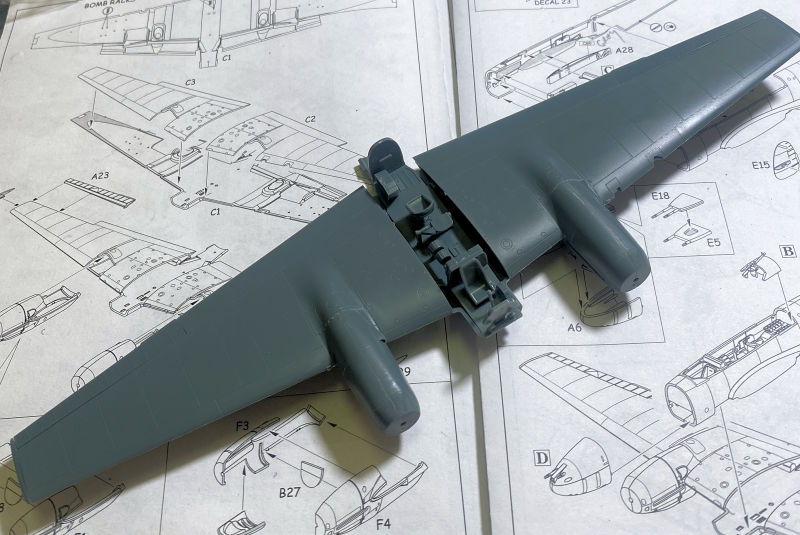
We have a good amount of interior detailing and decals to add to that before we can close it up inside the fuselage.
Now lets see what's going on in the Shipyards....
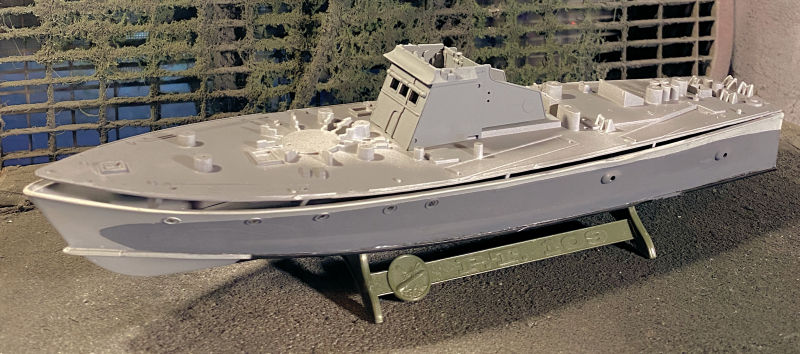
Here in the Shipyards a lot has been happening there, especially in the smaller slipways. To start with, the Vosper's 71 foot MBT, had the torpedo tubes and depth charges installed:
The mount for the 20mm gun was lost, so I had to fabricate a new stand. I calculated wrong on height, which was discovered later when I found the original part:
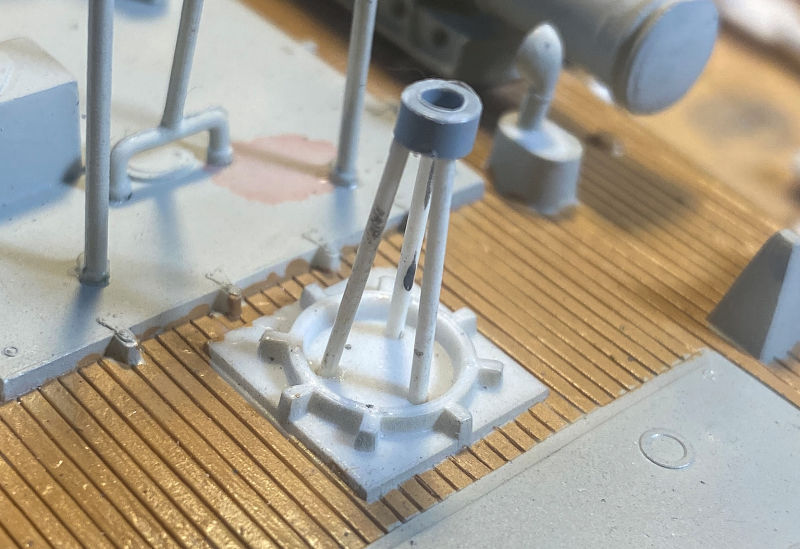
I'll have to decide later whether to remove my fabrication and use the original part later. Until then, all the remaining detail parts were added. All that is needed is the threads and the detail painting and this will be done:
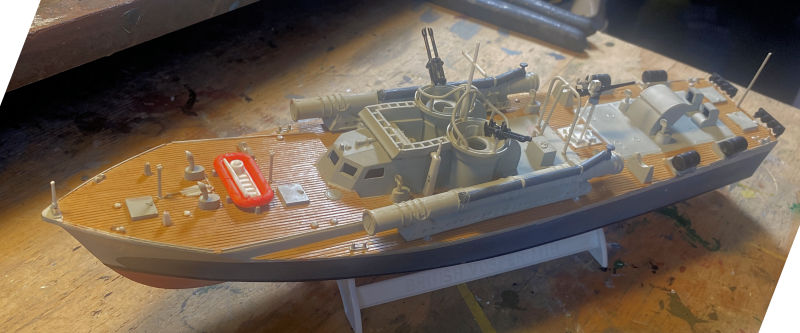
The original kit did not have hull number decals, only a flagsheet. I'm considering trying to find a hull number to add to this.
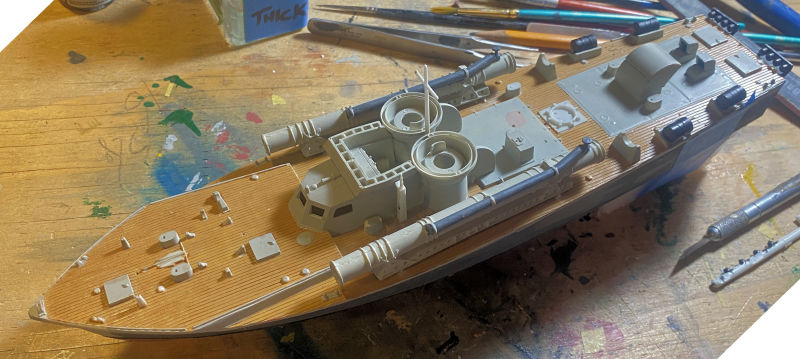
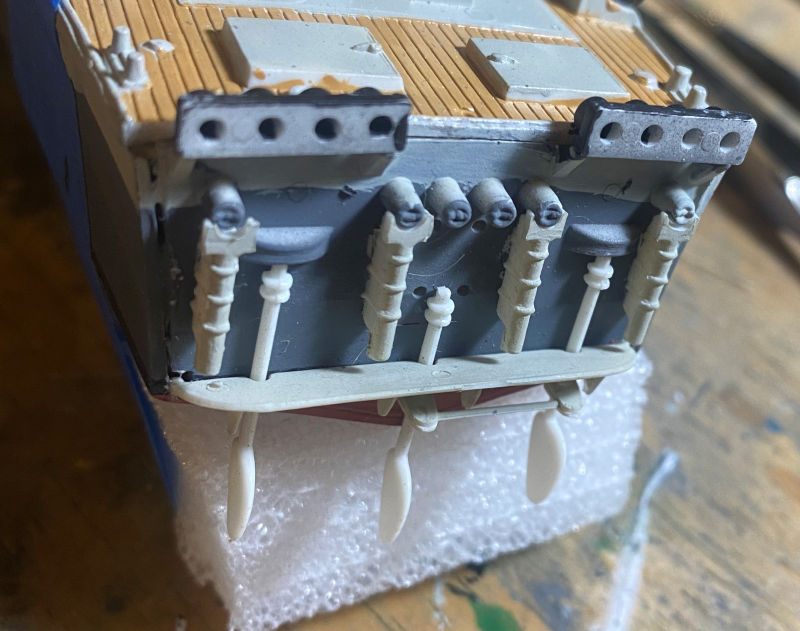
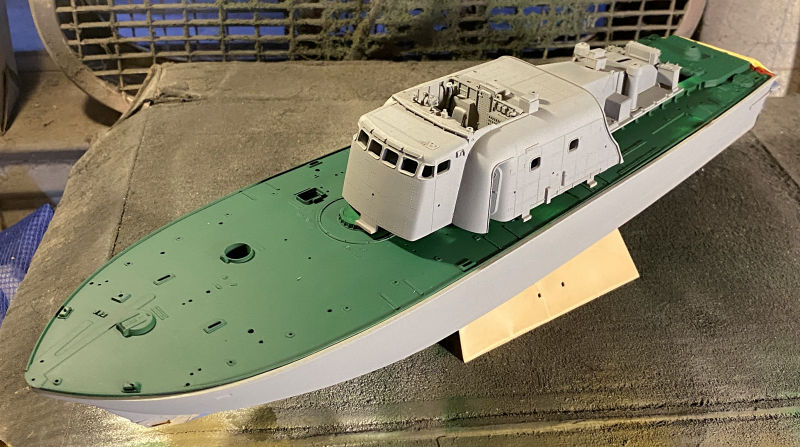
Moving on to the next slipway, we had to do a marathon session of adding all the detail parts to the Vosper's 73 foot MBT due to the fact that the instruction sheet got stuck on a wayward piece of tape and practically disintegrated on one side with pieces falling off the other side:
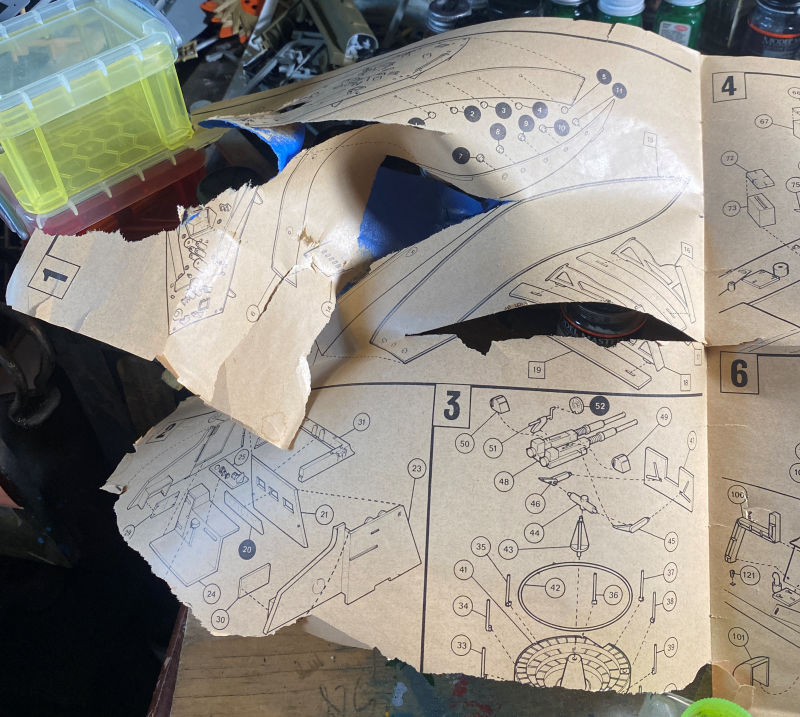

We were on a roll, so instead of trying to find and download a new set of instructions, some serious construction commenced while the instructions could still be (barely!) read:
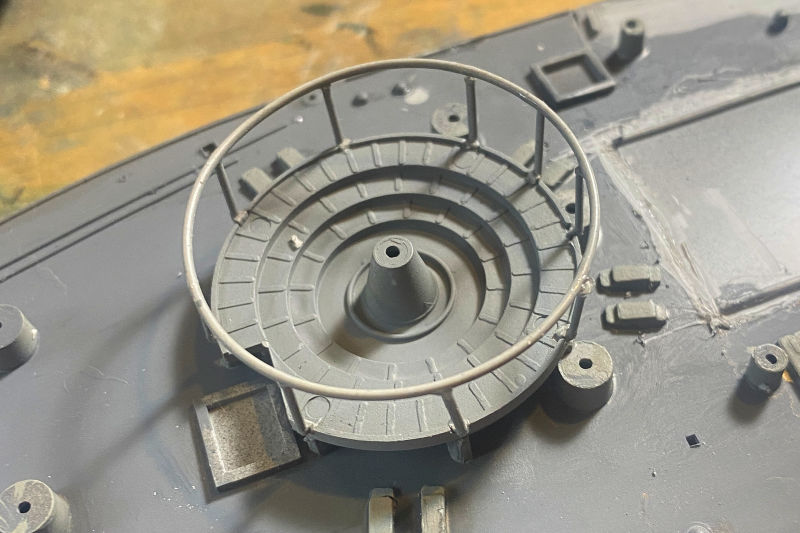
First, the bridge was built:
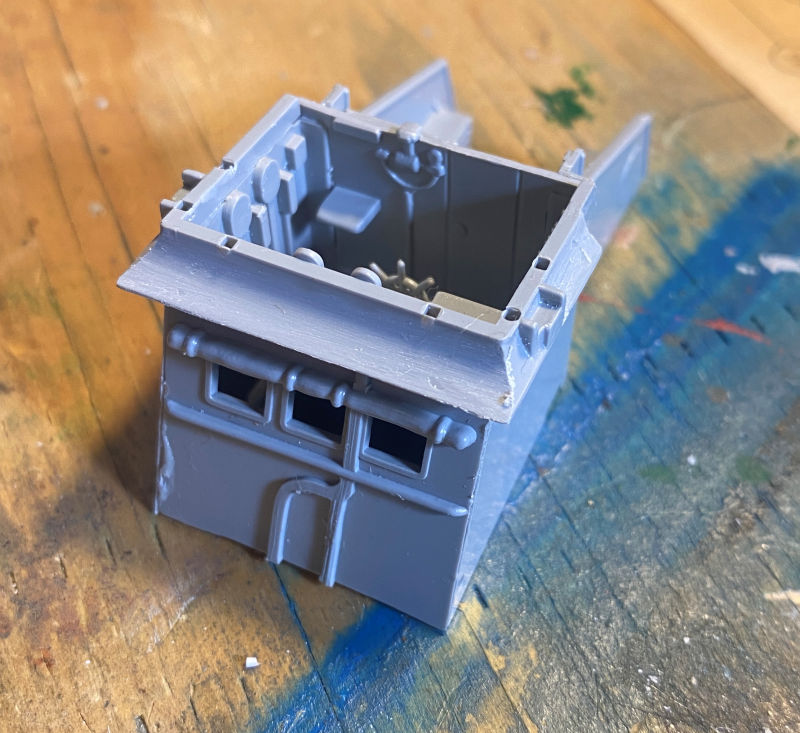
We then installed that onto the main deck, trying to get it to glue into the proper position:

We even tried a bit of persuasion, but this thing was stubborn:

You can see how stubborn it was by how it looks here when we tried applying the deck to the hull. This shot shows the deck placed on the hull to see how much persuasion it was going to need too:
That did need some persuasion but we applied a bit of glue to one section, allowed it to dry, then re-positioned the hull and deck to slowly glue it section by section into place. We then installed the railing around the forward gun. This was not so easy; the uprights were all individual pieces that had to be glued in place first, then the ring added later. Despite our best efforts, it isn't as pretty as it should look:
I was still not satisfied with the bridge cabin, so drastic measures were taken. The whole thing was removed and disassembled:
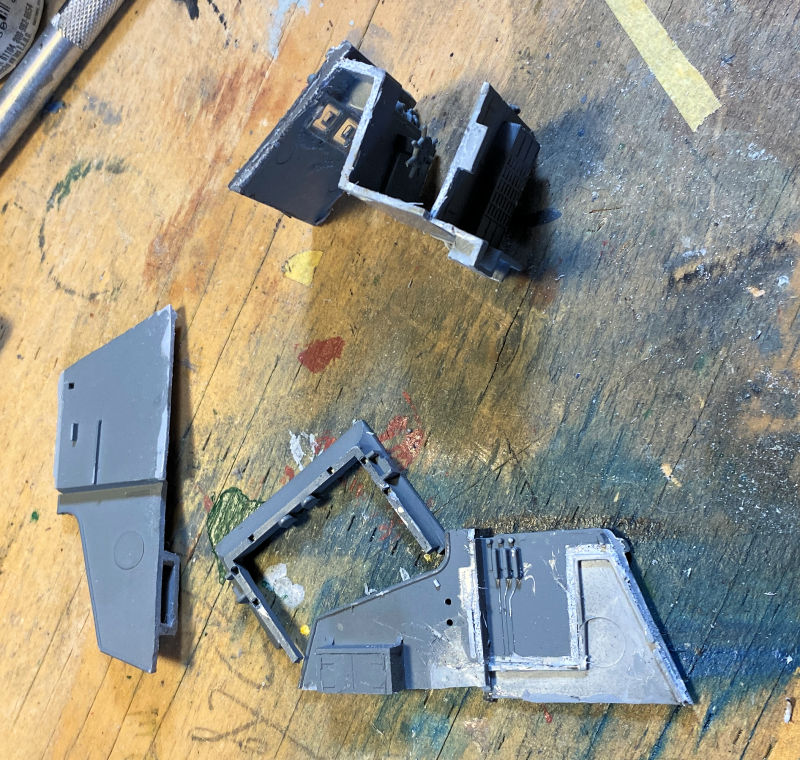
This time it was reassembled in situ right on the deck to insure everything lined up properly as it is supposed to do, starting with the troublesome side walls:
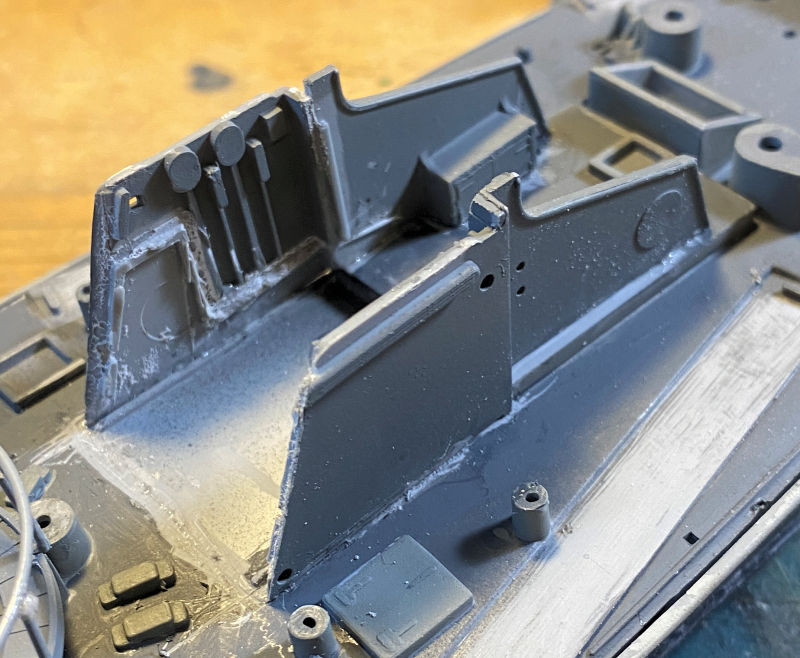
Later, just before the glue seriously set, the interior was added to the side walls, lined up and glued in place with a great clamp providing extra support:
After that dried, all the extra parts were installed at the stern of this boat; all but two of the mufflers because they both disappeared. They were too complicated for me to even consider scratching new ones so they got left off. The shafts, screws and rudders were also added at this time, hence the foam taped underneath to keep them from breaking off during handling:
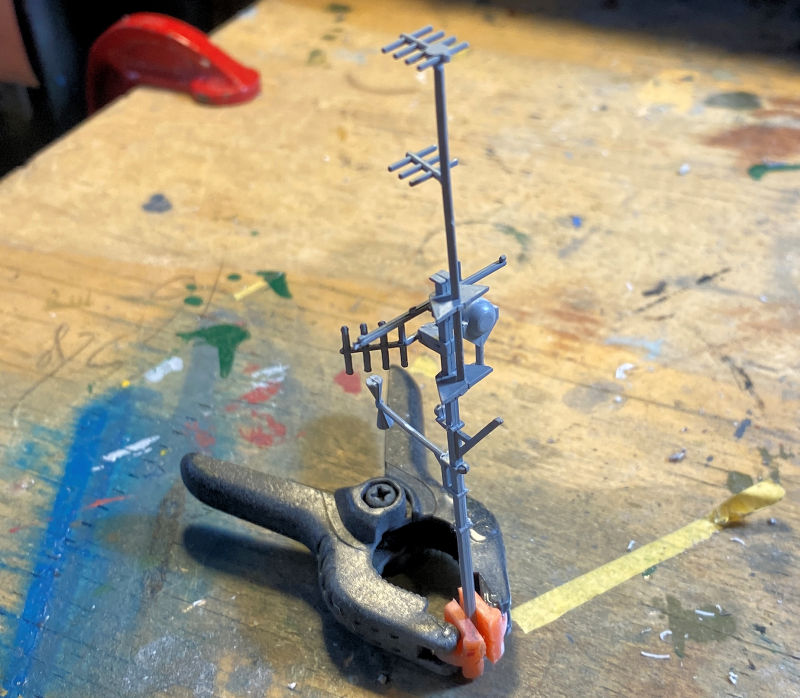
The main mast was completed next, but not installed yet. That thing is screaming to break at the slightest pressure so it's being held off untill the very last:
Finally everything else was installed on the boat. Now for final touch ups, decals and thread and this will be finished too.
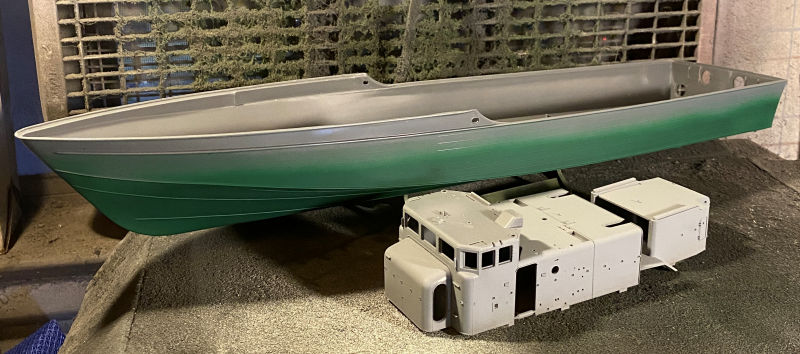
Following that, we masked off the bottom of the Vosper's Perkasa MBT and shot paint over the hull. The superstructure sub assemblies also got the same paint, even though it isn't shown here:
Later, we masked off the connection points on the deck and re-sprayed the green on the deck to make it a more uniform and solid color:
Here it is all mocked up to see how it will (hopefully!) look:
While we had that green out, we also shot it on the bottom of the hull for the Japanese PT-15, and we also shot the same grey over the PT-15 superstructure parts:
Finally, we started the PT-109 some days ago, getting it all assembled (mostly) and removing the life raft mounts on the forward deck. We plan on mounting a 37mm cannon on the deck like so many pictures of Kennedy's boat show:
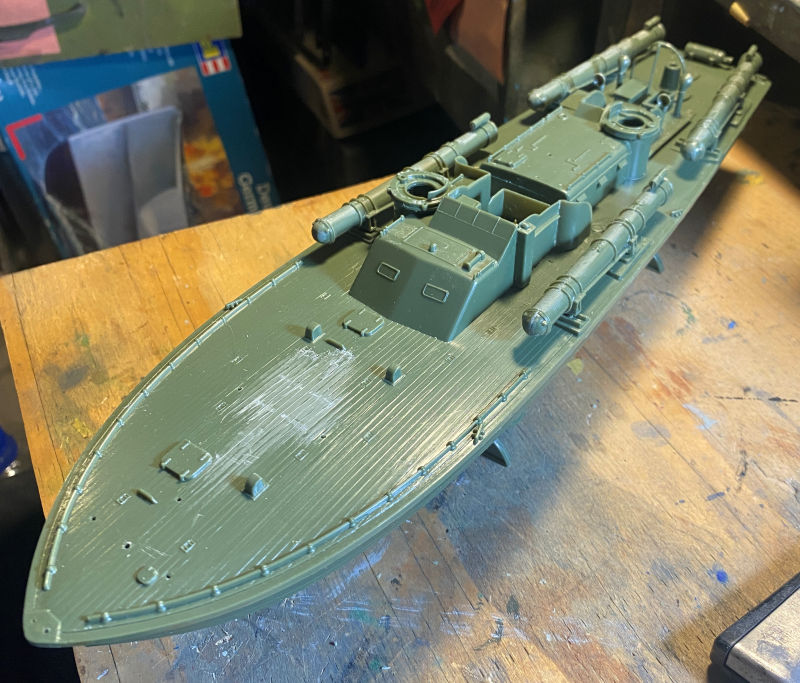
This then got the overall OD green paint on it:
That completes what's happening in the Shipyards, we'll make a brief stop in the Motor Pool where only one things was started and another moved closer to the finish line. Next door to that in the miscellaneous workshop, we have something else to check in on as well.
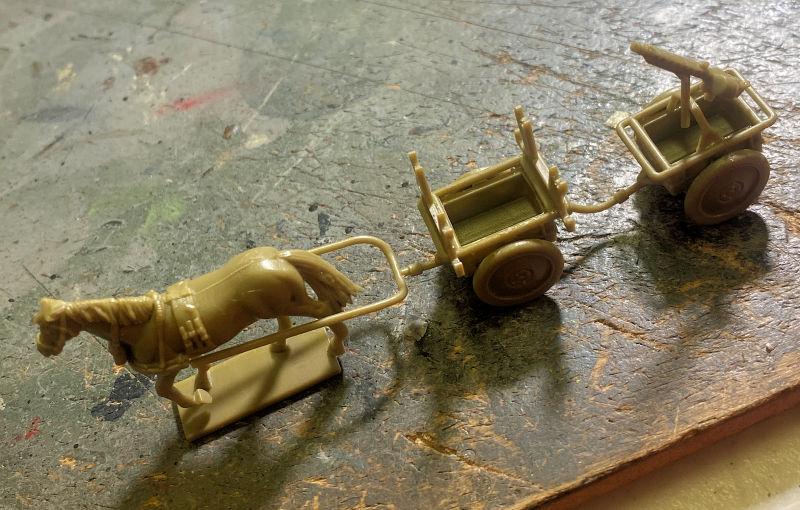
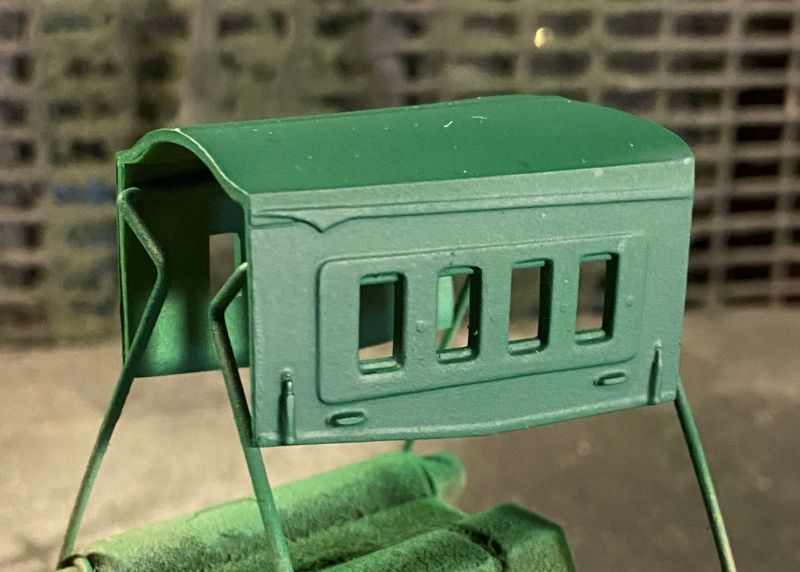
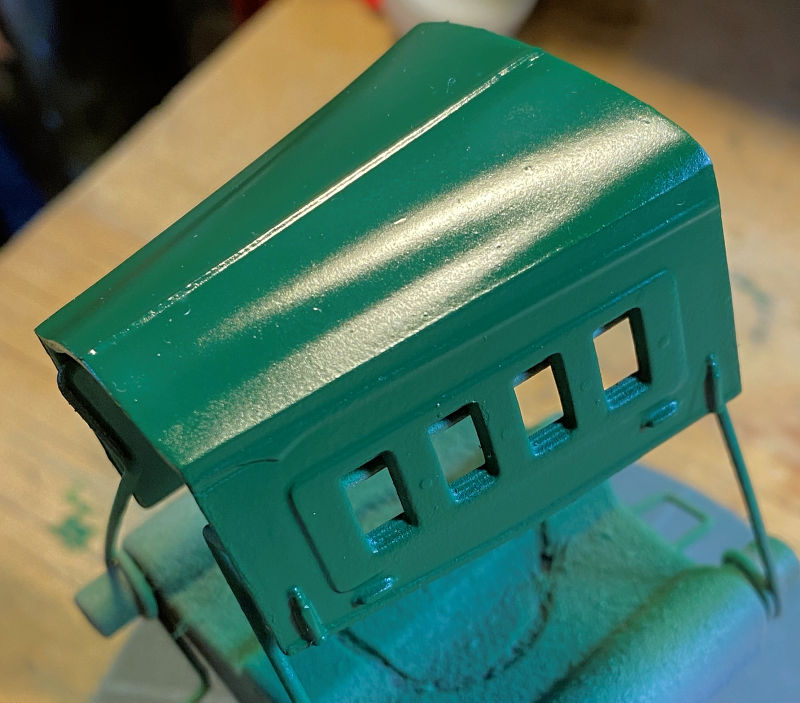
Here in the Motor Pool, we started on a couple of simple Infantry Carts used by the Wehrmacht in WWII. It was something needed to clear the pallet. Assembly was quite straightforward; it includes two horses and troops. We did one of the horses and then built the carts. One cart has a couple mounting brackets for holding Panzershreks, while the other is supporting a self defense machine gun:
Next, since we were shooting OD green on the PT-109, we also shot some on the M-4 Sherman sporting the M-17 rocket launcher on top of the turret:
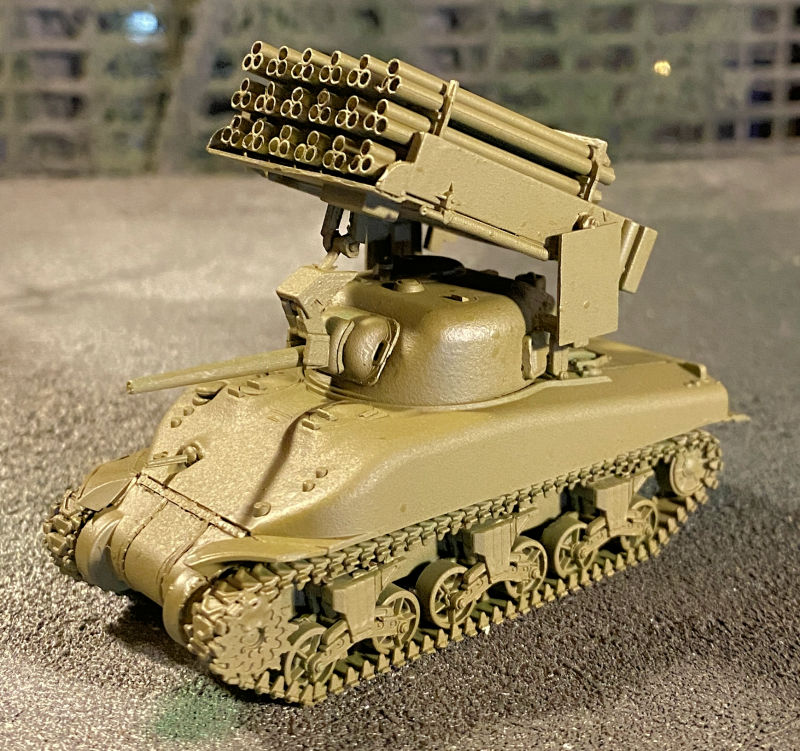
After a clear gloss coat, the decals went on:
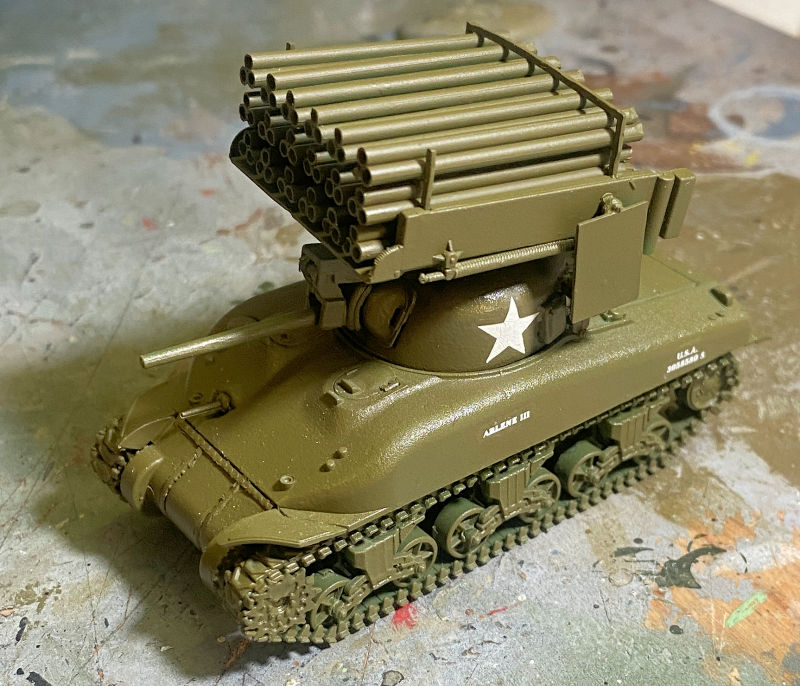
This tank did not sport the white stars originally. I just took some artistic license and added them as I think it makes this tank look better.
Finally next door, we repainted the hood on the Packard, giving it a nice smoother and more consistent color:
Later this was gloss coated for the shine:
Meanwhile, the interior was built up:
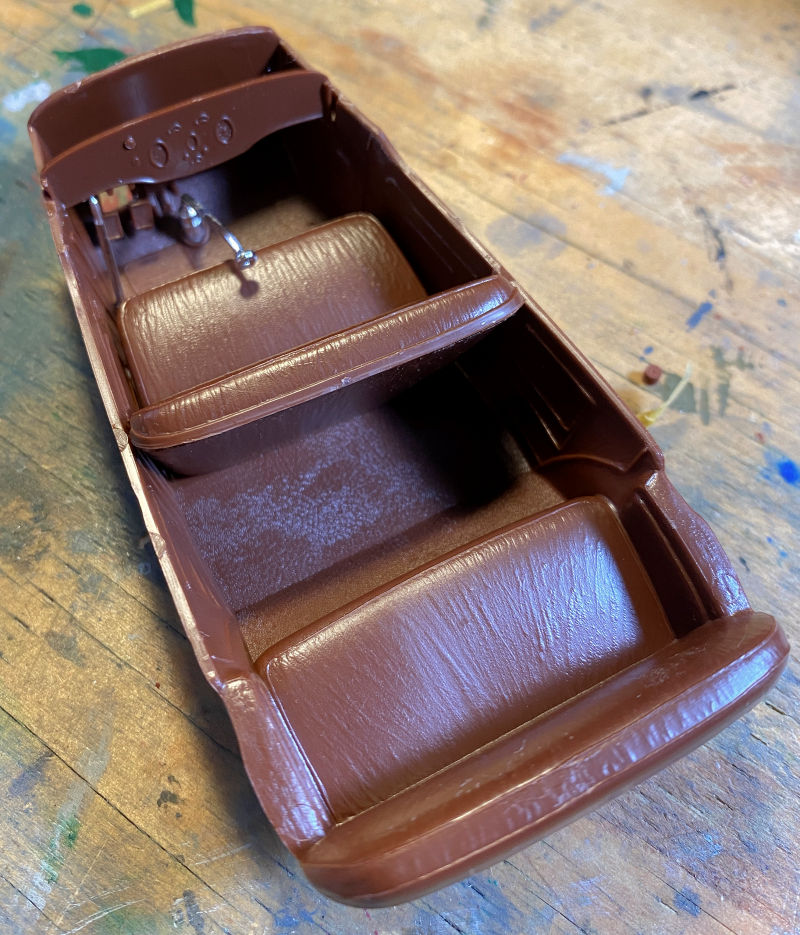
And that concludes this tour, thank you all for coming and remember comments are welcome.
This is what was done first, rendering the 'plant' unusable for a while. This is the one side of the room where my workbench and staging area are:
The reason for this? Right here. I have some new shelves that will be holding so many things in a far more organized manner. This is the view from the door. You can see half of my armor tubs already in place along with a few other things; some of which will not stay there:
Later on, I re-positioned my wife's sewing cabinet (after removing her sewing machine) into a new position to hold more model kits in a more organized manner. I also added a long shelf along the side in front of my model shelves for the purpose of holding even more model kits. This is on the opposite side of the new shelves facing the closet:
Then I placed the remaining armor tubs on the one side of the long shelf board, along with some open boxes of models under construction. Using sturdy display boxes from Costco, I filled them with more models kits to organize them better, as well as a couple boxes of smaller in-progress models. The plastic totes behind the armor tubs are holding many, many parts that I will need to sort out and organize later:
That was two days of work.I still have to clear the workbench and the chair I use as well as some of the rest of that side of the room before I can use it again. Until then, here is what we got done in between the two renovation days and at our weekly Monday Hobby Nights.
Starting in the Hangar we can show the start of a new aircraft this is part of a mini group build on another boards. This is the Eduard Weekend Edition of the Me-110. Naturally, we started with the interior and cockpit:
Then the wings and engine nacelles were built up:
We then decided to place the interior inside the wing cavity for fun:
We have a good amount of interior detailing and decals to add to that before we can close it up inside the fuselage.
Now lets see what's going on in the Shipyards....
Here in the Shipyards a lot has been happening there, especially in the smaller slipways. To start with, the Vosper's 71 foot MBT, had the torpedo tubes and depth charges installed:
The mount for the 20mm gun was lost, so I had to fabricate a new stand. I calculated wrong on height, which was discovered later when I found the original part:
I'll have to decide later whether to remove my fabrication and use the original part later. Until then, all the remaining detail parts were added. All that is needed is the threads and the detail painting and this will be done:
The original kit did not have hull number decals, only a flagsheet. I'm considering trying to find a hull number to add to this.
Moving on to the next slipway, we had to do a marathon session of adding all the detail parts to the Vosper's 73 foot MBT due to the fact that the instruction sheet got stuck on a wayward piece of tape and practically disintegrated on one side with pieces falling off the other side:
We were on a roll, so instead of trying to find and download a new set of instructions, some serious construction commenced while the instructions could still be (barely!) read:
First, the bridge was built:
We then installed that onto the main deck, trying to get it to glue into the proper position:
We even tried a bit of persuasion, but this thing was stubborn:
You can see how stubborn it was by how it looks here when we tried applying the deck to the hull. This shot shows the deck placed on the hull to see how much persuasion it was going to need too:
That did need some persuasion but we applied a bit of glue to one section, allowed it to dry, then re-positioned the hull and deck to slowly glue it section by section into place. We then installed the railing around the forward gun. This was not so easy; the uprights were all individual pieces that had to be glued in place first, then the ring added later. Despite our best efforts, it isn't as pretty as it should look:
I was still not satisfied with the bridge cabin, so drastic measures were taken. The whole thing was removed and disassembled:
This time it was reassembled in situ right on the deck to insure everything lined up properly as it is supposed to do, starting with the troublesome side walls:
Later, just before the glue seriously set, the interior was added to the side walls, lined up and glued in place with a great clamp providing extra support:
After that dried, all the extra parts were installed at the stern of this boat; all but two of the mufflers because they both disappeared. They were too complicated for me to even consider scratching new ones so they got left off. The shafts, screws and rudders were also added at this time, hence the foam taped underneath to keep them from breaking off during handling:
The main mast was completed next, but not installed yet. That thing is screaming to break at the slightest pressure so it's being held off untill the very last:
Finally everything else was installed on the boat. Now for final touch ups, decals and thread and this will be finished too.
Following that, we masked off the bottom of the Vosper's Perkasa MBT and shot paint over the hull. The superstructure sub assemblies also got the same paint, even though it isn't shown here:
Later, we masked off the connection points on the deck and re-sprayed the green on the deck to make it a more uniform and solid color:
Here it is all mocked up to see how it will (hopefully!) look:
While we had that green out, we also shot it on the bottom of the hull for the Japanese PT-15, and we also shot the same grey over the PT-15 superstructure parts:
Finally, we started the PT-109 some days ago, getting it all assembled (mostly) and removing the life raft mounts on the forward deck. We plan on mounting a 37mm cannon on the deck like so many pictures of Kennedy's boat show:
This then got the overall OD green paint on it:
That completes what's happening in the Shipyards, we'll make a brief stop in the Motor Pool where only one things was started and another moved closer to the finish line. Next door to that in the miscellaneous workshop, we have something else to check in on as well.
Here in the Motor Pool, we started on a couple of simple Infantry Carts used by the Wehrmacht in WWII. It was something needed to clear the pallet. Assembly was quite straightforward; it includes two horses and troops. We did one of the horses and then built the carts. One cart has a couple mounting brackets for holding Panzershreks, while the other is supporting a self defense machine gun:
Next, since we were shooting OD green on the PT-109, we also shot some on the M-4 Sherman sporting the M-17 rocket launcher on top of the turret:
After a clear gloss coat, the decals went on:
This tank did not sport the white stars originally. I just took some artistic license and added them as I think it makes this tank look better.
Finally next door, we repainted the hood on the Packard, giving it a nice smoother and more consistent color:
Later this was gloss coated for the shine:
Meanwhile, the interior was built up:
And that concludes this tour, thank you all for coming and remember comments are welcome.
The Duke
Virtuoso of Miniatures
"Do you know what the chain of command is? It's the chain I get and beat you with 'till you understand who's in ruttin' command!"
-Jayne Cobb, Firefly Episode 2 "The Train Job"
We are modelers - the same in spirit, in hunger to insanely buy newly released kits, hustlers in hiding our stash from our better halves and experts in using garbage as replacements for after-market parts.
Virtuoso of Miniatures
"Do you know what the chain of command is? It's the chain I get and beat you with 'till you understand who's in ruttin' command!"
-Jayne Cobb, Firefly Episode 2 "The Train Job"
We are modelers - the same in spirit, in hunger to insanely buy newly released kits, hustlers in hiding our stash from our better halves and experts in using garbage as replacements for after-market parts.
-
jeaton01
- Elite Member
- Posts: 2076
- Joined: Thu Apr 23, 2020 9:20 am
- Location: Northern California
- Contact:
Re: Maddog Manufacturing 2023 Grand Reopening!
Major progress. I know what happens when I reorganize..now where did I put that?