Stikpusher wrote: ↑Fri May 19, 2023 12:24 pm All those small details add up John. Your slow & steady progress is going to pay off handsomely Im sure.
1//32 Hasegawa Ki-61-1 Tei Hien
-
tempestjohnny
- Elite Member
- Posts: 3347
- Joined: Sat Oct 15, 2016 4:51 am
- Location: Naples. FL
Re: 1//32 Hasegawa Ki-61-1 Tei Hien

Re: 1//32 Hasegawa Ki-61-1 Tei Hien
Thanks guys! Now that the Jug is finished, I can hop back onto the Hien build.
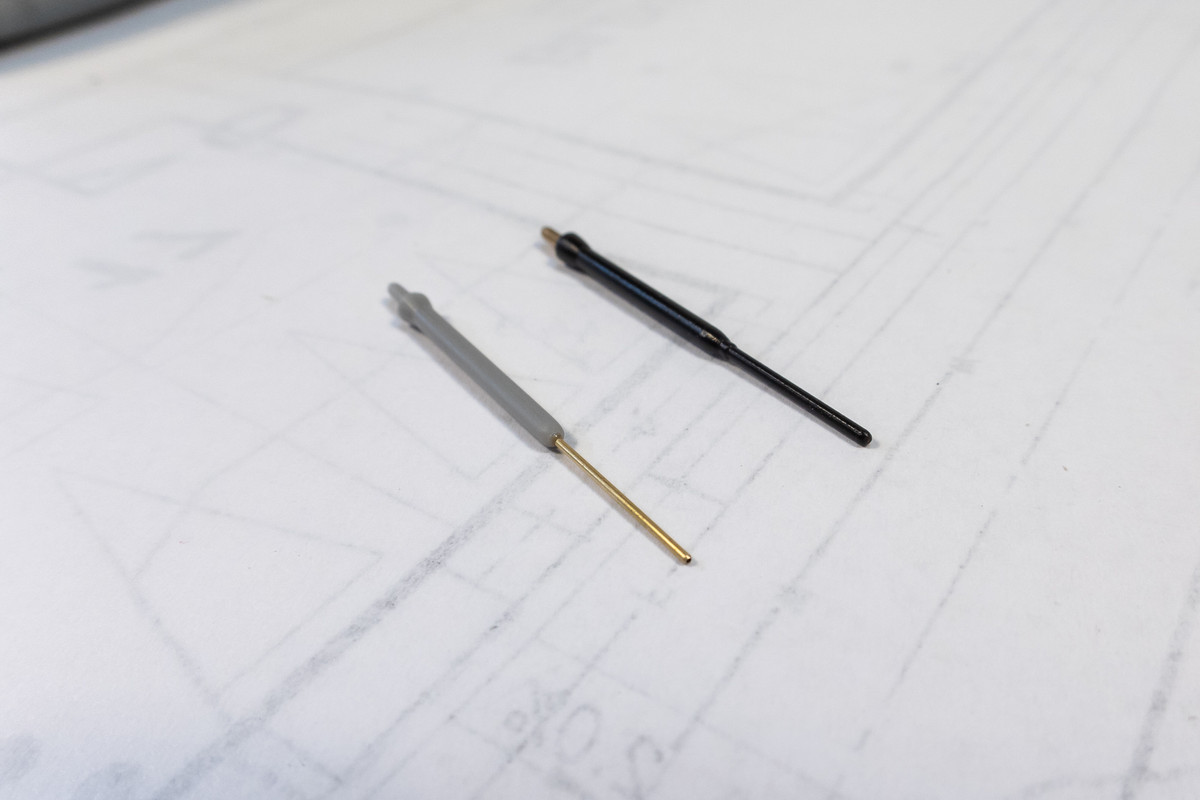
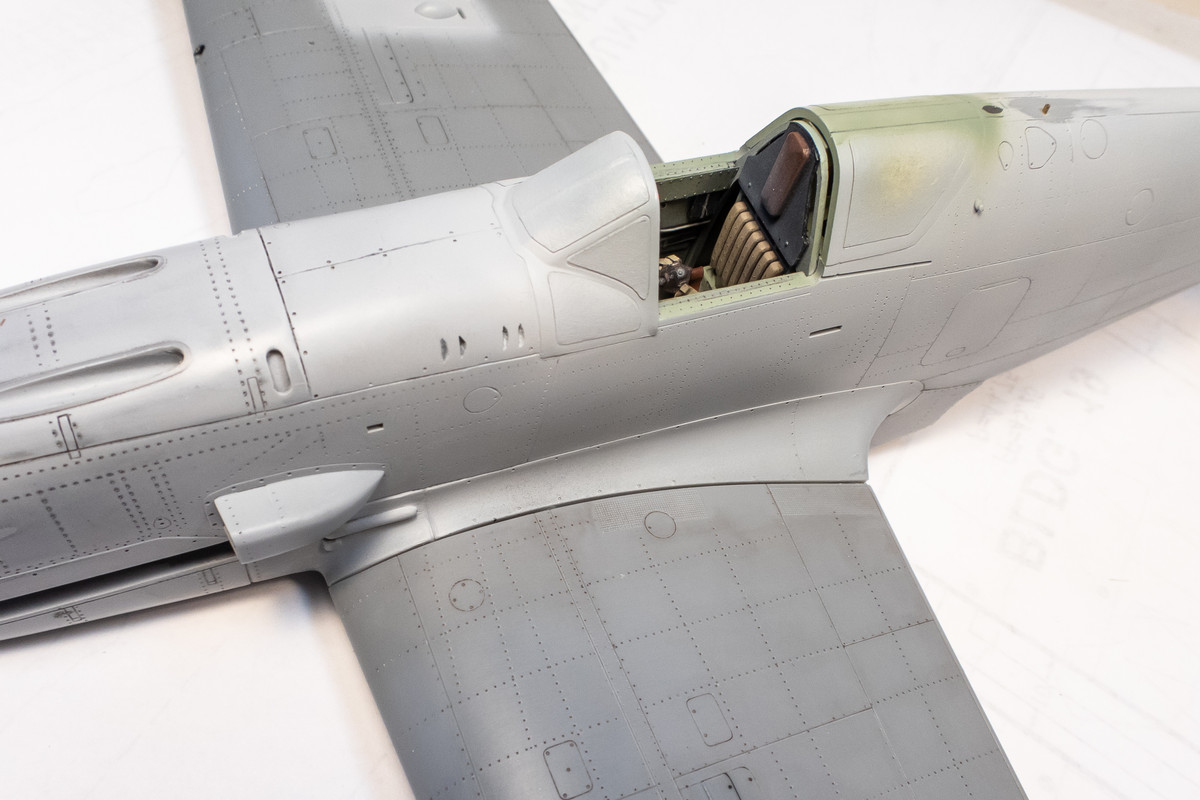
The Wolf Pack conversion set came with a brass pitot tube. It looked a tad thick so I played with the kit part to see if I could get a finer result. I'll have to check with actual photos to see if this is appropriate or not.

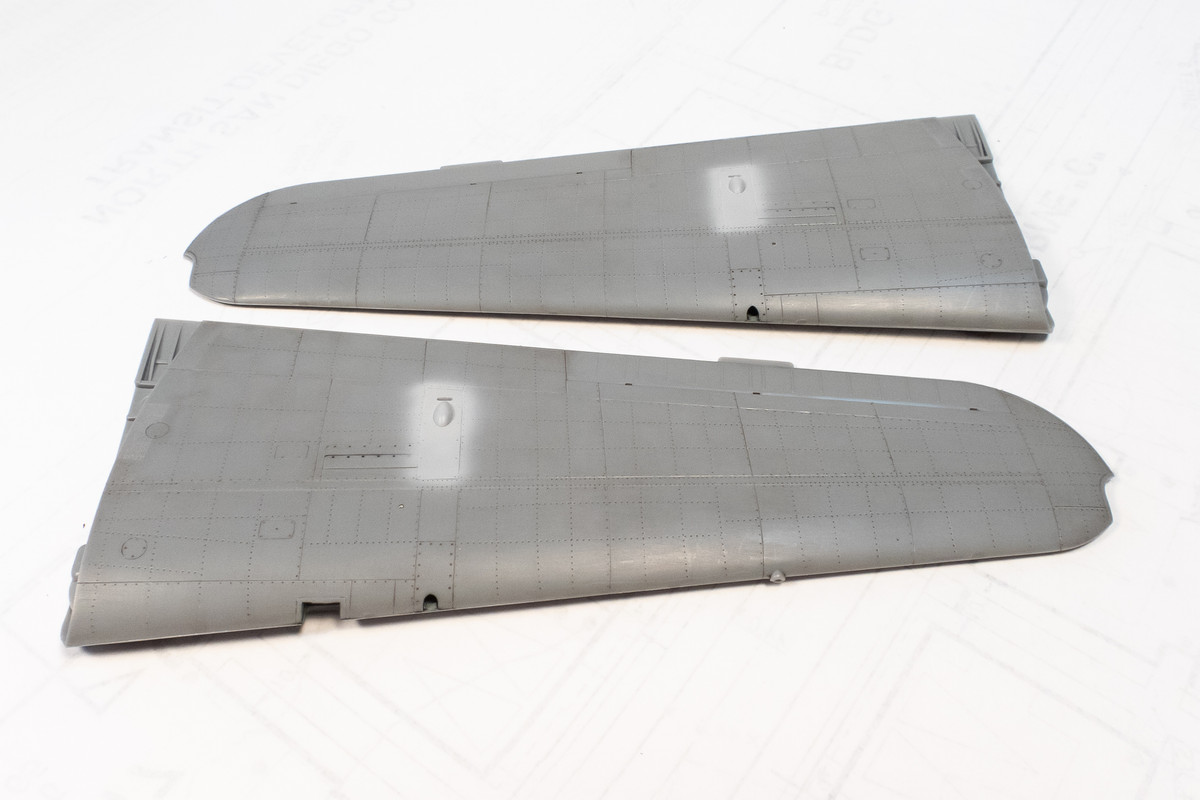
After hemming and hawing about how to attach the wings, I've decided to glue the wing halves together and deal with the leading and trailing edge joints cleanly.

The landing light was punched from a thin sheet of brass and coerced into a dish shape. The light bulb is courtesy of a small sphere from the Brita water filter.
The clear cover was cemented into place using Tamiya Extra Thin and will be masked off. I think there is a mask for it on the Eduard mask set.
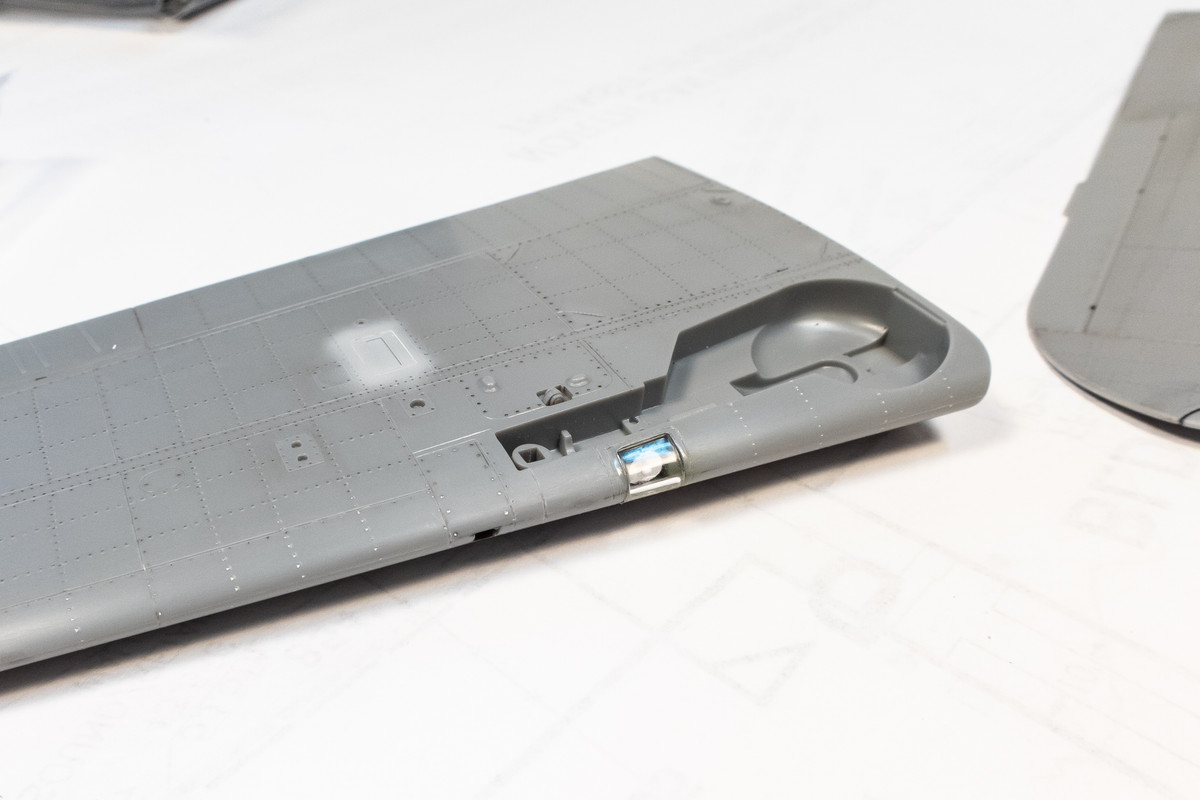
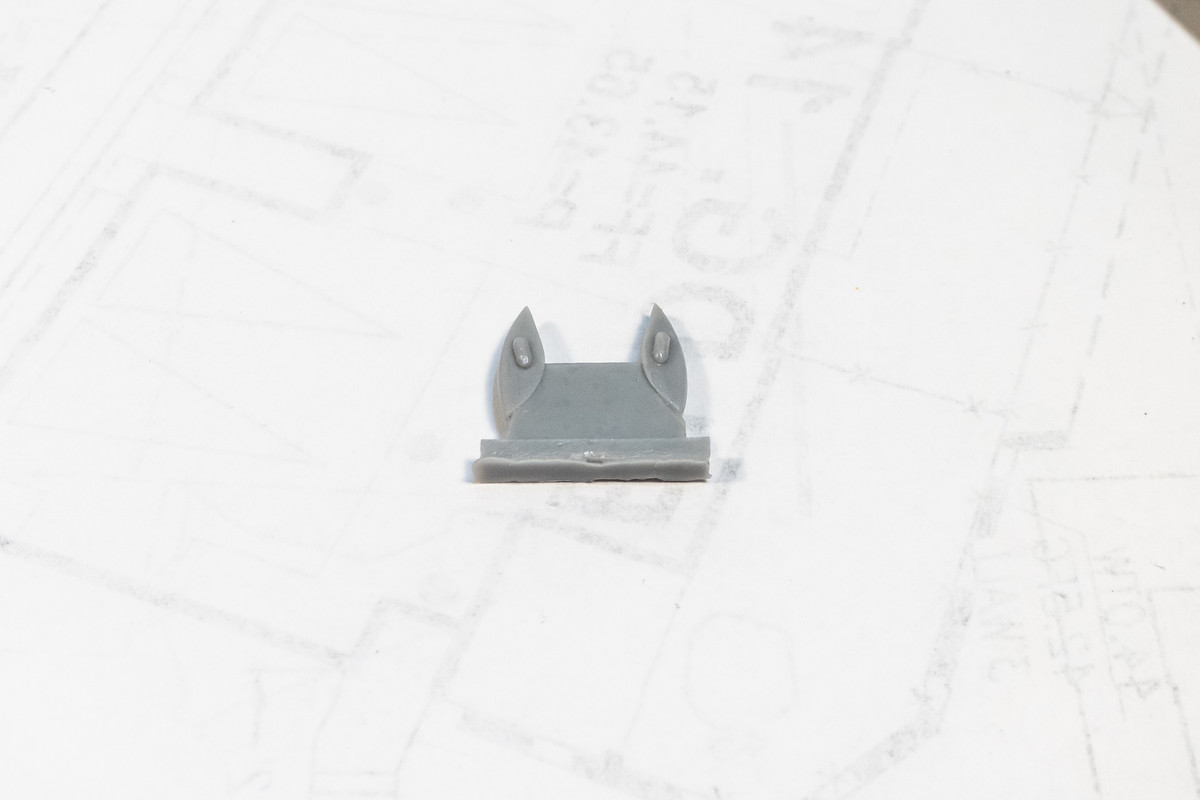
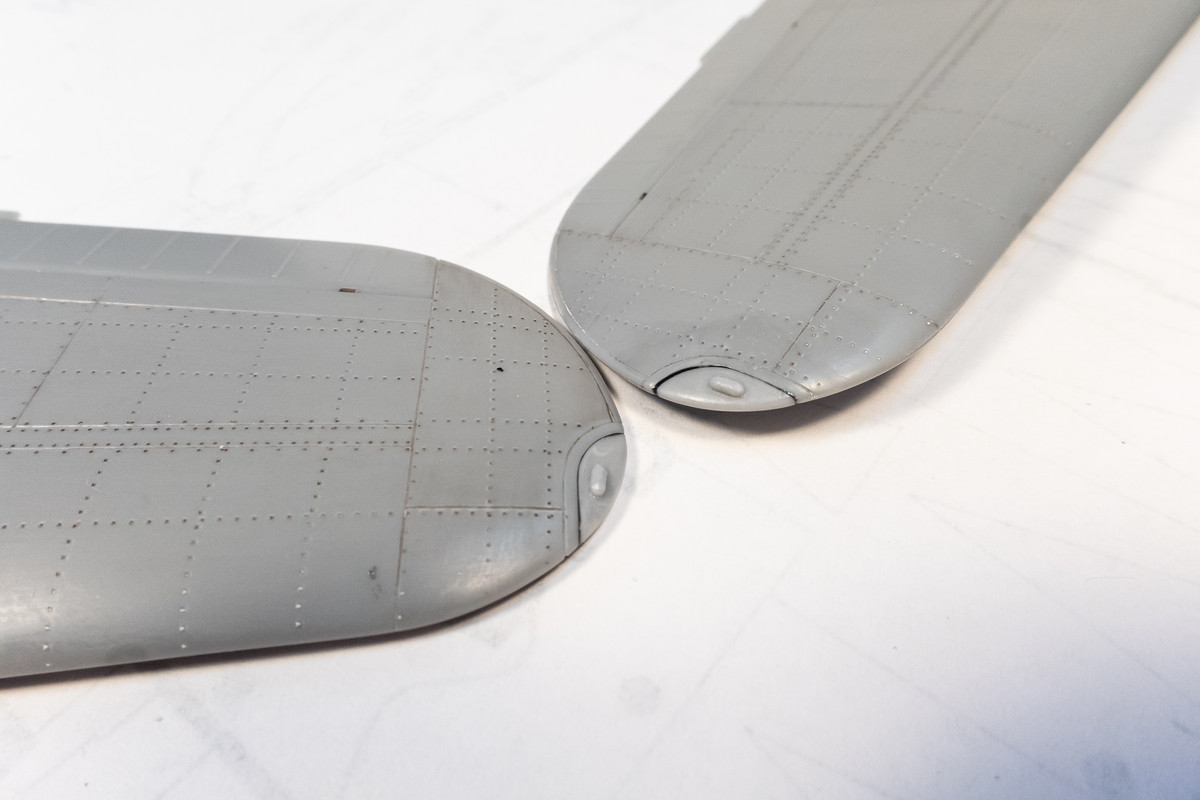
The conversion set also came with a different style of wing tip lights.
These were glued into place using black CA glue. Instead of sanding the excess glue, I used a cotton swab moistened with CA Debonder to remove the excess glue. This is a nice trick for filling areas adjacent to fine details that you don't want to sand away.
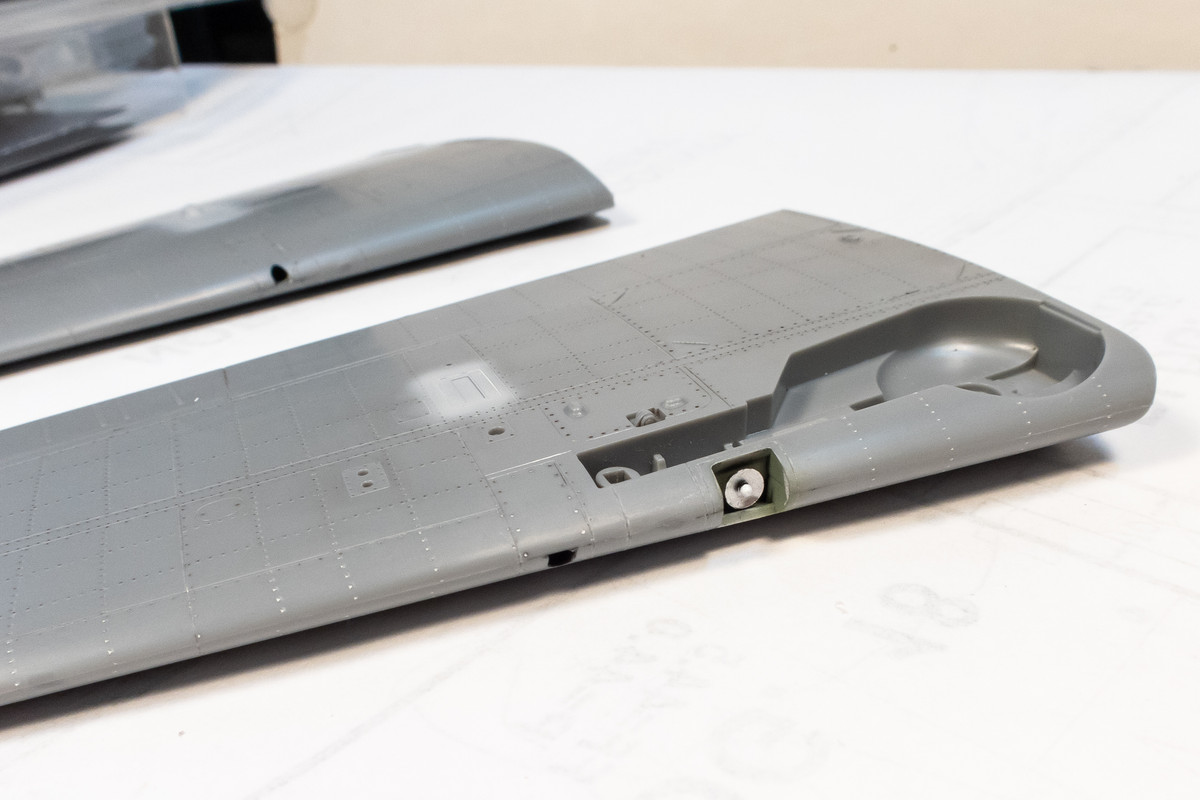
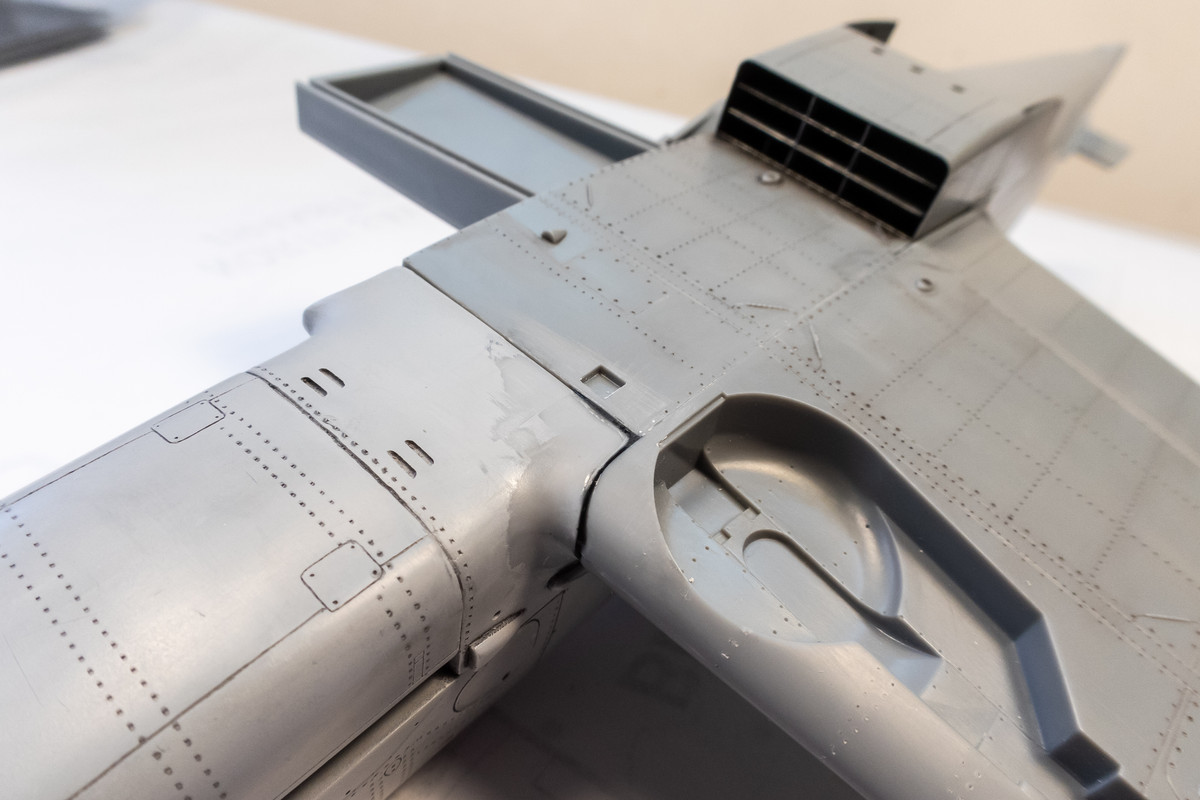
The wing fit on the bottom looks pretty good. Because of the joint detail on the bottom, I will concentrate on getting a good connection here and worry about the top wing root joint later.
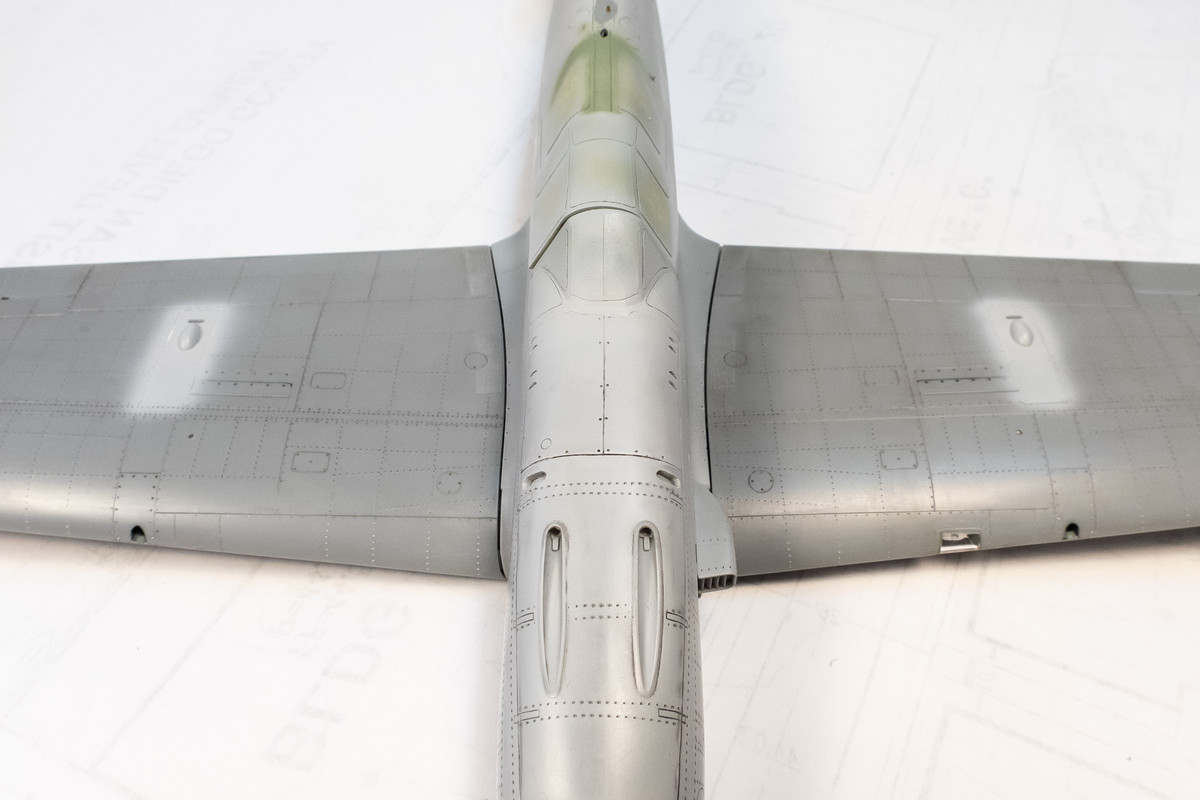
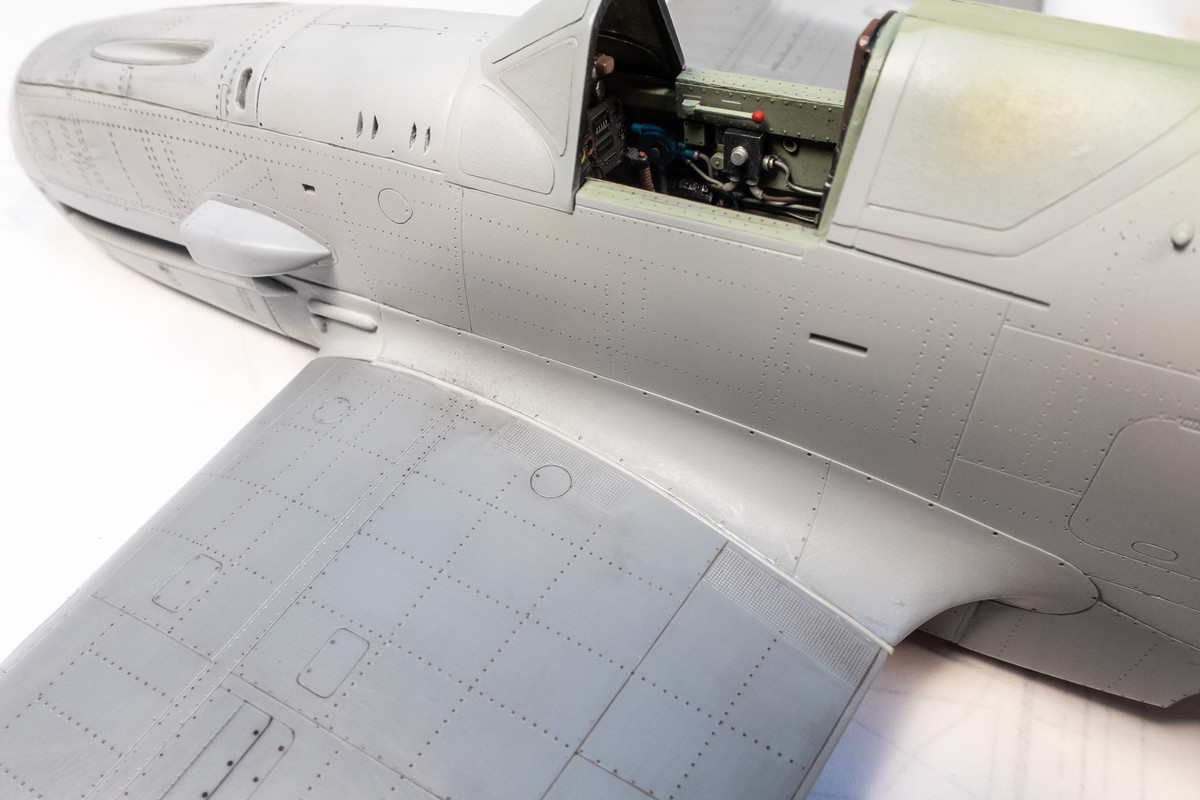
The wing spar was doused in tube glue and I slid the starboard wing into place. Some finger pressure was need to level the joint at the front. I filled the joint between the resin nose and wing bottom with Black CA glue to help secure the glue bond so I didn't have to hold it forever.
There is an obvious joint on the top. It may be reduced with some pressure but I'm planning to bridge the difference with stretched sprue.
Using the same Debonder trick, the excess CA glue on the bottom can be cleaned up significantly without sanding.
The Wolf Pack conversion set came with a brass pitot tube. It looked a tad thick so I played with the kit part to see if I could get a finer result. I'll have to check with actual photos to see if this is appropriate or not.
After hemming and hawing about how to attach the wings, I've decided to glue the wing halves together and deal with the leading and trailing edge joints cleanly.
The landing light was punched from a thin sheet of brass and coerced into a dish shape. The light bulb is courtesy of a small sphere from the Brita water filter.
The clear cover was cemented into place using Tamiya Extra Thin and will be masked off. I think there is a mask for it on the Eduard mask set.
The conversion set also came with a different style of wing tip lights.
These were glued into place using black CA glue. Instead of sanding the excess glue, I used a cotton swab moistened with CA Debonder to remove the excess glue. This is a nice trick for filling areas adjacent to fine details that you don't want to sand away.
The wing fit on the bottom looks pretty good. Because of the joint detail on the bottom, I will concentrate on getting a good connection here and worry about the top wing root joint later.
The wing spar was doused in tube glue and I slid the starboard wing into place. Some finger pressure was need to level the joint at the front. I filled the joint between the resin nose and wing bottom with Black CA glue to help secure the glue bond so I didn't have to hold it forever.
There is an obvious joint on the top. It may be reduced with some pressure but I'm planning to bridge the difference with stretched sprue.
Using the same Debonder trick, the excess CA glue on the bottom can be cleaned up significantly without sanding.
John aka JKim
-----------<><

-----------<><
-
BlackSheep214

- Elite Member
- Posts: 10422
- Joined: Sun Apr 06, 2014 8:47 pm
Re: 1//32 Hasegawa Ki-61-1 Tei Hien
I’m going to have to make a note of using black CA glue and using debonder for ease of clean up instead of sanding. Who knew? Now to see if my local HobbyTown has any Black CA a in stock. 
“Who controls the skies, controls the fate of this Earth”
Author unknown- 352nd Fighter Group, Blue-Nosed Bastards of Bodney
“Send one plane it’s a sortie; send two planes it’s a flight; send four planes it’s a test of airpower. - Richard Kohn
Author unknown- 352nd Fighter Group, Blue-Nosed Bastards of Bodney
“Send one plane it’s a sortie; send two planes it’s a flight; send four planes it’s a test of airpower. - Richard Kohn
-
Medicman71

- Elite Member
- Posts: 9729
- Joined: Mon Apr 07, 2014 9:32 am
- Location: Houston, Tx
Re: 1//32 Hasegawa Ki-61-1 Tei Hien
Very nice! I'll have to remember that black super glue trick.
Mike
Sponsored by Boeing, Lockheed Martin, Northrop Grumman, Saab, BAE, and Dassault
Sponsored by Boeing, Lockheed Martin, Northrop Grumman, Saab, BAE, and Dassault
-
SigEp Ziggy
- Advanced Member
- Posts: 213
- Joined: Sat Aug 03, 2019 9:26 am
- Location: Post Falls, Idaho
Re: 1//32 Hasegawa Ki-61-1 Tei Hien
Truly Amazing Work  I have the chrome 1/72 scale model w/decal camo, yours will be quite the bird when finished
Your fellow modeler,
Shane
Shane
Re: 1//32 Hasegawa Ki-61-1 Tei Hien
A good debonder definitely gives new uses for CA glue.
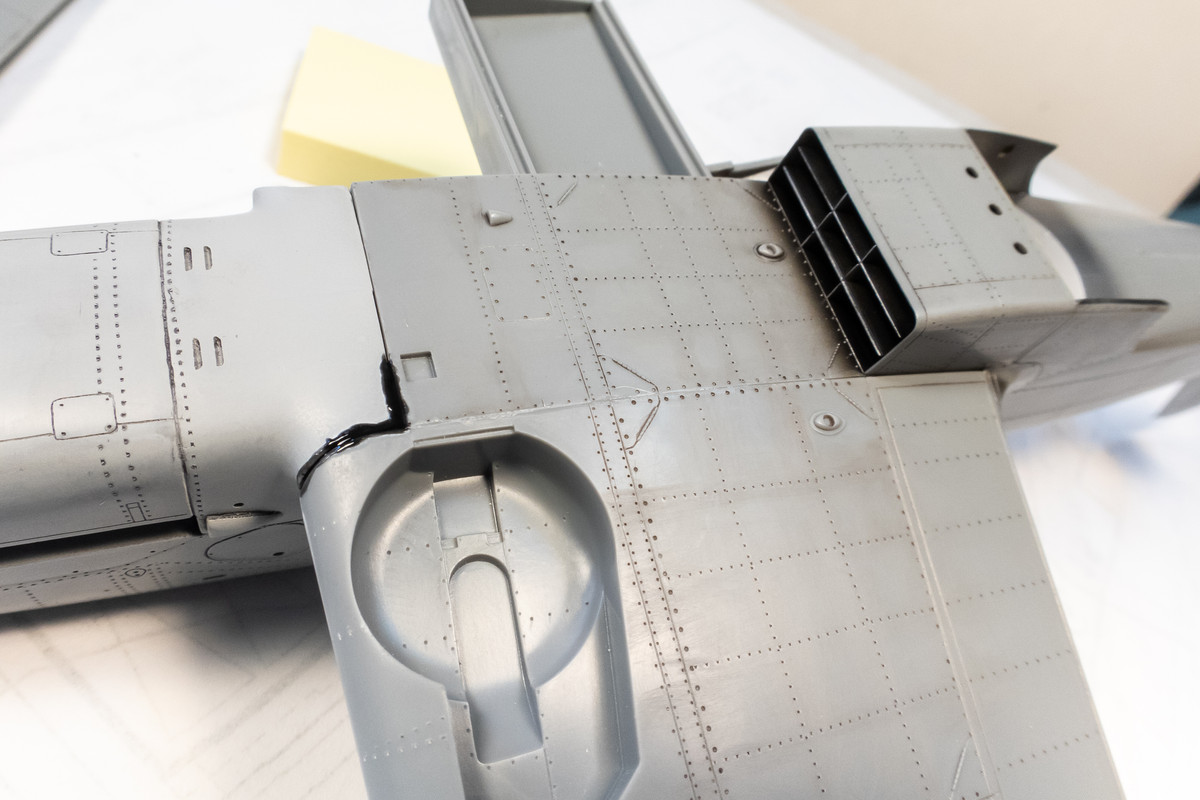
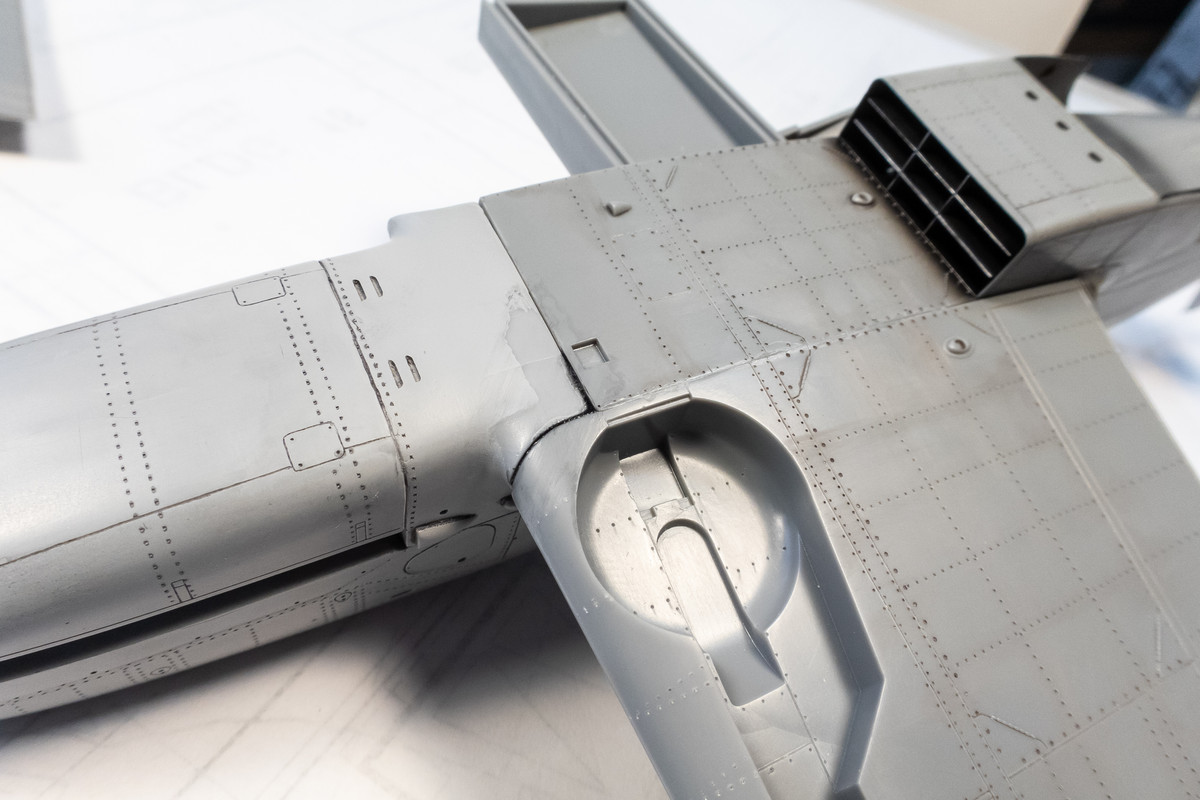
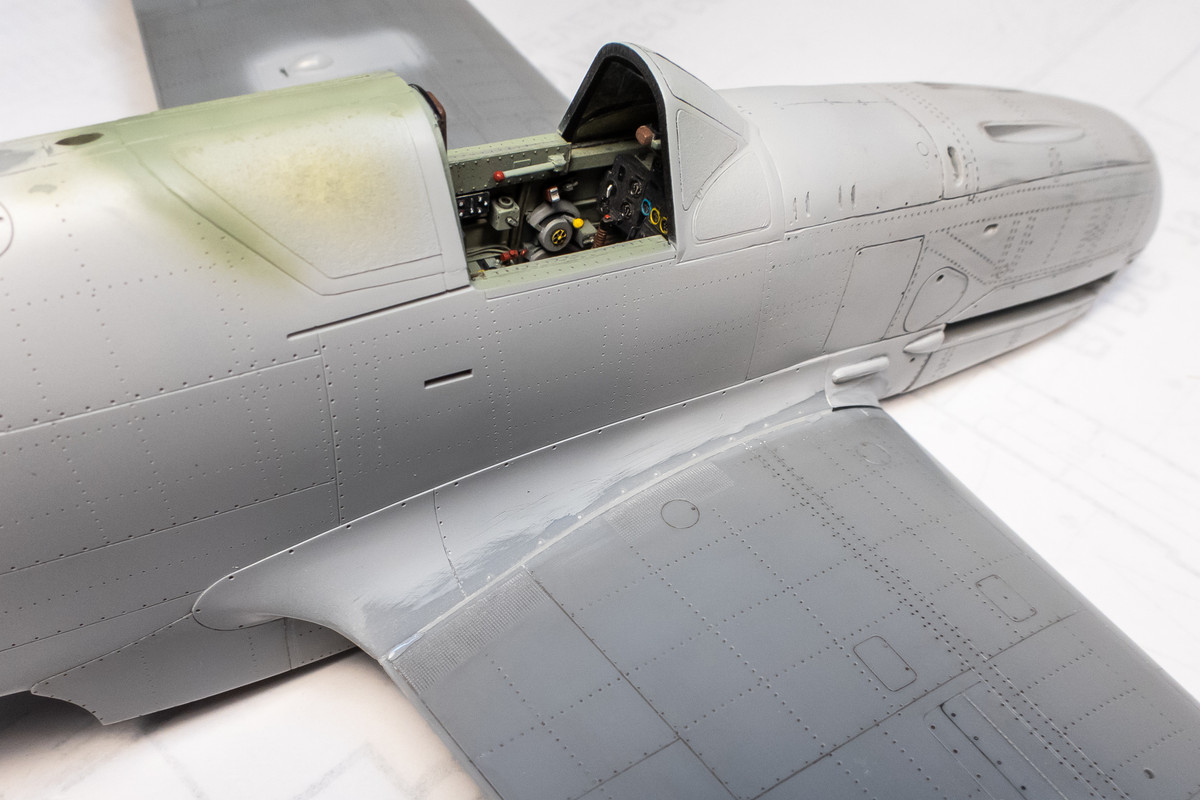
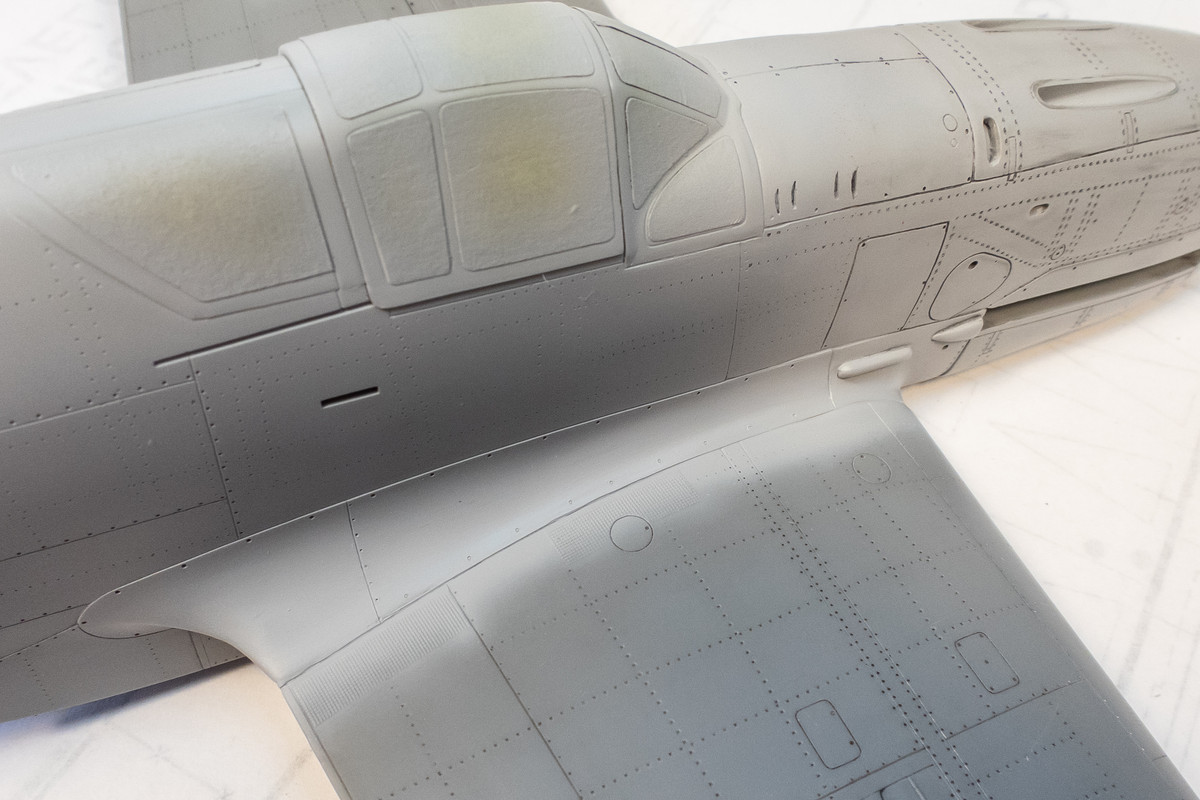
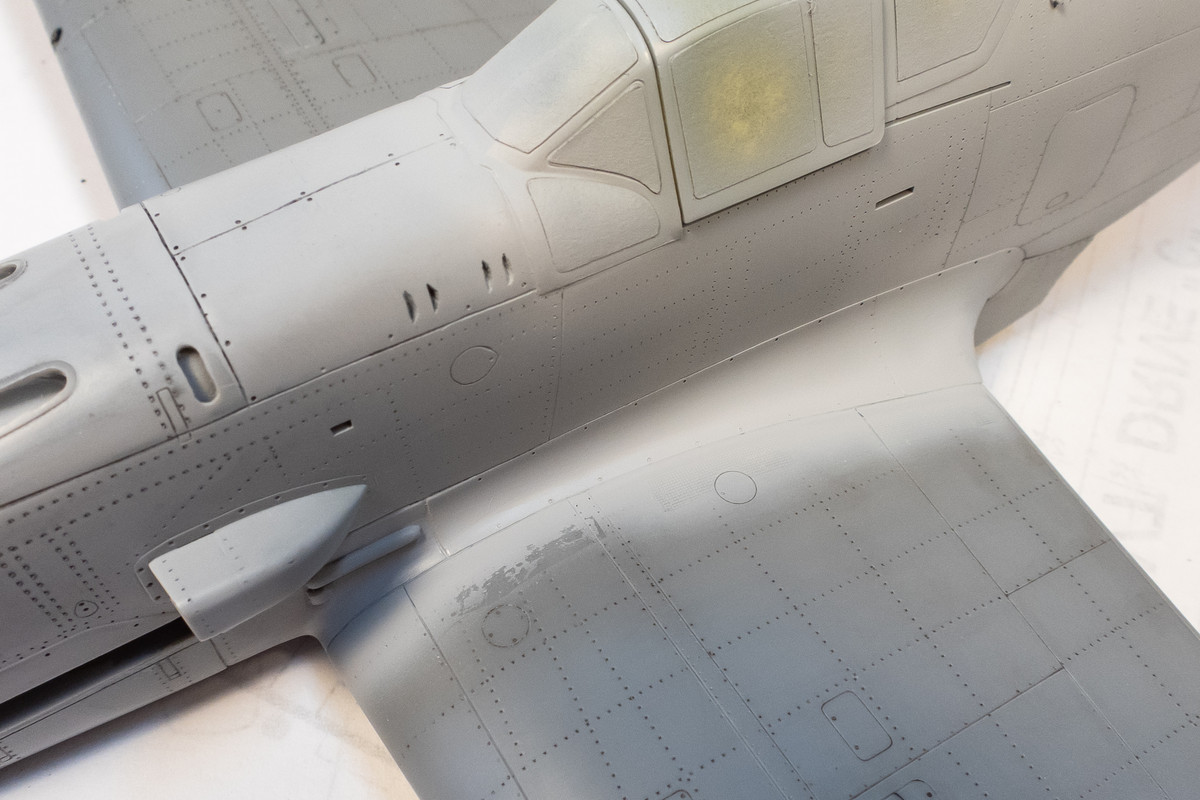
A bit of clean-up has been performed on the starboard wing bottom.
The wing root gap on the topside is being filled with stretched sprue on the plastic-plastic portions and black CA glue on the plastic-resin connection.
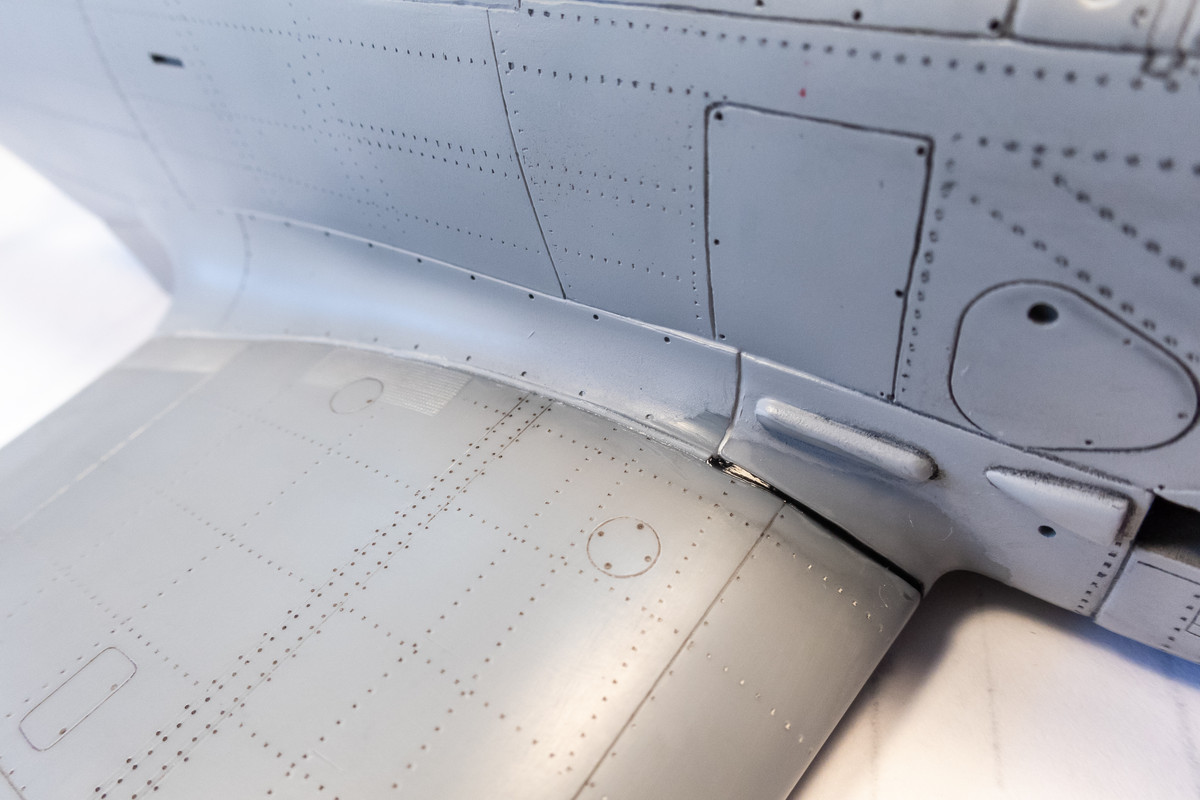
A bit of clean-up has been performed on the starboard wing bottom.
The wing root gap on the topside is being filled with stretched sprue on the plastic-plastic portions and black CA glue on the plastic-resin connection.
John aka JKim
-----------<><
-----------<><
-
BlackSheep214
- Elite Member
- Posts: 10422
- Joined: Sun Apr 06, 2014 8:47 pm
Re: 1//32 Hasegawa Ki-61-1 Tei Hien
I’ve heard of using stretched sprues for gap filling but never understood without photos. Now I understand it. What glue did you use for the stretched sprue.
Now sprue goo I’ve heard of, understood how to make it but never knew how it’s applied using… what?
Now sprue goo I’ve heard of, understood how to make it but never knew how it’s applied using… what?
“Who controls the skies, controls the fate of this Earth”
Author unknown- 352nd Fighter Group, Blue-Nosed Bastards of Bodney
“Send one plane it’s a sortie; send two planes it’s a flight; send four planes it’s a test of airpower. - Richard Kohn
Author unknown- 352nd Fighter Group, Blue-Nosed Bastards of Bodney
“Send one plane it’s a sortie; send two planes it’s a flight; send four planes it’s a test of airpower. - Richard Kohn
Re: 1//32 Hasegawa Ki-61-1 Tei Hien
I used Tamiya Extra Thin to weld the the stretched sprue into place. As the glue softens the plastic, I was able to push the stretched sprue further into the gap. I don't use sprue goo much anymore but the batch I made was in a bottle of Tamiya Extra Thin cement. And so, I was able to use the application brush that came with the bottle.
John aka JKim
-----------<><
-----------<><
Re: 1//32 Hasegawa Ki-61-1 Tei Hien
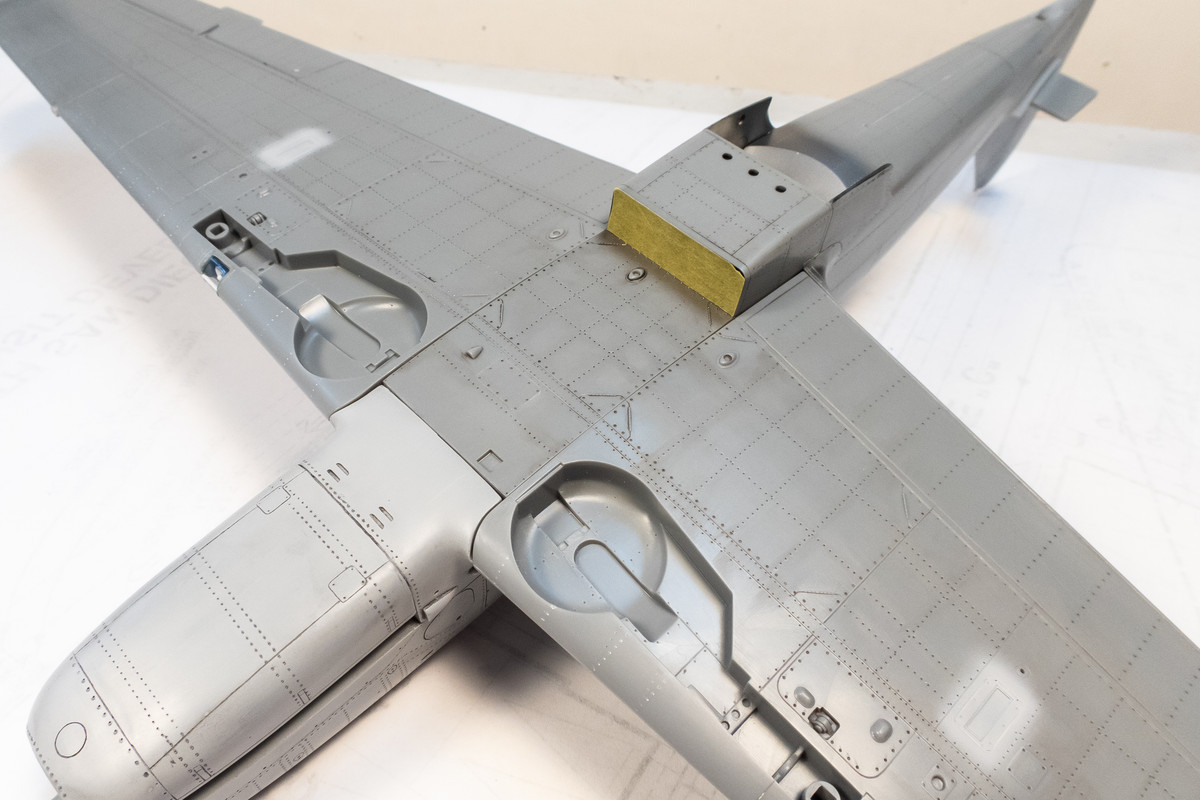
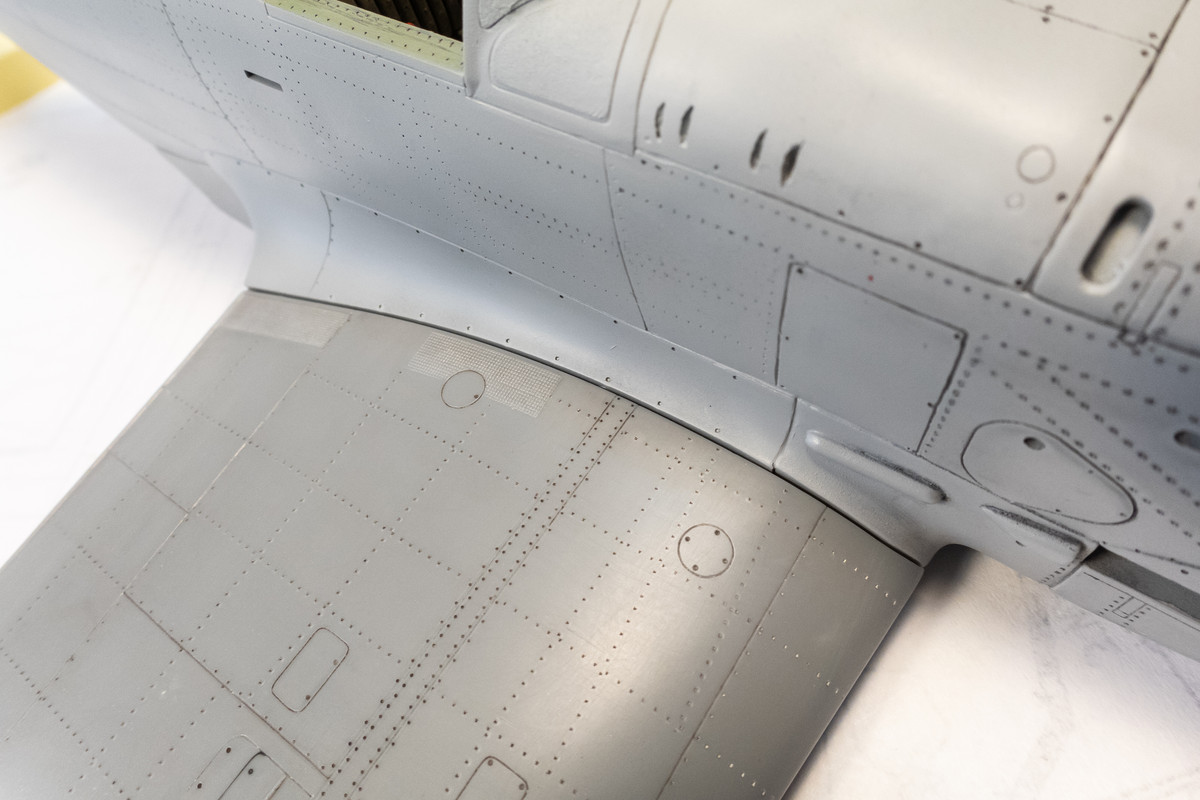
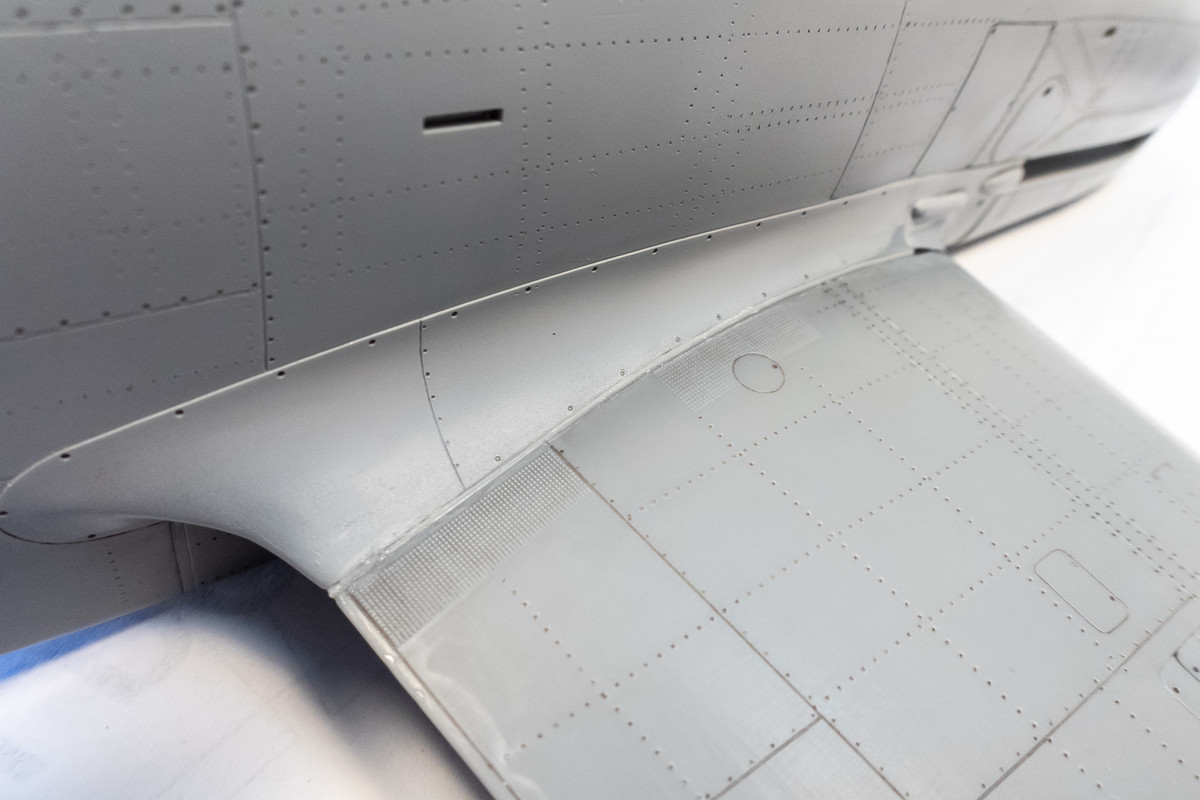
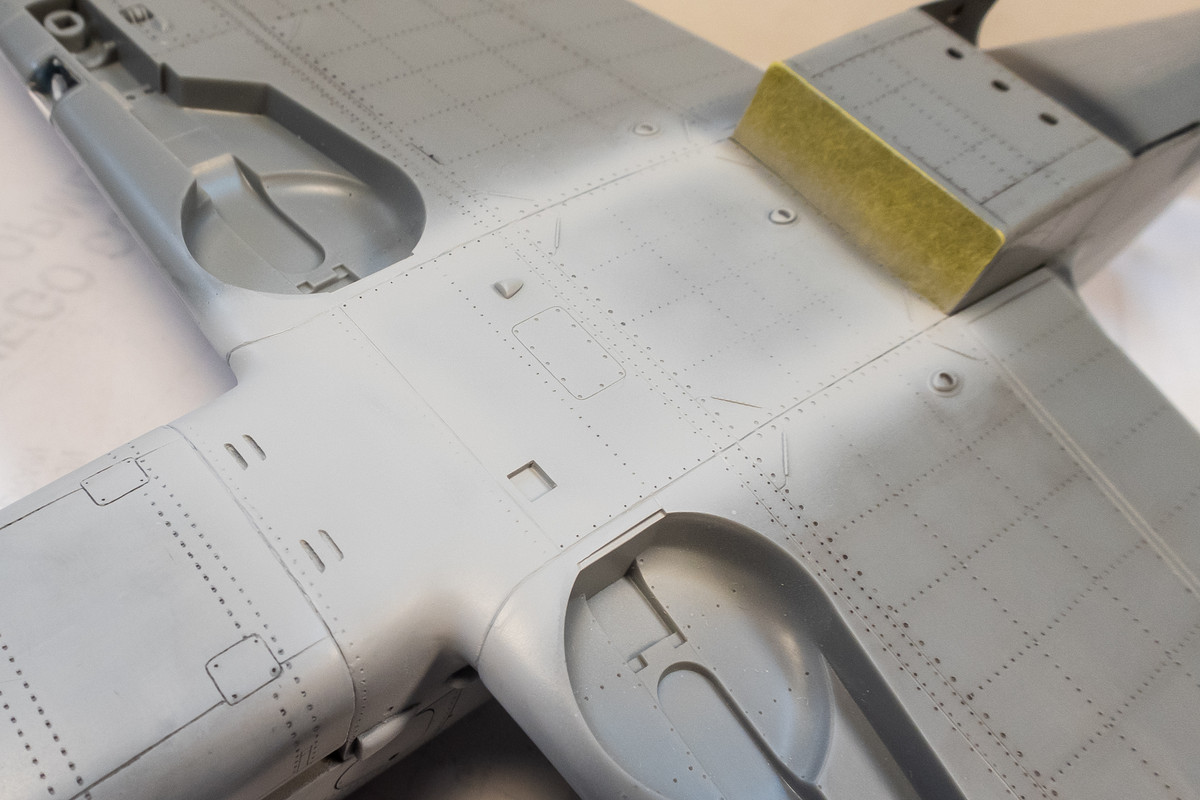
I've glued the port wing into place. Again, I used black CA to fill gaps and cleaned with debonder to minimize sanding.
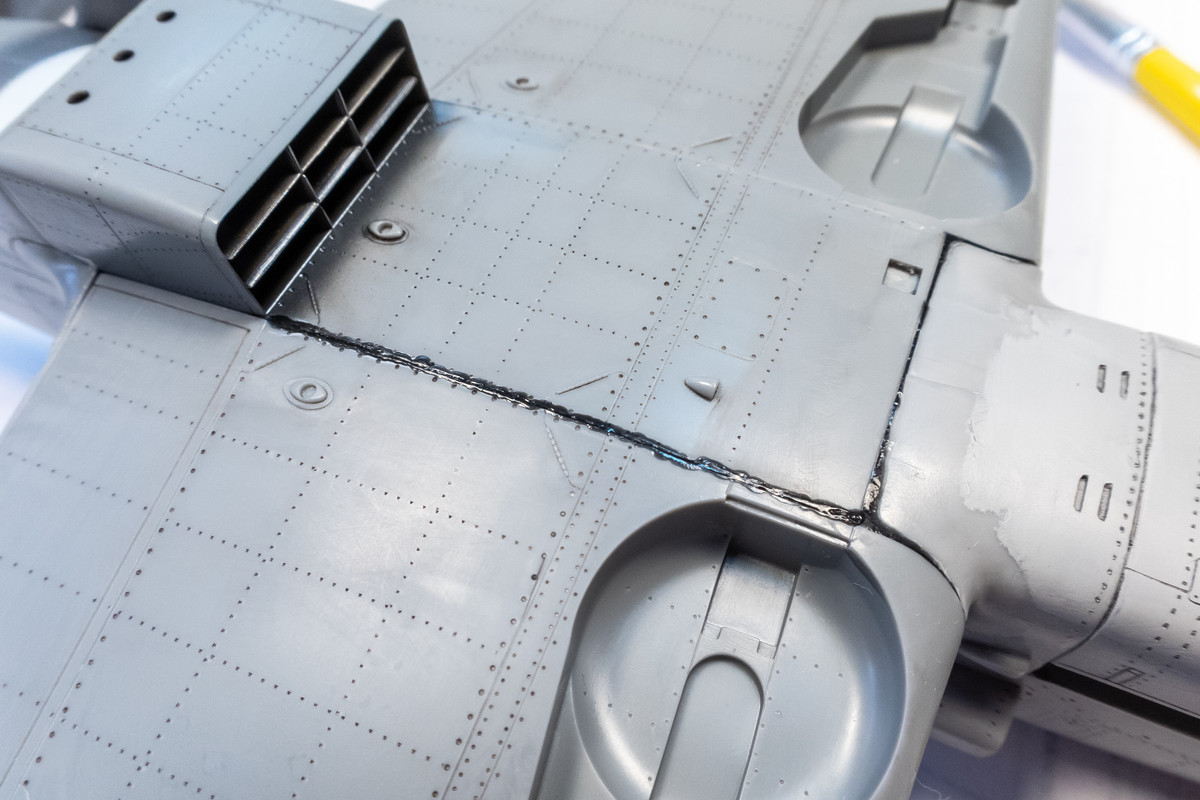
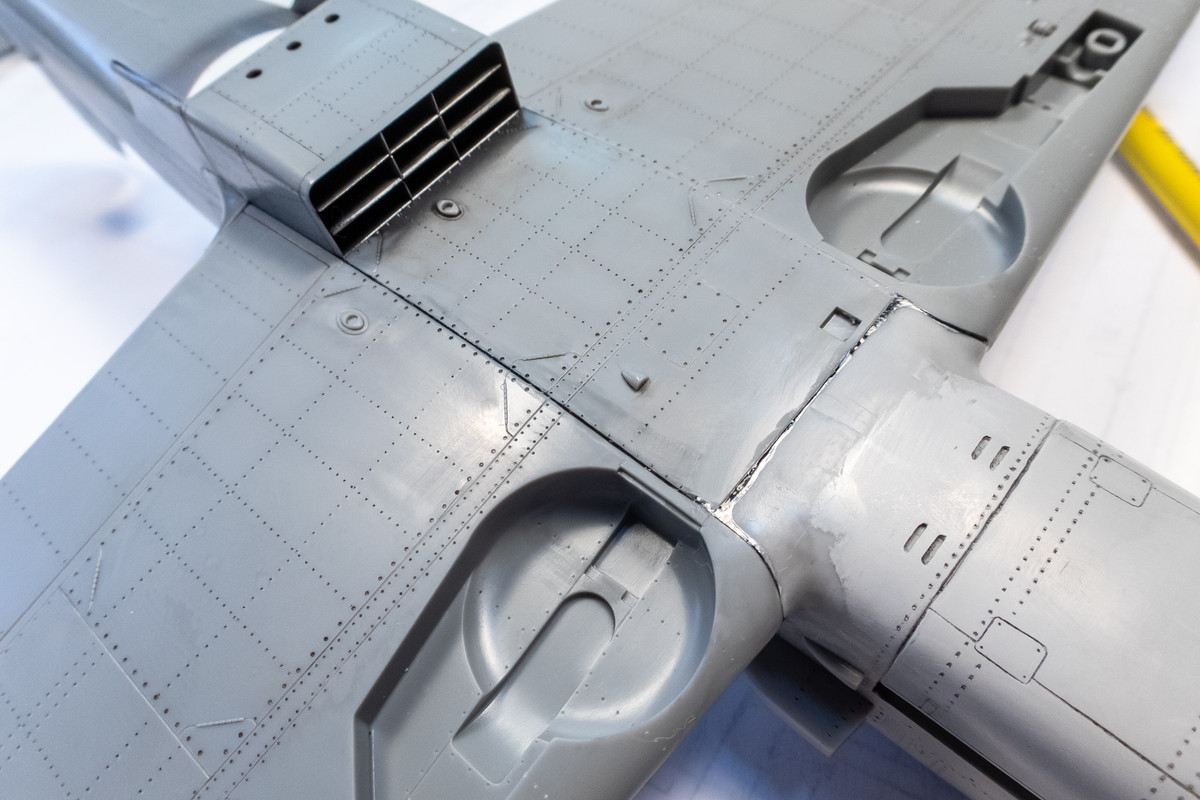
The port wing root gap is bigger than the starboard side so I used a thicker piece of stretched sprue to fill it.
I used a David Union rotary tool with a small ballhead attachment to grind down the raised portion of the stretched sprue. This was then sanded down further with sandpaper.
Mr Surfacer 1000 is used to touch up the joints as appropriate. A shot of Mr Surfacer Primer 1000 is applied to check the joins.
John aka JKim
-----------<><
-----------<><
-
Stikpusher

- Moderator
- Posts: 18880
- Joined: Sat Apr 05, 2014 8:37 pm
- Location: Ceti Alpha 5
Re: 1//32 Hasegawa Ki-61-1 Tei Hien
John, I may have missed an earlier explanation by you, but how do you clean up the excess Black CA with debonder? Do you just swab away the excess with something soaked in debonder?
"Surely I have made my meaning plain? I intend to avenge myself upon you, Admiral. I have deprived your ship of power, and when I swing 'round, I intend to deprive you of your life."
FLSM
FLSM