Page 5 of 6

Re: Tamiya 1/32 Spitfire XIVe Conversion

Posted: Tue Apr 23, 2024 11:15 am
by jkim
LyleW wrote: Sun Apr 21, 2024 6:55 am Wow, looking good on the mods. Been keeping up on FB, blad to see you back at the bench!
Thank you Lyle! The trip to Central Asia is always a high point of the year for me. The months of organizing and preparation, the actual trip itself and then the mental decompression and jetlag afterwards and going through all of my photos... it occupies most of my thoughts for a long period of time. I took about 4,000 photos, which I have to go through and process via Lightroom. From those 4,000, I post about a couple hundred on FB. And then I have to distill those to about 50-75 for a slideshow.

https://youtu.be/M6hVIJZMso8?si=VegIU27ftOH0gtjP (Religious in content so be forewarned!)

Stikpusher wrote: Sun Apr 21, 2024 9:47 am Oh I’m looking forward to seeing what comes next in the cockpit!

:popcorn:

Good to see your back on here and at the bench again John!
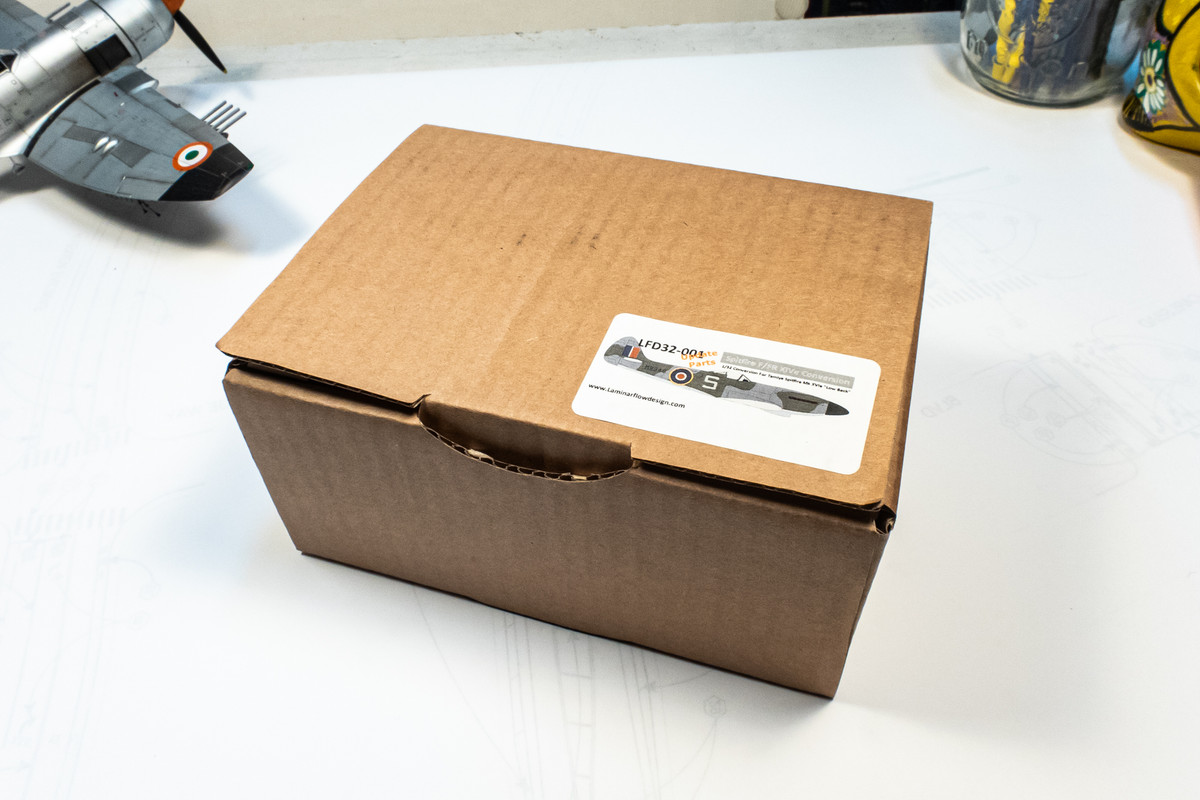
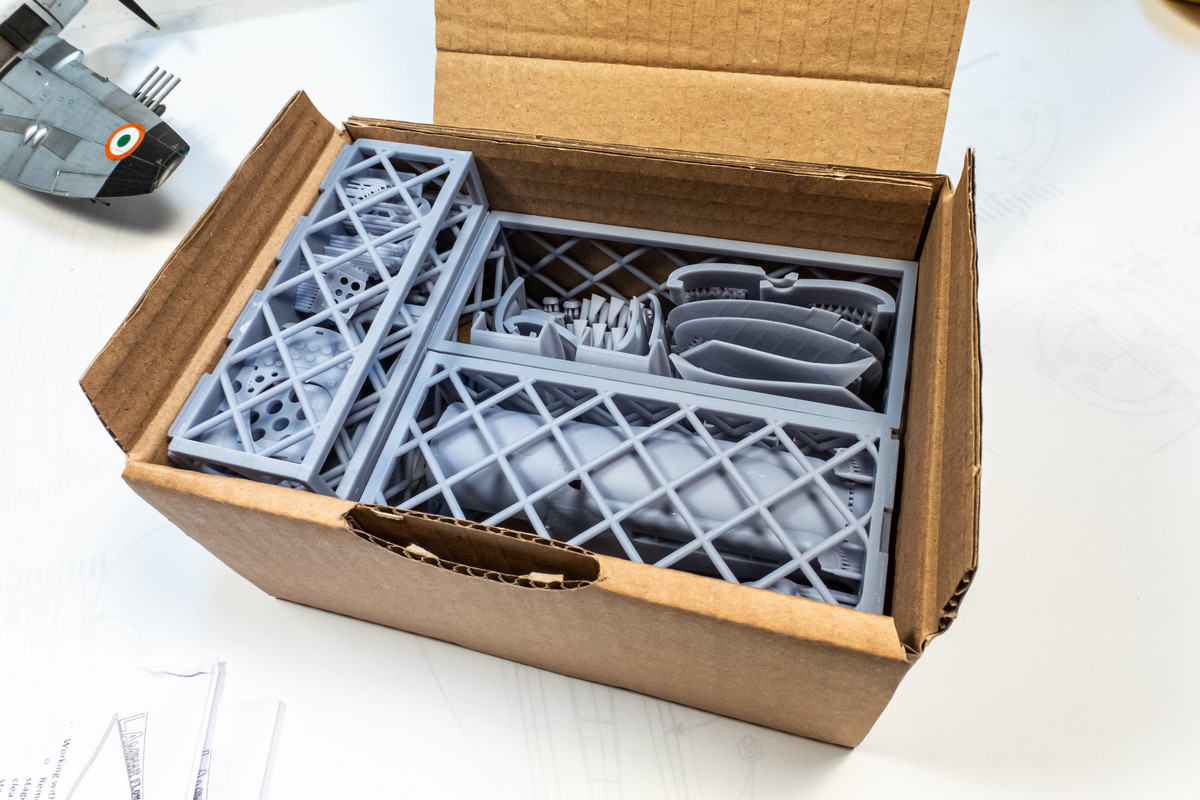
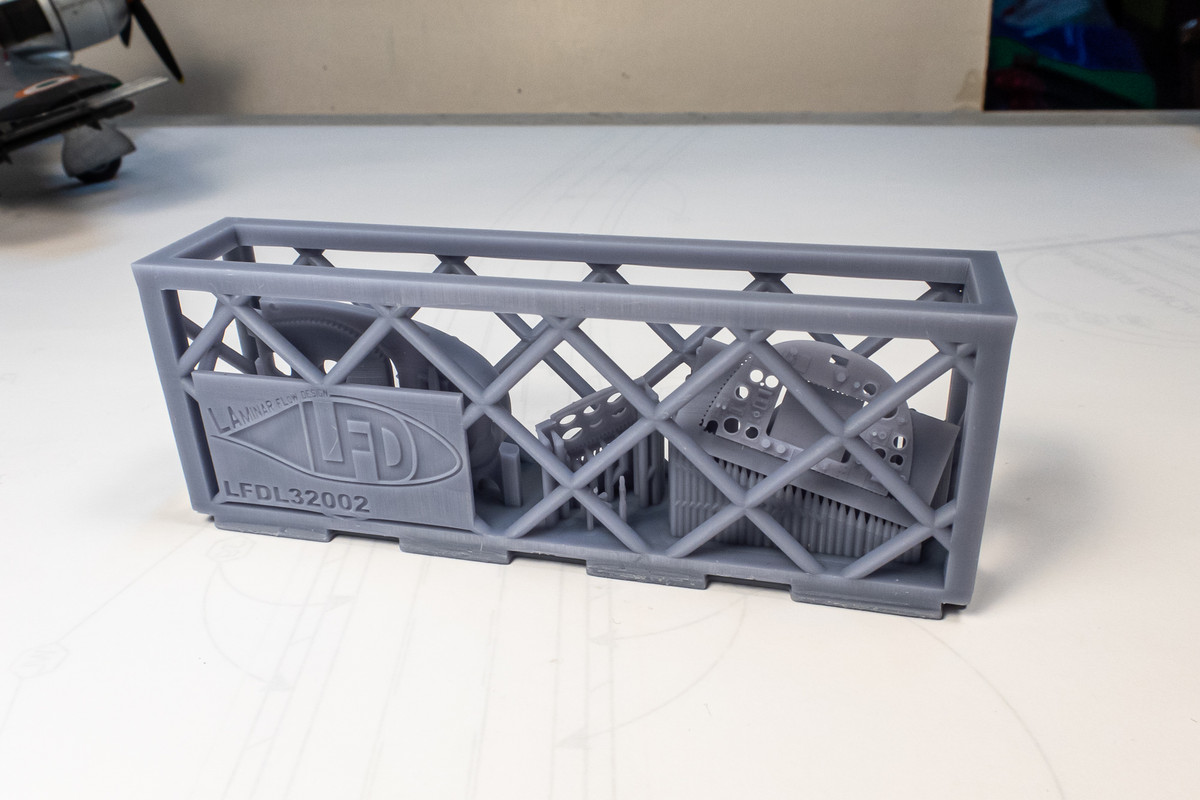
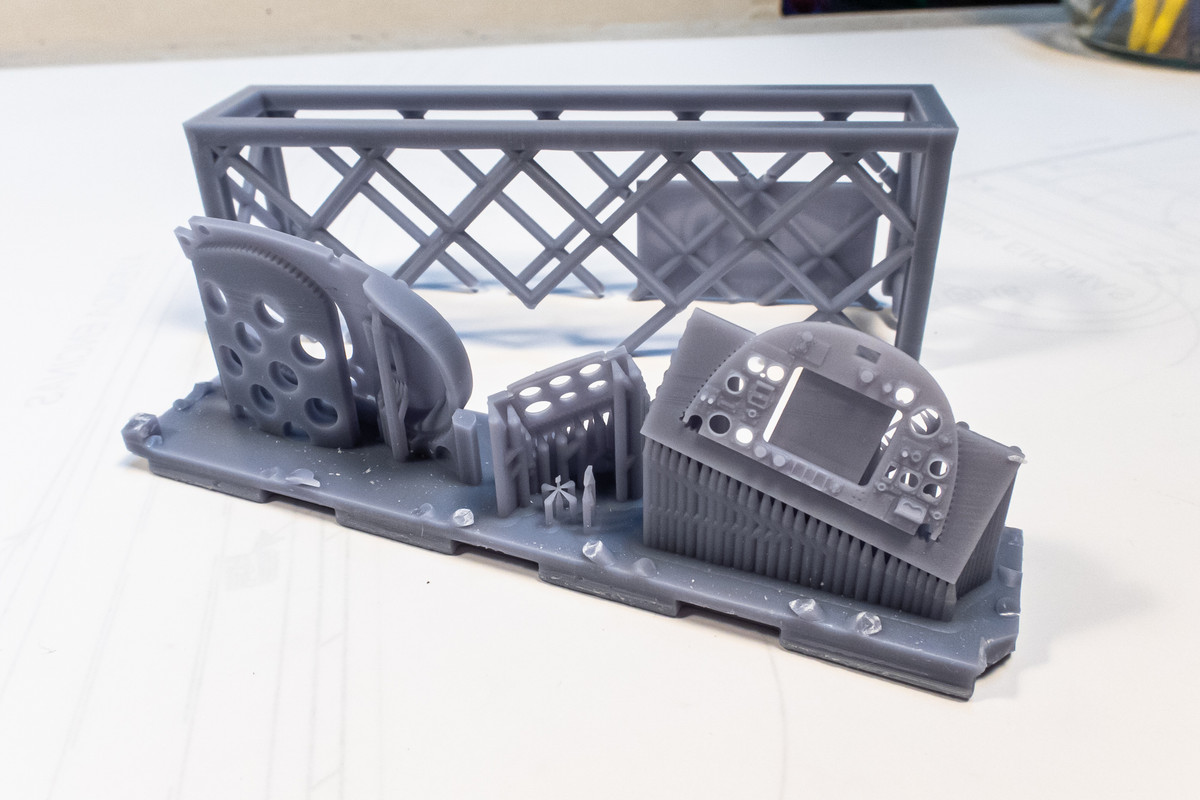
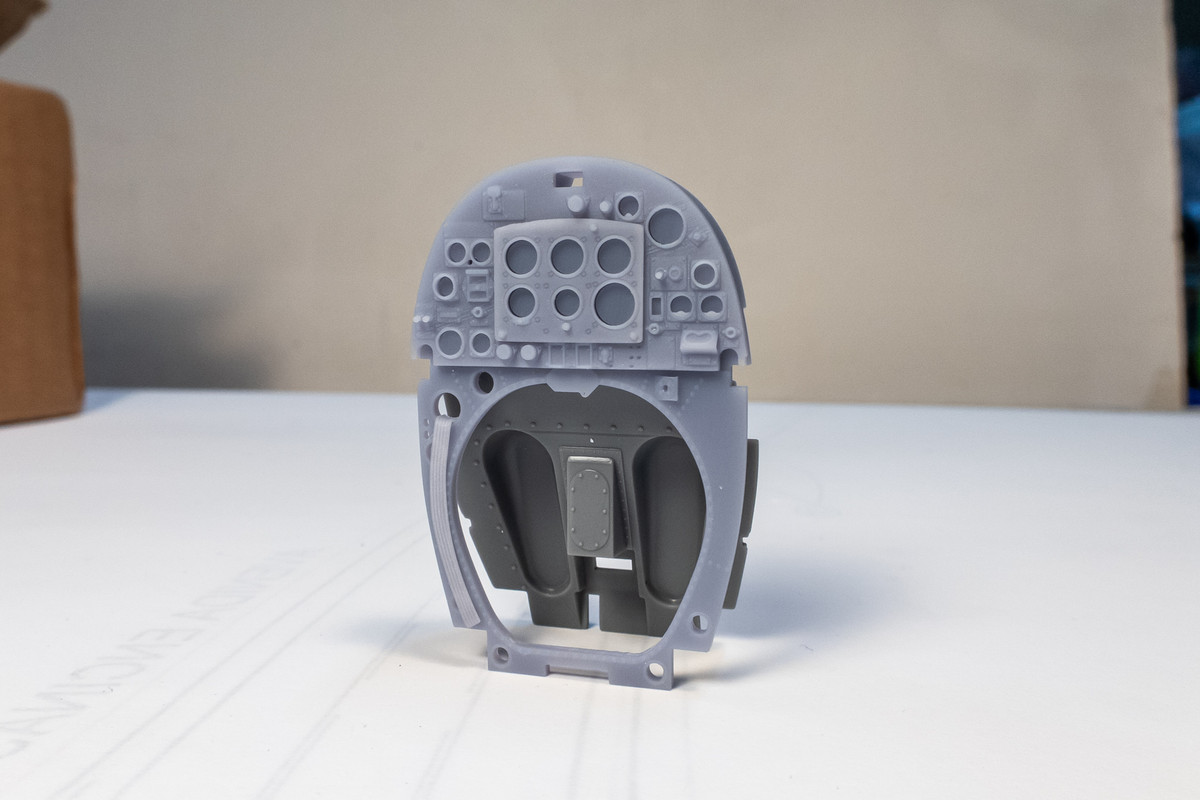
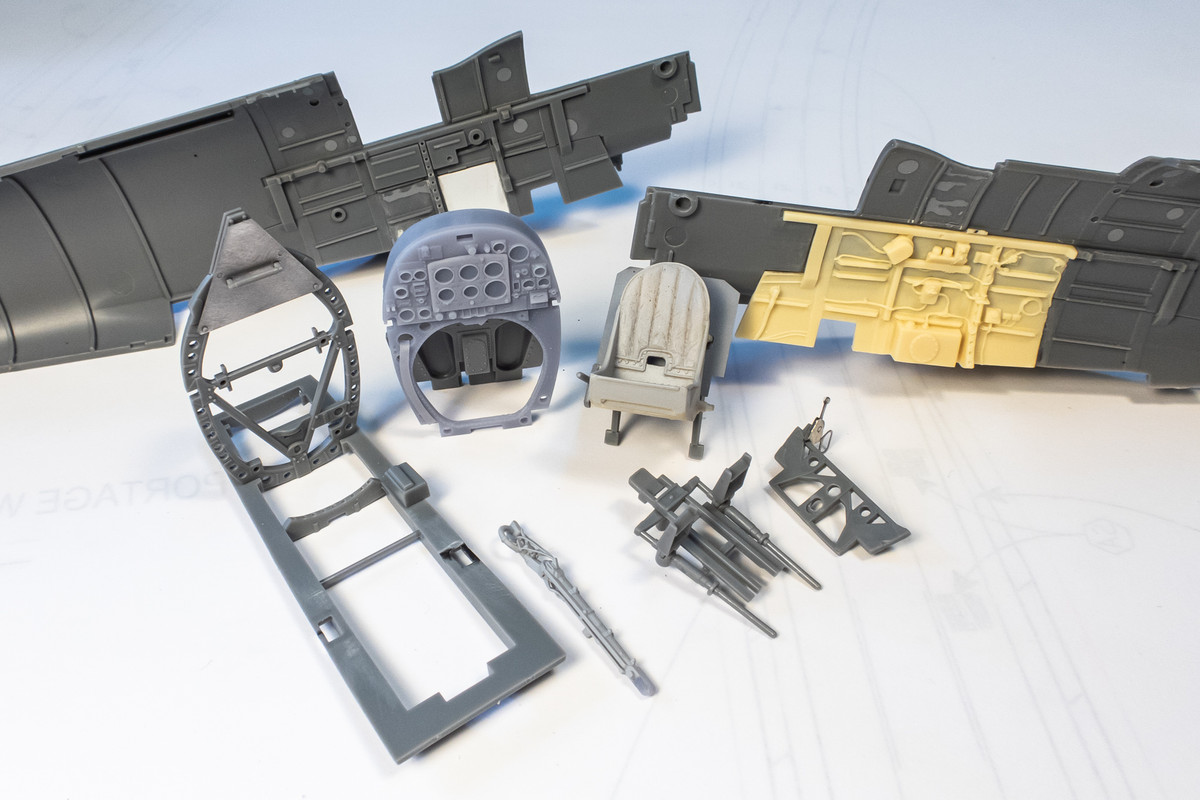
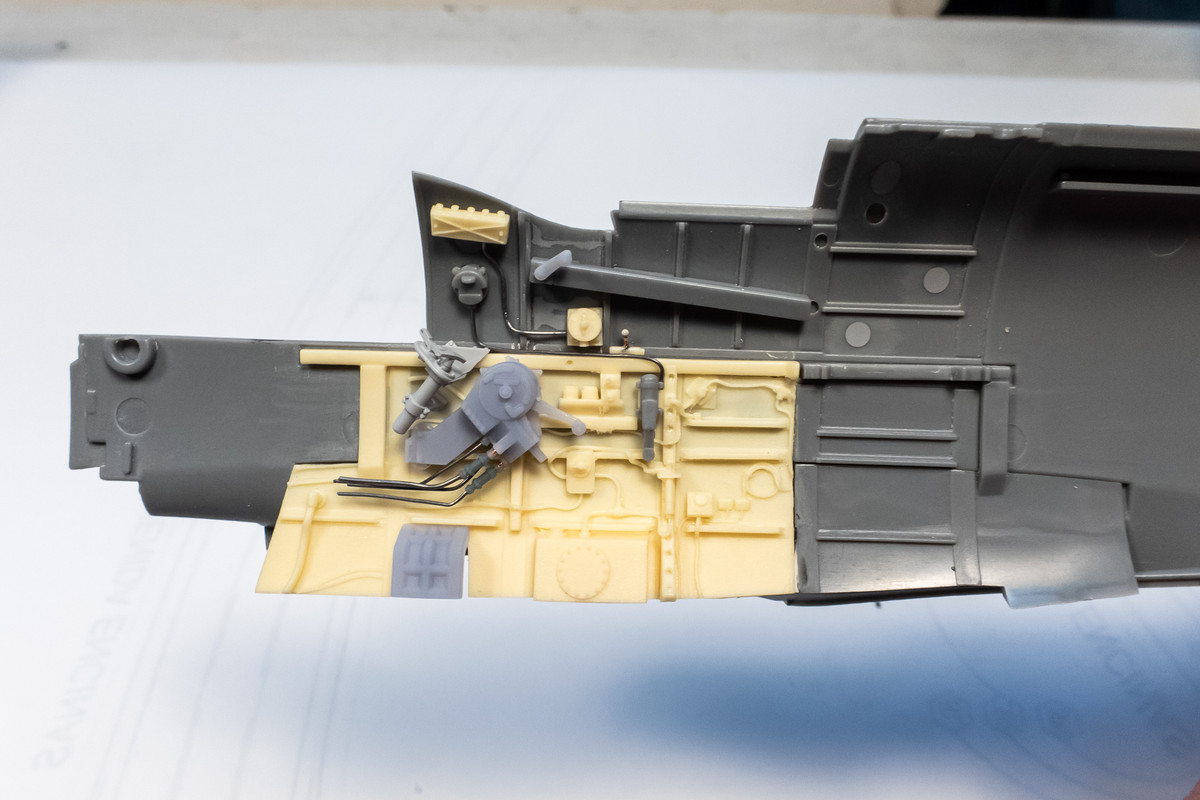
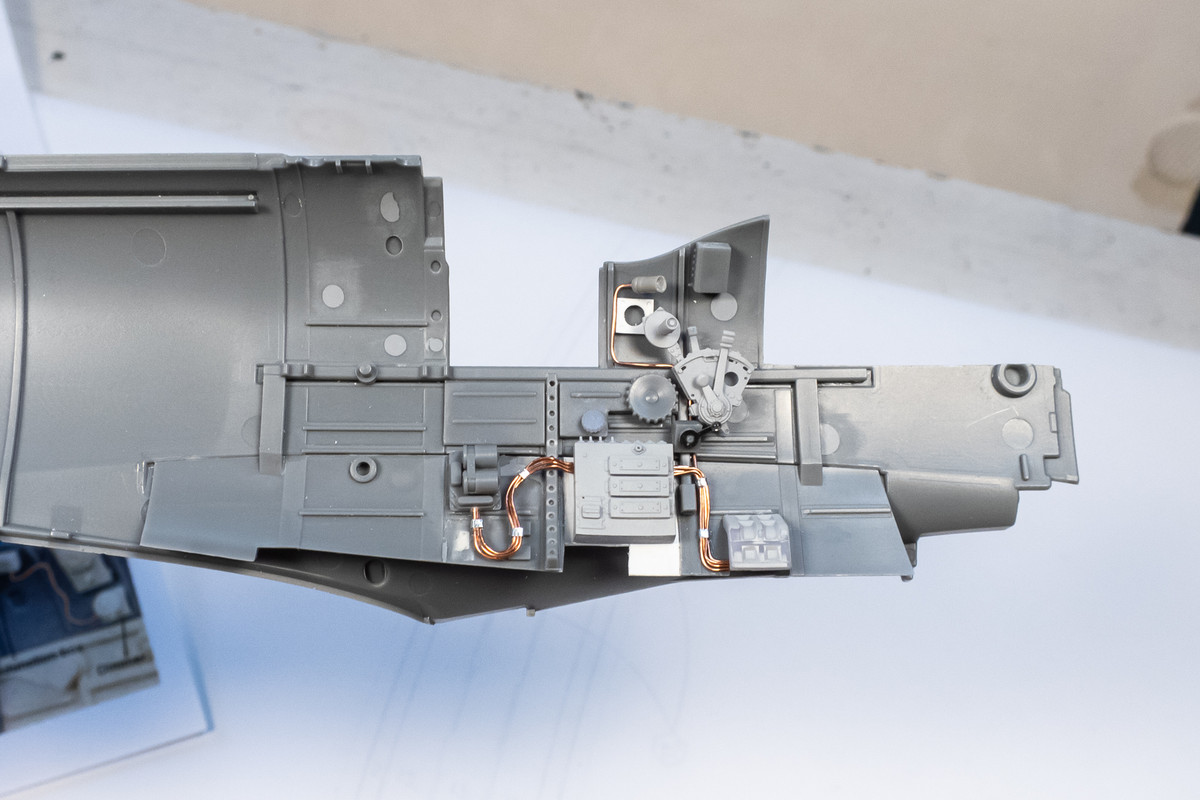
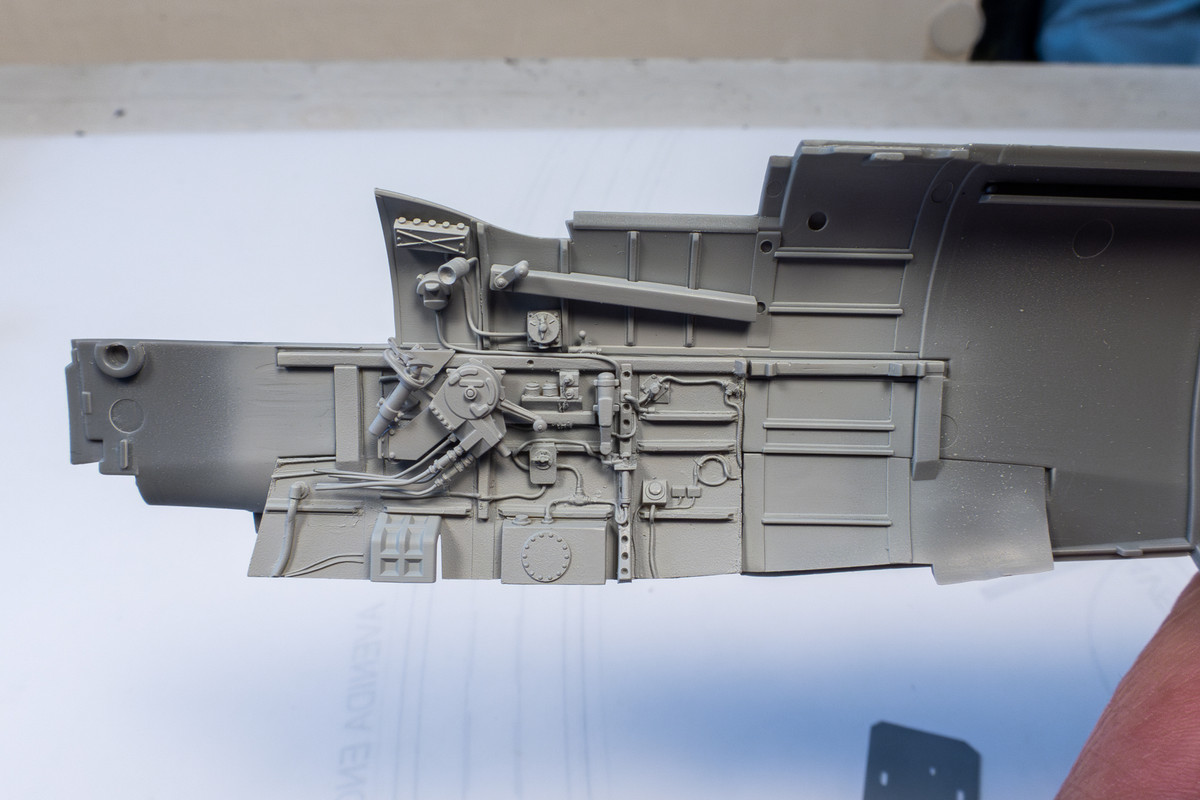
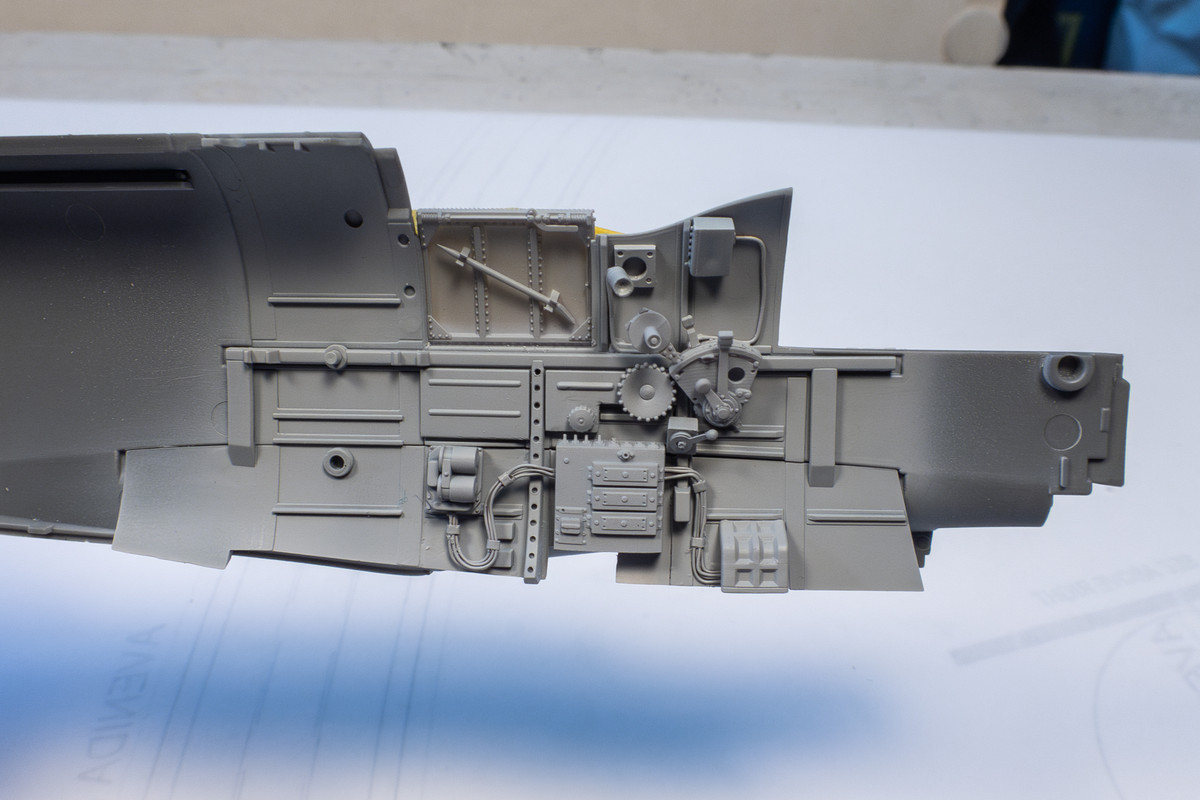
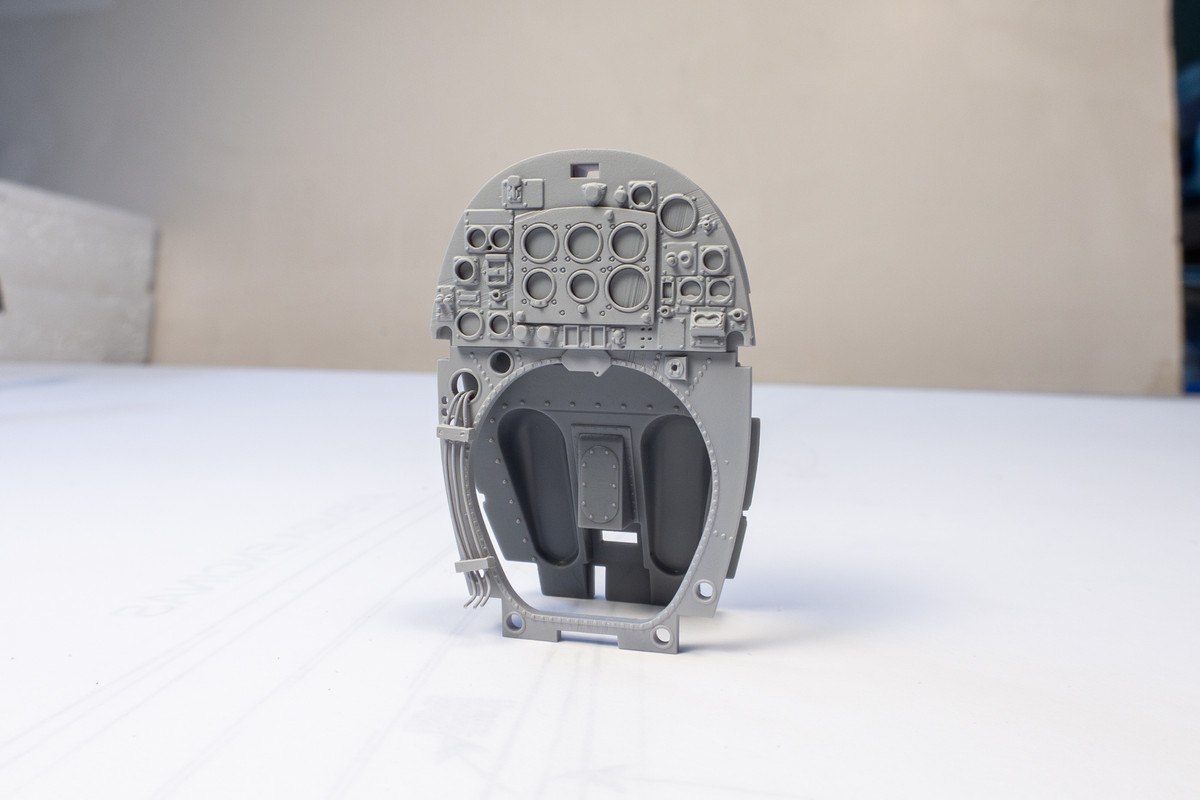
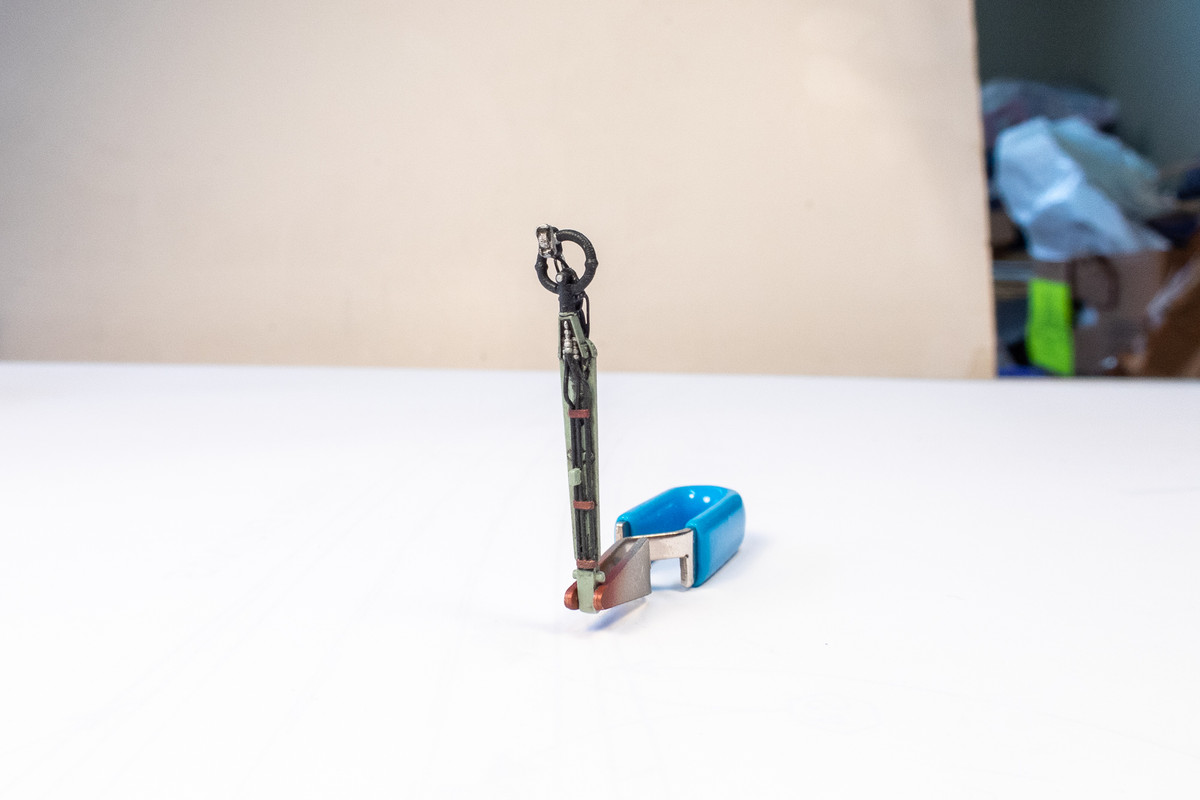
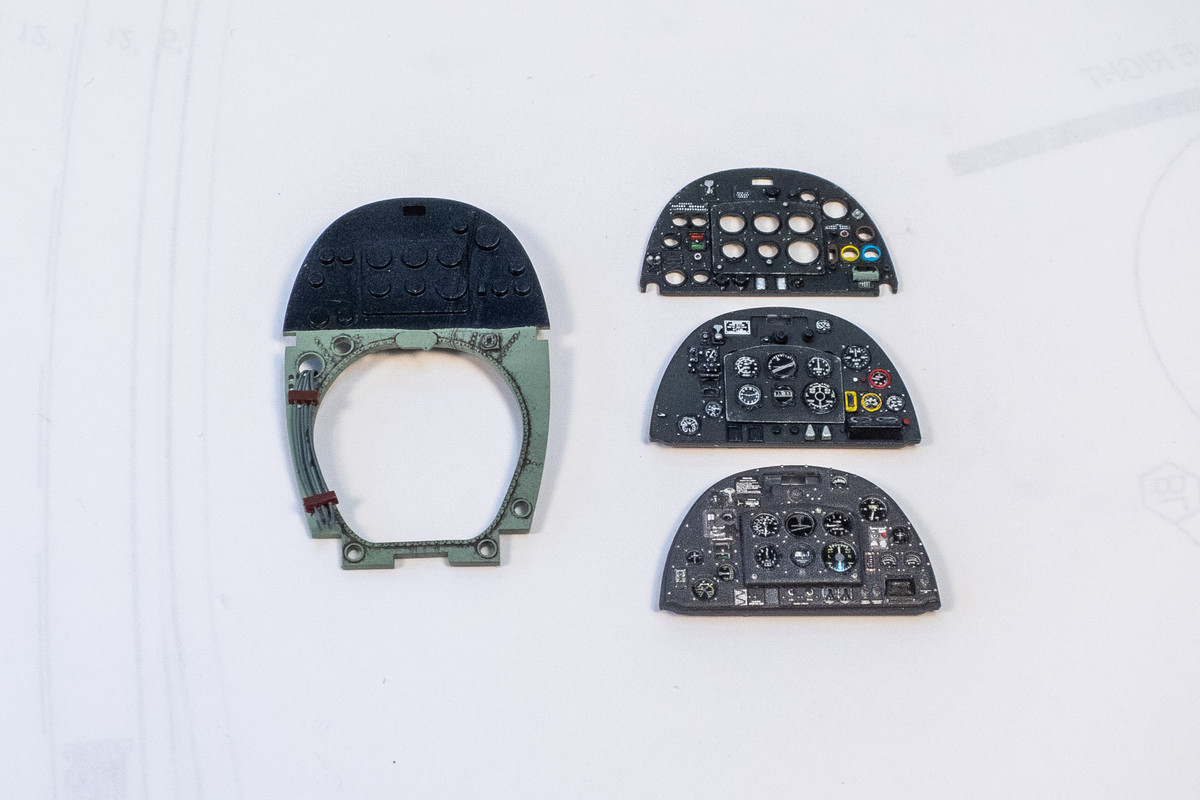
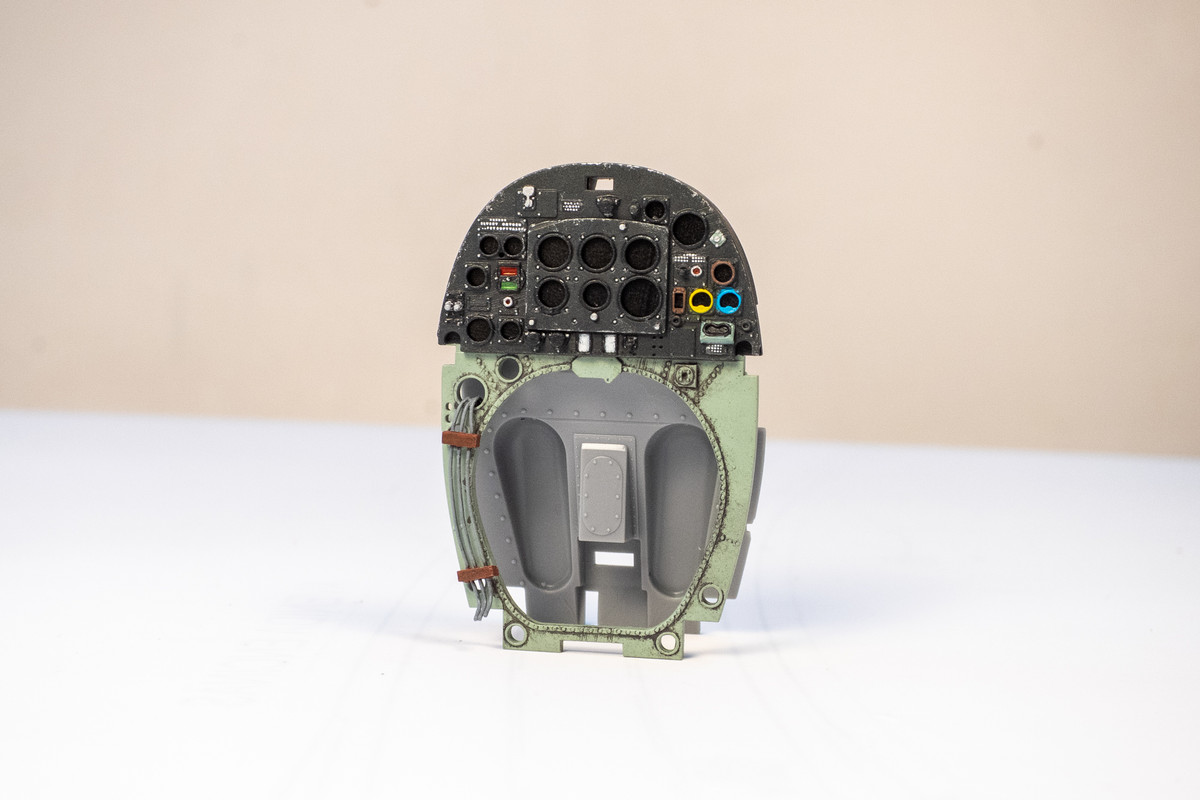
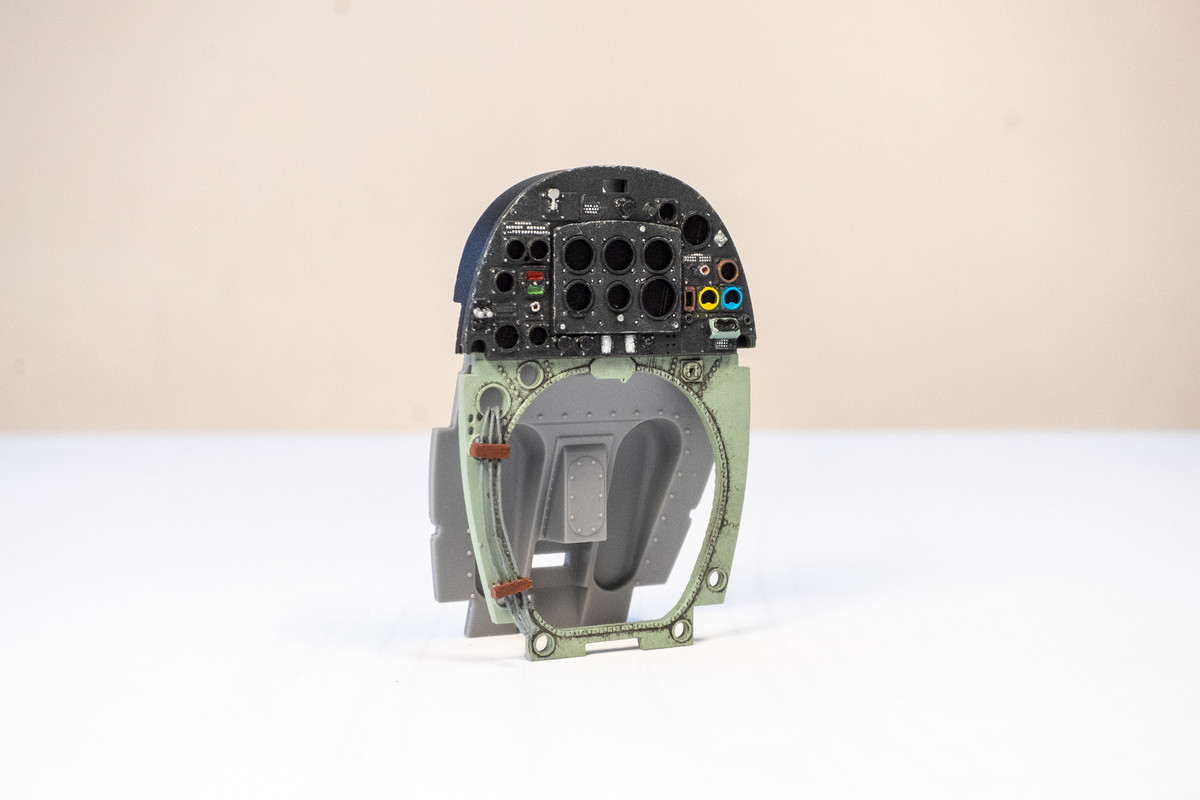
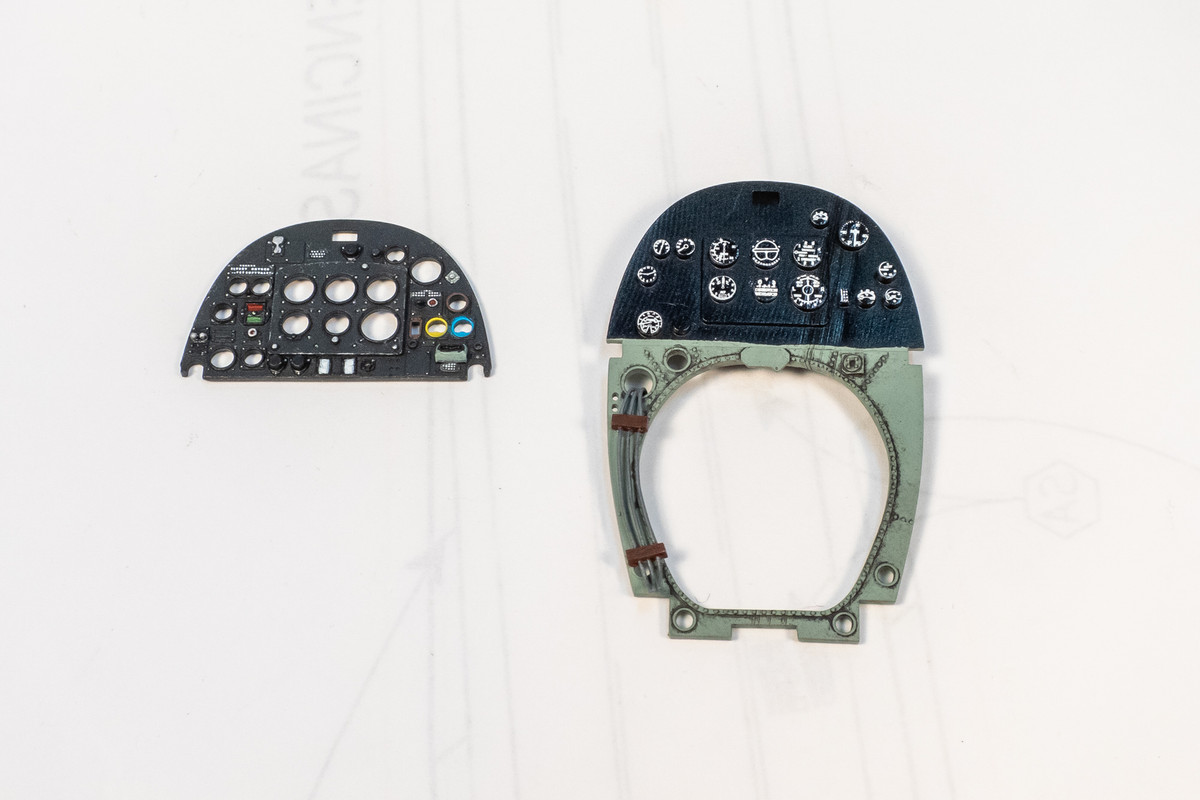
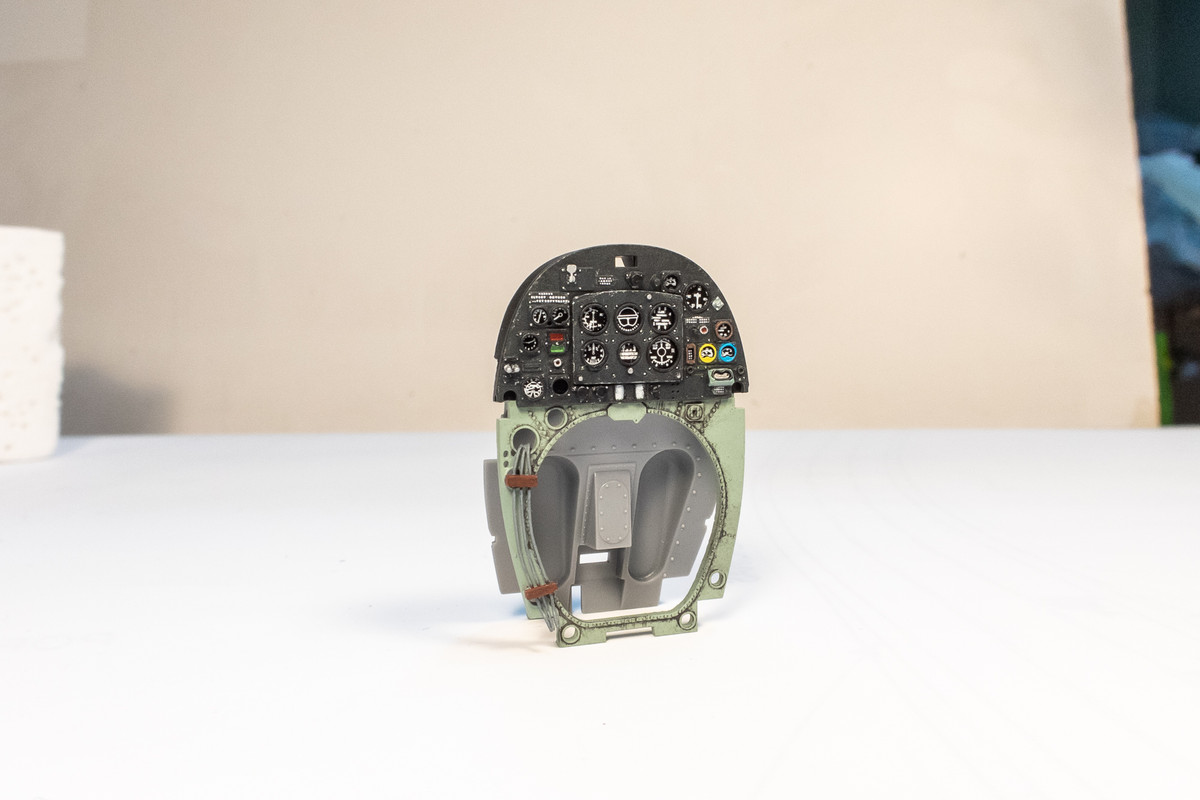
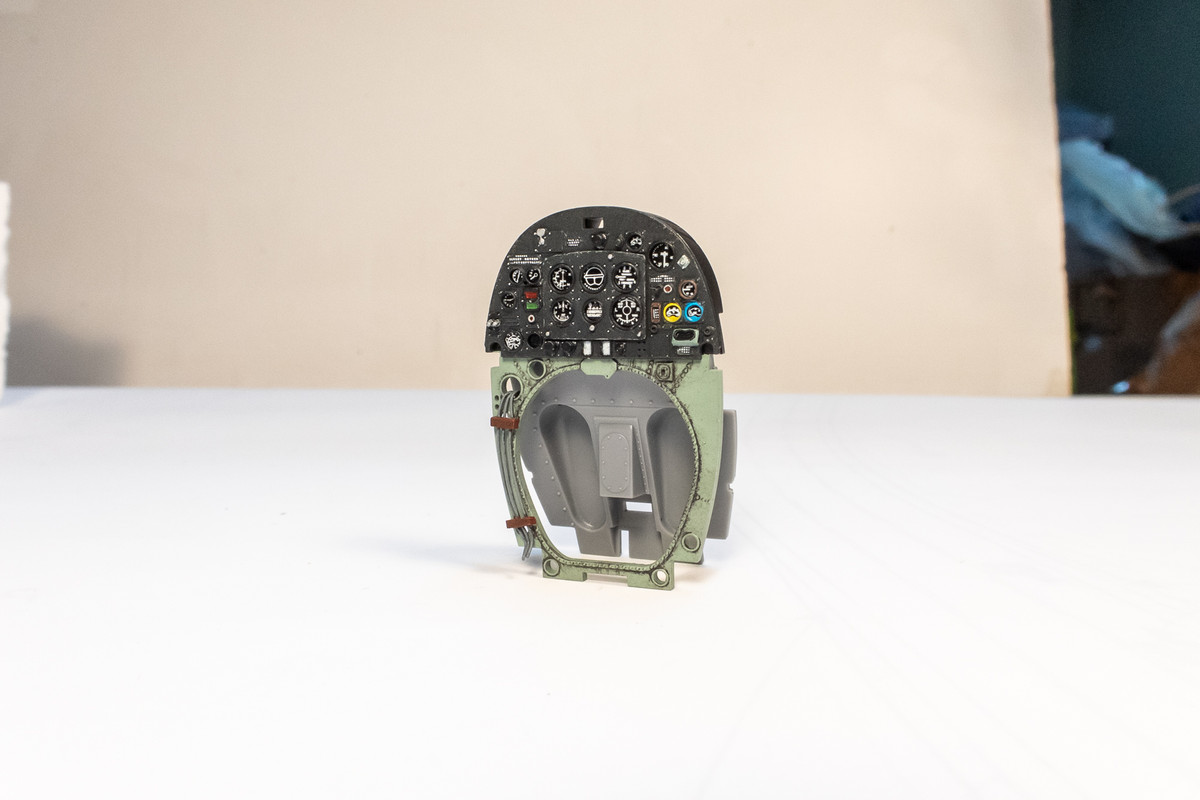
Thanks Carlos! Yeah, I'm excited to see how the cockpit is going to turn out. Really happy that Laminar Flow Design produced the cockpit details as they represent a major upgrade to many of the cockpit components, most notably that big electric box and throttle quadrant.

Medicman71 wrote: Sun Apr 21, 2024 2:04 pm That's gonna be a really nice looking cockpit!

Welcome back John!! :shoutout: :shoutout:
Thank you Mike! It's good to be back and modeling again!

tempestjohnny wrote: Mon Apr 22, 2024 3:13 am Details details. Lots of great stuff happening in the cockpit
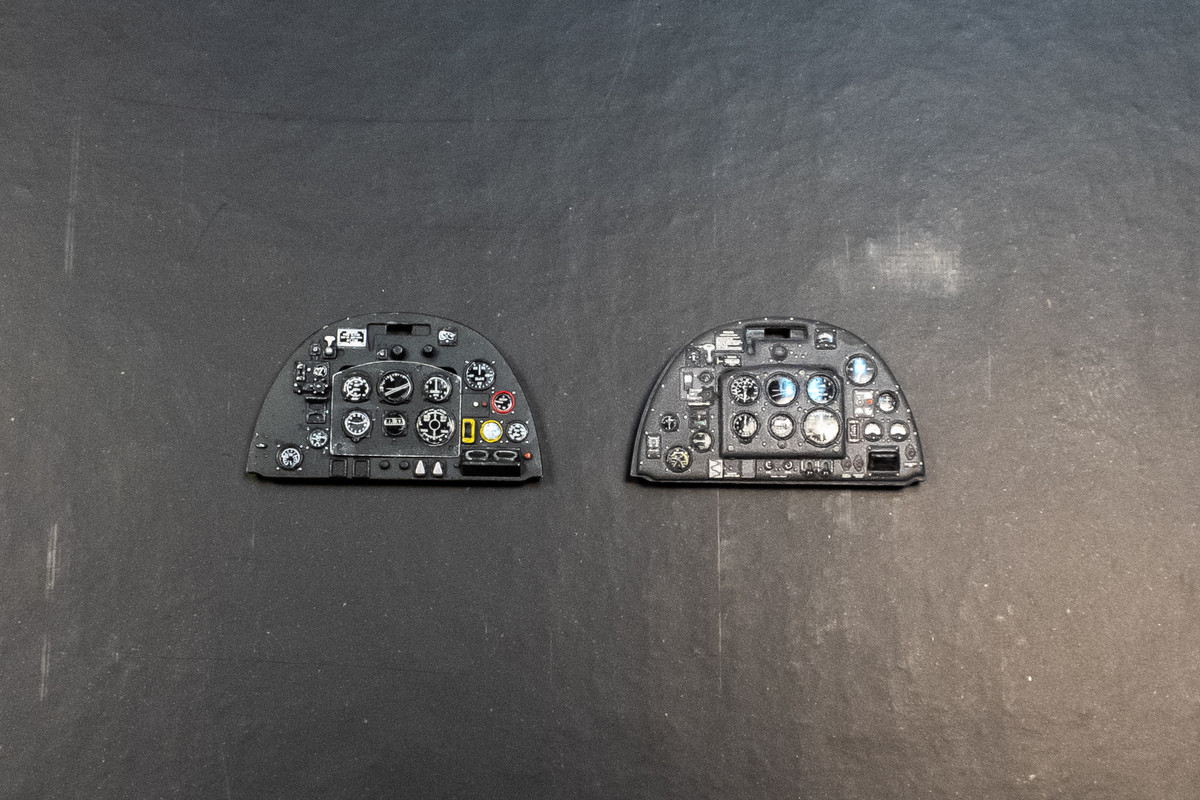
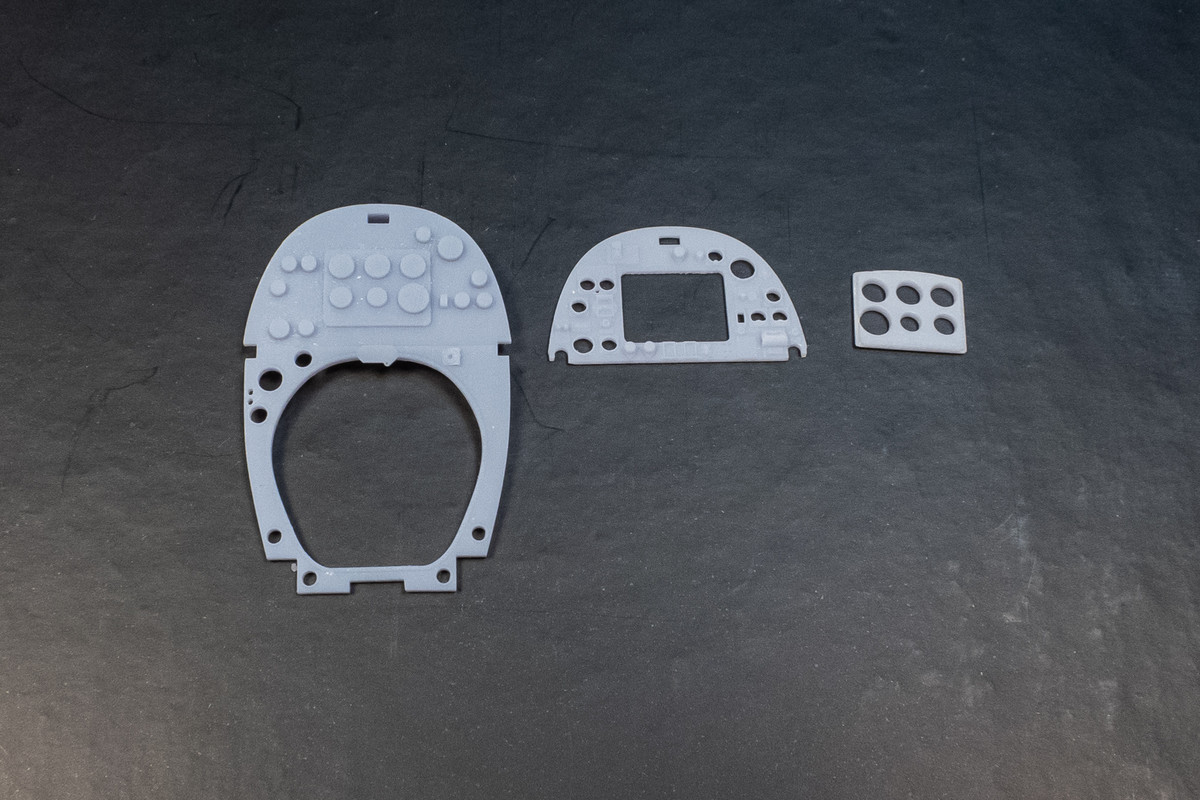
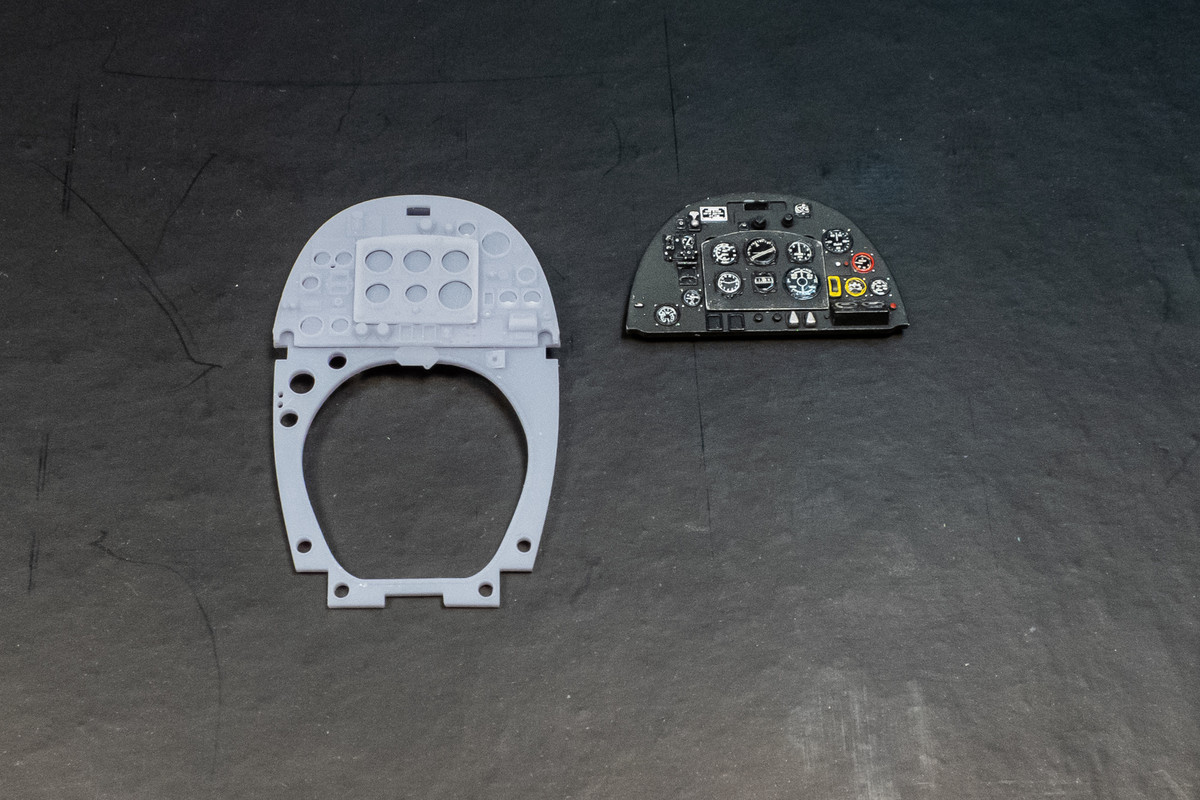
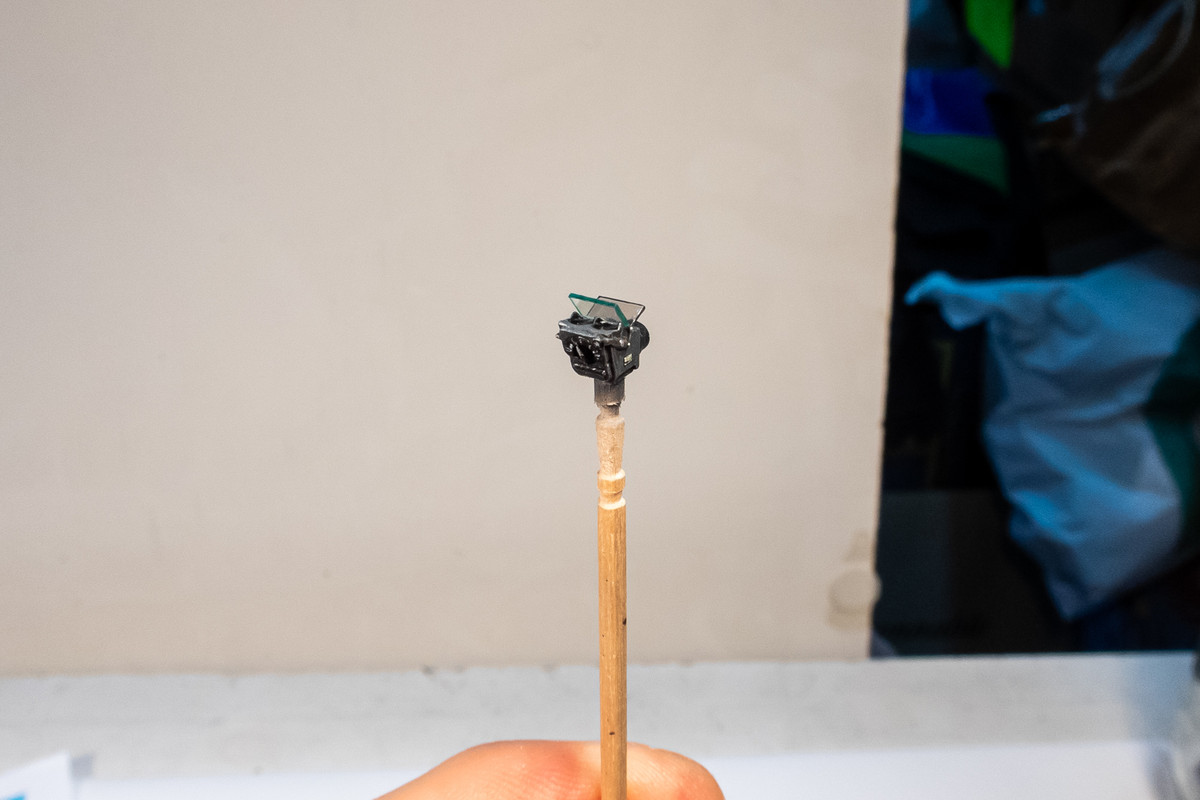
Thanks Johnny! Lots of great details, I agree. Gonna take a pause here as I'm awaiting some replacement parts from Laminar Flow Design including, hopefully, a 3D-printed instrument panel. In the meantime, I'm gonna spin up a new project, which you may like given your screen name!

Image

Re: Tamiya 1/32 Spitfire XIVe Conversion

Posted: Tue Apr 23, 2024 5:57 pm
by tempestjohnny
Very nice. The Tempest II reminds me of a Sea Fury

Re: Tamiya 1/32 Spitfire XIVe Conversion

Posted: Tue Apr 23, 2024 10:07 pm
by BlackSheep214
Great to see you back at this. Definitely miss watching your work come together. Incredible work on the cockpit walls.

Re: Tamiya 1/32 Spitfire XIVe Conversion

Posted: Sat May 25, 2024 9:17 pm
by jkim
Back to the Spitfire XIVe!

One of the reasons I put a pause on this build is that Mathieu at LFD informed me that he had updated the cowling for the XIVe conversion and was sending it to me. It was worth the short wait.
Image

I love how Mathieu incorporates a rectangular cage around the printed arts, protecting them during the shipping process.It looks like he sent me the entire conversion set and an additional goody... thank you, Mathieu!
Image

Also included is this new 3D-printed instrument panel. I was most curious about this so I decided to take a closer look.
Image
Image

As you may recall, I have two previous version of the panel already. One is the kit panel, slightly modified with the addition of Airscale instrument bezels to give more 3D relief to the panel. The other is the Quinta panel, which is incredibly detailed but I don't like the "pillowed" look around the edges of the parts.
Image

The LFD panel, which is comprised of three big parts and a couple of small levers, looks very promising and may be superior to the previous two if I can paint it adequately.
Image
Image

Here is the panel mounted onto the front cockpit bulkhead. Mathieu thoughtfully included the wiring loom on the left side.
Image

But I chose to work up a scratch-built alternative using bits of styrene and copper wire.
Image

I'm slowly familarizing myself with this build and working very slowly. I'm trying to identify sub-assemblies that can be glued together prior to painting. The Barracuda starboard sidewall and modified kit port sidewall have been glued into place.
Image

The bubble top XIVe has a canopy crank on the starboard sidewall that needs to be utilized, which forgot to include in the last mock-up of the starboard interior. LFD has a crank replacement in its cockpit set so the kit crank is trimmed off and replaced with the new one.
Image
Image

Re: Tamiya 1/32 Spitfire XIVe Conversion

Posted: Sun May 26, 2024 2:39 am
by KSaarni
jkim wrote: Sat May 25, 2024 9:17 pm
Image
Astonishing details or then that Xacto blade is in scale 5:1 !

Great that the build continues John !

- Kari

Re: Tamiya 1/32 Spitfire XIVe Conversion

Posted: Mon May 27, 2024 11:50 am
by jkim
Thanks Kari! Yes, the details from the Laminar Flow Design sets are impressive and some parts are pushing the edge of what is practical, I think. It's almost necessary to have two full copies of the Cockpit Set because of the unavoidable loss and breakage of small parts. Luckily for me, Mathieu DID include a second set with mine, labelled as a free sample copy. I've dipped into that reserve liberally.

Plodding forward with the cockpit details, trying to juggle how the LFD, Barracuda and Tamiya parts fit together. The starboard sidewall is an example of that hodgepodge. I've used the Barracuda sidewall, gyro gunsight dimmer and junction box (yellow resin) and the LFD landing gear quadrant, cylinder priming pump, canopy crank handle and waffle foot plates. The kit parts for the emergency landing gear lever and Morse Code key are still used. And I've added wiring via lead wire.
Image

Similar work on the port side of the cockpit except I've elected to use copper for the wiring for some random reason. The LFD throttle quadrant, electric control box and waffle foot guards are mixed with the kit trim wheel, radio, carb intake lever and relocated voltage regulator.
Image

I wasn't happy with the previous version of the gunsight so I took my spare Type II Gyro Gunsight from the Tempest V and painted it up. I've elected not to mount a sun shade on it.
Image

Re: Tamiya 1/32 Spitfire XIVe Conversion

Posted: Mon May 27, 2024 4:27 pm
by jkim
A coat of primer (Mr Primer Surfacer 1000) helps to tie all of the different materials (plastic, resin and metal)together and gives a better perspective of the work so far. Not everything is glued into place yet. I've kept the more complex items (throttle & landing gear quadrant, electric control box, etc) separate to make painting easier.
Image
Image

Primer also helps to show off the surface detail of the resin parts. This is the Laminar Flow Design 3D-printed instrument panel before painting.
Image

Re: Tamiya 1/32 Spitfire XIVe Conversion

Posted: Wed May 29, 2024 3:59 pm
by jkim
Well done aftermarket parts made of brass and resin look so impressive under a coat of primer that I feel hesitant about moving on to the actual painting. But I've forced myself to get on with it and have started to paint the cockpit parts. I'm taking this very slow and deliberately, trying to give each component a decent paint job. First up is the Barracuda 3D-printed control stick...
Image

The real time-killer has been the instrument panel. I've kept the front and backing part separate for now because I think applying the instrument dial decals to the backing will be easier without the front fascia in the way. The top is the 3D-printed panel from Laminar Flow Designs. In the middle is the kit instrument panel and the bottom is the Quinta Studios version.
Image

Here's the painted LFD IP face mounted on the backing but without the instrument dials. The small data stenciling is from one of the Barracuda Spitfire cockpit upgrade sets. Hopefully, I have enough IP dial decals to populate this panel as I'm waiting for a re-supply of Airscale products from Peter Castle.
Image
Image

Re: Tamiya 1/32 Spitfire XIVe Conversion

Posted: Wed May 29, 2024 6:42 pm
by Stikpusher
Oh those parts are nice!

Re: Tamiya 1/32 Spitfire XIVe Conversion

Posted: Wed May 29, 2024 11:35 pm
by jkim
Thank you Carlos!

I've populated the instrument panel dials. All of them were punched from Airscale's RAF Cockpit Decal set. The way this instrument panel is going to be assembled, I think I can just shoot the instruments with a gloss coat and forgo punching individual glass dials for all of the instruments.
Image

Here's what the instrument panel looks like when assembled. You'll notice a missing instrument in the lower left quadrant. I couldn't find a suitable Elevator Trim Indicator so I'll have to do some more scrounging. So a few more things to do on IP but it's just about complete.
Image
Image