
Never thought about that before Carlos but I like it!
Normally I would just make belts from Tamiya tape but I don’t know how well the decal would stick to it. Fermis had a cool setup he would do with Tamiya tape and home made buckles.
Kari's Revell 1/32 Bf-110 C-2/C-7
Re: Kari's Revell 1/32 Bf-110 C-2/C-7
Messerschmitt 109 Addict

Re: Kari's Revell 1/32 Bf-110 C-2/C-7
I have also been doing before belts of either Tamiya tape or then thin flat lead wire, for 1/72 works perfectly, with my competency 1/48 starts to look "clumsy", not to mention how the result would be if I made in 1/32 scale.. I hardly dare to even think of.
So yes, using decals, adding thickness (either thin lead, wine foil etc).
I guess the approach here would be;
- first the decal on the foil
- then cutting out it from the foil (carefully of course)
- then attaching it into the seat, bending it carefully so the decal would not crack. Decal solution of course helps avoiding disaster.
And finally some weathering to make it look "real"

- Kari
So yes, using decals, adding thickness (either thin lead, wine foil etc).
I guess the approach here would be;
- first the decal on the foil
- then cutting out it from the foil (carefully of course)
- then attaching it into the seat, bending it carefully so the decal would not crack. Decal solution of course helps avoiding disaster.
And finally some weathering to make it look "real"
- Kari
---
On the bench:
Eduard 1:48 - Fokker D.VII OAW
https://www.facebook.com/GrundAsk-Scale ... 721218708/
On the bench:
Eduard 1:48 - Fokker D.VII OAW
https://www.facebook.com/GrundAsk-Scale ... 721218708/
-
mustang1989

- Moderator
- Posts: 5044
- Joined: Tue Mar 18, 2014 8:35 pm
Re: Kari's Revell 1/32 Bf-110 C-2/C-7
For some wild reason I just skipped right over Carlos' post about using a thin backing behind the decals. That would work perfectly!! …..sorry bout dat Carlos! 
Re: Kari's Revell 1/32 Bf-110 C-2/C-7
Yep, testing that now!mustang1989 wrote:For some wild reason I just skipped right over Carlos' post about using a thin backing behind the decals. That would work perfectly!! …..sorry bout dat Carlos!
- Kari
---
On the bench:
Eduard 1:48 - Fokker D.VII OAW
https://www.facebook.com/GrundAsk-Scale ... 721218708/
On the bench:
Eduard 1:48 - Fokker D.VII OAW
https://www.facebook.com/GrundAsk-Scale ... 721218708/

Re: Kari's Revell 1/32 Bf-110 C-2/C-7
I’ve been pretty quiet, but following. Such fine building!
To make each build less crappy than the last one. Or, put another way, "Better than the last one, not as good as the next one!"..
-
Stikpusher

- Moderator
- Posts: 21410
- Joined: Sat Apr 05, 2014 8:37 pm
- Location: Ceti Alpha 5
Re: Kari's Revell 1/32 Bf-110 C-2/C-7
"Surely I have made my meaning plain? I intend to avenge myself upon you, Admiral. I have deprived your ship of power, and when I swing 'round, I intend to deprive you of your life."
FLSM
FLSM
Re: Kari's Revell 1/32 Bf-110 C-2/C-7
Ok, now I have tested adding one piece of belt-decal on a piece of thin folie (ex-Italian tomatoe puree tube).
Used some decal setting solution on top of it, as it did not really want to stick on the folie.
Afterwards I don't relly understand why I put the decal on the "green" side and not on the inner side that is metal colored, the edge would have smoothen out with the decal, as the metal color is pretty much same nuance.
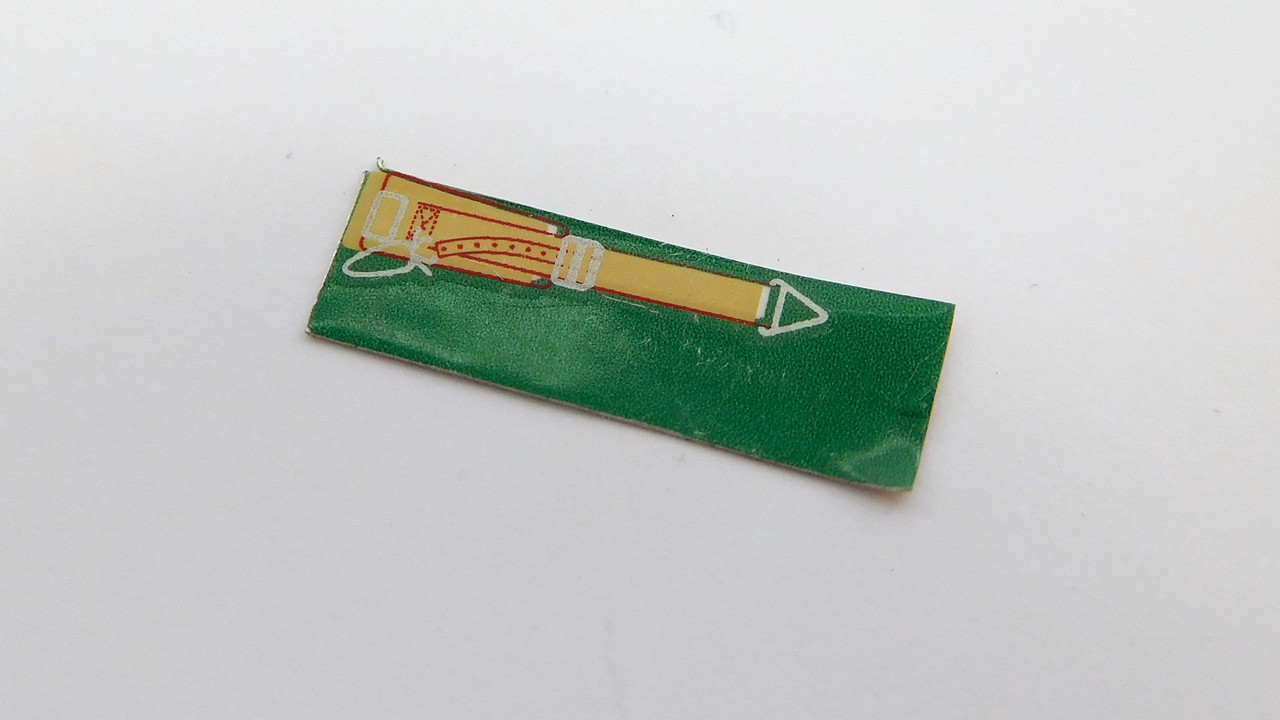
After the being sure the decal was dried and did not come off, i started slowly but surely cut it off with a brand new x-acto blade. Slowly and slowly. I added also a drop of Mister Paints Gloss varnish, for the weathering part but also to protect it.
I sanded carefully one side, the other side not yet when the picture below was taken.
Unfortunately I am not 100% sure if it was the decal setting "Mark Fit" or the drop of MRP gloss varnish, that caused some of the belt details to become blurry
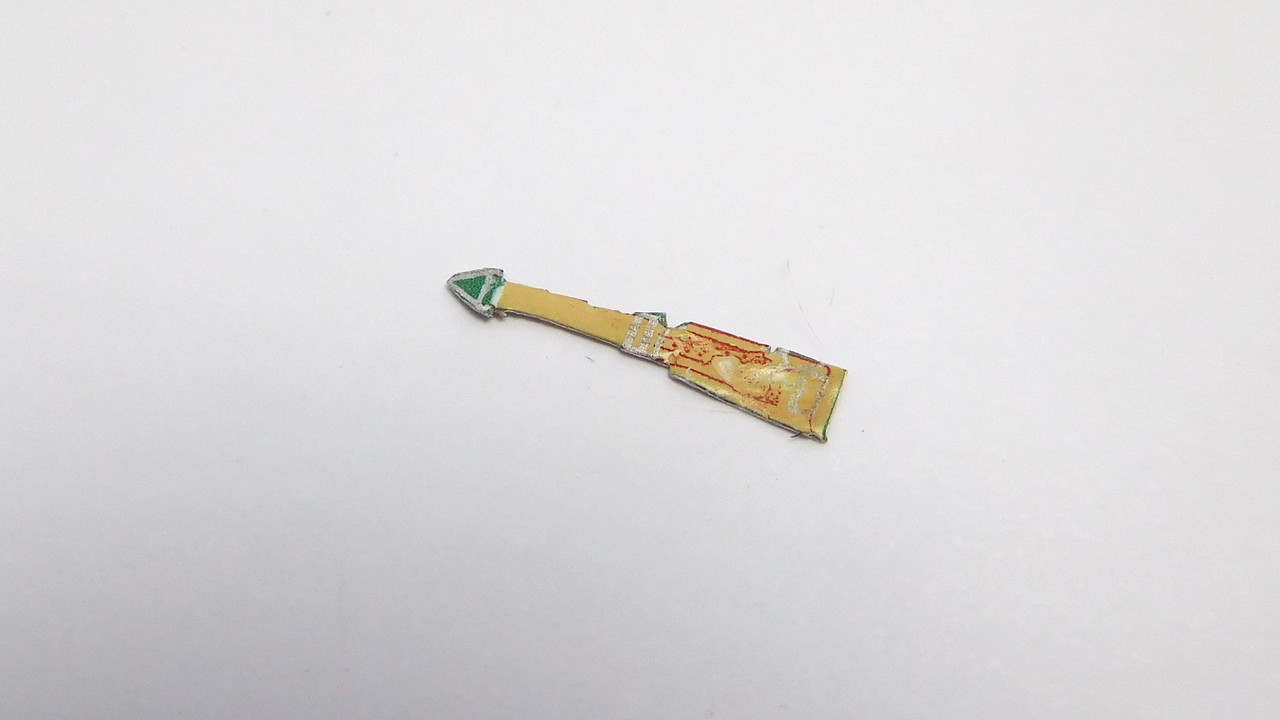
Nevertheless. lessons learned, I think this will be the way forward with this build.
- Kari
Used some decal setting solution on top of it, as it did not really want to stick on the folie.
Afterwards I don't relly understand why I put the decal on the "green" side and not on the inner side that is metal colored, the edge would have smoothen out with the decal, as the metal color is pretty much same nuance.
After the being sure the decal was dried and did not come off, i started slowly but surely cut it off with a brand new x-acto blade. Slowly and slowly. I added also a drop of Mister Paints Gloss varnish, for the weathering part but also to protect it.
I sanded carefully one side, the other side not yet when the picture below was taken.
Unfortunately I am not 100% sure if it was the decal setting "Mark Fit" or the drop of MRP gloss varnish, that caused some of the belt details to become blurry
Nevertheless. lessons learned, I think this will be the way forward with this build.
- Kari
---
On the bench:
Eduard 1:48 - Fokker D.VII OAW
https://www.facebook.com/GrundAsk-Scale ... 721218708/
On the bench:
Eduard 1:48 - Fokker D.VII OAW
https://www.facebook.com/GrundAsk-Scale ... 721218708/
-
mustang1989
- Moderator
- Posts: 5044
- Joined: Tue Mar 18, 2014 8:35 pm
Re: Kari's Revell 1/32 Bf-110 C-2/C-7
Just a little fill in needed but that came out perfectly Kari!!
Re: Kari's Revell 1/32 Bf-110 C-2/C-7
I like the belts. At that scale the bit of blurring could be “wear”... Maybe?
To make each build less crappy than the last one. Or, put another way, "Better than the last one, not as good as the next one!"..
-
Stikpusher
- Moderator
- Posts: 21410
- Joined: Sat Apr 05, 2014 8:37 pm
- Location: Ceti Alpha 5
Re: Kari's Revell 1/32 Bf-110 C-2/C-7
Looking good!  You can probably touch up the decal blur with a Staedtler pen.
You can probably touch up the decal blur with a Staedtler pen."Surely I have made my meaning plain? I intend to avenge myself upon you, Admiral. I have deprived your ship of power, and when I swing 'round, I intend to deprive you of your life."
FLSM
FLSM