Page 7 of 7
Re: Junkers F13 Floatplane by MiniArt 1:48
Posted: Sat Aug 22, 2026 3:12 am
by KSaarni
Raised padding done, window masks removed...
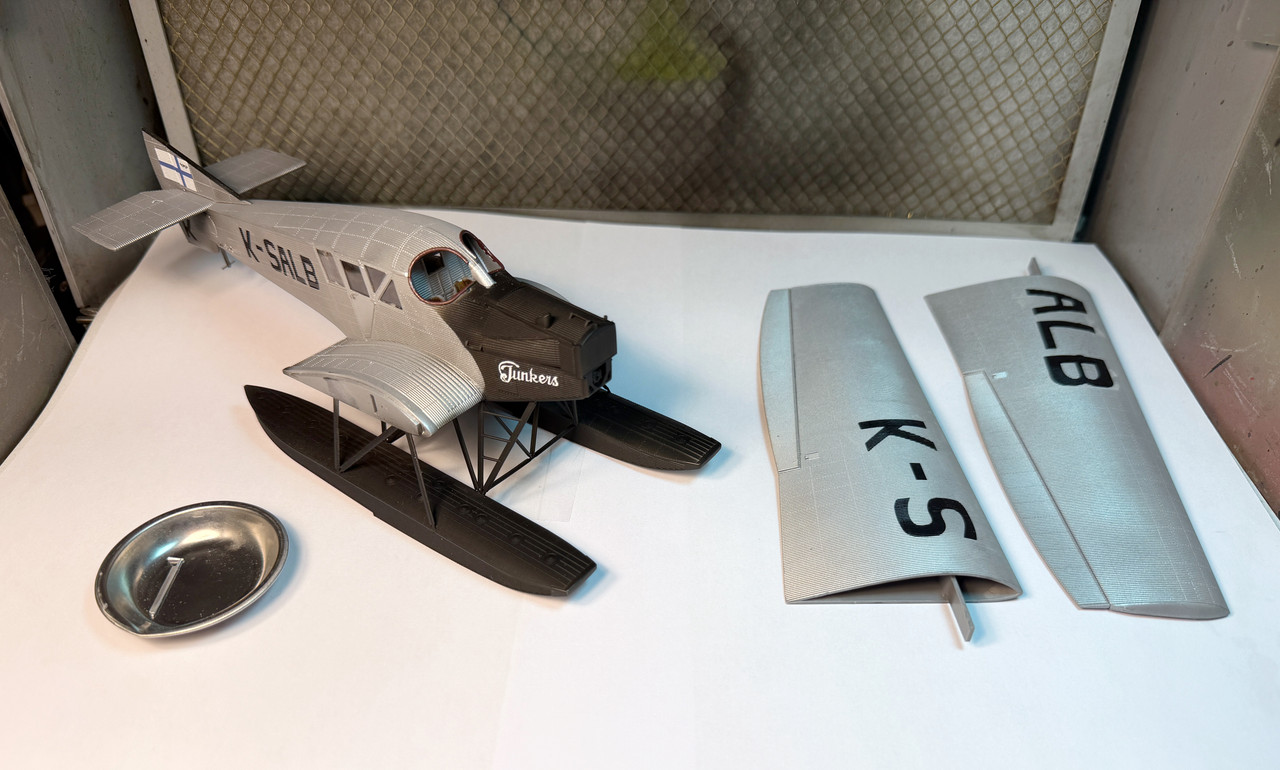
Next and final (!) steps:
1) The exhaust stack, already painted, just needs to be attached.
2) 'The propeller, should be more of a darker wood sort
3) The radio mast + antenna cable
4) Cockpit glasses
And then the Junkers is more of less ready. Have not decided yet, if I should do any weathering, even light touch-ups..
Let's see what next!
- Kari
Re: Junkers F13 Floatplane by MiniArt 1:48
Posted: Sat Aug 22, 2026 8:43 am
by BlackSheep214
Looking good!
Re: Junkers F13 Floatplane by MiniArt 1:48
Posted: Sat Aug 22, 2026 10:54 am
by KSaarni
Thanks Tom,
last details and then I would say, it's done!
I am rather pleased with the propeller. I base-coated the propeller with Tamiya XF-60 Dark Yellow, applied Burnt Umber oil color over top, and then dragged a stiff paintbrush across it to imitate the wood grain.
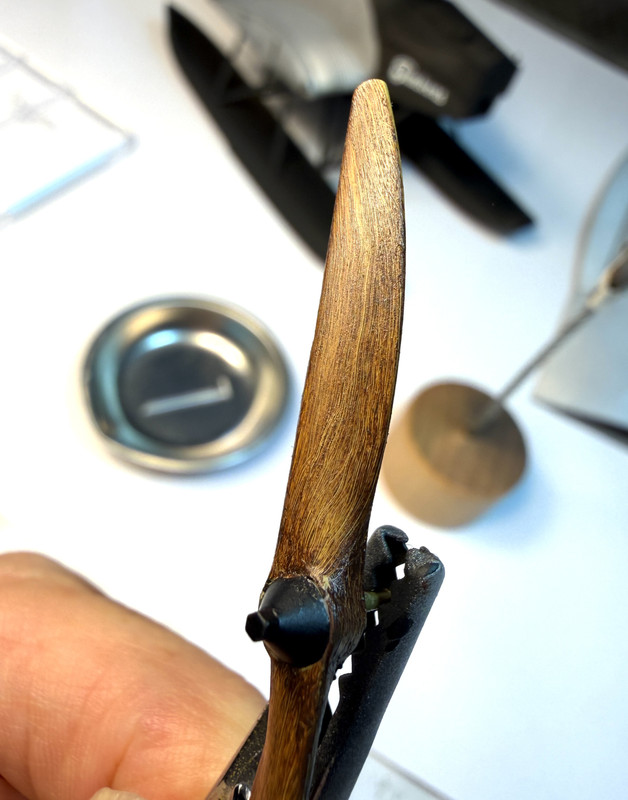
All the other parts have been attached; antenna, cable, exhaust stack and the cockpit glasses..
Finally I have managed to finish a build, I think I will have a beer tonight!

The end result soon to be seen in the "Completed builds" section
- Kari
Re: Junkers F13 Floatplane by MiniArt 1:48
Posted: Sat Aug 22, 2026 11:26 am
by FullMetal
OMG THAT PROPELLER IS FANTASTIC...and the built too..sorry I missed it


Re: Junkers F13 Floatplane by MiniArt 1:48
Posted: Sat Aug 22, 2026 12:41 pm
by keavdog
Right on! That prop is just money. There's some things you can only do with oils.
Re: Junkers F13 Floatplane by MiniArt 1:48
Posted: Sat Aug 22, 2026 3:15 pm
by Gary Brantley
That's beautiful work, Kari! 
Re: Junkers F13 Floatplane by MiniArt 1:48
Posted: Sat Aug 22, 2026 3:38 pm
by BlackSheep214
KSaarni wrote: ↑Sat Aug 22, 2026 10:54 am
Thanks Tom,
last details and then I would say, it's done!
I am rather pleased with the propeller. I base-coated the propeller with Tamiya XF-60 Dark Yellow, applied Burnt Umber oil color over top, and then dragged a stiff paintbrush across it to imitate the wood grain.
All the other parts have been attached; antenna, cable, exhaust stack and the cockpit glasses..
Finally I have managed to finish a build, I think I will have a beer tonight!
The end result soon to be seen in the "Completed builds" section
- Kari
Day-um… that propeller looks very real. Is burnt umber artist oil acrylic? What type of stiff rush did you use? When you say over the top, do you put a dab on the tip for both sides?
I never could make anything to look like real wood on a model kit accessory.
