I'll start with my one aircraft.
At my recent SoCal AMPS meeting, we had our annual "Four-Hour Build Challenge" where we were to choose an unbuilt, unstarted kit and build it over the course of the next four hours to see how far along we could get in that time. This was the second time we had done this challenge. The first time, most guys over-estimated how quickly they could finish something so almost nobody completed anything; except for three of us. I finished three models myself that time; all the way to the weathering stage.
This time I was far from that successful. I started with a simple bagged Airfix kit of a Saunders Roe experimental jet that had about 14 parts to it. I got the fuselage assembled first, then painted the pilot inside along with what could be seen of the cockpit:
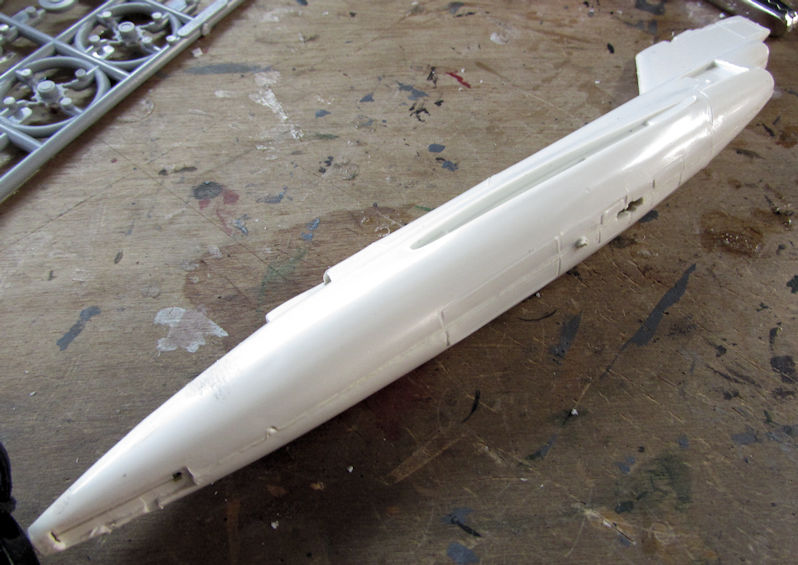
No, you can't see the cockpit in that pic but I did it. Next I finished off all the wings and tail, then masked off the cockpit for painting. I shot it with a white paint; after fixing the damage that occurred after I dropped it on the way outside:
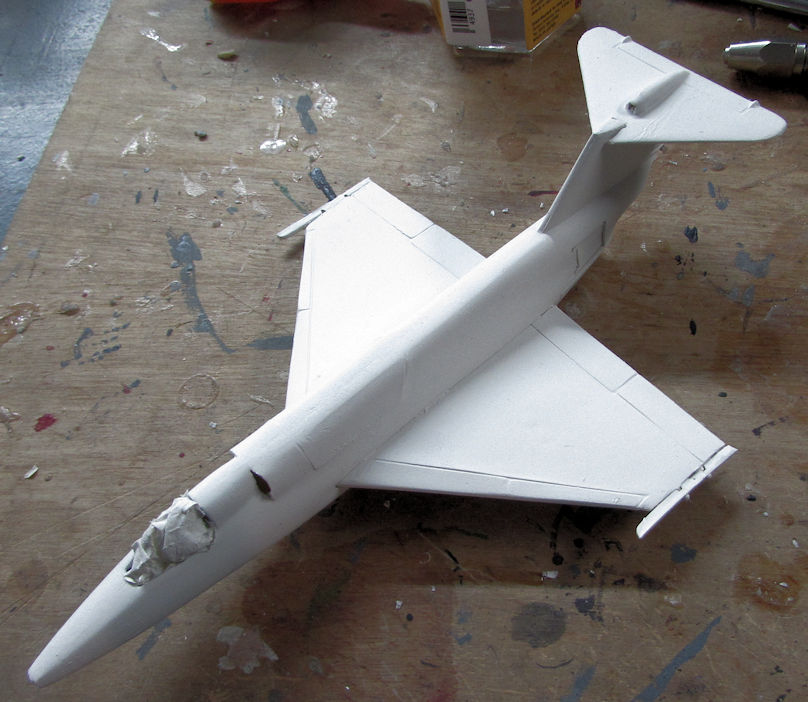
Then I dropped it again after painting so I had to wait till it dried and tried to sand out the damage to the paint. Some of it was apparently still wet since I found fingerprints on it afterward. After that dried, I tried again, only to damage the paint again. Okay, enough of that, I moved on to something else....
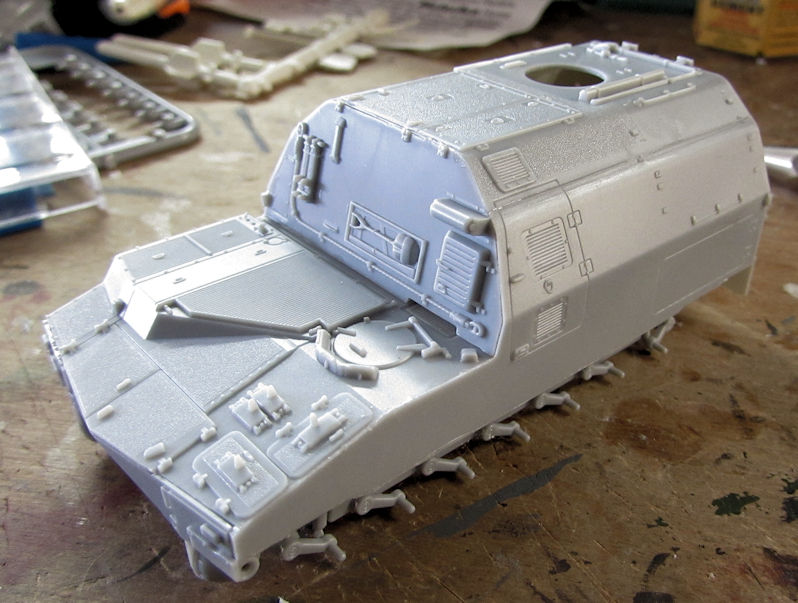
I pulled out an armor model and tried that. This was the Riich Models M-992 ammunition carrier for the M-109 Paladin. It should have been a simple build and started that way when I first assembled the main hull and superstructure. This was the result after 15 minutes:
I then tried to install the wheels and tracks. What a disaster! After fighting this for another 2.5 hours, I had this result; which doesn't show well all the gaps from poorly placed or missing indy links:

Part of the reason I had such difficulty with that was because I somehow managed to reverse some of the links near the end of the attempt to install them. That meant trying to find the reversed ones; pulling everything back off and trying to re-glue them all on again. I think I repeated that mistake at least three times before I finally got those tracks right. Finally, after all that and dinner break, I was too far gone to even try painting this so I gave up for the remaining 20 minutes of the time.
After the meeting, another friend and fellow AMPS member came up and offered me his 1/72 scale Dragon StuG he'd started for the build challenge. He had broken the rear idler since the tracks were too tight so he gave up on it. Since he had only done it for the challenge he didn't want to finish it since he doesn't normally do 1/72 scale armor. I accepted. Later when I got home I managed to get the rear idler glued on and then added the tracks. The other idler had been skewed as well so I adjusted it, and then added more glue to strengthen the bond more. Here it is after the repair:
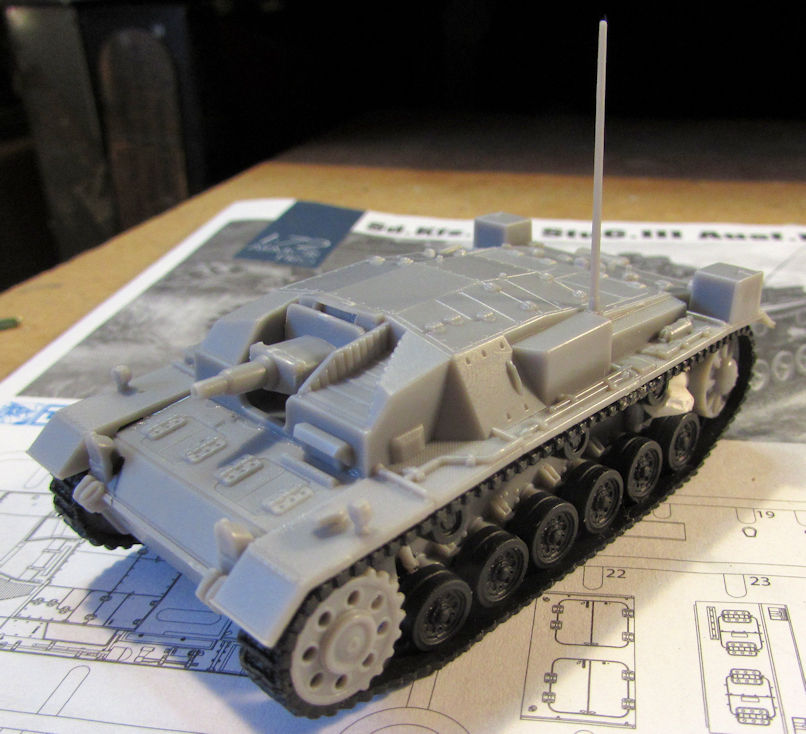
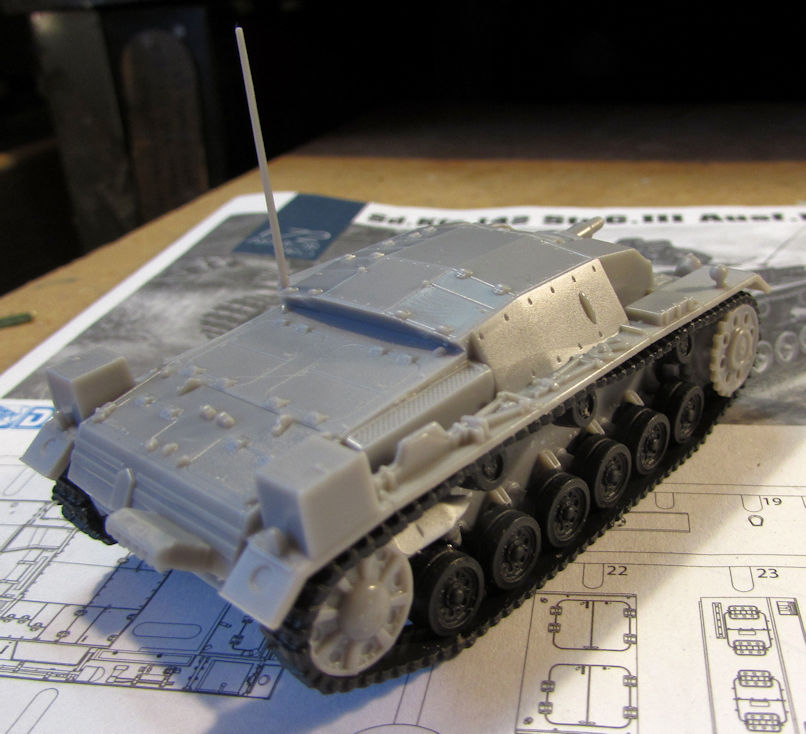
The white pieces in front of the idlers are sprue scraps that I'd positioned in there to hold the wheels straight while the glue dried. Of course, that tall antenna has already become 'shortened' when this got knocked over; breaking the upper third off. Oh well....
Later on at home, I had a tough time getting the mojo up to work on anything. It seemed every time I tried to do something, I screwed it up so I was constantly walking out of my hobby room in disgust. It's a miracle I got anything done at all. After all that crap, I just simply pulled out some short-run models and went to work on them. After all I figured, if I'm gonna screw something up, it wouldn't be as noticeable as if it were done on a well-molded kit. Besides, there was something rather therapeutic about cleaning all the parts; sanding and test fitting over and over to figure out how best to make the parts fit.
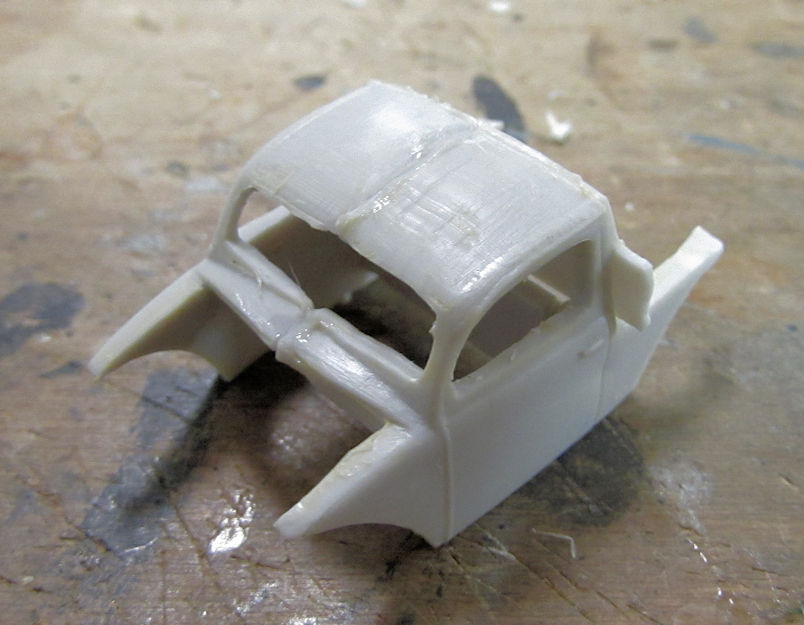
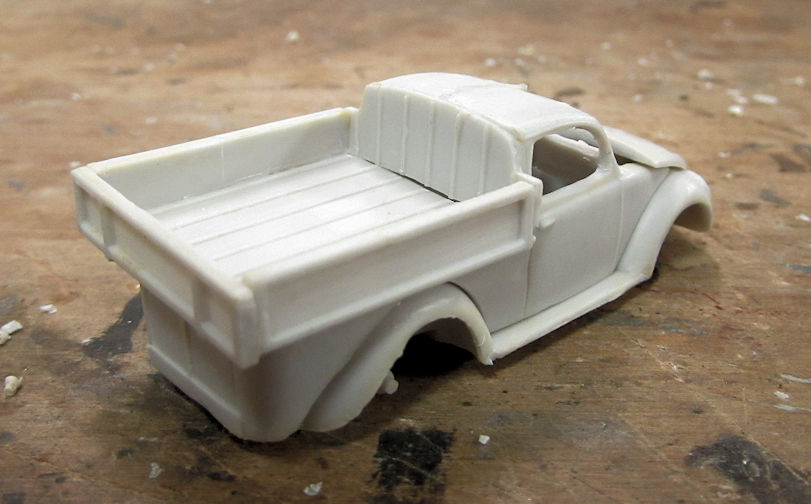
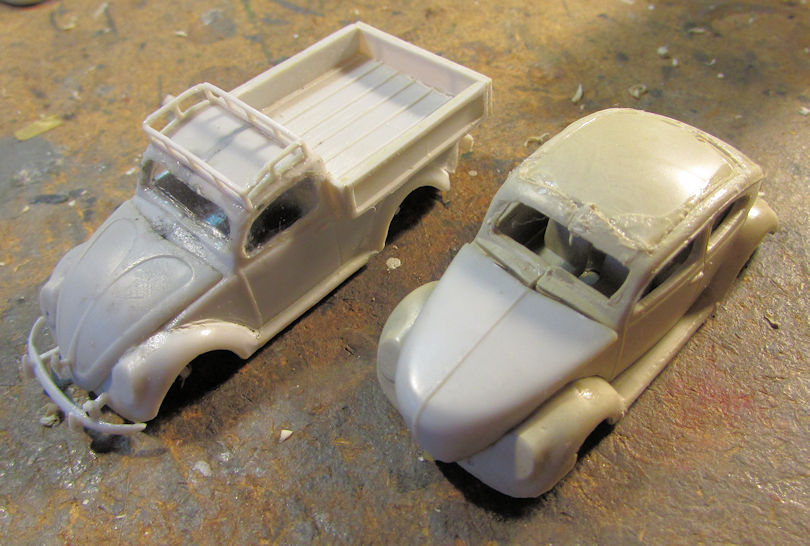
The first little short run model I worked on was this little Military Wheels 1/72 scale Volkswagen 'pickup'. I started with the lower chassis and interior which I did not shoot pics of. I then went and assembled the main cab:
After building the rear cargo bed, I test fit that, the lower chassis and the front hood all together to see how this little beastie would look:
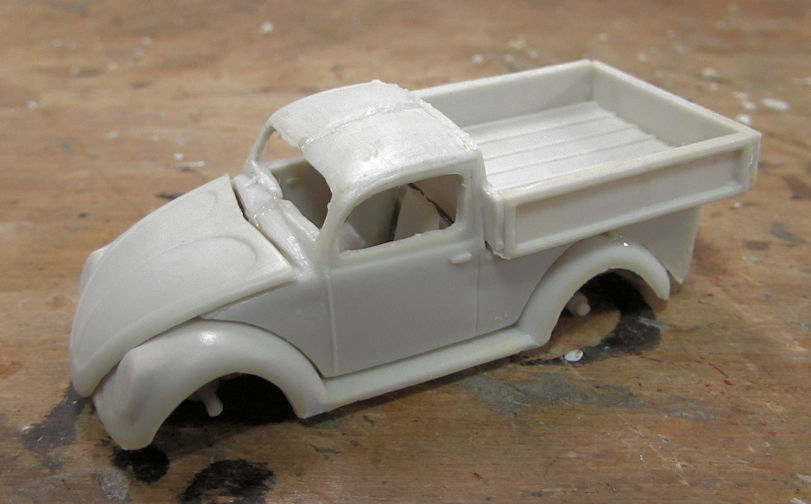
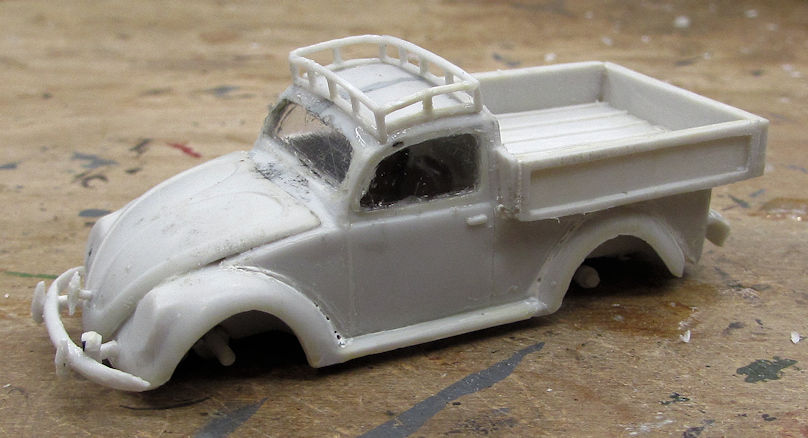
This also allowed me to see where the issues were. I worked on them and added the windows. I then got the body cemented down to the chassis; and added the roof rack; the fender and some other little fiddly bits. I also added some acrylic filler to the seams which needs to be re-done to fill the tiny holes there:
Moving on, I also started another Military Wheels Volkswagen; this one has a larger nose to increase the cargo space in the front. Again, I assembled the interior and the lower chassis but didn't shoot pics of it yet. The upper body was started though; and it was a bear to build due to being in five pieces with no attachment points. I got most of it assembled, leaving the nose off till later:

You can see how rough this was to assemble, given the crude glue joins from difficult, poorly molded parts. Still, I felt good doing this.
Later I test fit this and the nose to the chassis and interior:
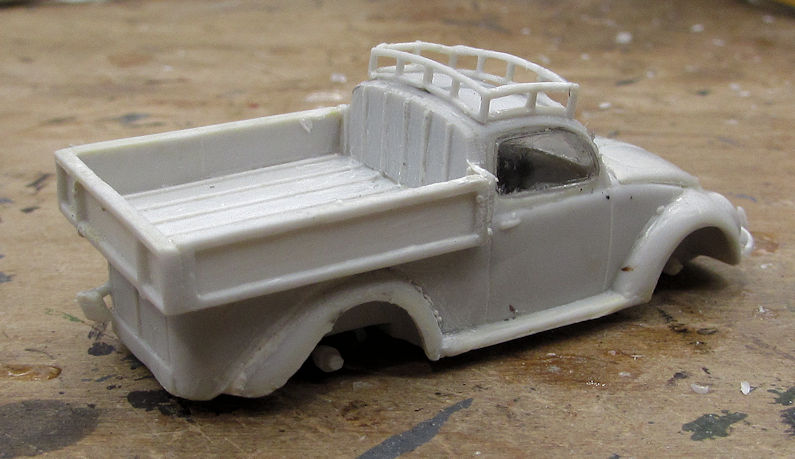
What a schnozz on that little beetle! Here it is sitting next to the 'pickup' beetle:
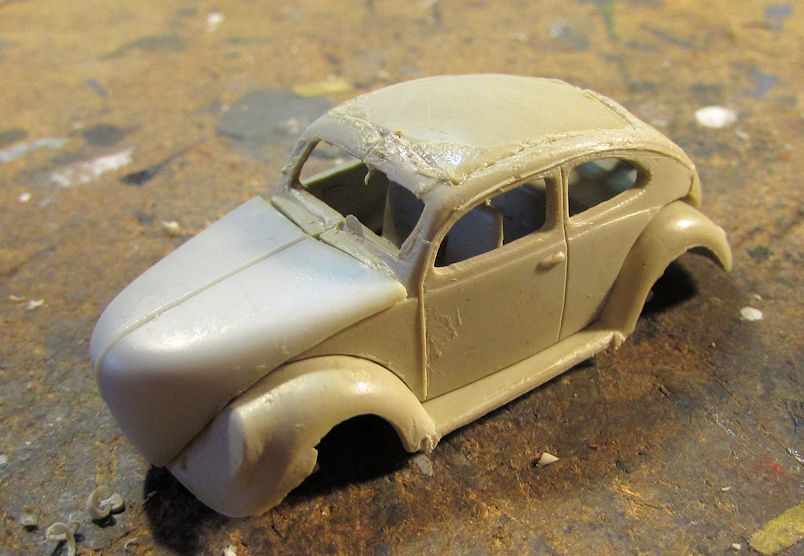
Later I sanded it all as smooth as possible, and then used Mr. Surface on the remaining crevices that were left:
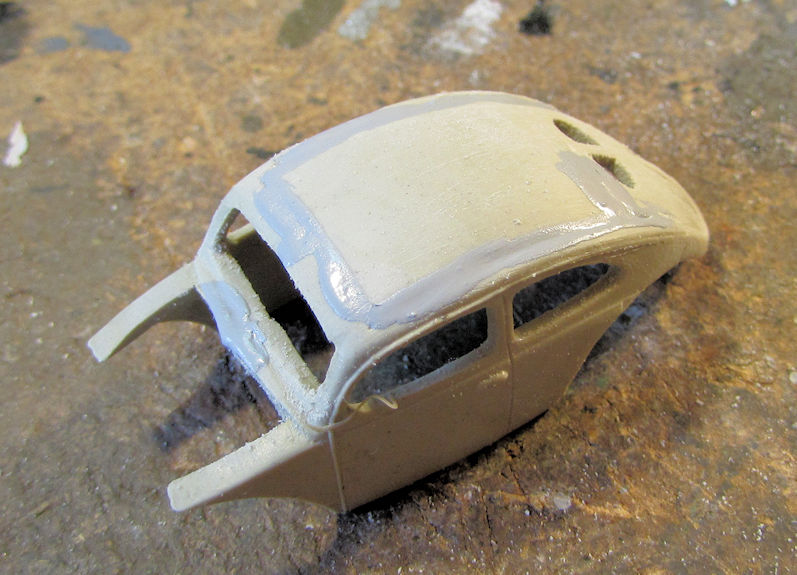
That's as far as I got on that one.
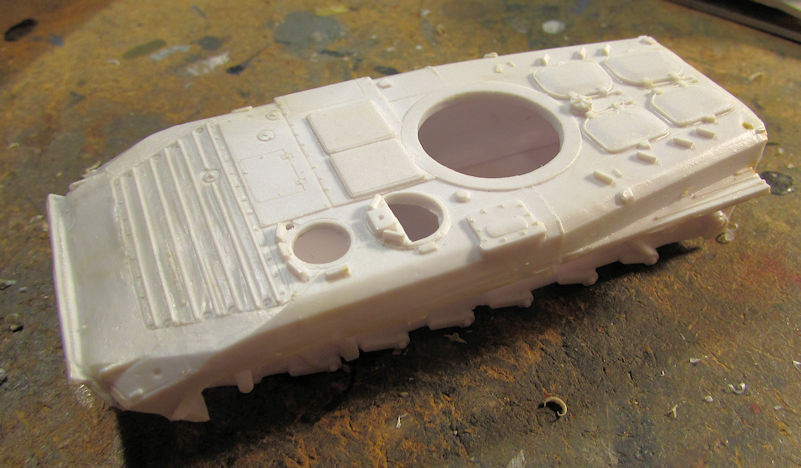
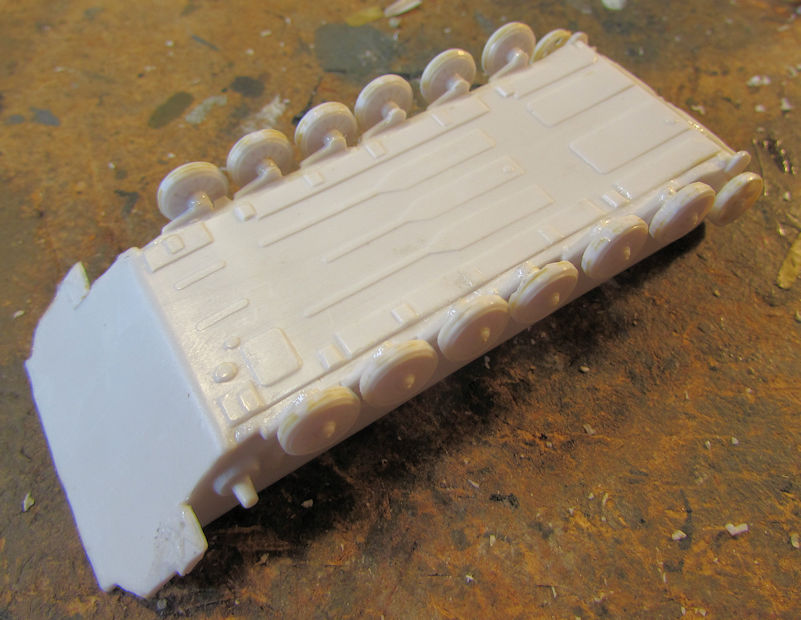
Moving on, I started another short-run kit; this time an ACE Russian BREM recovery vehicle based on the BMP I. I love doing ACE kits; it can be so relaxing doing the mind-numbing cleanup on all the parts. I started on the lower hull first:
I then test-fit the upper hull to it to see how well the lower hull was assembled:
I then found out that everything behind the turret had to be removed so I carved everything off and added the floor of the back work box on top of the bare area and clamped it down. I also added the armor plate over the turret ring:
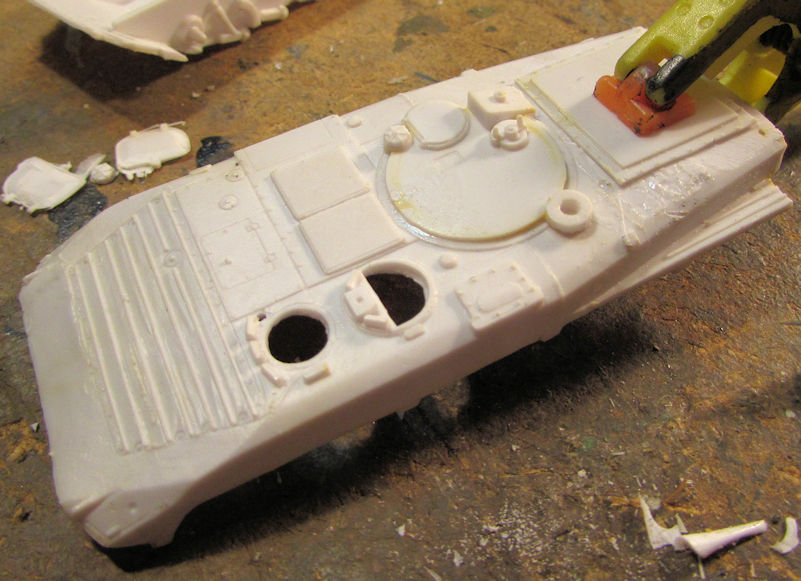
I then found out I'd put in on sideways so I had to carve it off and turn it 90 degrees and re-cement it. Afterwards, I added the sides of that box and the hatches for the driver and TC:
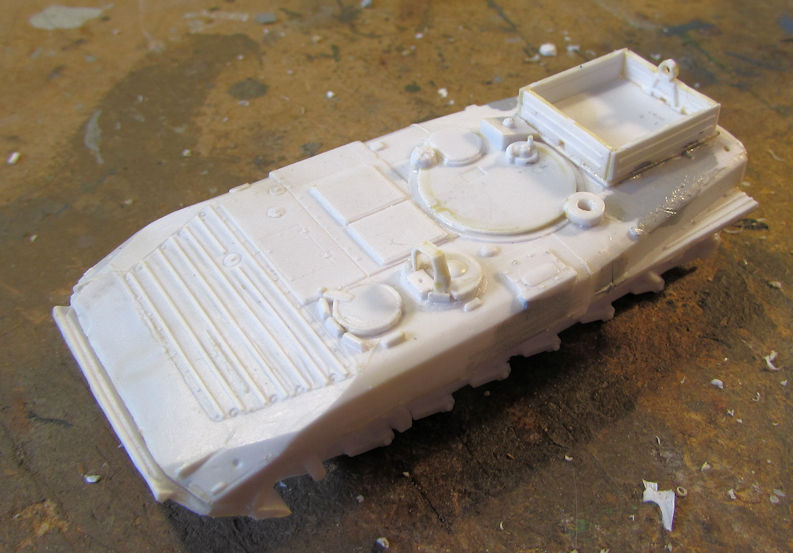
While that was drying, I added the wheels and idlers to the lower hull:
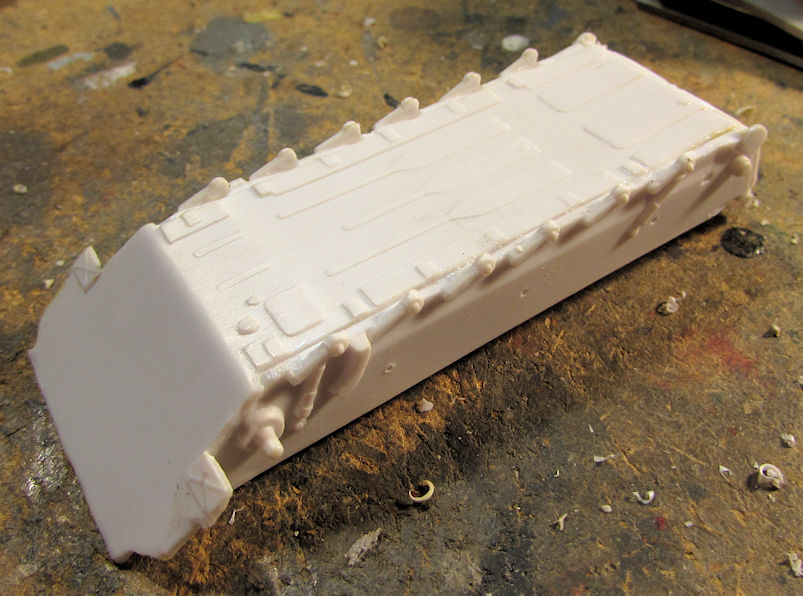
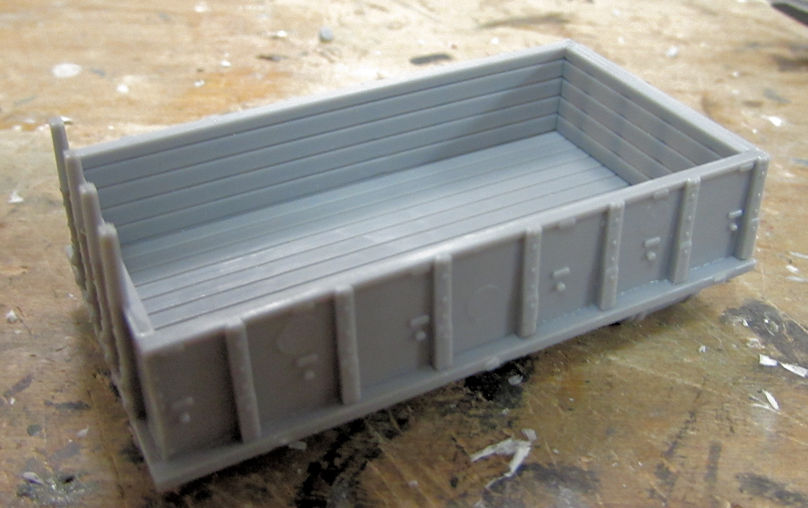
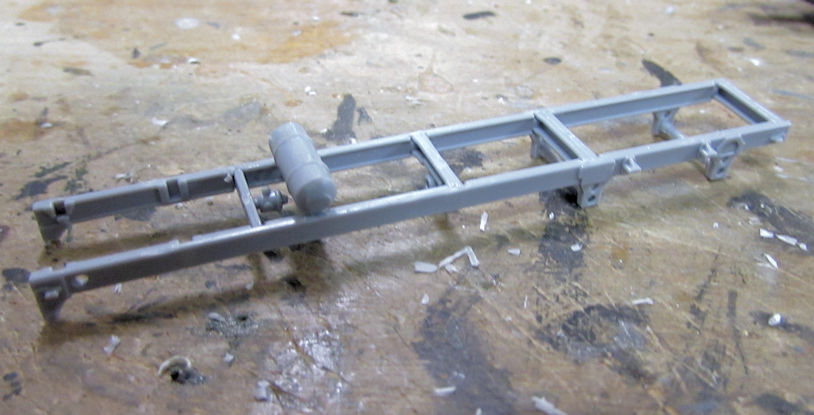
That's as far as I got with that. I then pulled out the MACK Truck and decided to build the rear cargo bed for that. I couldn't go wrong there; after all it's just a box. Fortunately I was right:
I then decided to do more with this. I assembled the chassis:
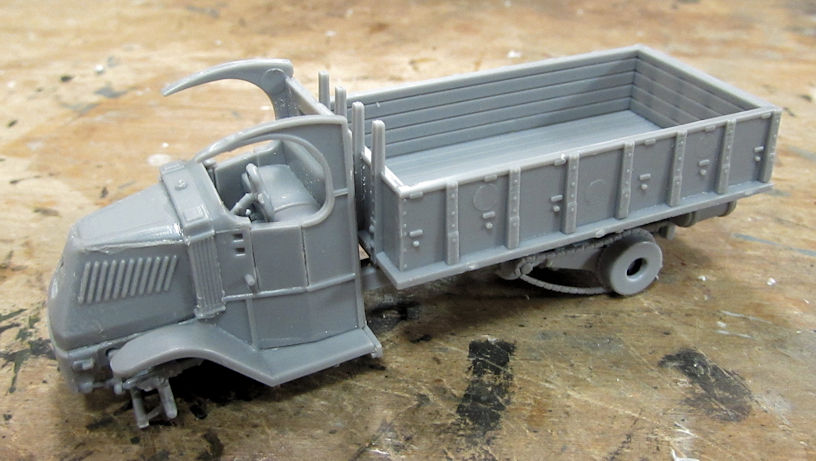
Once that was dry, I installed the cab and the dry-fit the cargo bed:
This one will be getting the tilt. I assembled the tilt and added it to the bed to see how it fit:
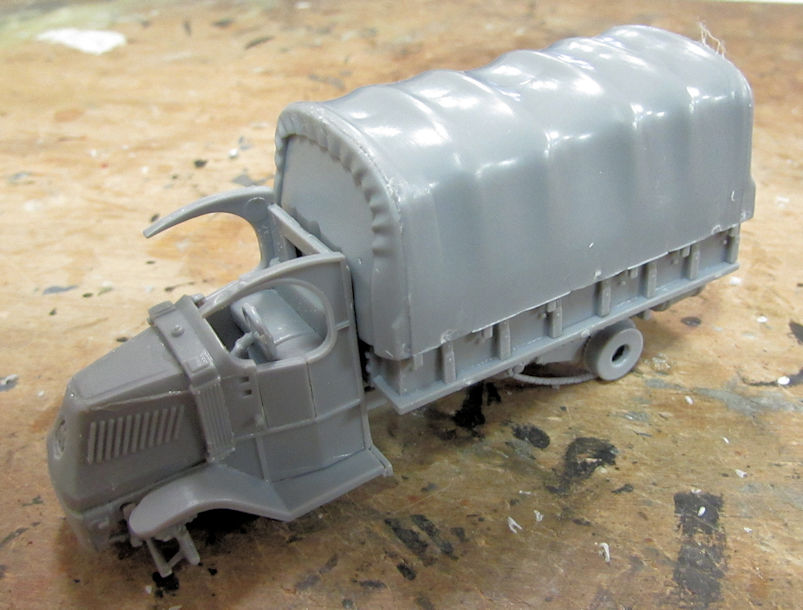
Not bad. This is gonna look good. I am now ready to paint this.
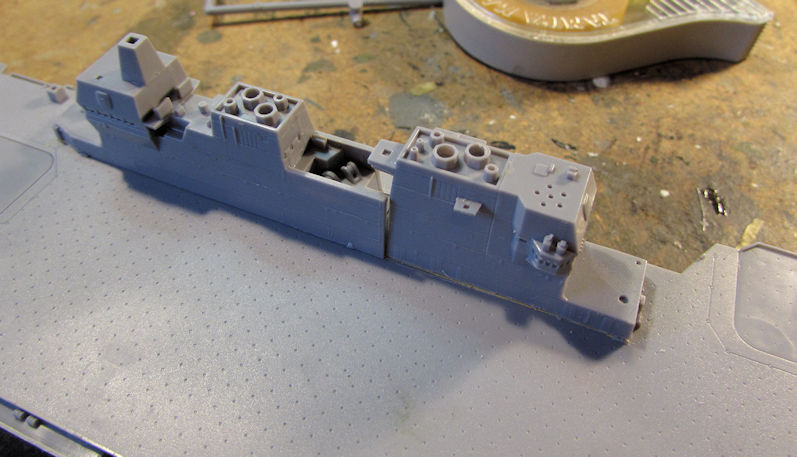
Speaking of ready to paint; I started to prepare the JMSDF Izumo for paint since almost all the assembly is done, except for detail parts. First, I wanted to mask off the area where the conning tower is supposed to go so when I shoot the deck, I won't get paint where the tower goes; allowing it to glue better later. Afterward, when I shoot the deck, I can then mask over the whole deck and shoot the rest of the hull and conning tower. I started by taping where the tower is supposed to go, burnishing it down as close as I can get it:
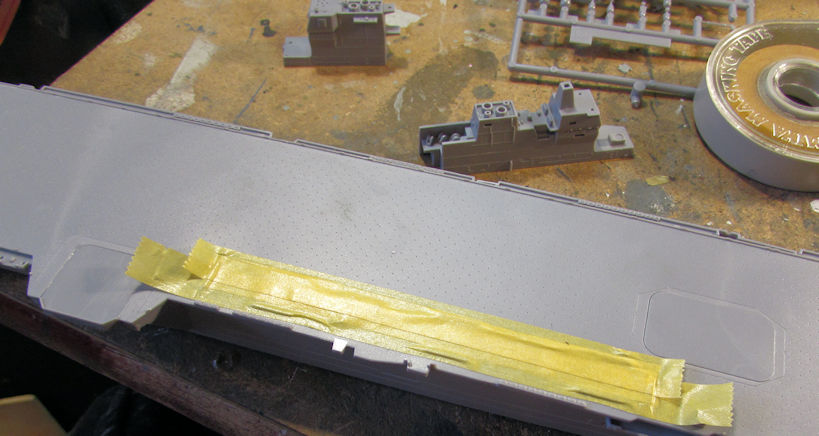
I then positioned the conning tower parts one at a time and scored the tape around the edge of the tower:
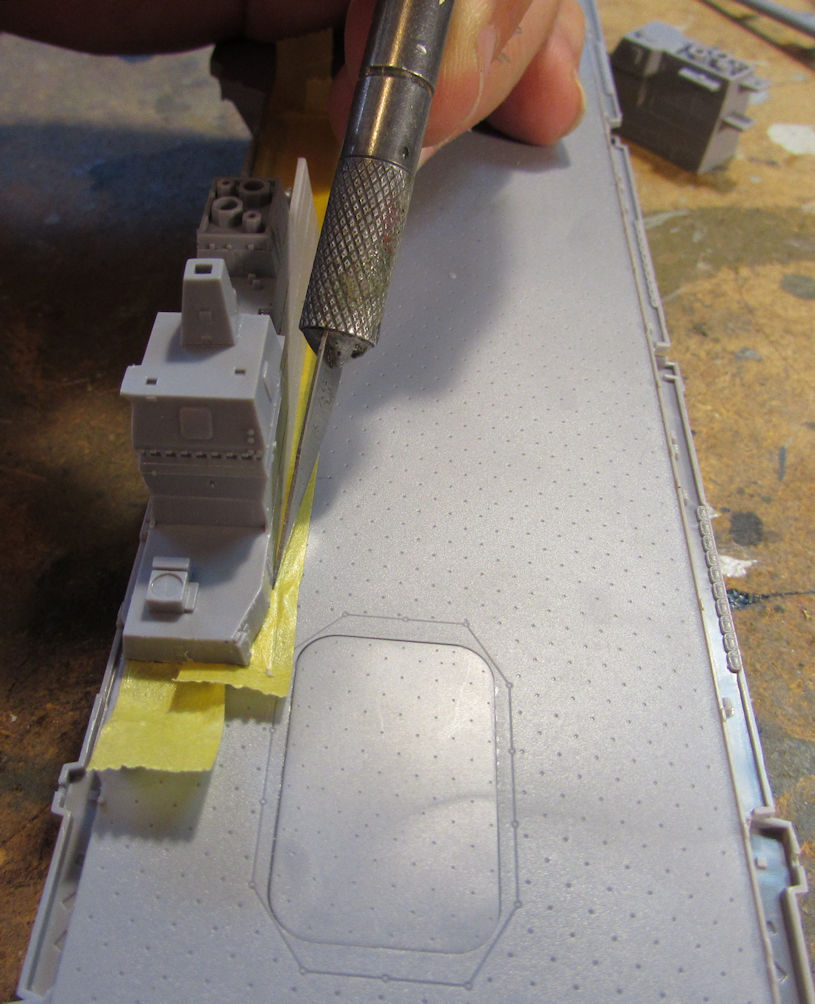
Afterward, I burnished it down again, and had a perfect covering for the tower area:
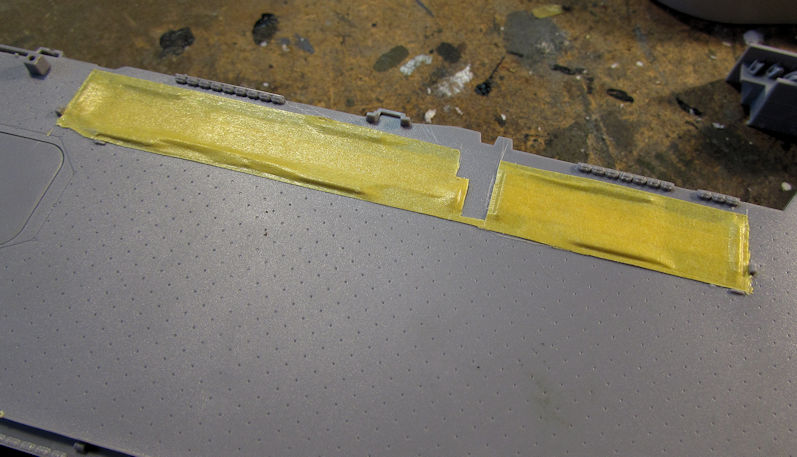
You can see that the area is almost perfectly covered. The rear tower part slipped a tiny bit:
Okay, that completes what I managed to get done so far. Hopefully this is a sign things are getting better for me. So, enjoy the tour and thanks all for looking in, comments are welcome.