This project is off the charts, Clint! I don’t want to pass quickly over the way you chose the detail pieces, a lot of time went into those choices, as well as the time you spent adding the lighting to the entire project. The ramp redo is effective. I am trying to catch up to the detail and painting stage, because you move efficiently and quickly! I do not have my reference nor do I have any experience building the particular kit, (FM, MPC, yes), but I am looking at your photos and wondering where the damaged areas are, or if I am missing these, or if this is part of your design? Maybe I am missing the dings and scrapes or do those appear last... or does your project fit into a different timeline from ESB on to TLJ, perhaps. I like the way you include a reference shot when you modified the ramp. What sources are you using for painting and weathering?
Let me add that I love seeing this project here. Sincerely. It’s by far the most amazing kit out there. I applaud the way you work with choices for the lighting, upgrades for components and the scratchbuilding for ramp. I also think the interior lighting is incredibly clean for a lighting project, and I love using Modge Podge! You certainly provide a wealth of information and inspiration for others to absorb.
I don’t want to be too critical of the engine weathering, because you are planning to address this, it’s a known issue. I have seen Falcon builds which make the area look as black as your current version, but the original ILM Falcon does not to my memory have heavy streaks. I hesitate to be critical when you are making adjustments. So, take with a grain not a pinch of salt.
All the best/warm regards from Los Angeles!
Fine Molds Millennium Falcon WIP
-
speedgraflex

- Moderator
- Posts: 9759
- Joined: Fri Feb 10, 2017 11:08 pm
- Location: Santa Monica, California
Re: Fine Molds Millennium Falcon WIP
Bruce / SPEEDGRAFLEX

Re: Fine Molds Millennium Falcon WIP
I know the exhaust just doesn't feel right. I have some nice hd photos of the the studio 5ft model and have been trying my best to replicate the weathering on it. I think I've gotten close on the rest but them darn exhaust streaks are puzzling me.Stikpusher wrote:You are a madman to do all that fiber optic wiring!
This project fits in here just fine. But I might suggest another more restrained go at the upper surface streaking. Radiating outwards, as opposed to straight back, doesn’t look quite right...
March as one, Don't look back
Odin's sons... Attack!
Unleash hell! Do not repent! Warfare grants us no lament
Let your weapons slash and tear This is no place for fear
Hold the lines! Move as one! In unity our victory's won
Our shields will form a mighty wall
United we shall never fall
Odin's sons... Attack!
Unleash hell! Do not repent! Warfare grants us no lament
Let your weapons slash and tear This is no place for fear
Hold the lines! Move as one! In unity our victory's won
Our shields will form a mighty wall
United we shall never fall
Re: Fine Molds Millennium Falcon WIP
I'm glad your liking the build. My reference is a book with alot of photos of mostly the 5ft studio model.speedgraflex wrote:This project is off the charts, Clint! I don’t want to pass quickly over the way you chose the detail pieces, a lot of time went into those choices, as well as the time you spent adding the lighting to the entire project. The ramp redo is effective. I am trying to catch up to the detail and painting stage, because you move efficiently and quickly! I do not have my reference nor do I have any experience building the particular kit, (FM, MPC, yes), but I am looking at your photos and wondering where the damaged areas are, or if I am missing these, or if this is part of your design? Maybe I am missing the dings and scrapes or do those appear last... or does your project fit into a different timeline from ESB on to TLJ, perhaps. I like the way you include a reference shot when you modified the ramp. What sources are you using for painting and weathering?
Let me add that I love seeing this project here. Sincerely. It’s by far the most amazing kit out there. I applaud the way you work with choices for the lighting, upgrades for components and the scratchbuilding for ramp. I also think the interior lighting is incredibly clean for a lighting project, and I love using Modge Podge! You certainly provide a wealth of information and inspiration for others to absorb.
I don’t want to be too critical of the engine weathering, because you are planning to address this, it’s a known issue. I have seen Falcon builds which make the area look as black as your current version, but the original ILM Falcon does not to my memory have heavy streaks. I hesitate to be critical when you are making adjustments. So, take with a grain not a pinch of salt.
All the best/warm regards from Los Angeles!
My time line in the film is the beginning of ESB so she wouldn't have the big gash underneath yet, I'm still needing to add the blaster marks to the cockpit tube. I'm not sure when the blaster hits next to the dish come in. Please be critical of the exhaust steaks. I know they need toned down and I'm thinking some brown mixed in. I would love to have any input.
March as one, Don't look back
Odin's sons... Attack!
Unleash hell! Do not repent! Warfare grants us no lament
Let your weapons slash and tear This is no place for fear
Hold the lines! Move as one! In unity our victory's won
Our shields will form a mighty wall
United we shall never fall
Odin's sons... Attack!
Unleash hell! Do not repent! Warfare grants us no lament
Let your weapons slash and tear This is no place for fear
Hold the lines! Move as one! In unity our victory's won
Our shields will form a mighty wall
United we shall never fall

Re: Fine Molds Millennium Falcon WIP
This is one of those WOW-projects. I'm ogling on Revell's repop of the Bandai Falcon that'll hit the market this month. But boy, it's huge...
-
speedgraflex
- Moderator
- Posts: 9759
- Joined: Fri Feb 10, 2017 11:08 pm
- Location: Santa Monica, California
Re: Fine Molds Millennium Falcon WIP
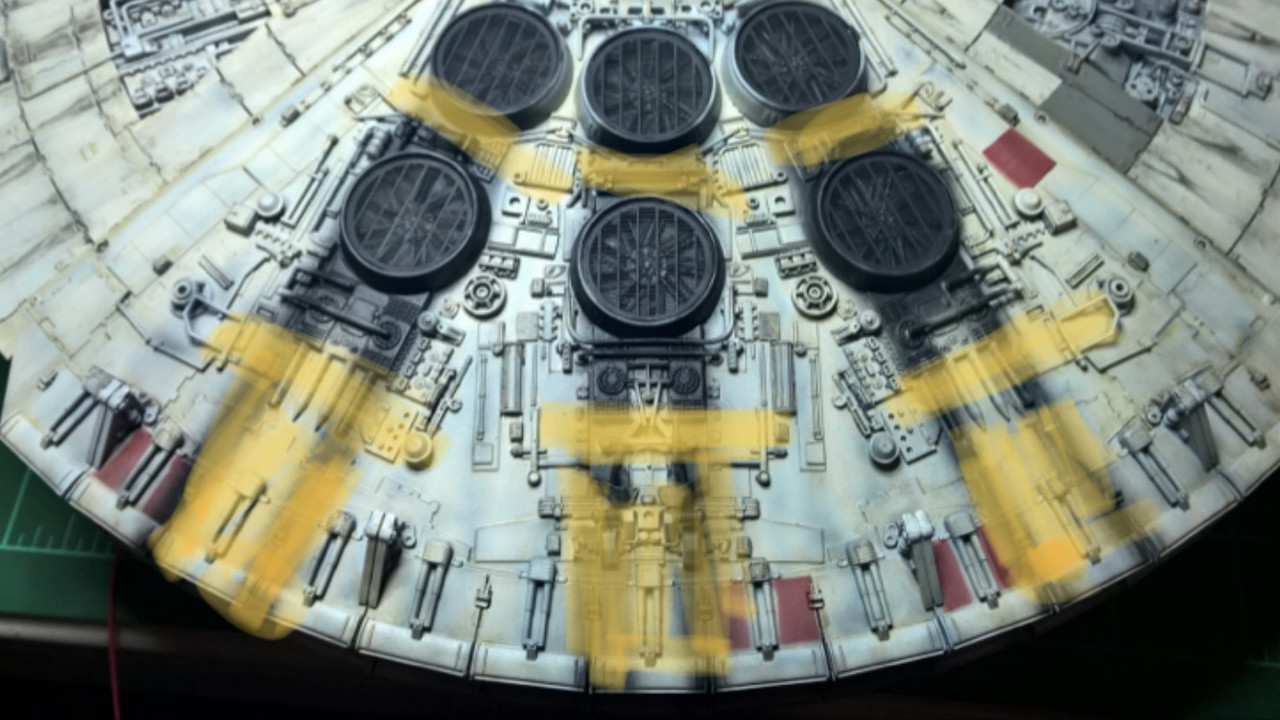
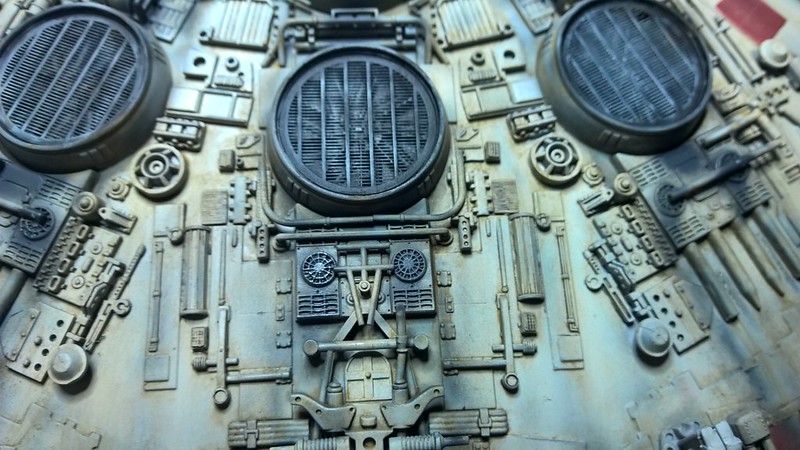
The black needs to be removed in the yellow areas. In my opinion, the exhaust stain starts in the center of each large exhaust, darkens the center and coats the 6 o’clock position below each large opening. Now the two smaller ports on Row 2 also vent a slightly darker stain which feathers out to just the next series of panels. I am working up a sketch. To be continued.
SKETCH
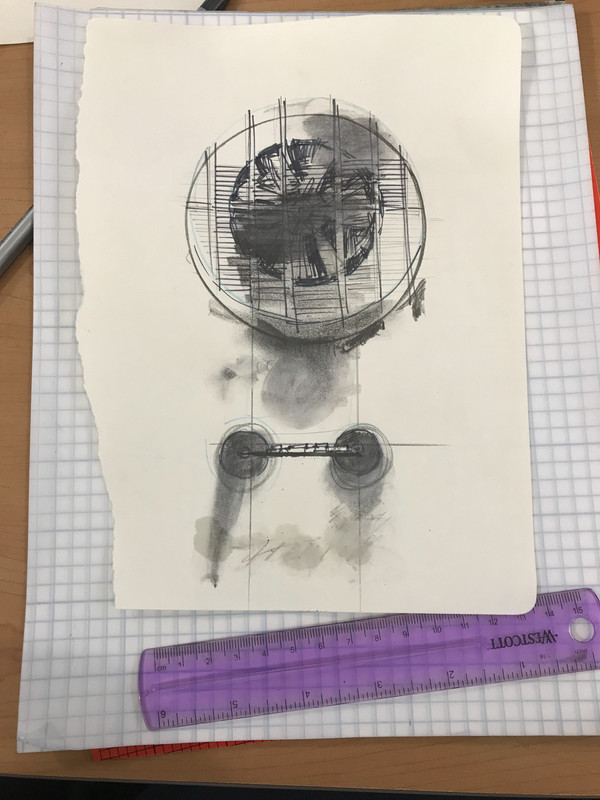
ESB
Bruce / SPEEDGRAFLEX
Re: Fine Molds Millennium Falcon WIP
Bruce thanks so much for taking the time with the edited photo and your sketch. After doing some more image searches on google I stumbled upon something funny, the photos I have of the back of the falcon are from a promo Disney model they had set up in the park in Florida. From what I've read they had the original in California and had another built for Florida and Europe. That one does have alot darker exhaust stains. Anyway the exhaust was the last thing done with the rest of the weathering being under a clear coat of Mr. Super clear flat. So all I should have to do is go in with some isopropyl alcohol and remove what I have done.... In theory... And not hurt the underlying work.
March as one, Don't look back
Odin's sons... Attack!
Unleash hell! Do not repent! Warfare grants us no lament
Let your weapons slash and tear This is no place for fear
Hold the lines! Move as one! In unity our victory's won
Our shields will form a mighty wall
United we shall never fall
Odin's sons... Attack!
Unleash hell! Do not repent! Warfare grants us no lament
Let your weapons slash and tear This is no place for fear
Hold the lines! Move as one! In unity our victory's won
Our shields will form a mighty wall
United we shall never fall
Re: Fine Molds Millennium Falcon WIP
Thanks for the support. I wasn't aware that revel was going to start making the new Bandai kits. I know Revel owns the molds for the Fine Molds kit now (this kit)mostrich wrote:This is one of those WOW-projects. I'm ogling on Revell's repop of the Bandai Falcon that'll hit the market this month. But boy, it's huge...
March as one, Don't look back
Odin's sons... Attack!
Unleash hell! Do not repent! Warfare grants us no lament
Let your weapons slash and tear This is no place for fear
Hold the lines! Move as one! In unity our victory's won
Our shields will form a mighty wall
United we shall never fall
Odin's sons... Attack!
Unleash hell! Do not repent! Warfare grants us no lament
Let your weapons slash and tear This is no place for fear
Hold the lines! Move as one! In unity our victory's won
Our shields will form a mighty wall
United we shall never fall
-
speedgraflex
- Moderator
- Posts: 9759
- Joined: Fri Feb 10, 2017 11:08 pm
- Location: Santa Monica, California
Re: Fine Molds Millennium Falcon WIP
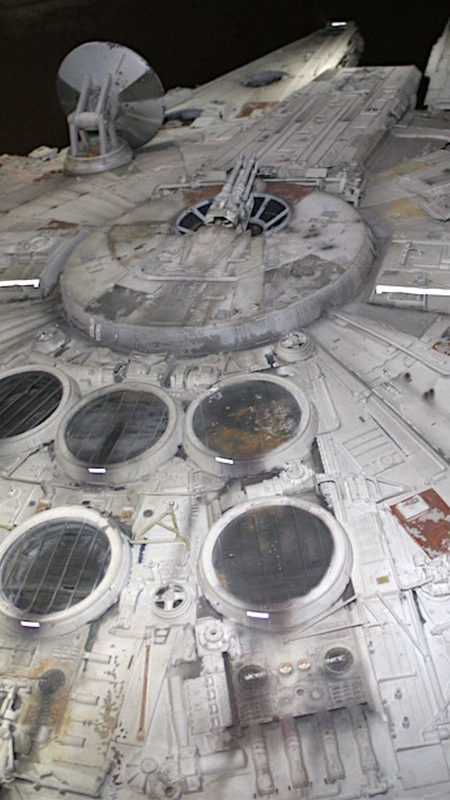
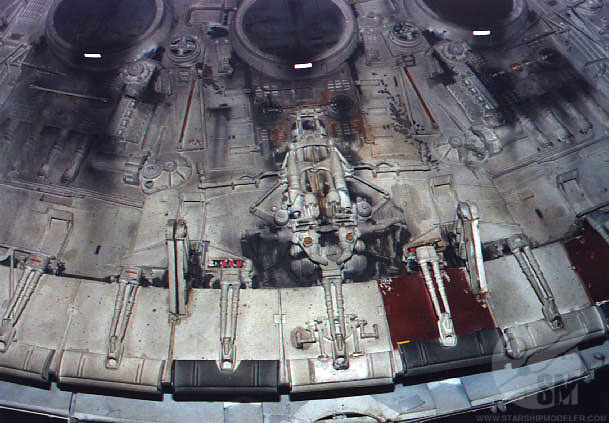
Clint, you are most welcome! Below is a shot of the 32-in original, which still holds a great many clues, especially for that “6 o’clock shadow.”Floki wrote:Bruce thanks so much for taking the time with the edited photo and your sketch. After doing some more image searches on google I stumbled upon something funny, the photos I have of the back of the falcon are from a promo Disney model they had set up in the park in Florida. From what I've read they had the original in California and had another built for Florida and Europe. That one does have alot darker exhaust stains. Anyway the exhaust was the last thing done with the rest of the weathering being under a clear coat of Mr. Super clear flat. So all I should have to do is go in with some isopropyl alcohol and remove what I have done.... In theory... And not hurt the underlying work.
Bruce / SPEEDGRAFLEX
Re: Fine Molds Millennium Falcon WIP
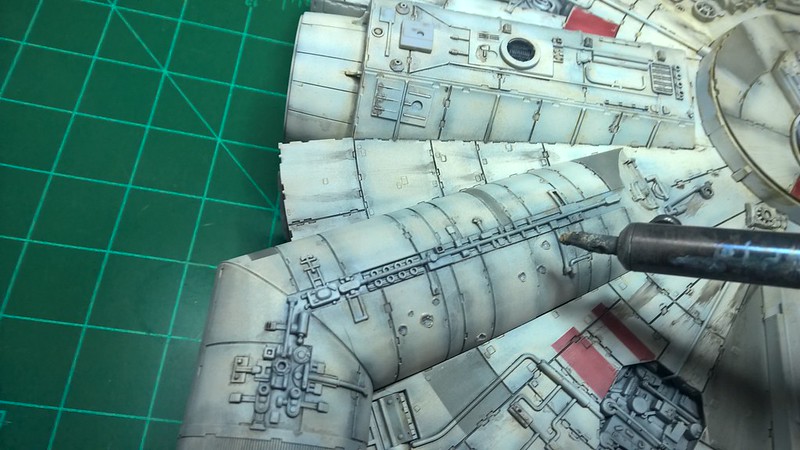
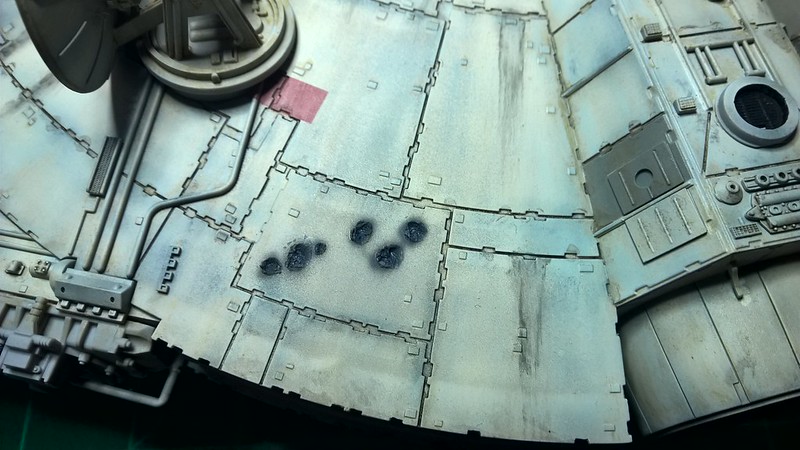
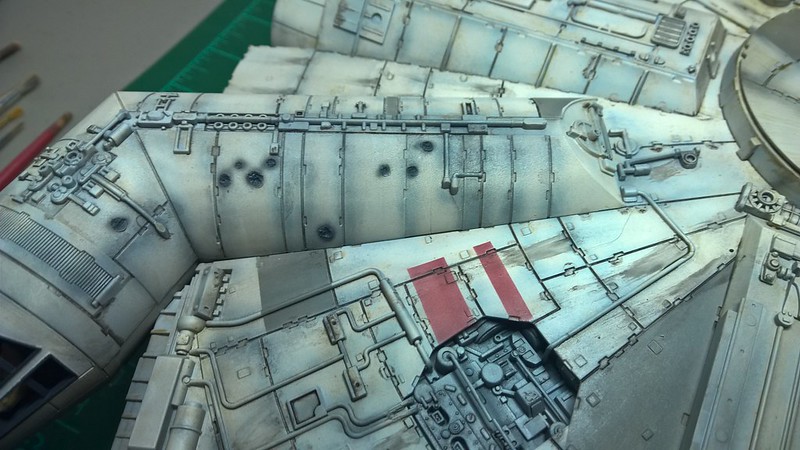
Started back on finishing up the weathering by adding the blaster hit marks by the dish, top turrent, and the cockpit tube. I used my soldering iron with a old nasty tip in to create the hit marks.
next I started to fix the engine exhaust so I tried to scrub it off with some isopropayl but I guess I had sealed it in with Mr. Super clear didn't think I did. Instead I went back with the base color and sprayed it over the streaks. I feathered it in as best I could then went back in with the MIG filters I used and again feathered it in with out trying to over do it. To finish it off I thinned some Tamiya XF-63 German Grey (1:3Thinner) and put in some new light shorter streaks. I couldn't get rid of the old ones completely but after blending for awhile I'm happy with the way it looks might not be screen accurate but I'm keeping it for now. While I had the XF-63 in the airbrush I hit the blaster hits.
Thanks for looking in.
March as one, Don't look back
Odin's sons... Attack!
Unleash hell! Do not repent! Warfare grants us no lament
Let your weapons slash and tear This is no place for fear
Hold the lines! Move as one! In unity our victory's won
Our shields will form a mighty wall
United we shall never fall
Odin's sons... Attack!
Unleash hell! Do not repent! Warfare grants us no lament
Let your weapons slash and tear This is no place for fear
Hold the lines! Move as one! In unity our victory's won
Our shields will form a mighty wall
United we shall never fall
-
speedgraflex
- Moderator
- Posts: 9759
- Joined: Fri Feb 10, 2017 11:08 pm
- Location: Santa Monica, California
Re: Fine Molds Millennium Falcon WIP
Clint, TGIF! Your blending skills are amazing! The exhaust effects look so much more accurate now. What a relief. It takes work to undo and make changes, but you rose to the challenge and completed the task. Congratulations.
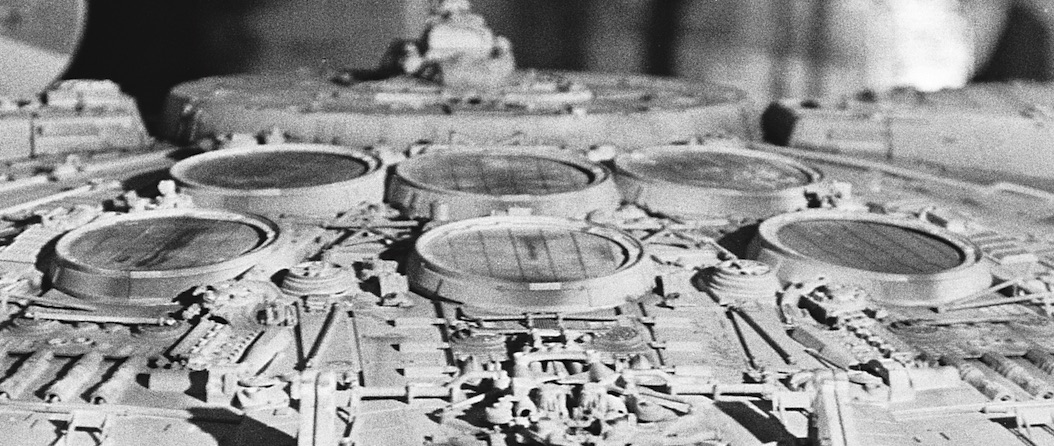
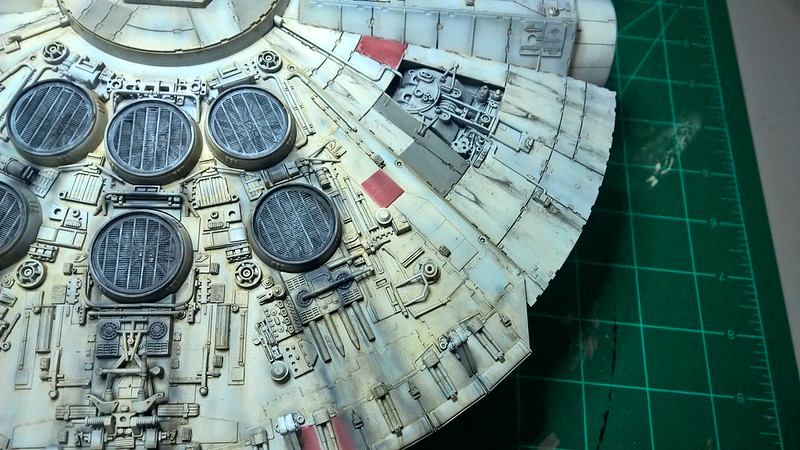
There is also a brown rust effect both on the surface of the louvers as well as mixing with the exhaust ports below—this is most prominent on the third exhaust in the top row and the ports below the middle exhaust of the bottom row, but it is also happening with the others... and I am not sure why nobody adds the reflective strips of tape at the six o’clock positions on the exhausts, but before digital models were made, those strips were there. Also, are you going to add the six Champion spark plug decals? I don’t remember if those are included with the FM kit.
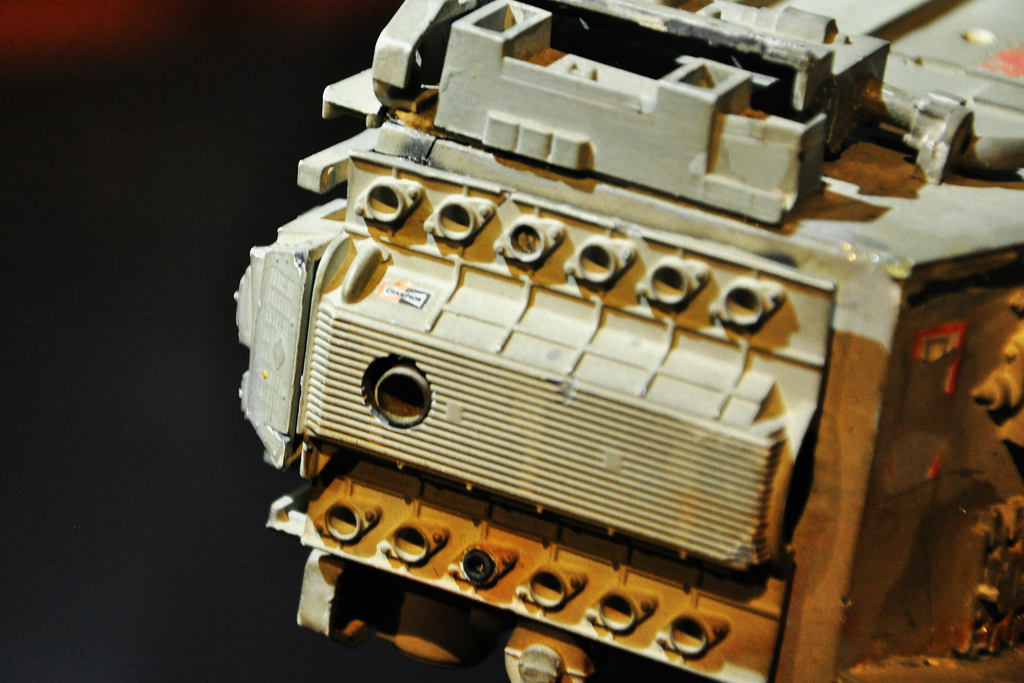
There is also a brown rust effect both on the surface of the louvers as well as mixing with the exhaust ports below—this is most prominent on the third exhaust in the top row and the ports below the middle exhaust of the bottom row, but it is also happening with the others... and I am not sure why nobody adds the reflective strips of tape at the six o’clock positions on the exhausts, but before digital models were made, those strips were there. Also, are you going to add the six Champion spark plug decals? I don’t remember if those are included with the FM kit.
Bruce / SPEEDGRAFLEX