Page 31 of 35

Re: 1/32 Special Hobby Hawker Tempest Mk V

Posted: Tue May 31, 2022 7:10 pm
by jkim
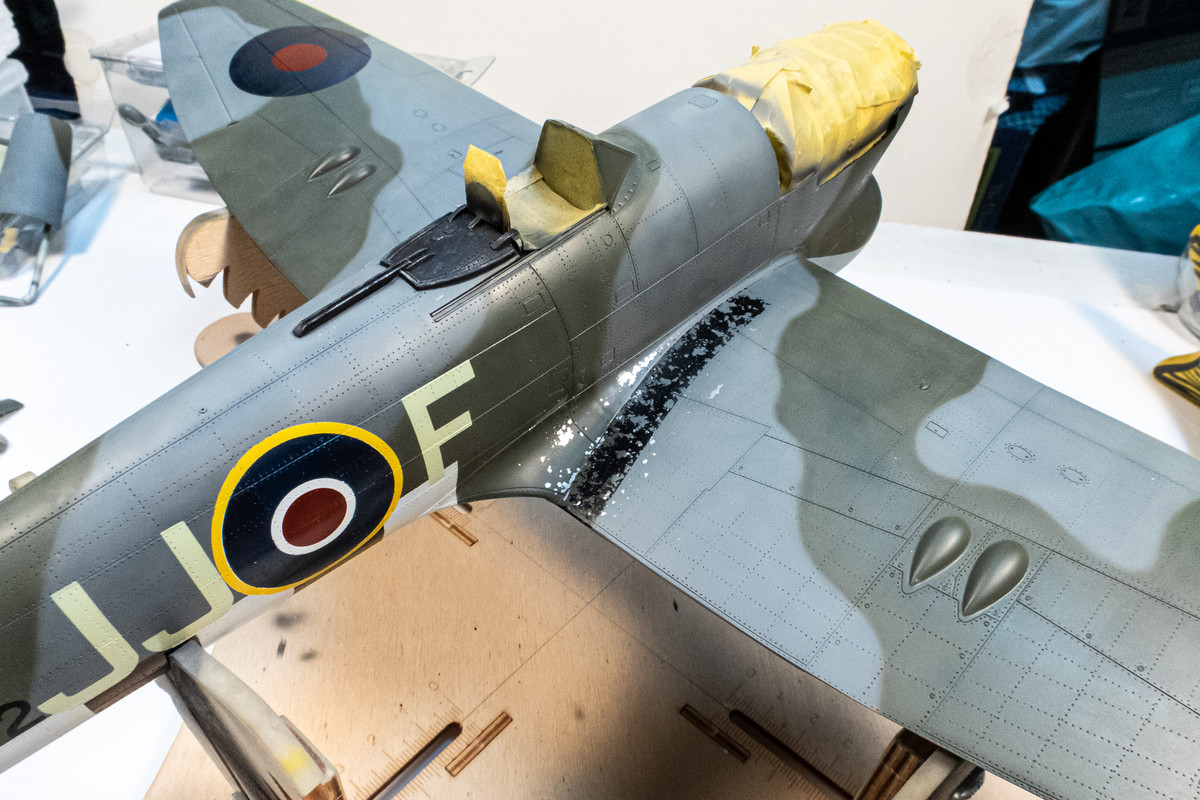
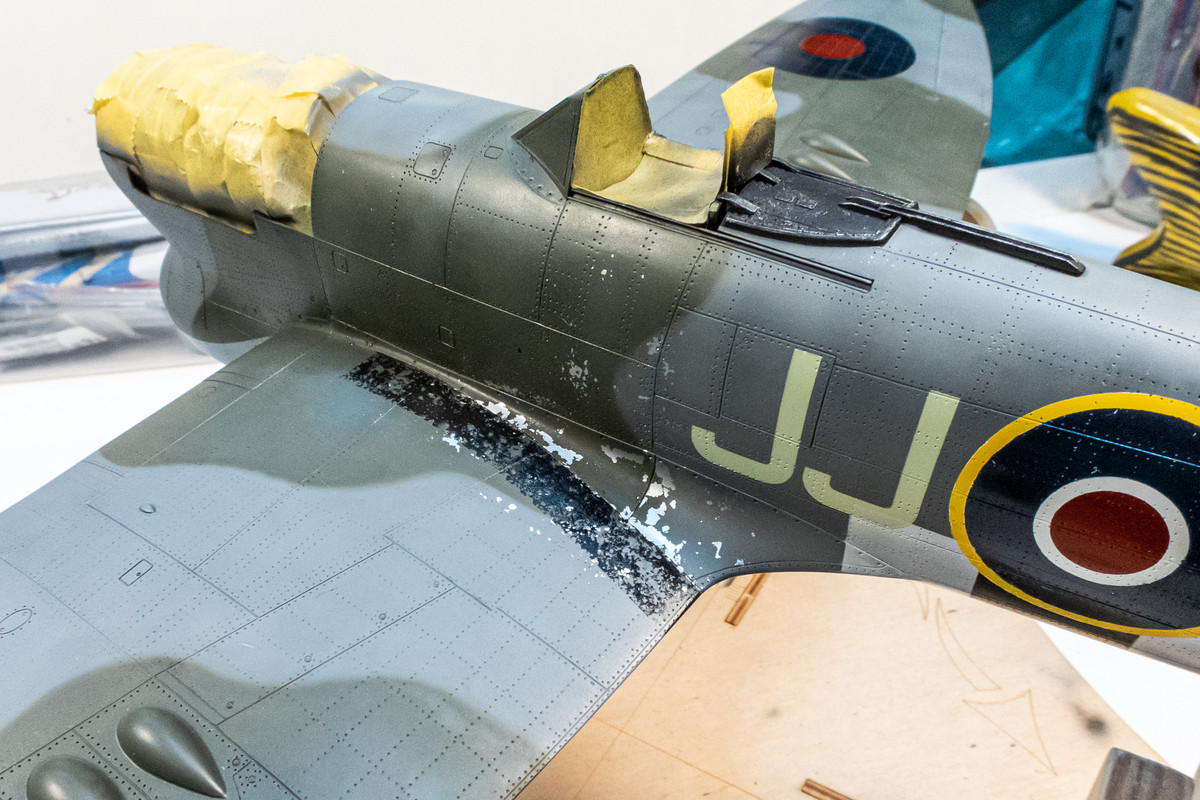
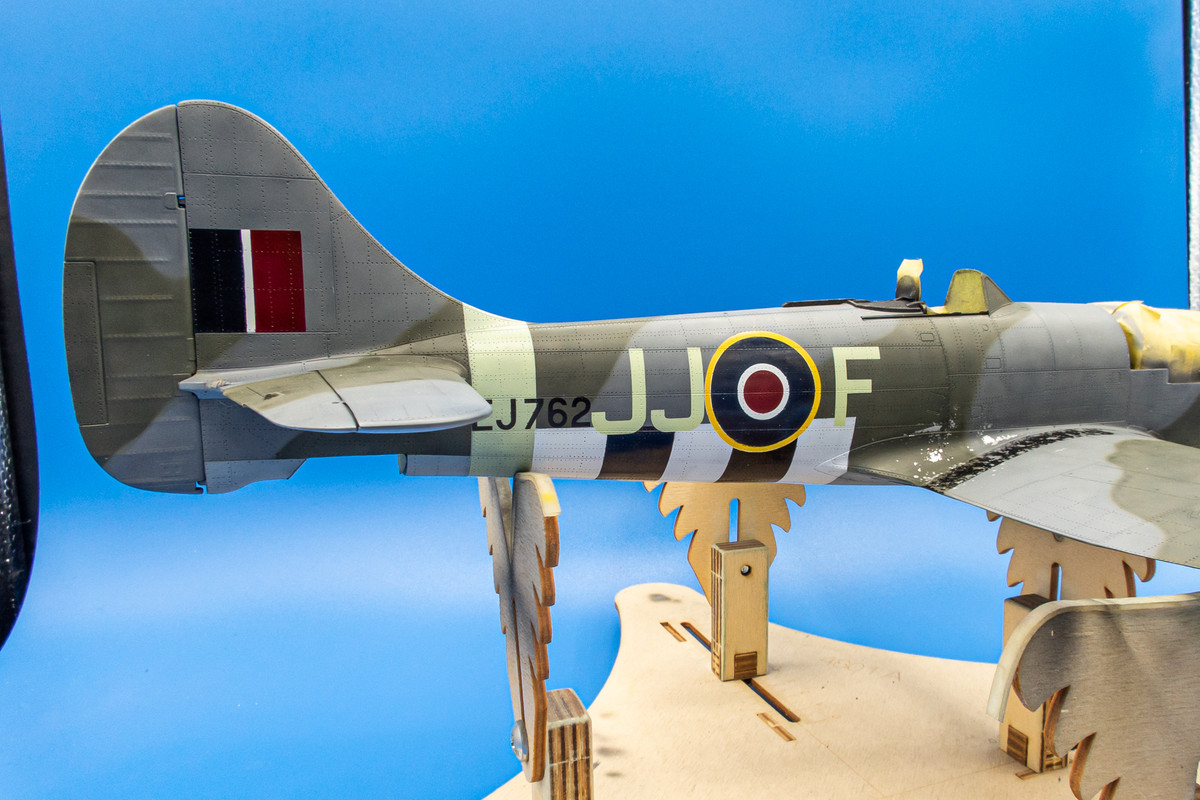
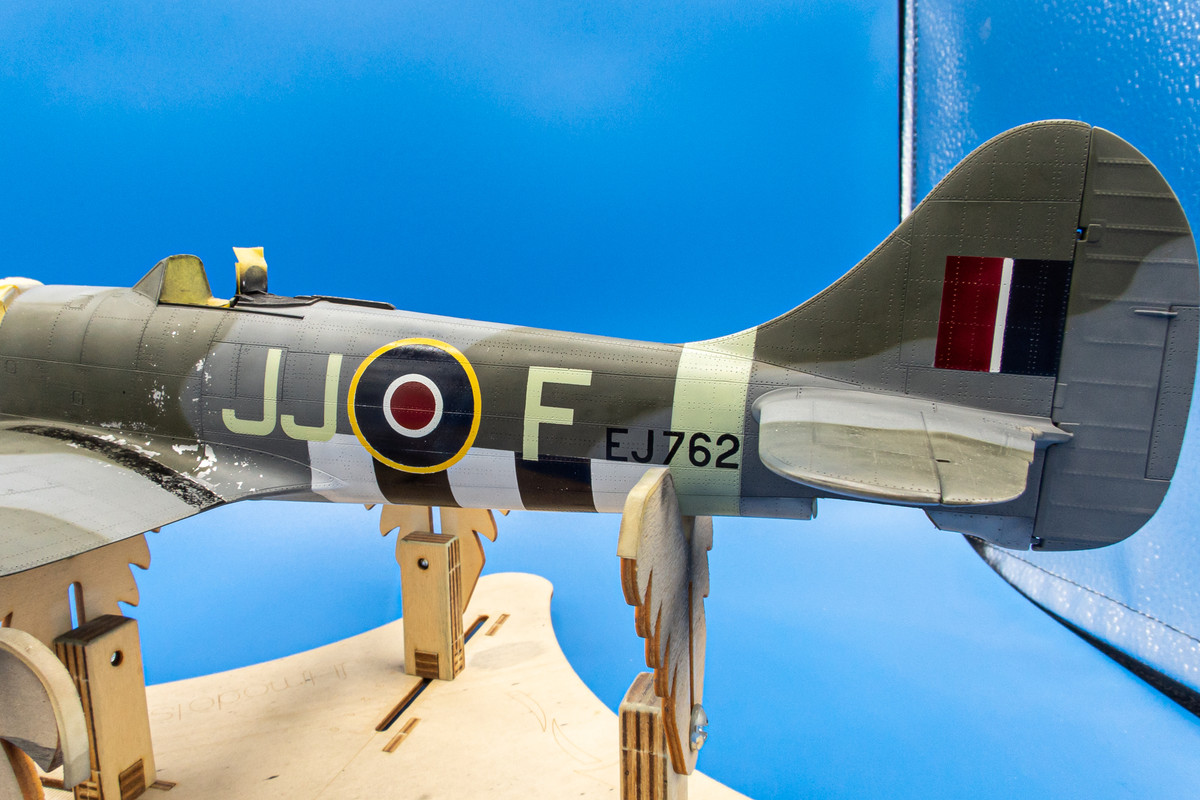
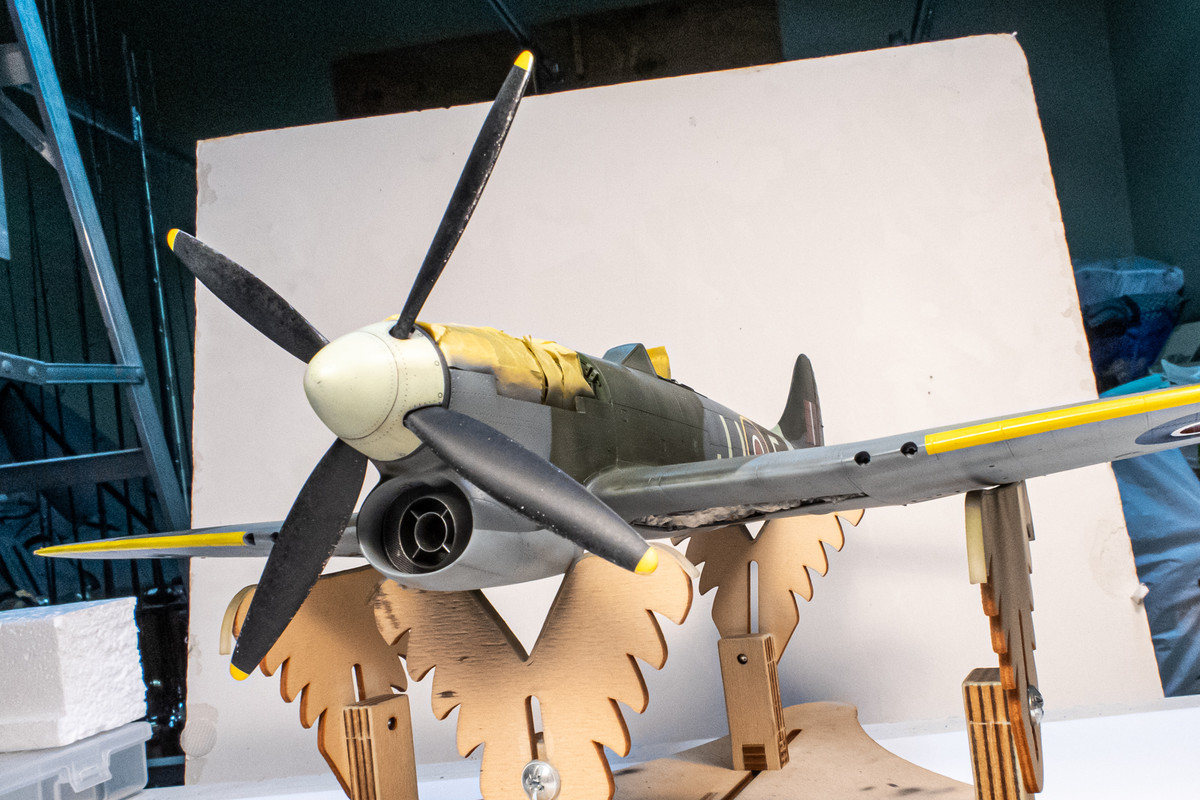
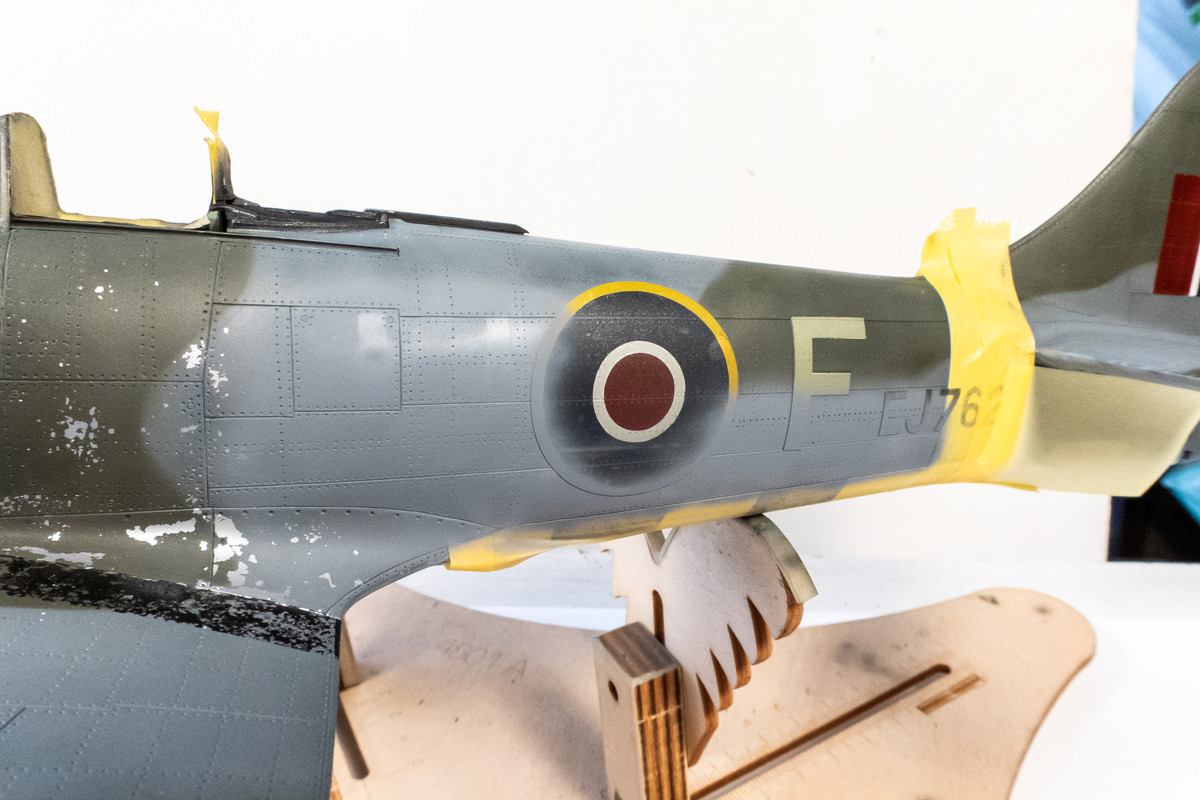
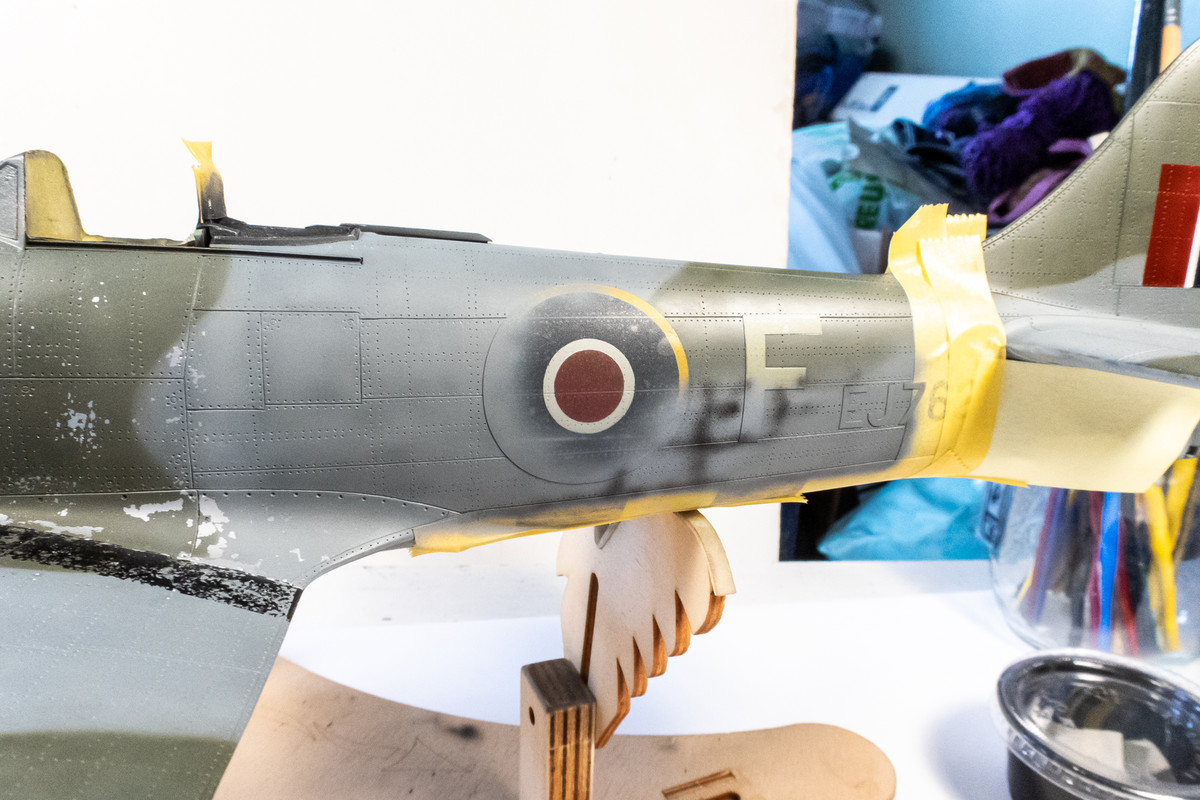
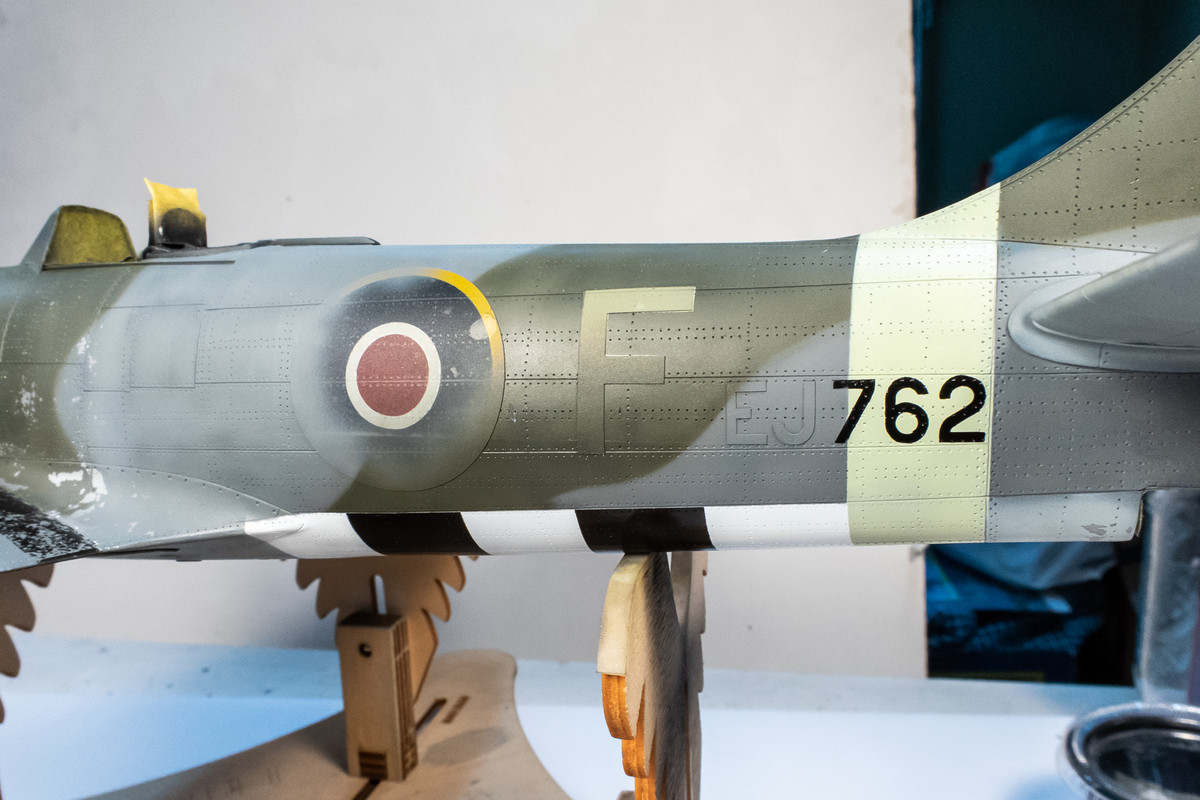
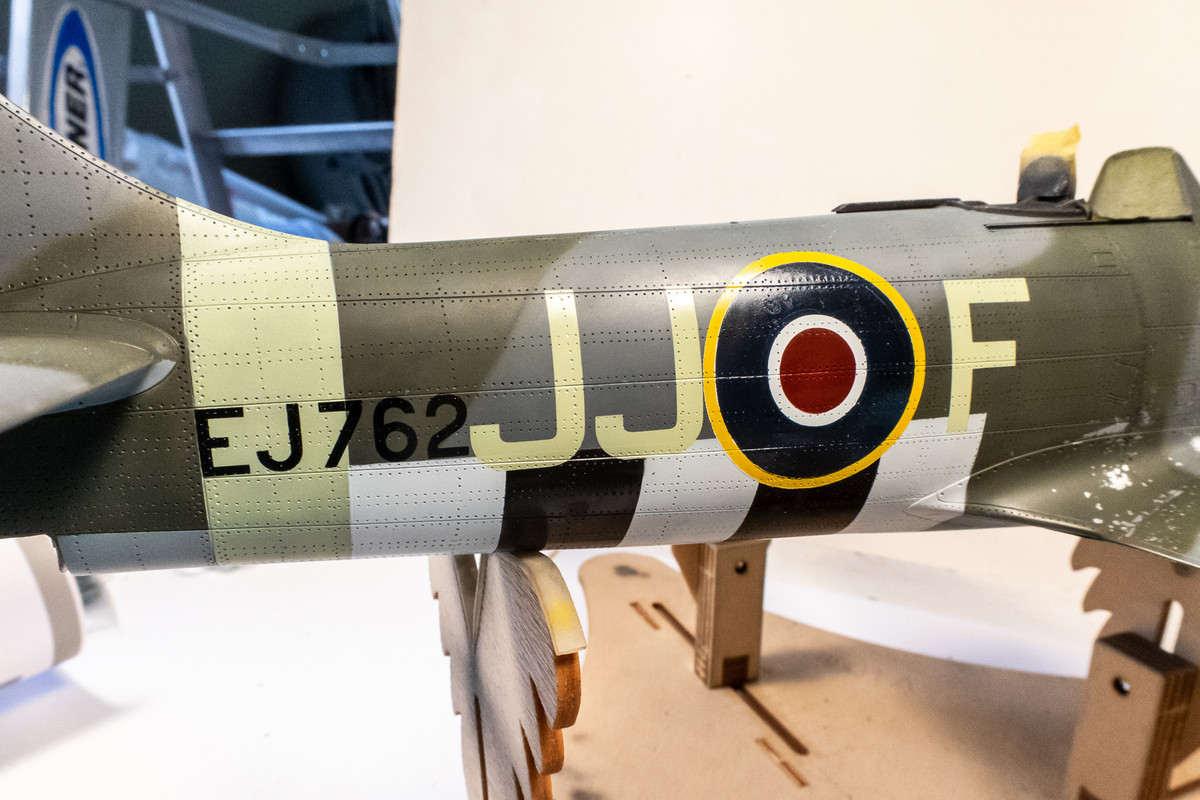
The serial numbers have been painted.
Image
Image

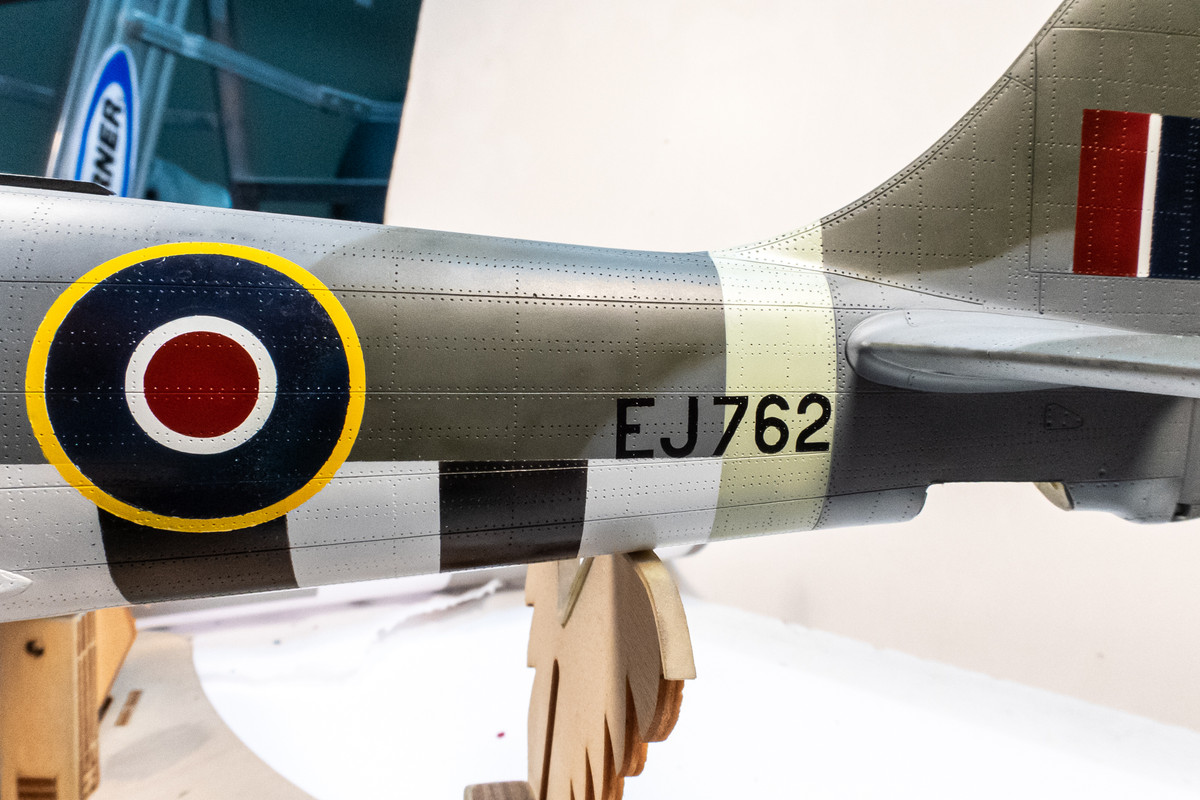
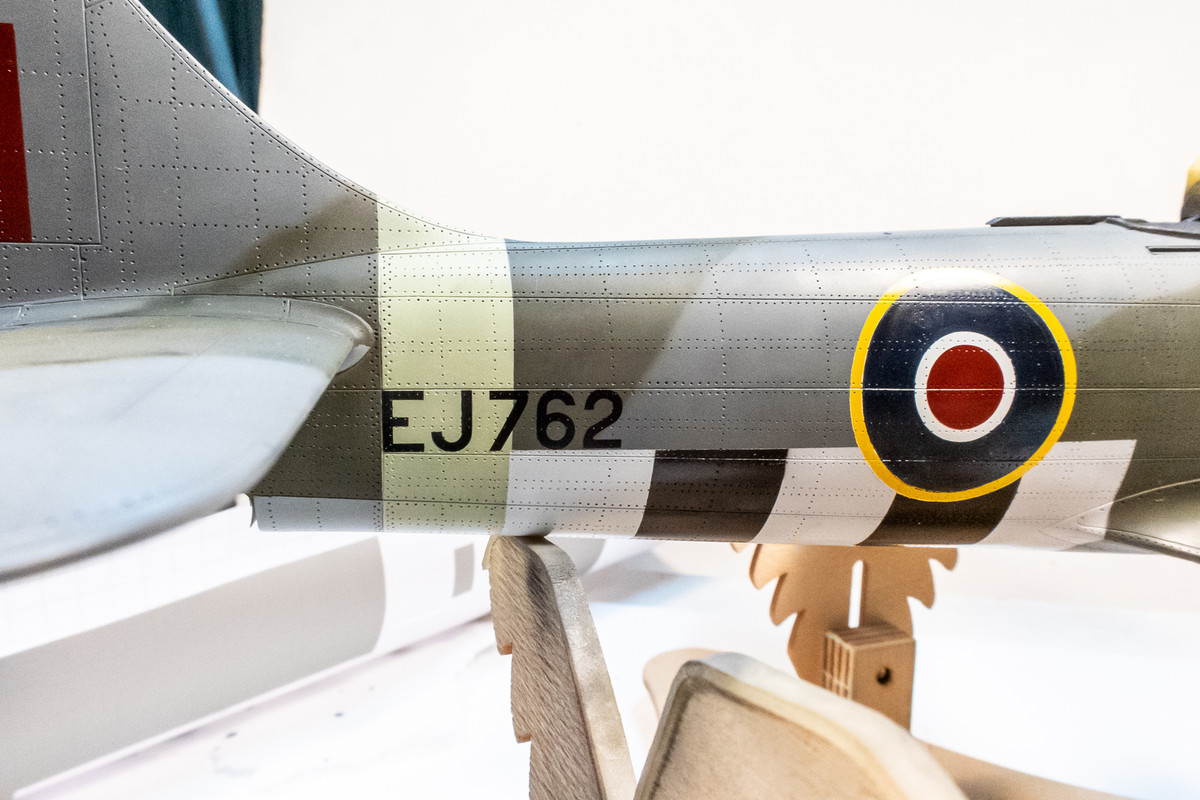
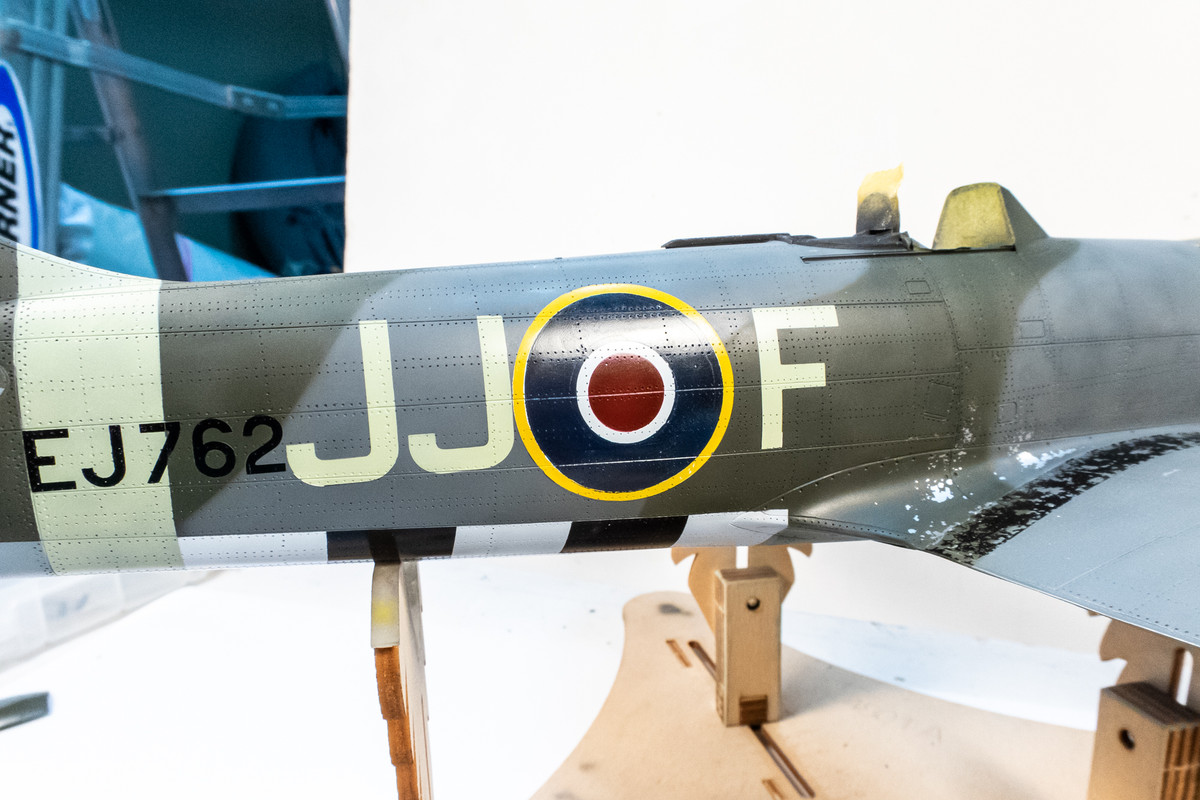
When I tried to place the "JJ" code, I found that is to large for the space that is between the serial number and fuselage roundel. The masks are traced from the decals so either the serial number or roundel is slightly out of position. Probably the roundel. But there is no way I am going to redo the roundel so I measured how much I'd have to squeeze the JJ down to make it fit. About 0.4mm.
Image

These types of adjustments are super easy to make in AutoCAD. I wanted to keep the height and thickness of the letters intact so I simply cut out a 0.2mm section of the horizontal part of each "J" to get the 0.4mm reduction.
Image

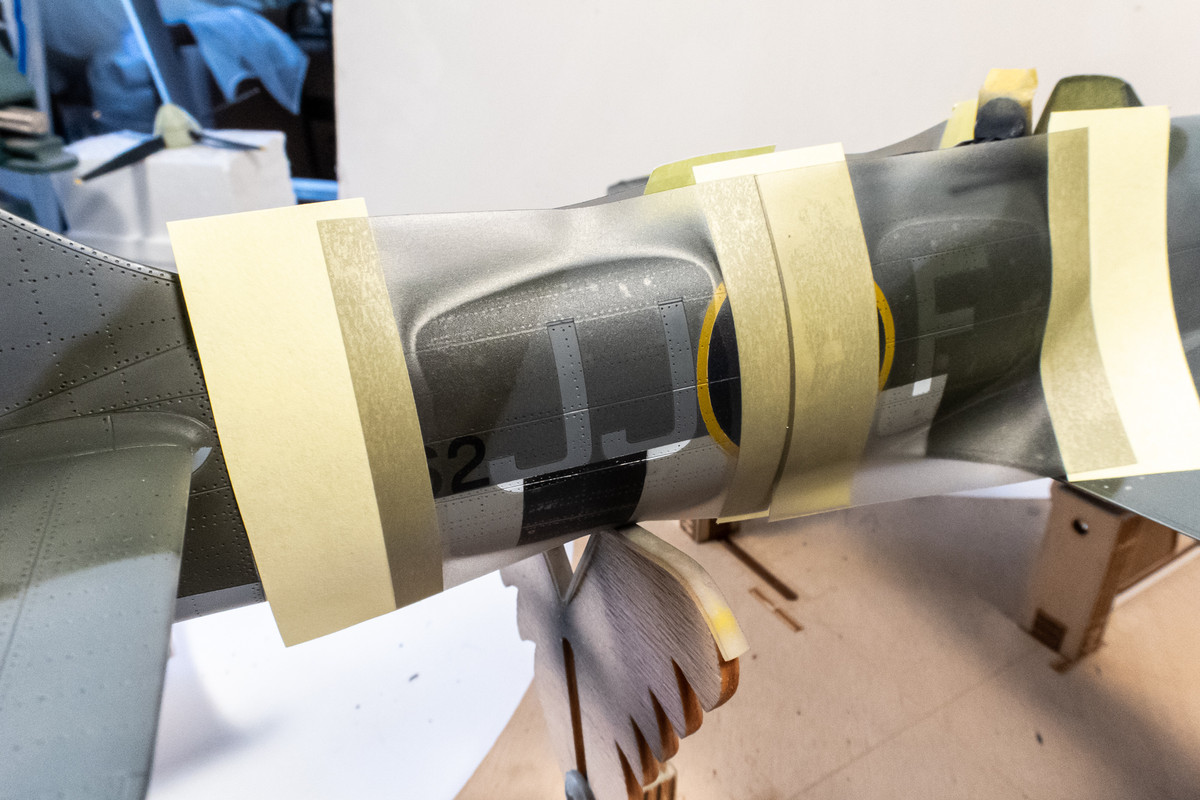
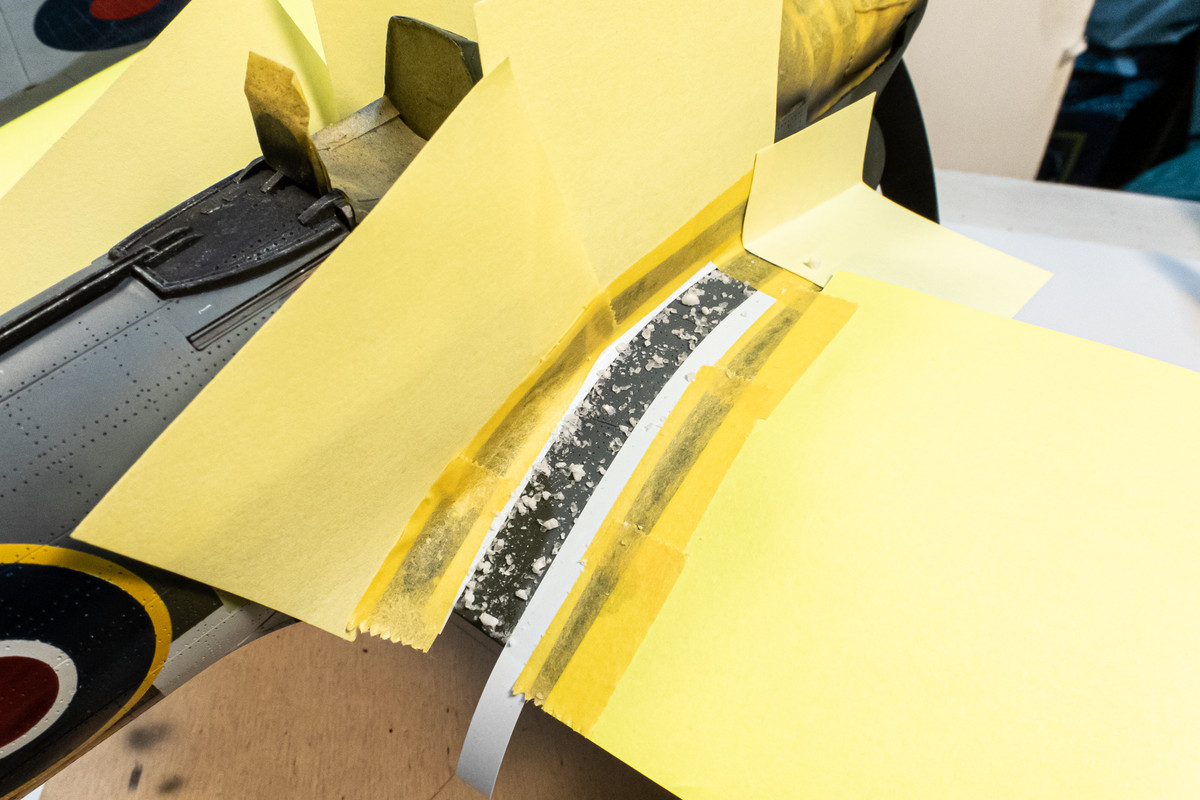
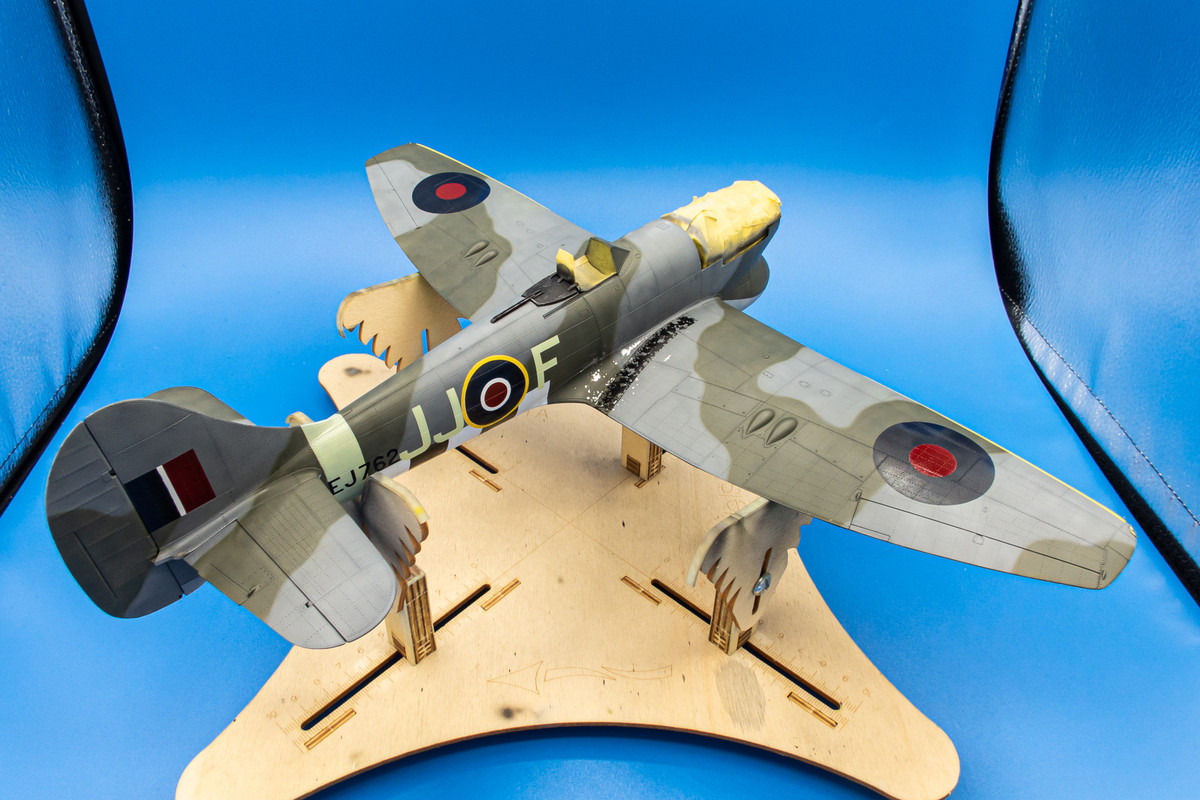
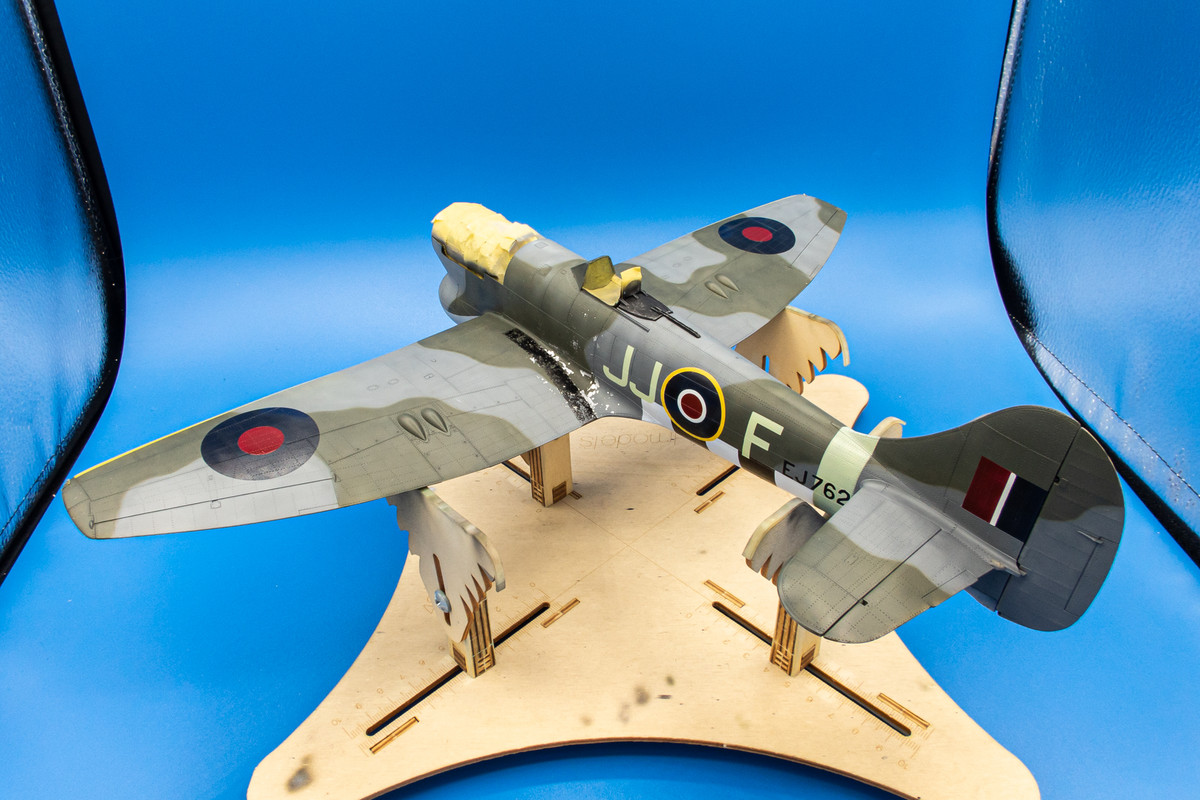
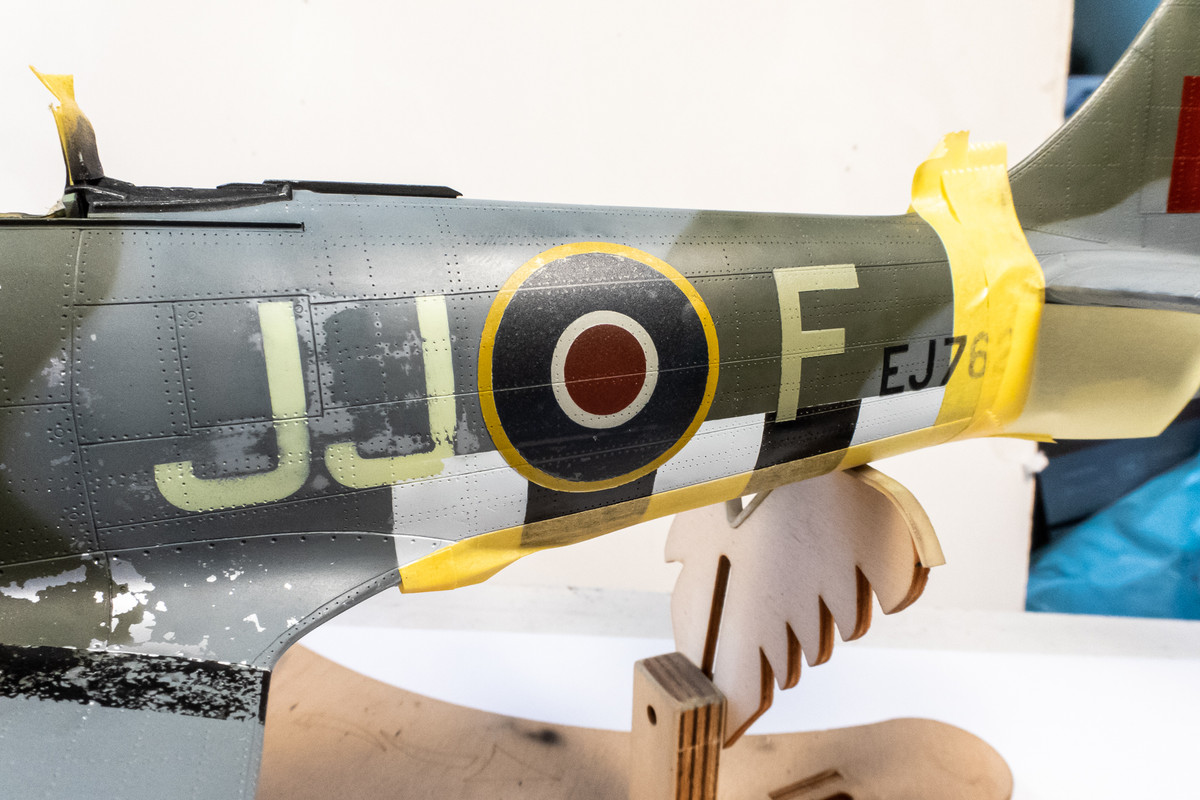
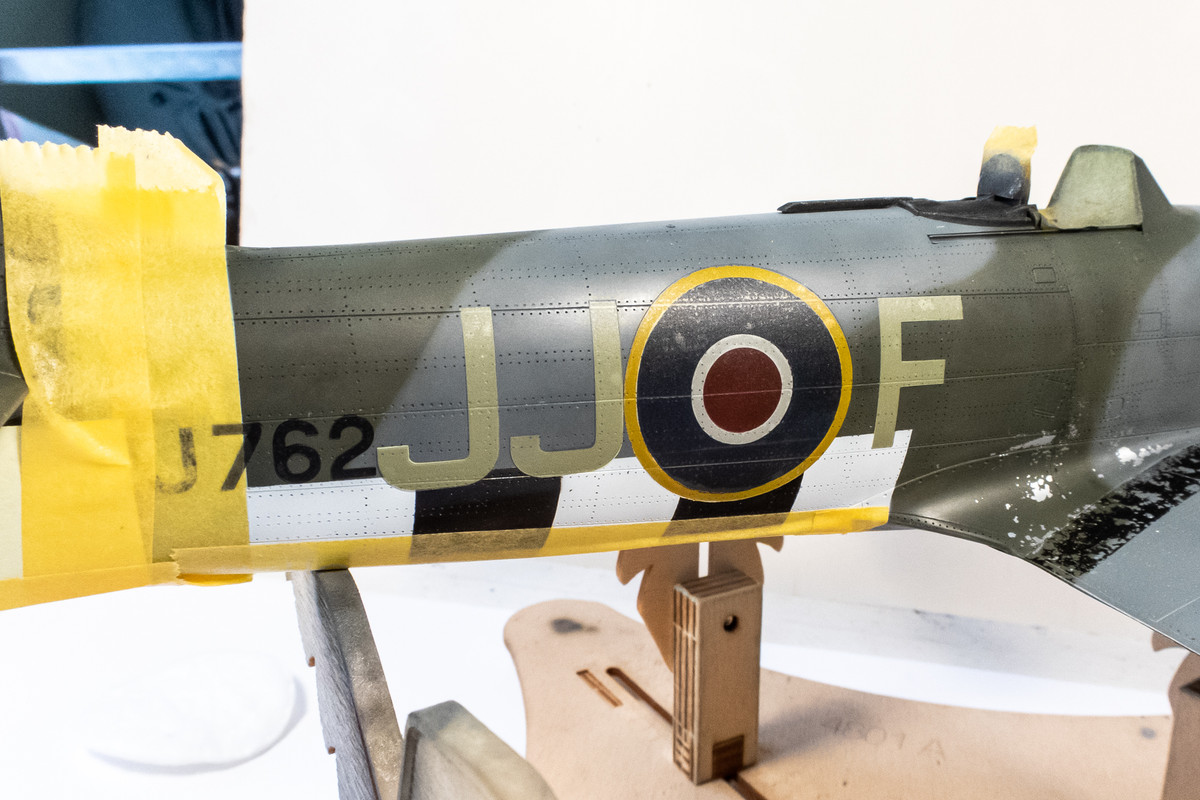
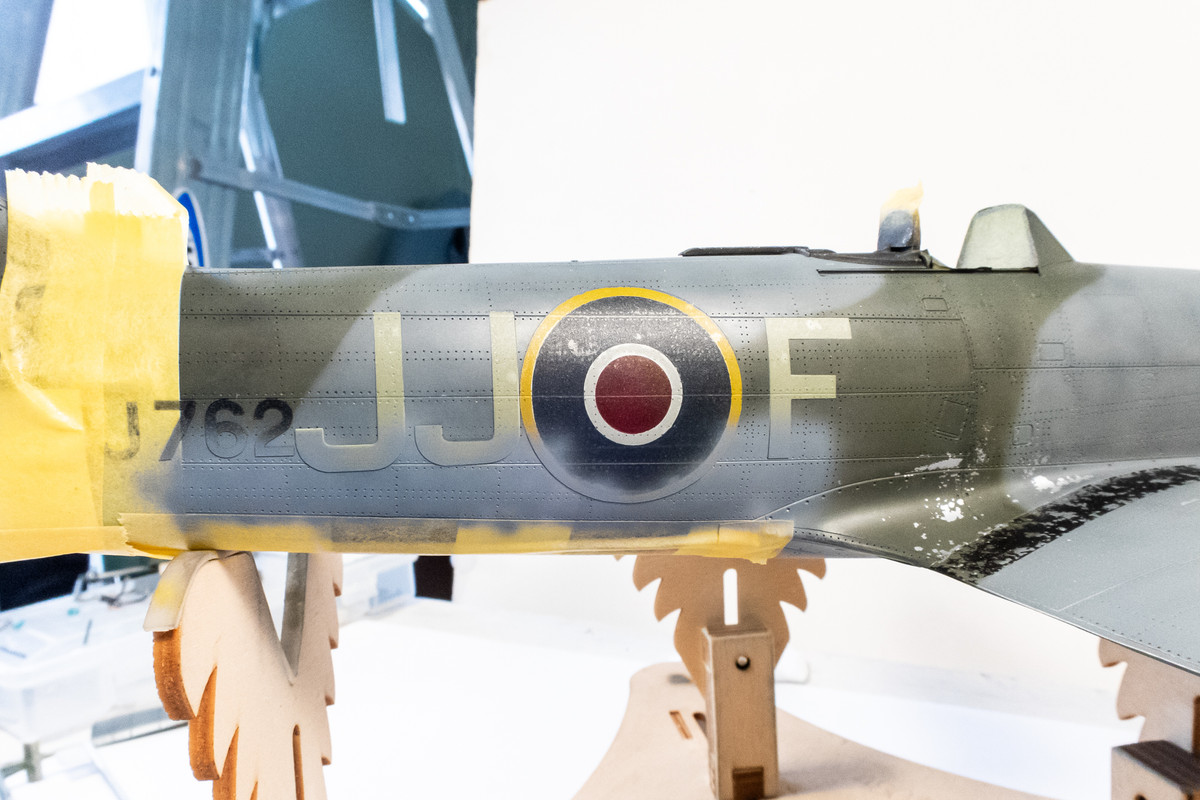
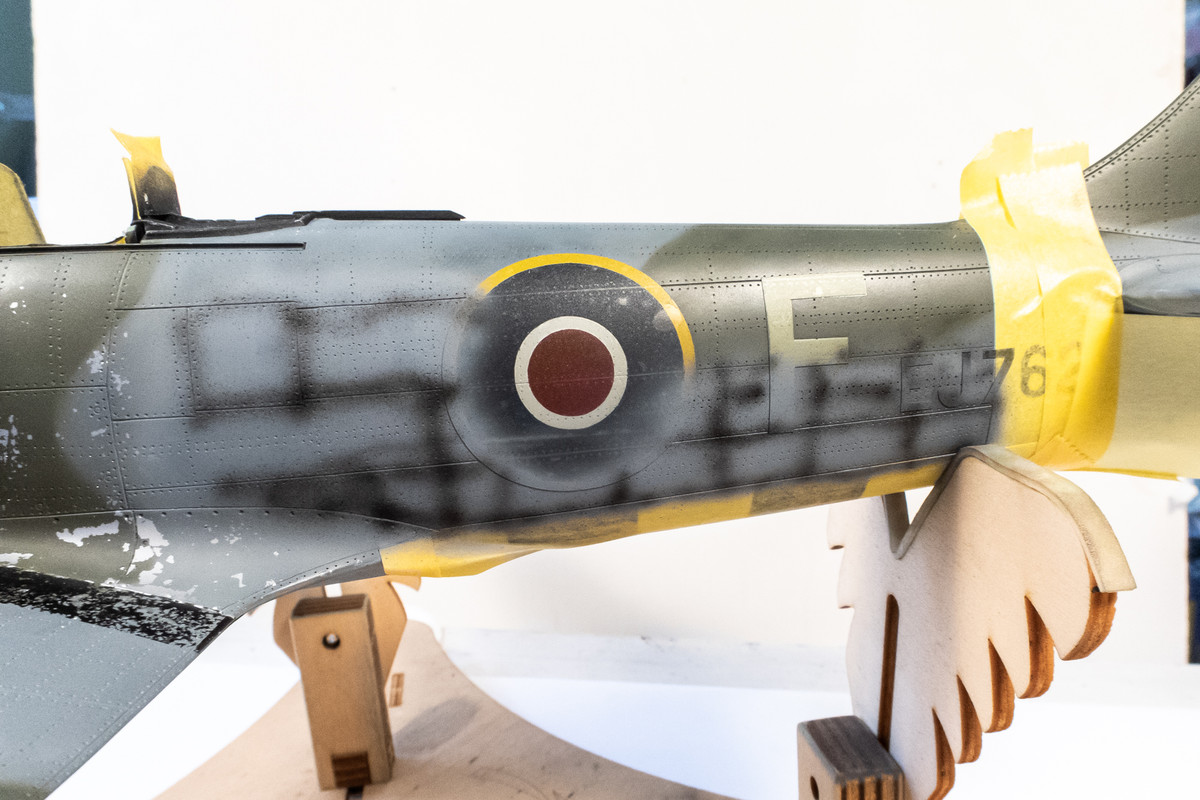
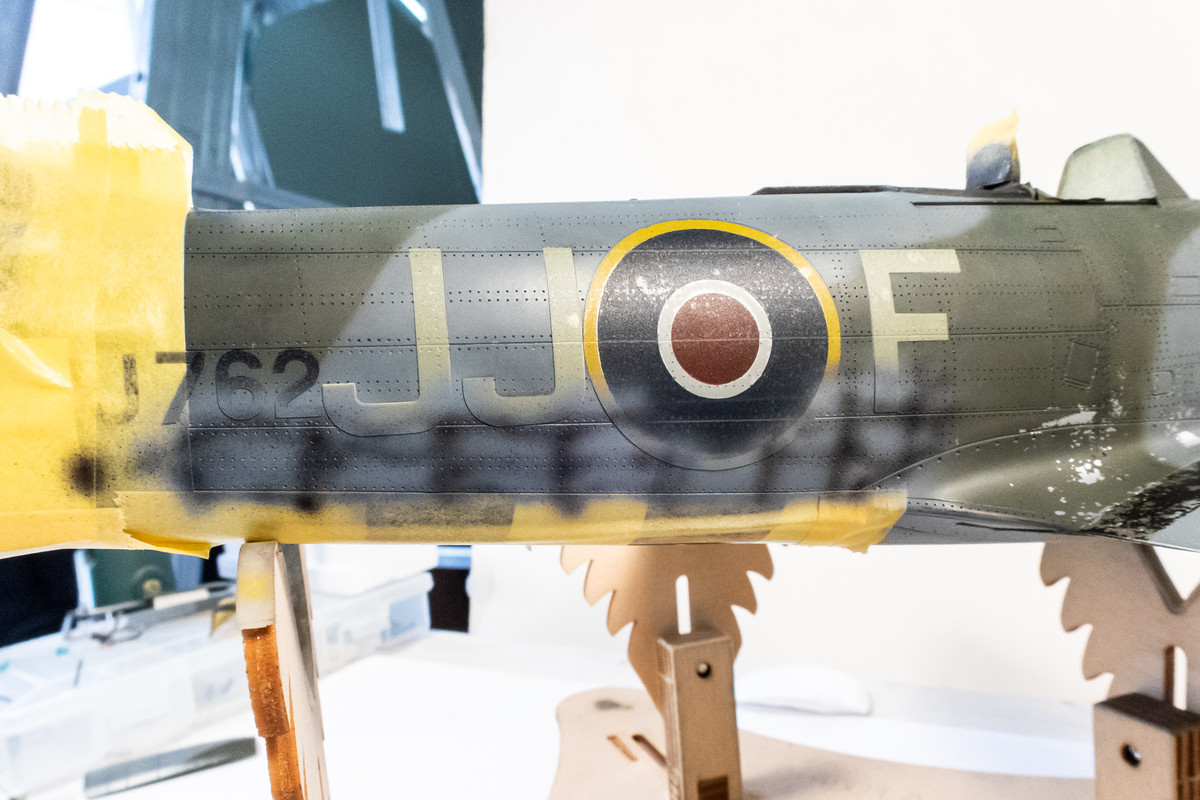
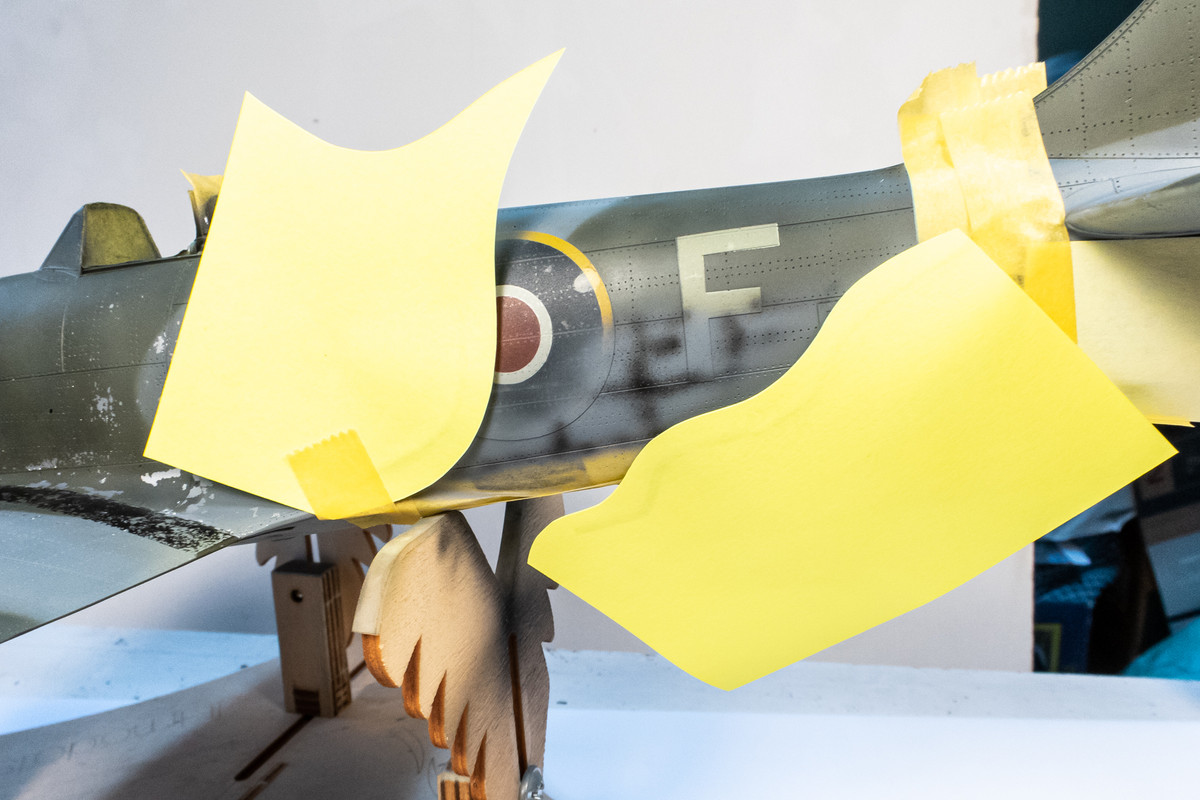
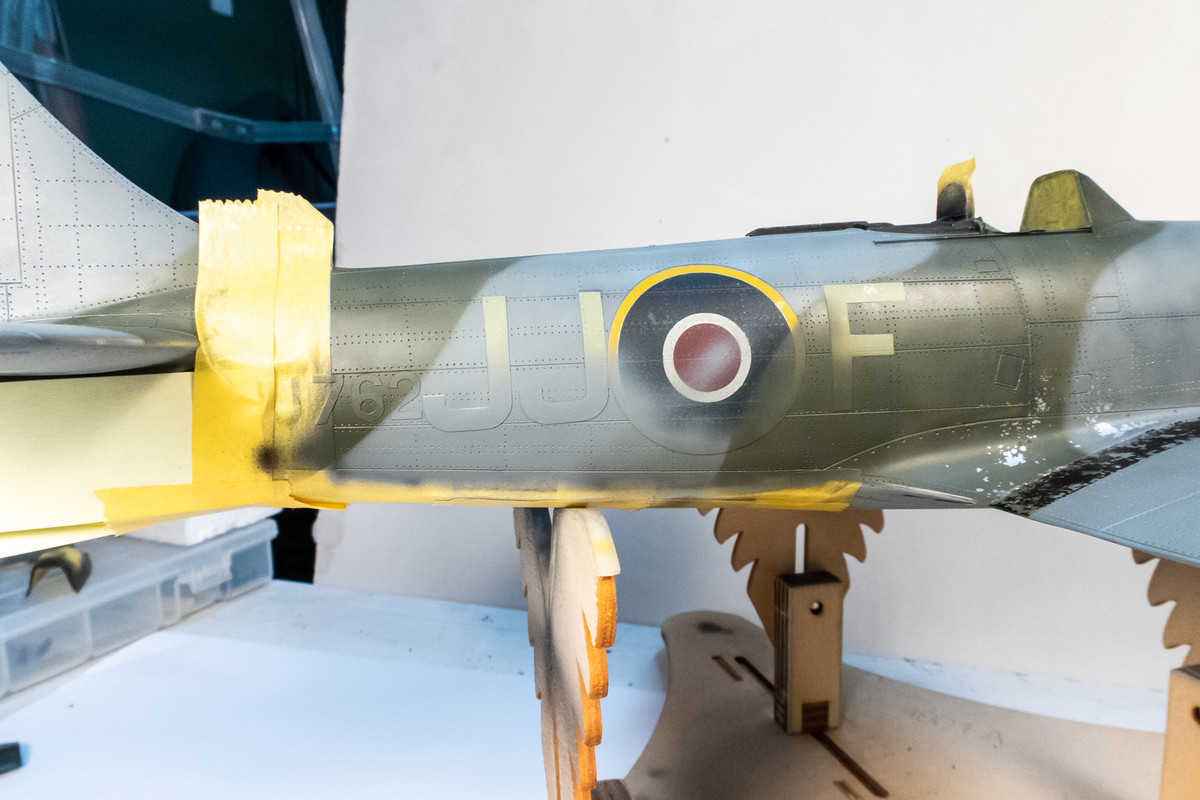
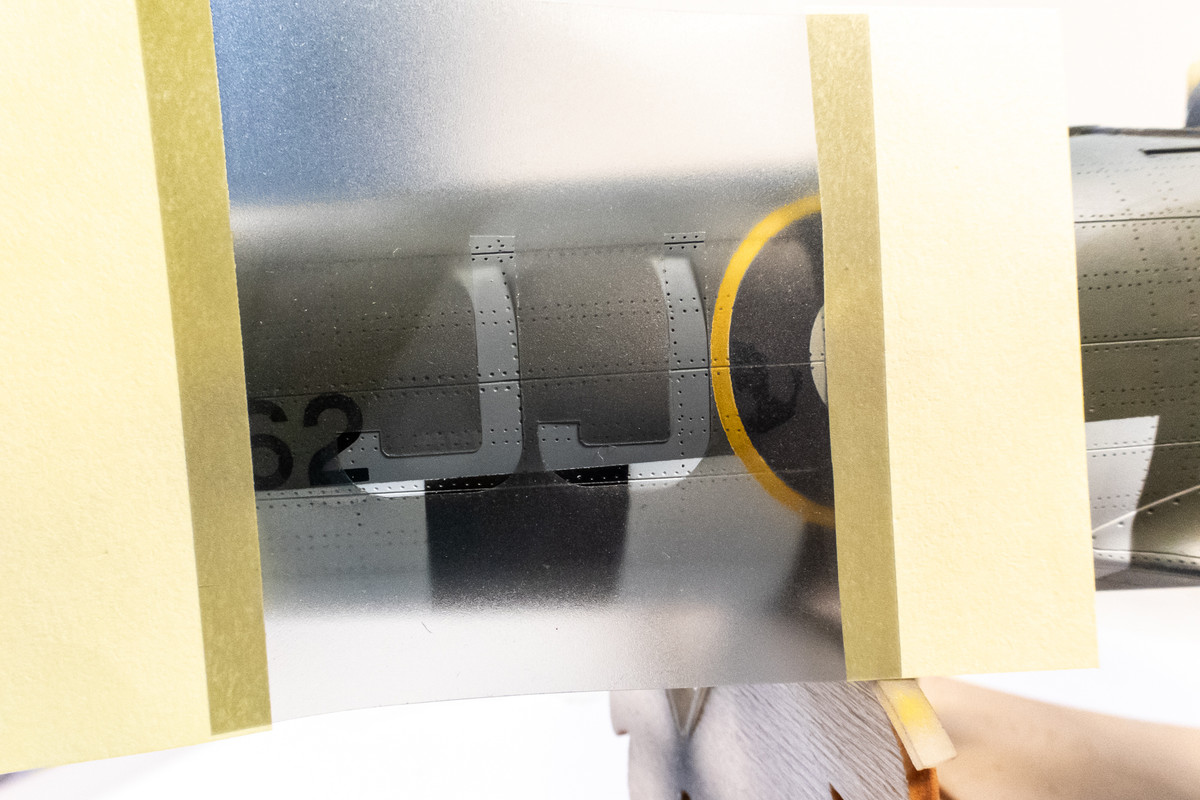
The JJ+F codes are painted in Sky, same as the tail band. For anyone using this type of vinyl mask, framing the mask with sections of paper like I've done make it MUCH easier to slide the mask into the correct position without the adhesive catching the model prematurely because of the vinyl bending.
Image

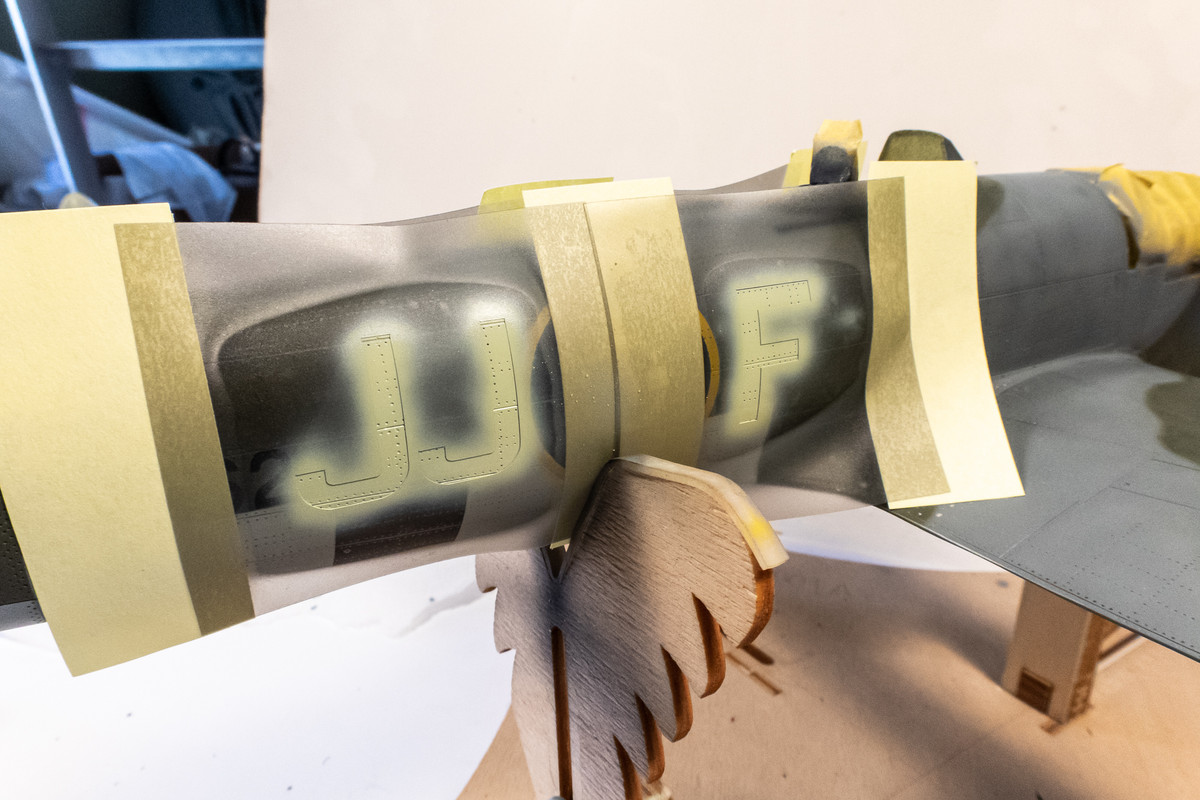
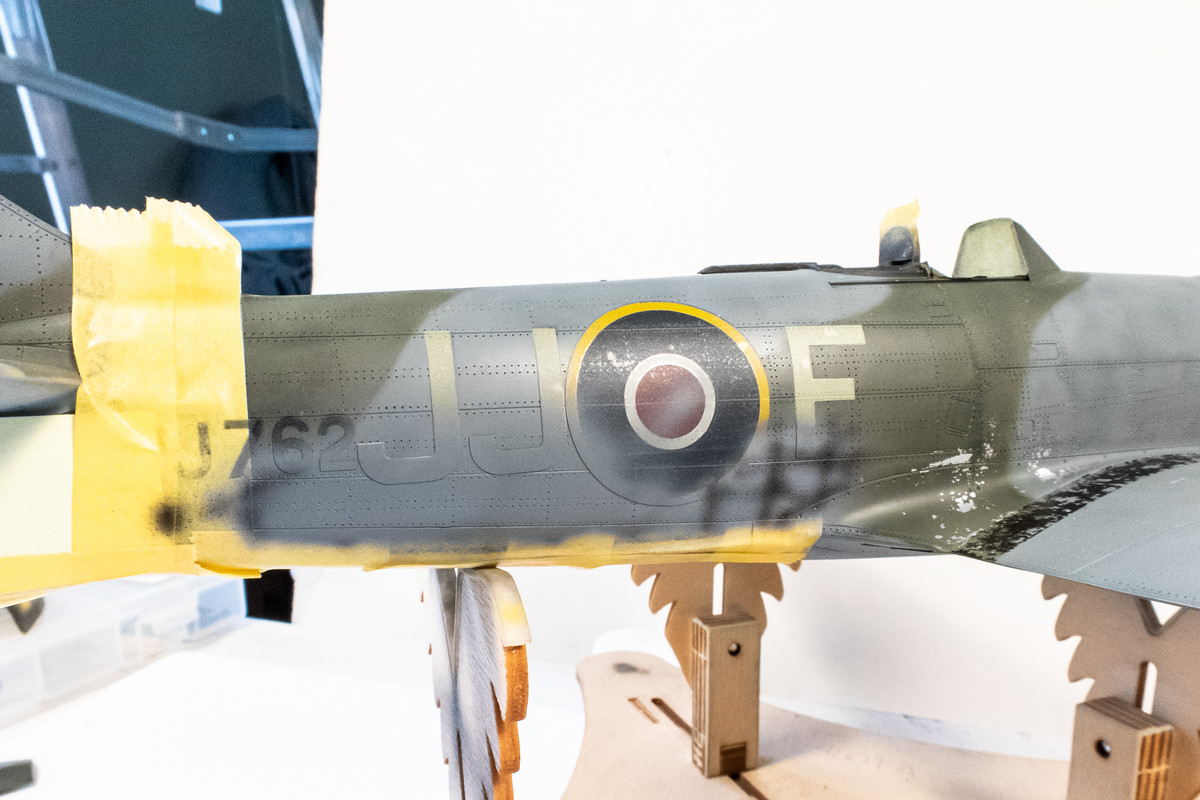
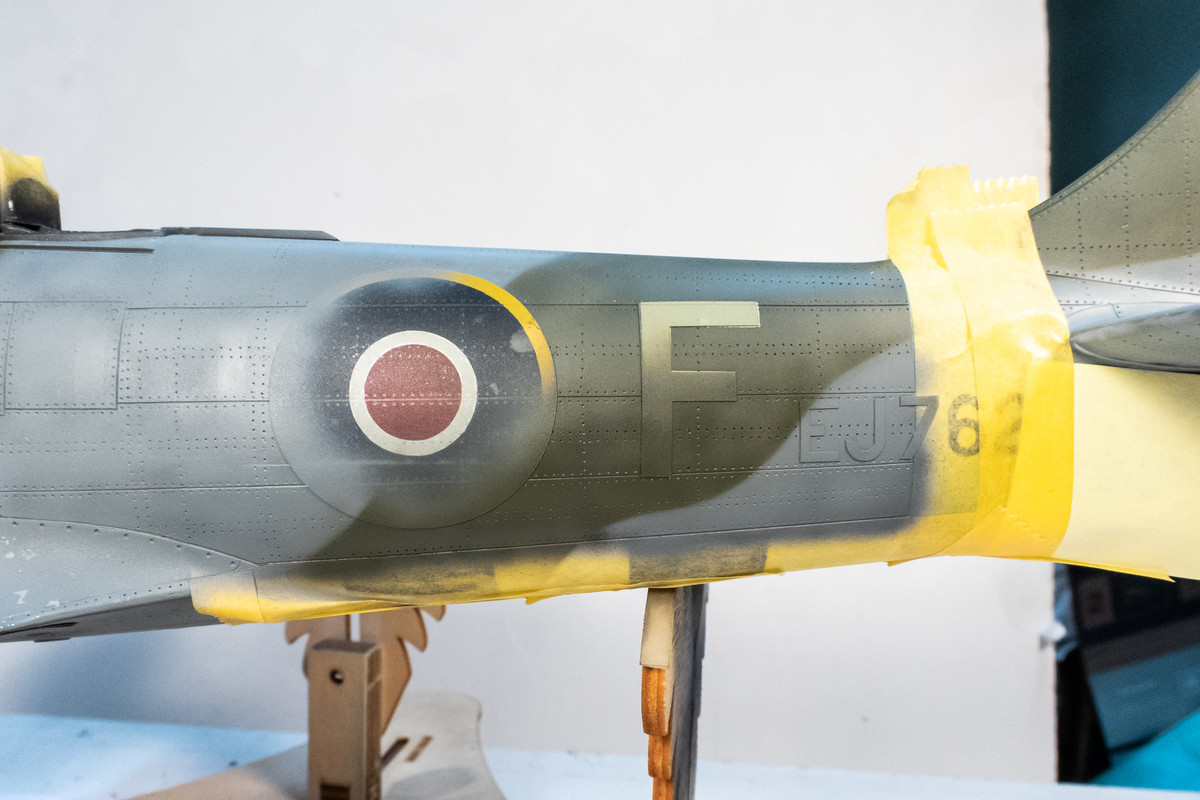
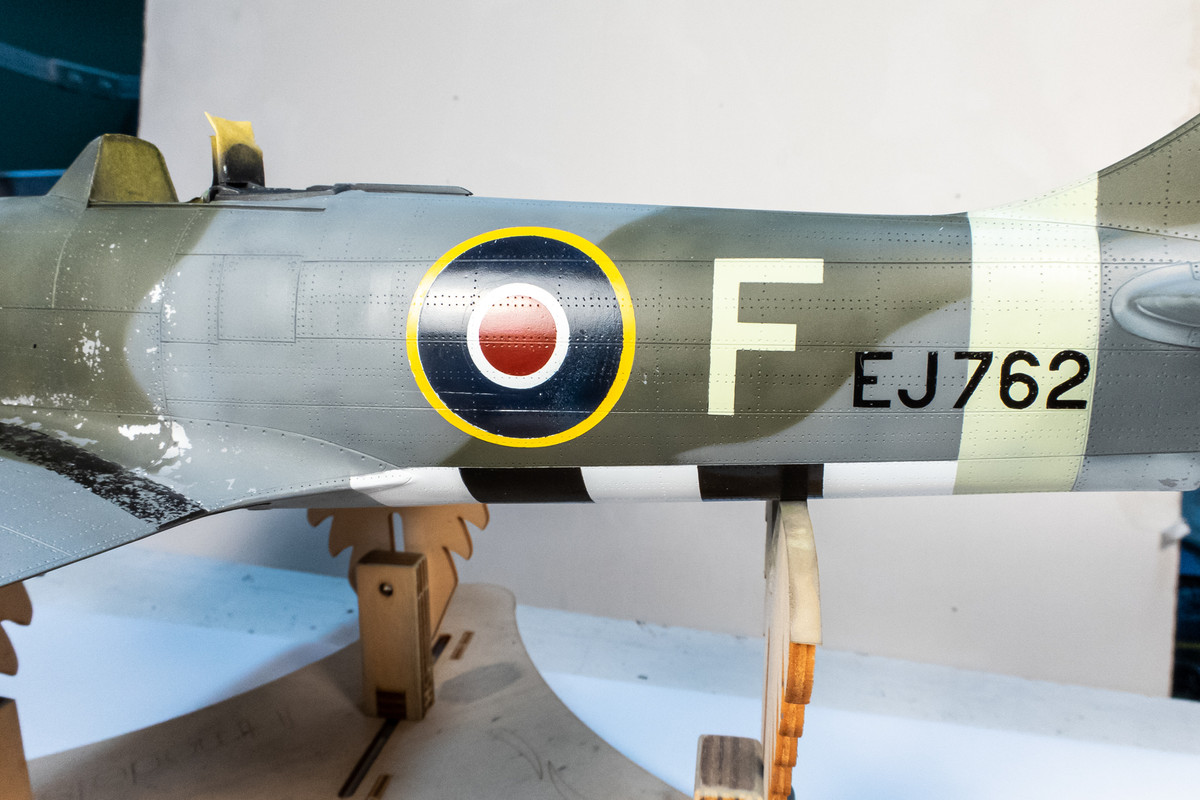
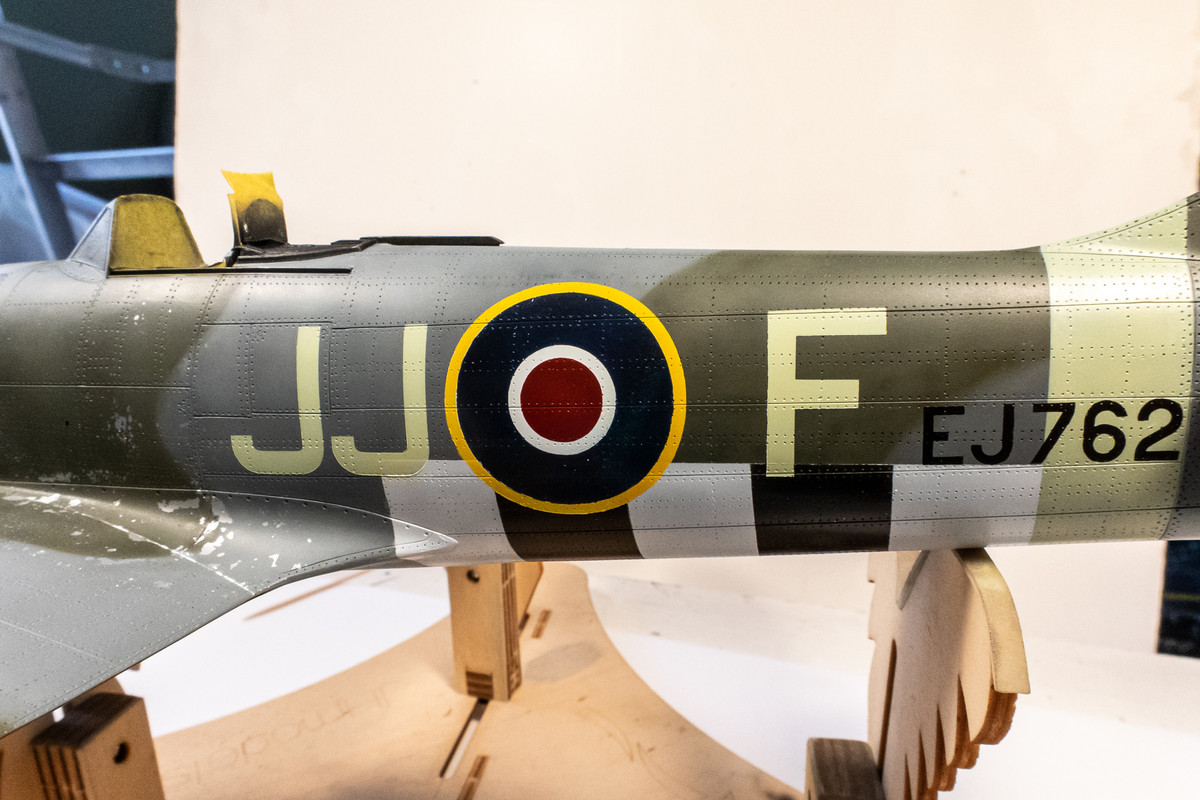
The codes fresh after mask removal. I still need to rub down the raised edges. FYI... I used the original "JJ" on the port side so the JJ's are different from one side to the other but I don't think it will be noticeable. The only other painted marking left are the black walkways on the wing roots.
Image
Image

Re: 1/32 Special Hobby Hawker Tempest Mk V

Posted: Tue May 31, 2022 9:23 pm
by Stikpusher
The markings look great John. The advantage of painted on vs. decals really shows.

Re: 1/32 Special Hobby Hawker Tempest Mk V

Posted: Wed Jun 01, 2022 6:17 am
by LyleW
:that:

Re: 1/32 Special Hobby Hawker Tempest Mk V

Posted: Wed Jun 01, 2022 8:07 am
by BlackSheep214
I agree. No way I could do it.

Re: 1/32 Special Hobby Hawker Tempest Mk V

Posted: Wed Jun 01, 2022 10:59 am
by jkim
Thanks guys! Paint work continues on the Tempest. While looking at wartime Tempest photos, I noticed that almost all of the light colored spinners had a dark backplate. It would've been much easier to add this BEFORE I glued the prop blades into place but with some careful masking, I painted the backplate a dark grey.
Image

The walkways were next. After masking them off using white Tamiya tape, I brush on some water and sprinkled salt crystals. Once this dries, it acts as a random pattern mask.
Image

The walkways were painted black and the results were kind of meh. More work needed on the walkways.
Image
Image

The red on the upperwing roundels was redone as I had not established a good neutral background and the result was not uniform.
Image
Image

The latest masked markings were burnished with a clean t-shirt and any stubborn raised paint edges were taken down with Micromesh.
Image
Image

Placement of the markings was all based on the kit painting instructions. I should have known better and looked at my reference photo. The most obvious difference is the height of the black/white stripes. Also the position of the JJ is slightly different.
Image

Now I have a dilemma... do I just proceed or do I attempt a fix? It's not impossible but it will be tricky to say the least. As I think, here is a preview of the business end of the Tempest with the prop mounted...
Image

Re: 1/32 Special Hobby Hawker Tempest Mk V

Posted: Wed Jun 01, 2022 11:38 am
by Medicman71
I'd leave it as is. It's close enough to work.

Re: 1/32 Special Hobby Hawker Tempest Mk V

Posted: Wed Jun 01, 2022 4:58 pm
by Duke Maddog
Medicman71 wrote:I'd leave it as is. It's close enough to work.

I agree. Why make more work for yourself? As you said, this will never be seen in competition or on display at a local show or Nationals so the only ones who know about this are your fellow Forum members on whatever boards you show this on. We don't care about little issues like this, we are all just gobsmacked by all this magnificently outstanding work!


:bow: :bow: :bow: :bow: :bow:

Re: 1/32 Special Hobby Hawker Tempest Mk V

Posted: Wed Jun 01, 2022 6:50 pm
by jkim
Thanks guys! I appreciate the support! I agree that no casual observer would notice anything amiss. Even Tempest enthusiasts might not catch it if they didn't have the photo of JJ+F to compare it to. But the most important person in this equation is me. And the picture is quite clear and impossible to dismiss. Once that little voice in my head starts going, its impossible to shut off.

So... I'm going to attempt a fix. There are a couple of ways to approach this. One is to wipe and start again but I'm going to leave that as a last option. It's very difficult and messy to try and remove multiple layers of paint and I've got at least 5-6 layers on the roundels. If the existing markings could be protected in place, the area of repair is actually quite small. And since the markings are generated by CAD and exact masks can be reproduced, I'm going to simply paint around the markings. If that doesn't work, I can regroup and perhaps do a paint removal.

I prepped the areas by Micromeshing the edges of the black and white band as much as possible. The JJ on the port side is given a more strenuous rub as it will be eradicated completely. The existing paint does not need to be completely removed but I want to get rid of all of the physical edges that I can.

I establish the new limits of the black and white stripe as well as protecting the sky fuselage band with tape. Using the leftover masks and some new whole circles to place over the fuselage roundels, all of the existing markings are covered. Very careful placement is needed and this step took the most time.
Image
Image

To help match the repair areas to existing paint, I lay down a base coat using Tamiya Neutral Grey.
Image
Image

A random mottle along the panel and rivet lines is used as a pre-shade. Since the repair area is small, I elected to forgo the full mottle pre-shade routine.
Image
Image

The Ocean Grey is applied next. It's pretty close to the Neutral Grey so I have make sure I cover all of the base coat.
Image
Image

Small masks are placed using the same servo tape technique that I used previously.
Image

The Dark Green is sprayed and the repair of the camo colors is done.
Image
Image

The moment of truth arrives when the masks are removed. First the major borders along the bottom and rear.
Image

The masks over the markings are then carefully removed. There are some very minor touch-ups required but overall, I am quite pleased with the repair result.
Image
Image

Re: 1/32 Special Hobby Hawker Tempest Mk V

Posted: Wed Jun 01, 2022 8:08 pm
by BlackSheep214
Daaaaaaaanm!!!! :shocked: :shoutout: :shoutout: :shoutout: :shoutout: :shoutout:

Re: 1/32 Special Hobby Hawker Tempest Mk V

Posted: Thu Jun 02, 2022 4:02 am
by tempestjohnny
I've said it before and I'll probably say it again and again. John your attention to the smallest details is amazing. The work you do is extraordinary