BMF will do the trick better as there'll be a sharp demarcation line. To simulate the rubber straps you could tape and mask off the sides of the straps but make the masking just a tad ( and I mean a tad) wider than the straps. AB the masked off area and then BMF the straps only and that'll leave the extra on the sides of the straps black to simulate the rubber. Just make sure you don't press too hard on the BMF on the sides of the straps as you don't want to lift the black paint when peeling the trimmed BMF pieces from the sides of the straps.LyleW wrote:Great truck!
I guess I’ll try a sharpie or a paint marker to trace around those straps. Now, Molotov or BMF?
AMT (Round 2) Mack R685ST
-
mustang1989

- Moderator
- Posts: 4903
- Joined: Tue Mar 18, 2014 8:35 pm
Re: AMT (Round 2) Mack R685ST
-
Medicman71

- Elite Member
- Posts: 9698
- Joined: Mon Apr 07, 2014 9:32 am
- Location: Houston, Tx
Re: AMT (Round 2) Mack R685ST
I'd go with the Molotov.LyleW wrote:Great truck!
I guess I’ll try a sharpie or a paint marker to trace around those straps. Now, Molotov or BMF?
Mike
Sponsored by Boeing, Lockheed Martin, Northrop Grumman, Saab, BAE, and Dassault
Sponsored by Boeing, Lockheed Martin, Northrop Grumman, Saab, BAE, and Dassault

Re: AMT (Round 2) Mack R685ST
I may yet. Started with the BMF, but I am having a hard time getting it to stick. There is a love/hate relationship with this stuff.
To make each build less crappy than the last one. Or, put another way, "Better than the last one, not as good as the next one!"..
Re: AMT (Round 2) Mack R685ST
Thanks, Joe.mustang1989 wrote:I hear you on the radiator hoses Lyle. It's one reason that I usually fabricate my own but in your case it looks like everything just worked out. Beautiful engine area dude.
Dude, I can't mask a 8x11 window paint to paint it! I agree with the concept, but execution would be so flawed...mustang1989 wrote:BMF will do the trick better as there'll be a sharp demarcation line. To simulate the rubber straps you could tape and mask off the sides of the straps but make the masking just a tad ( and I mean a tad) wider than the straps. AB the masked off area and then BMF the straps only and that'll leave the extra on the sides of the straps black to simulate the rubber. Just make sure you don't press too hard on the BMF on the sides of the straps as you don't want to lift the black paint when peeling the trimmed BMF pieces from the sides of the straps.
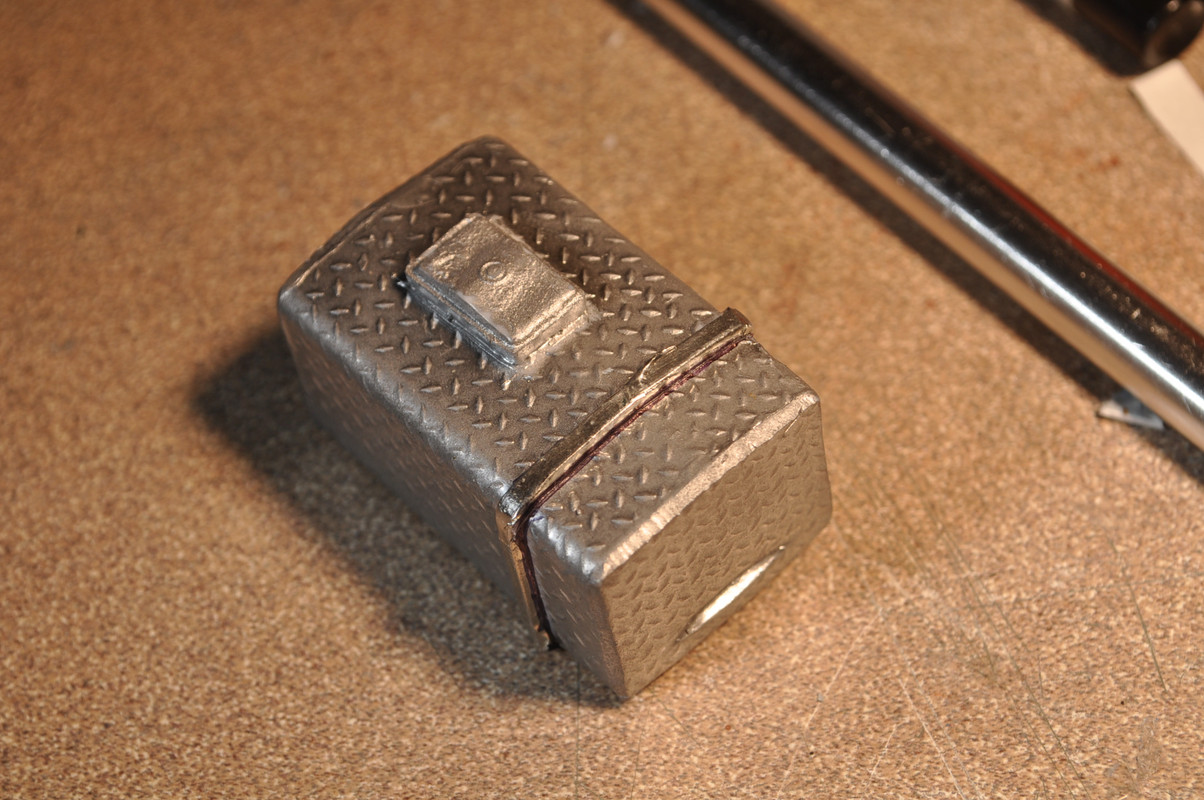
Here is one that I applied the BMF and then traced the edge with a extra fine point Sharpie. Okay, I guess. Getting ready to try something else on the other tank...IF my eyes, hands and neck will let me. Things are stiff and sore this morning.
To make each build less crappy than the last one. Or, put another way, "Better than the last one, not as good as the next one!"..
-
Stikpusher

- Moderator
- Posts: 18857
- Joined: Sat Apr 05, 2014 8:37 pm
- Location: Ceti Alpha 5
Re: AMT (Round 2) Mack R685ST
Strap edging looks good. Maybe some hot cocoa will warm you up. I’d suggest coffee, but then there go the straight lines… 
"Surely I have made my meaning plain? I intend to avenge myself upon you, Admiral. I have deprived your ship of power, and when I swing 'round, I intend to deprive you of your life."
FLSM
FLSM
Re: AMT (Round 2) Mack R685ST
Naw, until I can thread a sewing machine while it is running, it isn't too much coffee!
Gave up on the BMF. i've spent about two hours on one tank, with 4-5 strips of foil and the stuff simply will not stick all the way around no matter how much i burnish it, how much snot is used...nothing will keep it in place. I even cleaned that edge with isopropyl alcohol.
So, I gave in, fired up the compressor, masked the strap and sprayed Molotow on it. Still have some touch-up to do...but that is on the strapping that is on the bottom of the tank. The down side is now I have to wait a couple of days to seal it, wait a couple more days...and so on.
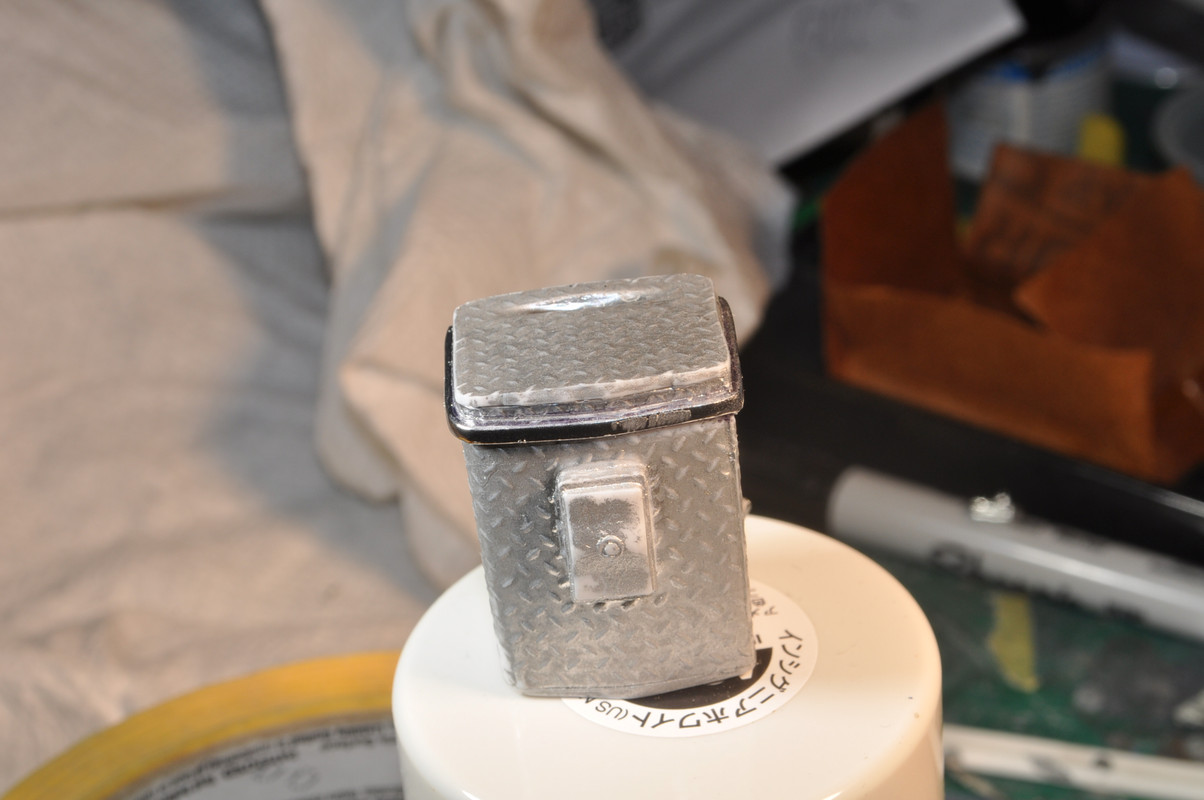
To make each build less crappy than the last one. Or, put another way, "Better than the last one, not as good as the next one!"..
-
BlackSheep214

- Elite Member
- Posts: 10376
- Joined: Sun Apr 06, 2014 8:47 pm
Re: AMT (Round 2) Mack R685ST
I’ve been hearing a lot of folks having issues with BMF as of late especially not sticking or adhering as it should. Something to do with the new adhesion.
“Who controls the skies, controls the fate of this Earth”
Author unknown- 352nd Fighter Group, Blue-Nosed Bastards of Bodney
“Send one plane it’s a sortie; send two planes it’s a flight; send four planes it’s a test of airpower. - Richard Kohn
Author unknown- 352nd Fighter Group, Blue-Nosed Bastards of Bodney
“Send one plane it’s a sortie; send two planes it’s a flight; send four planes it’s a test of airpower. - Richard Kohn

Re: AMT (Round 2) Mack R685ST
Great stuff Lyle, these little bits of added effort will really make it shine - great looking tanks
Stuart Templeton 'I may not be good but I'm slow...'
My blog: https://stuartsscalemodels.blogspot.com/
My blog: https://stuartsscalemodels.blogspot.com/
-
midnightprowler

- Addicted Member
- Posts: 1427
- Joined: Sun Jul 10, 2016 5:46 pm
- Location: East Bethel, MN USA
- Contact:
Re: AMT (Round 2) Mack R685ST
Now I want a big rig kit lol.
1 Corinthians 15:51-54
1 Thessalonians 4:13-18
Ask me about Speedway Decals.
1 Thessalonians 4:13-18
Ask me about Speedway Decals.
Re: AMT (Round 2) Mack R685ST
This was a Hobby Lobby buy.
So far, not a bad kit at all. A LOT of flash and seam lines...a lot. But, the plastic is a bit soft and it cleaned up pretty easily. Oddly enough, it did not take to the red tube glue as quickly as the Tamiya or Plast-I-weld ...guess they are hotter.
Parts placement can be vague on the instructions, but if you study them closely and pay attention (as I’m not usually doing) they fit fairly well. Interesting location pins, etc. different shapes for different sides.
There are a few build reviews on this kit on YouTube that highlight some gotchas.
I would do another at this point....but still a ways to go.
To make each build less crappy than the last one. Or, put another way, "Better than the last one, not as good as the next one!"..