M51 Sherman WIP
-
Duke Maddog

- Elite Member
- Posts: 7091
- Joined: Tue Jun 03, 2014 11:22 am
- Location: Rowland Heights, CA
Re: M51 Sherman WIP
What a sensational job! Looking better and better.
The Duke
Virtuoso of Miniatures
"Do you know what the chain of command is? It's the chain I get and beat you with 'till you understand who's in ruttin' command!"
-Jayne Cobb, Firefly Episode 2 "The Train Job"
We are modelers - the same in spirit, in hunger to insanely buy newly released kits, hustlers in hiding our stash from our better halves and experts in using garbage as replacements for after-market parts.
-
Gary Brantley

- Addicted Member
- Posts: 1748
- Joined: Tue Apr 08, 2014 9:40 pm
- Location: Cameron, Texas
Re: M51 Sherman WIP
First off, man, you make it look so easy Carlos! That SuperSherm looks great already!Stikpusher wrote:Thanks Gary! I’ve been working on painting the crew figures, so no changes to the tank since I got the primer on. But that will change soon.
You’re gonna love that Tamiya M41 kit, it is pure simplicity and fun. It has a couple of accuracy shortfalls, but nothing major. And a simple set of Value Gear stowage would take care of that kit and a few others if you continue your journey to the “Dark Side” of armor
And yes, a simple light box and iPhone are game changers for model photos. Although I pray that you’ll still be doing your airport photos with your aircraft builds. Those are always a treat to see.
-
Stikpusher

- Moderator
- Posts: 18880
- Joined: Sat Apr 05, 2014 8:37 pm
- Location: Ceti Alpha 5
Re: M51 Sherman WIP
Mark and Gary, thanks for your kind words. This one is finishing up fairly rapidly now.
Today I airbrushed on a more thinned and translucent coat of the same color over the dark areas to reduce the contrast…
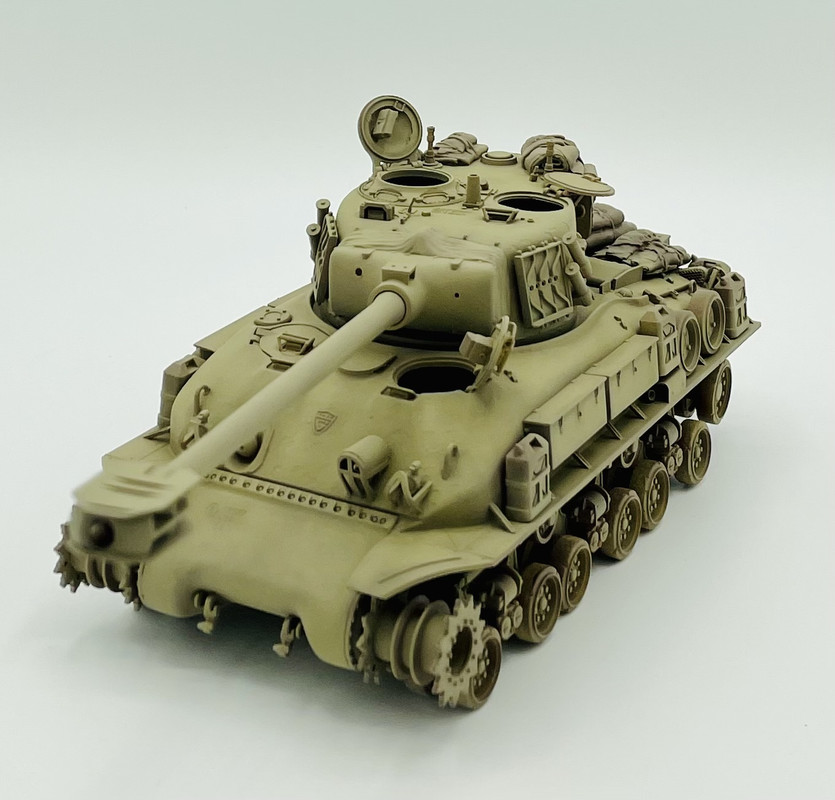
Now the contrast is far more subtle…
Today I airbrushed on a more thinned and translucent coat of the same color over the dark areas to reduce the contrast…
Now the contrast is far more subtle…
"Surely I have made my meaning plain? I intend to avenge myself upon you, Admiral. I have deprived your ship of power, and when I swing 'round, I intend to deprive you of your life."
FLSM
FLSM
-
jeaton01

- Elite Member
- Posts: 2071
- Joined: Thu Apr 23, 2020 9:20 am
- Location: Northern California
- Contact:
Re: M51 Sherman WIP
Looks great, Carlos, lots of depth there.
-
Medicman71

- Elite Member
- Posts: 9729
- Joined: Mon Apr 07, 2014 9:32 am
- Location: Houston, Tx
Re: M51 Sherman WIP
Very nice!
Mike
Sponsored by Boeing, Lockheed Martin, Northrop Grumman, Saab, BAE, and Dassault
Sponsored by Boeing, Lockheed Martin, Northrop Grumman, Saab, BAE, and Dassault
-
Stikpusher
- Moderator
- Posts: 18880
- Joined: Sat Apr 05, 2014 8:37 pm
- Location: Ceti Alpha 5
Re: M51 Sherman WIP
Thanks John & Mike… I see lots of brush painting ahead in the next bench sessions… 
"Surely I have made my meaning plain? I intend to avenge myself upon you, Admiral. I have deprived your ship of power, and when I swing 'round, I intend to deprive you of your life."
FLSM
FLSM

Re: M51 Sherman WIP
The paint work is looking good!
March as one, Don't look back
Odin's sons... Attack!
Unleash hell! Do not repent! Warfare grants us no lament
Let your weapons slash and tear This is no place for fear
Hold the lines! Move as one! In unity our victory's won
Our shields will form a mighty wall
United we shall never fall
Odin's sons... Attack!
Unleash hell! Do not repent! Warfare grants us no lament
Let your weapons slash and tear This is no place for fear
Hold the lines! Move as one! In unity our victory's won
Our shields will form a mighty wall
United we shall never fall
-
Stikpusher
- Moderator
- Posts: 18880
- Joined: Sat Apr 05, 2014 8:37 pm
- Location: Ceti Alpha 5
Re: M51 Sherman WIP
Thank you Clint. I’m very happy with how the paint has turned out so far.
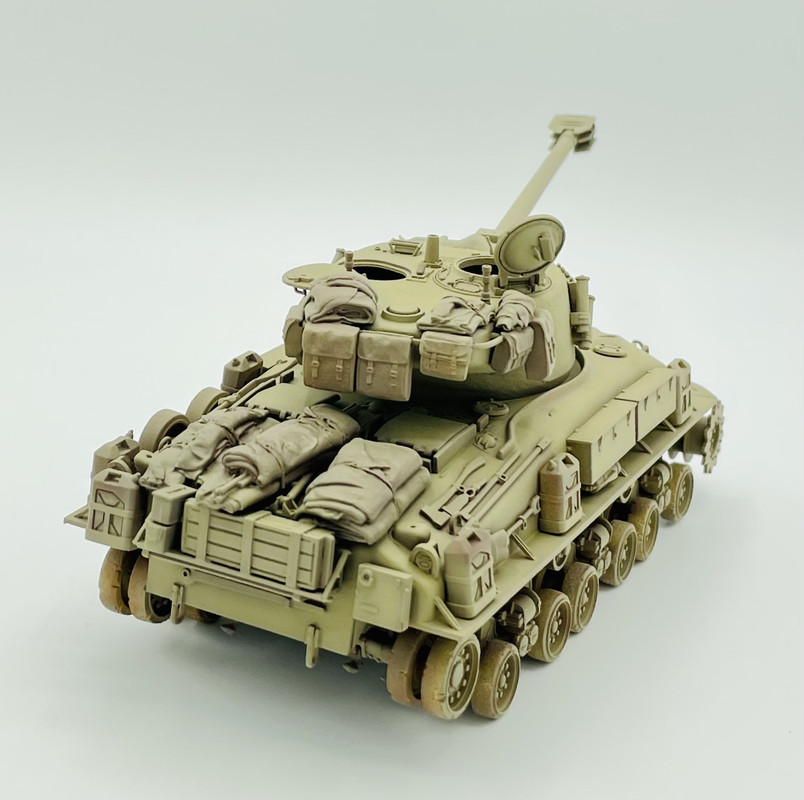
Today was a paint session on the stowage items base colors. Almost four hours using most of my enamel Olive Drabs, Olive Greens, Khakis, and most everything in between to paint the items. The beautiful thing about using enamels over acrylics is that any enamel mess ups onto the base acrylic IDF Sand are easily cleaned up with paint thinner.
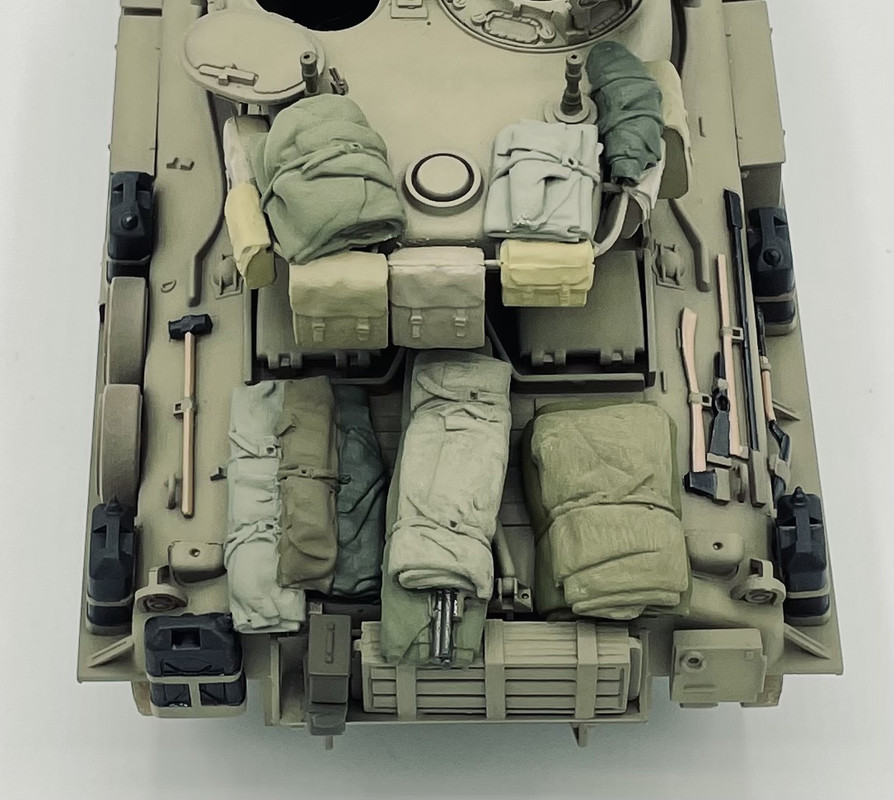
Tomorrow I need to work on the road wheel tires and the exhausts.
Today was a paint session on the stowage items base colors. Almost four hours using most of my enamel Olive Drabs, Olive Greens, Khakis, and most everything in between to paint the items. The beautiful thing about using enamels over acrylics is that any enamel mess ups onto the base acrylic IDF Sand are easily cleaned up with paint thinner.
Tomorrow I need to work on the road wheel tires and the exhausts.
"Surely I have made my meaning plain? I intend to avenge myself upon you, Admiral. I have deprived your ship of power, and when I swing 'round, I intend to deprive you of your life."
FLSM
FLSM
-
Gary Brantley
- Addicted Member
- Posts: 1748
- Joined: Tue Apr 08, 2014 9:40 pm
- Location: Cameron, Texas
Re: M51 Sherman WIP
Man, those tarps look fantastic Carlos! Very realistic work there sir.  On my only two tank models thus far, I painted the road wheel tire parts with a circle template after the finish color and then added them to the hull. But, I know many (most?) armor guys don't do it that way...or, do they? What's your technique for painting those Carlos?
-
Stikpusher
- Moderator
- Posts: 18880
- Joined: Sat Apr 05, 2014 8:37 pm
- Location: Ceti Alpha 5
Re: M51 Sherman WIP
Thanks Gary. I’m not one for using templates on road wheels, although it does sound tempting. In this case, since the wheels do turn on their axles, I hold a brush in one spot, then turn the wheels to get the paint on. Just like with this stowage, I’ll be using enamel for the tires, so that any mess ups can be easily cleaned off of the acrylic base color.
"Surely I have made my meaning plain? I intend to avenge myself upon you, Admiral. I have deprived your ship of power, and when I swing 'round, I intend to deprive you of your life."
FLSM
FLSM