Well, here it is almost a week later and we have a lot to show in this latest tour. The trams are coming around now, so when they are ready, feel free to climb aboard for another Maddog Manufacturing tour.
We did get back to the Russian tanks as mentioned above, but more on that later. Our tour starts in the Hangar.
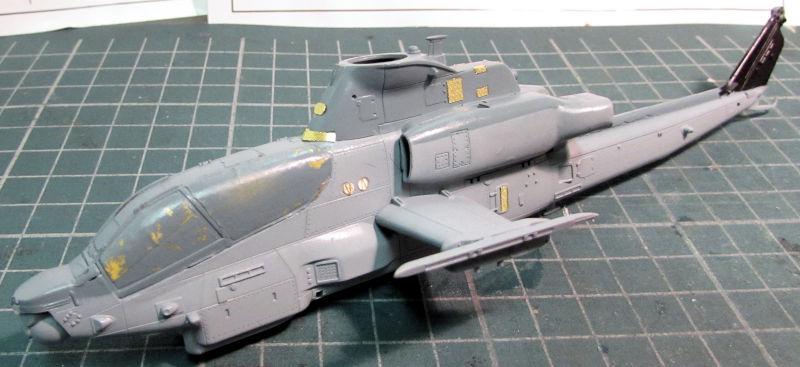
There's not much progress at all to show here. We had intended to apply decals to all the Cobras, but two of the decal sheets needed liquid decal film so they were coated and set aside to dry. Then we got ready to do the decals for the Zulu Cobra; but then I saw the photo etch fret inside with all the screens for this model. So, we added all the screens to this and set it aside to dry. It'll need paint again:
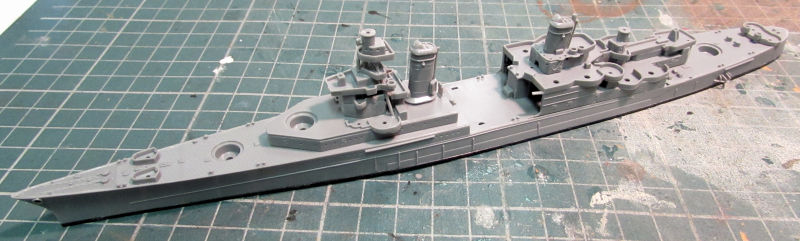
Moving on to the Shipyards, we've got a good bit more to show. While some work was done on the Enterprise, not enough was done to show any measurable progress. On the next slip over, the Indianapolis got all her superstructure built up:
Since we've been working on all these ships; I figured it was time to return to the USS Sacramento which had been languishing for months a couple slips over. After checking it out, we went to work adding on all these greeblies onto the upper deck of the superstructure. This was quite the challenge as the instructions were as clear as mud as to where they went. Hopefully, they are all in the proper places:
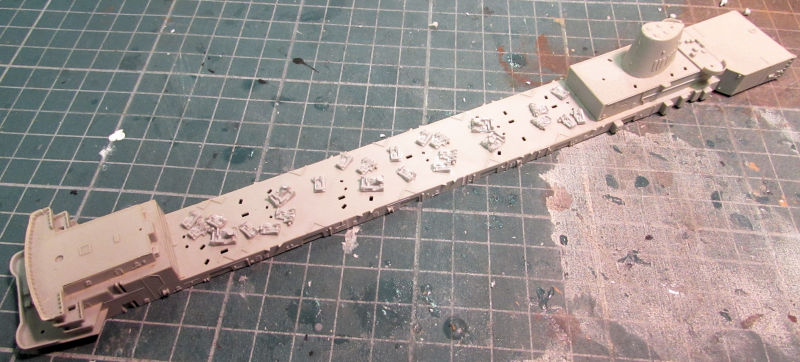
That's only half of them too. We still have a good bit to go. Here is a shot of the superstructure dry fit to the hull:
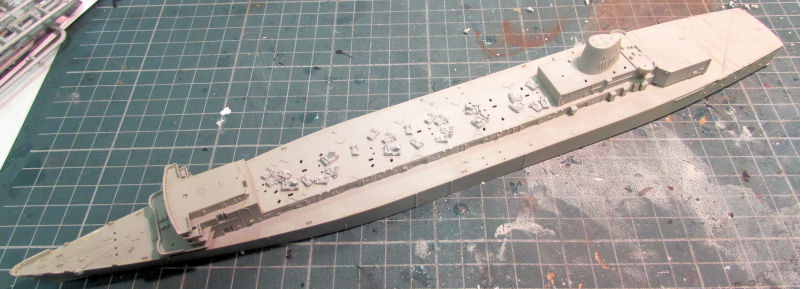
I'm still trying to figure out when to paint this before finishing all the rest of the detail parts. I think that's why she was left alone for so long.
Finally, we dropped the keep on another ship; this time one I'd never built before. This is the hull and decks of the Italian battleship Vittorio Venetto:
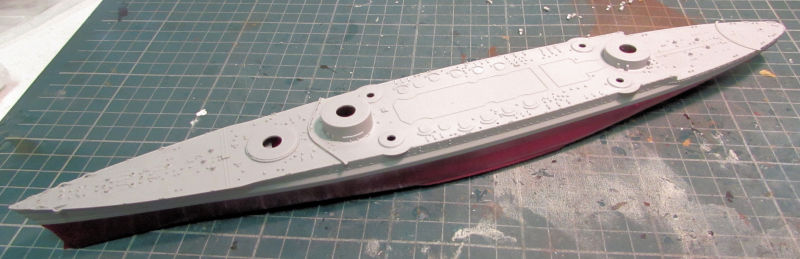
I've always loved Italian battleships; the Italians sure built them pretty back in WWII. It's about time I added one to the navy. I also have the Roma somewhere that I need to find and build along with the Venetto.
Moving on now to the Motor Pool, there's considerably more to see as was mentioned at the beginning of this tour. I was so close to finishing so many models that we marathoned these to see how far we could get. First off, I found the decals and photo etch for the Swedish M-34 Assault gun so we went to work on that straight away. The most important part was the gun muzzle. We first annealed the photo etch before removing the muzzle part to roll. Here it is partially rolled on the instruction sheet showing what needs to be done:
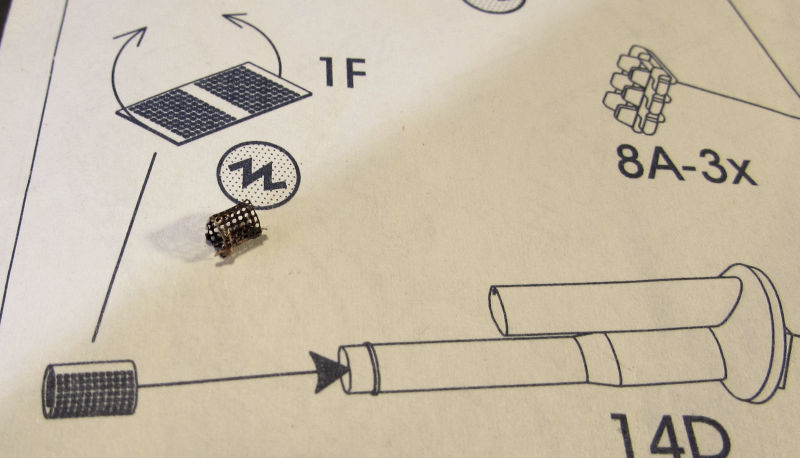
Yes, it's tiny; probably only 2mm long if that. I started with cementing the partially rolled muzzle brake onto the end of the gun:

Later we finished rolling it and cemented the remainder of the part down:
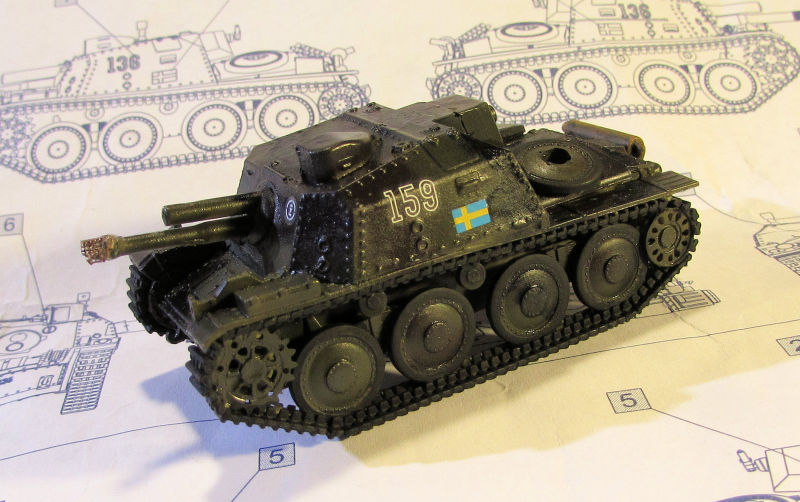
It may look like there's a gap at the bottom but that was a a part that folded under that I needed to unfold. You can also see in the pic that the decals had been applied.
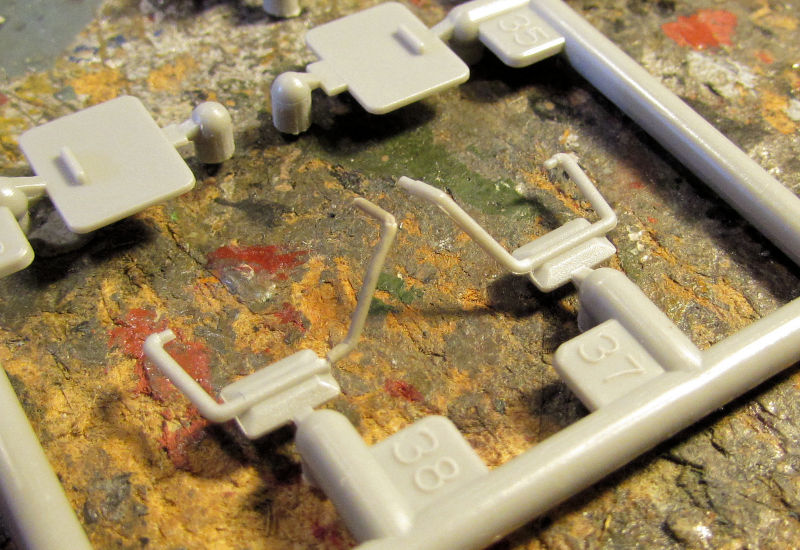
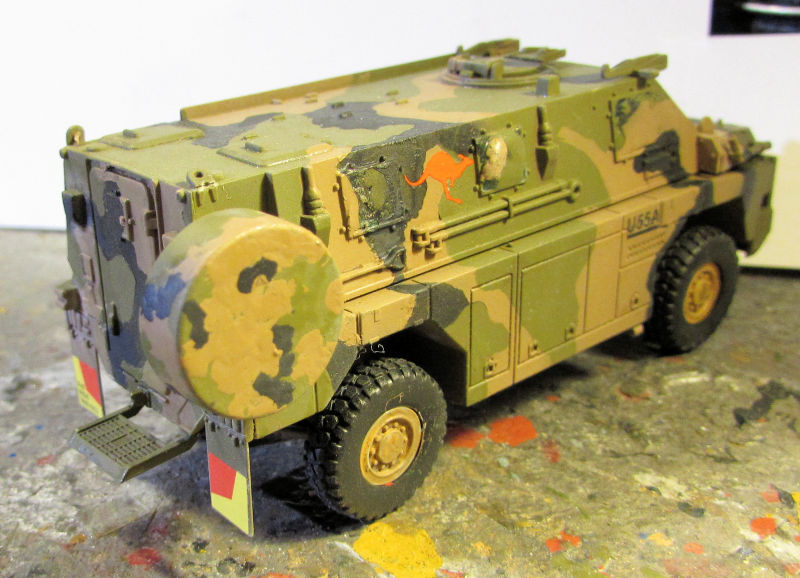
Next, I had to fix one of the broken arms of the Australian Bushmaster since; like the SAS one, it broke off and disappeared. So, a bit of stretched sprue bent just so and Bob's your uncle:
As that was drying, we took a shot at painting the spare tire cover with a representation of the hex-patterned camouflage. Why Dragon didn't include that I'll never know since they did include a dusty windshield decal for the SAS one. It ain't perfect, but close enough from three feet away:
Moving on from there we have a lot to show of the progress made on all my Russian tanks and truck.
Let's start with the truck...
This is the CLUB M coastal defense missile system truck that I've had sitting for a bit. Here you can see the decals have been applied (very hard to see but they are there) and the wheels have been added:
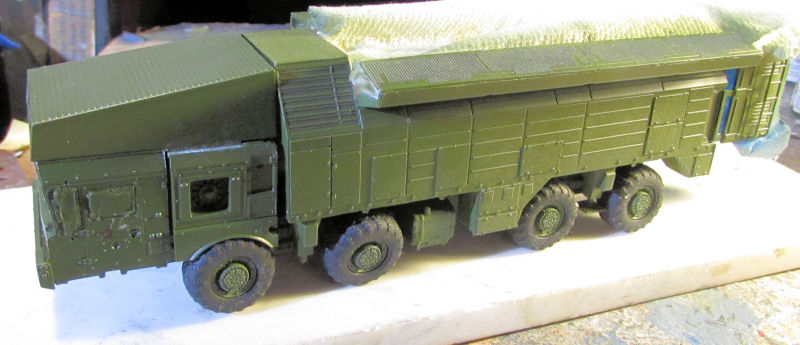
They were tough; the wheels would not stay lined up and the rubber part kept slipping off the hubs. What a pain!
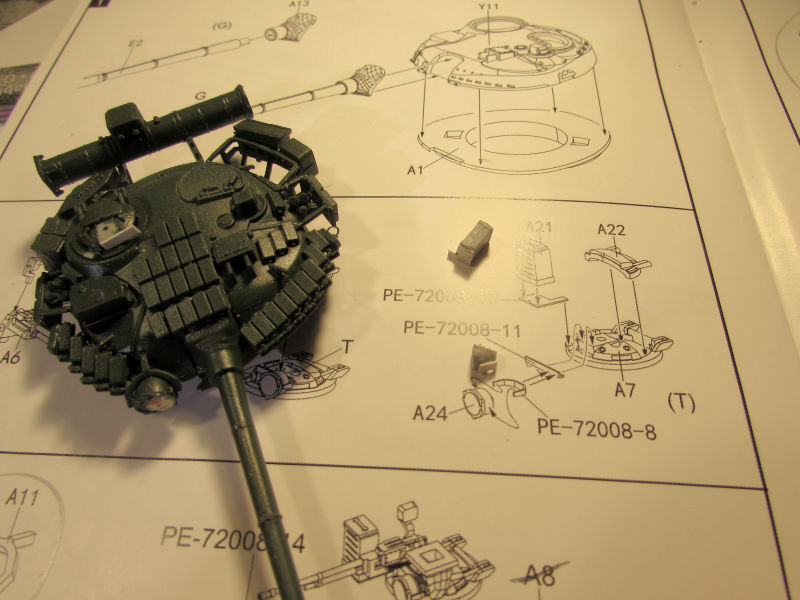
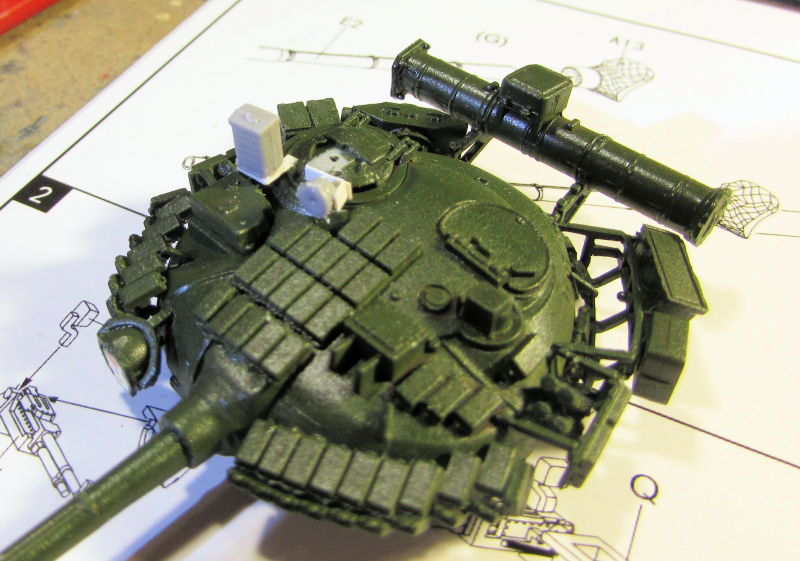
Next up are all the tanks, starting with the most difficult one: the T-64AV. First we added all the photo-etch plate to the forward deck and the screens to the engine deck:
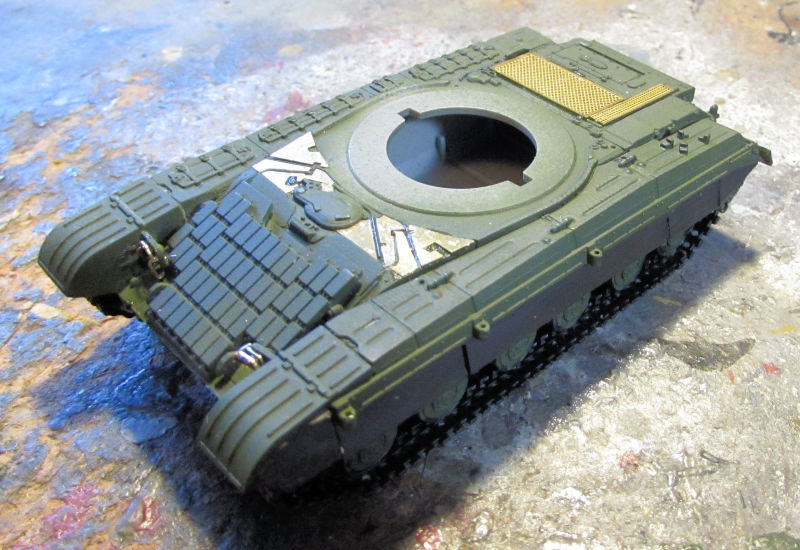
Here's where we checked it to see that nothing interfered with the turret turning. It's good:
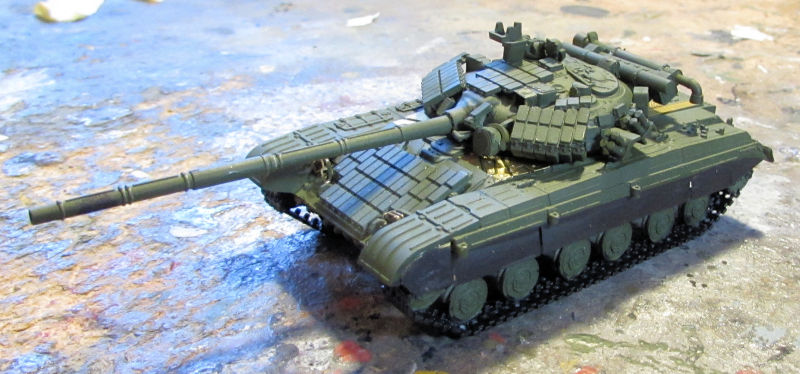
Next was the part I'd said "never again", but here I am: adding the side skirts to this thing by attaching it to the P/E brackets, just like on my T-64 BV I'd built some years before. Yes, I checked it to be sure I wasn't building two of the same tank. I don't know what the differences are but the instructions say this is an -AV while the one I built before was a -BV. I'd compare the two, but the T-64 BV is still packed in the tub.
Anyway, enough idle chatter, the first thing that was needed was something to hold the skirt at the proper height. After checking a bunch of clamps, clips, props and all I finally hit on the idea of using the Silly Putty. We pulled a good amount off, rolled it a bit and then added the skirt. We then placed the tank next to it, adjusted the brackets as best we could without breaking them (one did break but was fixed) and then we added the glue:
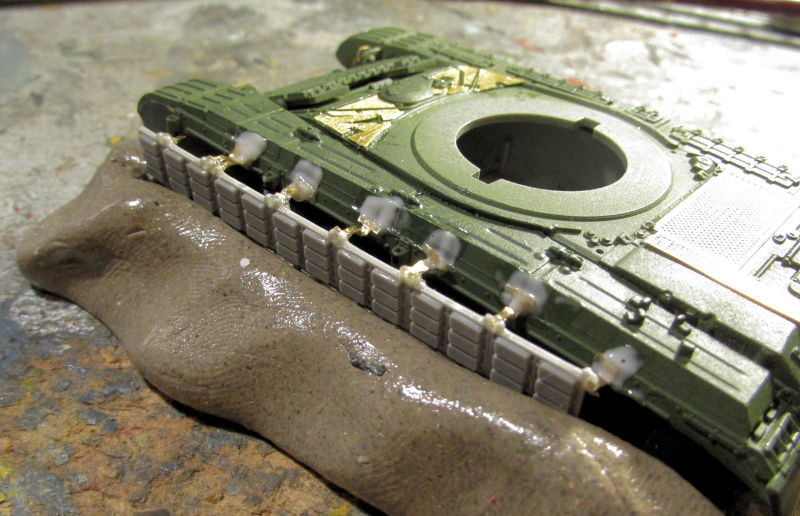
Once it was dry, we repeated the process on the other side:
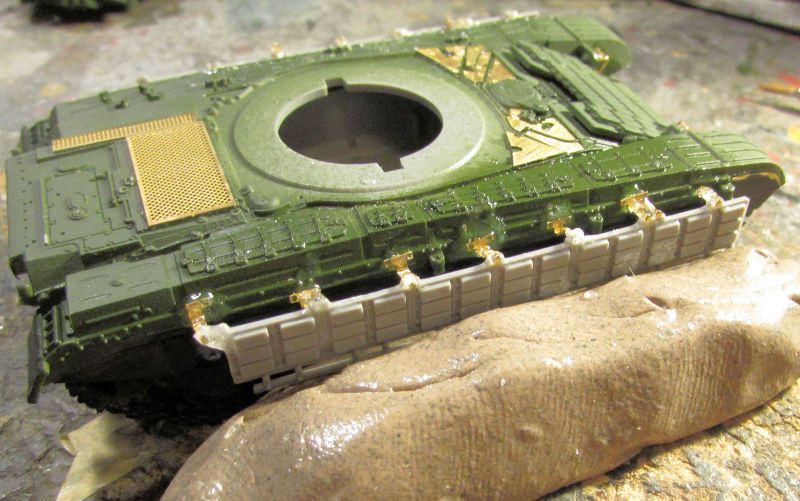
This was shot after the first skirt was dry to see how successful we were. It shows that the process worked:

I had enough of that so we moved on...
The next tough one was the T-80 which, because it was part of the tank transporter set, did not have the photo etch that it was supposed to have. Maybe I put it away after finishing the truck half of the kit; that seems to be the most logical result. Anyway, to save time, I pulled out some sheet styrene and cut the flat pieces out that would replace the missing photo etch:
It's kind of hard to see in that pic, but I replaced the shelf holding the ammo can and the plate and bracket for the small light next to the machine gun. Here they are in place:
And the glamour shot of the whole thing put together:
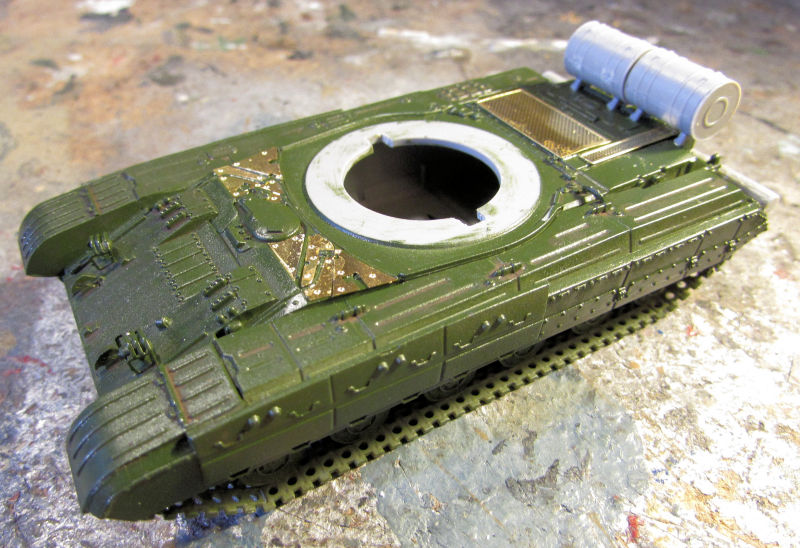
The T-72 Rogatka had some photo etch and the fuel drums added:
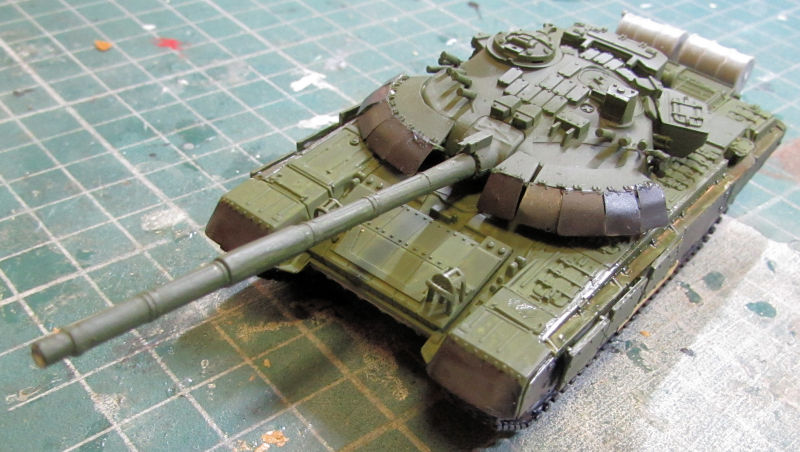
Later it was painted and cleared for decals:
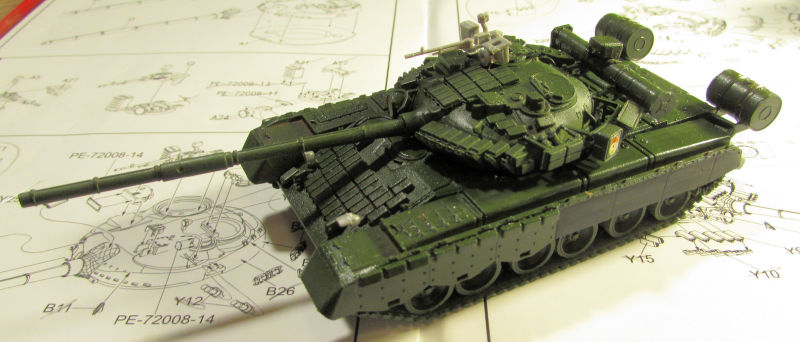
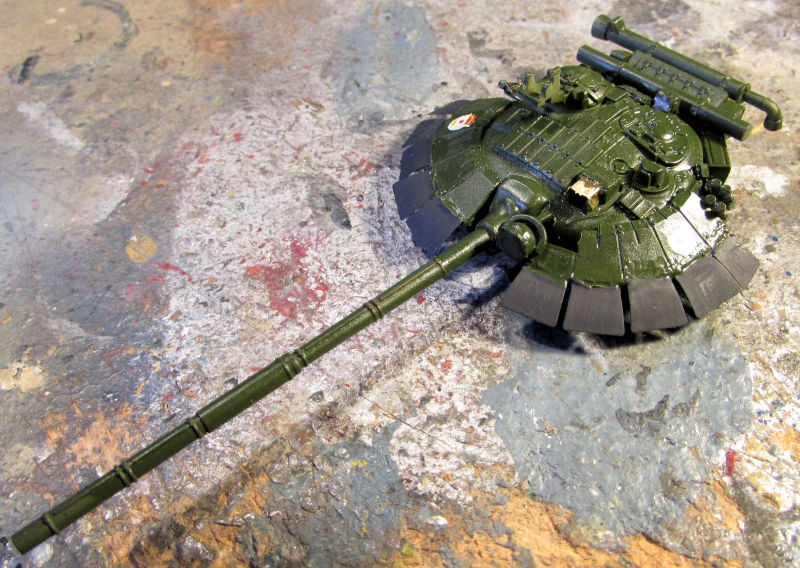
The T-64 Mod 1981 was cleared for decals:
The decals were applied and the machine gun gun accessories were added:
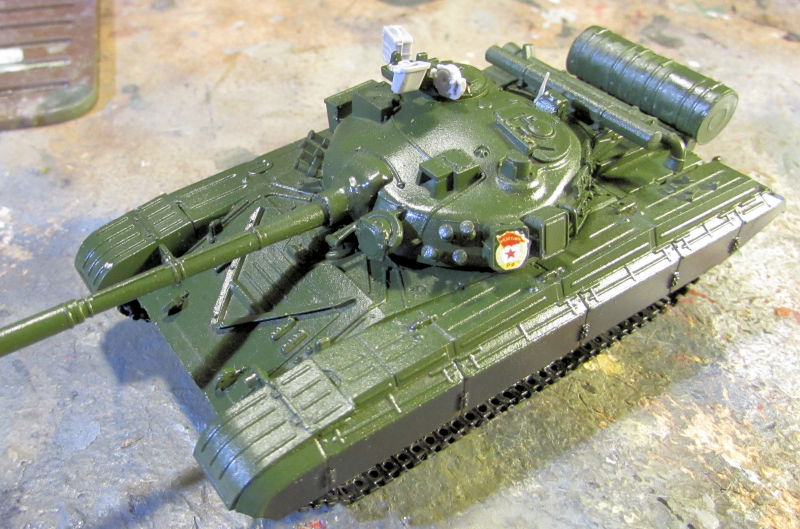
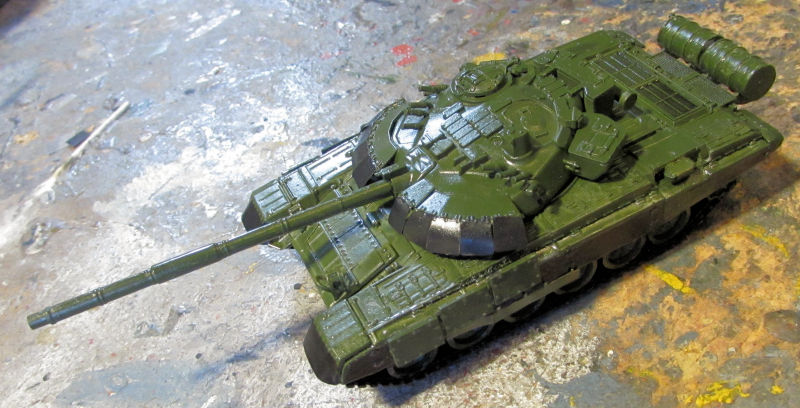
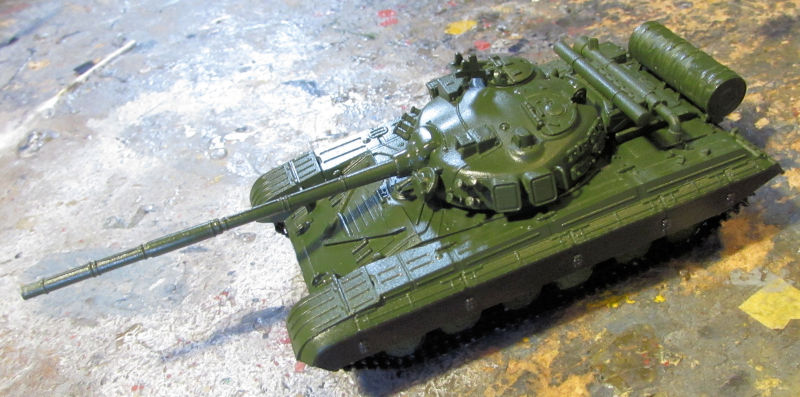
The T-64 BM-2 had decals added and the photo etch added to the turret as well as the hull:
Well, that was a lot. We worked on these assembling them in an assembly line manner to try and bring them over the finish line at about the same time.
That concludes our tour of the latest work achieved at Maddog Manufacturing. Thank you all for taking the tour and always remember comment are welcome.