1//32 Hasegawa Ki-61-1 Tei Hien

Re: 1//32 Hasegawa Ki-61-1 Tei Hien
Just ordered black CA and bonder - that sounds worth trying!
Thanks,
John
John
-
Medicman71

- Elite Member
- Posts: 9729
- Joined: Mon Apr 07, 2014 9:32 am
- Location: Houston, Tx
Re: 1//32 Hasegawa Ki-61-1 Tei Hien
You'll love it!! It's great stuff!
Mike
Sponsored by Boeing, Lockheed Martin, Northrop Grumman, Saab, BAE, and Dassault
Sponsored by Boeing, Lockheed Martin, Northrop Grumman, Saab, BAE, and Dassault

Re: 1//32 Hasegawa Ki-61-1 Tei Hien
Cleaning up the wing root seams has been an iterative process. The filling part is easy... rescribing, especially if it is over the puttied area, can be tricky.
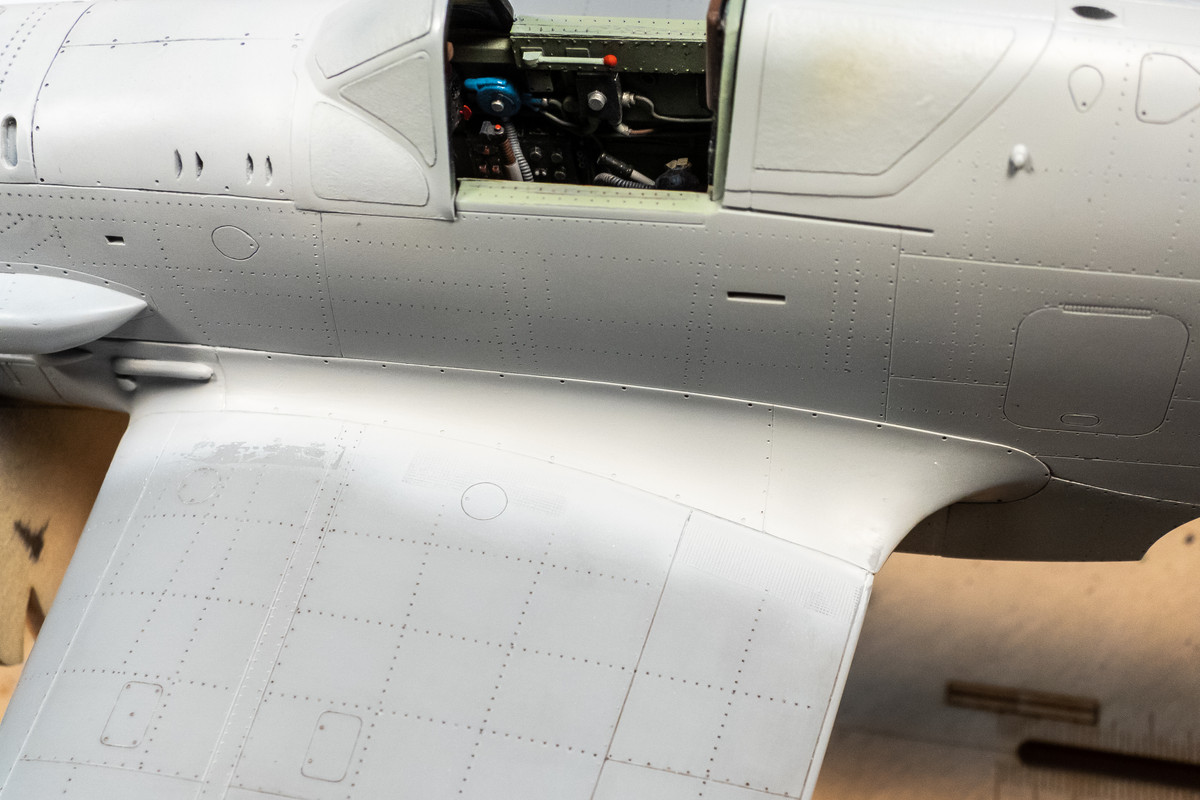
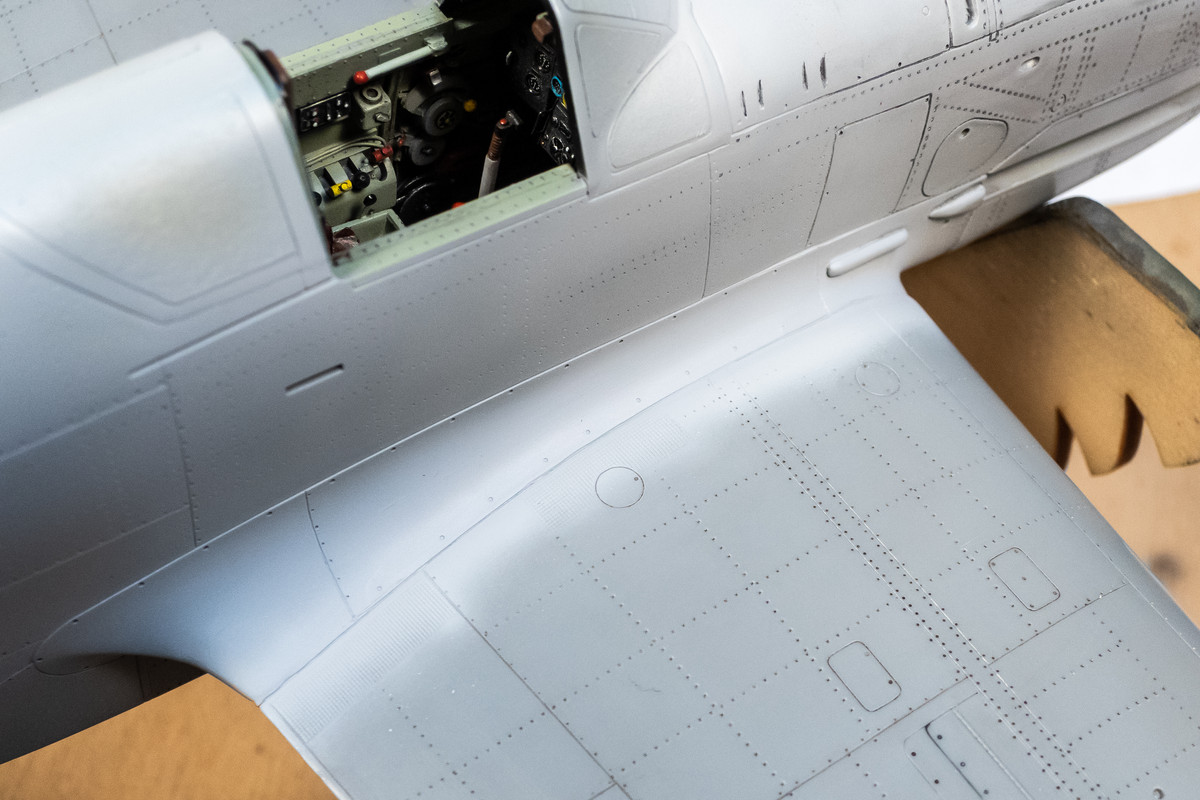
After the wing root work was completed, I sprayed the entire model with a primer (Mr Surfacer Primer 1000).
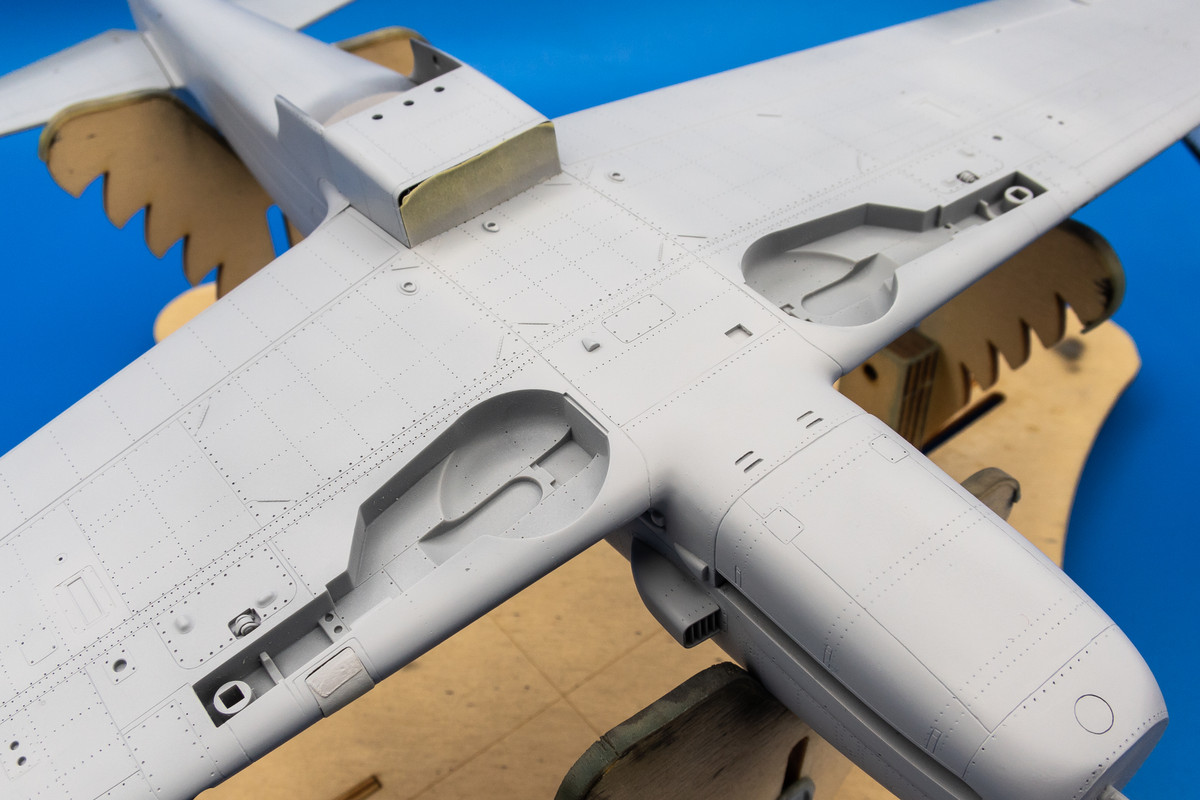
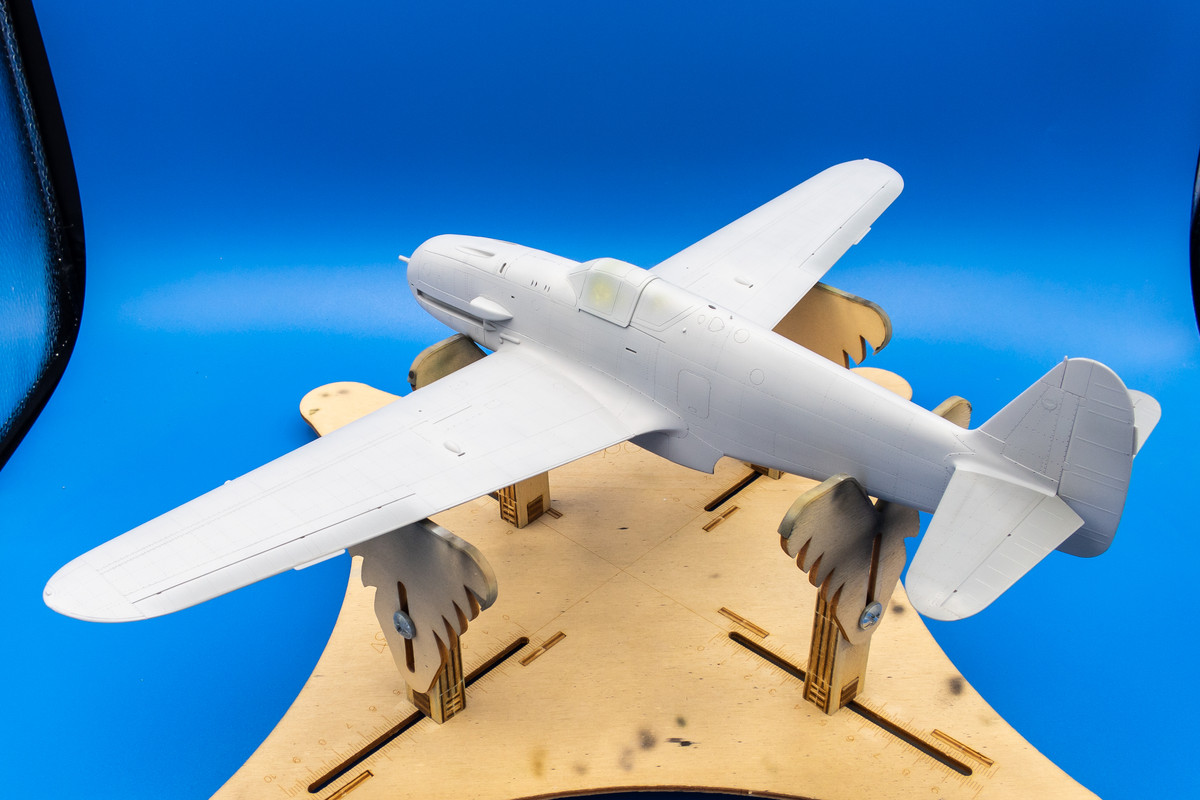
Almost ready for painting!
After the wing root work was completed, I sprayed the entire model with a primer (Mr Surfacer Primer 1000).
Almost ready for painting!
John aka JKim
-----------<><

-----------<><
-
BlackSheep214

- Elite Member
- Posts: 10422
- Joined: Sun Apr 06, 2014 8:47 pm
Re: 1//32 Hasegawa Ki-61-1 Tei Hien
Wow... I can't wait to see you sling some paint on her.
“Who controls the skies, controls the fate of this Earth”
Author unknown- 352nd Fighter Group, Blue-Nosed Bastards of Bodney
“Send one plane it’s a sortie; send two planes it’s a flight; send four planes it’s a test of airpower. - Richard Kohn
Author unknown- 352nd Fighter Group, Blue-Nosed Bastards of Bodney
“Send one plane it’s a sortie; send two planes it’s a flight; send four planes it’s a test of airpower. - Richard Kohn
Re: 1//32 Hasegawa Ki-61-1 Tei Hien
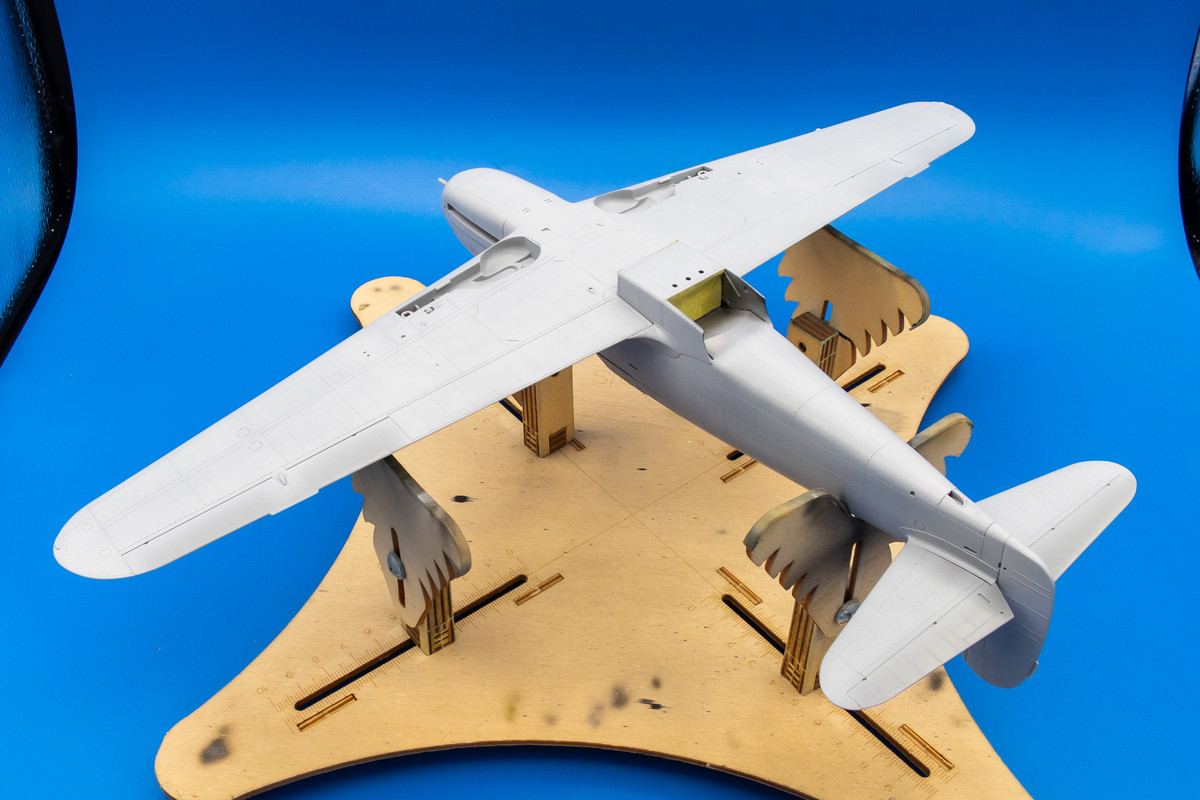
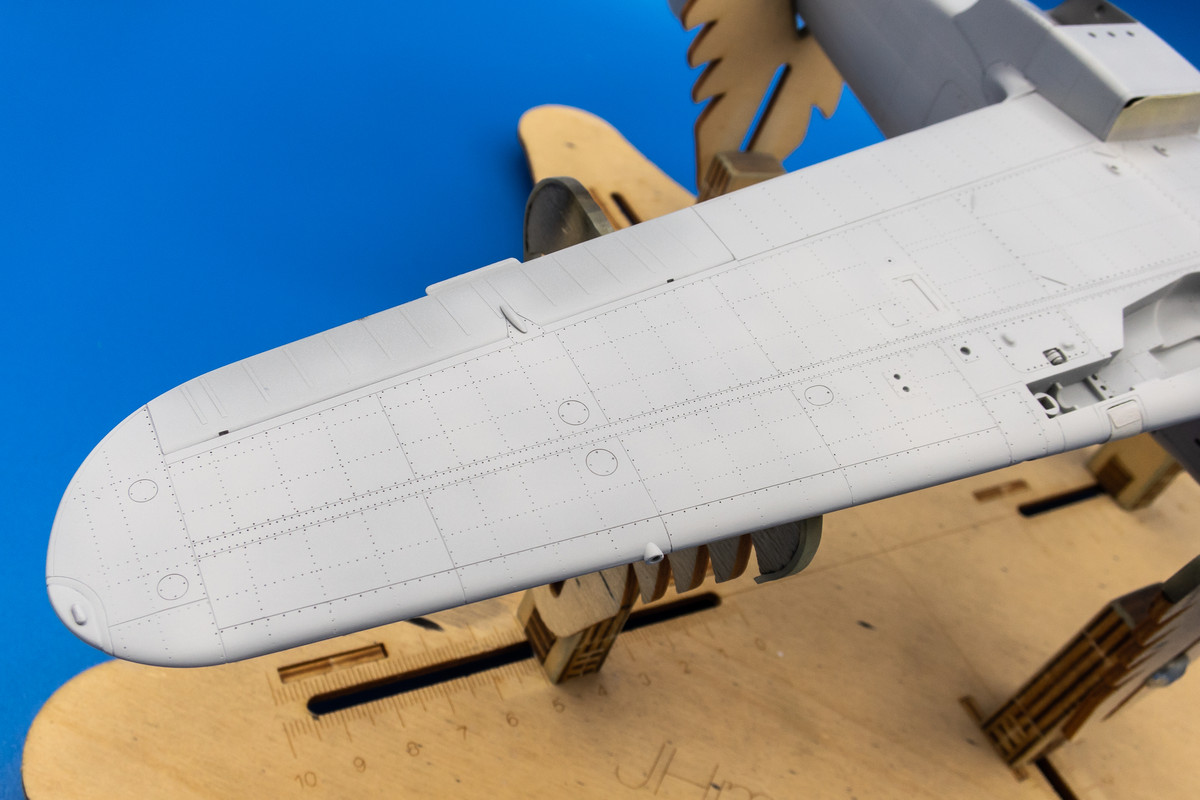
This one is not dead but I keep jumping to other projects!
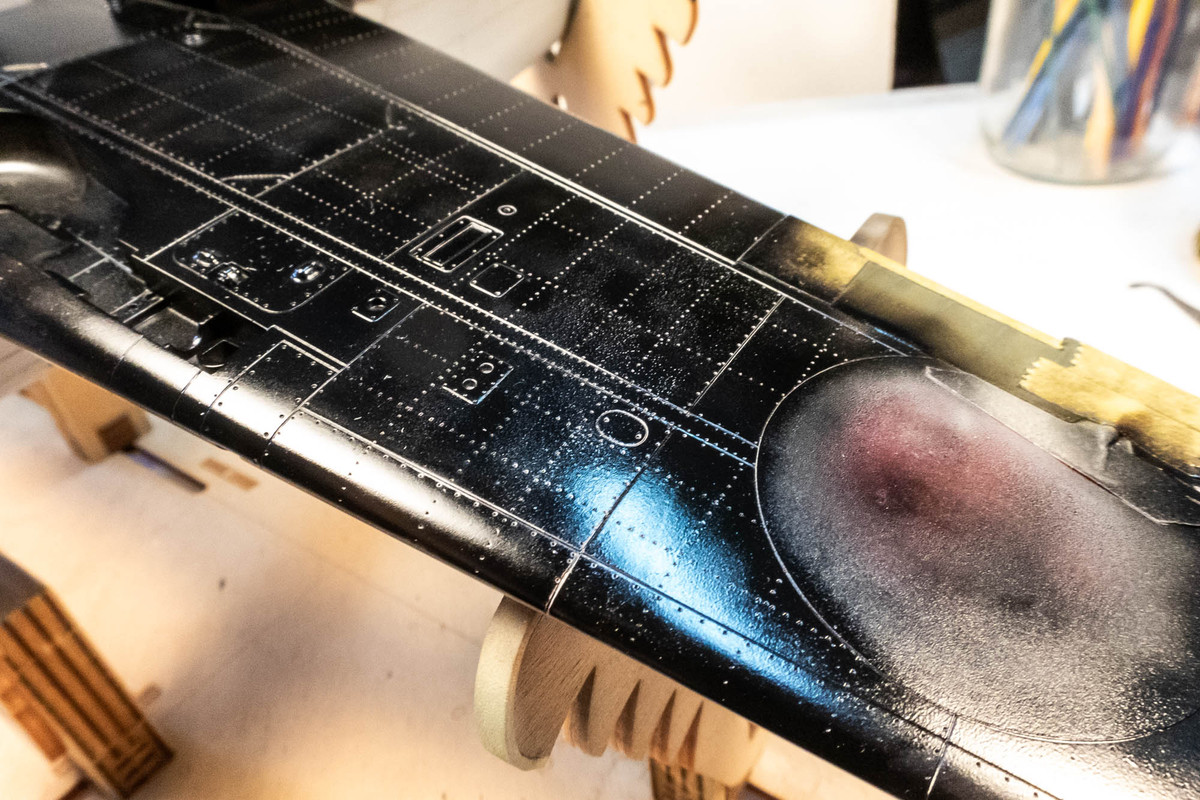
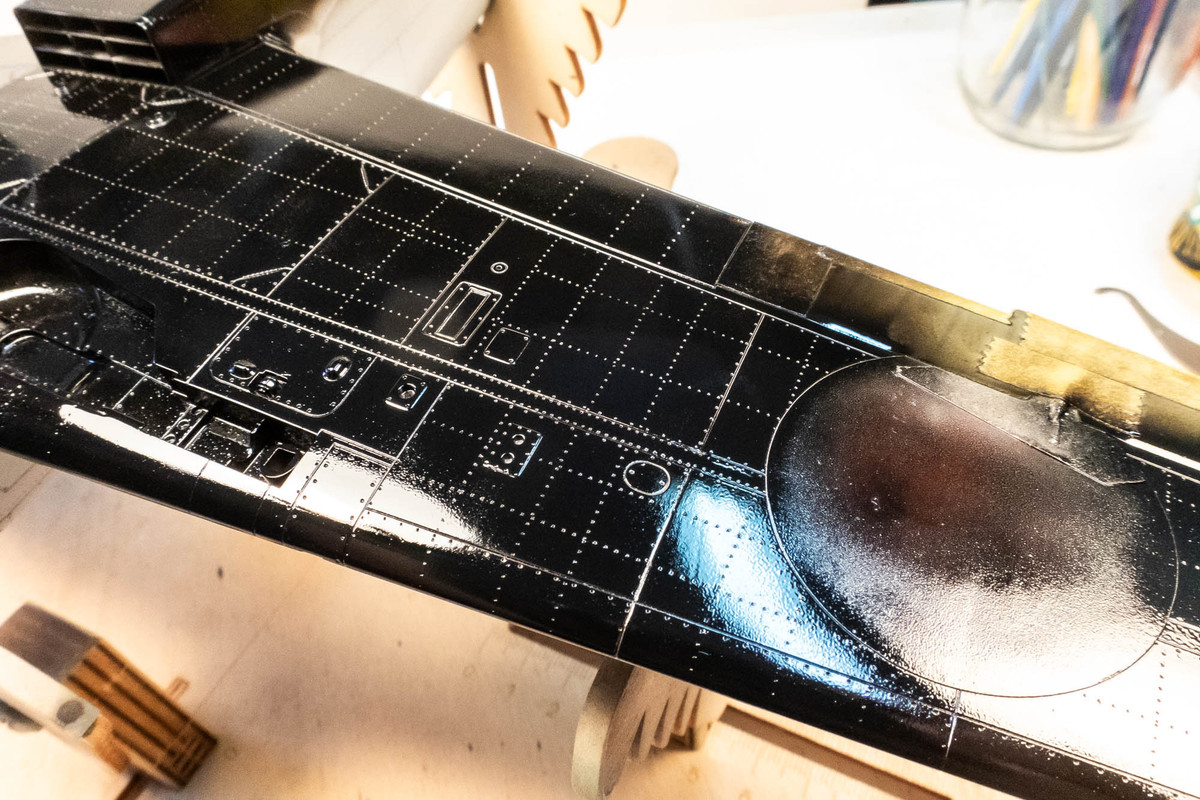
I decided to start the painting process by putting on the hinomarus on the wing bottom. Normally, I put the markings on after the camo painting but in order to protect the natural metal finish here, I thought I'd do some reverse masking. First, a rough base coat of Tamiya White. It is purposefully uneven to serve as a pre-shade layer.
After the white, Mr Color C385 IJN Red is sprayed on.
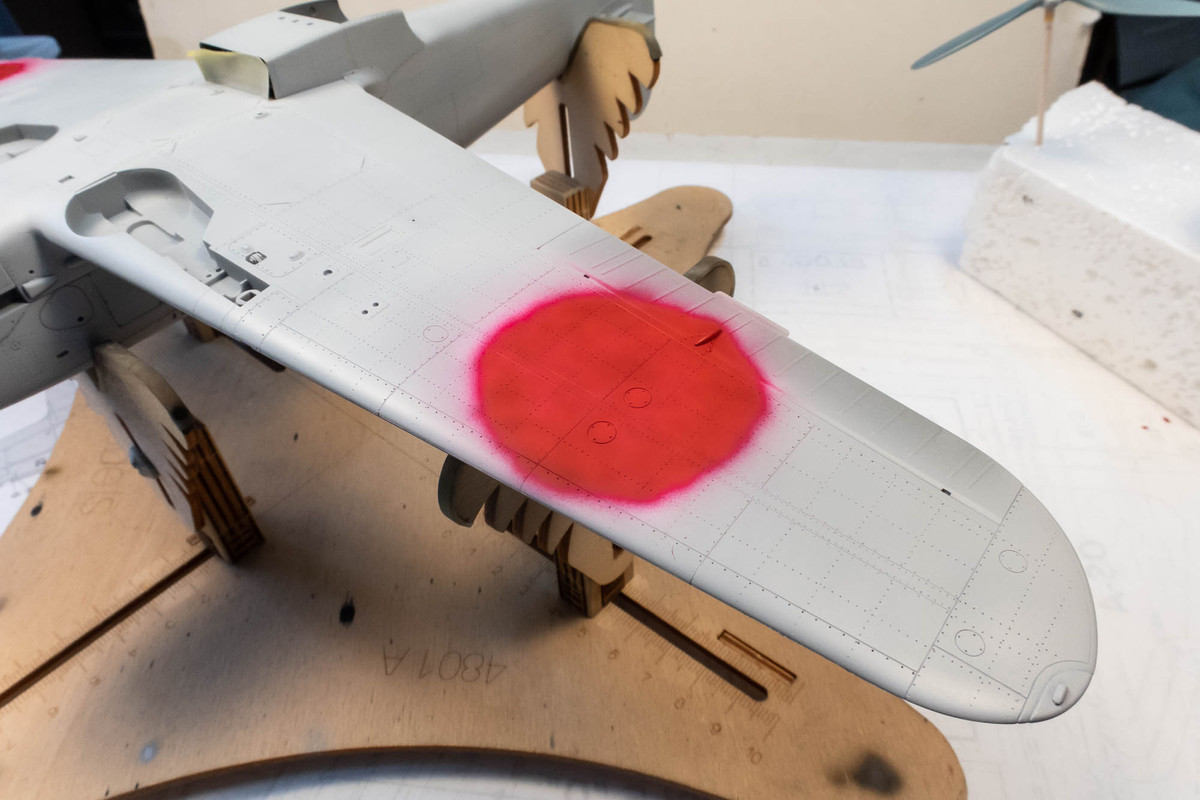
Masks cut from decal scans are placed over the red. Due to the raised feature on the aileron, the mask was snipped and replaced with a more form-fitting mask made from Tamiya tape.
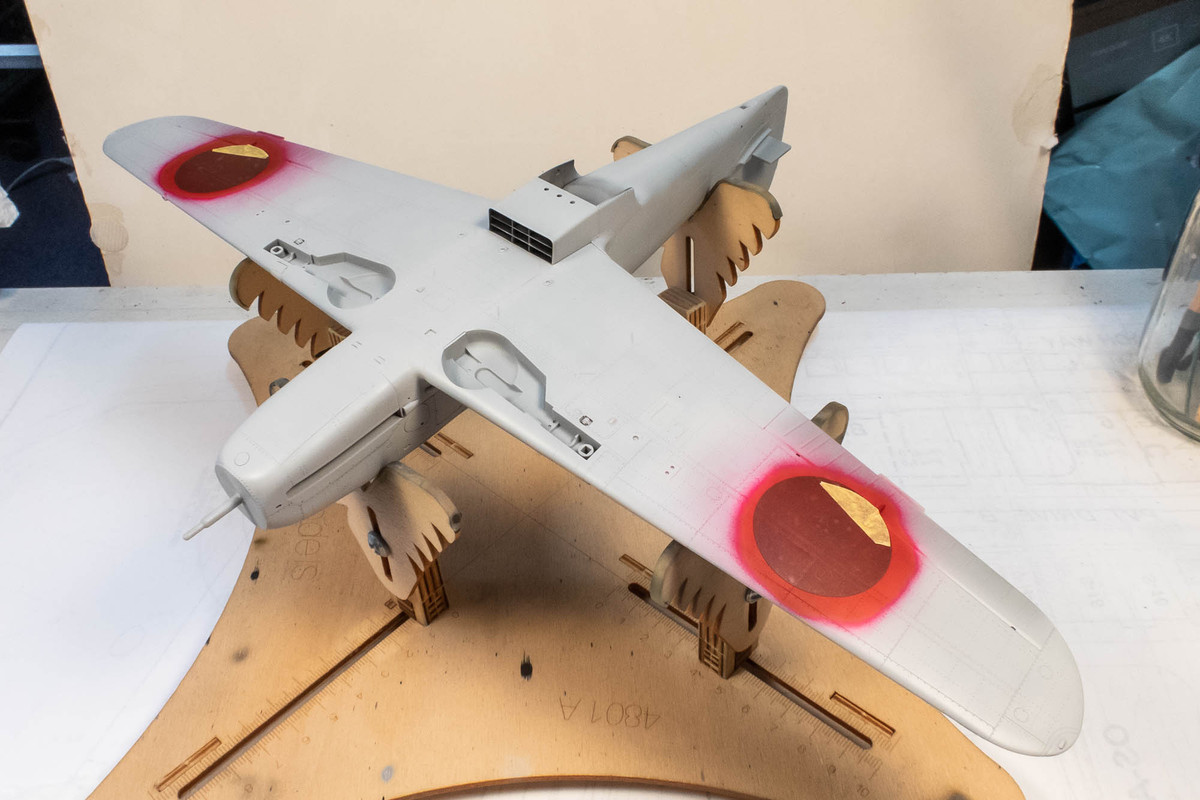
Mr Primer Surfacer 1000 was used to remove the excess red.
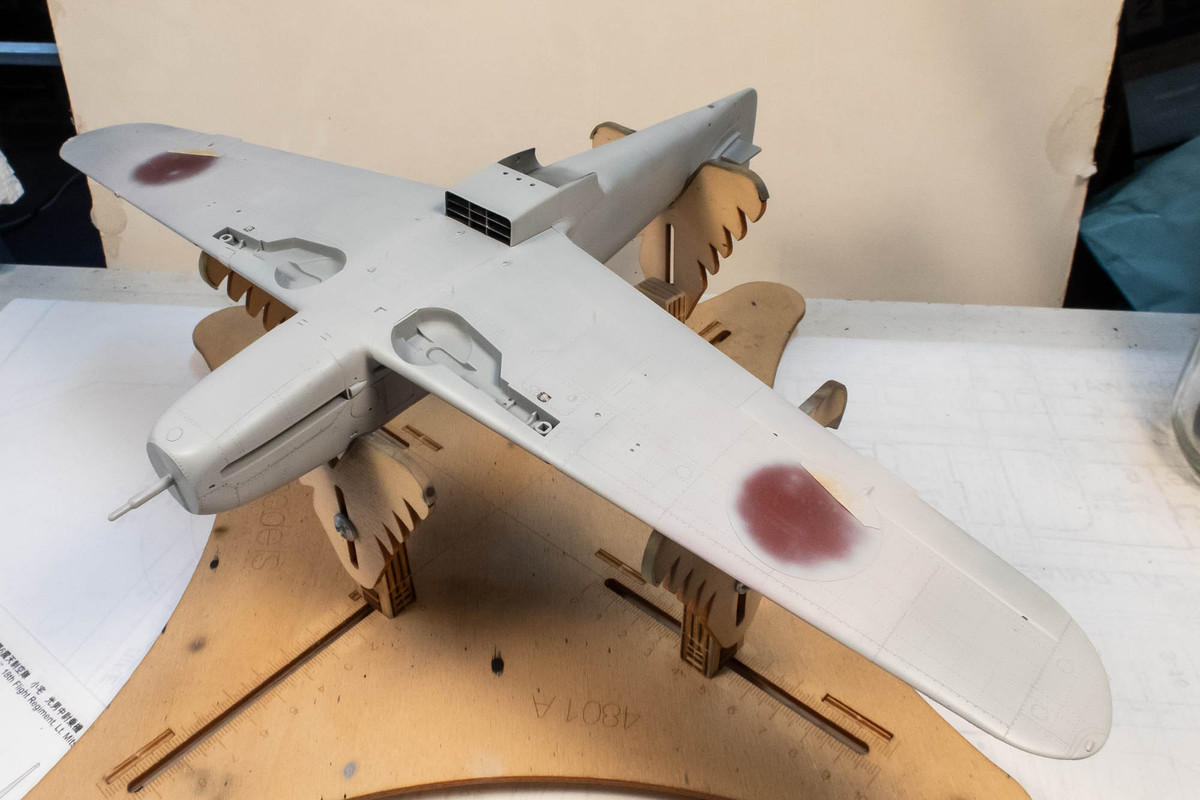
The fabric colored ailerons were then given a mottle pre-shade and painted with a grayish green shade (Tamiya XF-76).
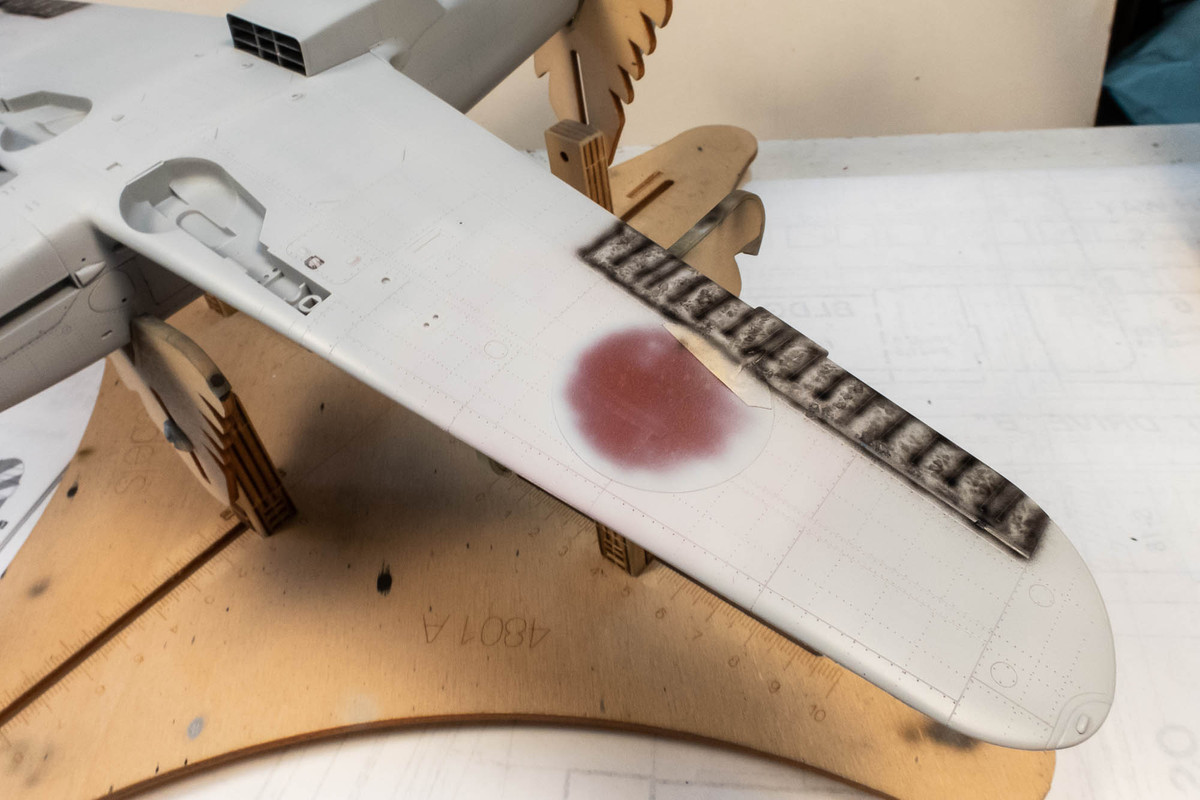
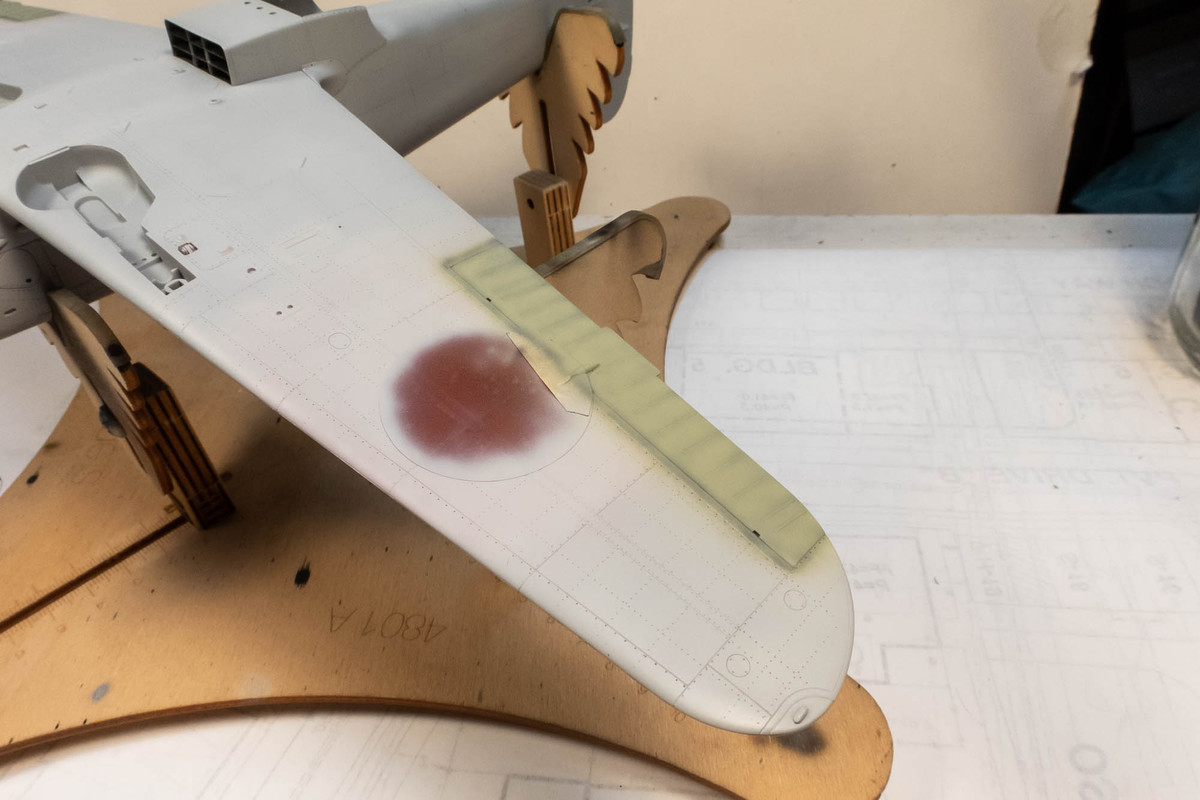
The ailerons will be masked off and I can start painting the NMF bottom.
I decided to start the painting process by putting on the hinomarus on the wing bottom. Normally, I put the markings on after the camo painting but in order to protect the natural metal finish here, I thought I'd do some reverse masking. First, a rough base coat of Tamiya White. It is purposefully uneven to serve as a pre-shade layer.
After the white, Mr Color C385 IJN Red is sprayed on.
Masks cut from decal scans are placed over the red. Due to the raised feature on the aileron, the mask was snipped and replaced with a more form-fitting mask made from Tamiya tape.
Mr Primer Surfacer 1000 was used to remove the excess red.
The fabric colored ailerons were then given a mottle pre-shade and painted with a grayish green shade (Tamiya XF-76).
The ailerons will be masked off and I can start painting the NMF bottom.
John aka JKim
-----------<><
-----------<><
-
Stikpusher

- Moderator
- Posts: 18880
- Joined: Sat Apr 05, 2014 8:37 pm
- Location: Ceti Alpha 5
Re: 1//32 Hasegawa Ki-61-1 Tei Hien
Good to see that you’re still chugging along with this one John.
"Surely I have made my meaning plain? I intend to avenge myself upon you, Admiral. I have deprived your ship of power, and when I swing 'round, I intend to deprive you of your life."
FLSM
FLSM
Re: 1//32 Hasegawa Ki-61-1 Tei Hien
Thanks Carlos! This one is obviously further along than the D3A1 so I'm hoping to push it over the finish line so that I'll have the opportunity to start a new build. I've got the Border 1/35 Fw 190A-6 that I want to do in Nowotny's scheme. I've got the Italeri 1/32 Macchi C.202 Folgore on pre-order but that probably won't get released until August. And I've got the 1/32 Tamiya Spitfire XVIe but I'm waiting for the 1/32 Spitfire XIVe conversion to be made available so I can make a 5-bladed Griffon Spitfire.
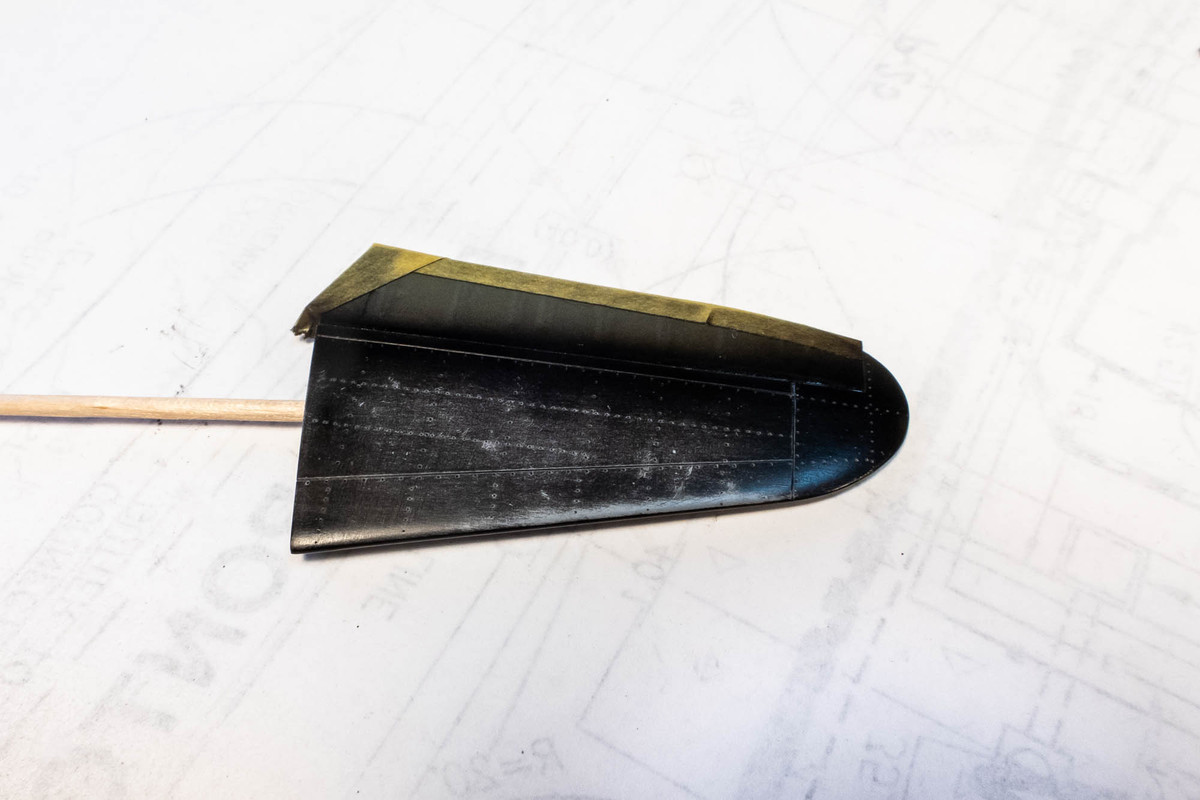
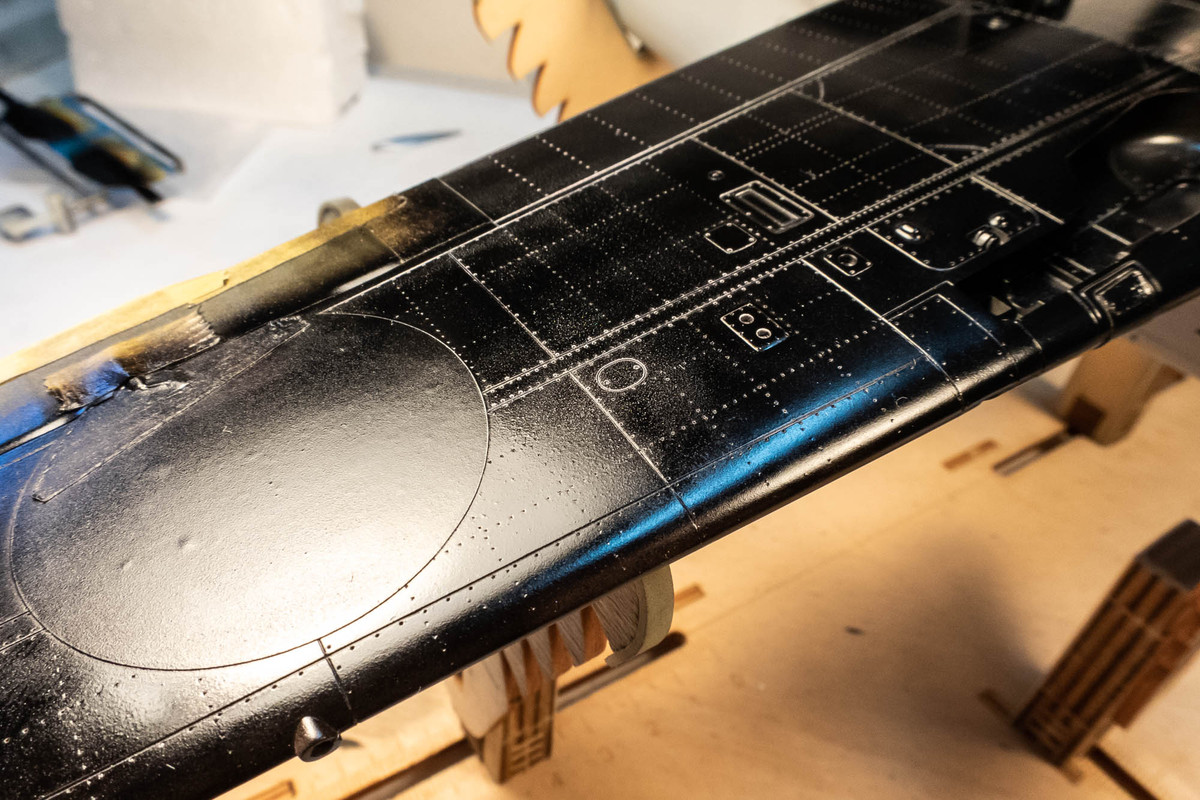
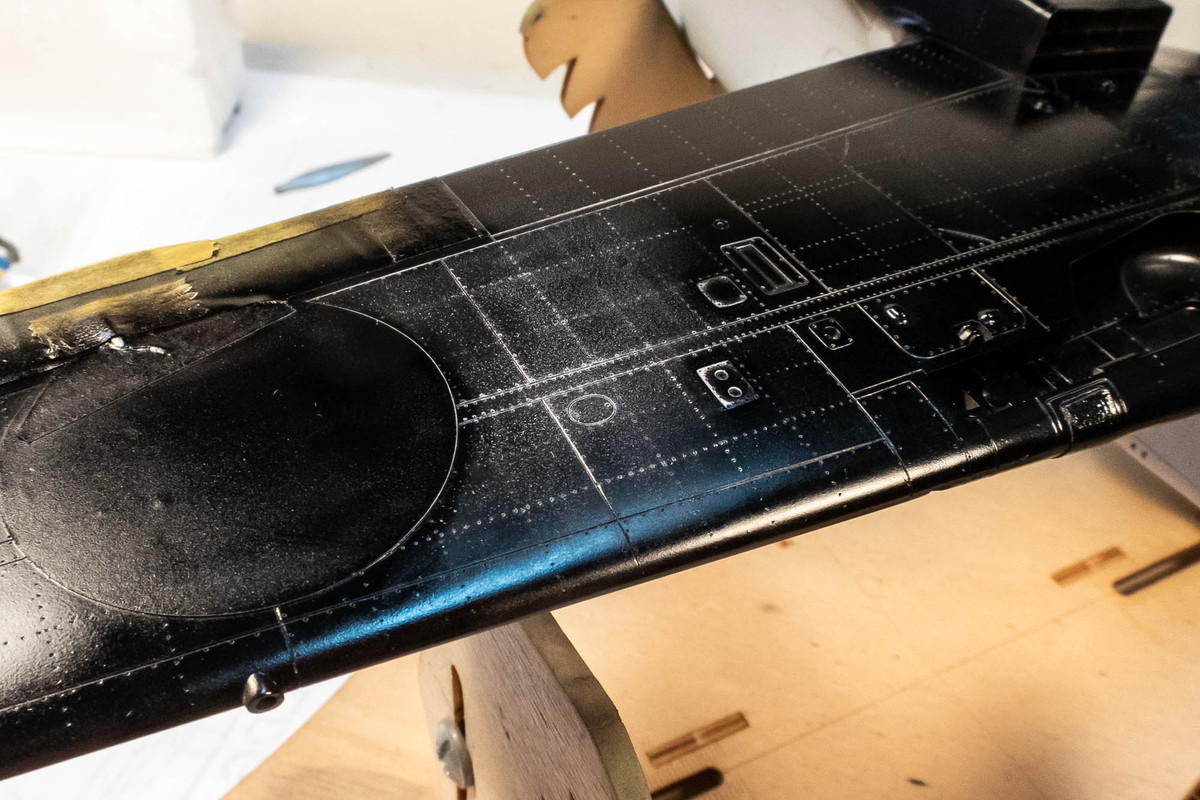
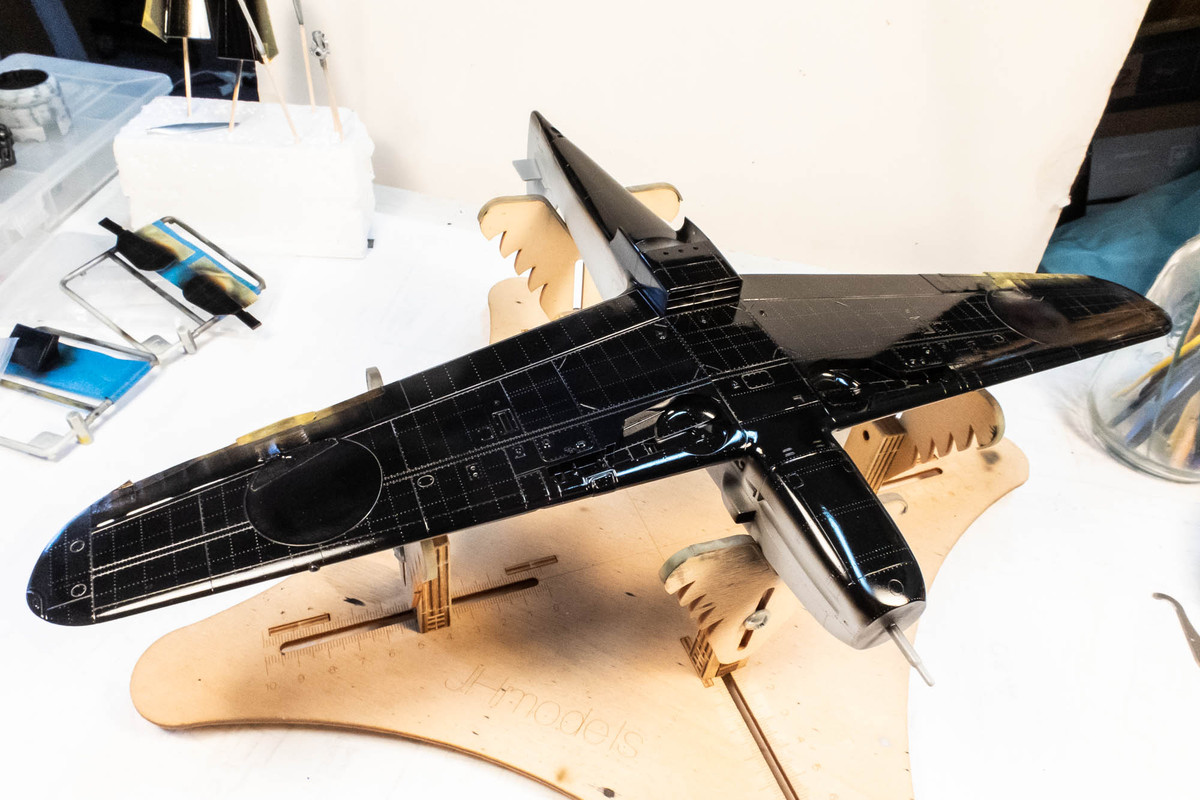
The bottom was sprayed Tamiya Black. I tried to get a glossy finish so I can use some of Alclad's higher shine shades, although it probably won't matter because I'm going to end up weathering it anyway.
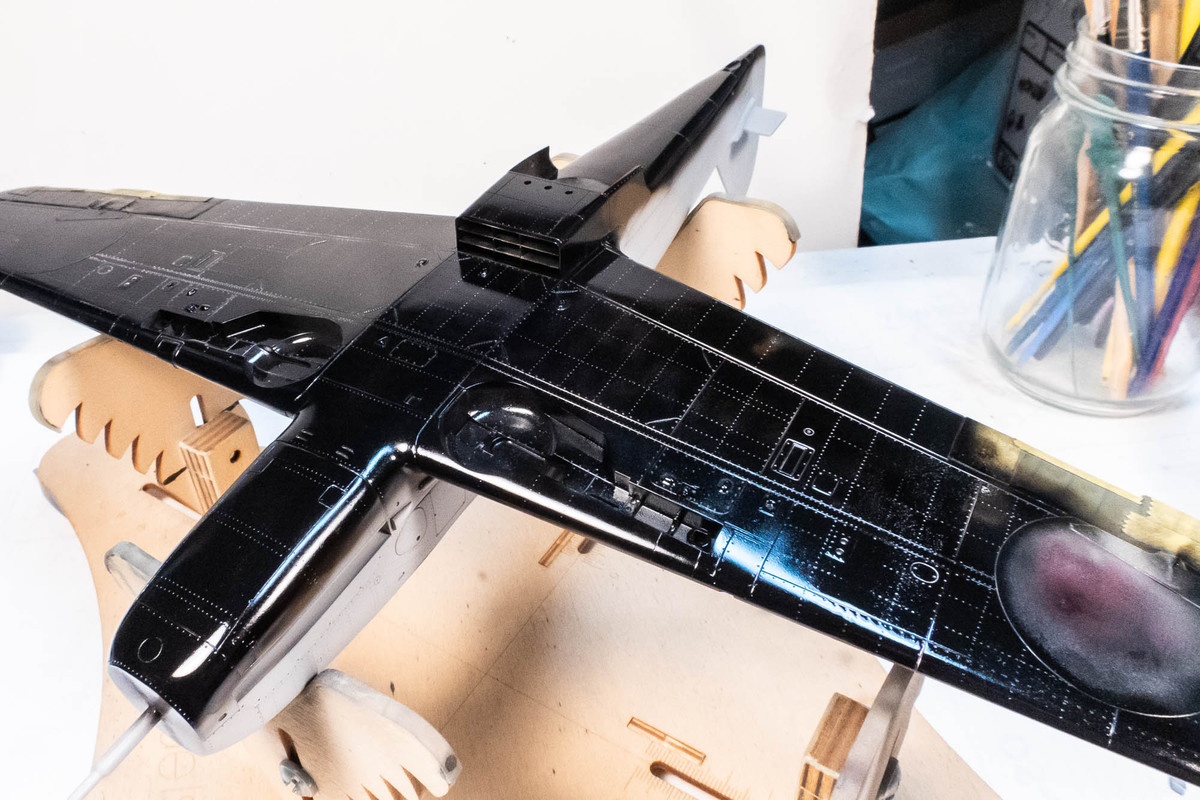
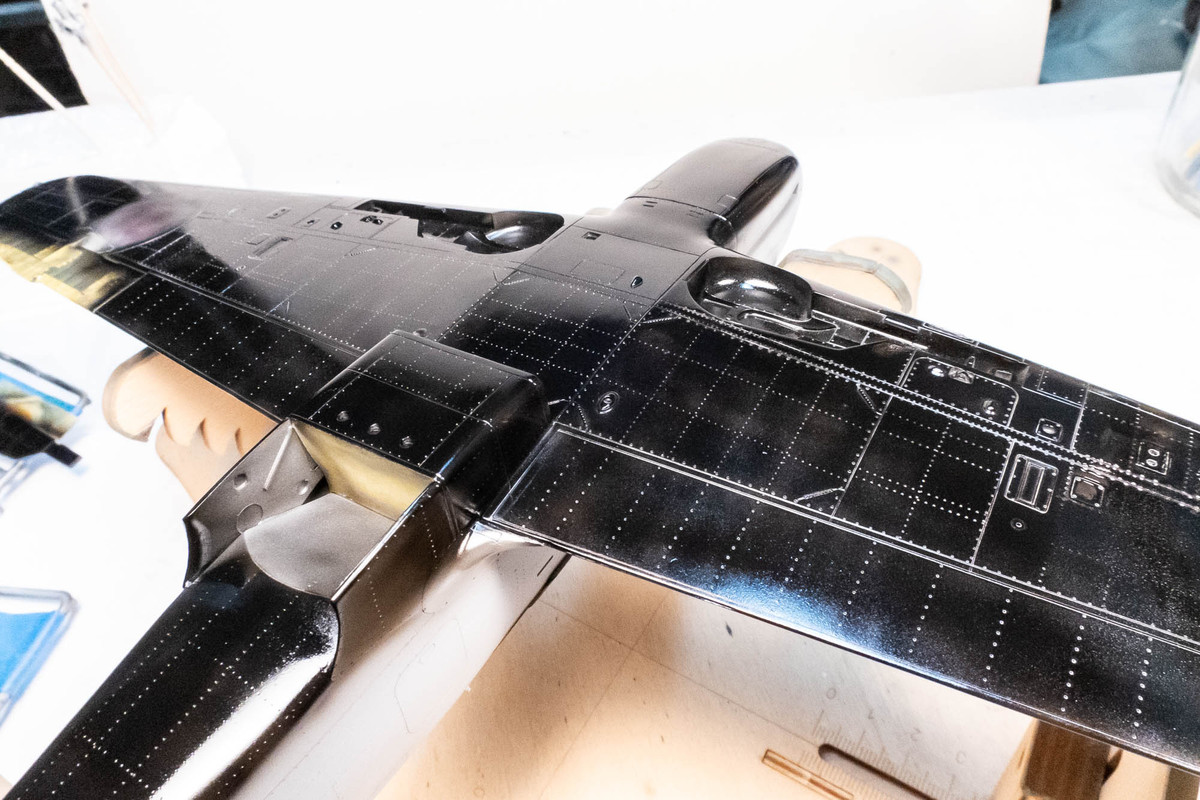
There were some rough spots coincidentally (?) in the same place on both wings (between the outer gun position and the hinomaru). To try and smooth it out, I sprayed straight Mr Leveling Thinner on the black. It helped but there is still some texture that I'm going to have to buff out before I apply the Alclad.
The styrofoam block holding the horizontal stabilizers got knocked off the bench while they were still wet from the MLT treatment. Hopefully, I can scrub the dust off without messing up the finish too much but I'm going to wait until this black fully cures before I do anything.
The bottom was sprayed Tamiya Black. I tried to get a glossy finish so I can use some of Alclad's higher shine shades, although it probably won't matter because I'm going to end up weathering it anyway.
There were some rough spots coincidentally (?) in the same place on both wings (between the outer gun position and the hinomaru). To try and smooth it out, I sprayed straight Mr Leveling Thinner on the black. It helped but there is still some texture that I'm going to have to buff out before I apply the Alclad.
The styrofoam block holding the horizontal stabilizers got knocked off the bench while they were still wet from the MLT treatment. Hopefully, I can scrub the dust off without messing up the finish too much but I'm going to wait until this black fully cures before I do anything.
John aka JKim
-----------<><
-----------<><
-
Stikpusher
- Moderator
- Posts: 18880
- Joined: Sat Apr 05, 2014 8:37 pm
- Location: Ceti Alpha 5
Re: 1//32 Hasegawa Ki-61-1 Tei Hien
Hope that you can fix that dust on the stabilizer without too much fuss John.
As far as your next project goes, my vote is for the Macchi. You don’t see many of those built, and even fewer in 1/32. But I am also a fan of any 190 or Griffon engined Spitfire…. Tough call as they are all great subjects.
As far as your next project goes, my vote is for the Macchi. You don’t see many of those built, and even fewer in 1/32. But I am also a fan of any 190 or Griffon engined Spitfire…. Tough call as they are all great subjects.
"Surely I have made my meaning plain? I intend to avenge myself upon you, Admiral. I have deprived your ship of power, and when I swing 'round, I intend to deprive you of your life."
FLSM
FLSM
Re: 1//32 Hasegawa Ki-61-1 Tei Hien
Thank you Carlos! The paint fix was pretty easy as you'll see below.
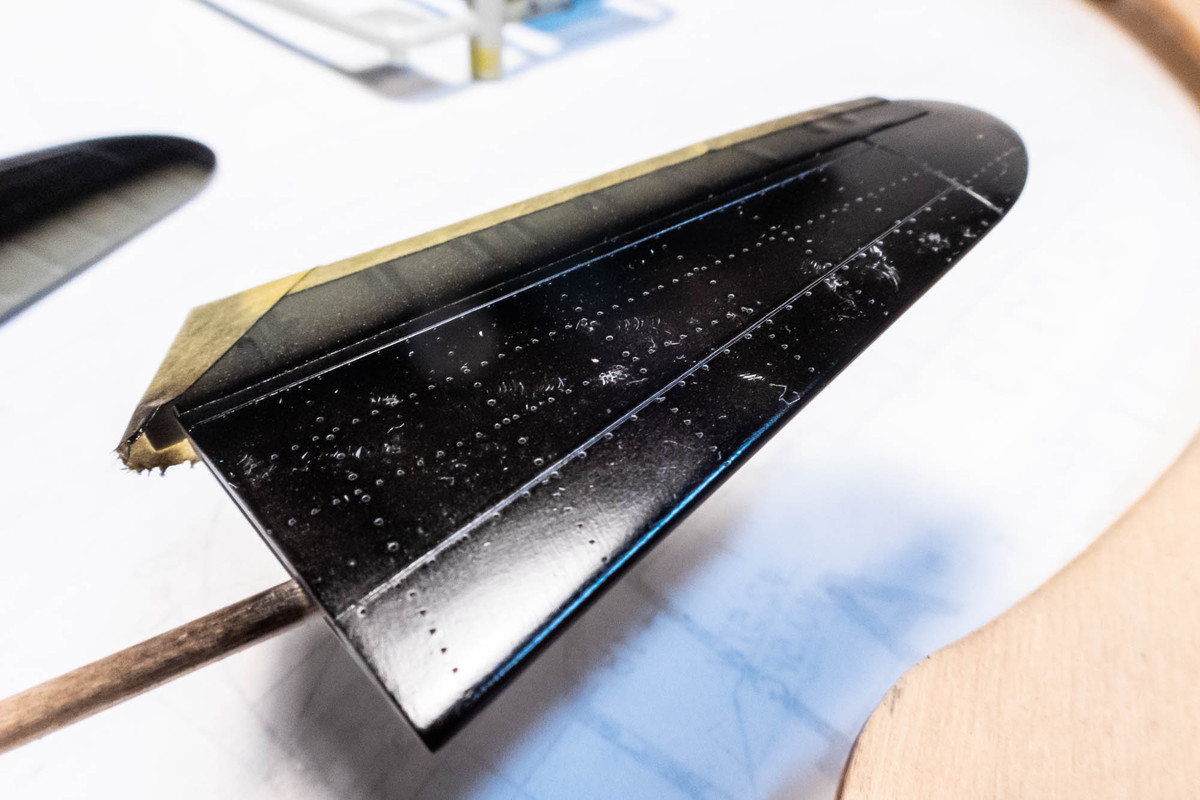
There was no dust embedded onto the stabilizer as I had initially thought. The wet paint just got scratched off by the carpet. There hardly any surface imperfections.
I gave the stabs a quick rubbing with Micromesh (4000 and 6000) just to be safe.
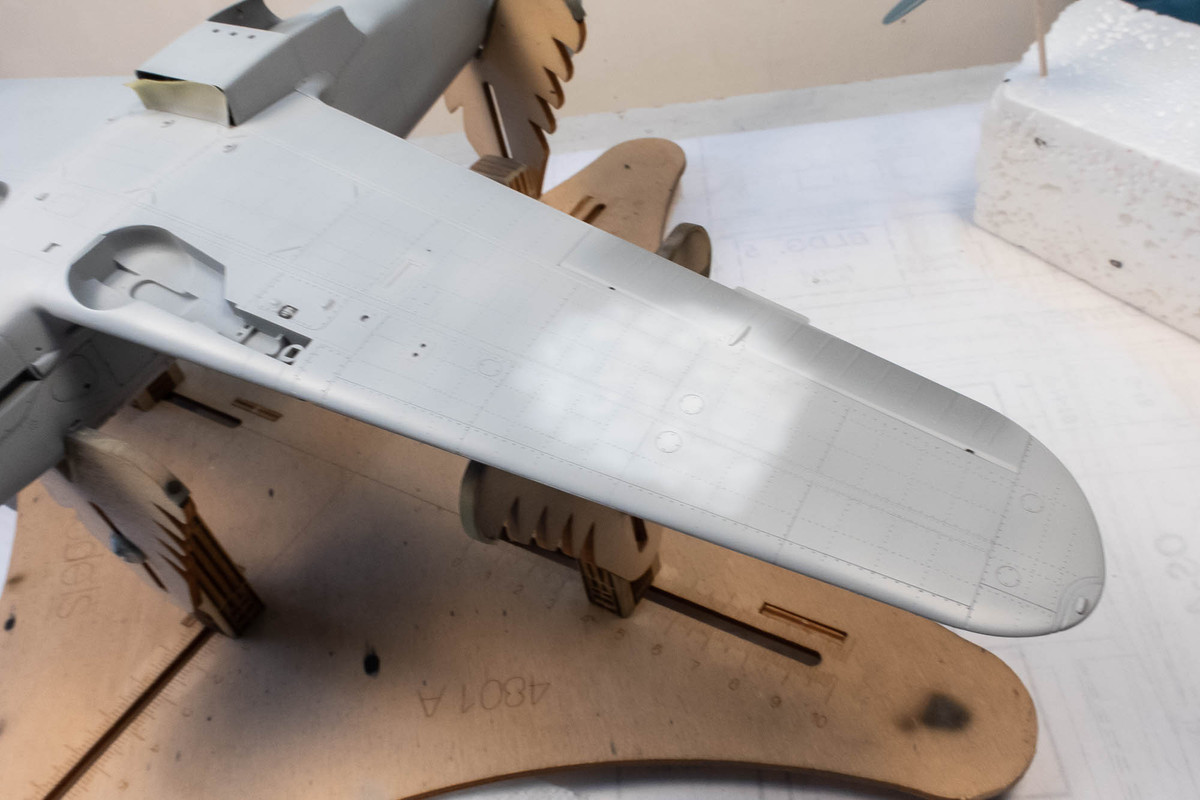
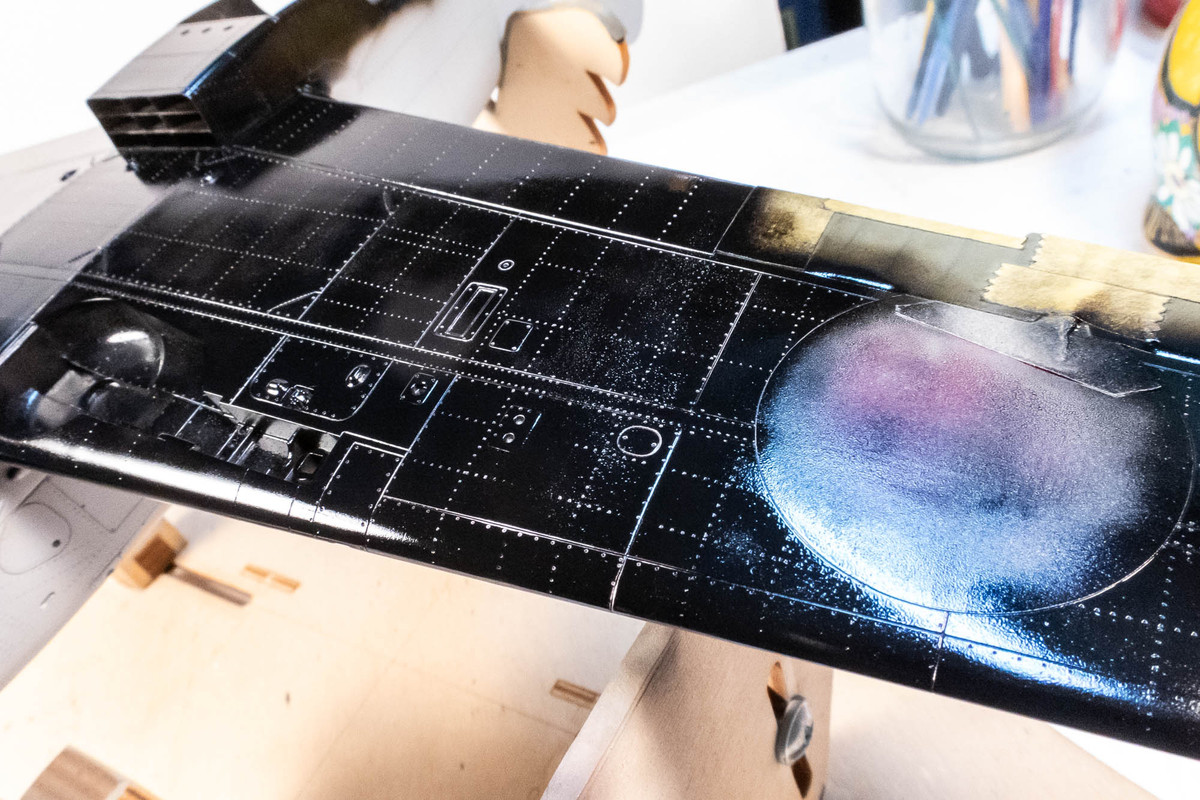
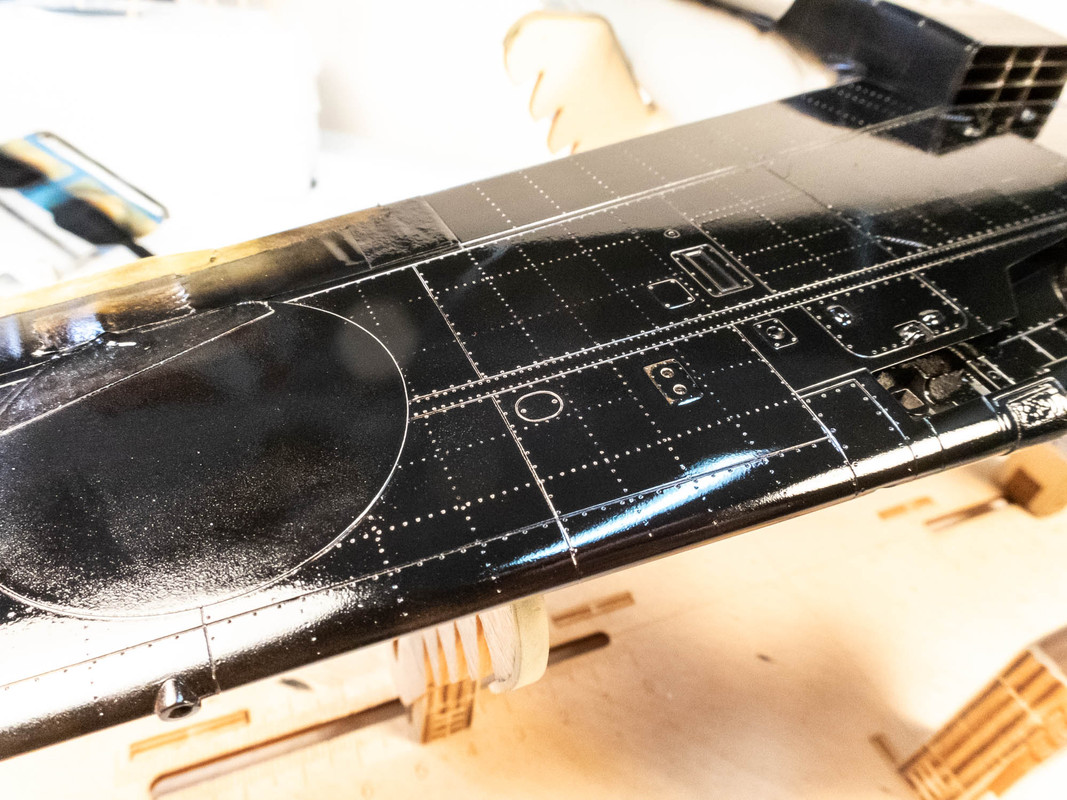
For the texture on the wings, I initially gave it a good rubbing with a soft, clean cotton t-shirt. That helped a little but it was still noticeable. Here are some close-ups of the remaining texture on the wings.
I used wet Micromesh 4000 and 6000 successively to smooth out the surface. It still looks messy but running my fingers over it tells me it's smooth.
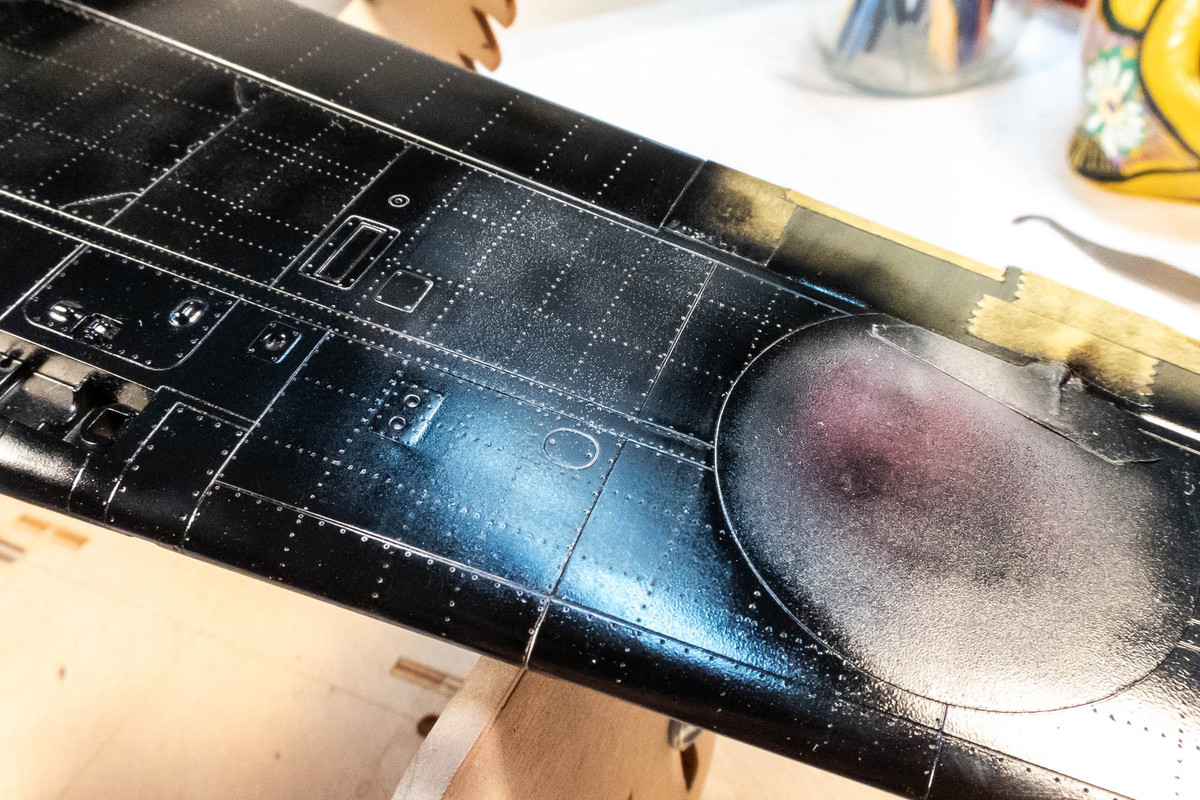
It's important not to gauge this with a straight on view but at an angle using a light source.
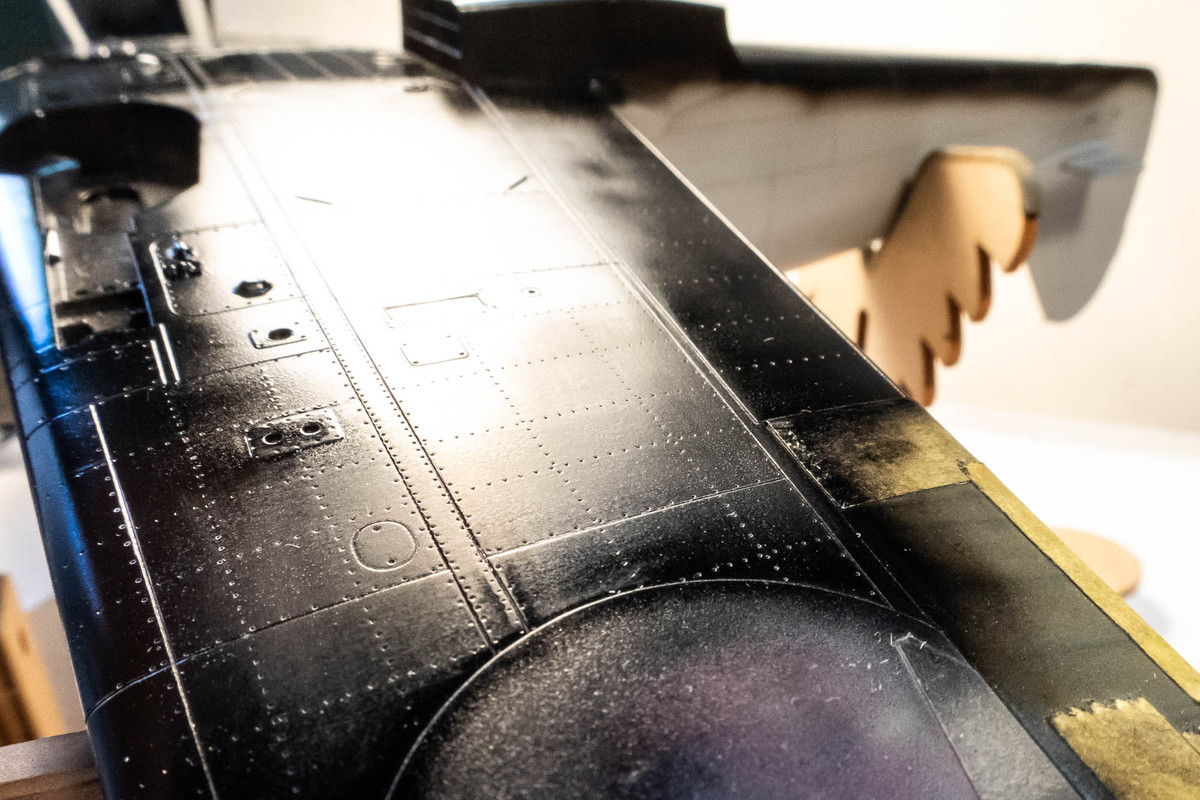
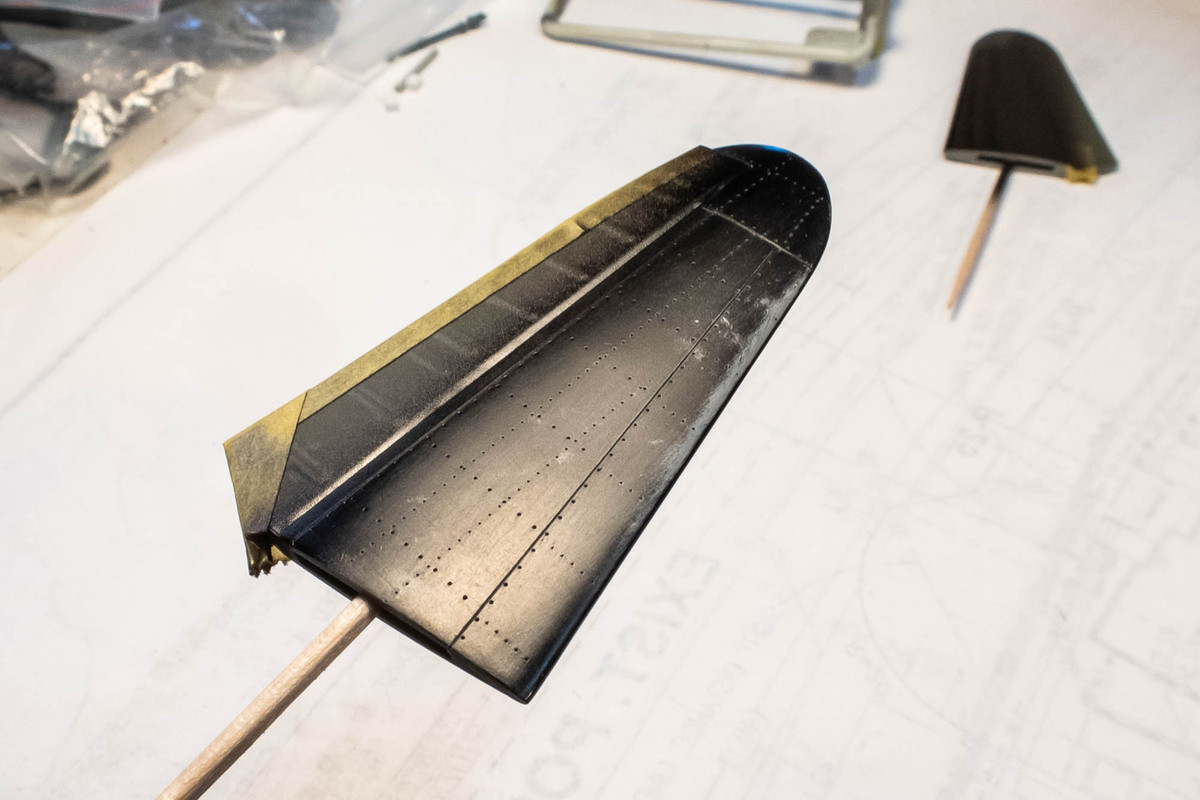
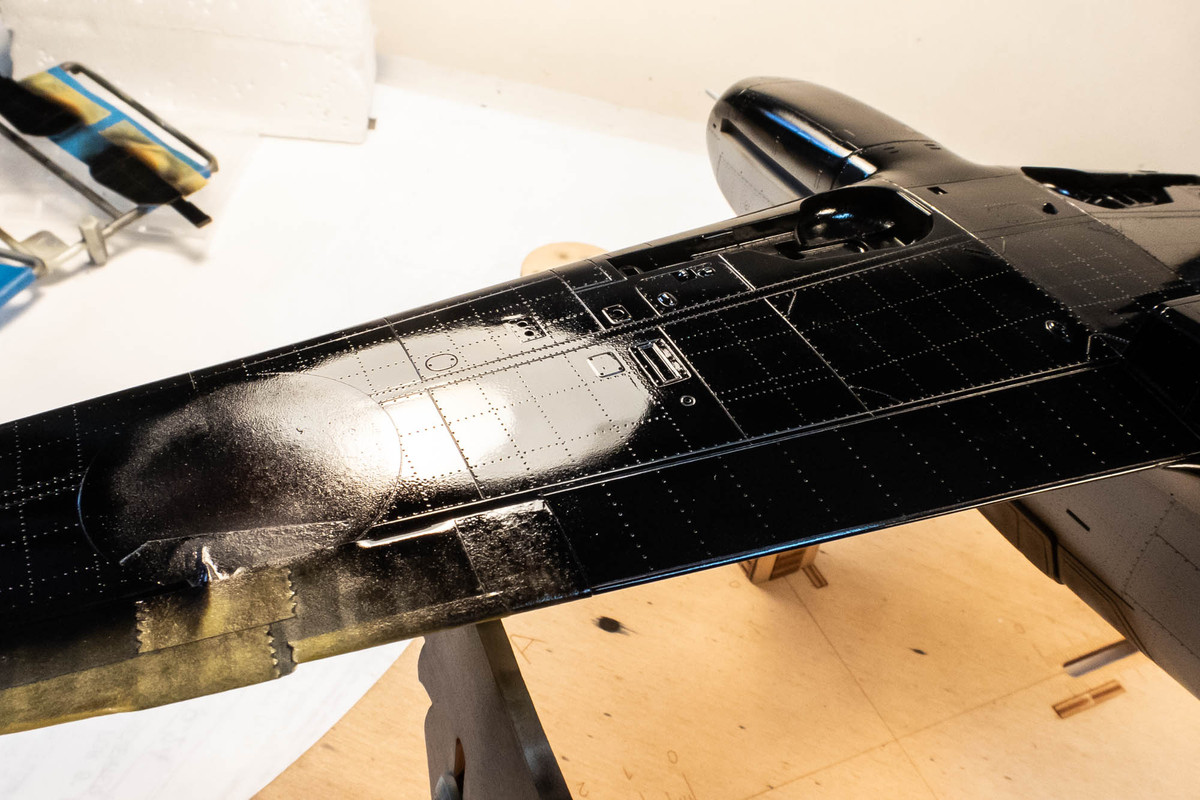
Satisfied that I had adequately smoothed the surface, I re-sprayed the area with Tamiya Black thinned with Mr Leveling Thinner. The entire bottom was then sprayed with straight Mr Leveling Thinner to give the bottom surfaces a uniform finish.
There was no dust embedded onto the stabilizer as I had initially thought. The wet paint just got scratched off by the carpet. There hardly any surface imperfections.
I gave the stabs a quick rubbing with Micromesh (4000 and 6000) just to be safe.
For the texture on the wings, I initially gave it a good rubbing with a soft, clean cotton t-shirt. That helped a little but it was still noticeable. Here are some close-ups of the remaining texture on the wings.
I used wet Micromesh 4000 and 6000 successively to smooth out the surface. It still looks messy but running my fingers over it tells me it's smooth.
It's important not to gauge this with a straight on view but at an angle using a light source.
Satisfied that I had adequately smoothed the surface, I re-sprayed the area with Tamiya Black thinned with Mr Leveling Thinner. The entire bottom was then sprayed with straight Mr Leveling Thinner to give the bottom surfaces a uniform finish.
Last edited by jkim on Sun Jul 16, 2023 9:55 am, edited 1 time in total.
John aka JKim
-----------<><
-----------<><
-
Stikpusher
- Moderator
- Posts: 18880
- Joined: Sat Apr 05, 2014 8:37 pm
- Location: Ceti Alpha 5
Re: 1//32 Hasegawa Ki-61-1 Tei Hien
Silky smooth and shiny! 
"Surely I have made my meaning plain? I intend to avenge myself upon you, Admiral. I have deprived your ship of power, and when I swing 'round, I intend to deprive you of your life."
FLSM
FLSM