I agree, John. It's certainly nothing like the representation on the model.
Infinity 1/32 Aichi D3A1 - The Constanza Rule
-
Gary Brantley

- Addicted Member
- Posts: 1751
- Joined: Tue Apr 08, 2014 9:40 pm
- Location: Cameron, Texas

Re: Infinity 1/32 Aichi D3A1 - The Constanza Rule
I thought you found the kit in the trash and the Constanza rule being applied is it's okay to take it if it's on top 
Thanks,
John
John
-
Stikpusher

- Moderator
- Posts: 18912
- Joined: Sat Apr 05, 2014 8:37 pm
- Location: Ceti Alpha 5
Re: Infinity 1/32 Aichi D3A1 - The Constanza Rule
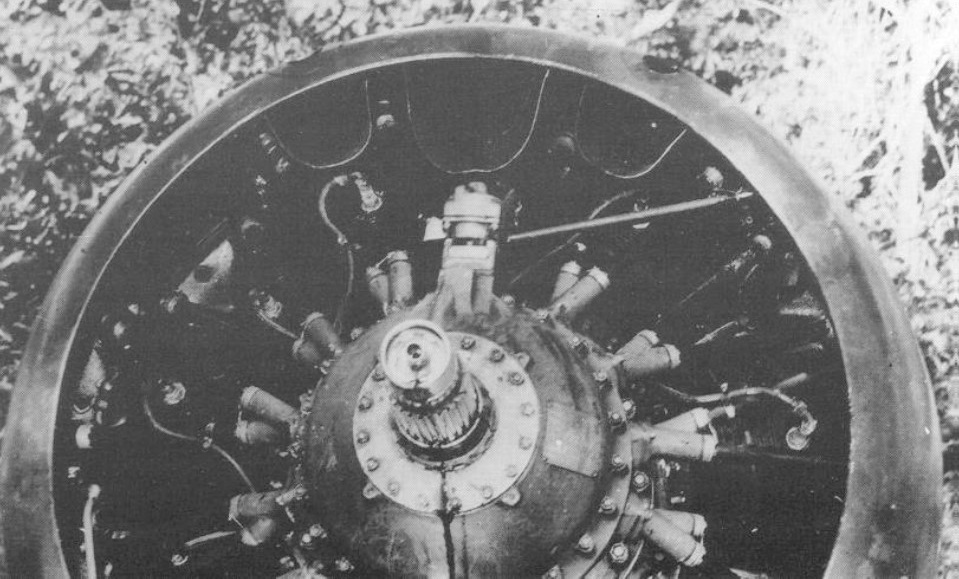
Indeed. On the downed Val, the rivets are practically invisible, and the skin panels appear to be overlapping as opposed to butt joined. And zero appearance of any oil canning on the skin.
"Surely I have made my meaning plain? I intend to avenge myself upon you, Admiral. I have deprived your ship of power, and when I swing 'round, I intend to deprive you of your life."
FLSM
FLSM
-
BlackSheep214

- Elite Member
- Posts: 10462
- Joined: Sun Apr 06, 2014 8:47 pm
Re: Infinity 1/32 Aichi D3A1 - The Constanza Rule
Ok now I understand.
I do recall seeing it on the Lancaster bomber on display at the Canadian Air Museum in Ottawa last year.
I do recall seeing it on the Lancaster bomber on display at the Canadian Air Museum in Ottawa last year.
“Who controls the skies, controls the fate of this Earth”
Author unknown- 352nd Fighter Group, Blue-Nosed Bastards of Bodney
“Send one plane it’s a sortie; send two planes it’s a flight; send four planes it’s a test of airpower. - Richard Kohn
Author unknown- 352nd Fighter Group, Blue-Nosed Bastards of Bodney
“Send one plane it’s a sortie; send two planes it’s a flight; send four planes it’s a test of airpower. - Richard Kohn

Re: Infinity 1/32 Aichi D3A1 - The Constanza Rule
Oh man, I don't know what I've gotten myself into! After the horizontal stabilizer test, I thought I'd jump over and try the rivet removal process on the fuselage. Idea being that I'd do one half of each component for comparison purposes.
Before doing the rivet thing, I noticed a couple of big ejector pin stubs on the fuselage interior. I carefully scraped and sanded them away.
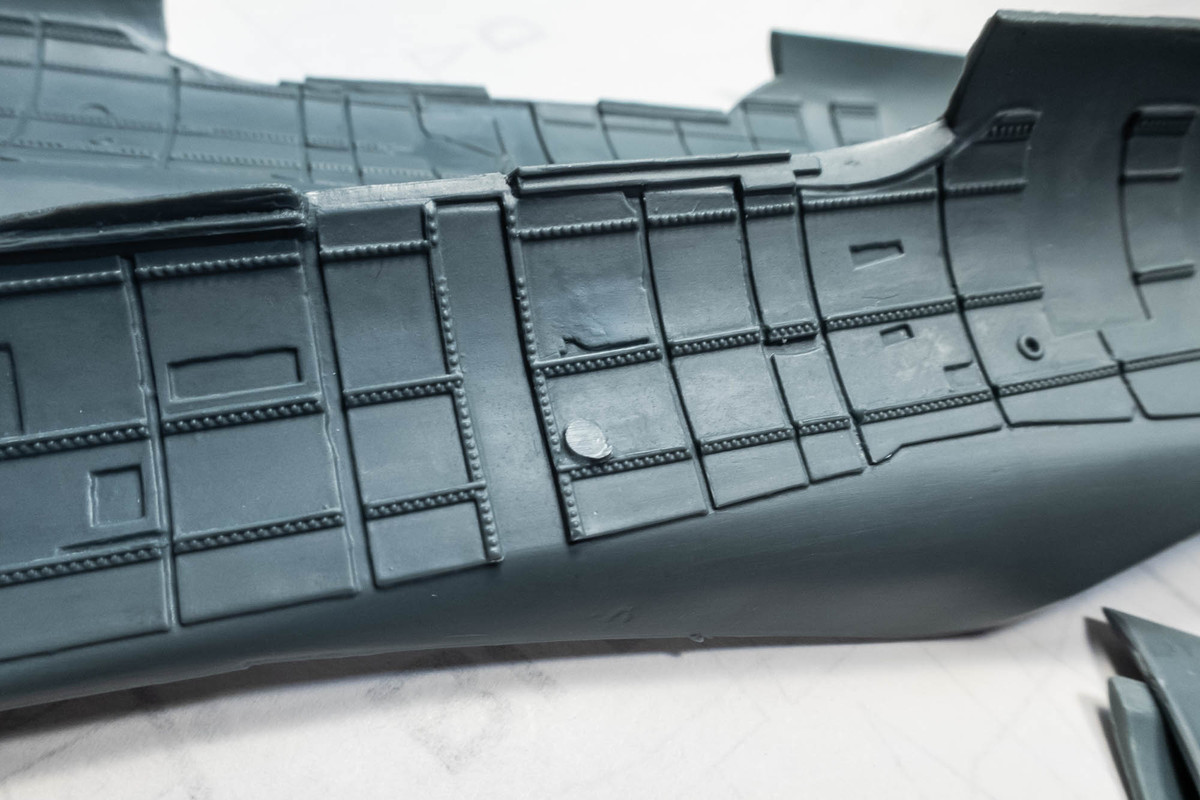

The fuselage is a few levels more complex than the stabilizers and it was a cramp-inducing exercise trying to avoid the details that needed to be preserved. I took it one section at a time on the port fuselage part and worked my way towards the front. Basically applying the black CA glue with a toothpick, zapping it with activator and sanding.
It took a full day to finish one fuselage half.
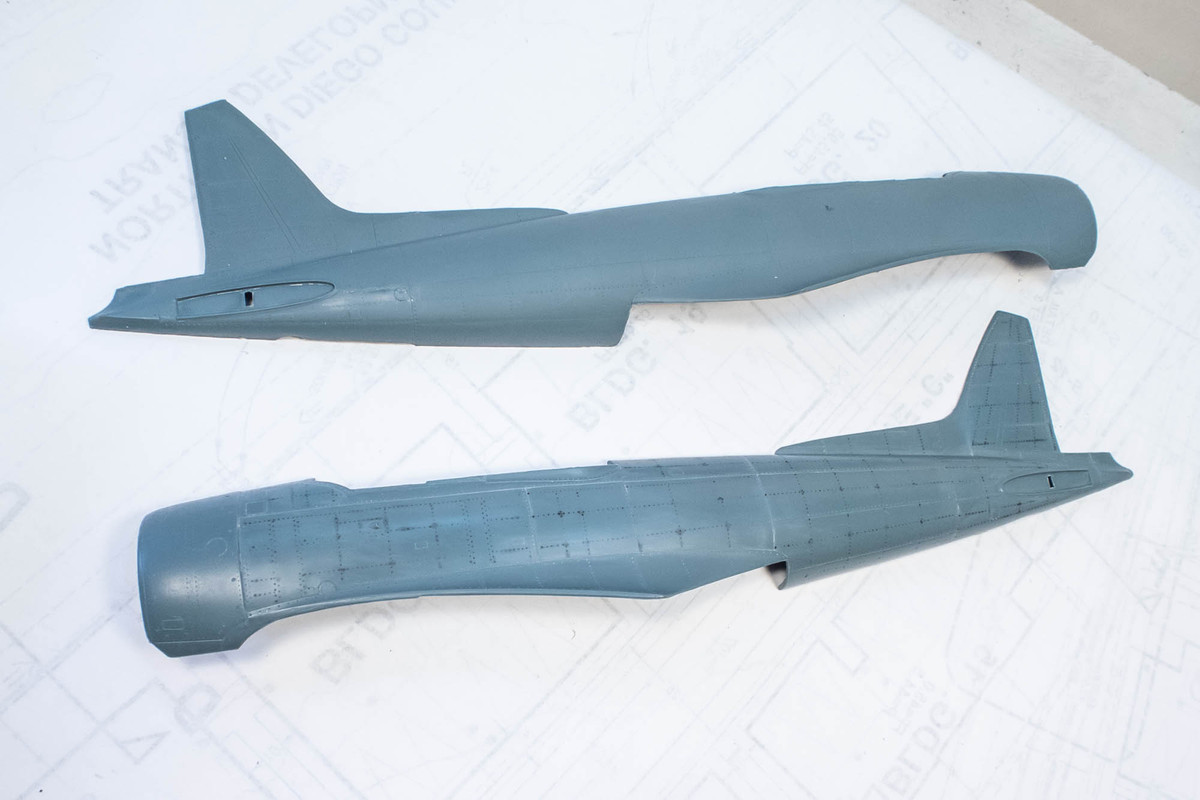
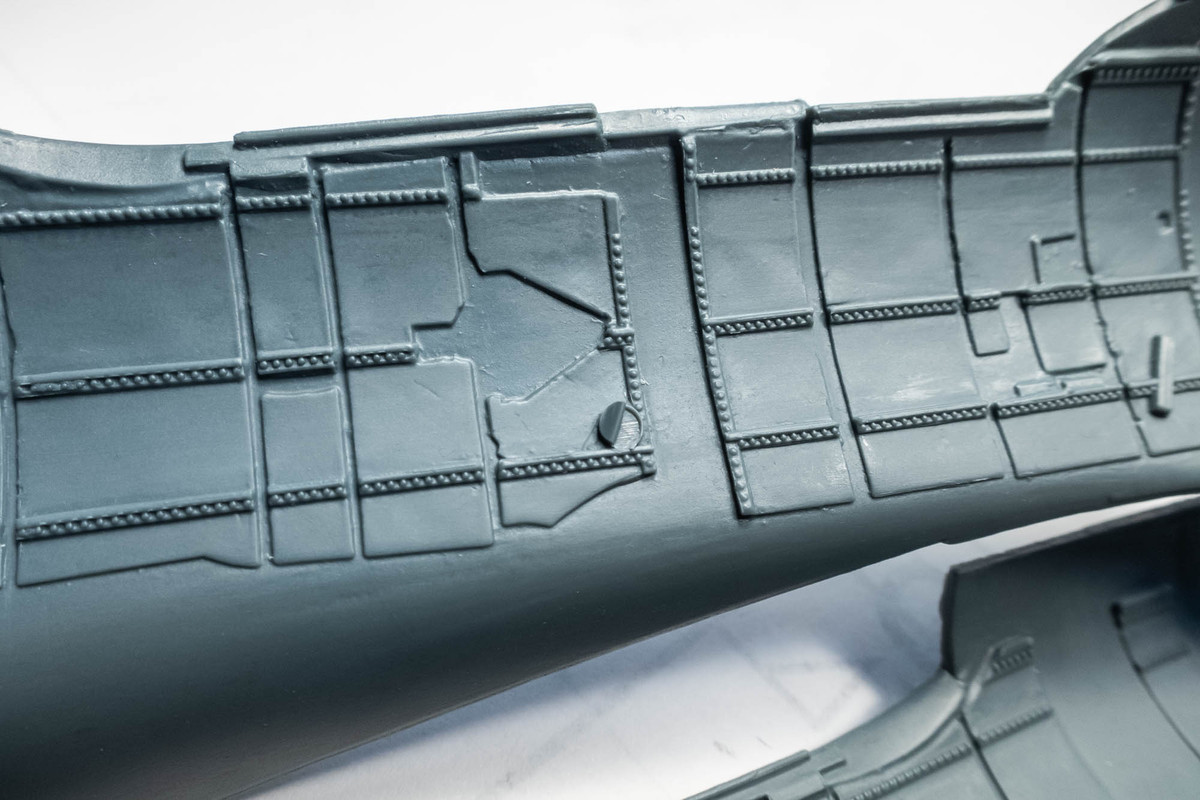
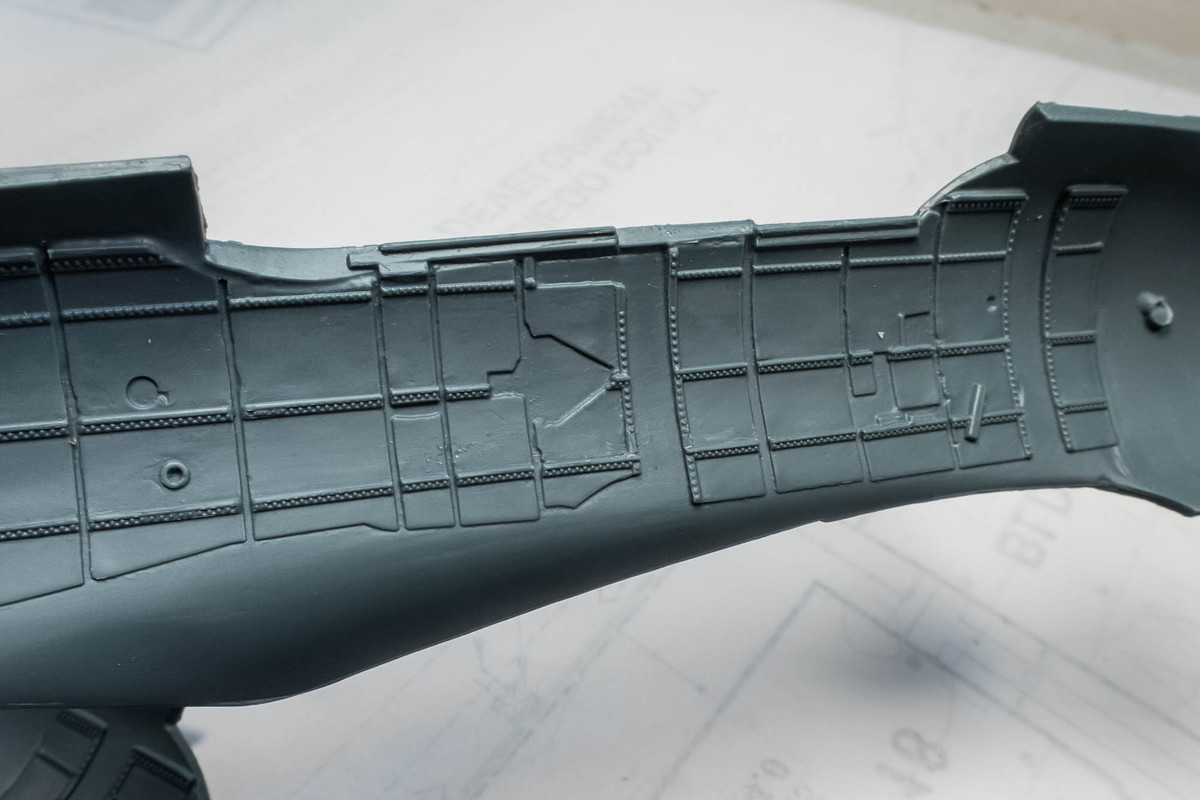
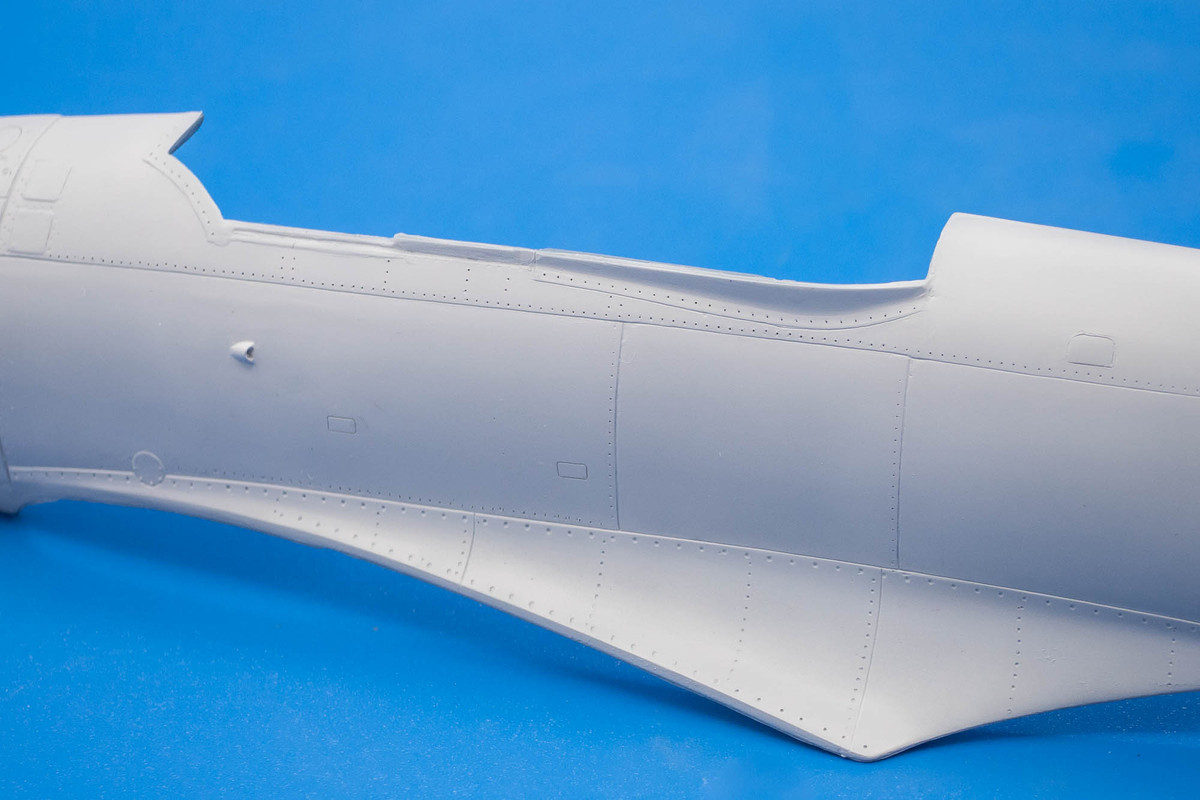
Really difficult to see the results so I sprayed the port fuselage with Mr Primer Surfacer 1000 and took some comparison photos with the starboard fuselage part.
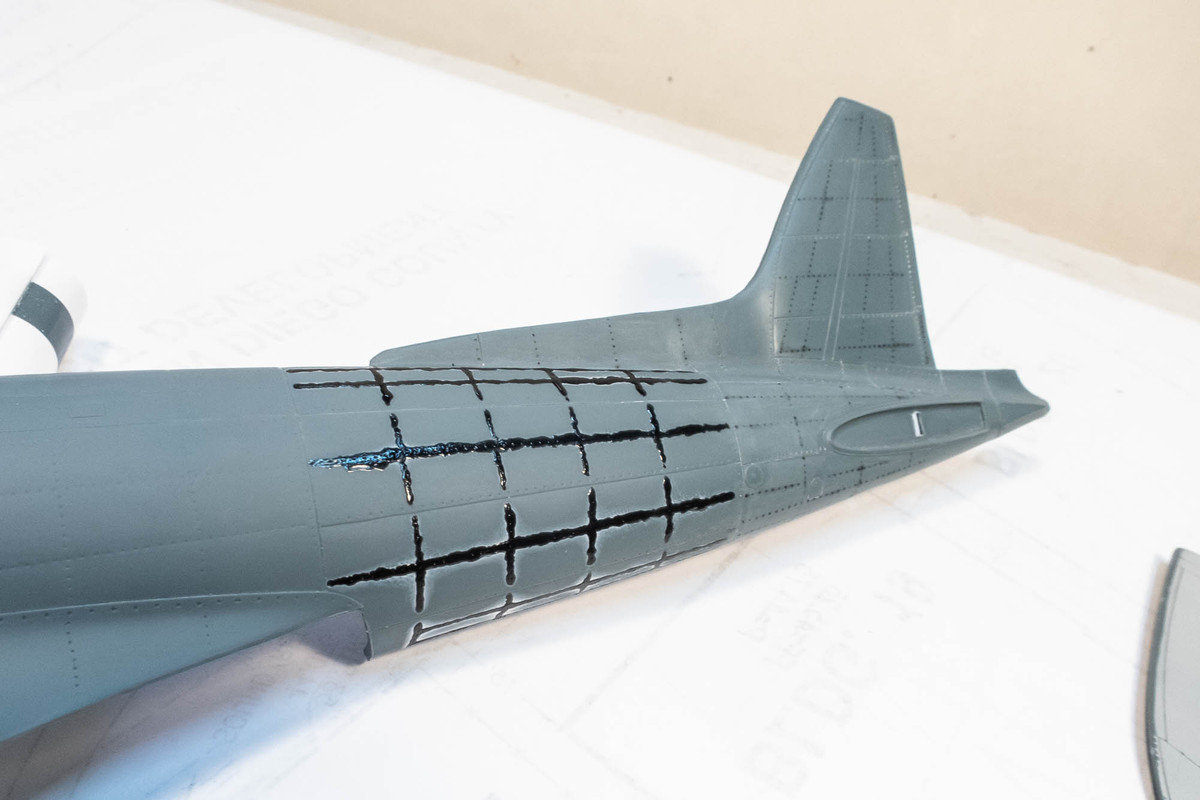
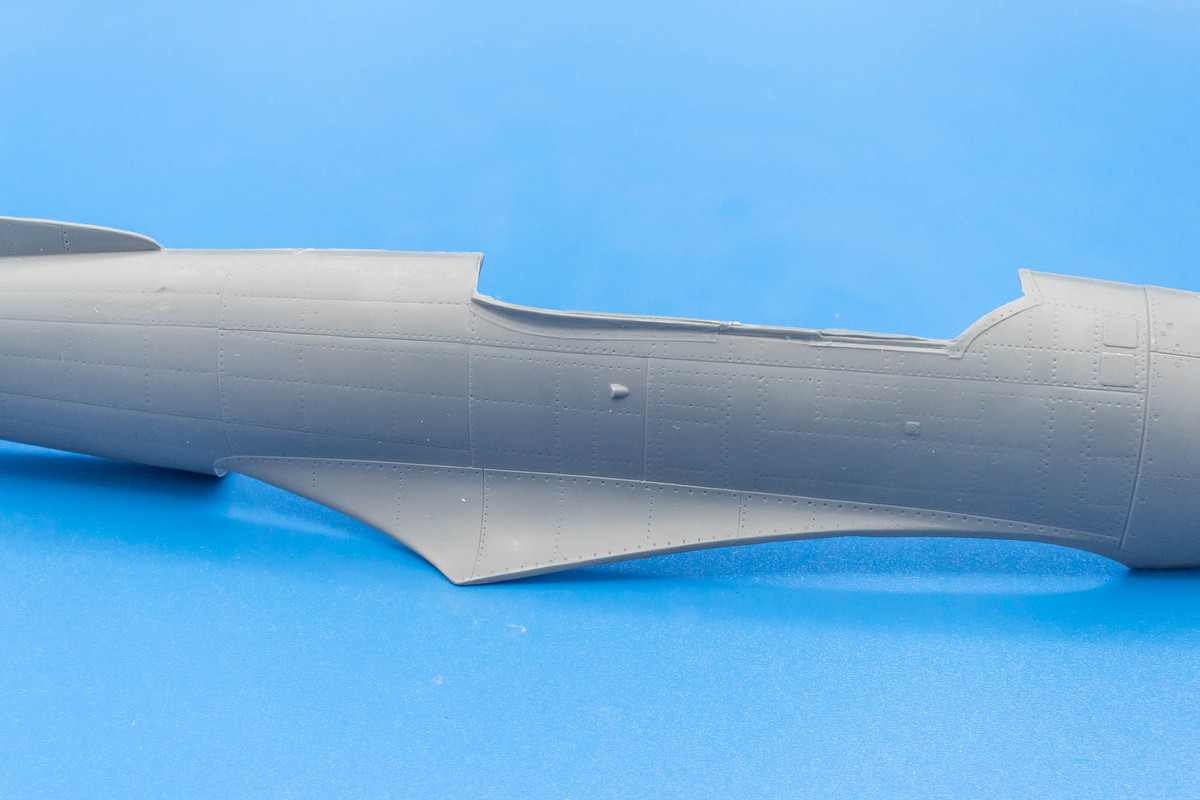
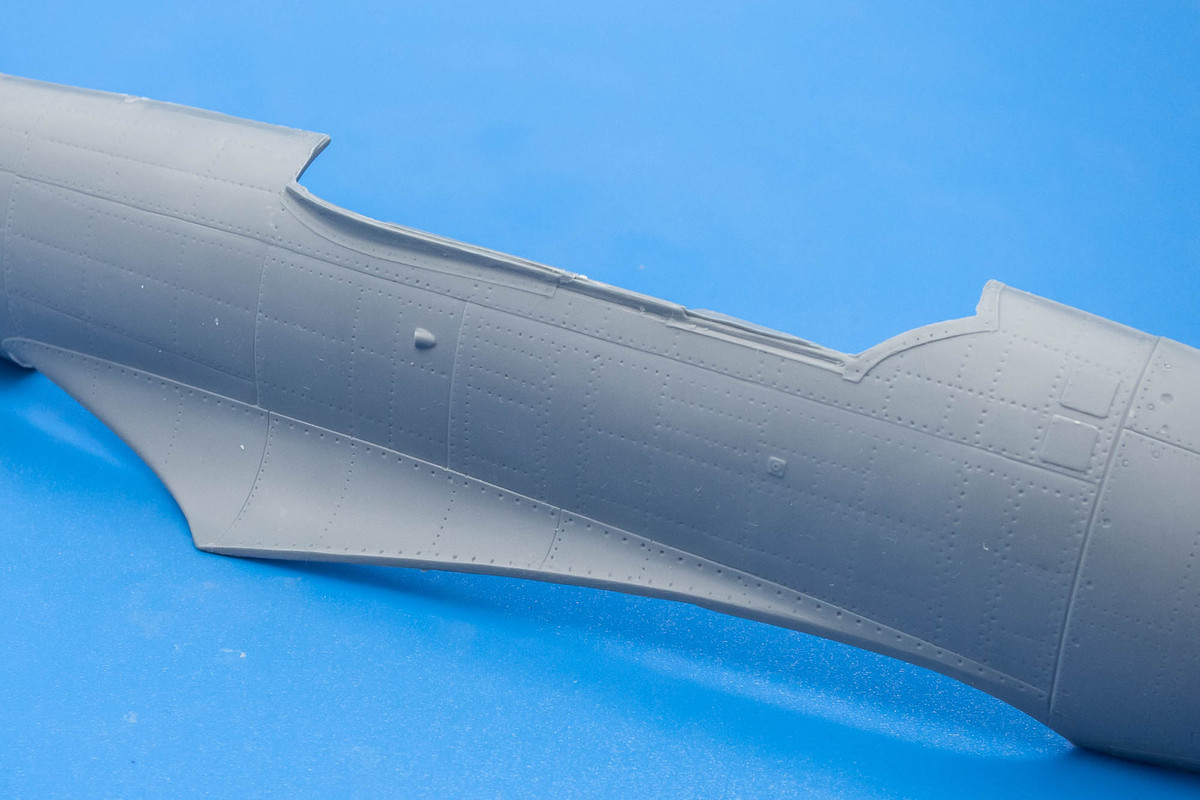
With rivets...
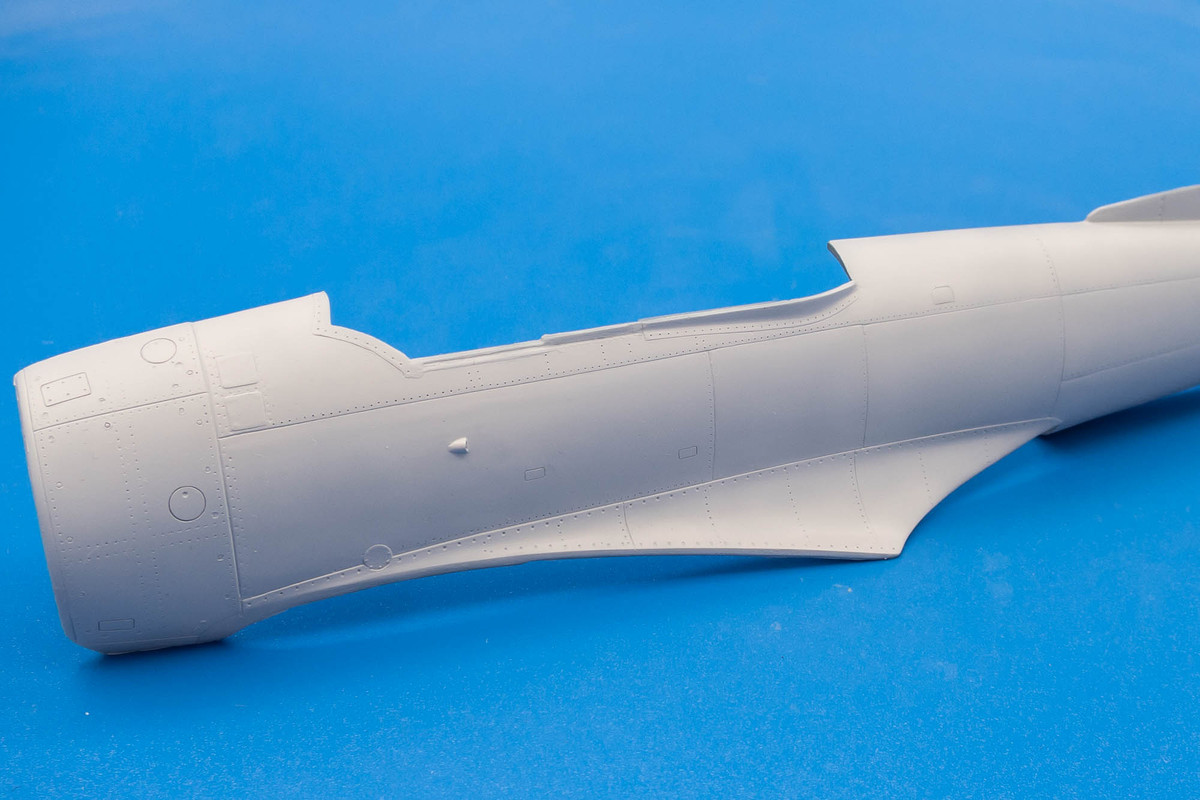
Majority of rivets removed. Like the stabilizers, I elected to keep some of the rivet lines intact, primarily the ones directly adjacent to panel lines.
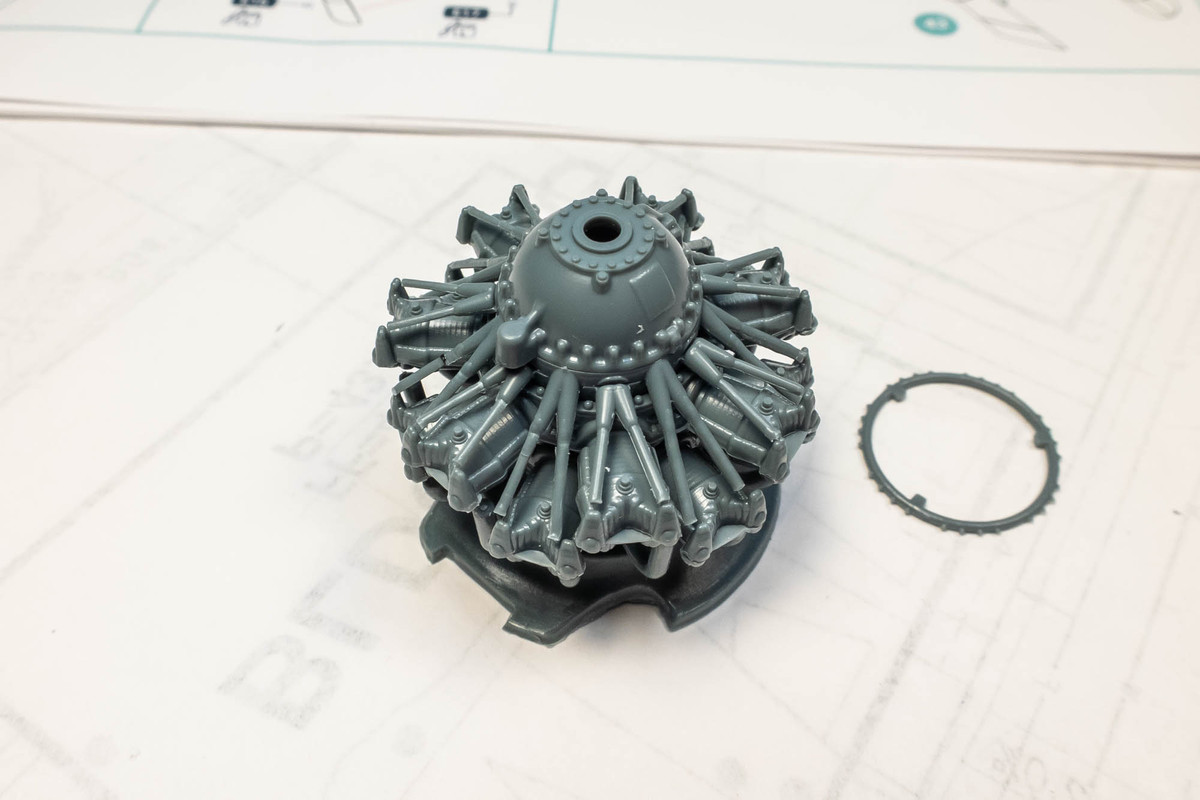
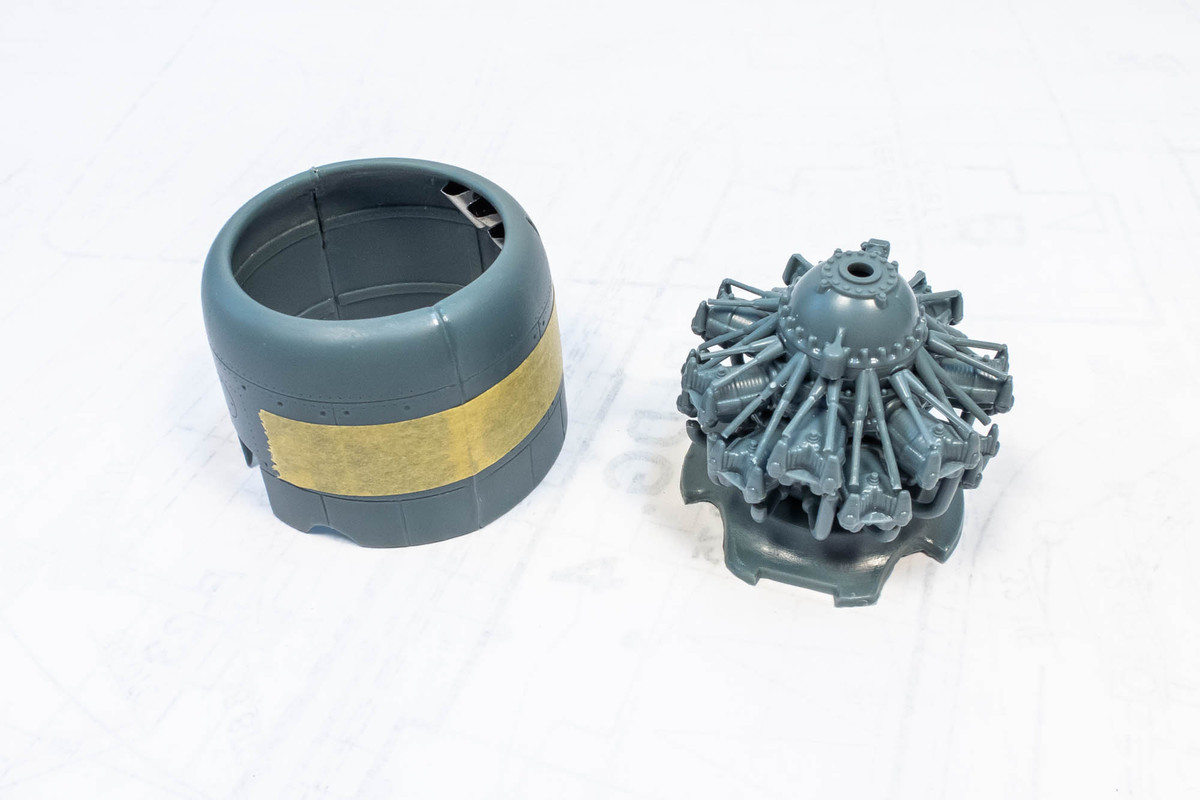
I don't think I can plow through all of the exterior parts in one go so I jumped over to the engine assembly for a break. Engine is pretty much complete and is nicely detailed although there is no provision for any open cowlings. I'm a closed cowling type of person anyway so this is not a big deal. I cut the parts from the sprue, cleaned them and I noticed on the instructions that the ignition ring appears to be in the rear of the engine and not the front. I'm not sure if this makes things easier or harder for me if I choose to add wiring to the engine so I'll have to dig into this a little more.
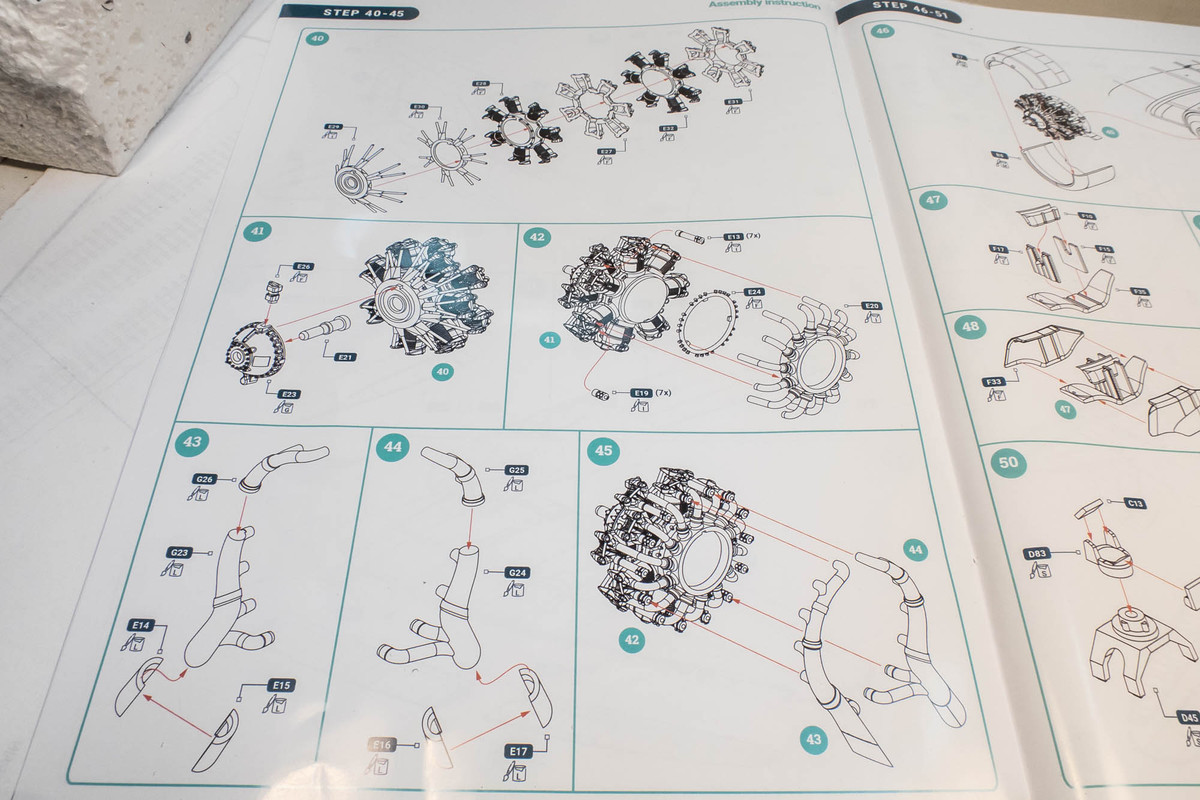
Being a short-run kit, there are no locating pins on this kit. There are key tabs on the connection points but since the cylinder bank halves can be arbitrarily glued into seven possible positions, you have to careful when you glue them together. I dry-fit the engine and mounted it on the engine firewall, making sure it is oriented correctly and then took it apart, making sure I kept the orientation of the cylinder bank halves while gluing them together. Fit is decent but slightly vague... typical of these types of kits from Europe. The plastic is soft too... similar to my experience with Special Hobby Tempest kit.
Before doing the rivet thing, I noticed a couple of big ejector pin stubs on the fuselage interior. I carefully scraped and sanded them away.
The fuselage is a few levels more complex than the stabilizers and it was a cramp-inducing exercise trying to avoid the details that needed to be preserved. I took it one section at a time on the port fuselage part and worked my way towards the front. Basically applying the black CA glue with a toothpick, zapping it with activator and sanding.
It took a full day to finish one fuselage half.
Really difficult to see the results so I sprayed the port fuselage with Mr Primer Surfacer 1000 and took some comparison photos with the starboard fuselage part.
With rivets...
Majority of rivets removed. Like the stabilizers, I elected to keep some of the rivet lines intact, primarily the ones directly adjacent to panel lines.
I don't think I can plow through all of the exterior parts in one go so I jumped over to the engine assembly for a break. Engine is pretty much complete and is nicely detailed although there is no provision for any open cowlings. I'm a closed cowling type of person anyway so this is not a big deal. I cut the parts from the sprue, cleaned them and I noticed on the instructions that the ignition ring appears to be in the rear of the engine and not the front. I'm not sure if this makes things easier or harder for me if I choose to add wiring to the engine so I'll have to dig into this a little more.
Being a short-run kit, there are no locating pins on this kit. There are key tabs on the connection points but since the cylinder bank halves can be arbitrarily glued into seven possible positions, you have to careful when you glue them together. I dry-fit the engine and mounted it on the engine firewall, making sure it is oriented correctly and then took it apart, making sure I kept the orientation of the cylinder bank halves while gluing them together. Fit is decent but slightly vague... typical of these types of kits from Europe. The plastic is soft too... similar to my experience with Special Hobby Tempest kit.
John aka JKim
-----------<><

-----------<><

Re: Infinity 1/32 Aichi D3A1 - The Constanza Rule
I commend your hard work as that is definitely an improvement John - the fuselage looks much better.
That engines looks like it might turn out well after you've worked your magic on it.
That engines looks like it might turn out well after you've worked your magic on it.
Stuart Templeton 'I may not be good but I'm slow...'
My blog: https://stuartsscalemodels.blogspot.com/
My blog: https://stuartsscalemodels.blogspot.com/
-
Gary Brantley
- Addicted Member
- Posts: 1751
- Joined: Tue Apr 08, 2014 9:40 pm
- Location: Cameron, Texas
Re: Infinity 1/32 Aichi D3A1 - The Constanza Rule
Thank you, John. That same resolve is visibly evident in your exquisitely done cockpits, or in your riveting, adding an entire new nose, or even when modifying an entire kit for even higher accuracy. My hat's off to you, sir!
Re: Infinity 1/32 Aichi D3A1 - The Constanza Rule
Thanks guys!
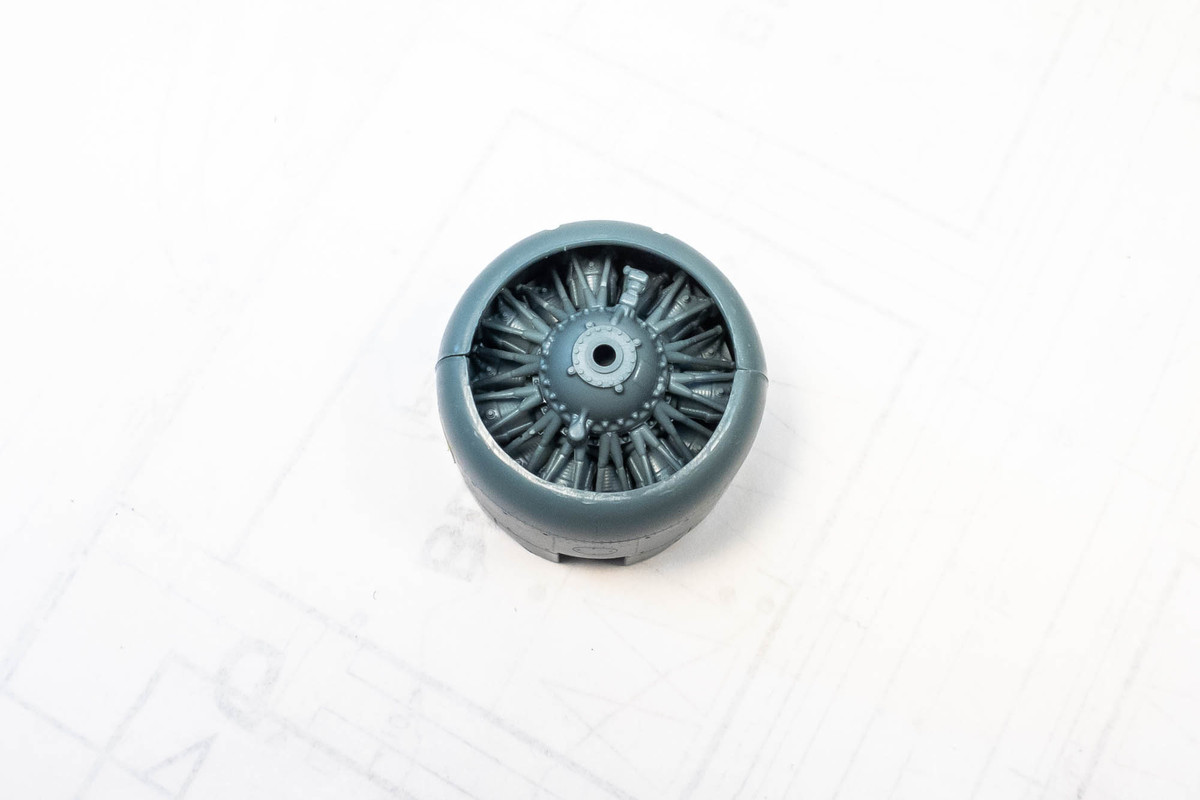
Working further on the engine, the exhaust manifolds have a heavy seam line and some flash that needs to be carefully cleaned. I guess "need" is arguable since these are in the back of the engine and will not be visible at all on the completed model. Since I consider these photographs as much a part of the model as the finished product itself, I usually like to address even the ultimately unseen flaws.
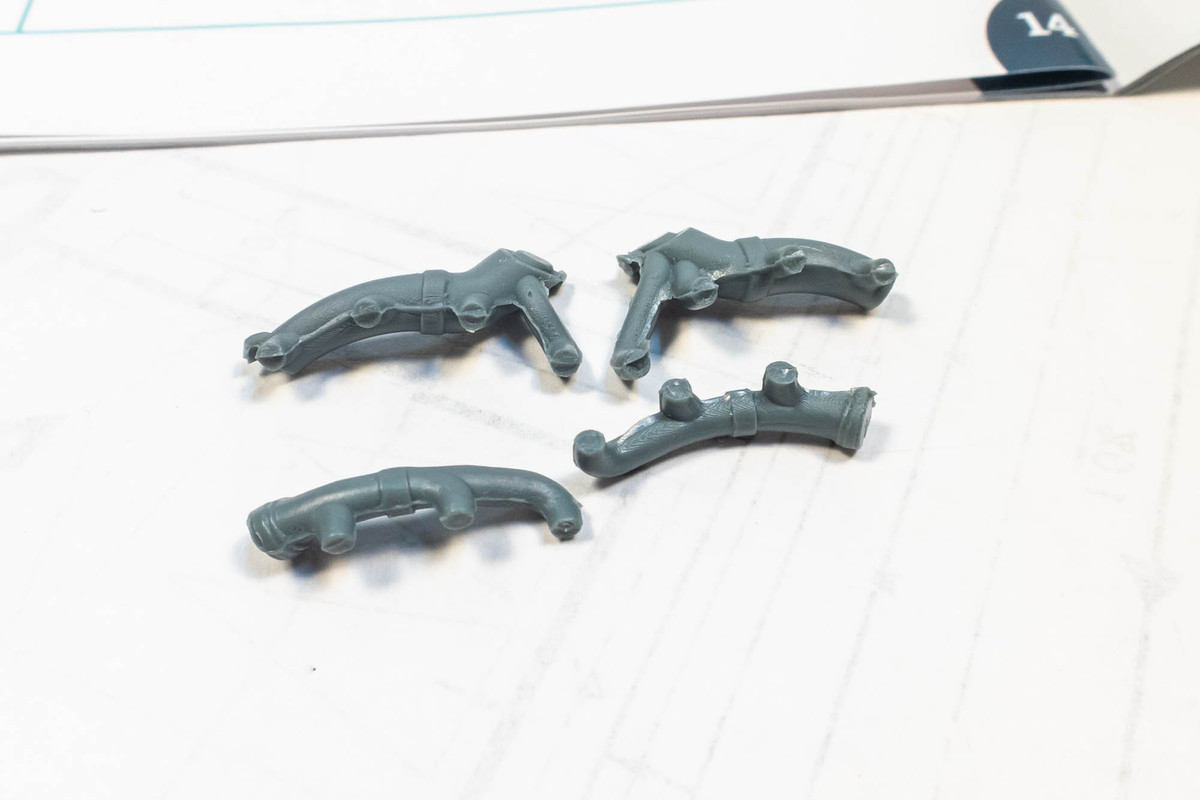
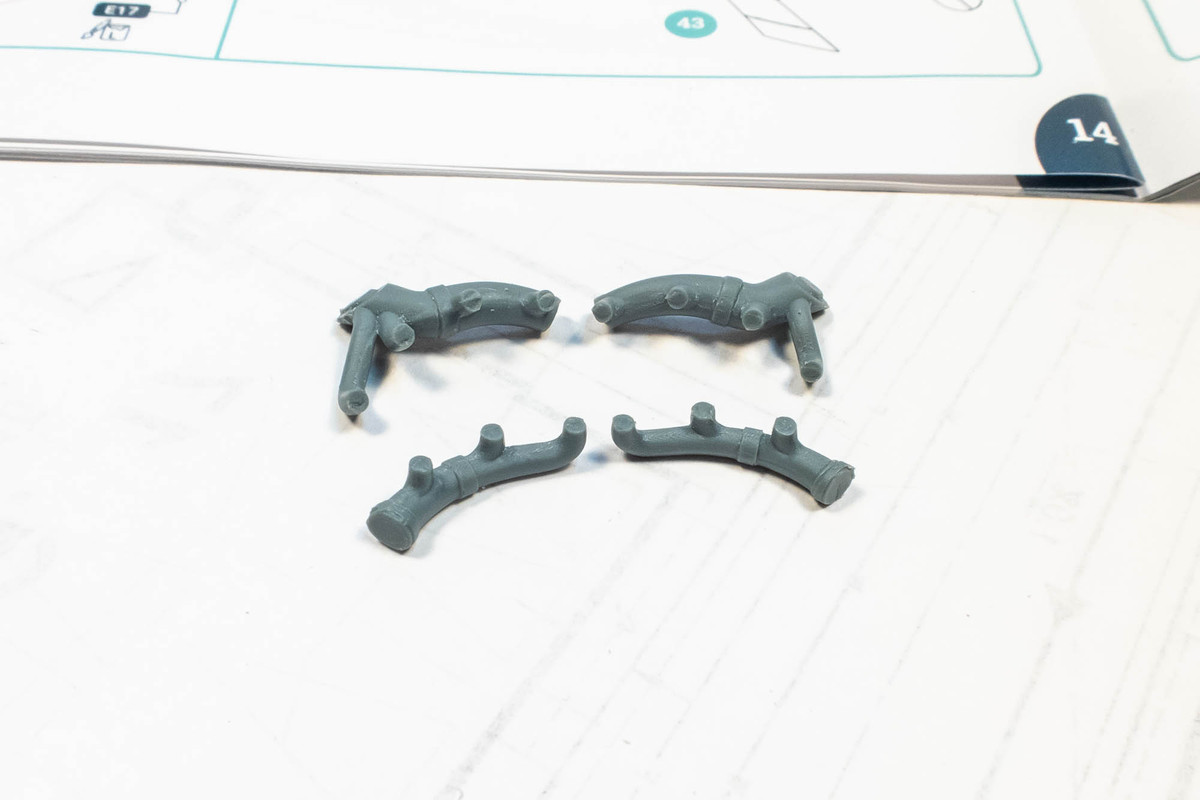
The exhaust tips are needless molded into two parts instead of one so we have to take care of the visible seams.
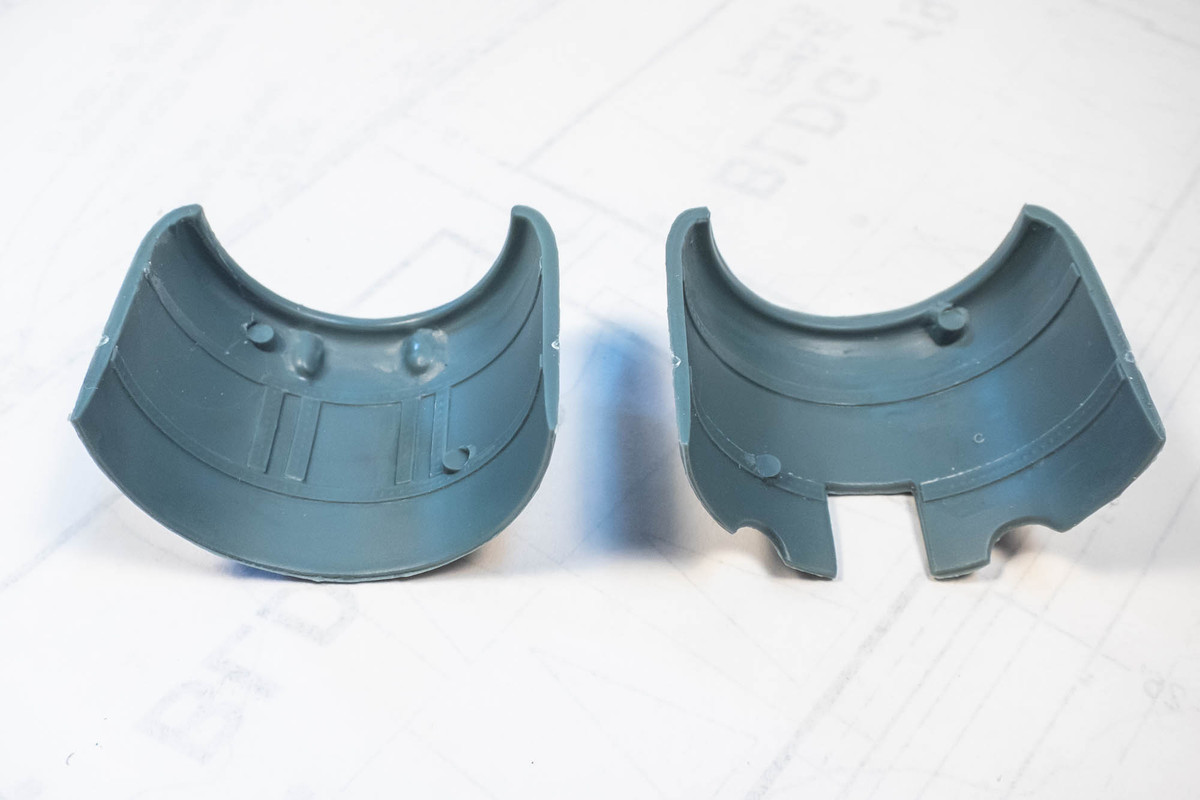
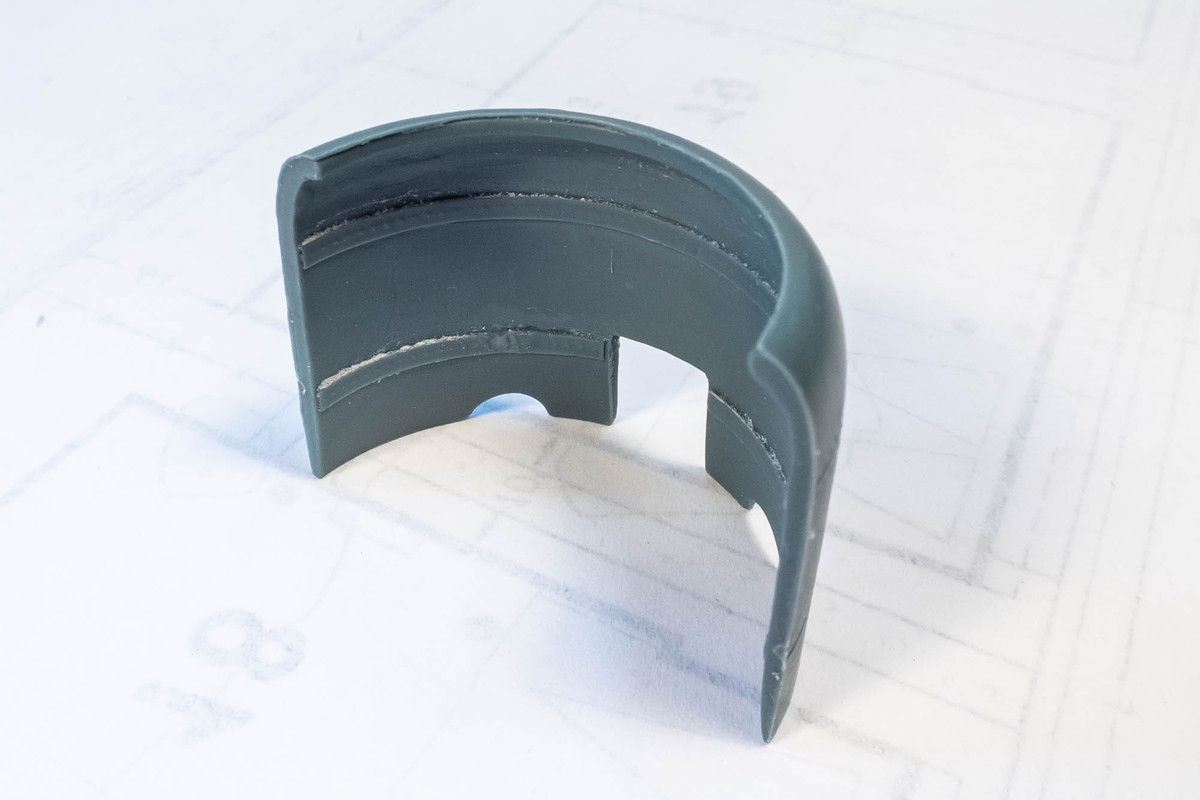
The engine cowling is also two parts instead of one. The interior features a couple of ejector pin whoppers.
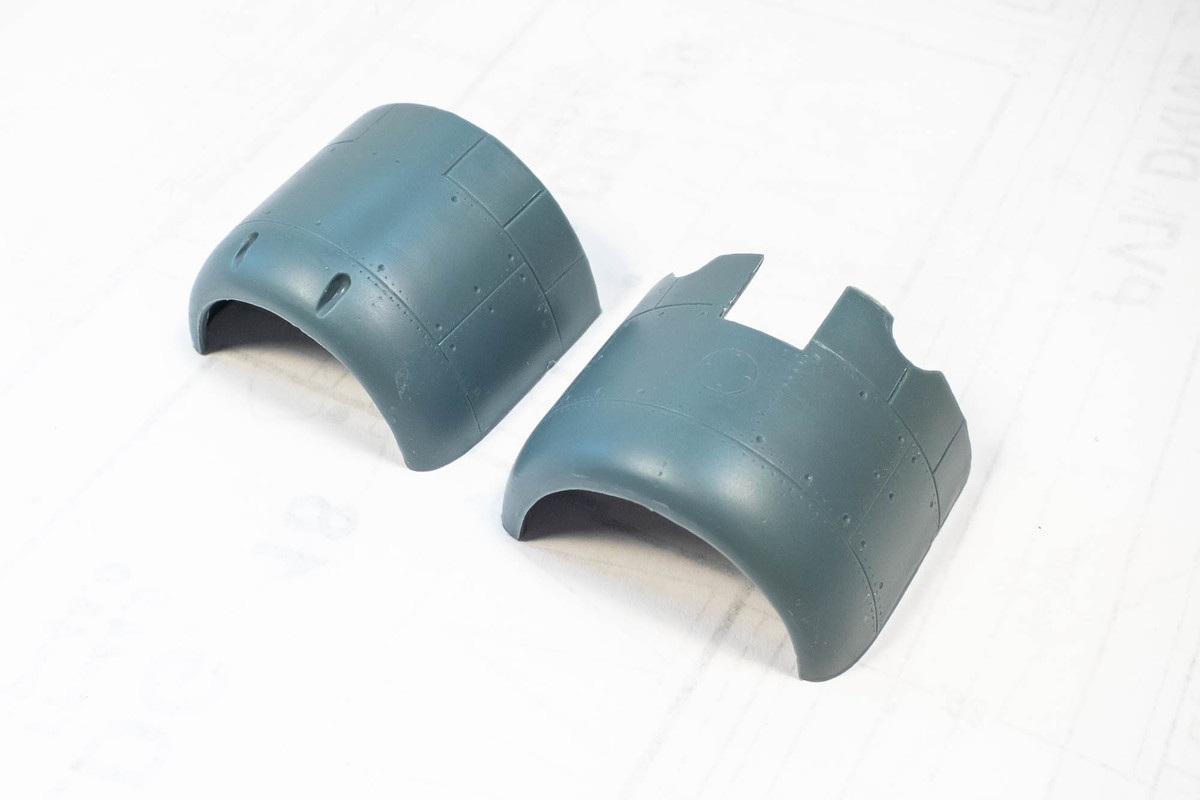
The view from the front tells me that these ejector pins will not be visible in most cases.
But I should probably take care of them now, when the cowlings pieces are still separate.
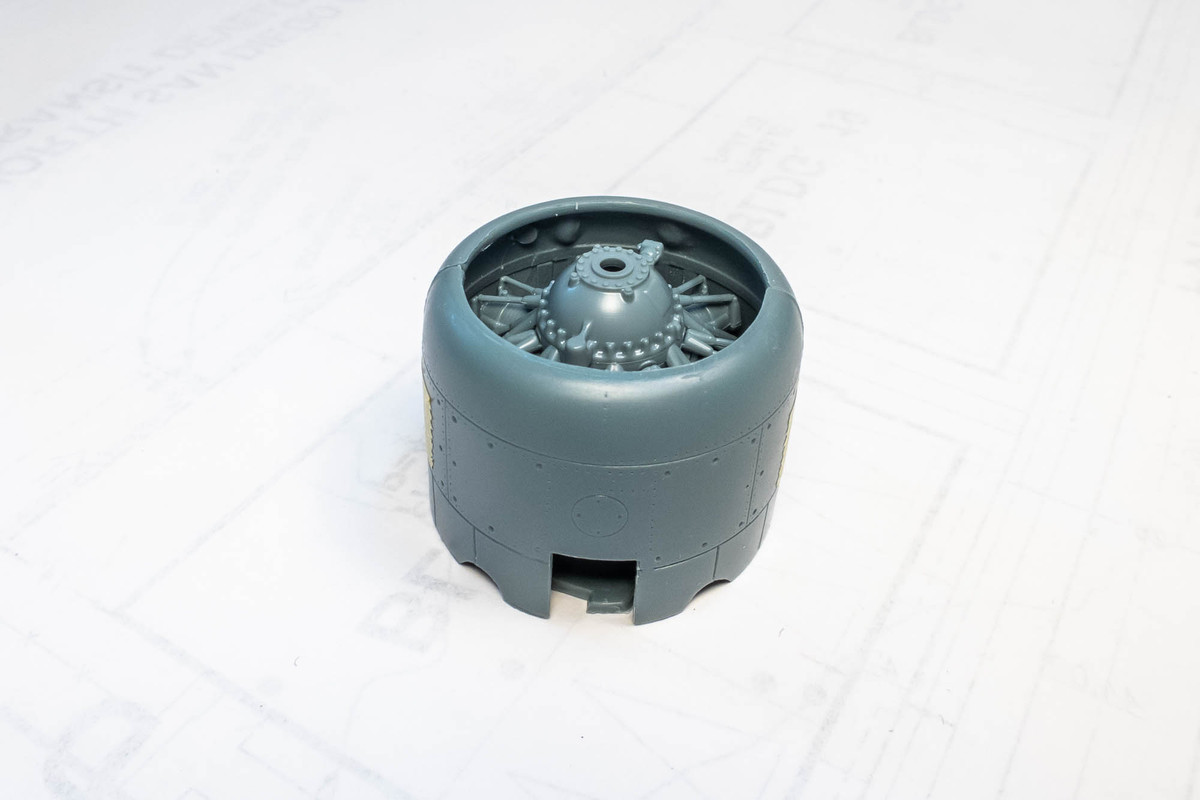
The holes for the cowling gun openings need to be hollowed out.
The trailing edges of the cowling flaps can be thinned.
The lip of cowling opening has some funky molding defects that need to be cleaned up. Lots to do these two parts before I glue them together.
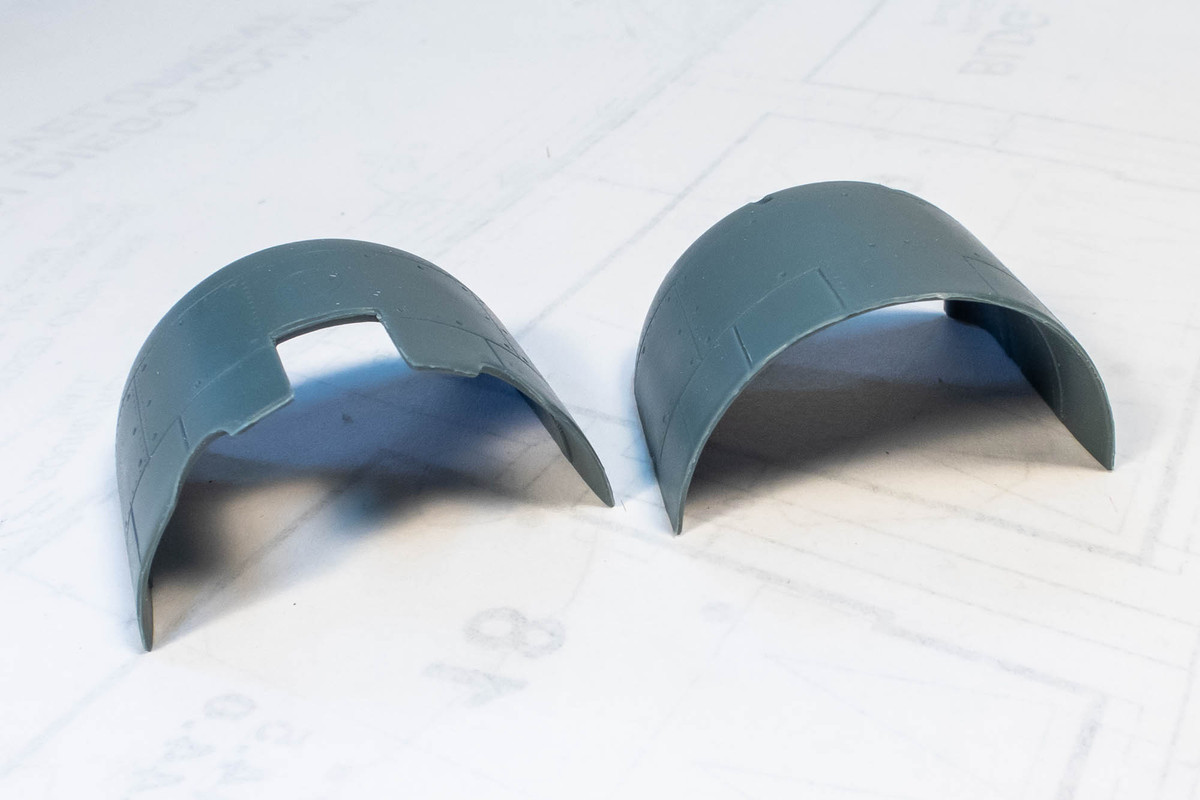
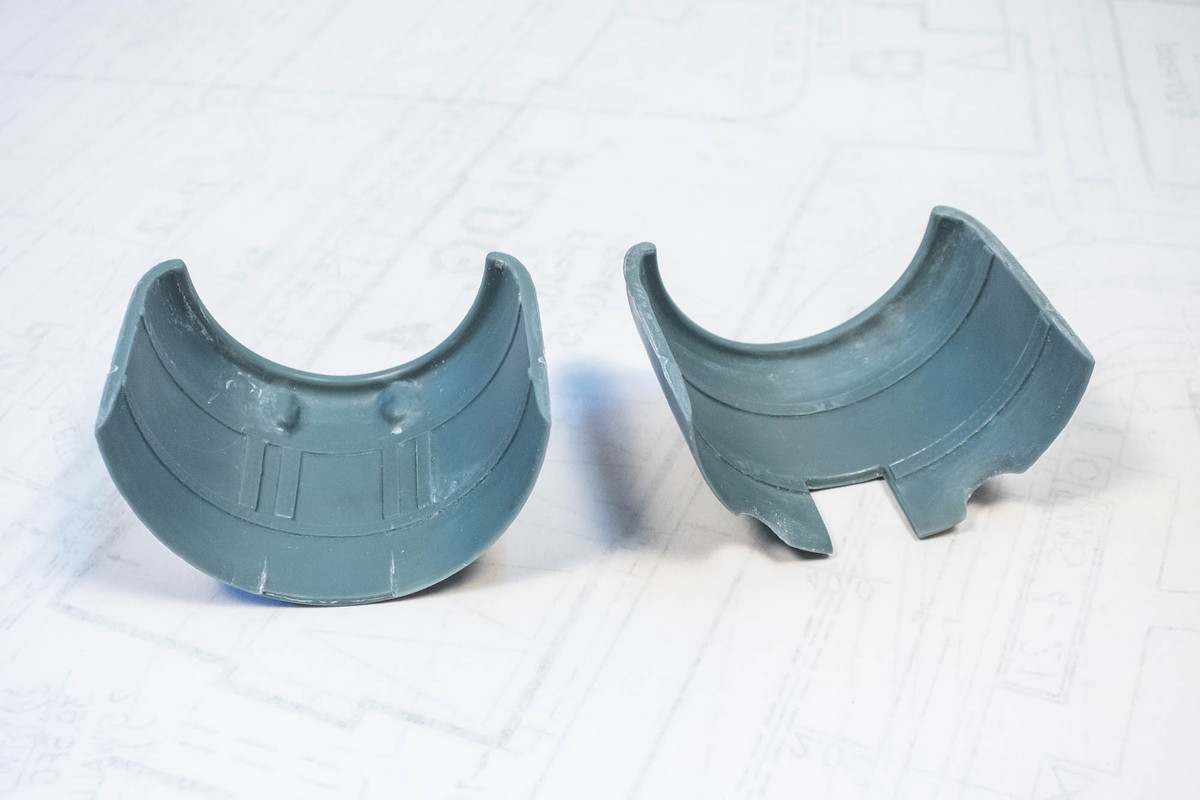
Gun openings are hollowed out with a drill bit.
The ejector pin marks are cleaned up and the cowling trailing edges are thinned.
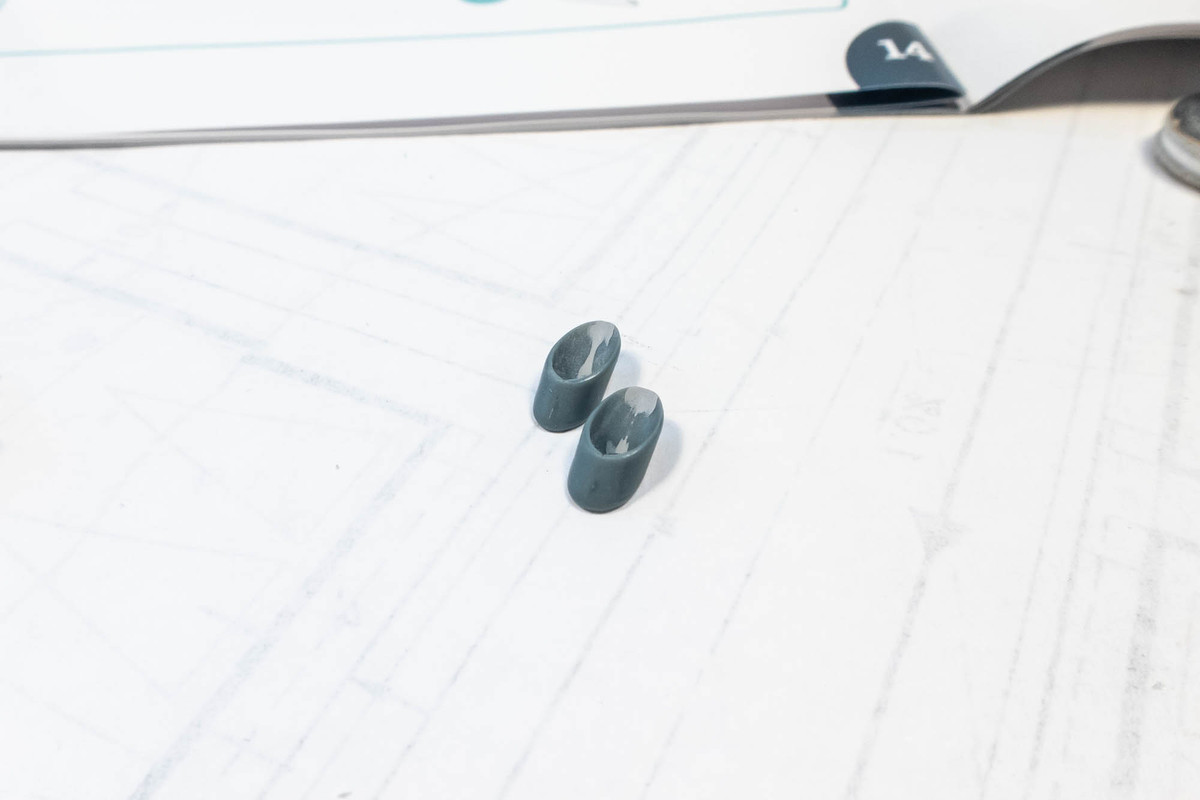
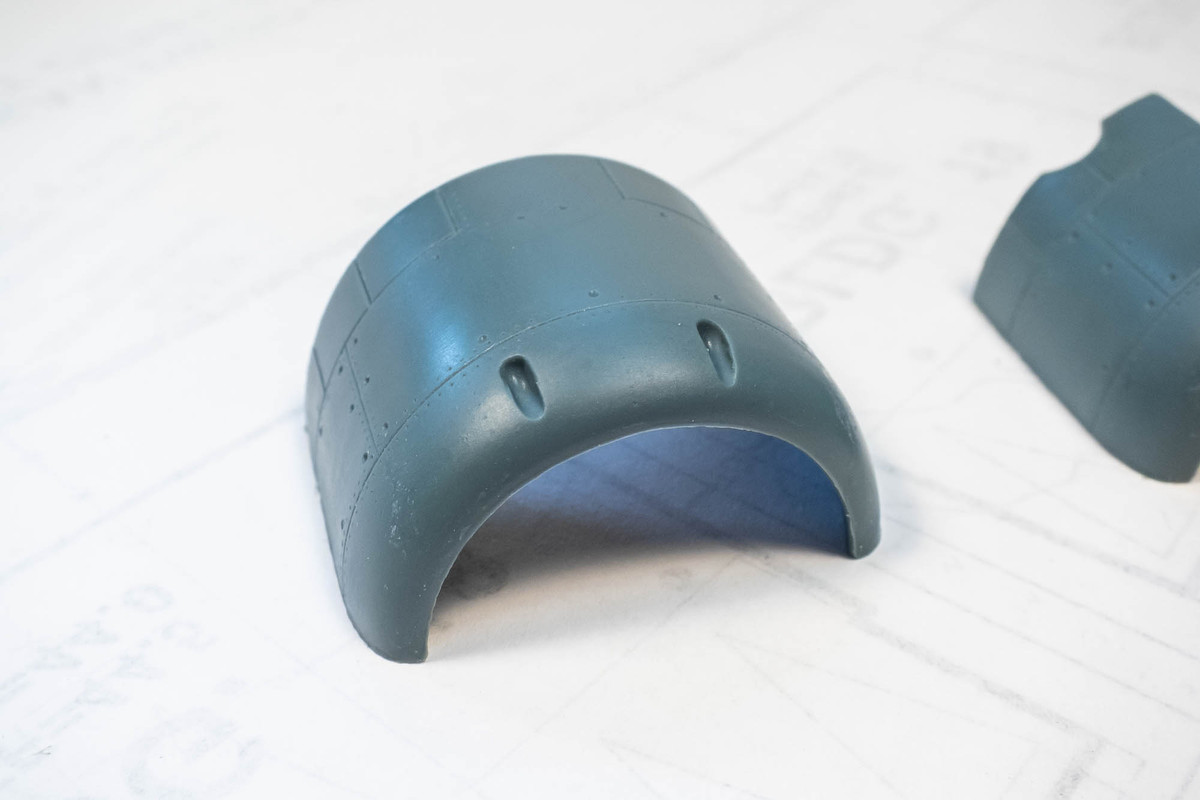
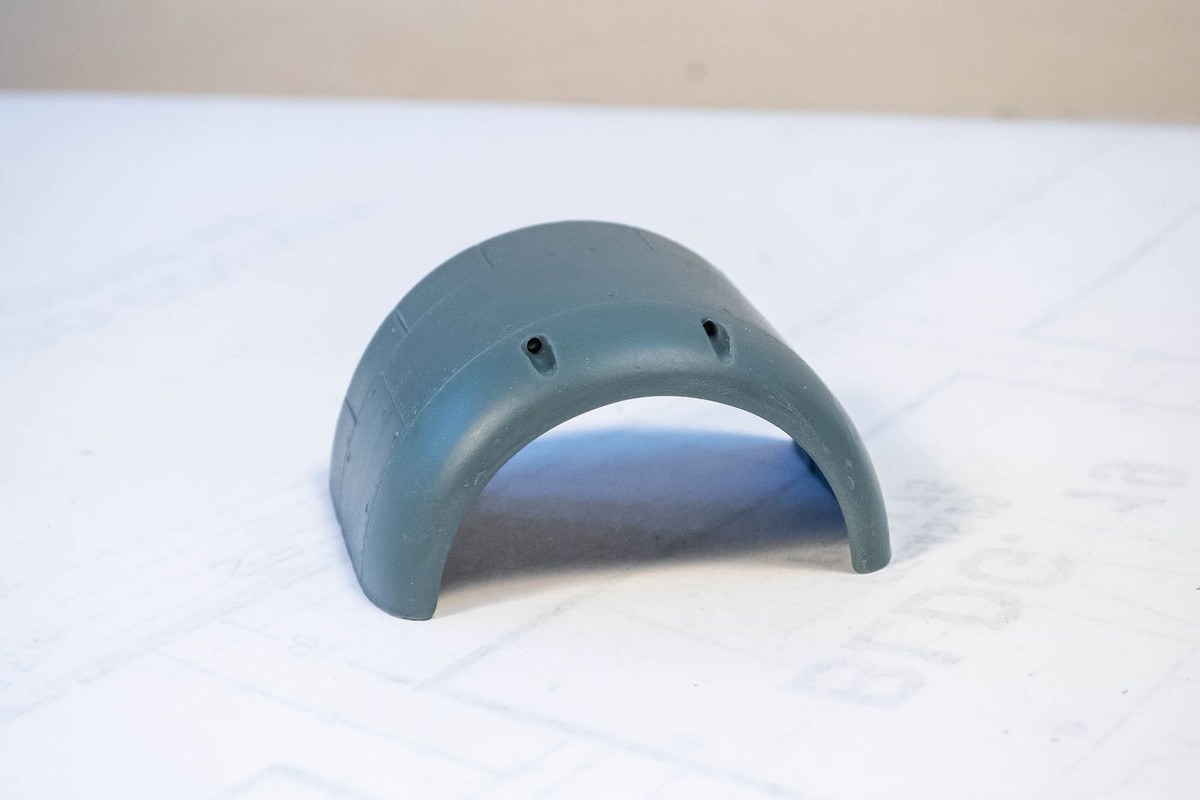
I couldn't find much detailed information on the engine for the D3A1, which was the Mitsubishi Kinsei 14-cylinder radial engine. I was lucky enough to get a PDF copy of Ryan Toew's "Detailing the D3A1" from the man himself. In addition to identifying some of the engine component colors, he includes one of the few photos of the Kinsei engine within the D3A1. He notes, "Under the upper lip of the cowling were three black painted carburetor air intake ports."
So I decided to add these to the engine cowling using curved pieces cut from a soda can.
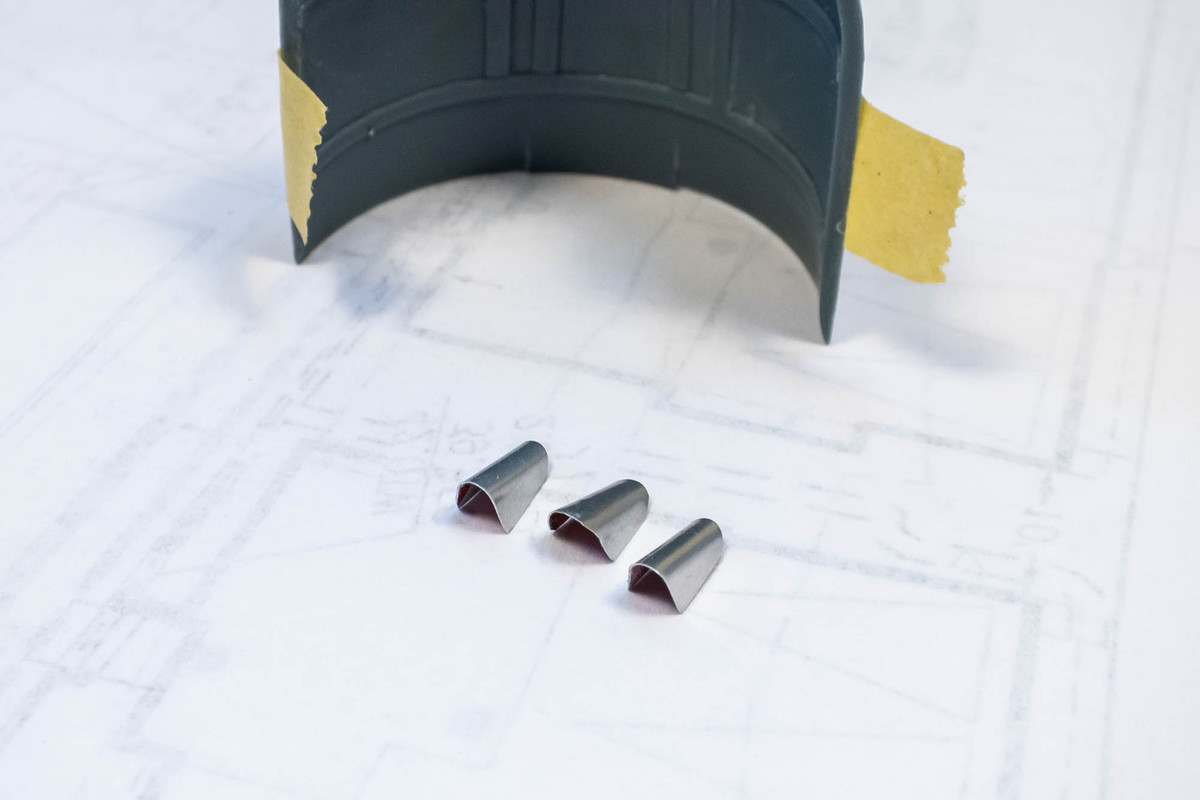
A test fit to make sure the three intake ports don't interfere with the rest of the engine.

With that work done, I have glued the two halves of the engine cowling together with Tamiya Extra Thin cement. Then I'll have to deal with the seam.
Working further on the engine, the exhaust manifolds have a heavy seam line and some flash that needs to be carefully cleaned. I guess "need" is arguable since these are in the back of the engine and will not be visible at all on the completed model. Since I consider these photographs as much a part of the model as the finished product itself, I usually like to address even the ultimately unseen flaws.
The exhaust tips are needless molded into two parts instead of one so we have to take care of the visible seams.
The engine cowling is also two parts instead of one. The interior features a couple of ejector pin whoppers.
The view from the front tells me that these ejector pins will not be visible in most cases.
But I should probably take care of them now, when the cowlings pieces are still separate.
The holes for the cowling gun openings need to be hollowed out.
The trailing edges of the cowling flaps can be thinned.
The lip of cowling opening has some funky molding defects that need to be cleaned up. Lots to do these two parts before I glue them together.
Gun openings are hollowed out with a drill bit.
The ejector pin marks are cleaned up and the cowling trailing edges are thinned.
I couldn't find much detailed information on the engine for the D3A1, which was the Mitsubishi Kinsei 14-cylinder radial engine. I was lucky enough to get a PDF copy of Ryan Toew's "Detailing the D3A1" from the man himself. In addition to identifying some of the engine component colors, he includes one of the few photos of the Kinsei engine within the D3A1. He notes, "Under the upper lip of the cowling were three black painted carburetor air intake ports."
So I decided to add these to the engine cowling using curved pieces cut from a soda can.
A test fit to make sure the three intake ports don't interfere with the rest of the engine.
With that work done, I have glued the two halves of the engine cowling together with Tamiya Extra Thin cement. Then I'll have to deal with the seam.
John aka JKim
-----------<><
-----------<><
-
Medicman71

- Elite Member
- Posts: 9764
- Joined: Mon Apr 07, 2014 9:32 am
- Location: Houston, Tx
Re: Infinity 1/32 Aichi D3A1 - The Constanza Rule
Man this is an ugly kit. But you’re making look great!
Mike
Sponsored by Boeing, Lockheed Martin, Northrop Grumman, Saab, BAE, and Dassault
Sponsored by Boeing, Lockheed Martin, Northrop Grumman, Saab, BAE, and Dassault
Re: Infinity 1/32 Aichi D3A1 - The Constanza Rule
Really? Hmmm... I don't think so. I consider it the about the current state-of-art when it comes to a modern short-run kit. Loads of detail, pretty good fit but no alignment pins and some flash to contend with. If you've built a kit from a European company like Special Hobby or Pacific Coast Models, this is pretty standard stuff. Infinity also follows the same strategy as Special Hobby in providing more parts than practically necessary. So if you have an aversion to a bunch of eensy weensy parts, this is probably not your cup of tea. I'm enjoying the build!
John aka JKim
-----------<><
-----------<><