Infinity 1/32 Aichi D3A1 - The Constanza Rule
-
Stikpusher

- Moderator
- Posts: 18880
- Joined: Sat Apr 05, 2014 8:37 pm
- Location: Ceti Alpha 5
Re: Infinity 1/32 Aichi D3A1 - The Constanza Rule
Ahhhh, I didn’t realize that this was a limited run kit. The amount of detail is nice, but it all looks a bit rough around the edges. The limited run explains that aspect.
"Surely I have made my meaning plain? I intend to avenge myself upon you, Admiral. I have deprived your ship of power, and when I swing 'round, I intend to deprive you of your life."
FLSM
FLSM
-
tempestjohnny
- Elite Member
- Posts: 3348
- Joined: Sat Oct 15, 2016 4:51 am
- Location: Naples. FL
Re: Infinity 1/32 Aichi D3A1 - The Constanza Rule
The engine and cowling look fantastic but will undoubtedly look better when you're done. You're handling if the "sheetmetal" on the exterior looks great

Re: Infinity 1/32 Aichi D3A1 - The Constanza Rule
Thanks guys! Yes, this is a short run kit and from what I've read, the last injection molded kit that Infinity Models will produce.
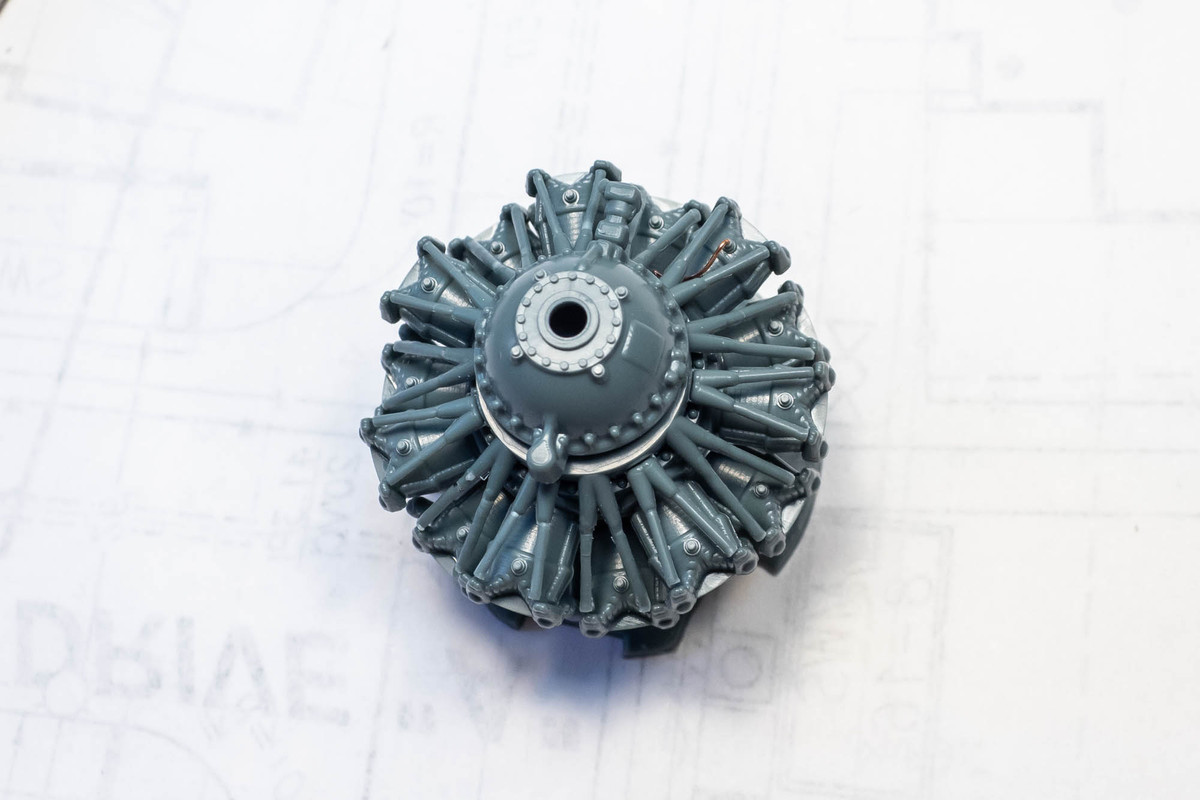
If I am to assume that the ignition ring for the spark plug wires is located in the back, It will make wiring of the engine a little bit easier. I'm just going to add wiring to the front of each cylinder head and I am not going to bother connecting it to the ignition ring since the rear of the engine won't be visible. I conducted a simple test with a single copper wire to see how the wiring would clear the forest of push rods in the front.
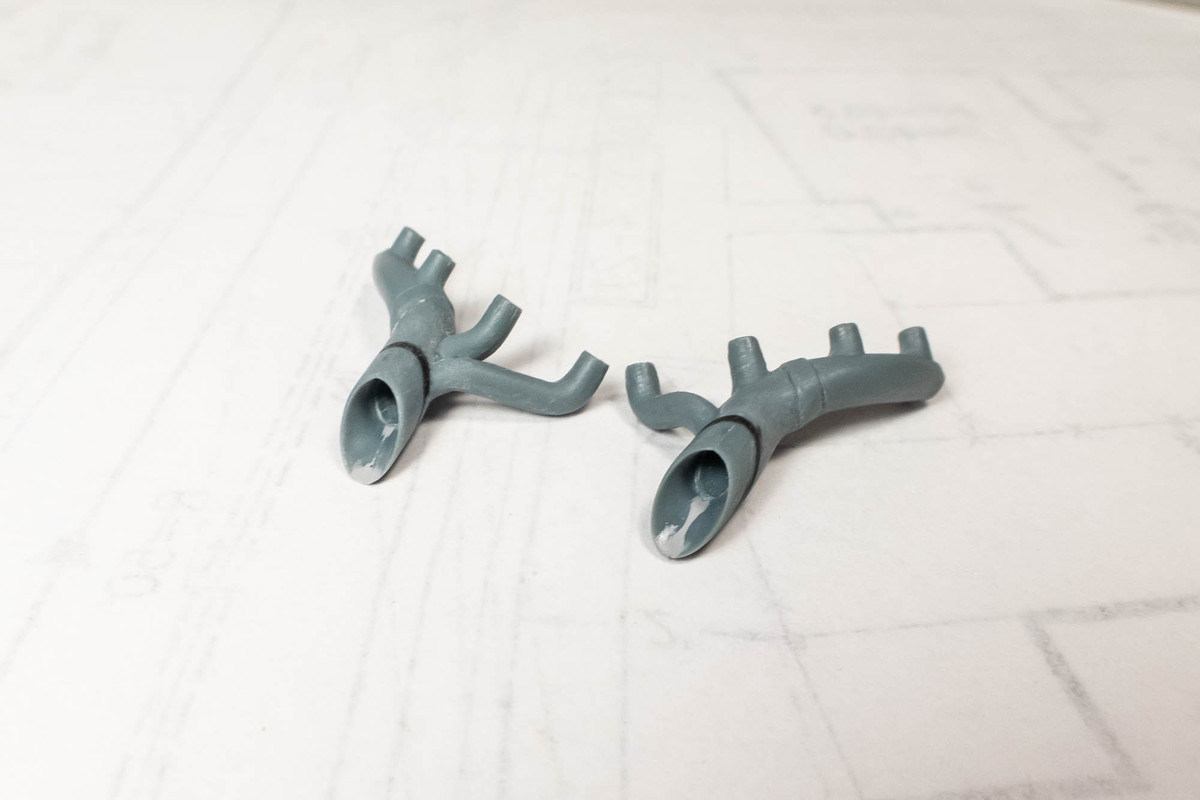
The two-piece exhaust tips have been cleaned up. They are supposed to but against the thick end of the exhaust manifold part. I ended up slicing off the raised portion of the manifold and drilling a hole there to make a better illusion of a hollow exhaust.

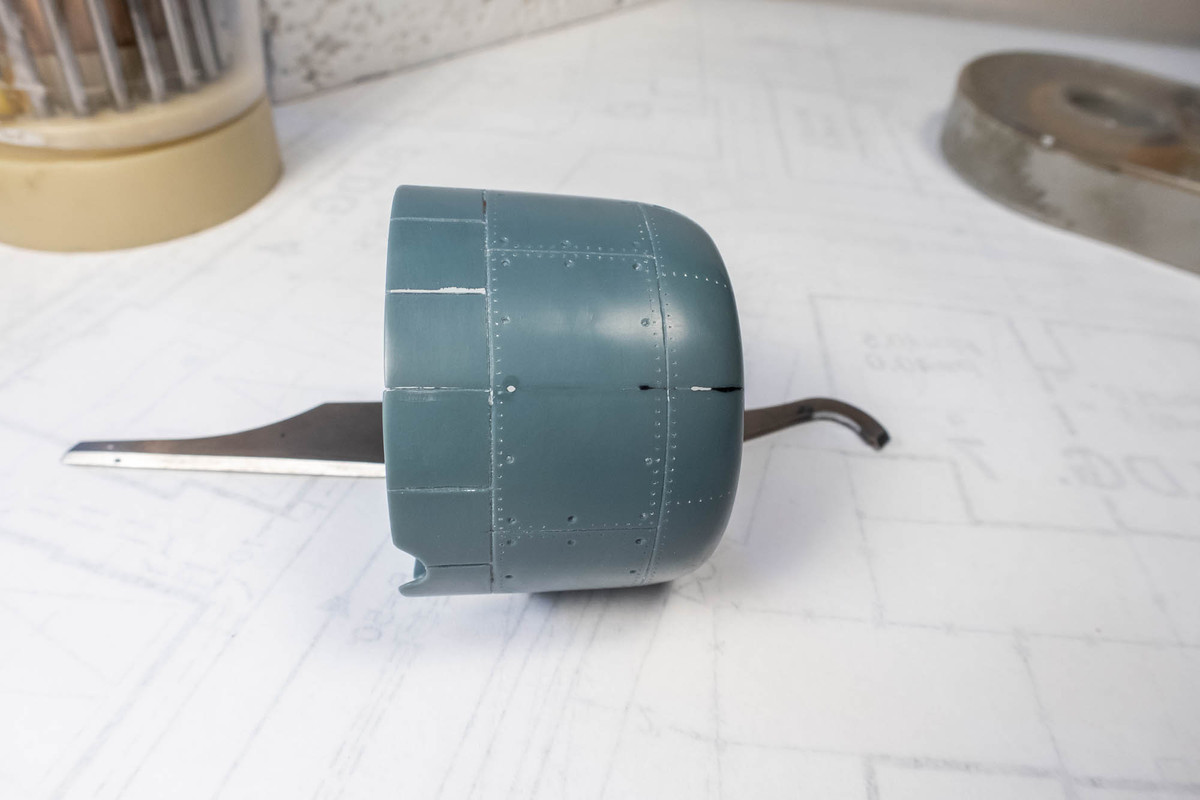
This is the seam after gluing the cowling halves together, which fit very well. Without alignment pins, you can fine tune the fit of parts like these before the glue dries.
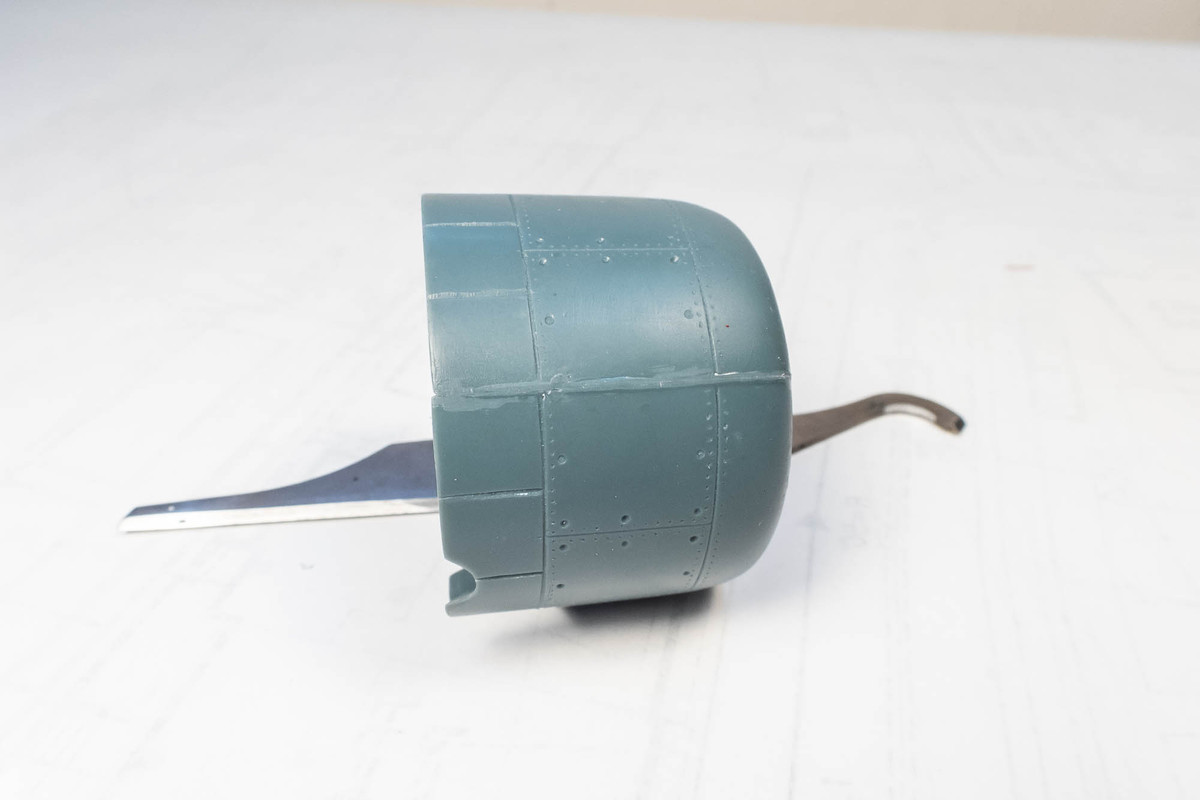
The seam was touched up with a combination of black CA glue and Mr Primer Surfacer 1000.
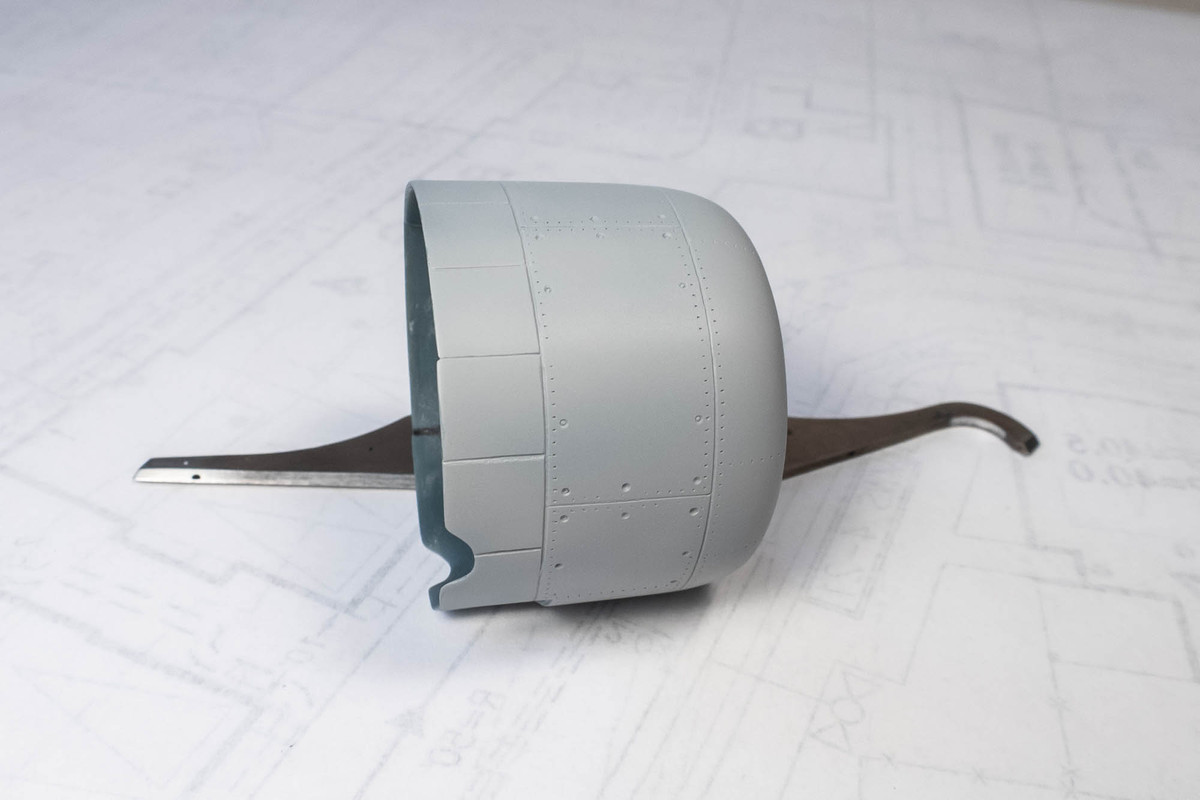
Once the rivets and panel lines were restored, I sprayed the cowling with a thin coat of Mr Primer Surfacer.
If I am to assume that the ignition ring for the spark plug wires is located in the back, It will make wiring of the engine a little bit easier. I'm just going to add wiring to the front of each cylinder head and I am not going to bother connecting it to the ignition ring since the rear of the engine won't be visible. I conducted a simple test with a single copper wire to see how the wiring would clear the forest of push rods in the front.
The two-piece exhaust tips have been cleaned up. They are supposed to but against the thick end of the exhaust manifold part. I ended up slicing off the raised portion of the manifold and drilling a hole there to make a better illusion of a hollow exhaust.
This is the seam after gluing the cowling halves together, which fit very well. Without alignment pins, you can fine tune the fit of parts like these before the glue dries.
The seam was touched up with a combination of black CA glue and Mr Primer Surfacer 1000.
Once the rivets and panel lines were restored, I sprayed the cowling with a thin coat of Mr Primer Surfacer.
John aka JKim
-----------<><

-----------<><
-
Stikpusher
- Moderator
- Posts: 18880
- Joined: Sat Apr 05, 2014 8:37 pm
- Location: Ceti Alpha 5
Re: Infinity 1/32 Aichi D3A1 - The Constanza Rule
Sometimes those alignment pins are more hinderance than help, and not having them reduces or removes seam issues. Very nice work on the cowling John!
"Surely I have made my meaning plain? I intend to avenge myself upon you, Admiral. I have deprived your ship of power, and when I swing 'round, I intend to deprive you of your life."
FLSM
FLSM

Re: Infinity 1/32 Aichi D3A1 - The Constanza Rule
Thank you for the extensive sprue tour, John. Very informative. The kit's quality reminds me on early ICM products. A lot to clean up, but the overall fit is pretty good. And with that a kit stands or falls, doesn't it?
This is a cool subject and I'm following closely!
This is a cool subject and I'm following closely!
When the sun of culture hangs low even dwarfs throw shadows.
Re: Infinity 1/32 Aichi D3A1 - The Constanza Rule
Thank you Carlos and Torben!
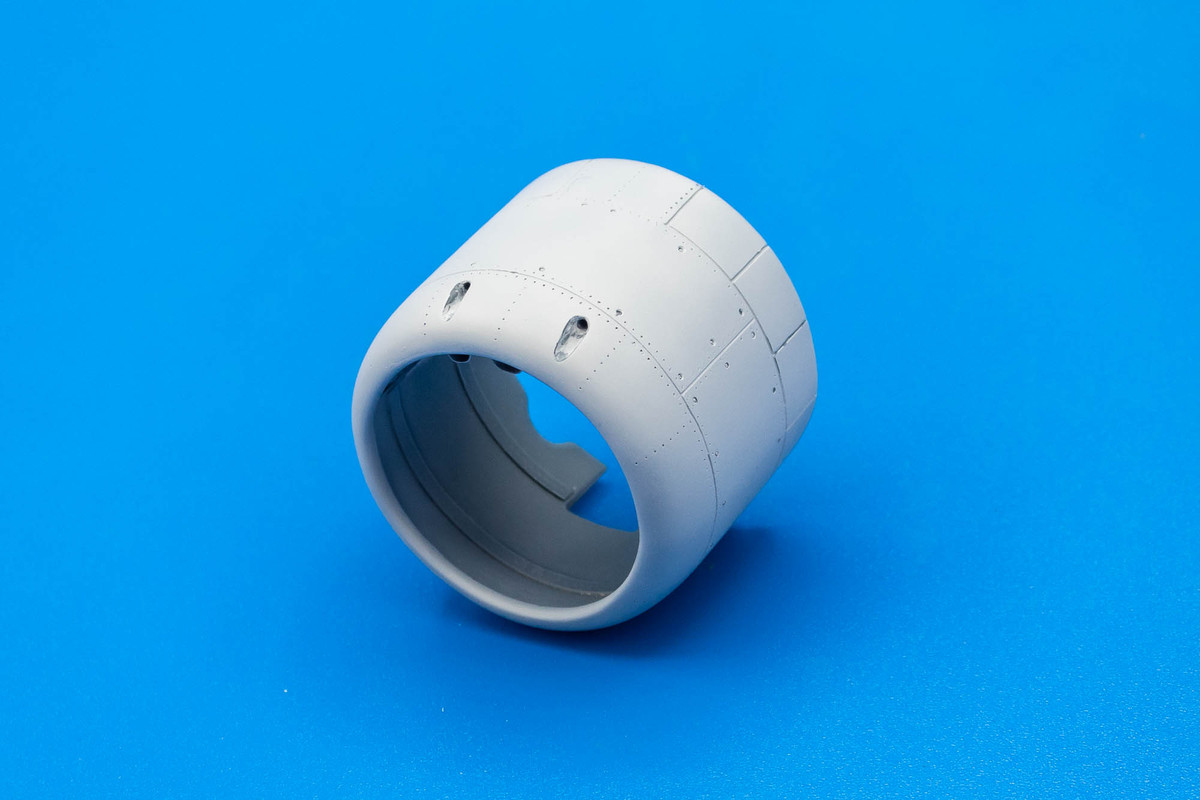
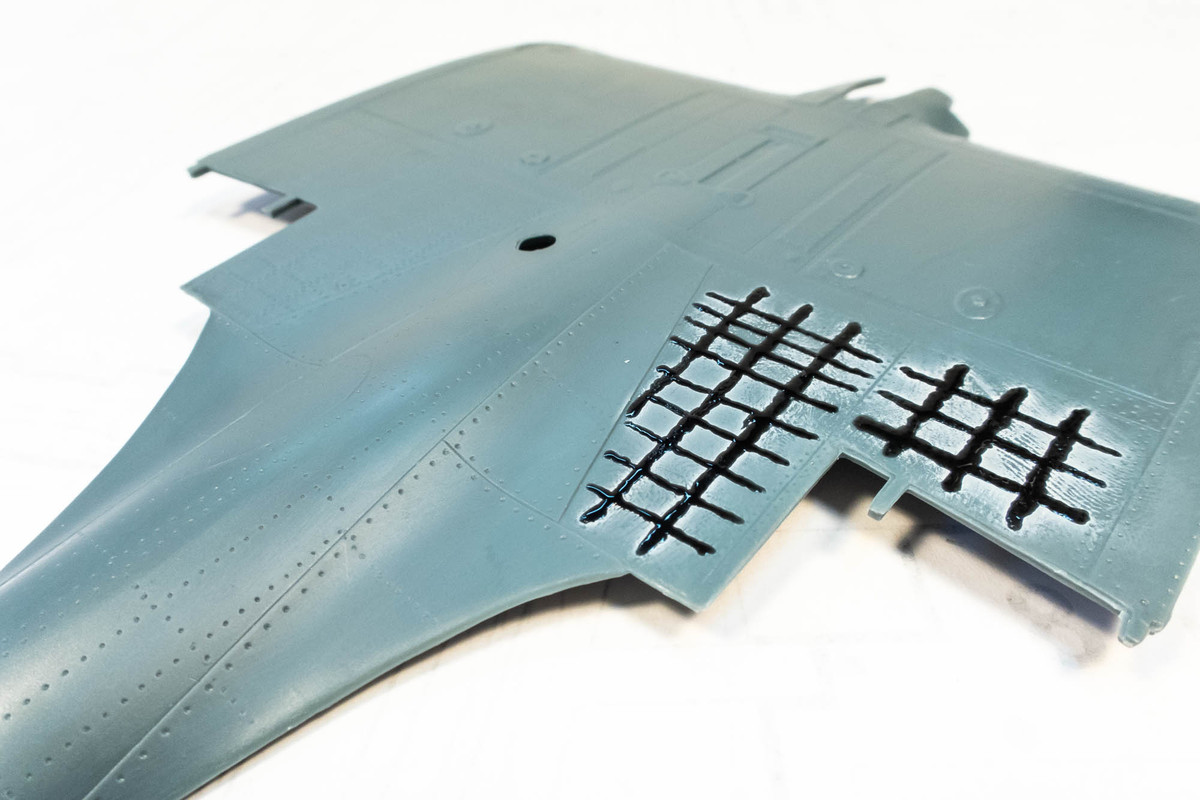
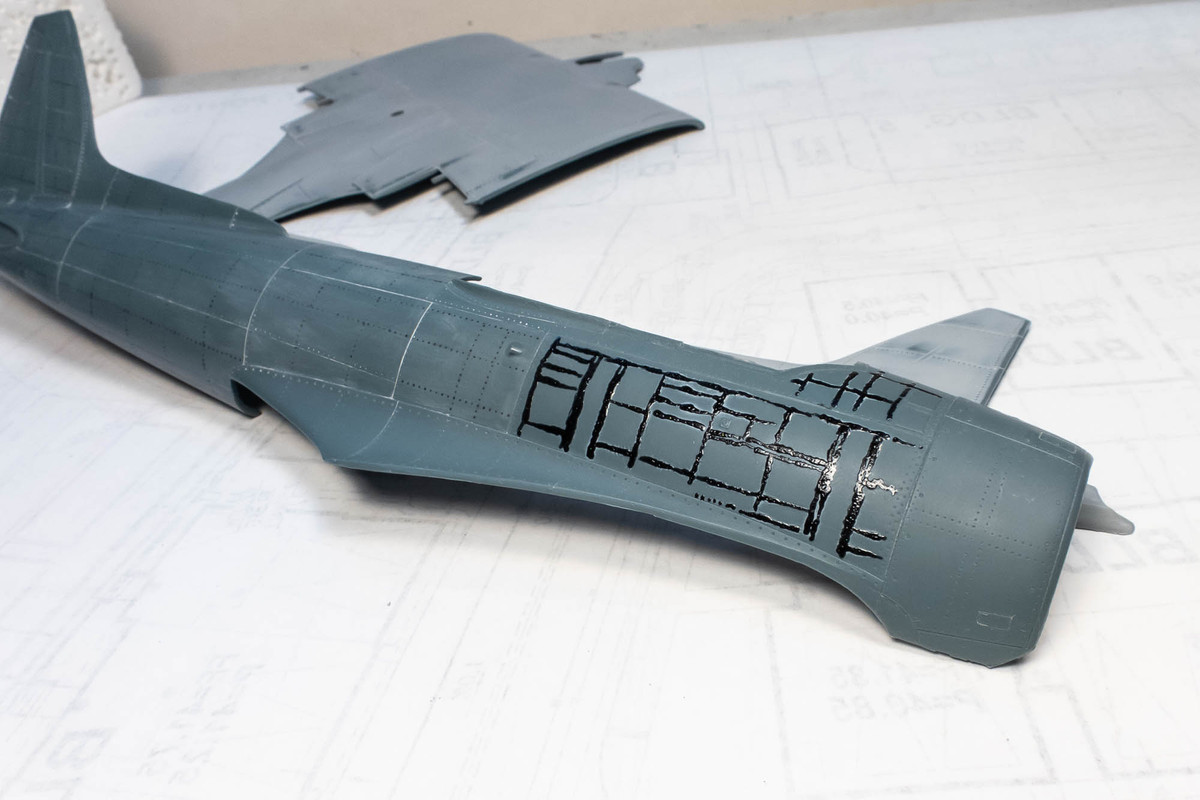
Here's some additional clean-up on the engine cowling. I'm removing most of the wing and fuselage rivets but I've elected to keep the riveting on the cowling and forward fuselage area intact because there is no oil-canning effect there.
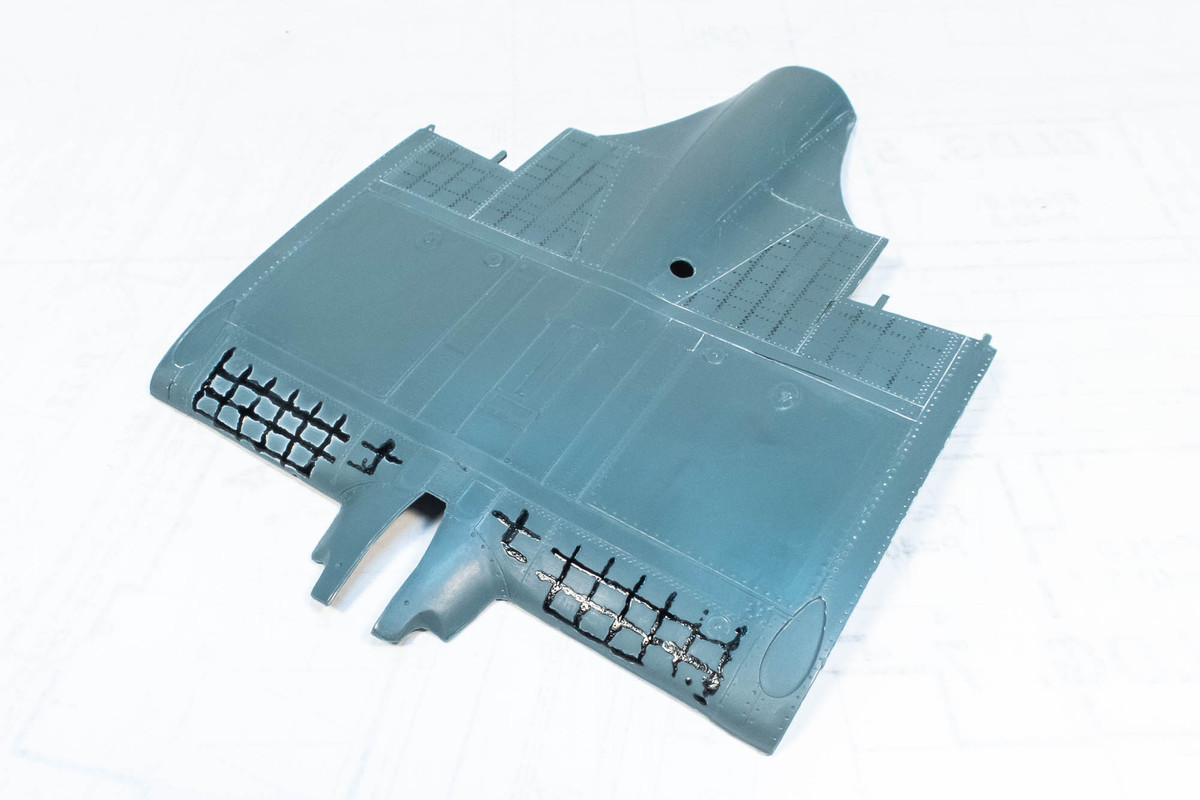
The center wing part is next on the rivet removal schedule.

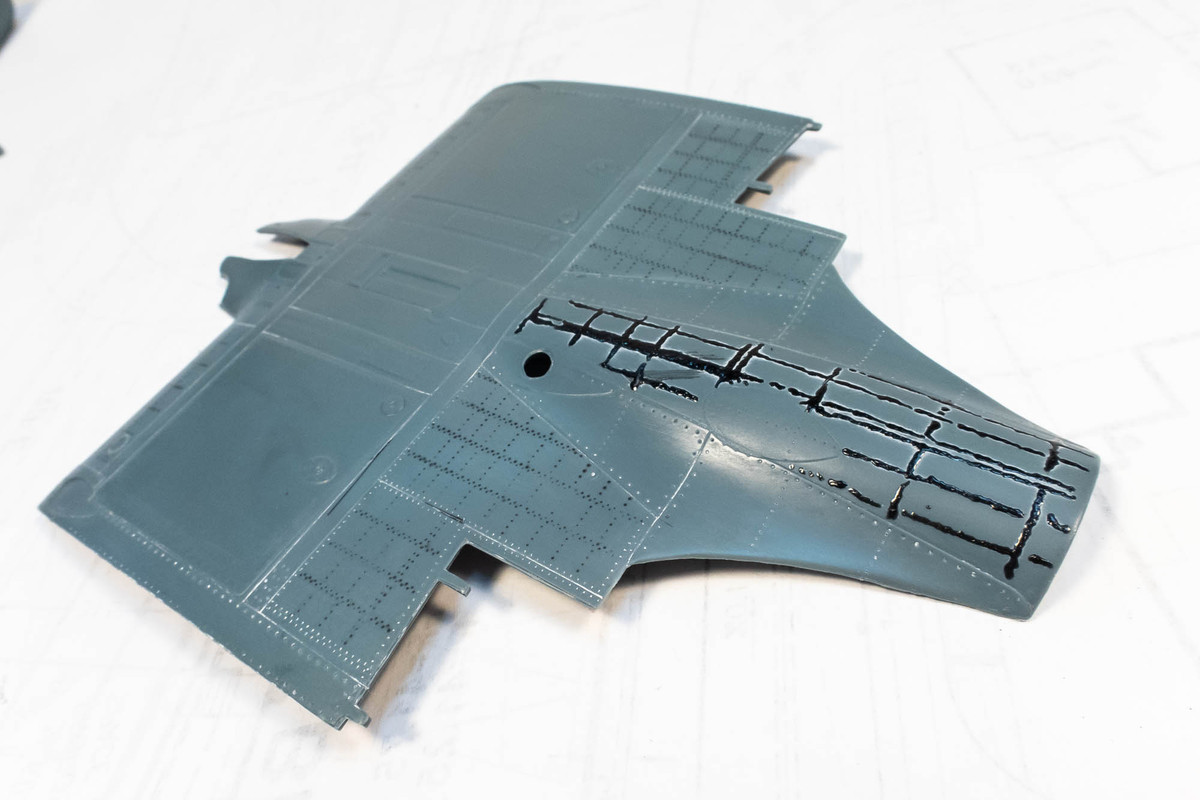
I do this a small section at a time. Fresh sandpaper is key to keep the process from bogging down.
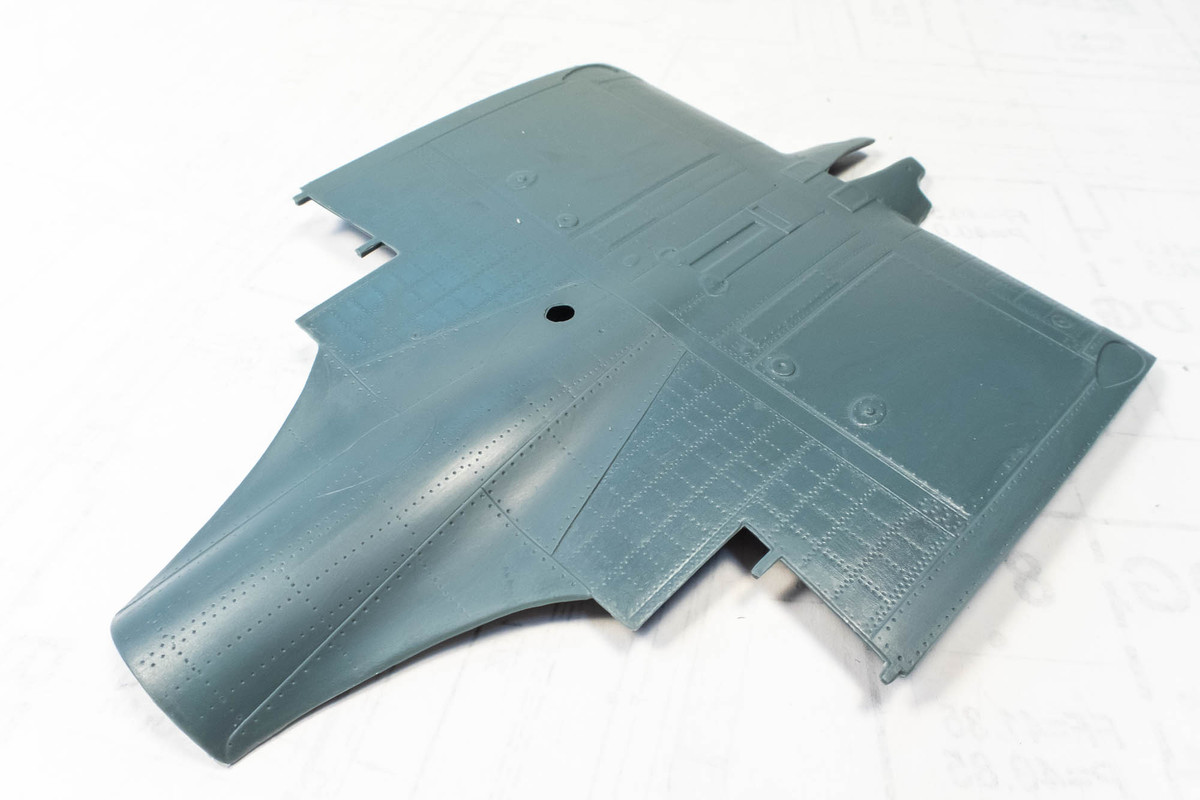
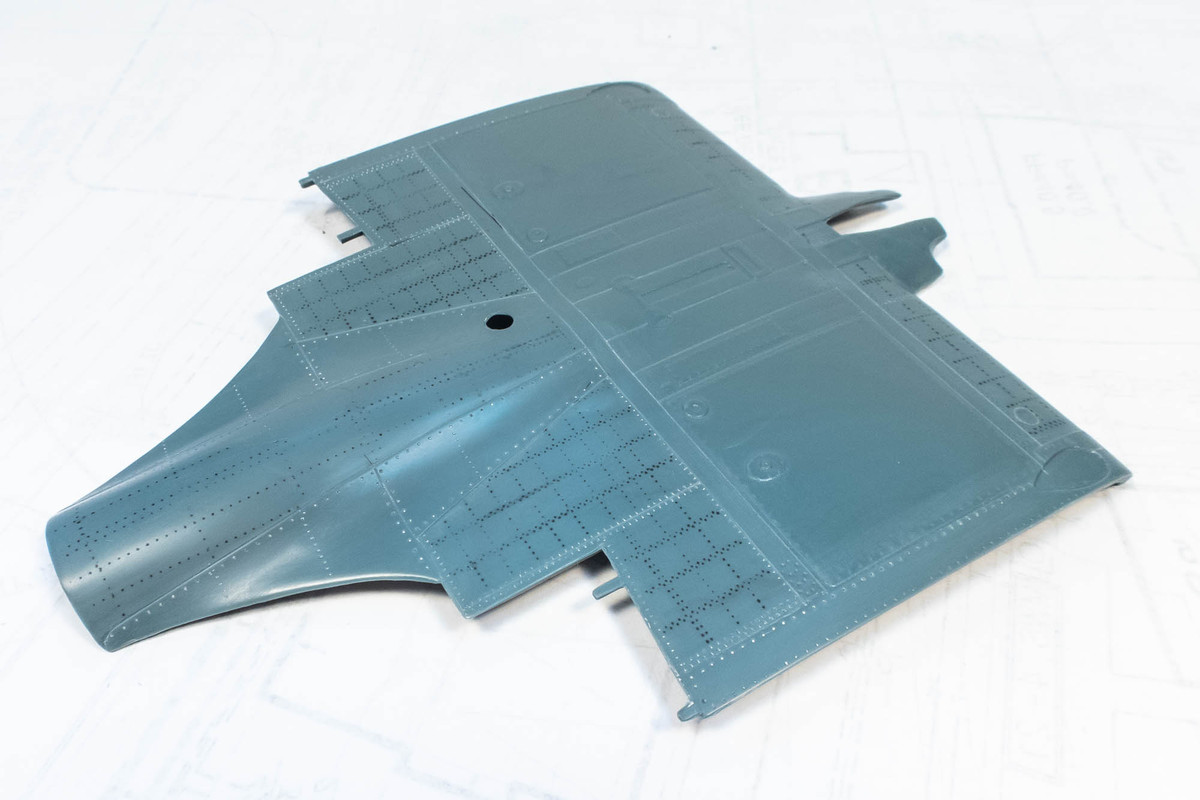
The center wing is done. I'll cover this with some primer and then touch up the panel lines and remaining rivets.
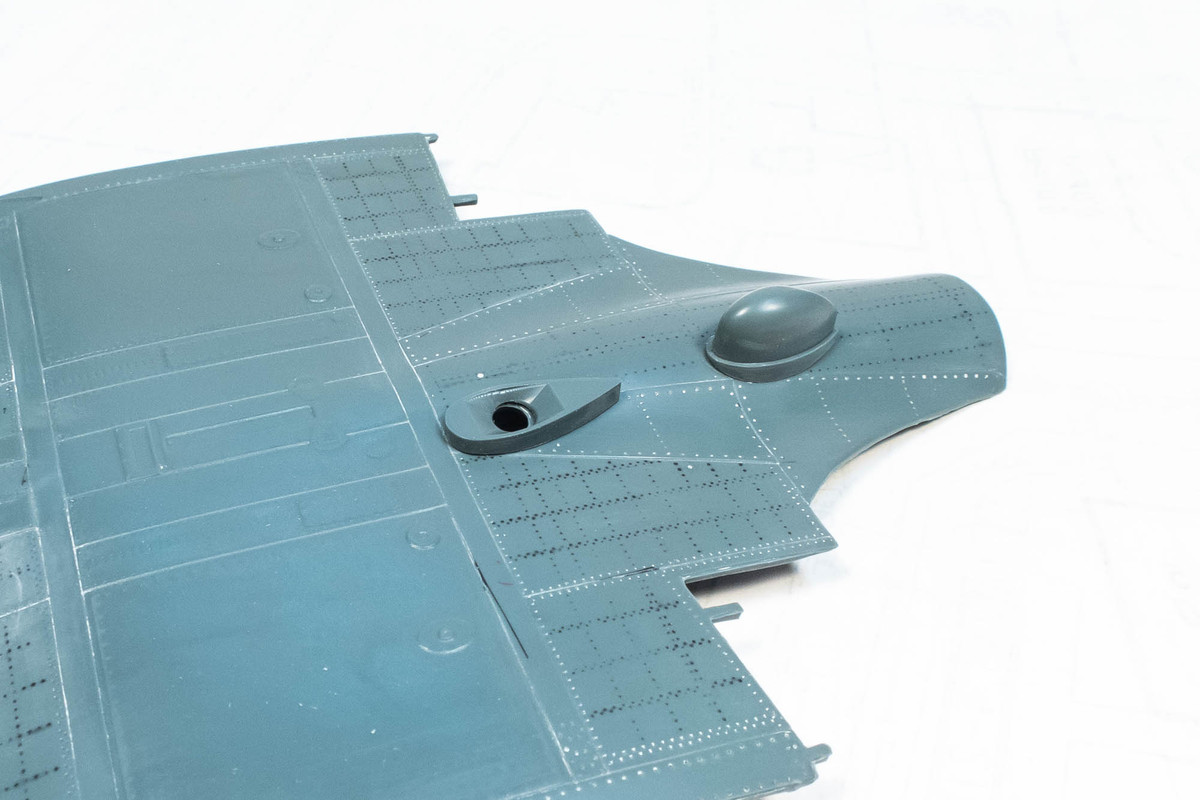
There are some parts that attach to the bottom wing. One looks like some sort of observation or camera port? I don't know what the bulbous thing is. The port part needs adjustment on the bottom as it does not fit the curvature of the wing very well as is.
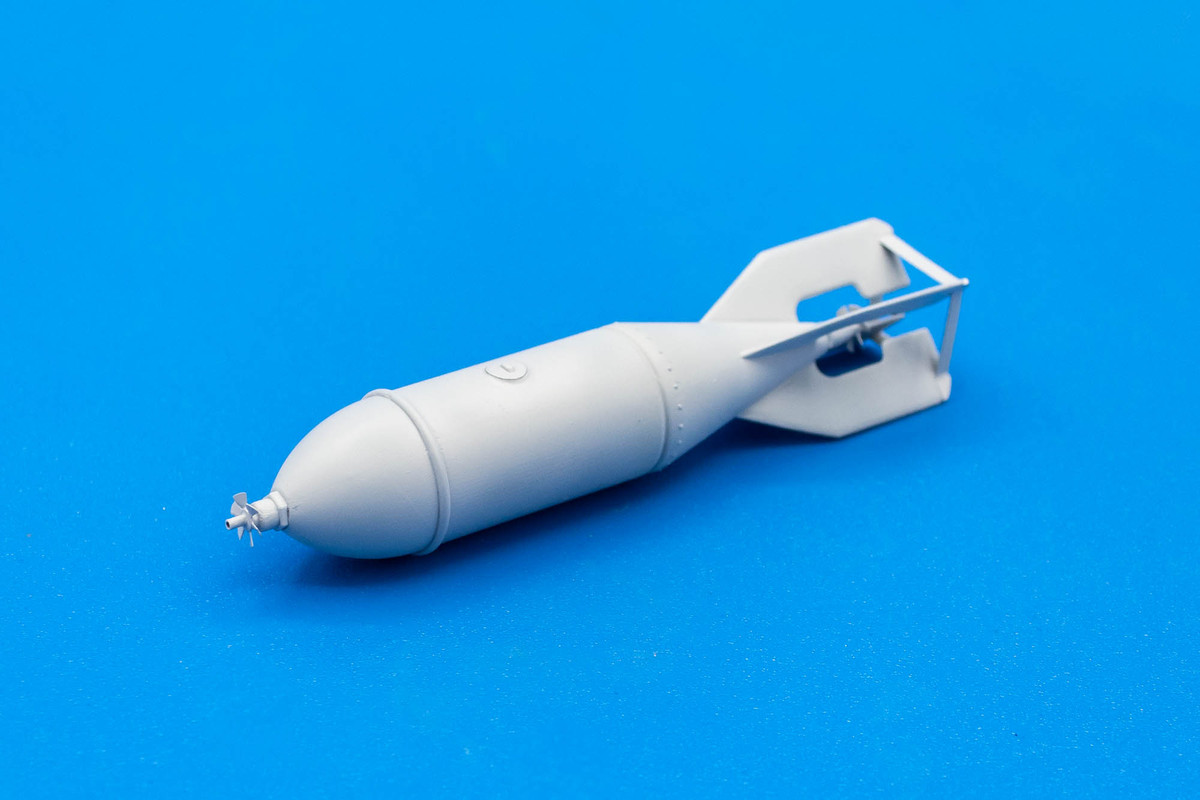
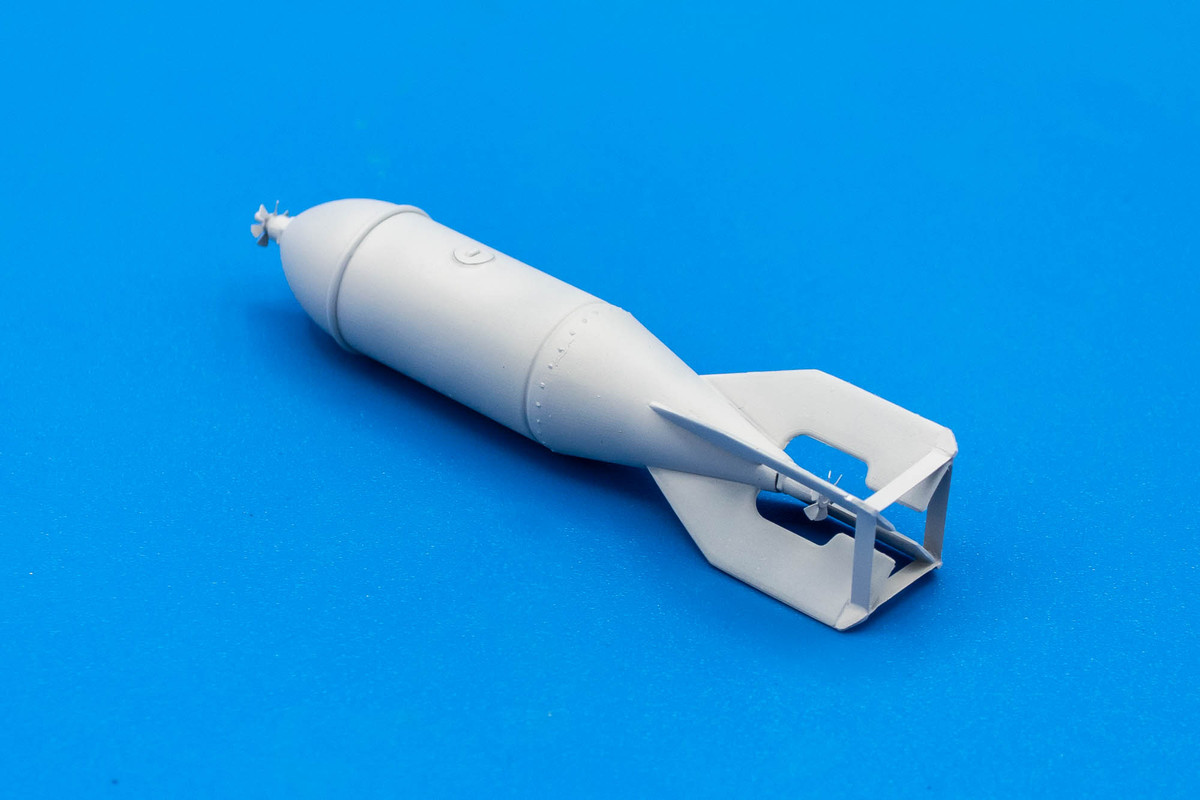
Here is the kit bomb. As far as I know, the Pearl Harbor D3A1's did not carry any wing bombs so this the only bomb that I'm mounting. Instead of the kit plastic for the bracing around the fins, I elected to use sheet brass and bits of sheet styrene instead.

There are PE parts for the spinner things on the front and back. I added a row of raised rivets courtesy of Archer's decals.
Here's some additional clean-up on the engine cowling. I'm removing most of the wing and fuselage rivets but I've elected to keep the riveting on the cowling and forward fuselage area intact because there is no oil-canning effect there.
The center wing part is next on the rivet removal schedule.
I do this a small section at a time. Fresh sandpaper is key to keep the process from bogging down.
The center wing is done. I'll cover this with some primer and then touch up the panel lines and remaining rivets.
There are some parts that attach to the bottom wing. One looks like some sort of observation or camera port? I don't know what the bulbous thing is. The port part needs adjustment on the bottom as it does not fit the curvature of the wing very well as is.
Here is the kit bomb. As far as I know, the Pearl Harbor D3A1's did not carry any wing bombs so this the only bomb that I'm mounting. Instead of the kit plastic for the bracing around the fins, I elected to use sheet brass and bits of sheet styrene instead.
There are PE parts for the spinner things on the front and back. I added a row of raised rivets courtesy of Archer's decals.
John aka JKim
-----------<><
-----------<><

Re: Infinity 1/32 Aichi D3A1 - The Constanza Rule
Hey John things are looking great. I tried the black CA and debonder trick. Ultimately did the trick in a great way but the debonder attacked the plasic (Italeri) so I have cleanup to do. I'm using the Bob Smith stuff - applied the debonder to a q-tip. Any thoughts? Could be the plastic I suppose.
Thanks,
John
John
Re: Infinity 1/32 Aichi D3A1 - The Constanza Rule
Thank you! Hmmm... are you using BSI debonder along with the BSI Black CA glue? I'm using Great Planes CA Pro Debonder and the debonder has not affected any of the kits that I've used it on. I'll have to test it on Italeri plastic.keavdog wrote: ↑Sat Jul 01, 2023 9:07 pm Hey John things are looking great. I tried the black CA and debonder trick. Ultimately did the trick in a great way but the debonder attacked the plasic (Italeri) so I have cleanup to do. I'm using the Bob Smith stuff - applied the debonder to a q-tip. Any thoughts? Could be the plastic I suppose.
John aka JKim
-----------<><
-----------<><

Re: Infinity 1/32 Aichi D3A1 - The Constanza Rule
This kit certainly looks rough around the edges but it's cleaning up beautifully with all the work you're putting into John.
I really like the simplified, lack of AM approach you're using on this build - making the most of simple additions and the kit parts. Those extra tin scoops you added to the cowling looked excellent.
I really like the simplified, lack of AM approach you're using on this build - making the most of simple additions and the kit parts. Those extra tin scoops you added to the cowling looked excellent.
Stuart Templeton 'I may not be good but I'm slow...'
My blog: https://stuartsscalemodels.blogspot.com/
My blog: https://stuartsscalemodels.blogspot.com/
Re: Infinity 1/32 Aichi D3A1 - The Constanza Rule
Thank you Stuart!
The rivet removal process was performed on the starboard fuselage half. I figured that if I get both fuselage halves complete, I can at least move on to the complex cockpit assembly.
After the filling process, the panel lines and remaining rivets were cleaned up. They were then sprayed with a light coat of Mr Primer Surfacer 1000. My natural tendency is to apply more rivets, which I think would look ok without the kit's built-in oil-canning effect but I'm still in Costanza mode and will resist the urge.
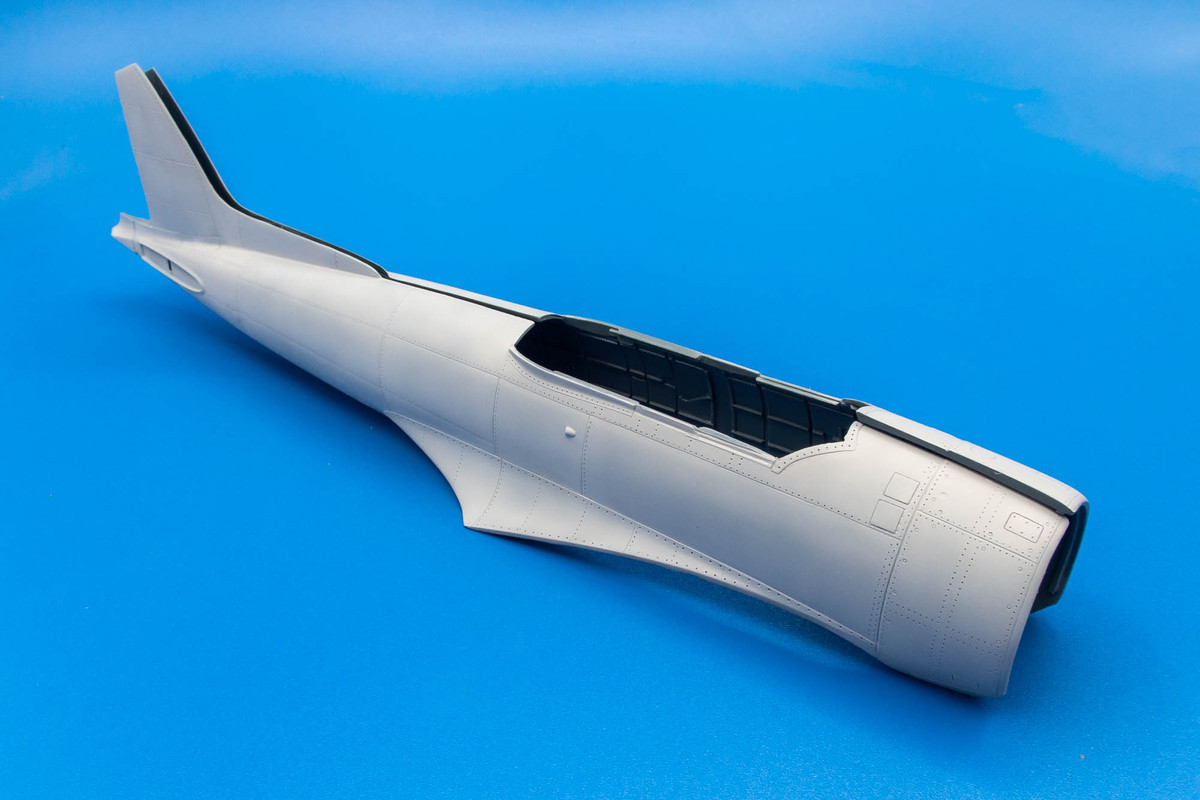

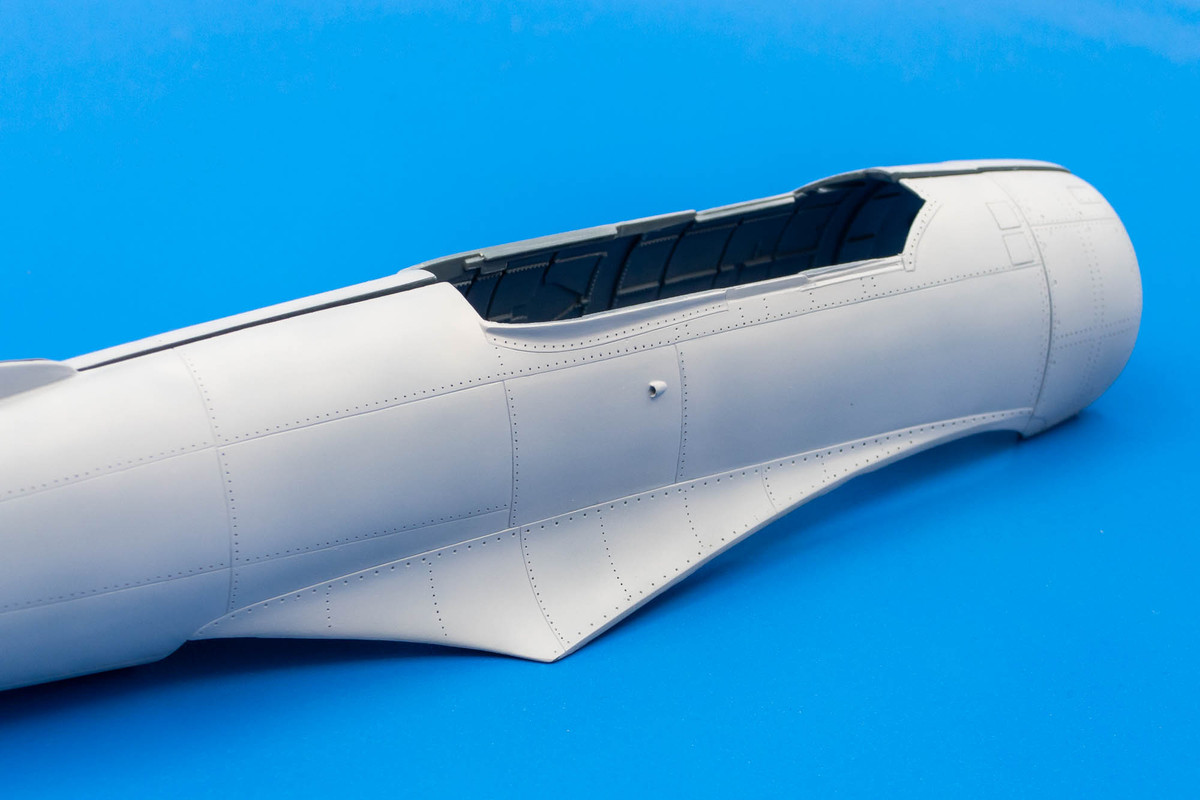
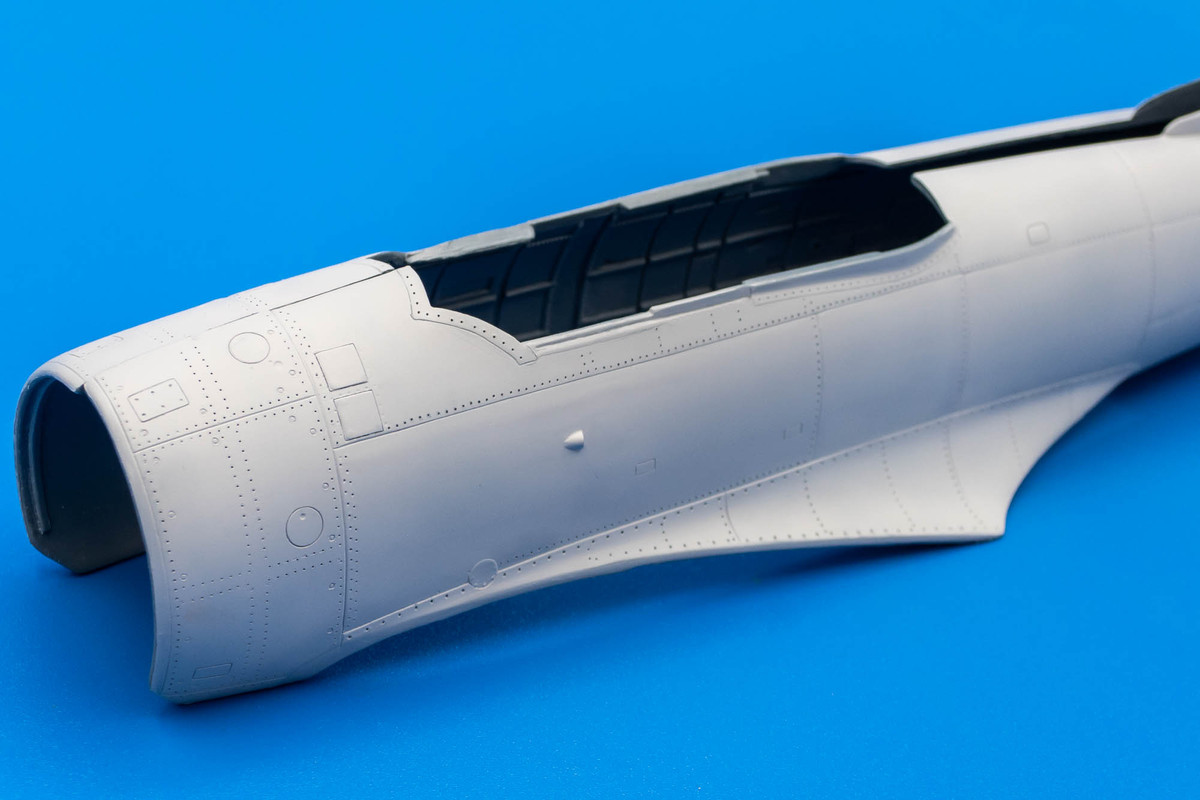
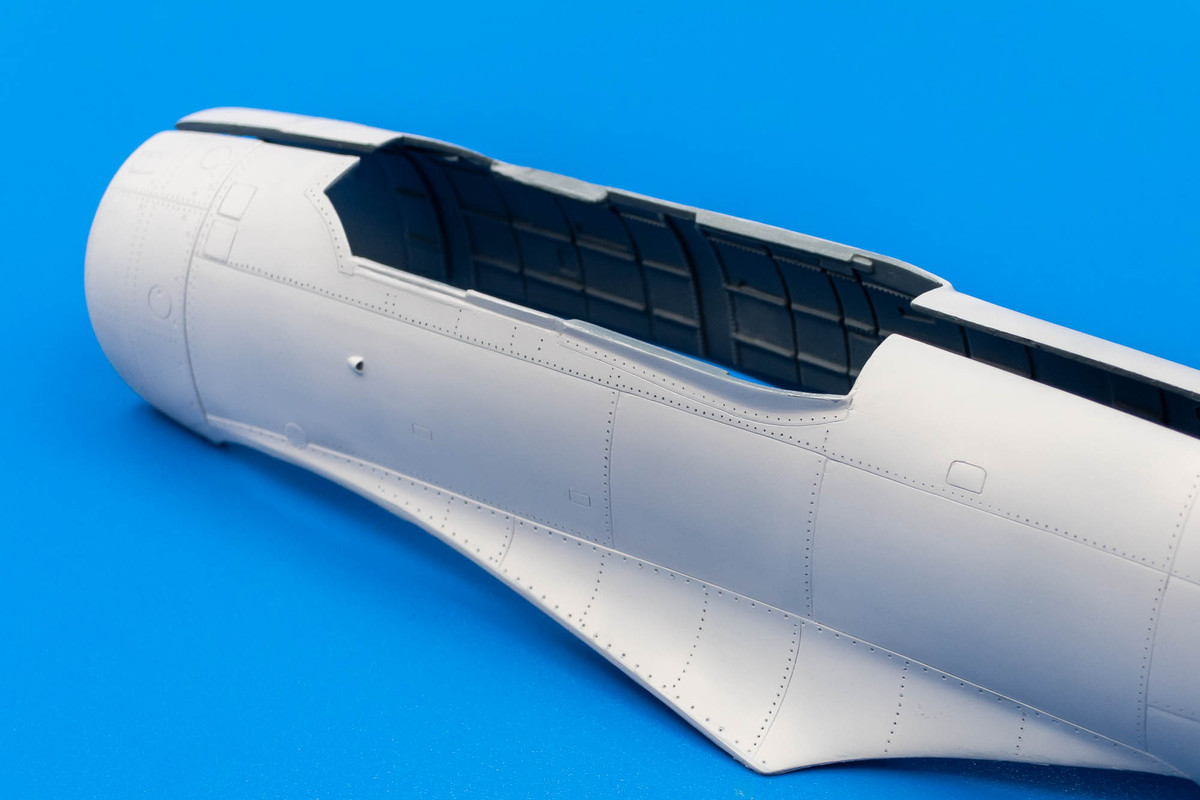
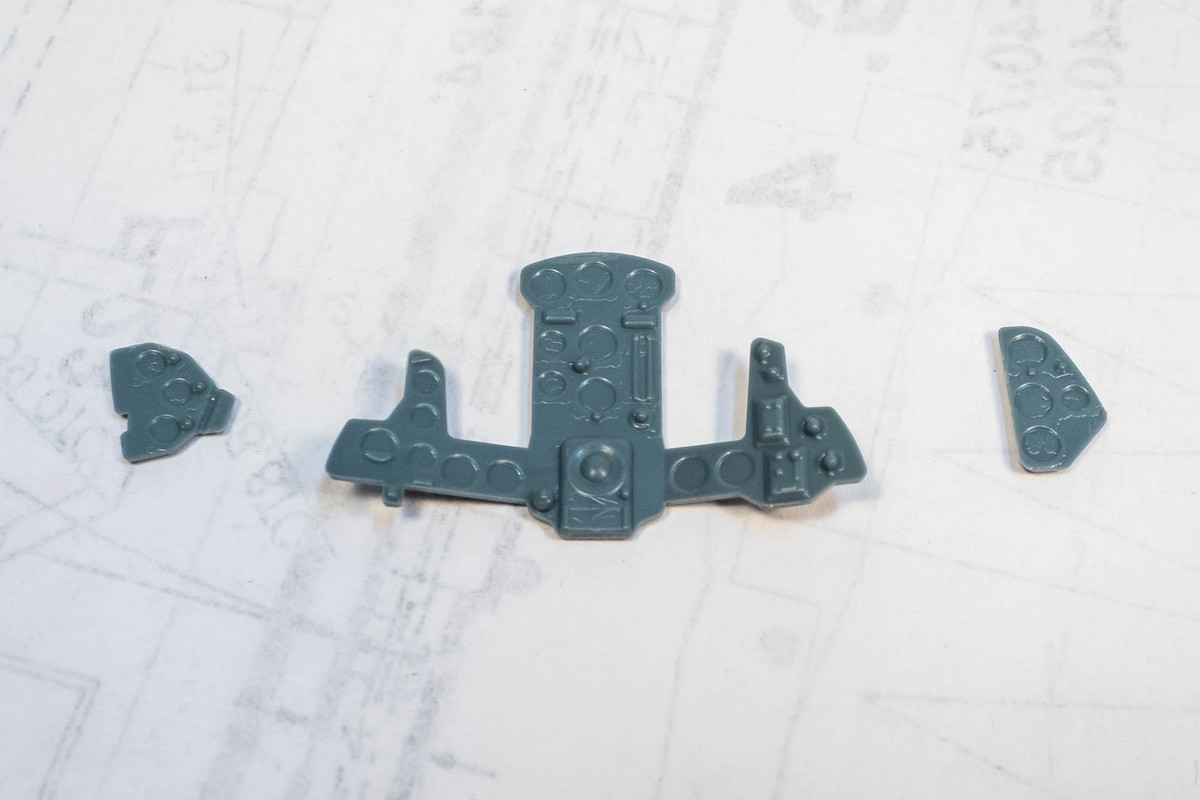
Taking an initial look at the instrument panel parts. It's hard to see but there is some weird surface striations on the panels. At first, I thought they were raised bezels but they are random marks... minor defects from the molding process. The panels are black so I'm pretty sure it won't be an issue. Again, no aftermarket... I'm going to use the kit decals for the instrument faces. In case I mess up, I do have a copy of Airscale Japanese instruments to fall back on.
The rivet removal process was performed on the starboard fuselage half. I figured that if I get both fuselage halves complete, I can at least move on to the complex cockpit assembly.
After the filling process, the panel lines and remaining rivets were cleaned up. They were then sprayed with a light coat of Mr Primer Surfacer 1000. My natural tendency is to apply more rivets, which I think would look ok without the kit's built-in oil-canning effect but I'm still in Costanza mode and will resist the urge.
Taking an initial look at the instrument panel parts. It's hard to see but there is some weird surface striations on the panels. At first, I thought they were raised bezels but they are random marks... minor defects from the molding process. The panels are black so I'm pretty sure it won't be an issue. Again, no aftermarket... I'm going to use the kit decals for the instrument faces. In case I mess up, I do have a copy of Airscale Japanese instruments to fall back on.
John aka JKim
-----------<><
-----------<><