Border 1/35 Focke Wulf Fw190A-5 Nowotny Double Chevron
-
Brandons_Iron
- Advanced Member
- Posts: 261
- Joined: Tue Jan 21, 2020 11:18 am
- Location: Eastern Idaho
Re: Border 1/35 Focke Wulf Fw190A-5 Nowotny Double Chevron
That's impressive. 
BrandonK
If you can't fix it with duct tape, you're not using enough duct tape.
If you can't fix it with duct tape, you're not using enough duct tape.

Re: Border 1/35 Focke Wulf Fw190A-5 Nowotny Double Chevron
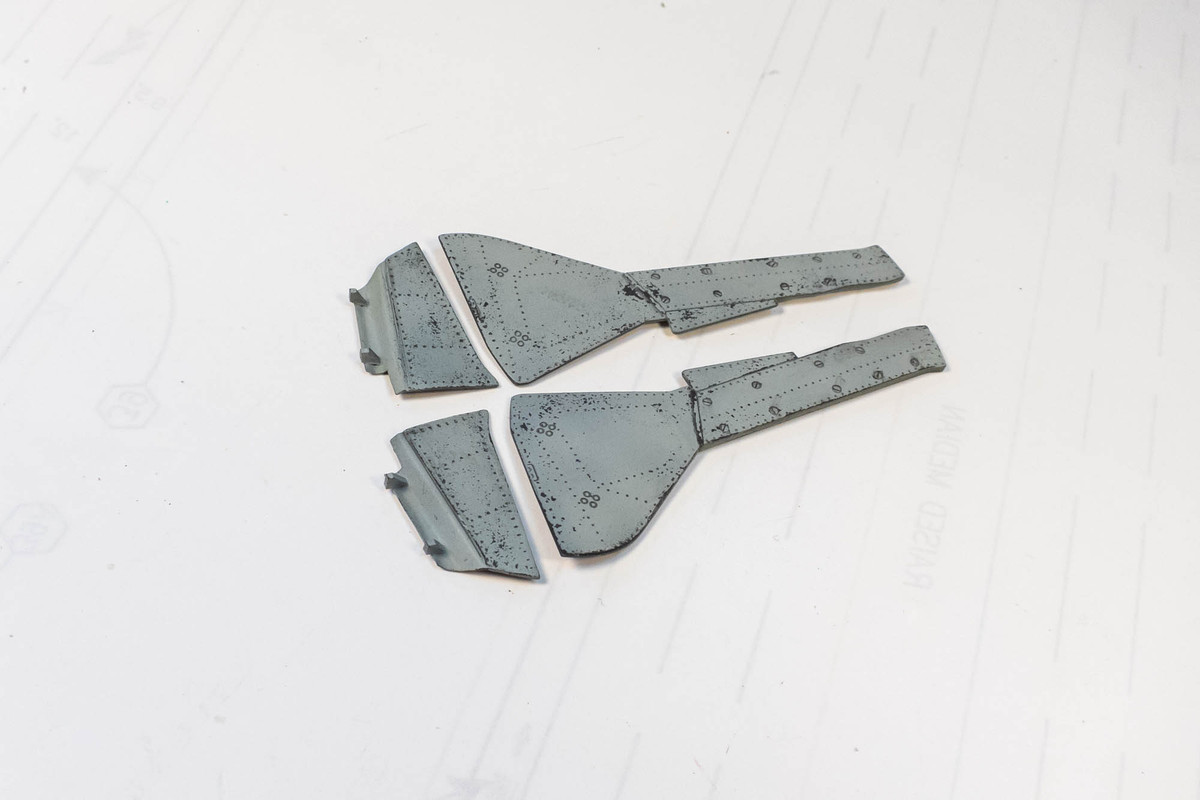
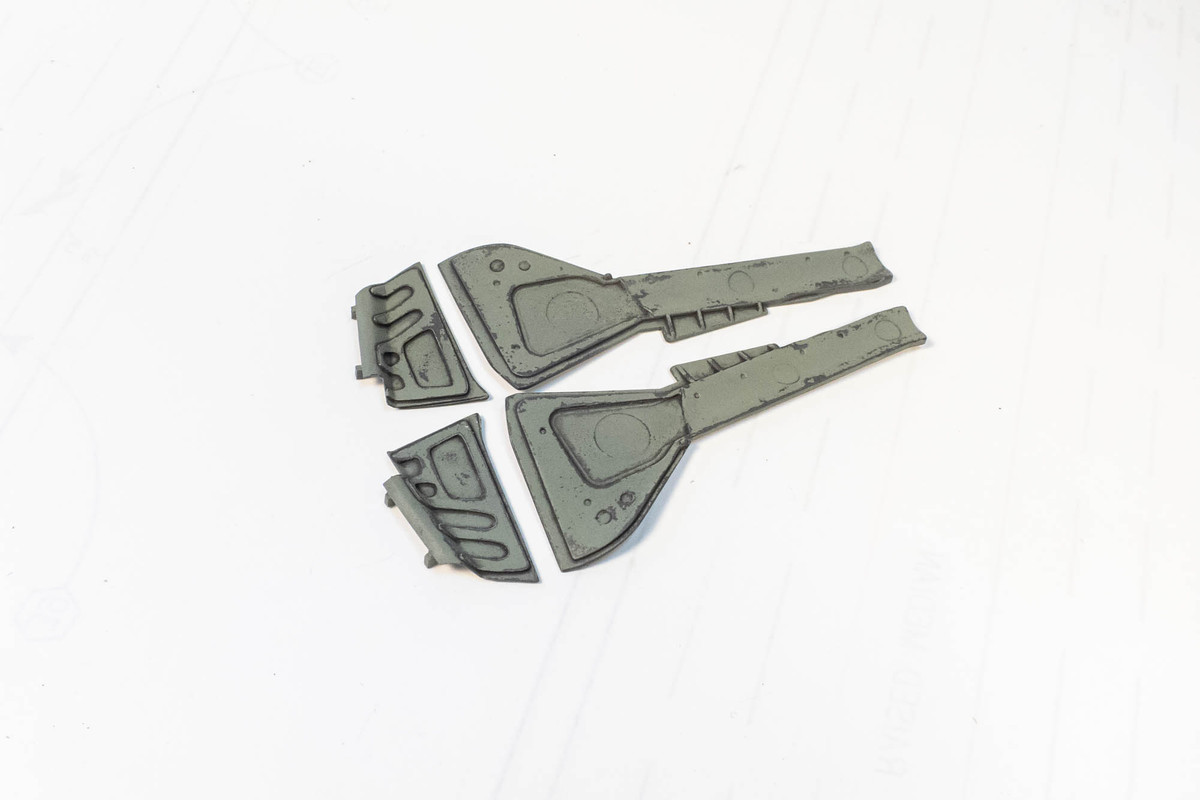
Thanks guys! Although the brass-only version of the inner doors was in-scale in terms of thickness, the main gear doors were not. I wanted the two sets of doors to match. I've painted the landing gear covers... light hairspray chipping on both sides.
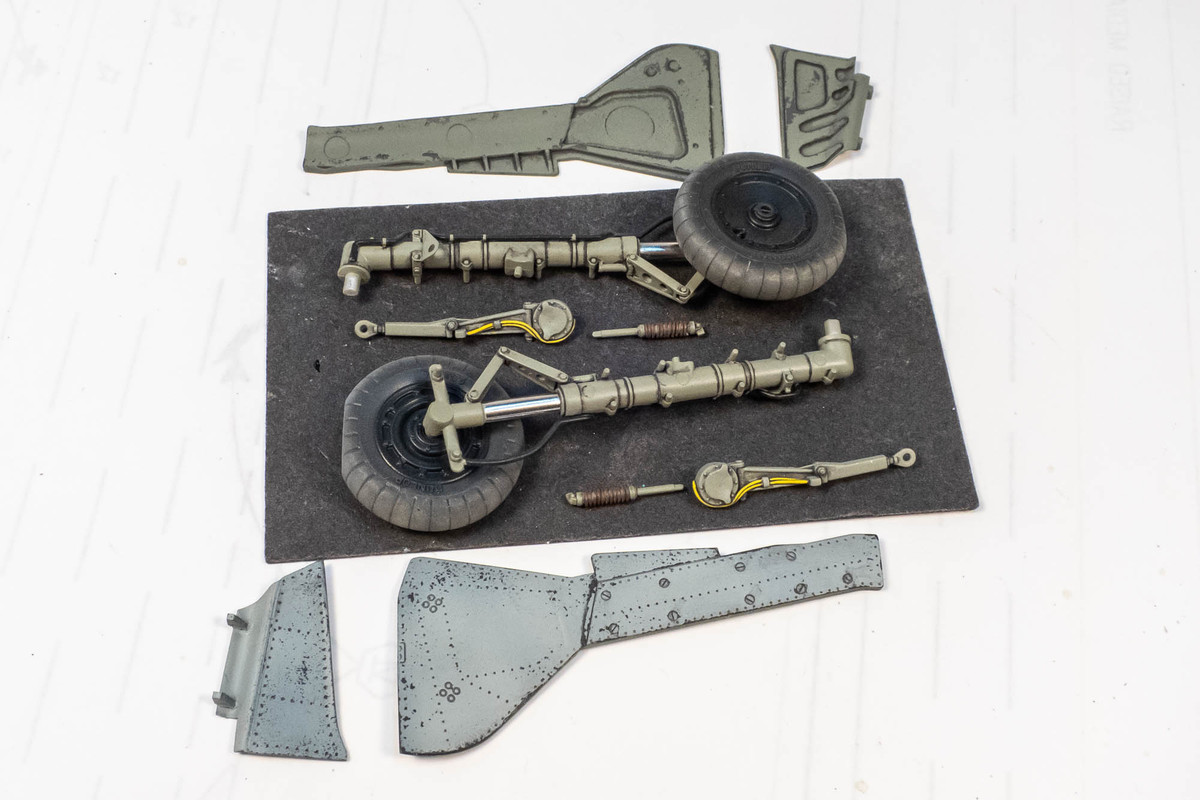
The landing gear component are just about finished. I added some springs to the retracting rod links. I'll do some post-shading to the exterior surfaces of the covers especially at the base of the inner doors since they are in the path of the engine exhausts.
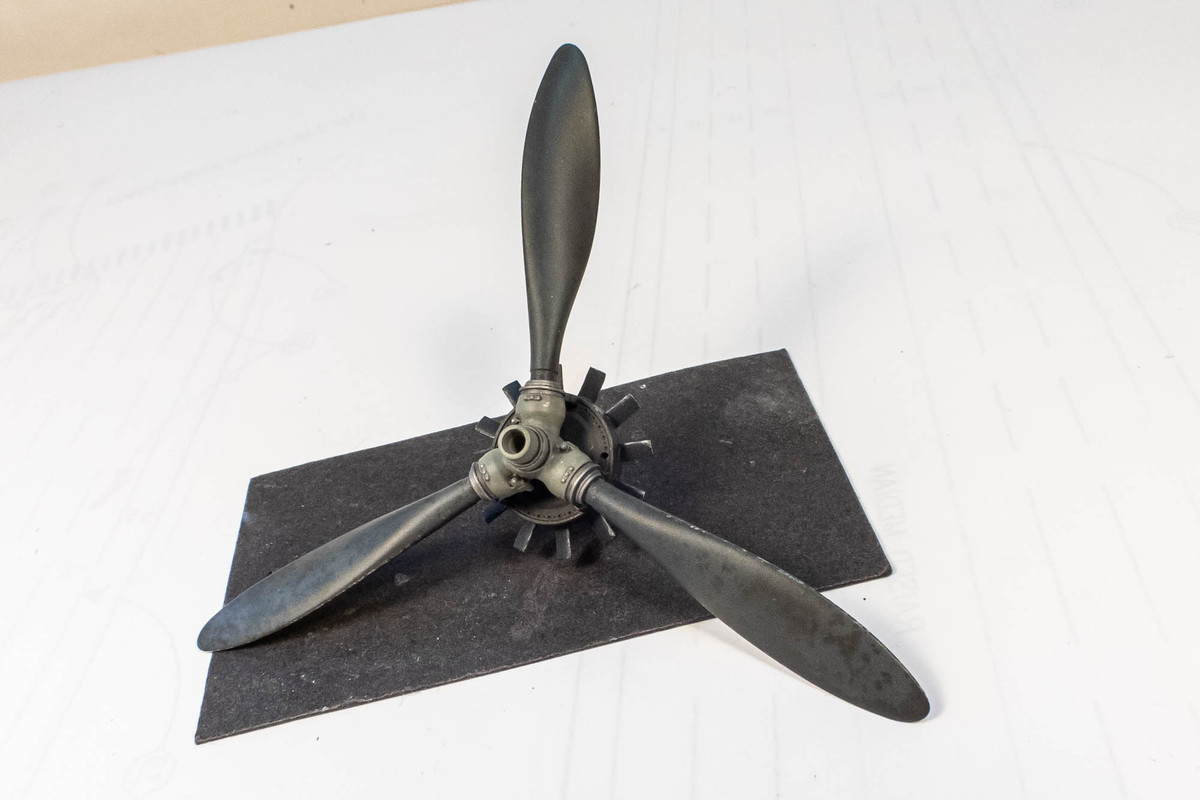
I've also added some salt fading effects on the prop blades.
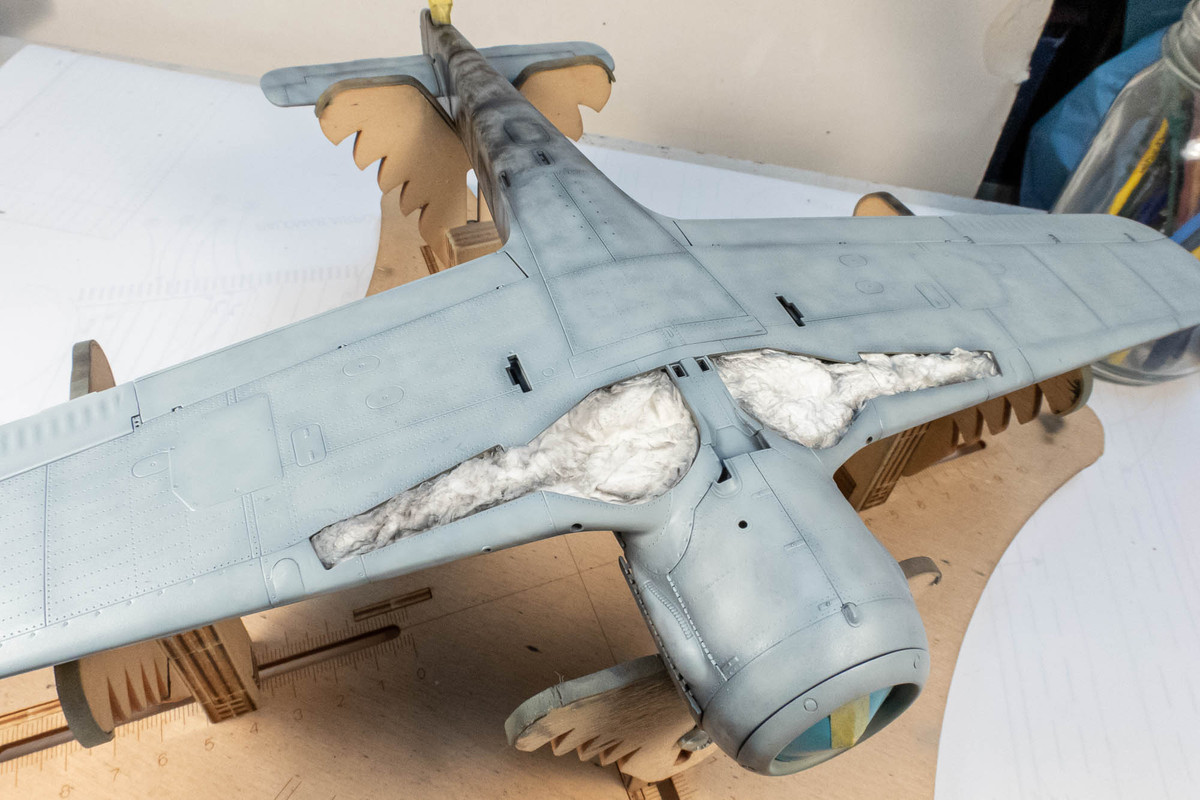
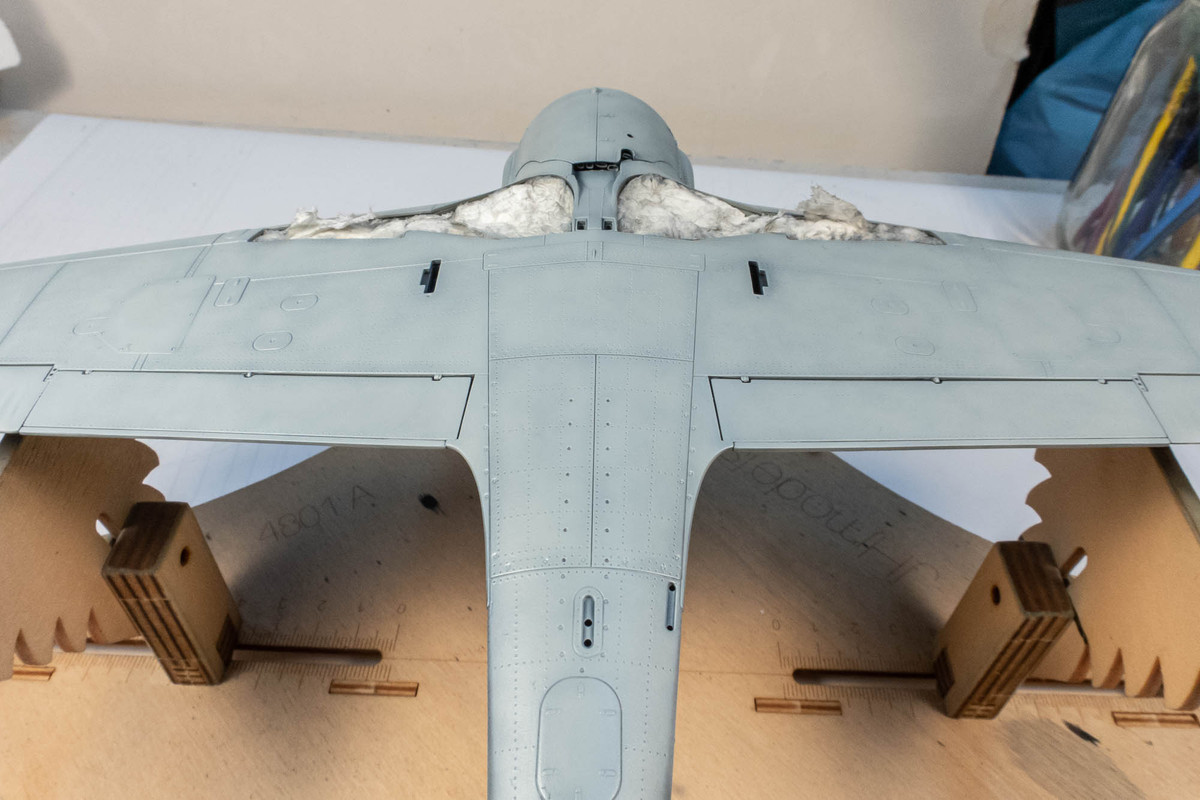
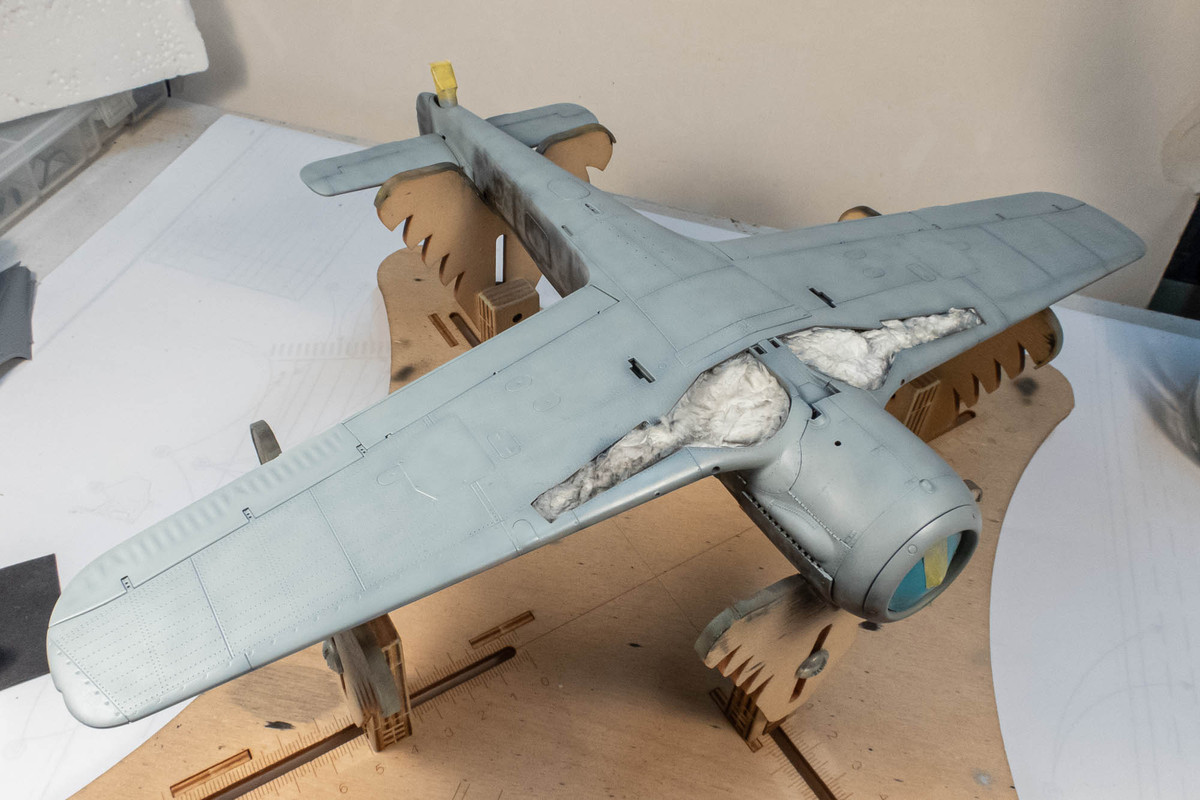
In preparation for the upcoming camo painting, I've filled the wheel wells with wet tissue paper.
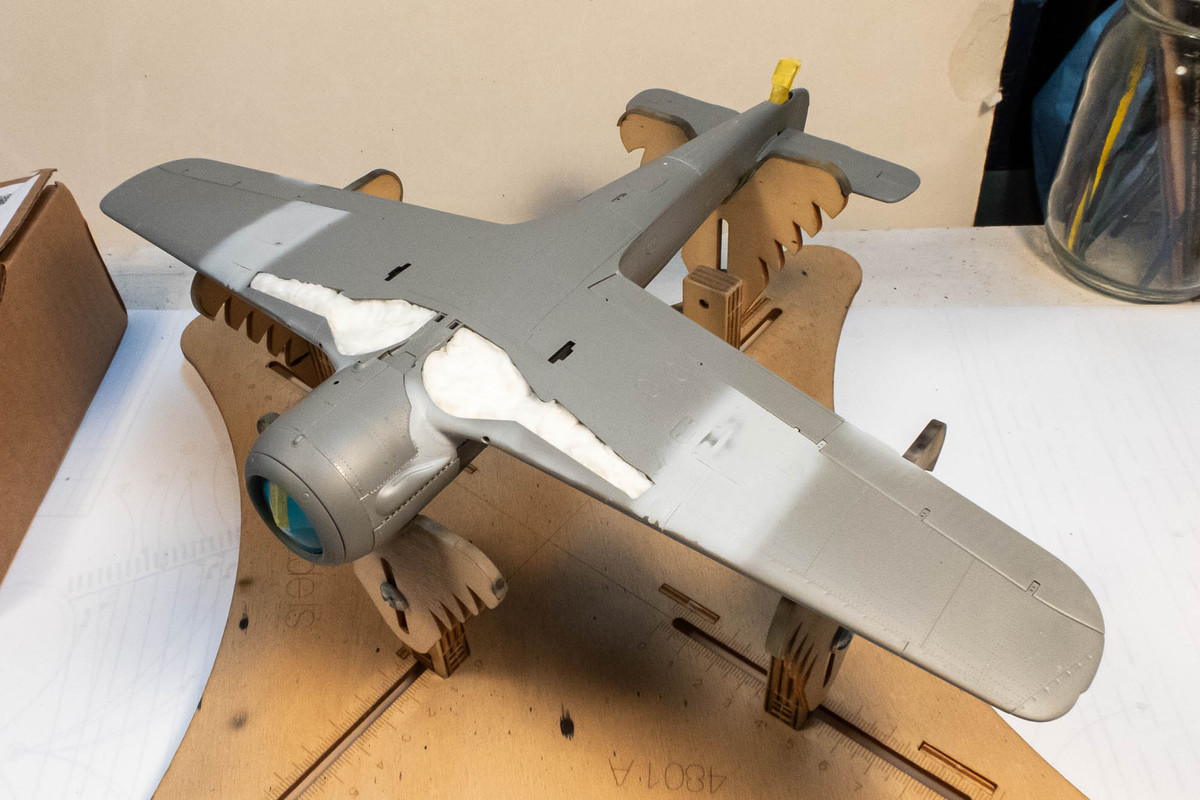
I'm planning on doing some light painting chipping via hairspray at the wing roots so this area has been given a base coat of Tamiya Silver AS-12.

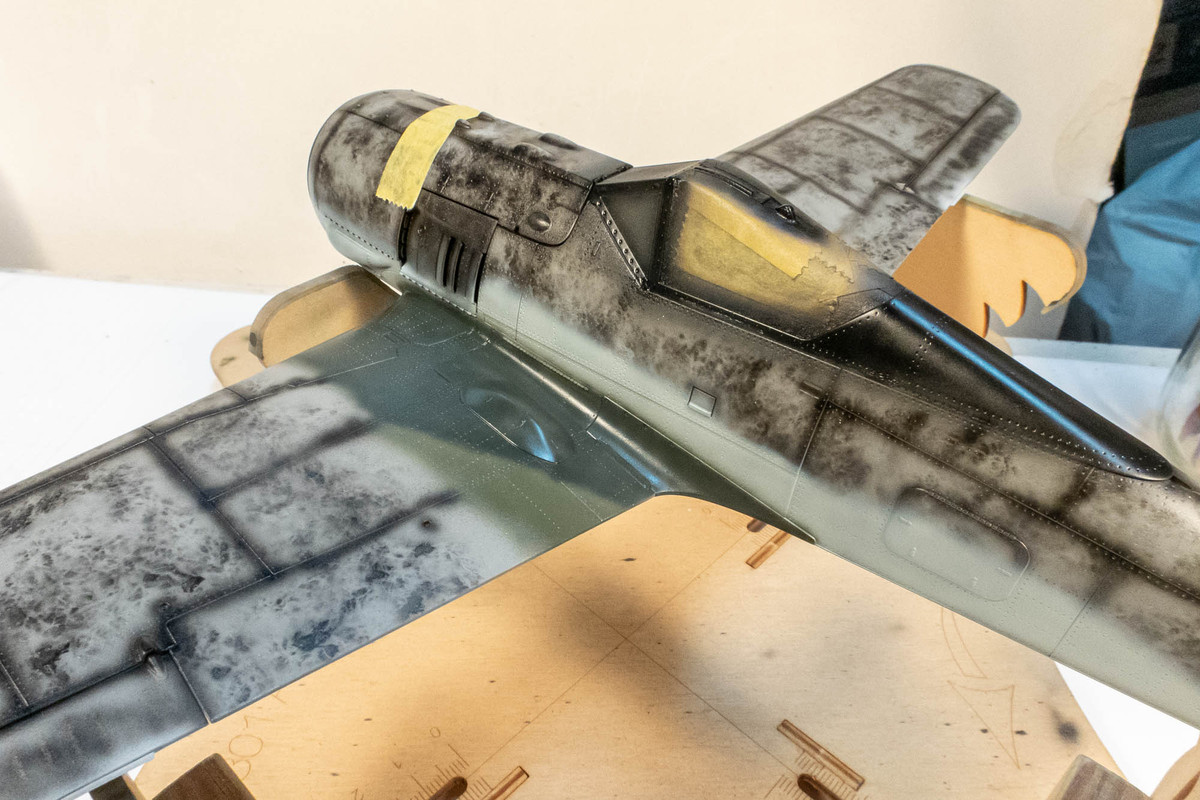
Next comes my customary pre-shading of the panel lines.

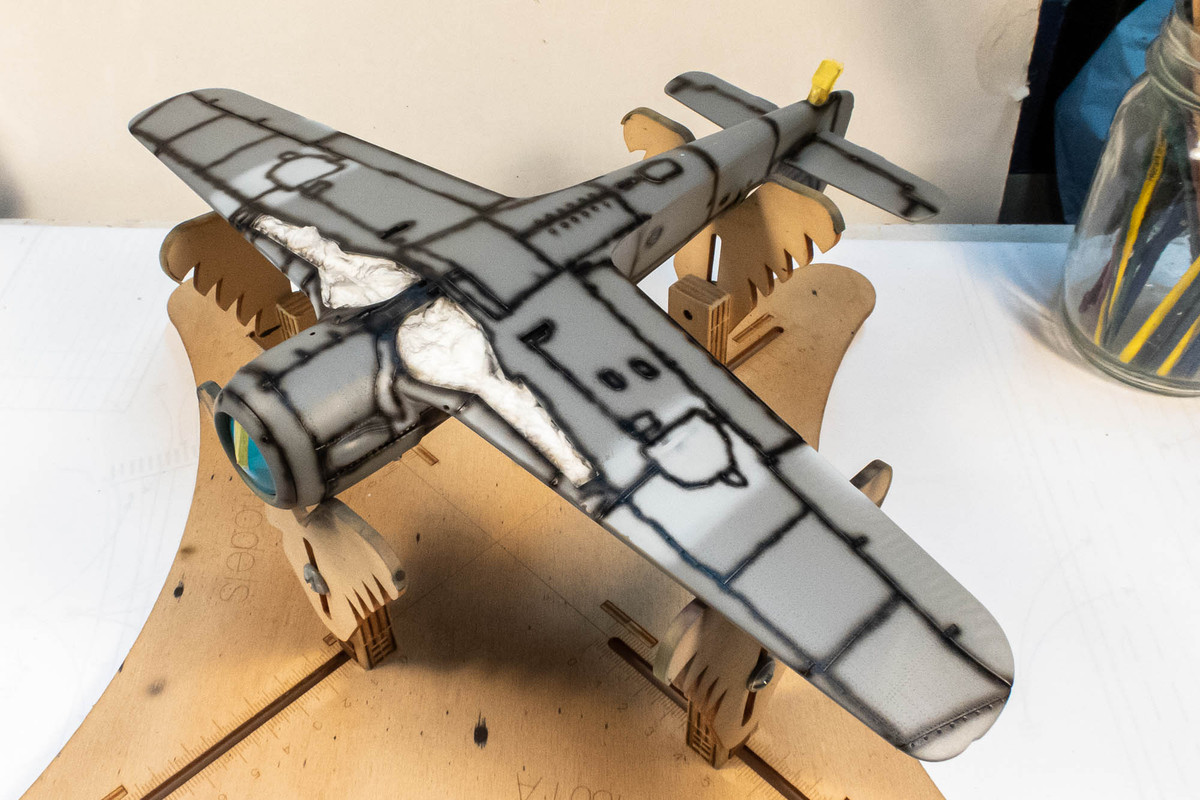
I like to give the camo finish some tonal variation and to do this, I employ an inverse of black basing which is essentially a random mottle pattern of black on grey plastic. I use a piece of plastic scrubbing pad that is thinned to allow paint to be sprayed through it.
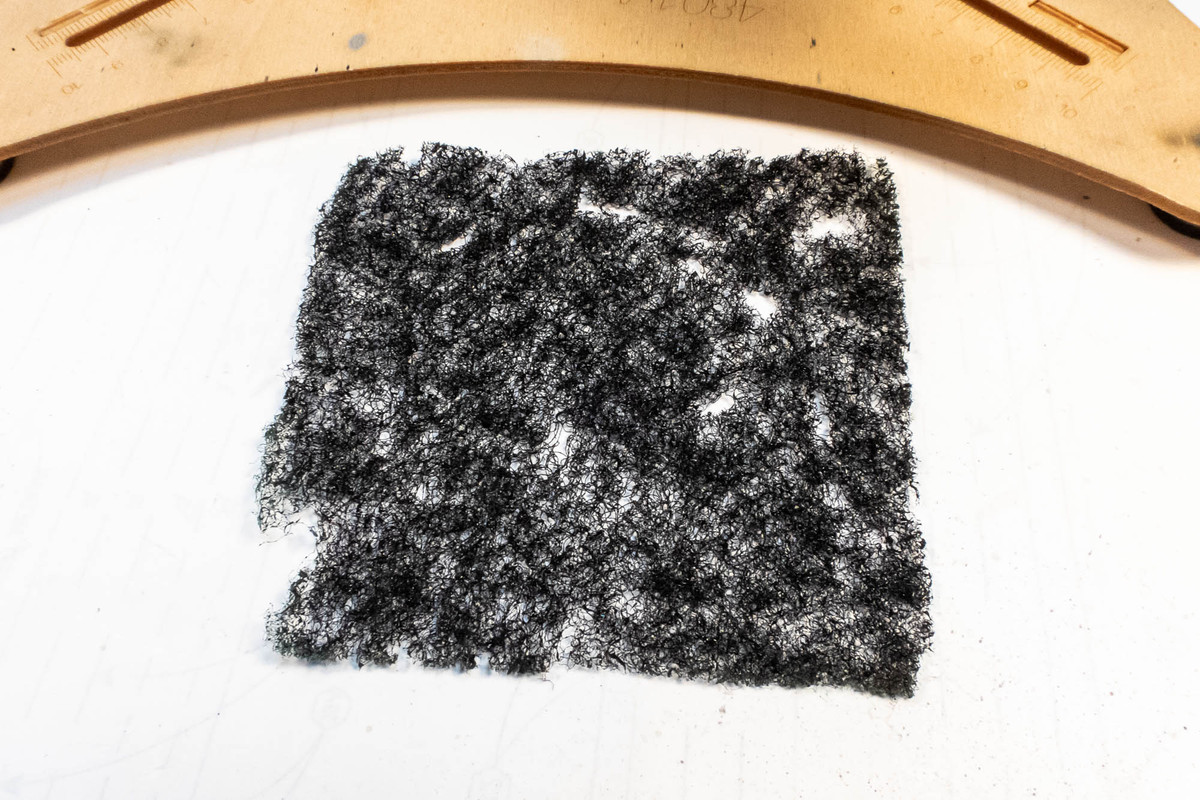
Using this as a mask, I apply the mottle pattern over the entire model, except the chipping area, which I want to restrict to as few layers of paint as possible to better enable the hairspray chipping.
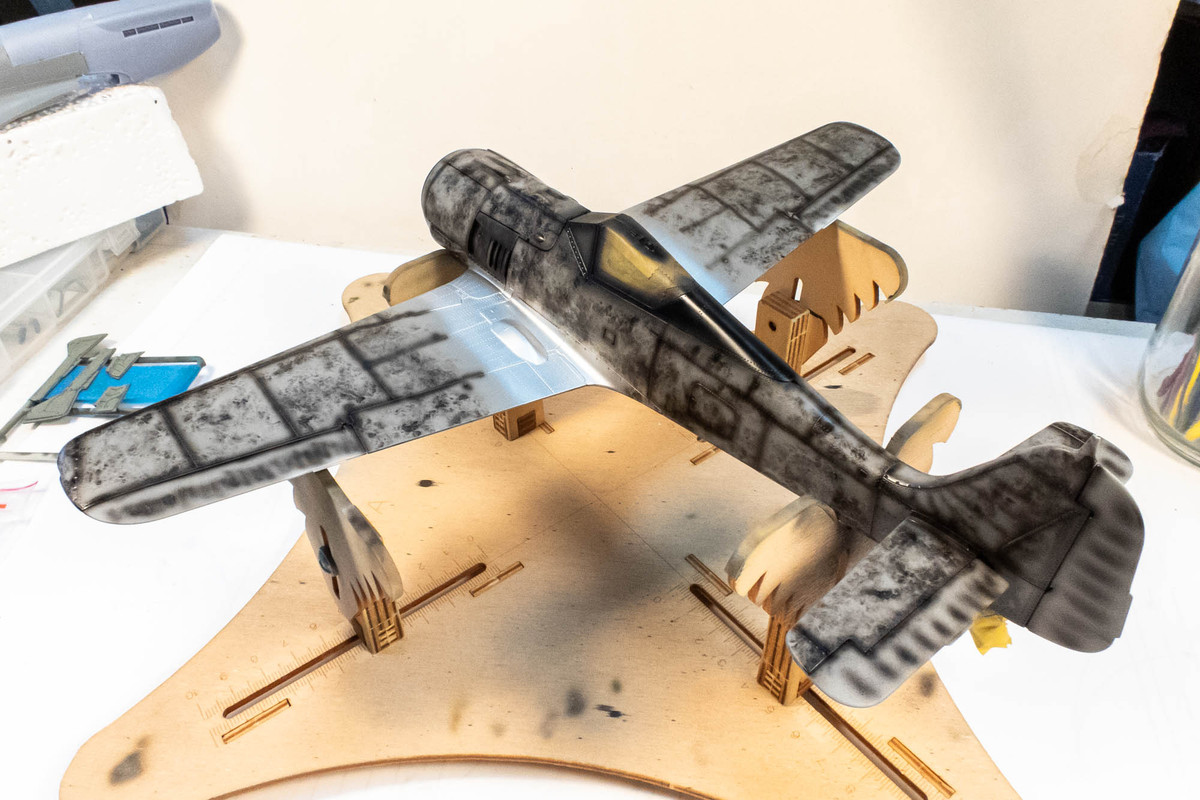
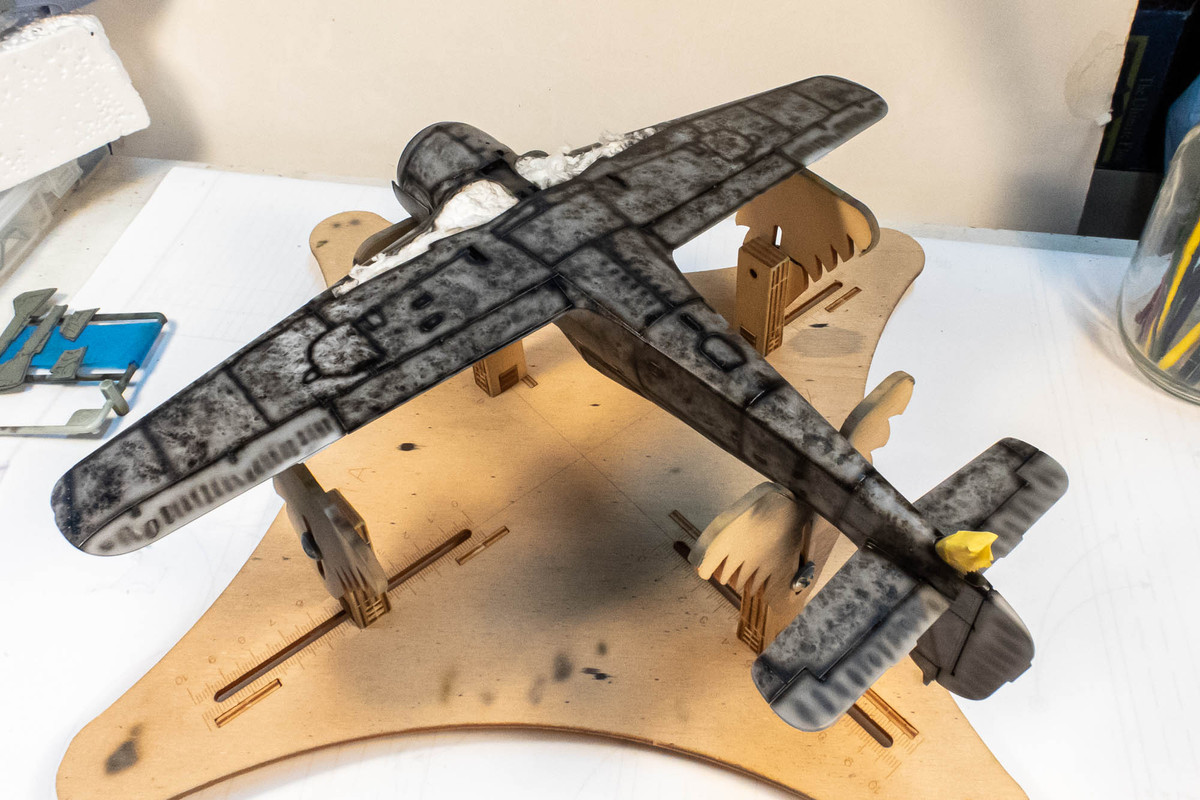
Next will be Light Blue RLM 76.
The landing gear component are just about finished. I added some springs to the retracting rod links. I'll do some post-shading to the exterior surfaces of the covers especially at the base of the inner doors since they are in the path of the engine exhausts.
I've also added some salt fading effects on the prop blades.
In preparation for the upcoming camo painting, I've filled the wheel wells with wet tissue paper.
I'm planning on doing some light painting chipping via hairspray at the wing roots so this area has been given a base coat of Tamiya Silver AS-12.
Next comes my customary pre-shading of the panel lines.
I like to give the camo finish some tonal variation and to do this, I employ an inverse of black basing which is essentially a random mottle pattern of black on grey plastic. I use a piece of plastic scrubbing pad that is thinned to allow paint to be sprayed through it.
Using this as a mask, I apply the mottle pattern over the entire model, except the chipping area, which I want to restrict to as few layers of paint as possible to better enable the hairspray chipping.
Next will be Light Blue RLM 76.
John aka JKim
-----------<><

-----------<><
-
BlackSheep214

- Elite Member
- Posts: 10424
- Joined: Sun Apr 06, 2014 8:47 pm
Re: Border 1/35 Focke Wulf Fw190A-5 Nowotny Double Chevron
Thin scrubbing pad for mottling... genius idea!! 
“Who controls the skies, controls the fate of this Earth”
Author unknown- 352nd Fighter Group, Blue-Nosed Bastards of Bodney
“Send one plane it’s a sortie; send two planes it’s a flight; send four planes it’s a test of airpower. - Richard Kohn
Author unknown- 352nd Fighter Group, Blue-Nosed Bastards of Bodney
“Send one plane it’s a sortie; send two planes it’s a flight; send four planes it’s a test of airpower. - Richard Kohn
-
Stikpusher

- Moderator
- Posts: 18880
- Joined: Sat Apr 05, 2014 8:37 pm
- Location: Ceti Alpha 5
Re: Border 1/35 Focke Wulf Fw190A-5 Nowotny Double Chevron
Man you work quick John! Not even taking into consideration the quality of your work and the amount of detailing that you add… 
"Surely I have made my meaning plain? I intend to avenge myself upon you, Admiral. I have deprived your ship of power, and when I swing 'round, I intend to deprive you of your life."
FLSM
FLSM
Re: Border 1/35 Focke Wulf Fw190A-5 Nowotny Double Chevron
Thanks guys! Lots of time on the modeling bench this weekend because I'm homebound watching over my elderly mom. Can't go anywhere so I might as well make models!
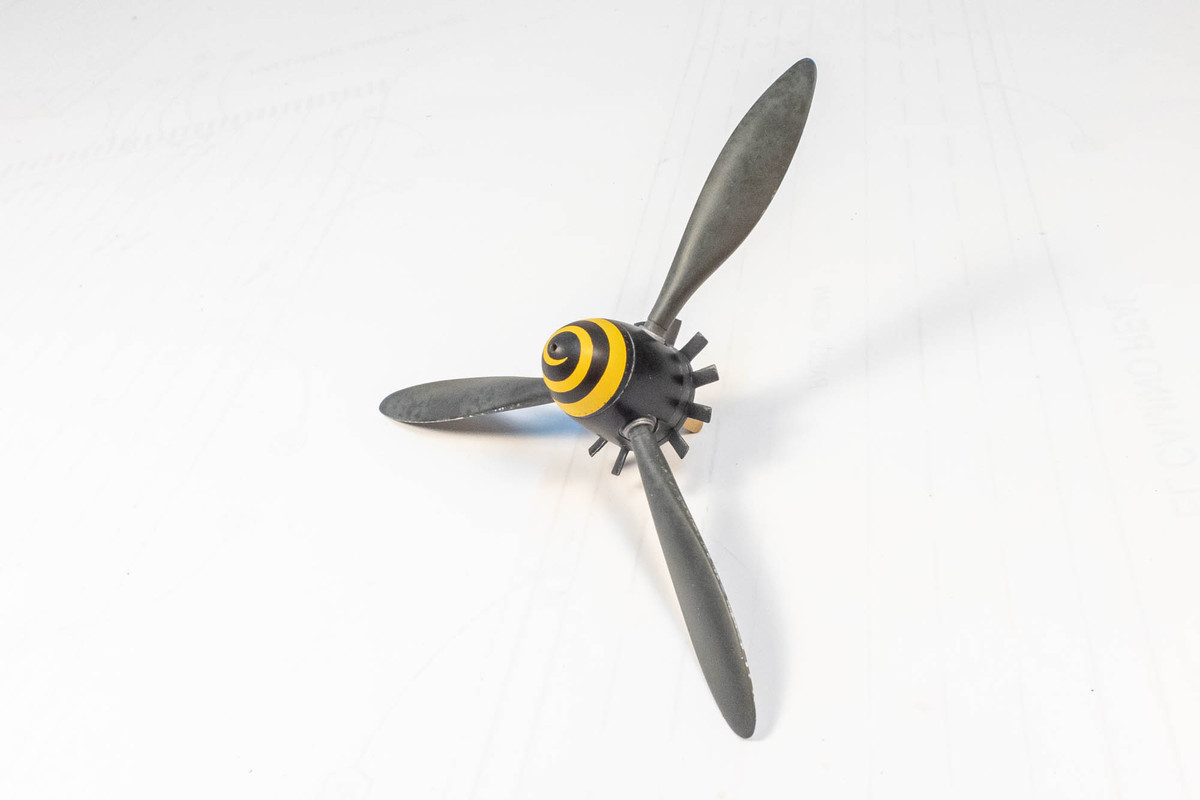
Before starting the camo painting on Nowotny's A-5, I wanted to show the completed prop. I re-did the spiral as I thought the original was too thick at the tip. Adjustment to the spiral mask was very easy in CAD.
Ok... time to start laying down some paint. First is the RLM 76 Light Blue (Mr Hobby Aqueous). The paint was thinned to about 1.5:1 (thinner to paint using Mr Leveling Thinner) ratio. You want the paint thin enough to slowly modulate the pre-shading effect to where you want it. I favor a very subtle effect. It's important to remember that with the multiple weathering effects to come, you don't have to rely on any one technique to accomplish everything. It's additive and it won't look complete until the end.
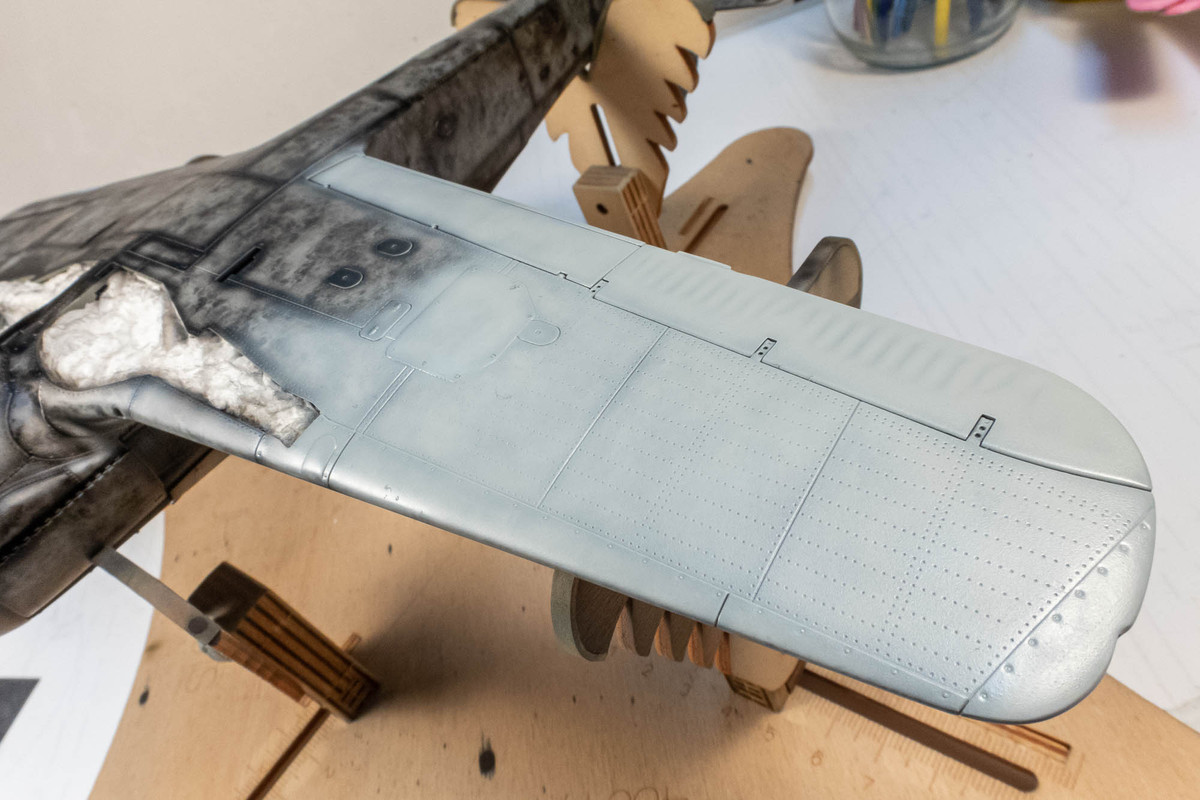
The light blue is built up, section by section until the panel and mottle pre-shade is just barely noticeable. Keep in mind that with these thin paint mixes, the wet paint will be slowly seeping into the pre-shade layer so always trace back to previously painted areas to check because it may look a little different than when you left it. And always vary your visual perspective as you are painting because light direction can alter perception.
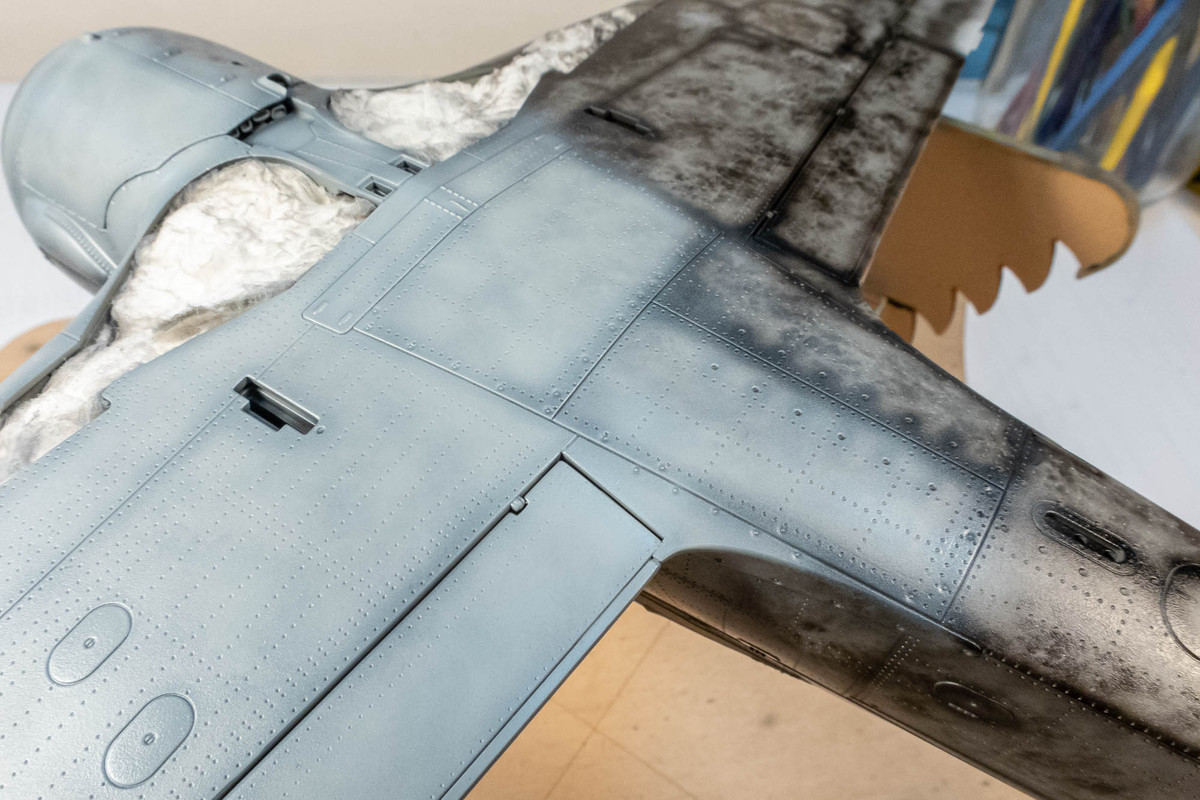
Slowly we get to a place we feel good about.
The light blue layer is complete for now.
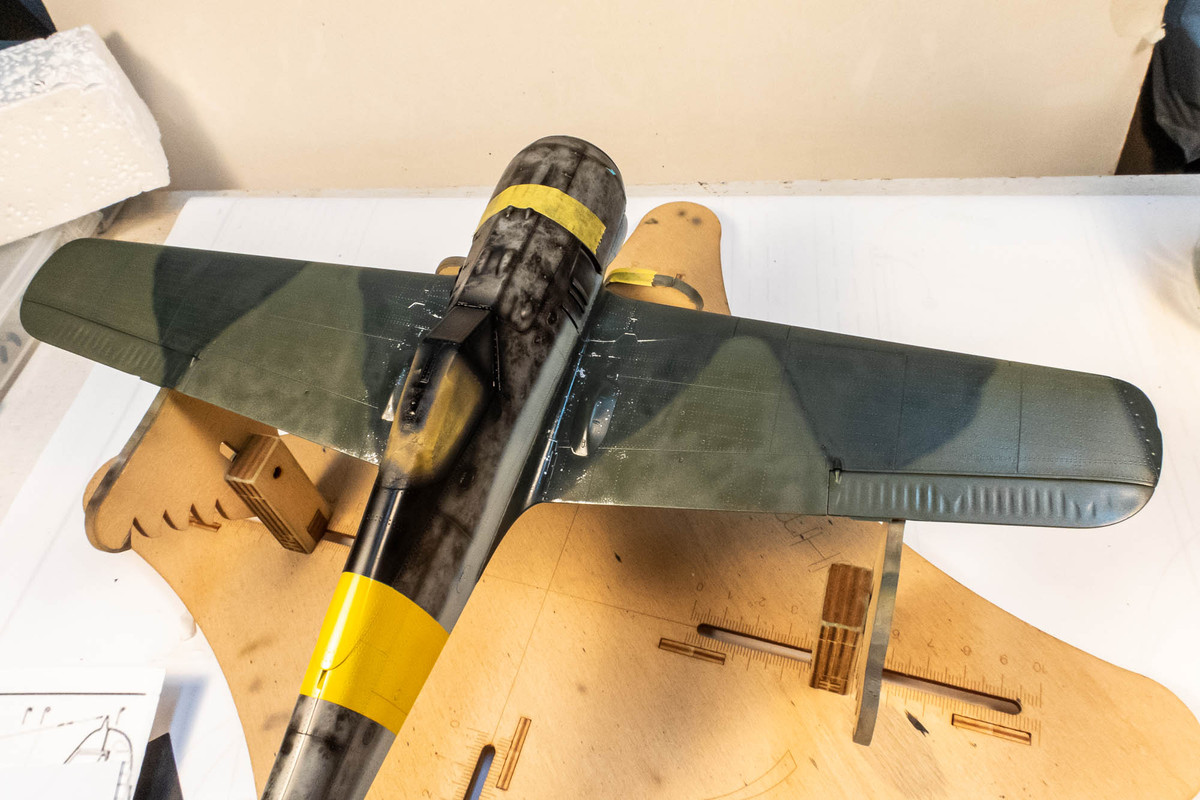
The hairspray section at the wing roots is done first since time elapsed seems to have an effect on how the chipping goes. The Dark Green RLM 71 and Black Green RLM 70 (Mr Hobby Aqueous) is applied but only over the wing root section where the hairspray was previously laid down.
Chipping was performed about an hour or two later. I use a stiff-bristled paint brush dipped in water and rub over the area until paint chips start to appear. I was hoping for a lighter effect with smaller chips but this is ok... I can work with it.
Once the chipping is finished, I complete the painting of the RLM 71 Dark Green on the upper wings and stabilizers.
The RLM 70 Black Green is sprayed next. I get a fine enough spray from my Iwata HP-C Plus (0.3mm needle size) to do this freehand.
I need to pre-plan the fuselage colors a bit. The demarcation has a distinct curvature at the fuselage band that I want to mimic so I'll have to map out those limits beforehand.
Before starting the camo painting on Nowotny's A-5, I wanted to show the completed prop. I re-did the spiral as I thought the original was too thick at the tip. Adjustment to the spiral mask was very easy in CAD.
Ok... time to start laying down some paint. First is the RLM 76 Light Blue (Mr Hobby Aqueous). The paint was thinned to about 1.5:1 (thinner to paint using Mr Leveling Thinner) ratio. You want the paint thin enough to slowly modulate the pre-shading effect to where you want it. I favor a very subtle effect. It's important to remember that with the multiple weathering effects to come, you don't have to rely on any one technique to accomplish everything. It's additive and it won't look complete until the end.
The light blue is built up, section by section until the panel and mottle pre-shade is just barely noticeable. Keep in mind that with these thin paint mixes, the wet paint will be slowly seeping into the pre-shade layer so always trace back to previously painted areas to check because it may look a little different than when you left it. And always vary your visual perspective as you are painting because light direction can alter perception.
Slowly we get to a place we feel good about.
The light blue layer is complete for now.
The hairspray section at the wing roots is done first since time elapsed seems to have an effect on how the chipping goes. The Dark Green RLM 71 and Black Green RLM 70 (Mr Hobby Aqueous) is applied but only over the wing root section where the hairspray was previously laid down.
Chipping was performed about an hour or two later. I use a stiff-bristled paint brush dipped in water and rub over the area until paint chips start to appear. I was hoping for a lighter effect with smaller chips but this is ok... I can work with it.
Once the chipping is finished, I complete the painting of the RLM 71 Dark Green on the upper wings and stabilizers.
The RLM 70 Black Green is sprayed next. I get a fine enough spray from my Iwata HP-C Plus (0.3mm needle size) to do this freehand.
I need to pre-plan the fuselage colors a bit. The demarcation has a distinct curvature at the fuselage band that I want to mimic so I'll have to map out those limits beforehand.
John aka JKim
-----------<><
-----------<><
-
BlackSheep214
- Elite Member
- Posts: 10424
- Joined: Sun Apr 06, 2014 8:47 pm
Re: Border 1/35 Focke Wulf Fw190A-5 Nowotny Double Chevron
Question... how thin the consistency of RLM76 at 1.5:1 ratio? It's not too opaque, is it?
“Who controls the skies, controls the fate of this Earth”
Author unknown- 352nd Fighter Group, Blue-Nosed Bastards of Bodney
“Send one plane it’s a sortie; send two planes it’s a flight; send four planes it’s a test of airpower. - Richard Kohn
Author unknown- 352nd Fighter Group, Blue-Nosed Bastards of Bodney
“Send one plane it’s a sortie; send two planes it’s a flight; send four planes it’s a test of airpower. - Richard Kohn
Re: Border 1/35 Focke Wulf Fw190A-5 Nowotny Double Chevron
Not very opaque at all. Relatively transparent. It takes multiple passes to slowly build up the opacity. I used to use thinner mixes... 2:1 but I was getting a little too much paint pooling so I've adjusted the mixture.BlackSheep214 wrote: ↑Sun Sep 17, 2023 8:06 am Question... how thin the consistency of RLM76 at 1.5:1 ratio? It's not too opaque, is it?
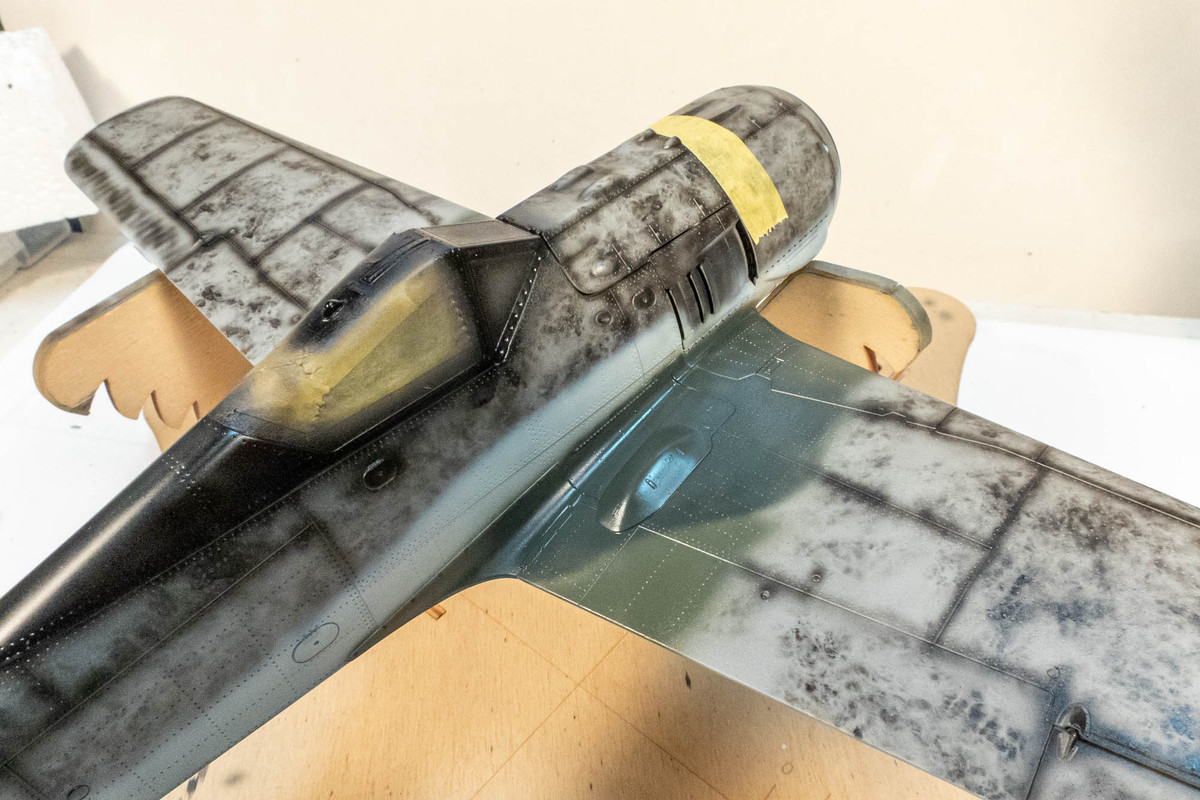
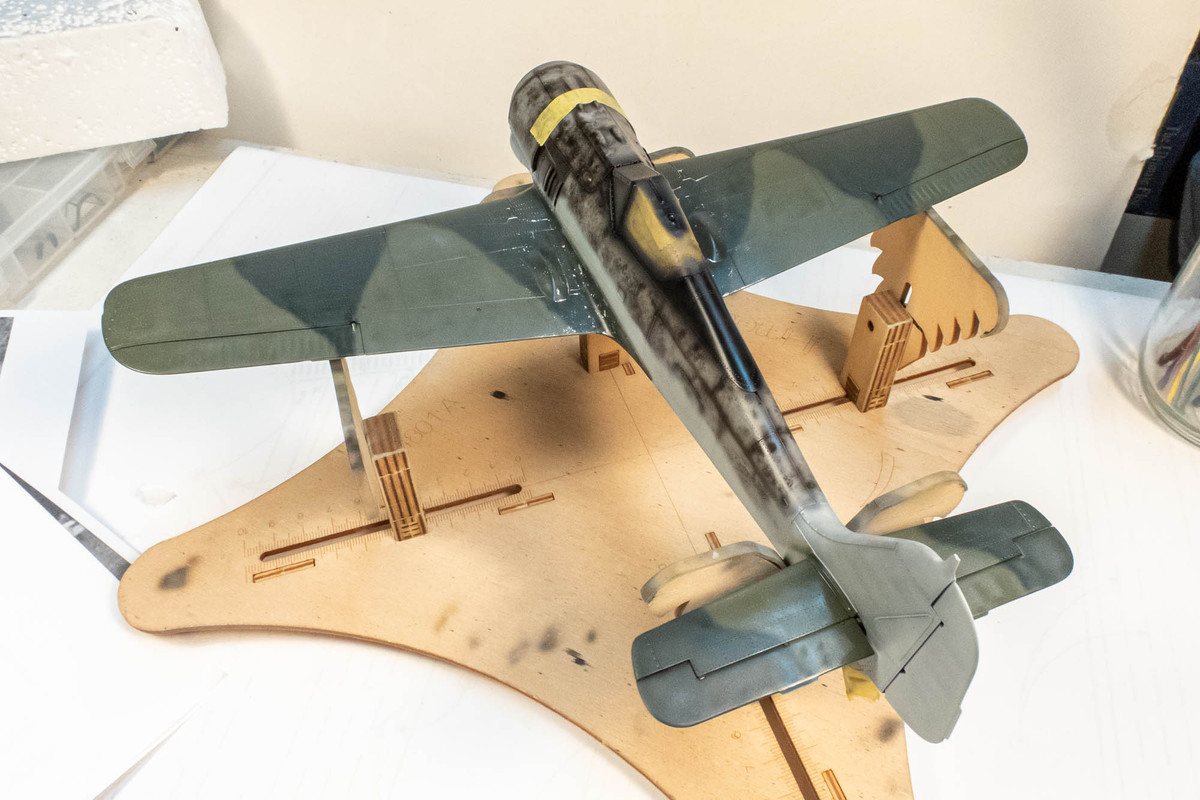
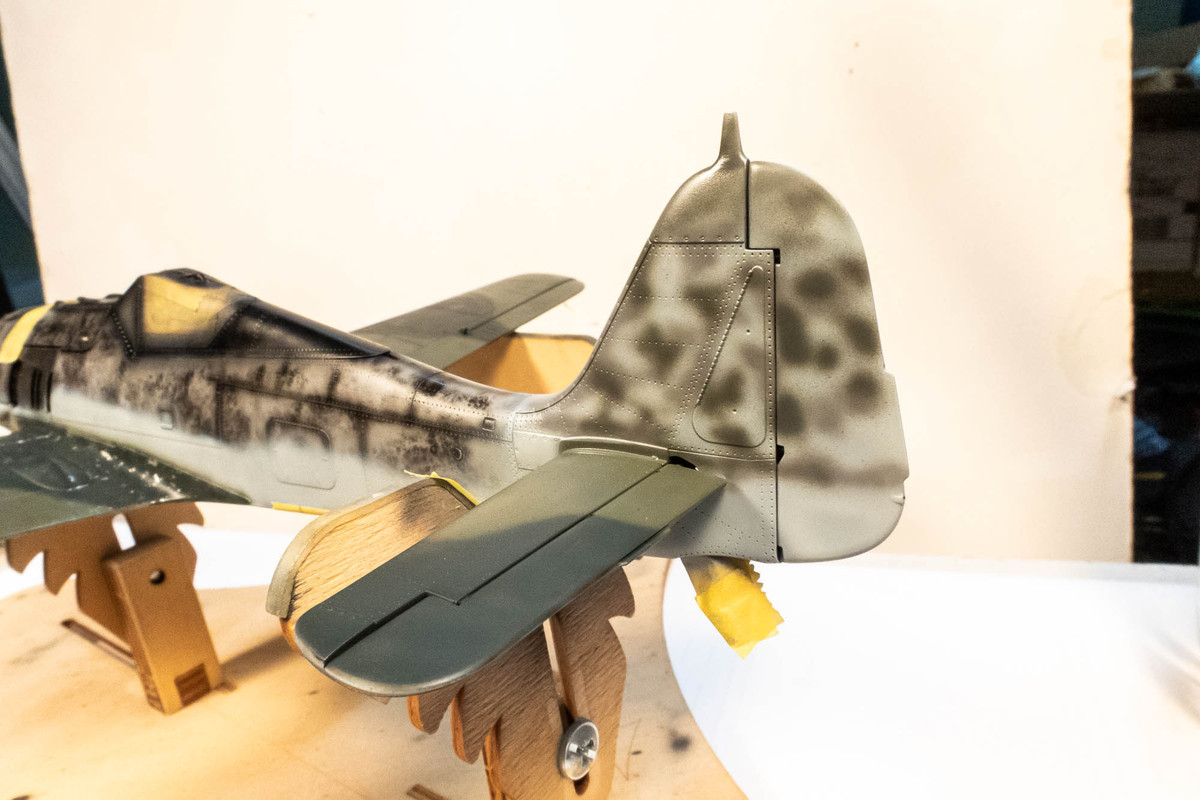
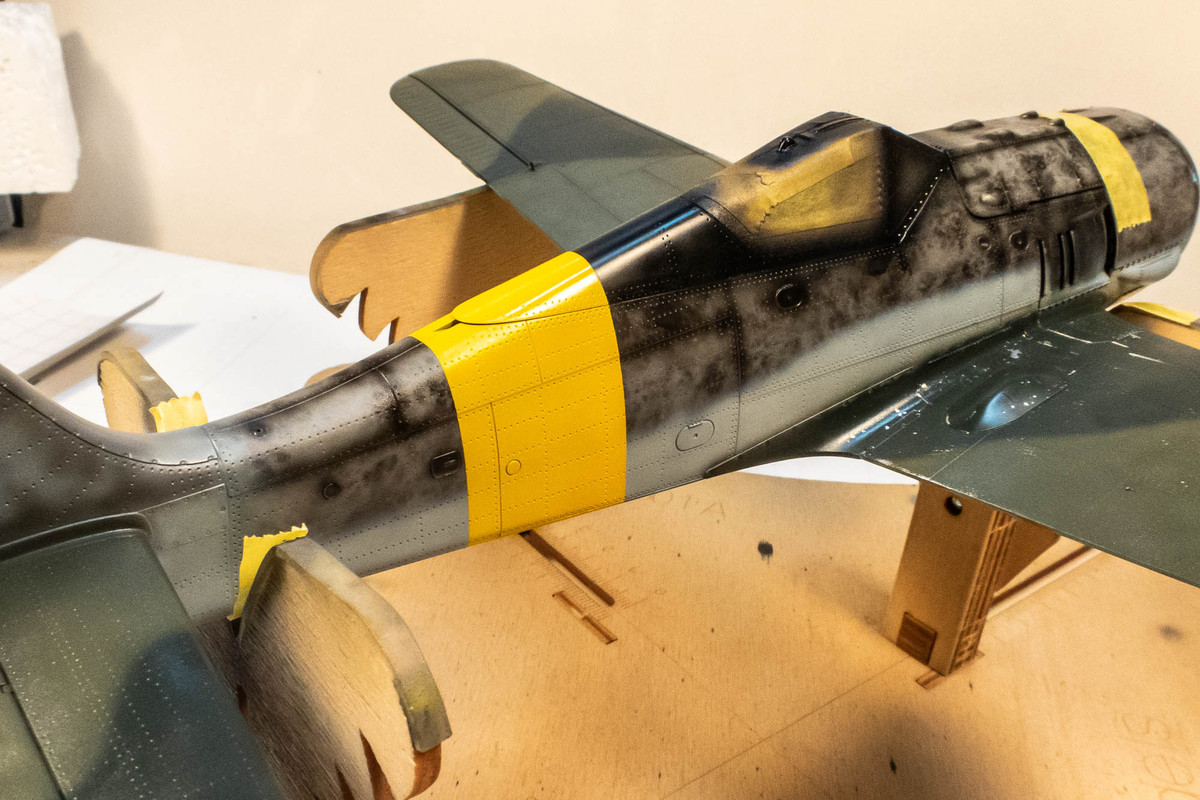
I believe Nowotny's Double Chevron was painted in the darker greens (I'm assuming RLM 70/71) in the field but the tail is noted as being in the grey scheme. First, I applied the lighter mottle (RLM 75 Violet Grey, trying to go by what I see in the photos of the aircraft.

The darker mottle (RLM 74 Dark Grey) is applied next. Both colors were Mr Hobby Aqueous.
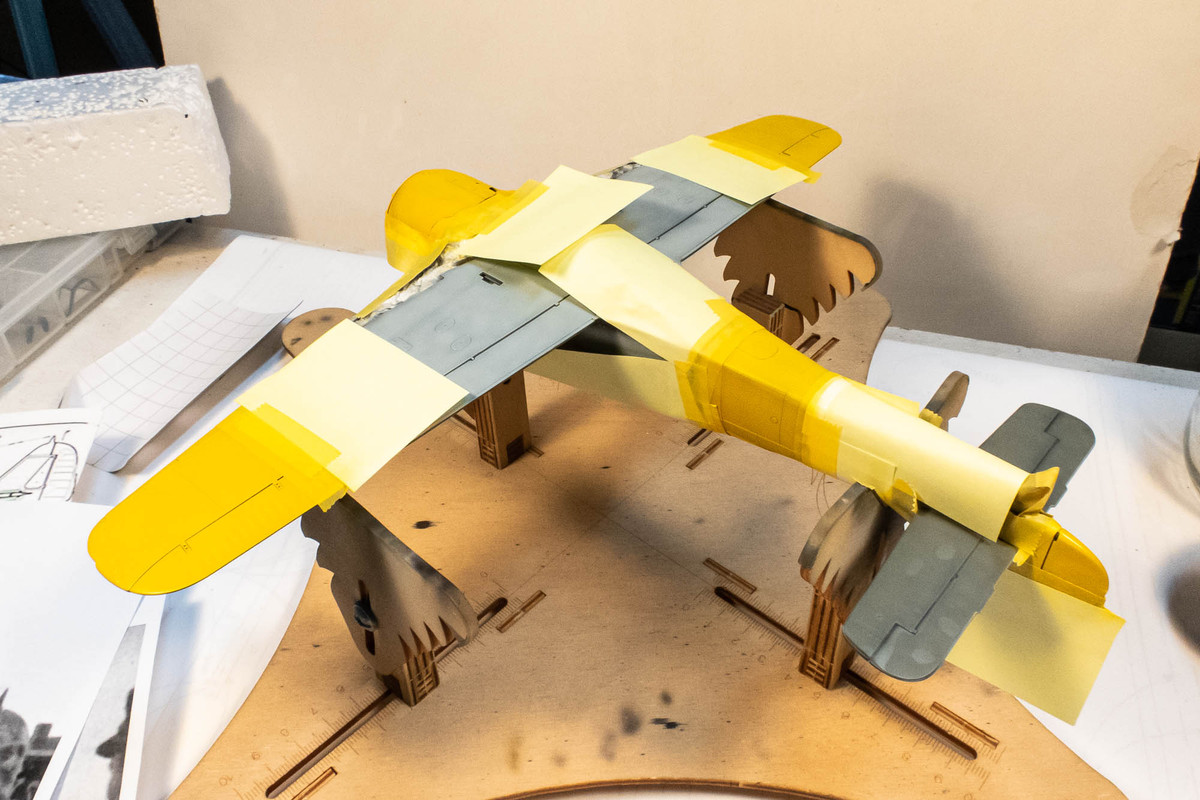
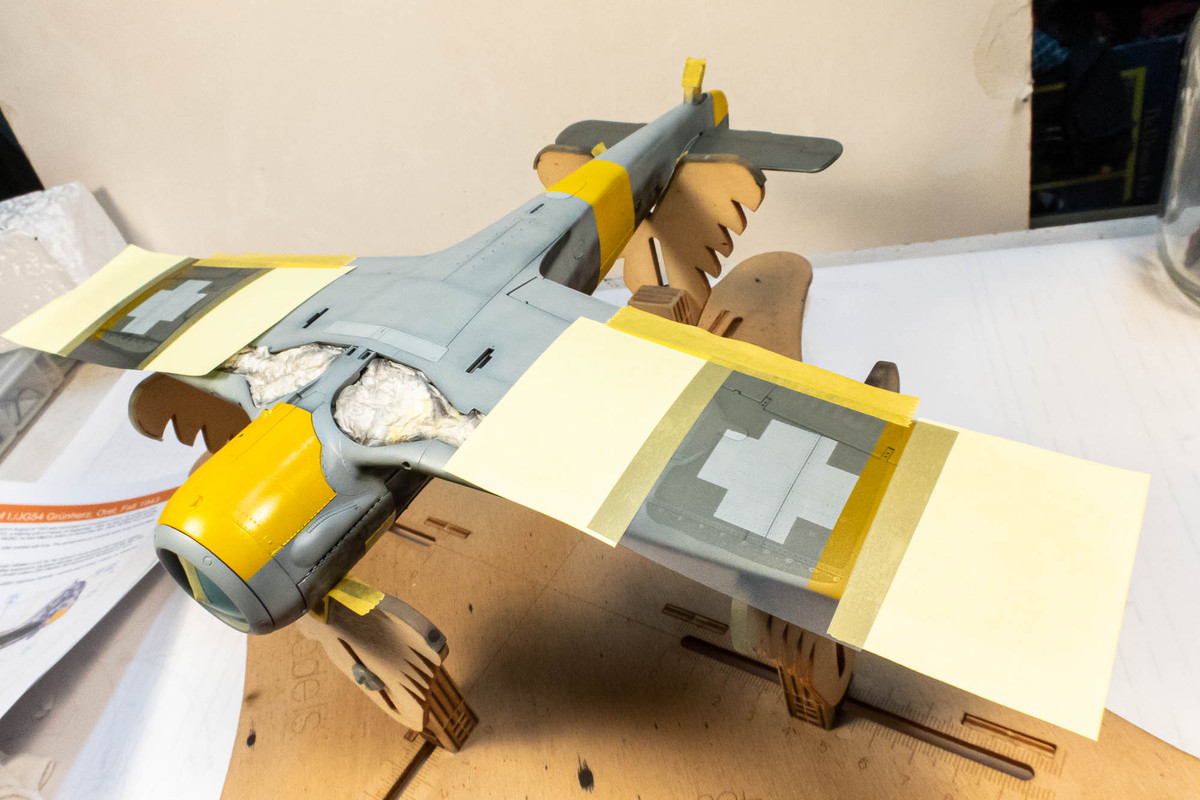
I decided to do the yellow panels next. I thought it would be easier to match the upper/lower color demarcation on the fuselage with the yellow band and fuselage cross in place rather than trying to guess where they would be.
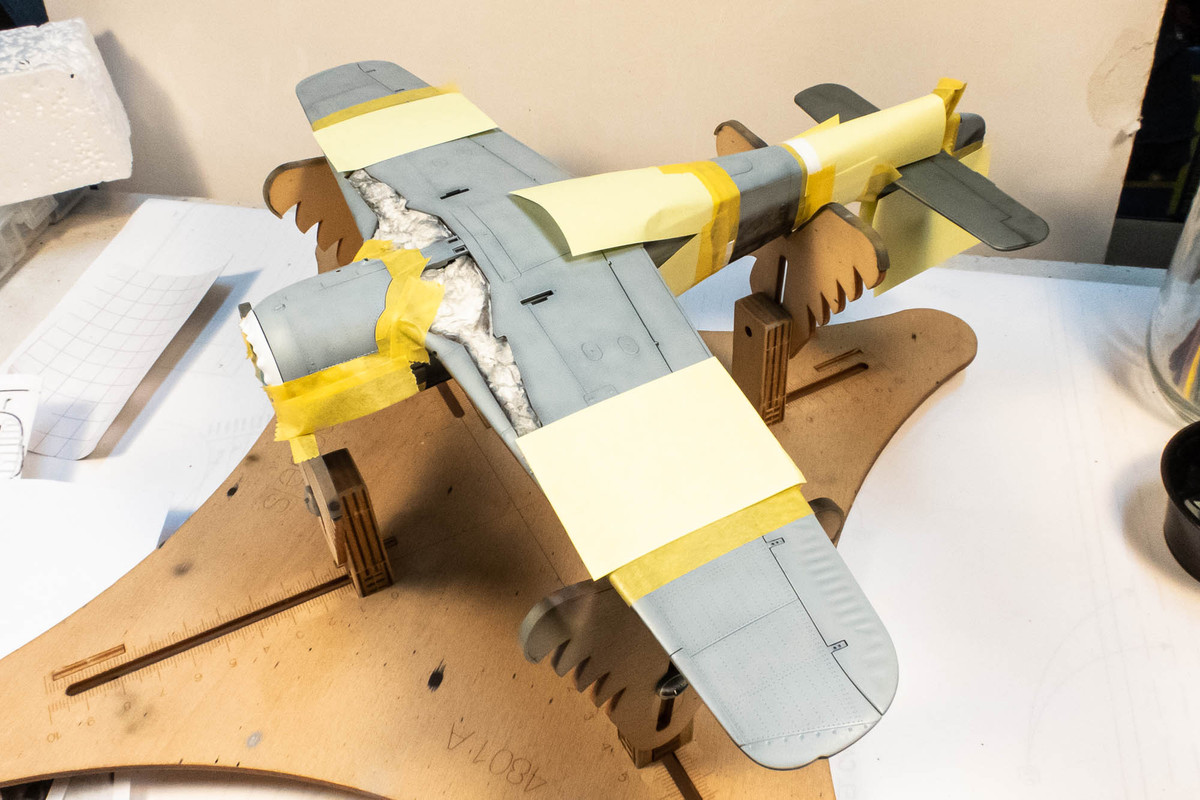
The yellow is a 4:1 mixture of Tamiya Yellow and Orange sprayed over a light coat of Tamiya White.
John aka JKim
-----------<><
-----------<><
Re: Border 1/35 Focke Wulf Fw190A-5 Nowotny Double Chevron
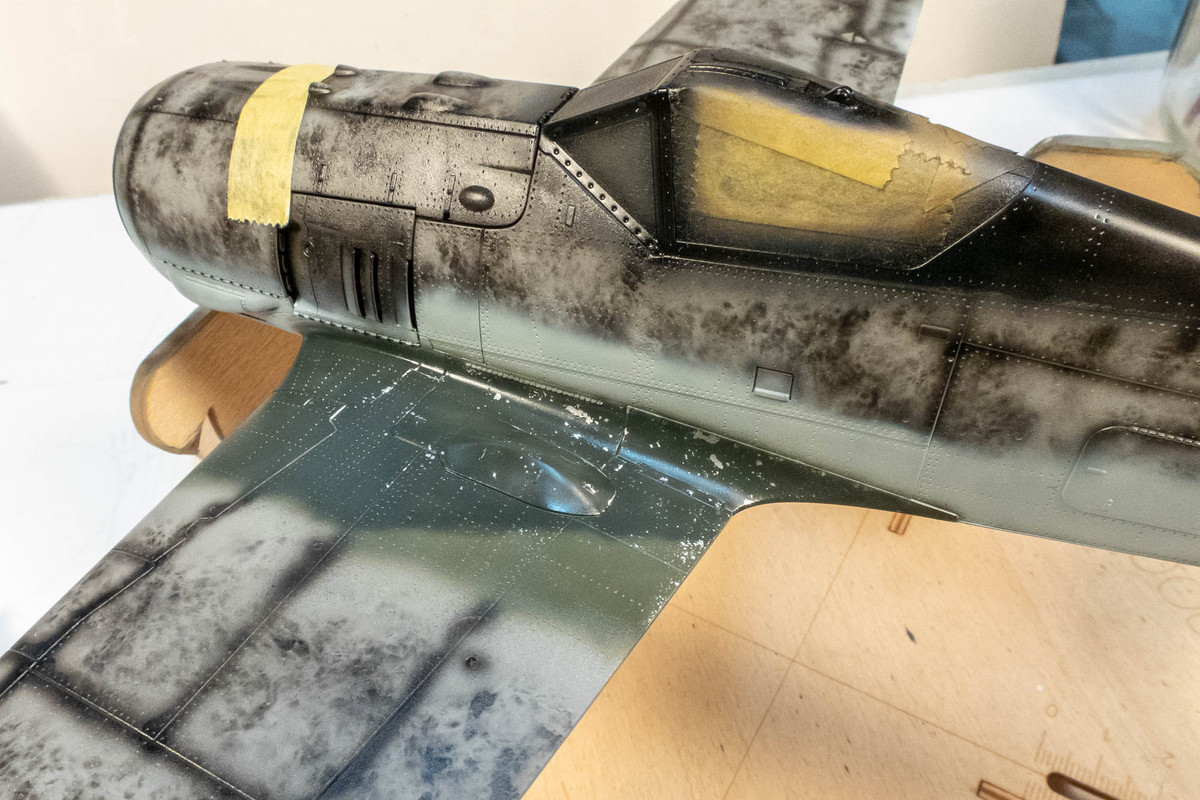
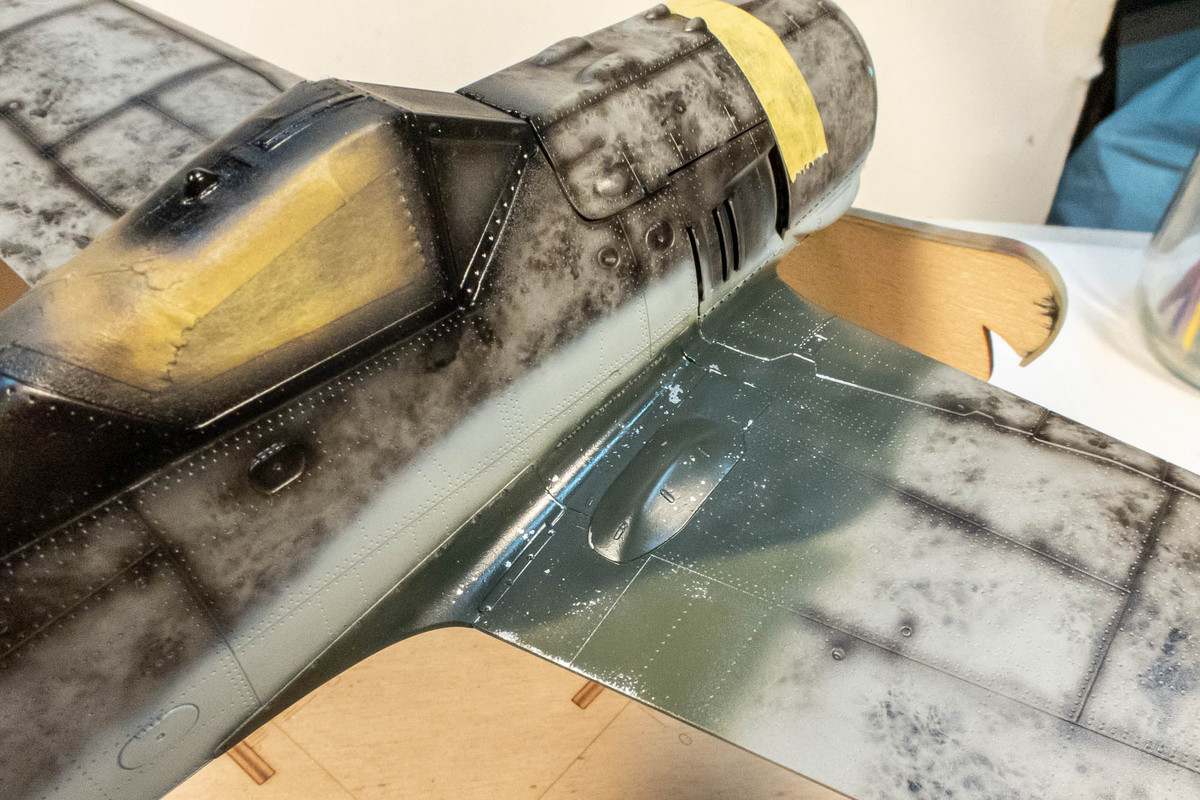
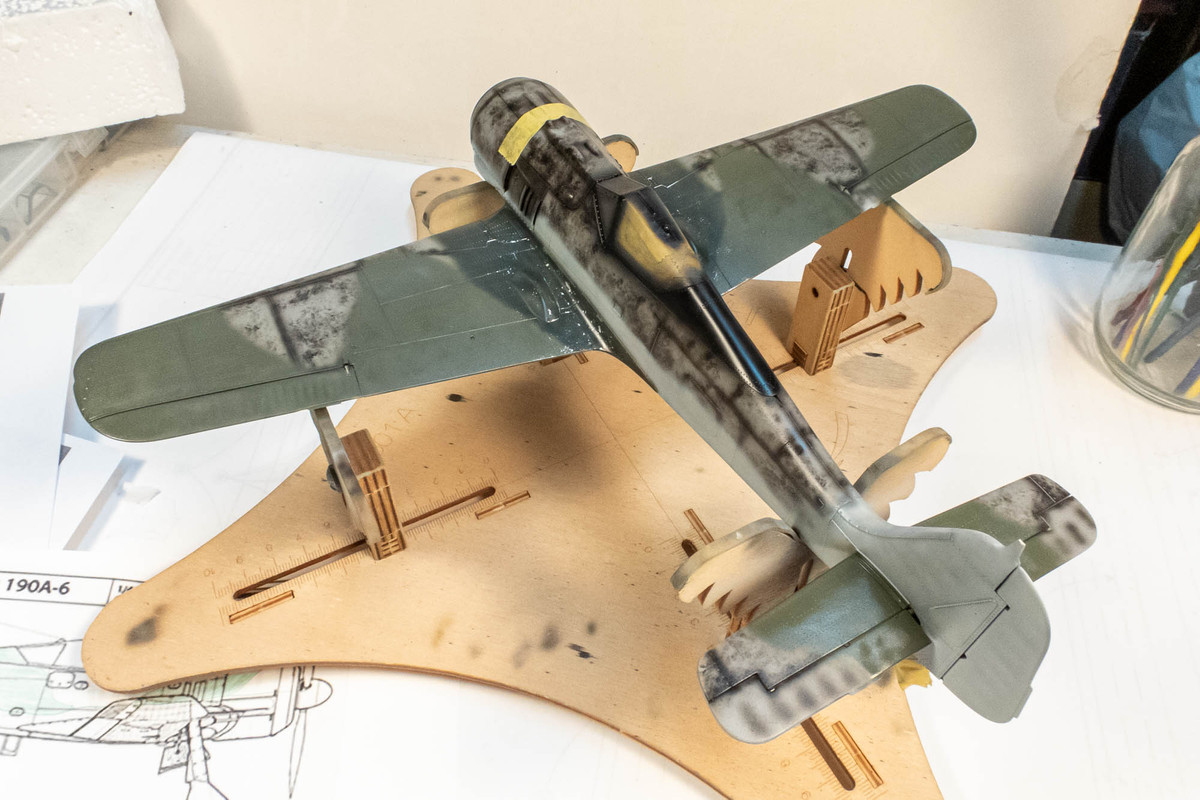
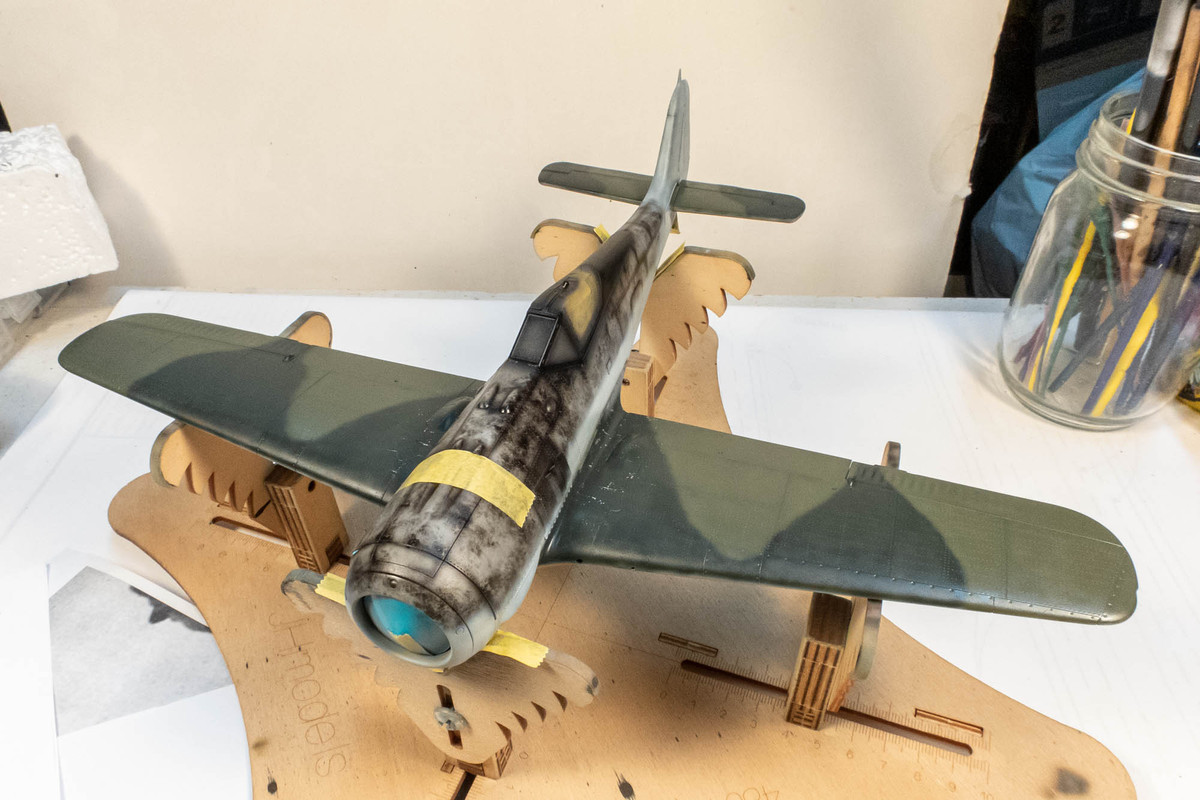
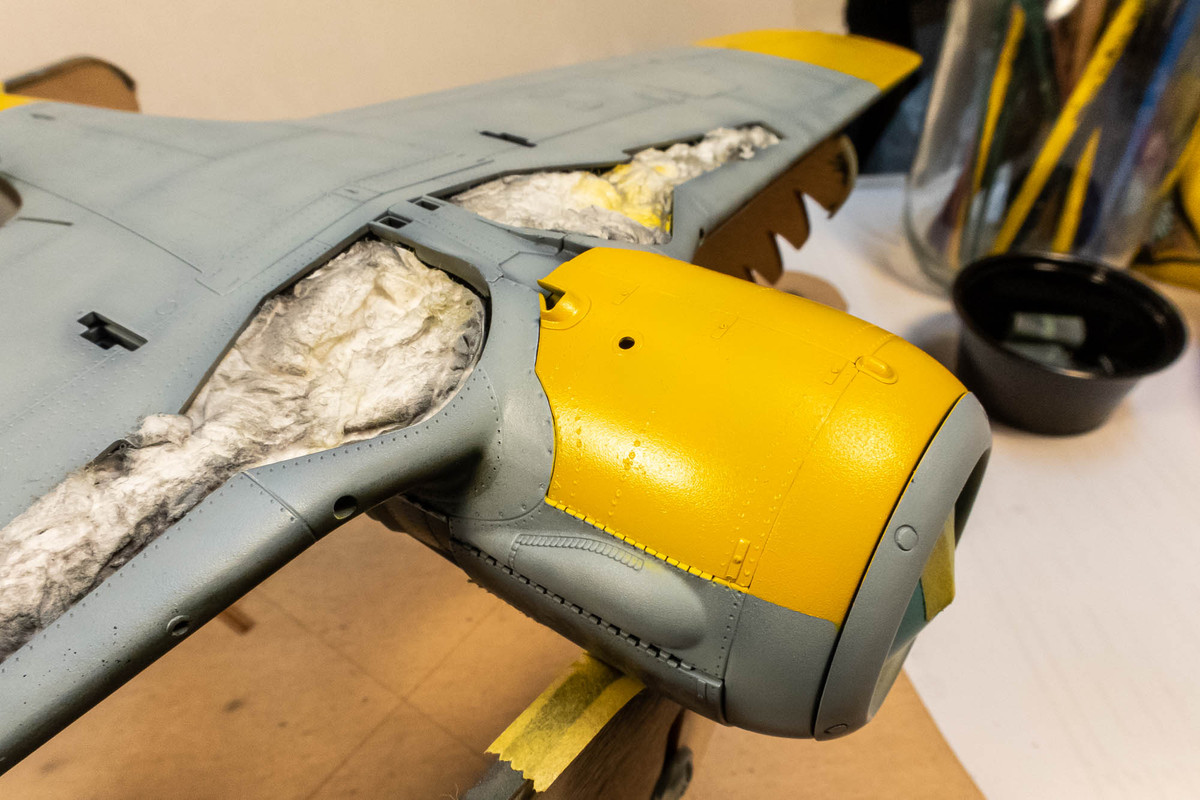
Here are the yellow panels after the masking has been removed. There is some pebbly texture on the nose cowling, which is from the plastic, not the paint. I am wondering if I should have sanded the entire surface of the model prior to painting. I think the matt coat will reduce that texture to the point of not being noticeable.
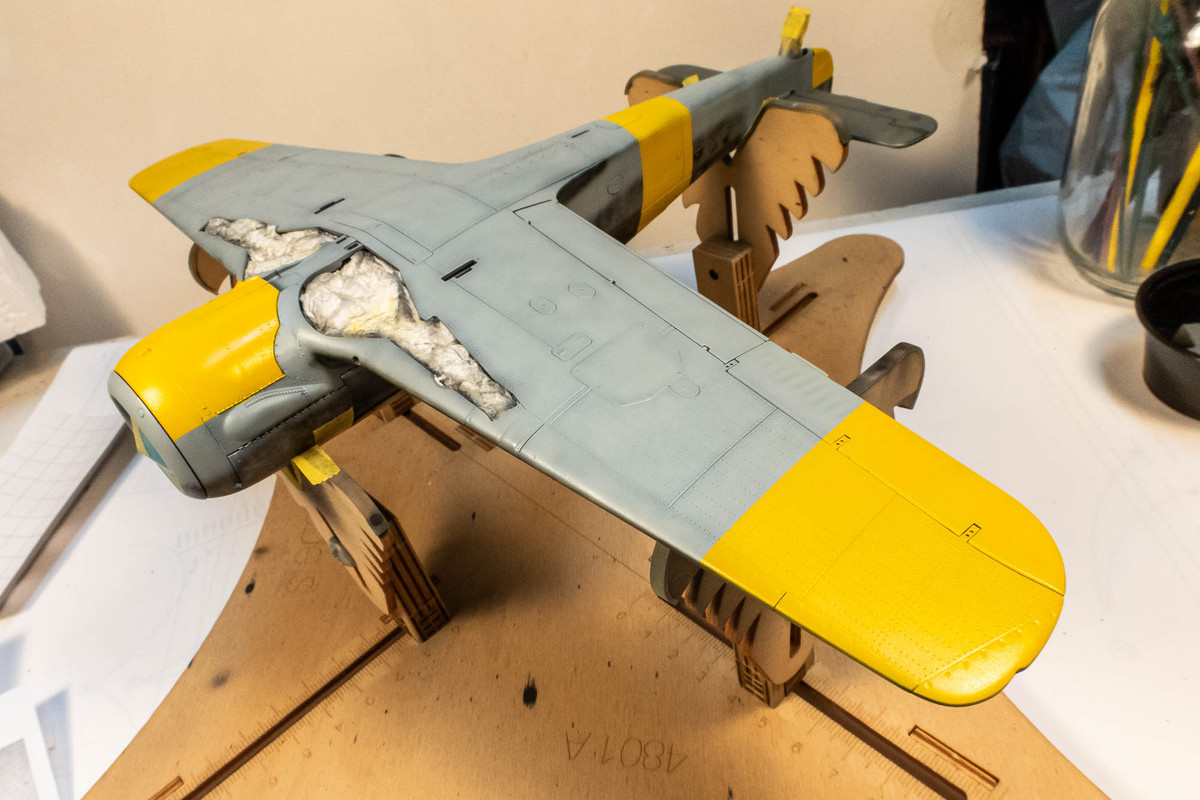

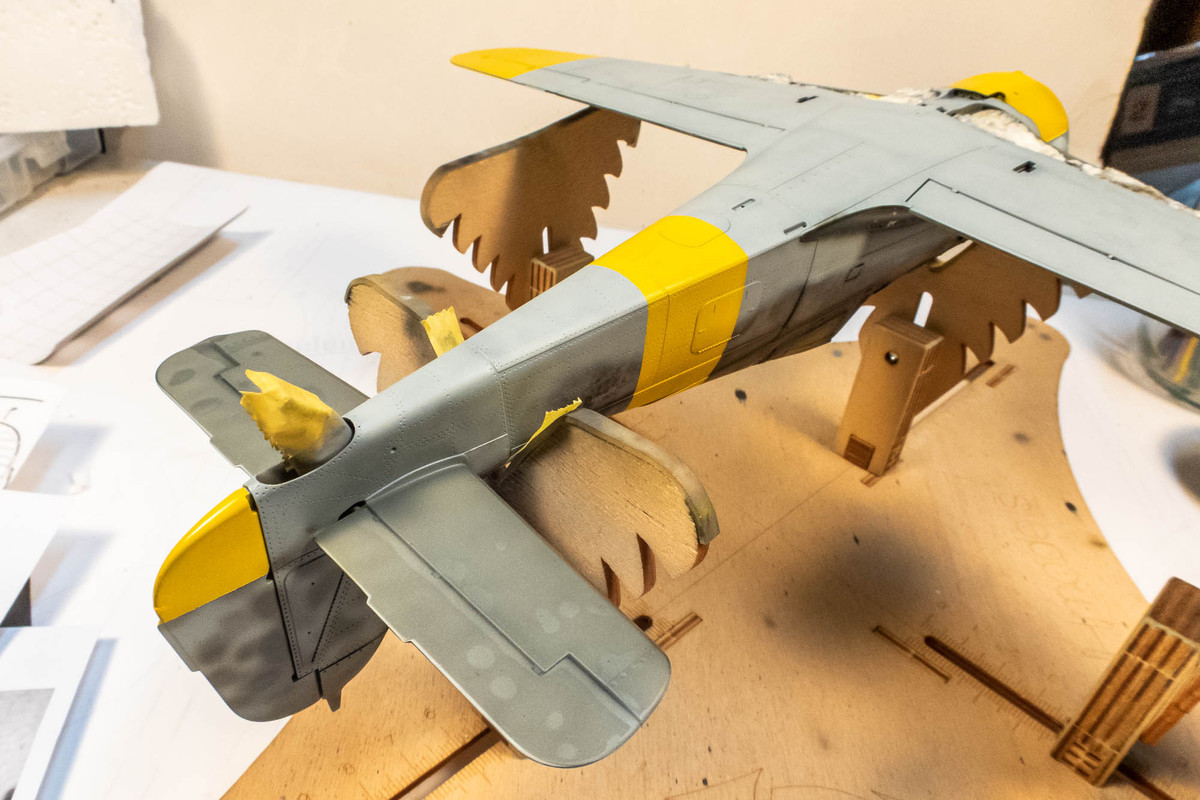
Looks strange to have the yellow band in place without the upper camo color completed.
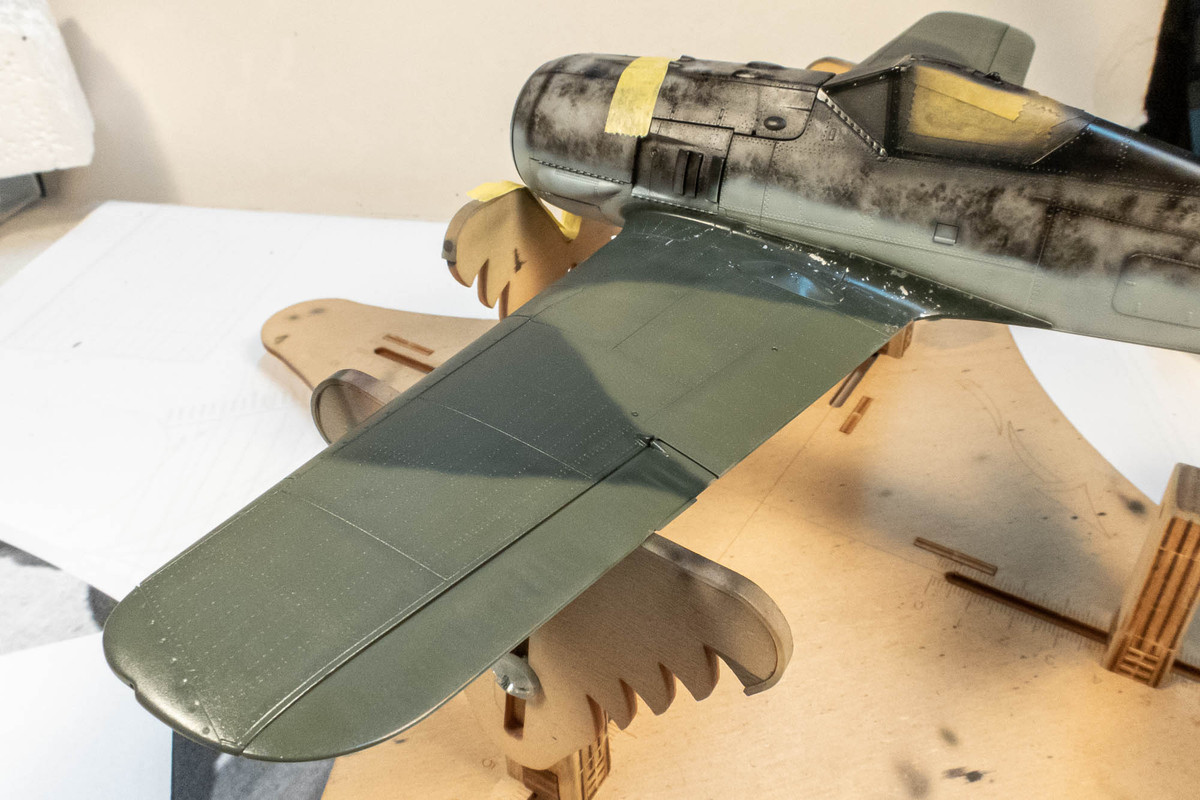
Using some custom cut masks, I highlighted some of the panels in a lighter shade of RLM 76 just for some color variation.
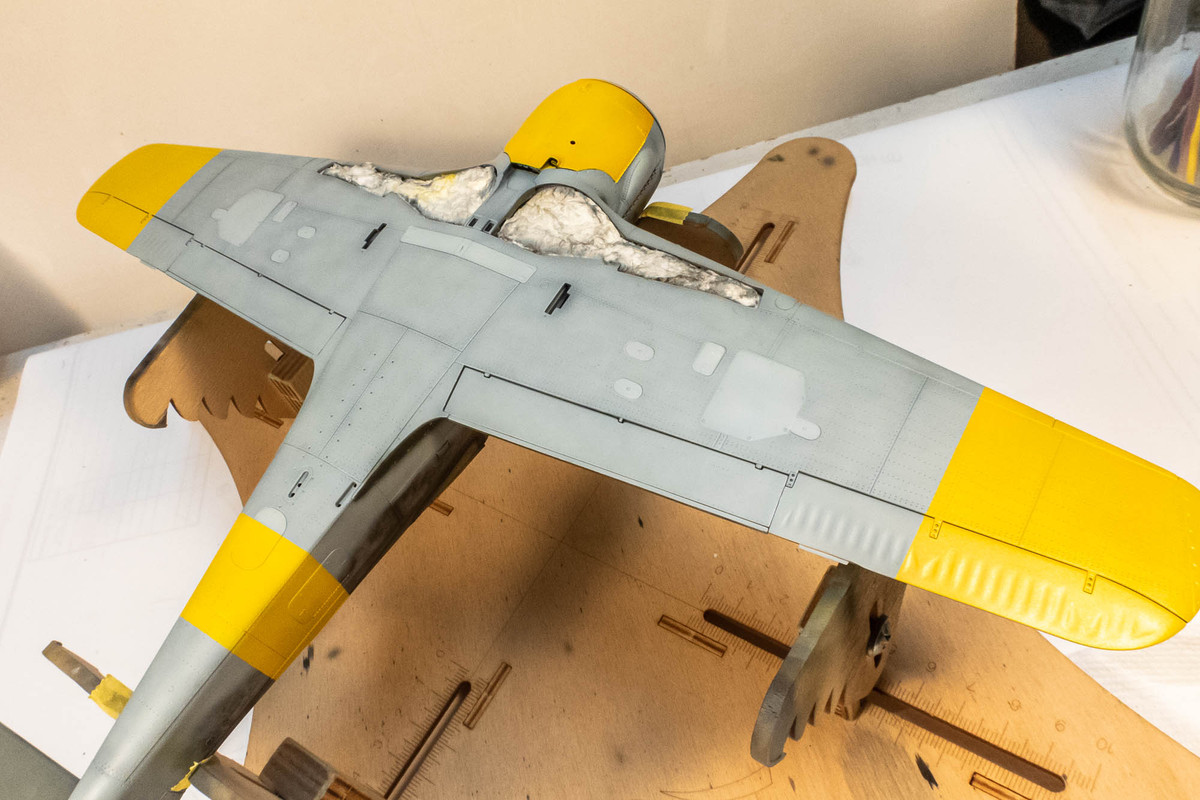
I also adjusted the upper camo demarcations slightly just to reduce the symmetry between the left and right wings.
Looks strange to have the yellow band in place without the upper camo color completed.
Using some custom cut masks, I highlighted some of the panels in a lighter shade of RLM 76 just for some color variation.
I also adjusted the upper camo demarcations slightly just to reduce the symmetry between the left and right wings.
John aka JKim
-----------<><
-----------<><
Re: Border 1/35 Focke Wulf Fw190A-5 Nowotny Double Chevron
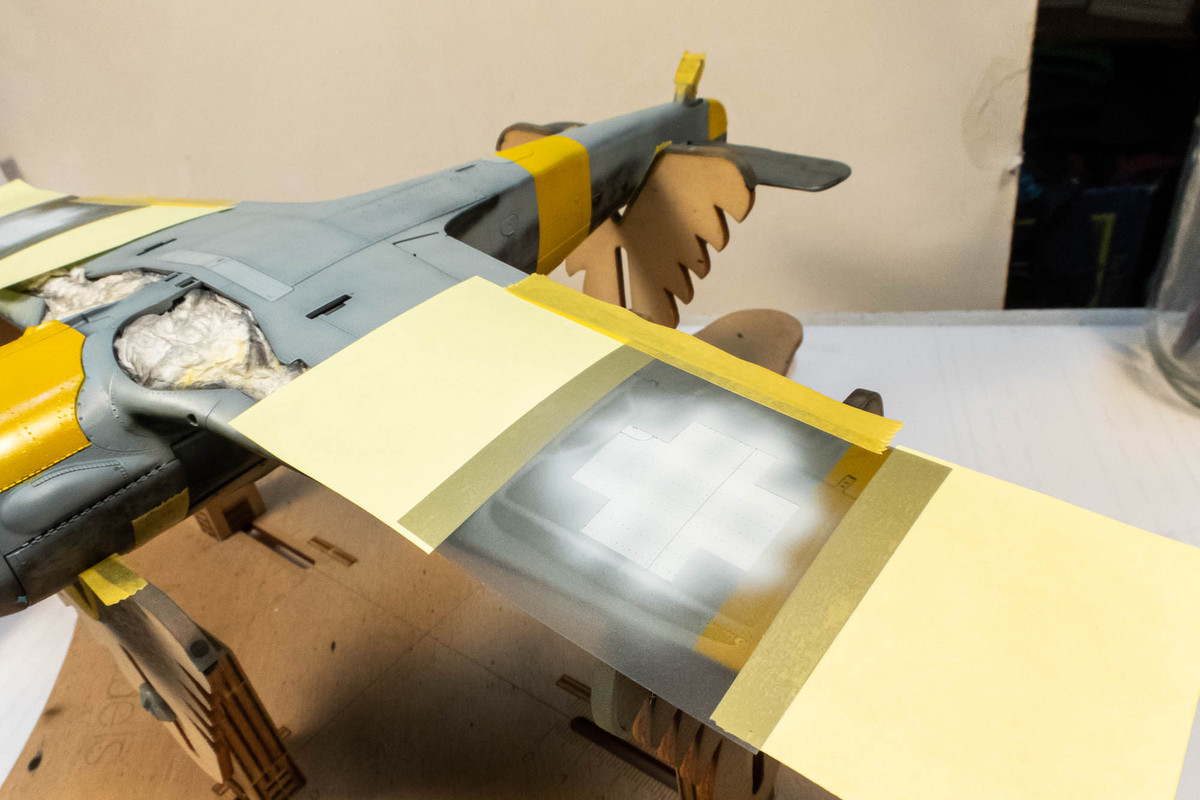
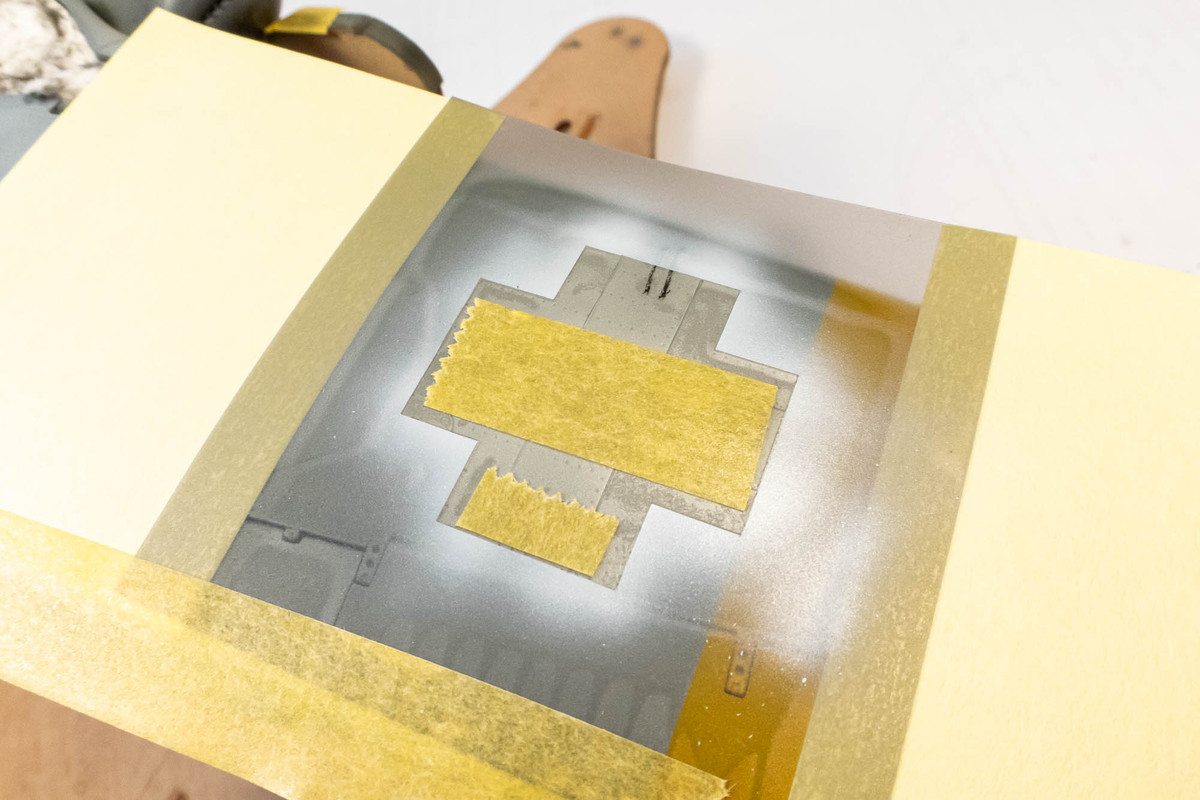
Painting continues with the markings. The underwing crosses are first. When using multi-color masks, my default painting order is outside to inside. This is helps prevent seepage of unwanted colors on the outside of the markings. There are exceptions of course but this is a good general rule to follow. One tip that greatly eases the placement of these masks is to pre-apply strips of paper (in this case, Post-Its) to the edges of the mask. This "frame" allows you to slide the mask into position much easier than just the mask itself. Try it!
Once the outline mask is put into position, all of the paint edges of the mask are burnished down with a wood toothpick and the white is sprayed. To get a smooth edge, the paint layers should be thin but "dry". Avoid pooling of paint, especially at the mask edges as this will cause the paint to crack upon mask removal.
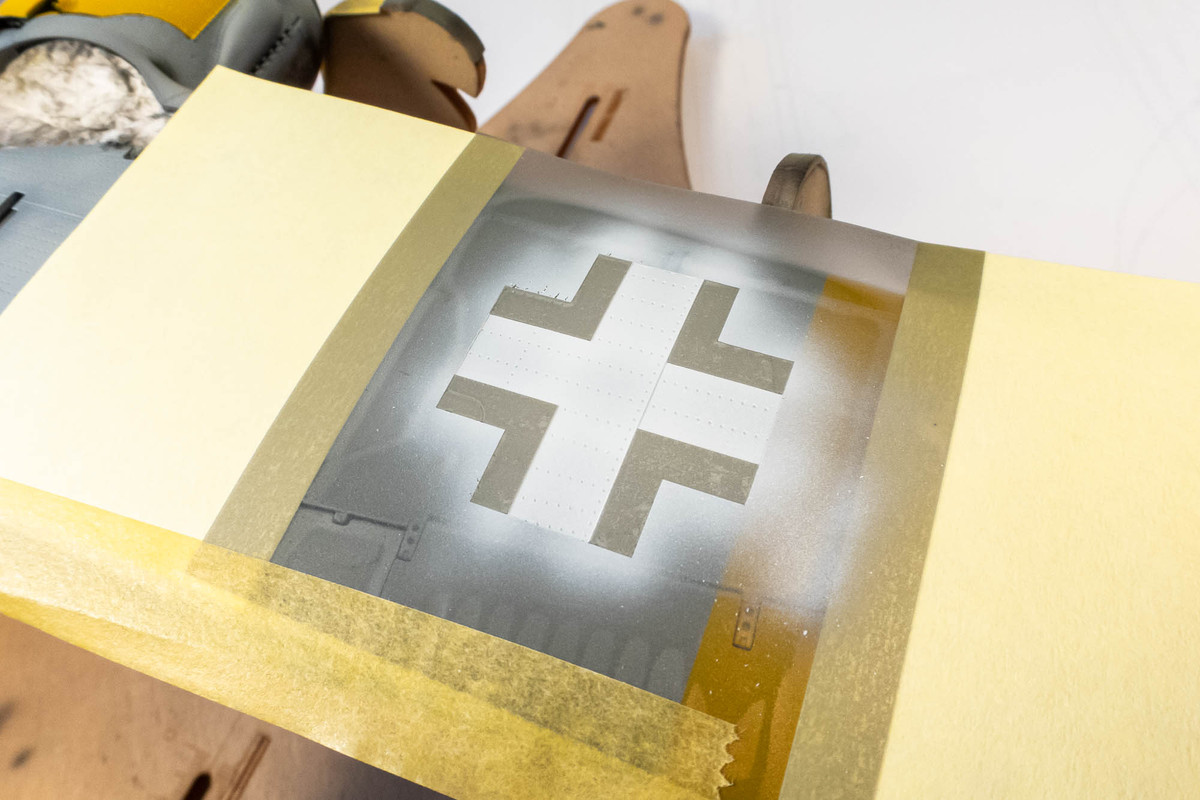
The remaining internal mask components are taped to help hold them together. The idea is to place these components, connected as one piece into the painted area. The mask was pre-marked with a Sharpie for orientation purposes. Although the shape is symmetric, there may be very slight variations in how the mask was cut so keeping the orientation will ensure a better interlocking fit of the mask components.
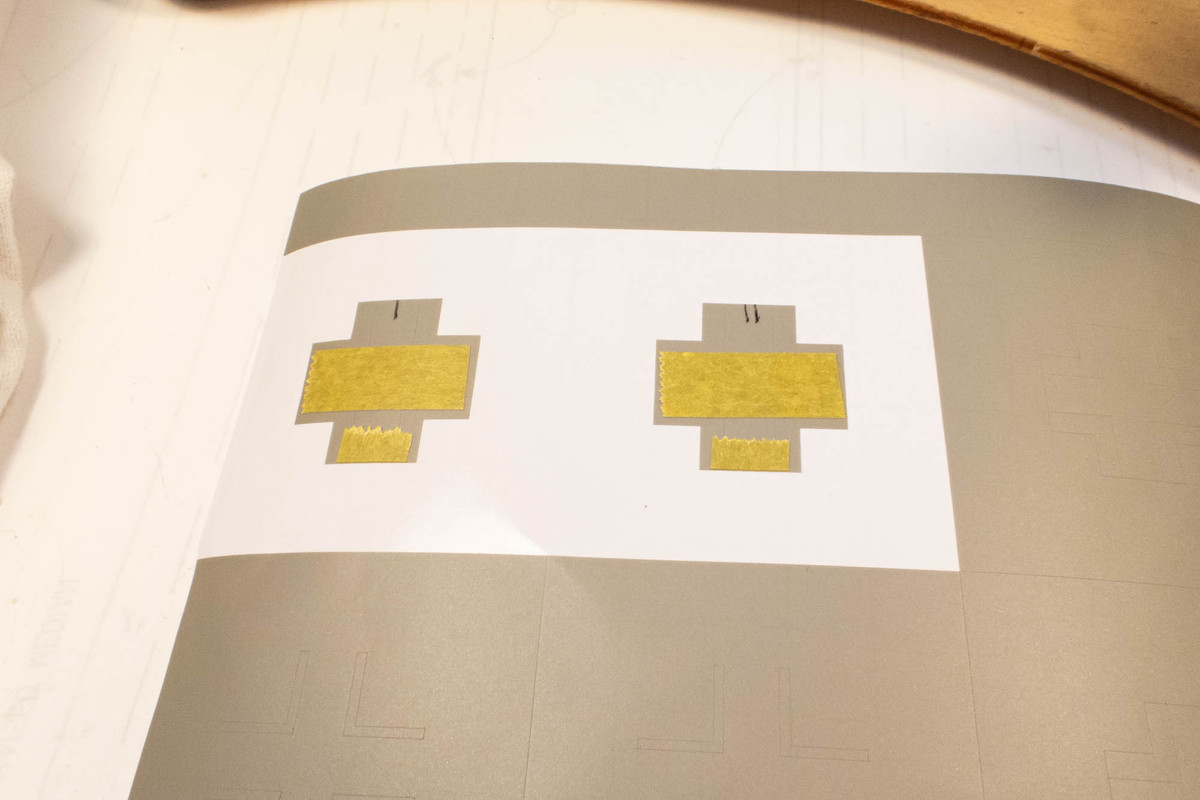
I use a sharp knife to help lift the pieces off the backing paper that want to separate.
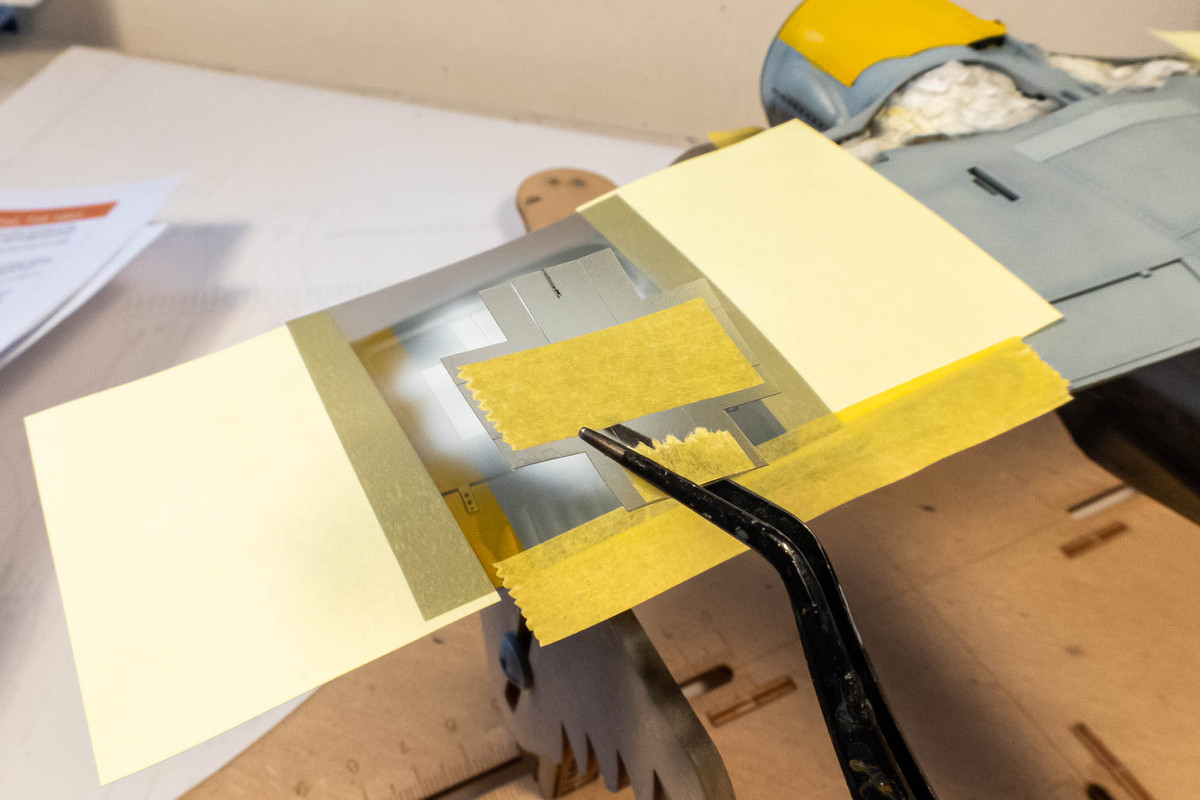
The internal mask components are then carefully placed back onto the mask outline. Make sure you give ample time for the paint to dry before putting a mask over it.
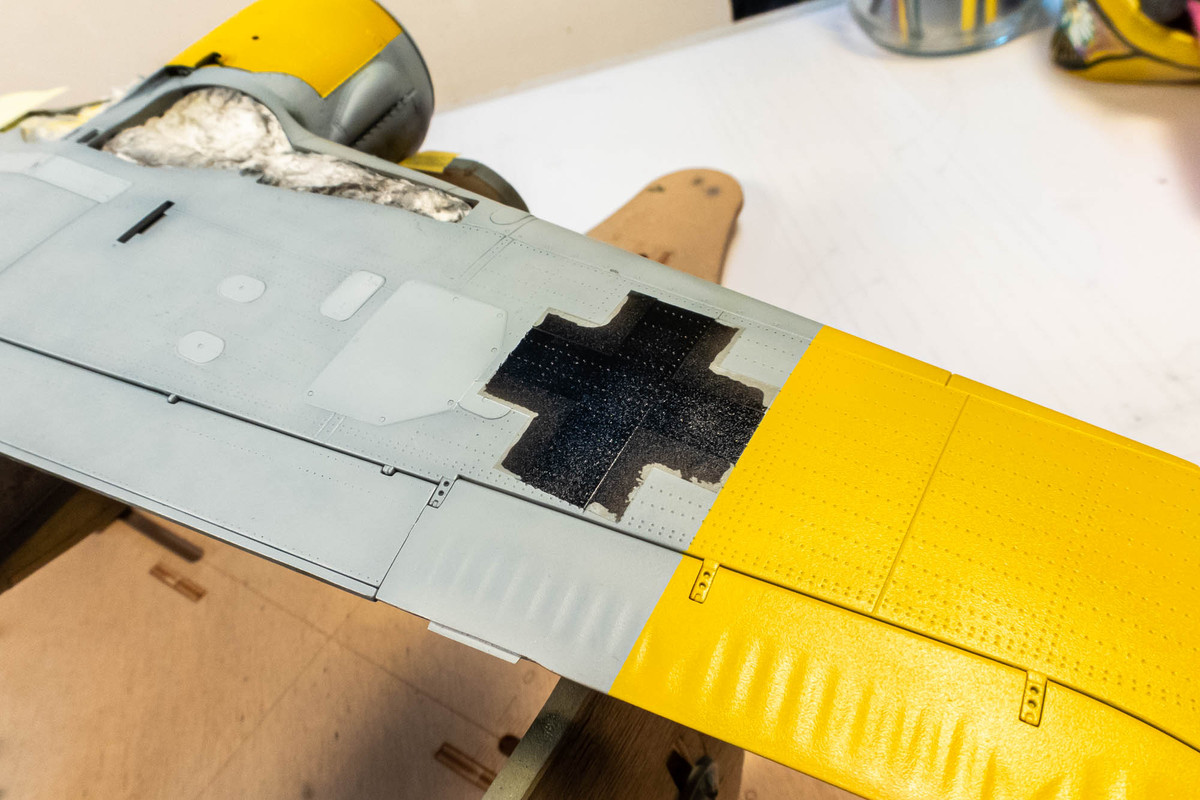
Once the internal components are in position, the tape is removed, along with the internal cross shape that will be painted black.
To ensure the black paint doesn't seep where it is not supposed to, I like to use liquid mask to seal those joints.
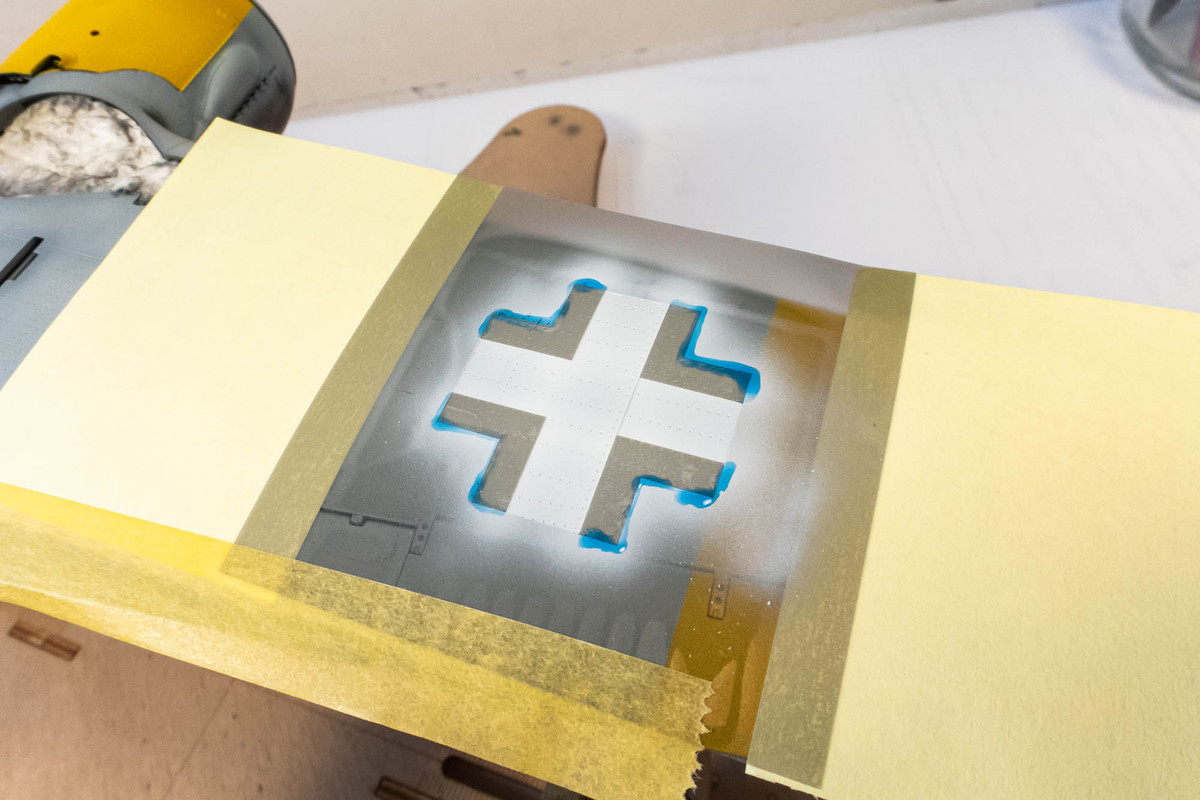
The black is sprayed next.
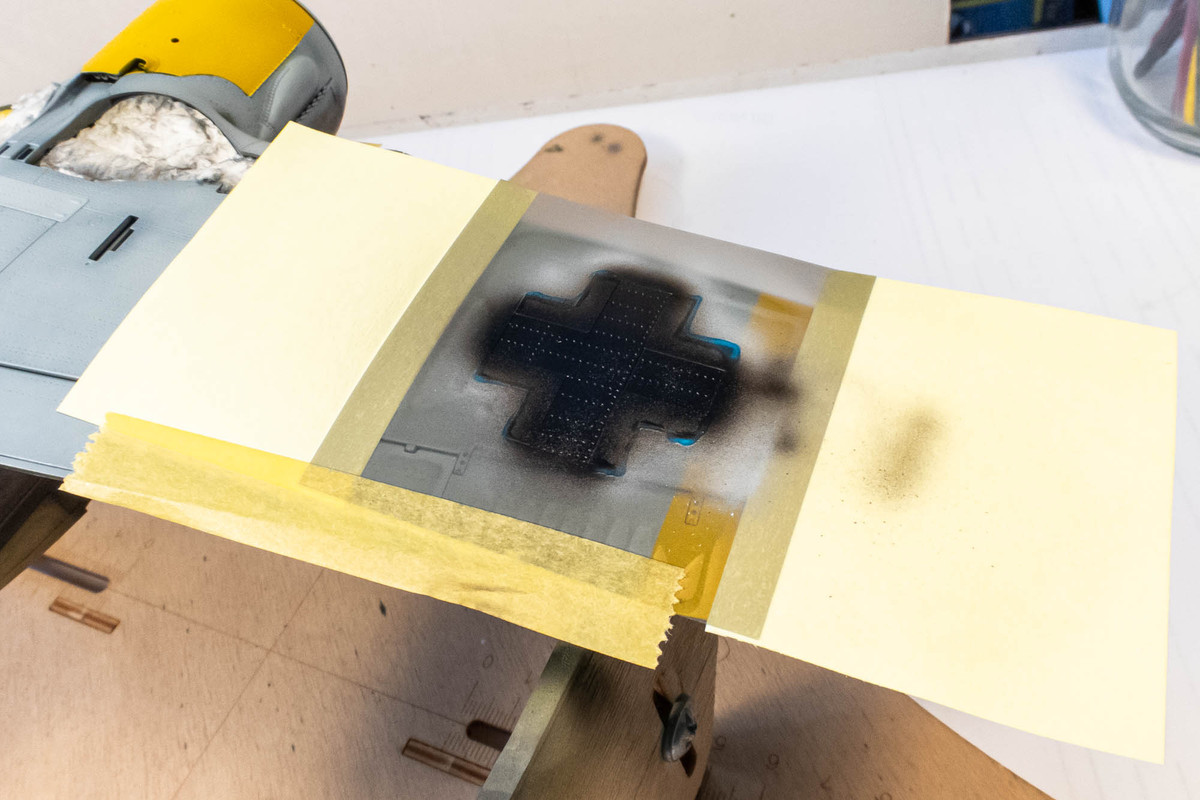
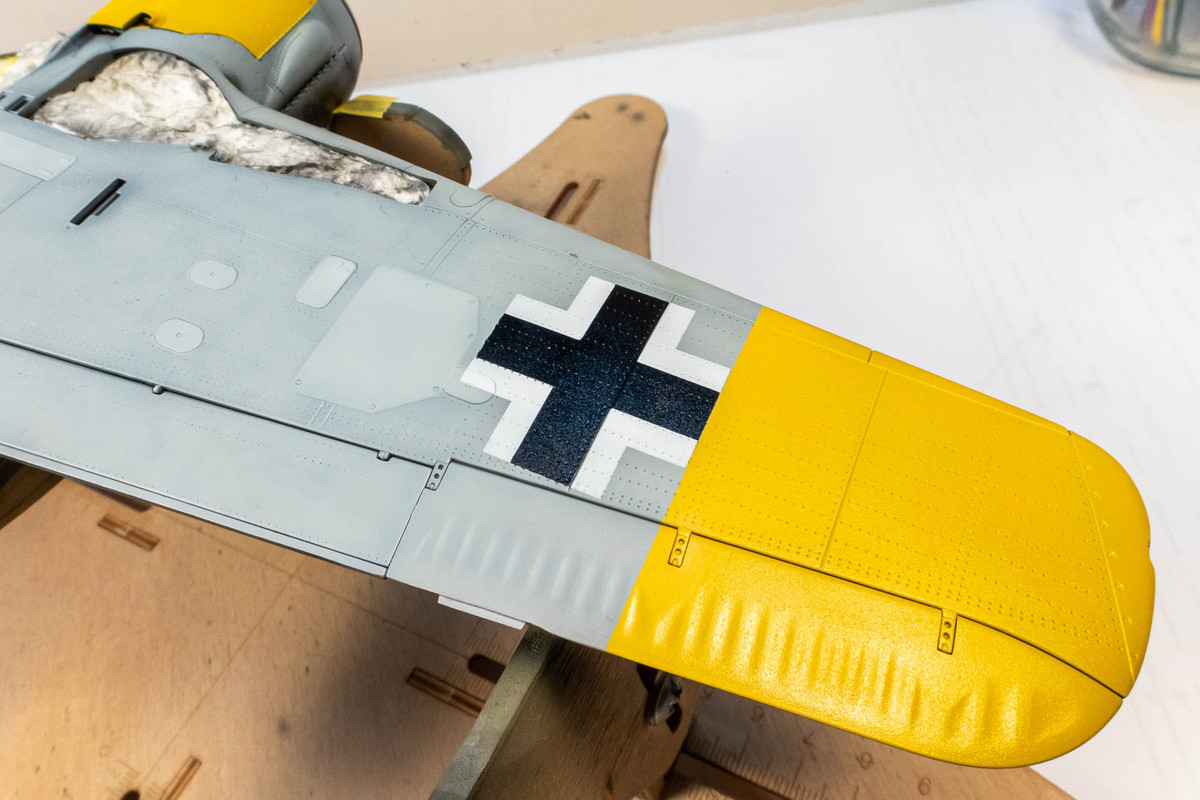
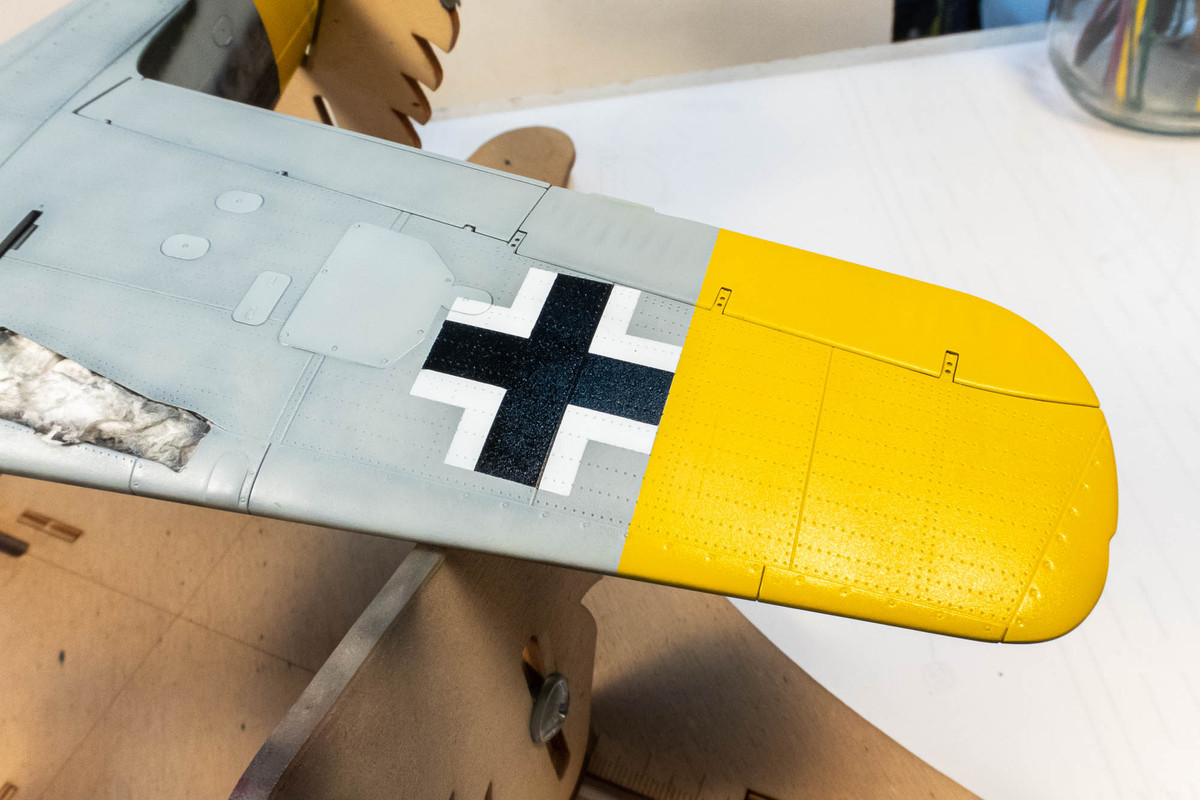
After the paint is dry, you can remove the masks. The liquid mask is not strong enough to keep the mask components together so you'll have to pull off the individual mask pieces one by one.
If all goes well, you should have your completed markings. The used mask parts are kept handy in case any paint repairs need to be done but I don't think I'll need them for the bottom crosses.
Once the outline mask is put into position, all of the paint edges of the mask are burnished down with a wood toothpick and the white is sprayed. To get a smooth edge, the paint layers should be thin but "dry". Avoid pooling of paint, especially at the mask edges as this will cause the paint to crack upon mask removal.
The remaining internal mask components are taped to help hold them together. The idea is to place these components, connected as one piece into the painted area. The mask was pre-marked with a Sharpie for orientation purposes. Although the shape is symmetric, there may be very slight variations in how the mask was cut so keeping the orientation will ensure a better interlocking fit of the mask components.
I use a sharp knife to help lift the pieces off the backing paper that want to separate.
The internal mask components are then carefully placed back onto the mask outline. Make sure you give ample time for the paint to dry before putting a mask over it.
Once the internal components are in position, the tape is removed, along with the internal cross shape that will be painted black.
To ensure the black paint doesn't seep where it is not supposed to, I like to use liquid mask to seal those joints.
The black is sprayed next.
After the paint is dry, you can remove the masks. The liquid mask is not strong enough to keep the mask components together so you'll have to pull off the individual mask pieces one by one.
If all goes well, you should have your completed markings. The used mask parts are kept handy in case any paint repairs need to be done but I don't think I'll need them for the bottom crosses.
John aka JKim
-----------<><
-----------<><
-
BlackSheep214
- Elite Member
- Posts: 10424
- Joined: Sun Apr 06, 2014 8:47 pm
Re: Border 1/35 Focke Wulf Fw190A-5 Nowotny Double Chevron
I'm lost. I understand the outer template for the white on the cross. How is it possible the overspray excess white disappeared after its all done? Did you mask the outer borders on the white cross before spraying the white as seen in 2nd photo? Am I missing something I don't see or understand?
“Who controls the skies, controls the fate of this Earth”
Author unknown- 352nd Fighter Group, Blue-Nosed Bastards of Bodney
“Send one plane it’s a sortie; send two planes it’s a flight; send four planes it’s a test of airpower. - Richard Kohn
Author unknown- 352nd Fighter Group, Blue-Nosed Bastards of Bodney
“Send one plane it’s a sortie; send two planes it’s a flight; send four planes it’s a test of airpower. - Richard Kohn