Maddog Manufacturing Open for 2024
Posted: Wed Feb 14, 2024 4:53 am
Even though I have a number of projects going from last year, I'm going to skip posting them and just start this with this latest tour.
Well, despite having a lot of time to work on my hobby thanks to Hobby Days; I have had no real time to start a new tour. Because of that, this will be another two part post so all my projects can be viewed.
So, all aboard the trams everyone, it's time to start our tour!
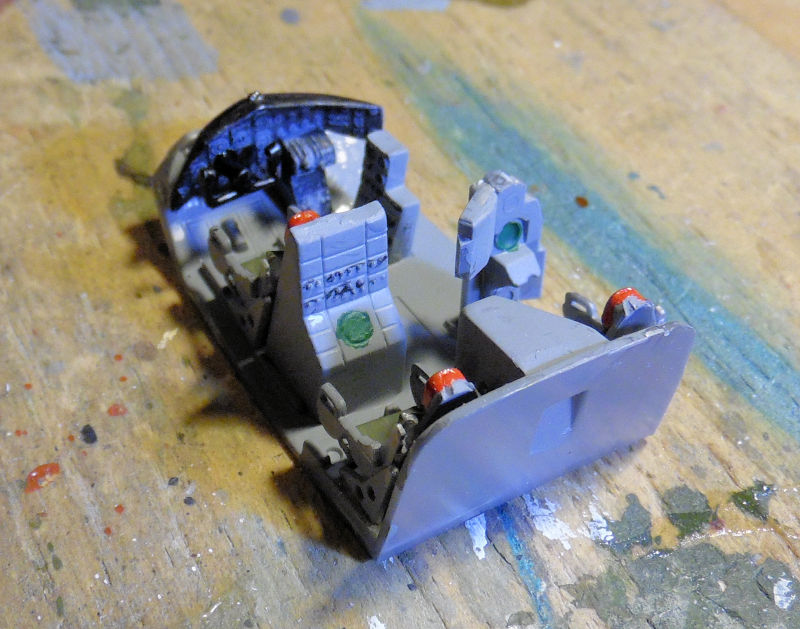
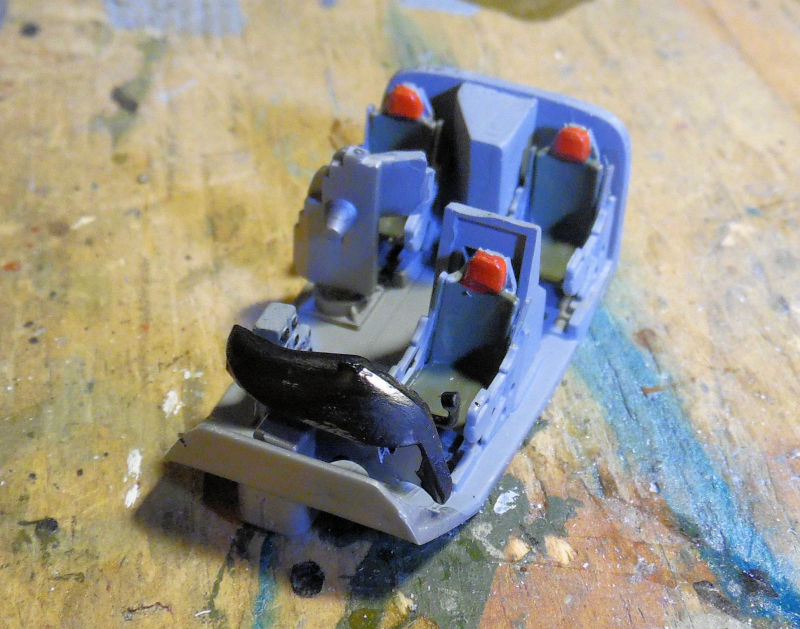
As always, we start in the Hangar. We only worked on one aircraft this past week. It's the old Italeri kit of the 1/72 scale B-66 Destroyer. The cockpit had been built already so it finally got painted. Yes, it might look a bit sloppy, but it won't be seen once this gets closed up inside the fuselage:
Later that is what we did, we closed this up, cemented it and allowed it to dry:
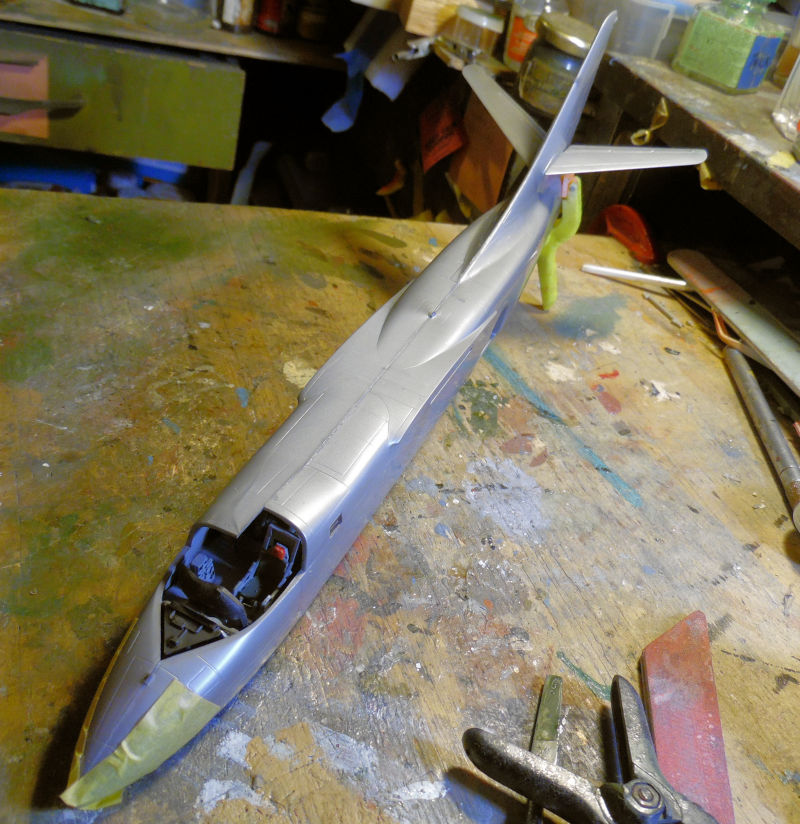
It was so surprising how well this fuselage.wings and tail fit together! As you can see here, half the cockpit can't even be seen:
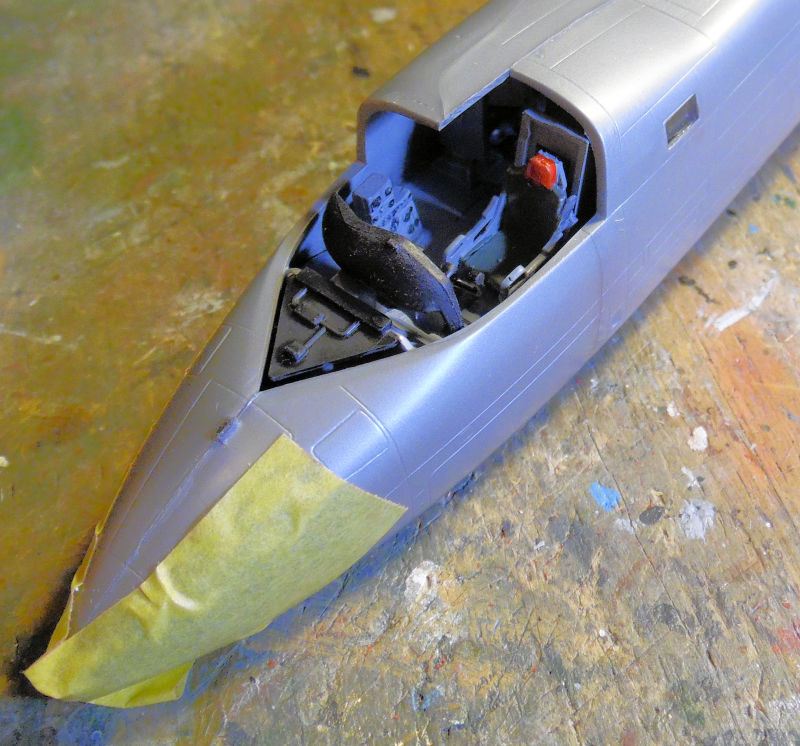
The canopy was added and masked off for paint next:
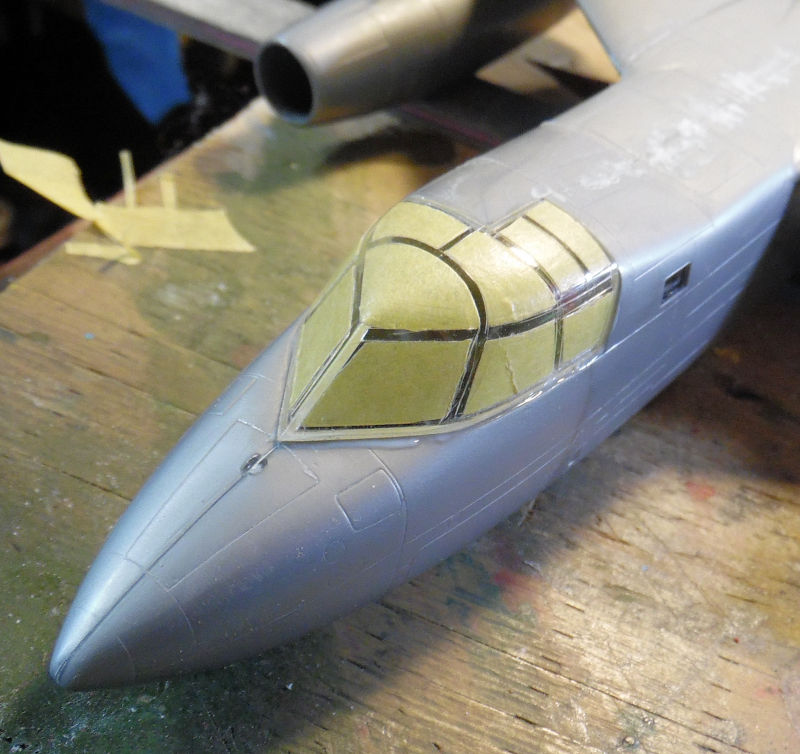
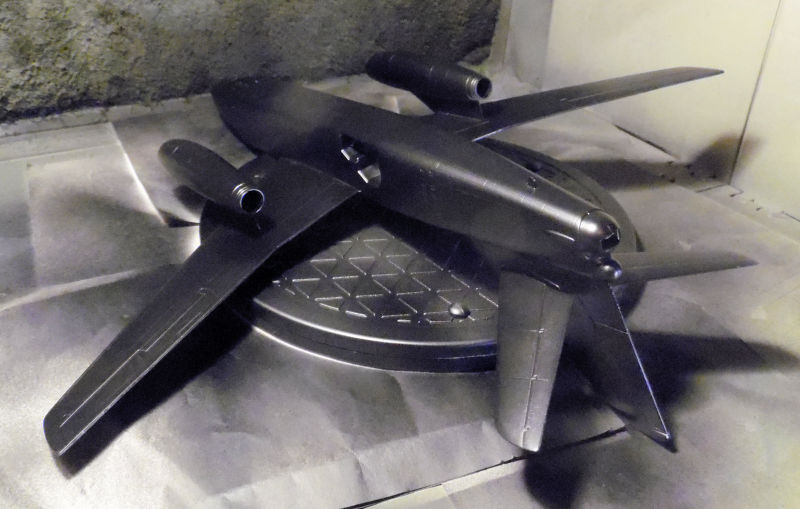
...which came later. We hit this with a black primer to see what issues we had:
We found a considerable number of small issues, (all of which I brought on myself!) so some filler, sanding and more filler and sanding happened:
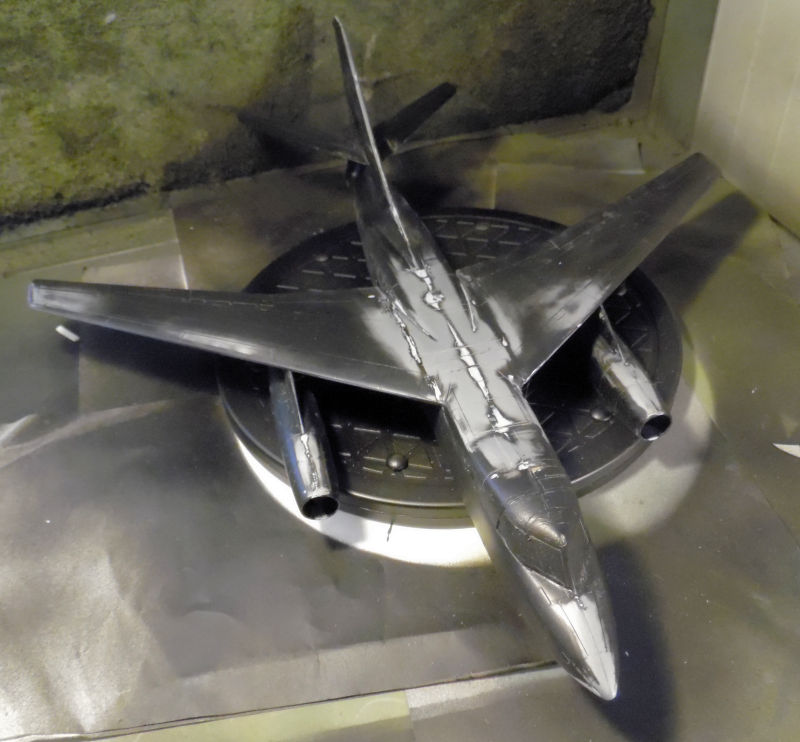
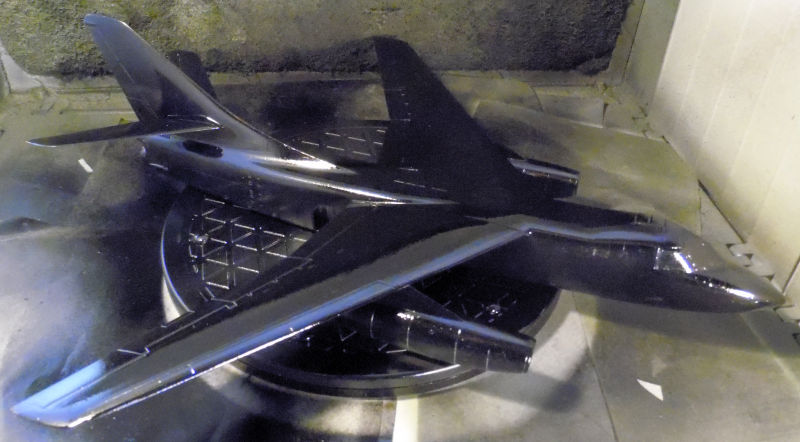
We had started out with Tamiya putty, then moved to Mr. Surfacer 500. Later we shot a gloss black coat on this to see if everything got fixed. It didn't so another round of sanding and filling will be happening.... not that you can see here:
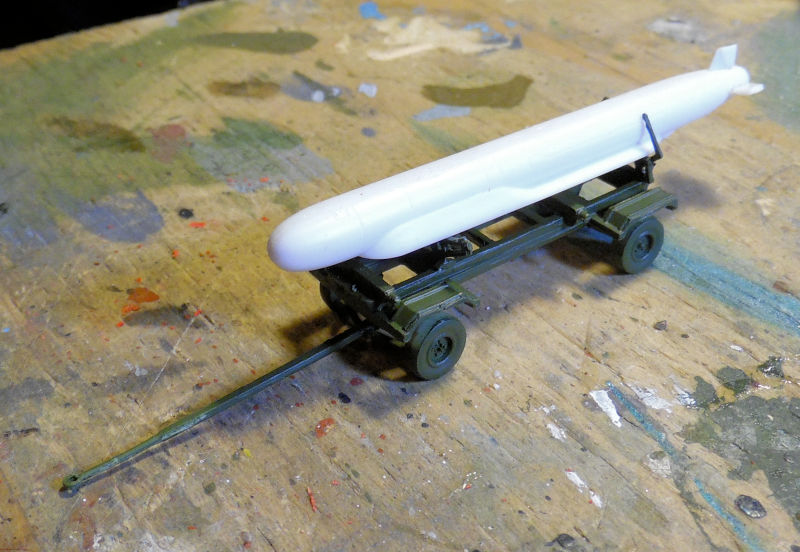
Finally, the little AS-15 Kent had it's trailer painted up. Not too much longer before that one gets done:
That completes the tour of the Hangar for now, our tour continues in the Shipyards....
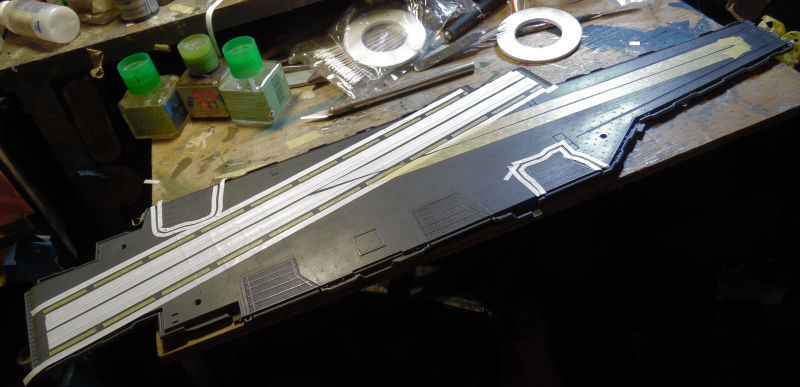
Here in the Shipyards, we tried to mask off the main deck of the 1/600 scale USS Enterprise. It started out pretty good:
However, we found out that the flexible Tamiya tape doesn't play well with the cold and humidity we had that night. Expensive lesson to learn:
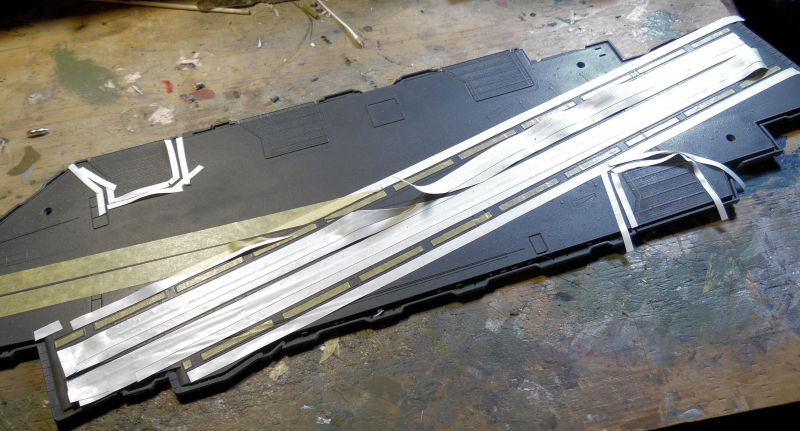
The regular Tamiya tape seemed to stick well, unless it was on the flexible stuff, so everything will be replaced with Tamiya tape later.
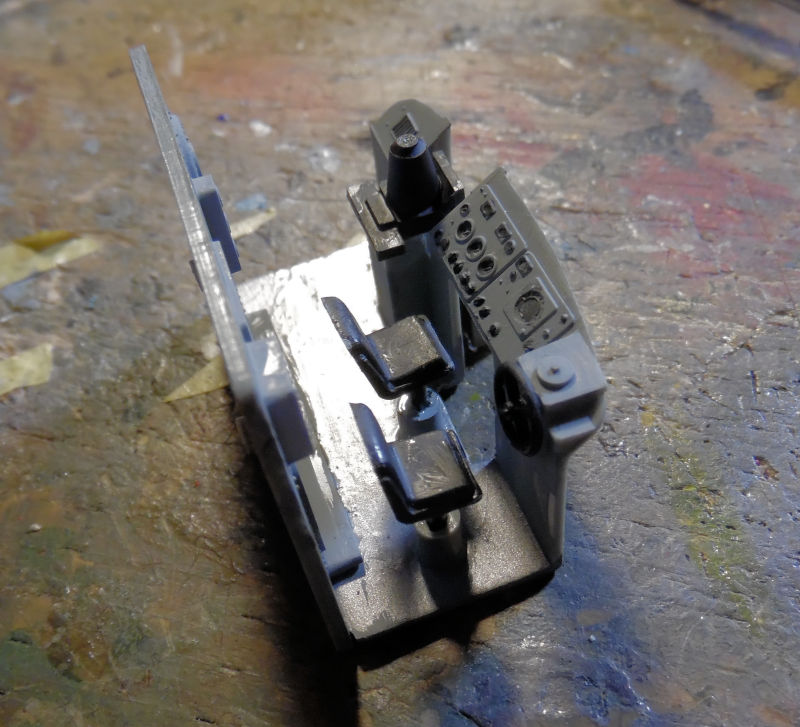
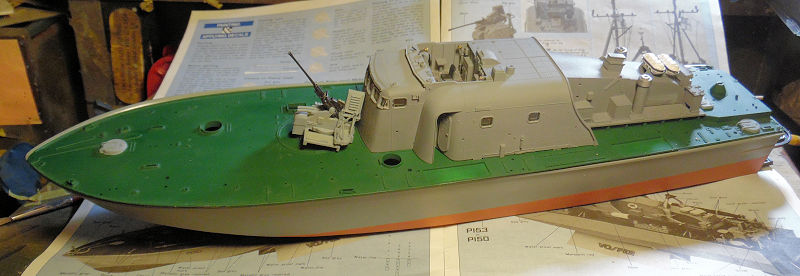
In the next slipway, we have the Tamiya British Vospers Perkasa. The main bridge was painted and detailed before being closed up inside the cabin:
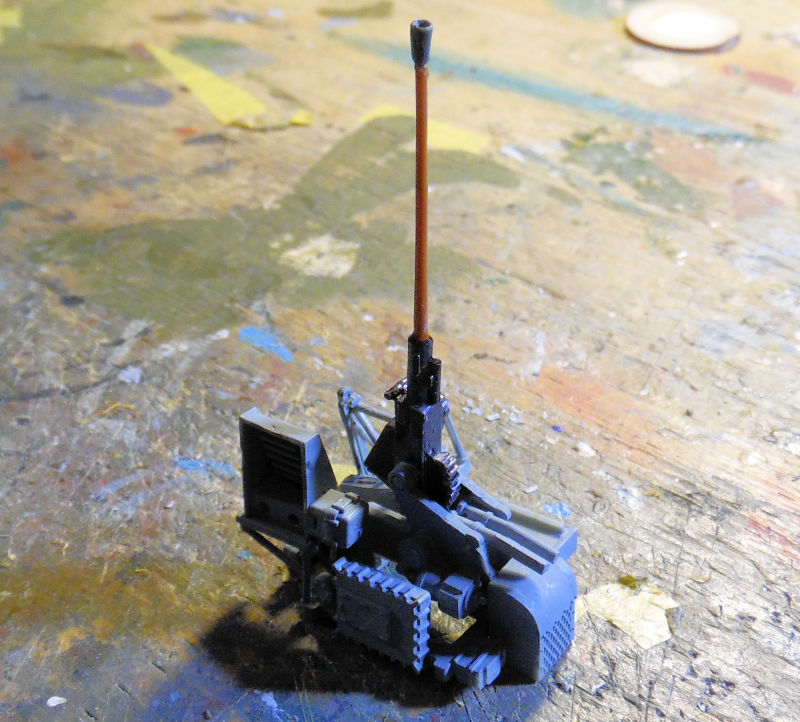
Meanwhile, the barrel broke on the 40mm Bofors so we had to fabricate a new one and replace the broken one. I can hear the comments now, but this was the best way to make sure it glued straight:
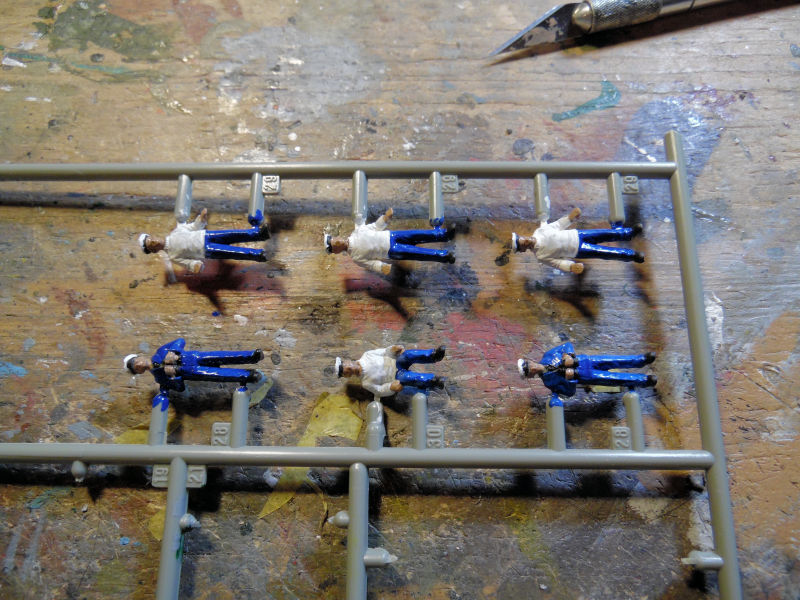
The crew at least showed up to prepare for training:
We started adding some of the detail parts to the main deck; the Bofors is only dry fit right now, that is why it's cocked. There isn't much to see here:
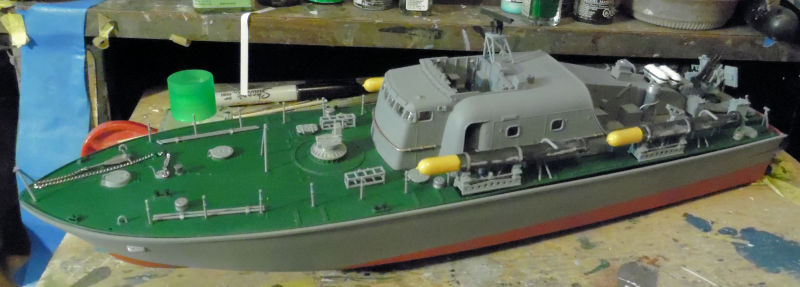
More parts went on....

....and still more. The torpedoes are only dry fit to see how well they place, we still need to touch them up. The hand rail stanchions are installed, they just need to be rigged:
That is as far as we got on that one, so we move on to the next slipway where the Robert E Lee has been fighting me. In this shot, you can see the incredible warp of the rear railings that required us to glue, clamp; wait for it to dry. Then move a little further, glue and clamp, etc. You get the idea:
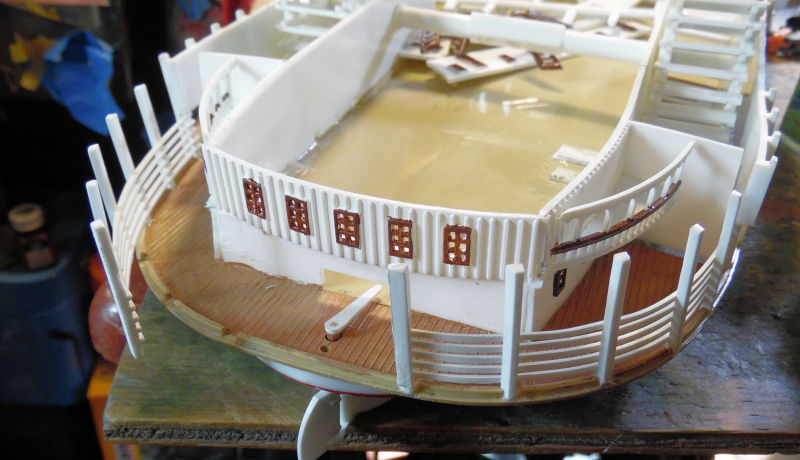
Later the rear deck got added. Because of a mistake made earlier, I had to compensate for it by shaving a section of one side of this so that the paddle wheel housing would fit where it's supposed to... or close enough:
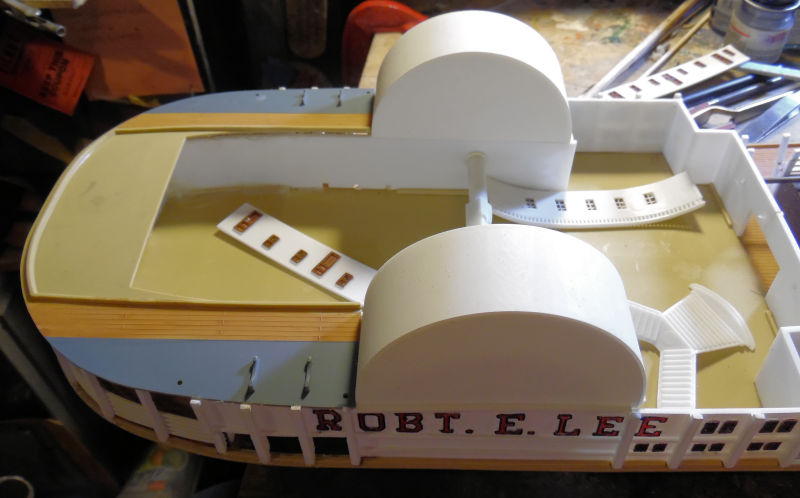
Once that was dry enough, we added the upper cabin walls to the deck. These too needed to be finessed into place. The curved section next to the housing needed to be shaped to fit:
Later we added the front portion of that deck after prepping the upper parts of the cabins and pylons below. This also needed to be shaved on the one side so it would sit straight and not have a huge gap. You can see here how much persuasion it needed to hold in place:
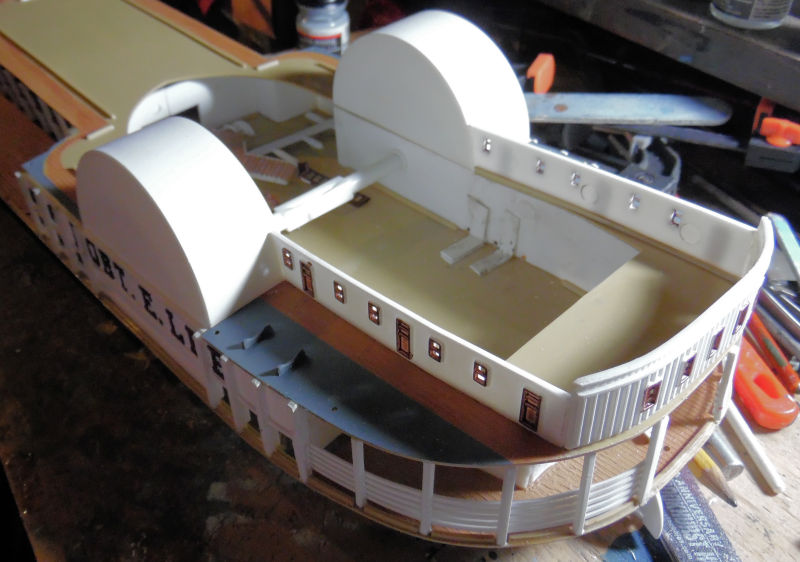
When the tape came off, it looked pretty good:
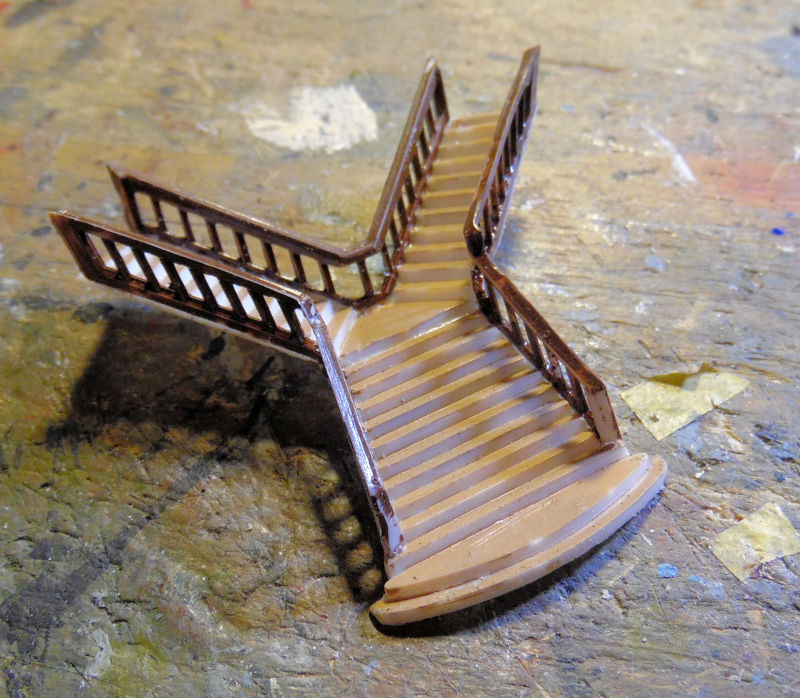
While all that had been drying, we went to work on the Grand Staircase:
Again it took some serious finagling to get that staircase installed. We had to fix the railings three times before everything stayed in place as it supposed to do:
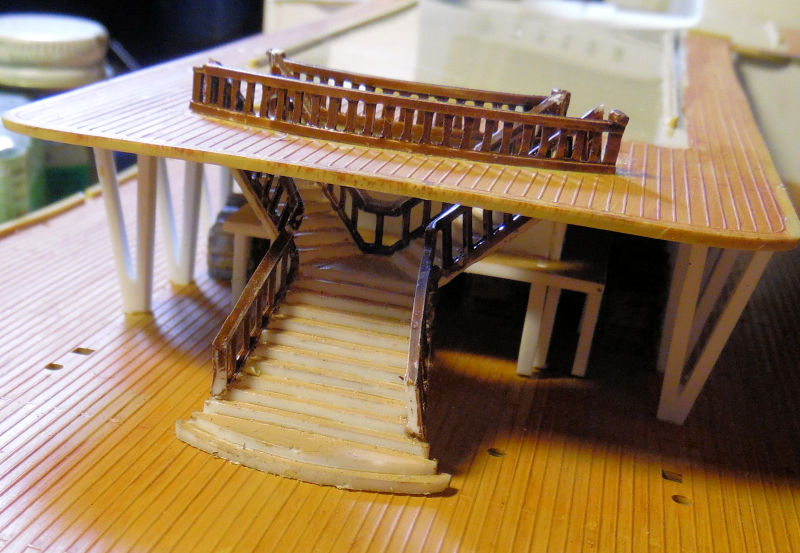
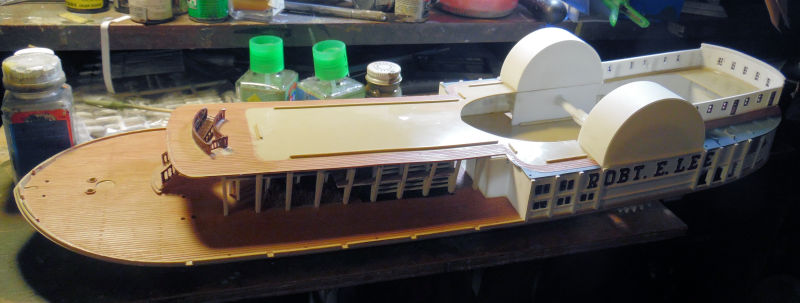
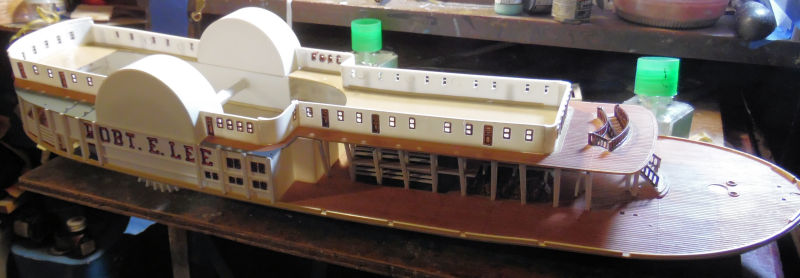
Here's the look over all so far. It's starting to look like a riverboat:
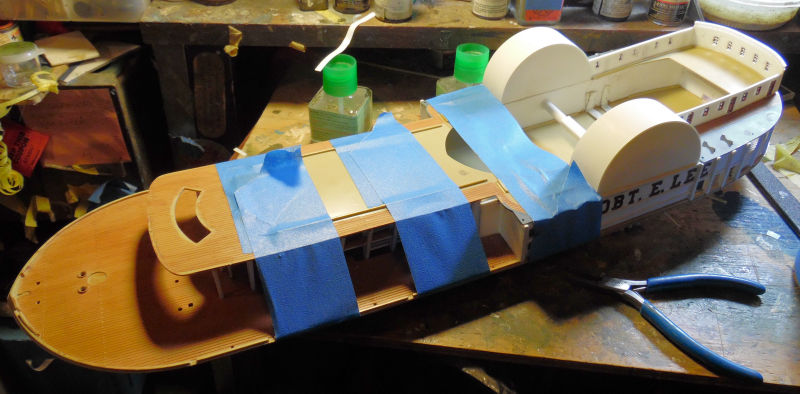
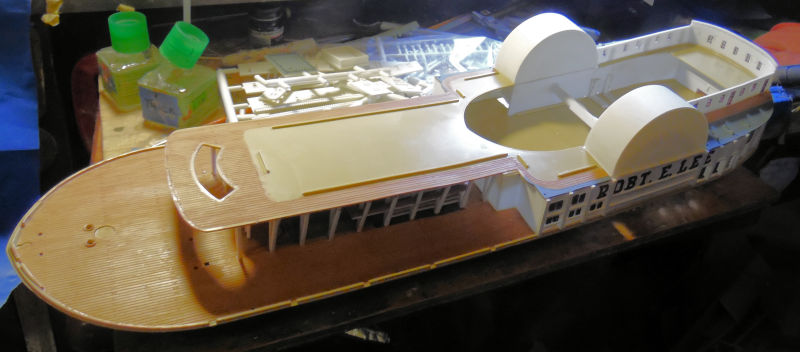
Later the forward cabin went on the deck. This was slightly easier to build, but we still had some issues with some gaps, too-long pieces, and other issues. After dealing with them and getting everything cemented down, I'm happy with the results:
Just for fun, we test fit the upper deck on top of all this. It's going to be a bit easier than the previous two decks:
That concludes this tour of the Shipyards for now; as we head on over to the Motor Pool, you can see some damaged buildings and sandbag emplacements we are working on for another project:
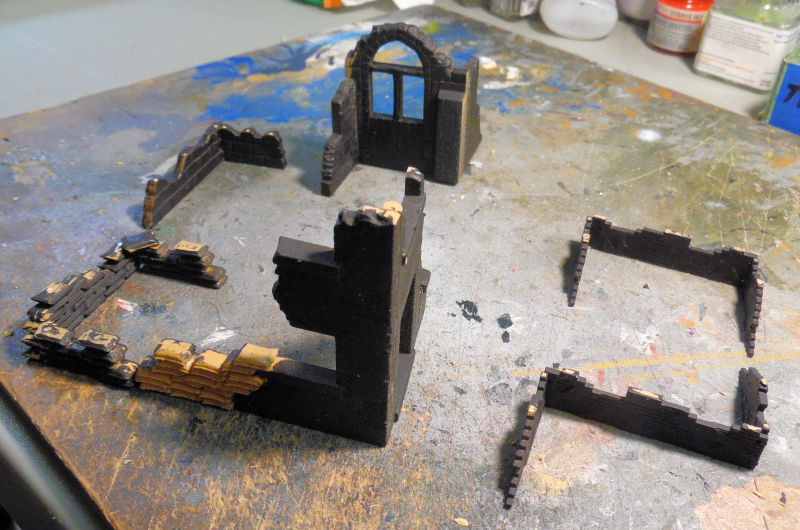
I found a whole mess of Matchbox bases that they used to include in all their armor models, some were even duplicates. My idea is to find a way to arrange them all on a board in some manner, add these ruin pieces, fill in the area between them with putty or something and create some kind of scene/base. It'll be interesting.....
The Motor Pool tour will continue in the next post due to the large quantity of pics for that tour.......
Well, despite having a lot of time to work on my hobby thanks to Hobby Days; I have had no real time to start a new tour. Because of that, this will be another two part post so all my projects can be viewed.
So, all aboard the trams everyone, it's time to start our tour!
As always, we start in the Hangar. We only worked on one aircraft this past week. It's the old Italeri kit of the 1/72 scale B-66 Destroyer. The cockpit had been built already so it finally got painted. Yes, it might look a bit sloppy, but it won't be seen once this gets closed up inside the fuselage:
Later that is what we did, we closed this up, cemented it and allowed it to dry:
It was so surprising how well this fuselage.wings and tail fit together! As you can see here, half the cockpit can't even be seen:
The canopy was added and masked off for paint next:
...which came later. We hit this with a black primer to see what issues we had:
We found a considerable number of small issues, (all of which I brought on myself!) so some filler, sanding and more filler and sanding happened:
We had started out with Tamiya putty, then moved to Mr. Surfacer 500. Later we shot a gloss black coat on this to see if everything got fixed. It didn't so another round of sanding and filling will be happening.... not that you can see here:
Finally, the little AS-15 Kent had it's trailer painted up. Not too much longer before that one gets done:
That completes the tour of the Hangar for now, our tour continues in the Shipyards....
Here in the Shipyards, we tried to mask off the main deck of the 1/600 scale USS Enterprise. It started out pretty good:
However, we found out that the flexible Tamiya tape doesn't play well with the cold and humidity we had that night. Expensive lesson to learn:
The regular Tamiya tape seemed to stick well, unless it was on the flexible stuff, so everything will be replaced with Tamiya tape later.
In the next slipway, we have the Tamiya British Vospers Perkasa. The main bridge was painted and detailed before being closed up inside the cabin:
Meanwhile, the barrel broke on the 40mm Bofors so we had to fabricate a new one and replace the broken one. I can hear the comments now, but this was the best way to make sure it glued straight:
The crew at least showed up to prepare for training:
We started adding some of the detail parts to the main deck; the Bofors is only dry fit right now, that is why it's cocked. There isn't much to see here:
More parts went on....
....and still more. The torpedoes are only dry fit to see how well they place, we still need to touch them up. The hand rail stanchions are installed, they just need to be rigged:
That is as far as we got on that one, so we move on to the next slipway where the Robert E Lee has been fighting me. In this shot, you can see the incredible warp of the rear railings that required us to glue, clamp; wait for it to dry. Then move a little further, glue and clamp, etc. You get the idea:
Later the rear deck got added. Because of a mistake made earlier, I had to compensate for it by shaving a section of one side of this so that the paddle wheel housing would fit where it's supposed to... or close enough:
Once that was dry enough, we added the upper cabin walls to the deck. These too needed to be finessed into place. The curved section next to the housing needed to be shaped to fit:
Later we added the front portion of that deck after prepping the upper parts of the cabins and pylons below. This also needed to be shaved on the one side so it would sit straight and not have a huge gap. You can see here how much persuasion it needed to hold in place:
When the tape came off, it looked pretty good:
While all that had been drying, we went to work on the Grand Staircase:
Again it took some serious finagling to get that staircase installed. We had to fix the railings three times before everything stayed in place as it supposed to do:
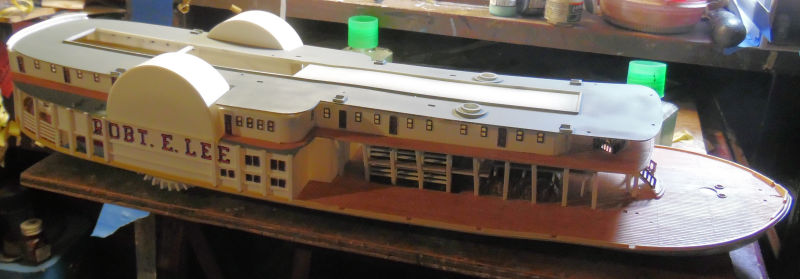
Here's the look over all so far. It's starting to look like a riverboat:
Later the forward cabin went on the deck. This was slightly easier to build, but we still had some issues with some gaps, too-long pieces, and other issues. After dealing with them and getting everything cemented down, I'm happy with the results:
Just for fun, we test fit the upper deck on top of all this. It's going to be a bit easier than the previous two decks:
That concludes this tour of the Shipyards for now; as we head on over to the Motor Pool, you can see some damaged buildings and sandbag emplacements we are working on for another project:
I found a whole mess of Matchbox bases that they used to include in all their armor models, some were even duplicates. My idea is to find a way to arrange them all on a board in some manner, add these ruin pieces, fill in the area between them with putty or something and create some kind of scene/base. It'll be interesting.....
The Motor Pool tour will continue in the next post due to the large quantity of pics for that tour.......
