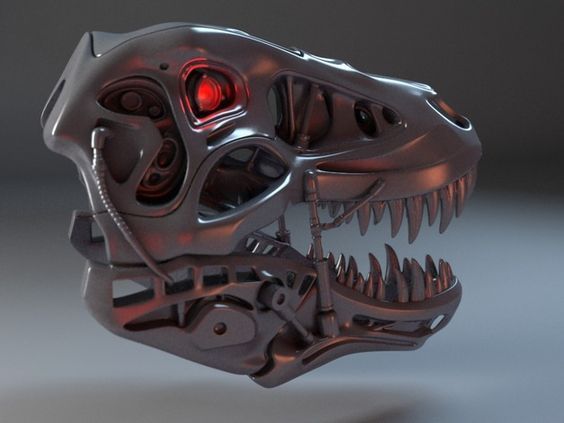
3D Rex head

Here is the place to show off the progress on your figurines and dioramas.
Post Reply
User avatar
wedfactory
Advanced Member
Posts: 126
Joined: Mon Apr 07, 2014 5:06 pm

3D Rex head

Post by wedfactory »

Again more fun with the 3D printer. Again into the Sci-Fi realm.

Hot off the printer (after removing the support material)

Image

The small ruler under it is six inches long (15cm for those of you in the rest of the world)

Next a gave it a acetone vapor bath to smooth out the print layers and 2 hours later...

Image

Image

Image

It hopefully will look something like this when done..
Image
User avatar
Thomas_M
Admin
Posts: 4411
Joined: Fri Dec 13, 2013 9:43 am
Location: Bad Wurzach - Germany
Contact:

Re: 3D Rex head

Post by Thomas_M »

This looks absolutely impressive! Did you design this one yourself?

I was puzzled to read you gave it a bath in Acetone. For two hours?
There is a 3D printed kit on the bench here with me. The material used only could be cleaned with destilled water in an ultrasonic bath... If I tried anything else, not even close to Acetone, the parts got useless due to their reaction.

Yours look really smooth, nicely glossy!
User avatar
wedfactory
Advanced Member
Posts: 126
Joined: Mon Apr 07, 2014 5:06 pm

Re: 3D Rex head

Post by wedfactory »

Thomas, if you look at the first picture you can see the layering for the printer on the parts. The acetone vapor bath is what smoothed it out. Catch word being vapor. If I had dunked the print into acetone for two hours I would have ended up with a pile of ABS plastic at the bottom of the tub. Not good. What you will need is a good size tupperware tub (big enough for your print to fit in with a little room all the way around) with a top (helps if the tub is clear) and some paper towels, aluminum foil and acetone. Line the bottom and 3 sides of the tub with paper towels, pour in 4 oz of acetone. The paper towels will soak it all up and wick it up the sides some that is fine. next place the aluminum foil in the bottom of the tub. You do not want to set your print right into the acetone. Now place your on the aluminum foil and close the top. I set an alarm for 1 hour to go check on it. When it went off I checked on the status of the "vapor bath". Remember you got a clear tub and left one side uncovered so you can look in and not knock yourself out by opening the top. After one hour it had started to smooth out, so i set the timer of 30 minutes the next time. After that it still wasn't quite where I wanted it so I set the timer for 30 minutes again. this time when I came back it looked just about right. You will need to pull it out before you may think it is done. the ABS will still be soft when you pull it out and still take about 30 - 45 minutes to air out and it will still smooth out some more in that time.

I found this by googling "how to smooth 3d prints"
User avatar
BlackSheep214
Elite Member
Posts: 10518
Joined: Sun Apr 06, 2014 8:47 pm

Re: 3D Rex head

Post by BlackSheep214 »

Following this one... Very impressive indeed.
“Who controls the skies, controls the fate of this Earth”

Author unknown- 352nd Fighter Group, Blue-Nosed Bastards of Bodney

“Send one plane it’s a sortie; send two planes it’s a flight; send four planes it’s a test of airpower. - Richard Kohn
User avatar
Thomas_M
Admin
Posts: 4411
Joined: Fri Dec 13, 2013 9:43 am
Location: Bad Wurzach - Germany
Contact:

Re: 3D Rex head

Post by Thomas_M »

wedfactory wrote:Thomas, if you look at the first picture you can see the layering for the printer on the parts. The acetone vapor bath is what smoothed it out. Catch word being vapor. If I had dunked the print into acetone for two hours I would have ended up with a pile of ABS plastic at the bottom of the tub. Not good. What you will need is a good size tupperware tub (big enough for your print to fit in with a little room all the way around) with a top (helps if the tub is clear) and some paper towels, aluminum foil and acetone. Line the bottom and 3 sides of the tub with paper towels, pour in 4 oz of acetone. The paper towels will soak it all up and wick it up the sides some that is fine. next place the aluminum foil in the bottom of the tub. You do not want to set your print right into the acetone. Now place your on the aluminum foil and close the top. I set an alarm for 1 hour to go check on it. When it went off I checked on the status of the "vapor bath". Remember you got a clear tub and left one side uncovered so you can look in and not knock yourself out by opening the top. After one hour it had started to smooth out, so i set the timer of 30 minutes the next time. After that it still wasn't quite where I wanted it so I set the timer for 30 minutes again. this time when I came back it looked just about right. You will need to pull it out before you may think it is done. the ABS will still be soft when you pull it out and still take about 30 - 45 minutes to air out and it will still smooth out some more in that time.

I found this by googling "how to smooth 3d prints"
Very clever! Wished I had known this some weeks earlier. But it´s ok; who knows if your print has been done in the same material as mine? Anyway, mine is already in the works.
Post Reply

Return to “Work In Progress: Figures and Dios”