1/32 Tamiya F4U-1a Corsair - Boyington 17740
-
BlackSheep214

- Elite Member
- Posts: 13059
- Joined: Sun Apr 06, 2014 8:47 pm
Re: 1/32 Tamiya F4U-1a Corsair - Boyington 17740
Heh.... you’ll find it sooner or later. Using expoxy as a substitute is incredible! I couldn’t tell the difference. Well done! 
“Who controls the skies, controls the fate of this Earth”
Author unknown- 352nd Fighter Group, Blue-Nosed Bastards of Bodney
“Send one plane it’s a sortie; send two planes it’s a flight; send four planes it’s a test of airpower. - Richard Kohn
Author unknown- 352nd Fighter Group, Blue-Nosed Bastards of Bodney
“Send one plane it’s a sortie; send two planes it’s a flight; send four planes it’s a test of airpower. - Richard Kohn

Re: 1/32 Tamiya F4U-1a Corsair - Boyington 17740
Thanks guys! The comments are very nice! Still not satisfied with certain things but the build is definitely approaching the finish line!
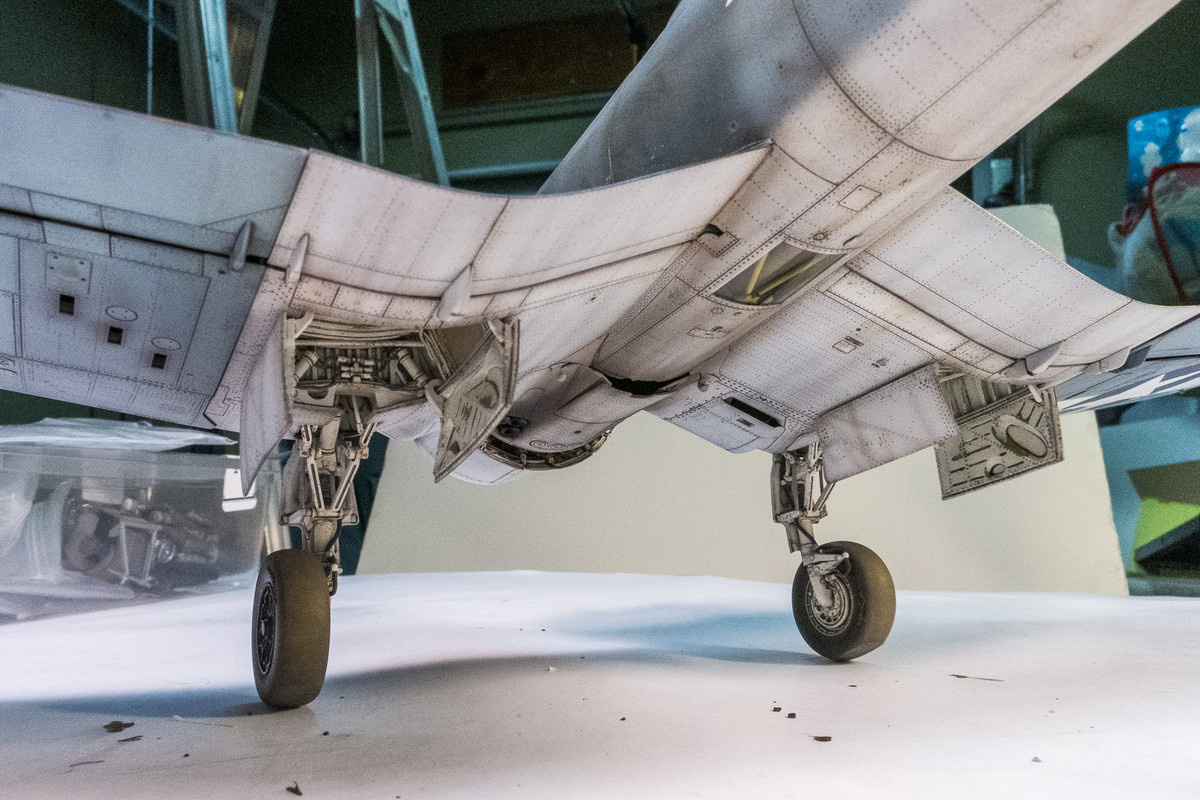
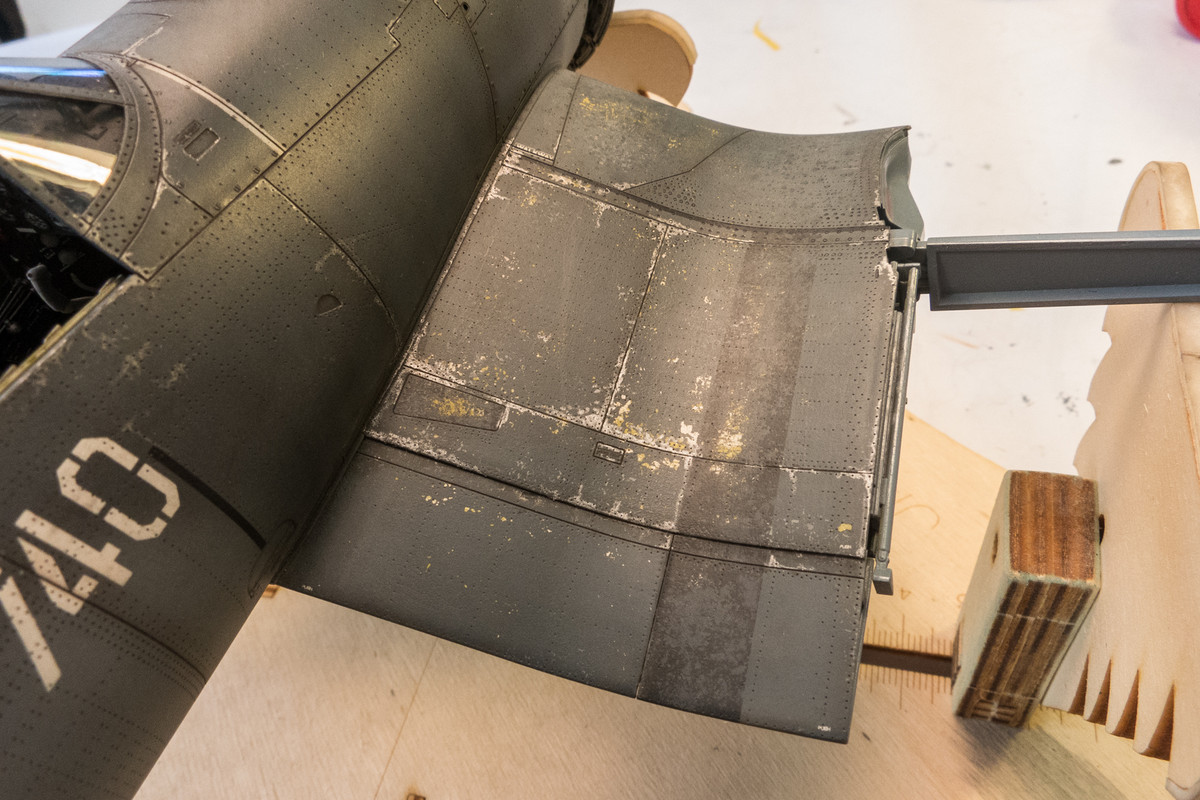
The epoxy on the wheels has cured so I attached the landing gear doors.

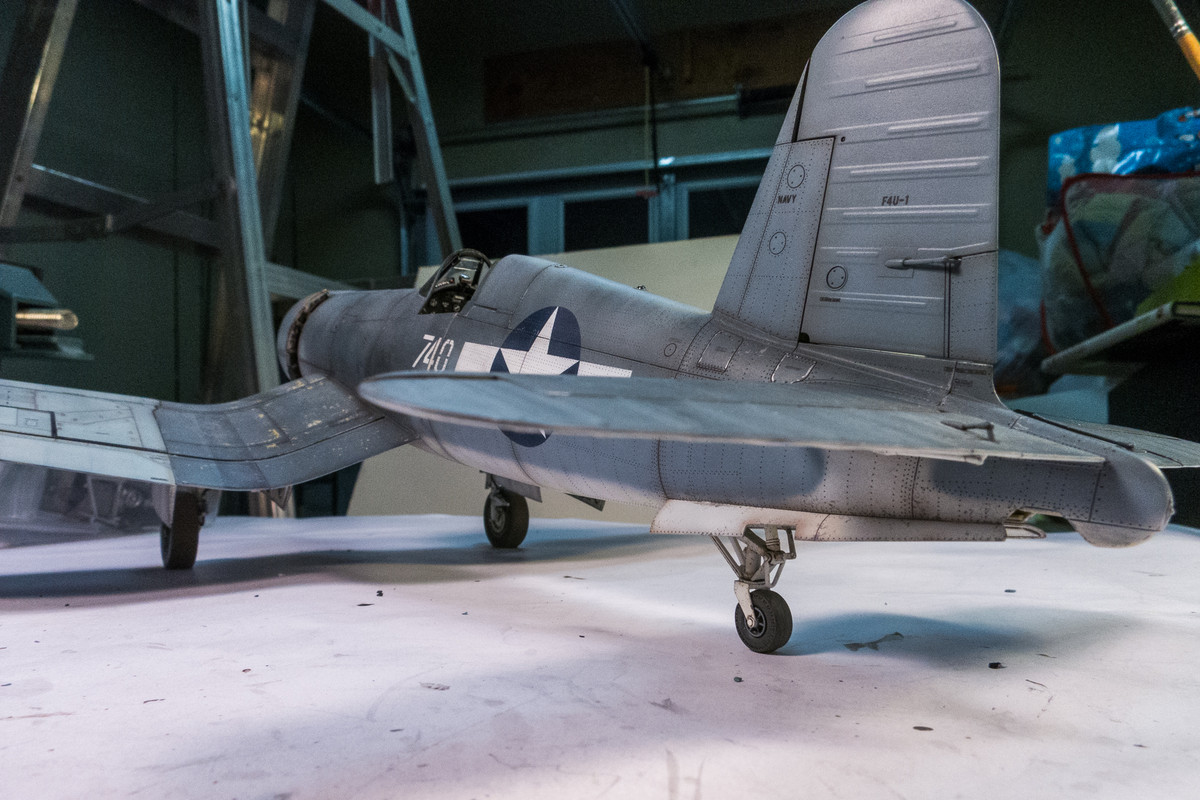
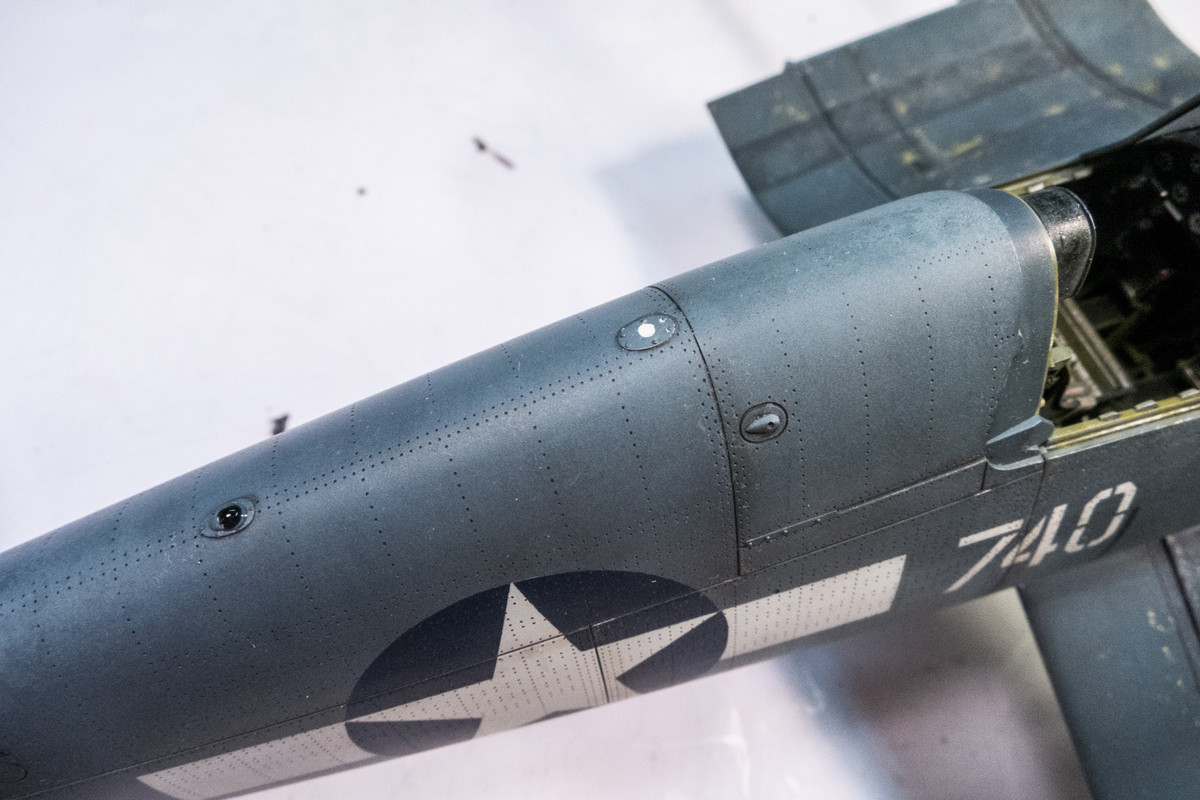
A quick look up top with the prop in place and you can see that 740 is almost done!
Yeah, I was surprised too. The nice thing about the UV epoxy is that when you shoot it with the light, it is done right there... no waiting. I blobbed a drop on and it started to sink into the hole so I shot it with the UV light to seal the hole. I then applied another drop which formed a nice little semi-sphere. I gently pushed the rear of it further back to approximate a tear drop shape and then zapped it with the UV to harden it. The UV glue has many interesting uses.BlackSheep214 wrote:Heh.... you’ll find it sooner or later. Using expoxy as a substitute is incredible! I couldn’t tell the difference. Well done!
The epoxy on the wheels has cured so I attached the landing gear doors.
A quick look up top with the prop in place and you can see that 740 is almost done!
John aka JKim
-----------<><

-----------<><
-
speedgraflex

- Moderator
- Posts: 11129
- Joined: Fri Feb 10, 2017 11:08 pm
- Contact:
Re: 1/32 Tamiya F4U-1a Corsair - Boyington 17740
John; this is a masterpiece. Congratulations. A couple of pos/neg thoughts that are really teensy bitty jiggly things that immediately stood out are your absolutely flawless overall finish both from a construction standpoint as well as capturing the form of the actual aircraft, but I think I would like to see the scratches and scrapes, though with a fine series of colored pencils or whatever you use, to break that up into organic sections. As far as I can tell from looking at prototype views the walk area was scuffed very deeply, and there is an overall block-and-tackle feeling of scratches from the way the aircraft were handled that I miss. Now my notes are just passing through your last two sequences of photos but I do kind of miss the chiaroscuro effect of a good series of scratches. That’s my yin and yang though and believe me this is nothing when I get my first glance at the aircraft and think your model is real, but I would be somehow reduced if I didn’t write down the parts that jingled and jangled, for me.
Make more models!

Re: 1/32 Tamiya F4U-1a Corsair - Boyington 17740
Looks amazing! I still can't get over the cockpit it's so awesome the placard decals really make it
March as one, Don't look back
Odin's sons... Attack!
Unleash hell! Do not repent! Warfare grants us no lament
Let your weapons slash and tear This is no place for fear
Hold the lines! Move as one! In unity our victory's won
Our shields will form a mighty wall
United we shall never fall
Odin's sons... Attack!
Unleash hell! Do not repent! Warfare grants us no lament
Let your weapons slash and tear This is no place for fear
Hold the lines! Move as one! In unity our victory's won
Our shields will form a mighty wall
United we shall never fall
Re: 1/32 Tamiya F4U-1a Corsair - Boyington 17740
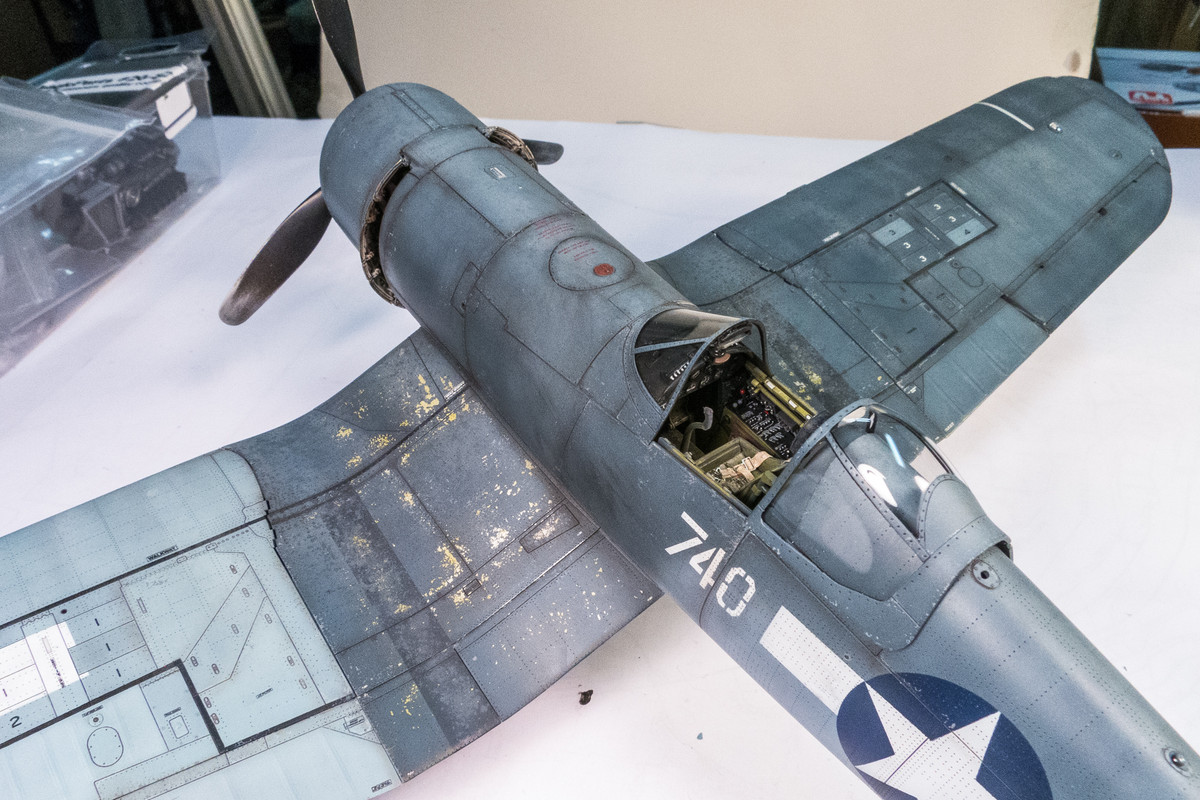
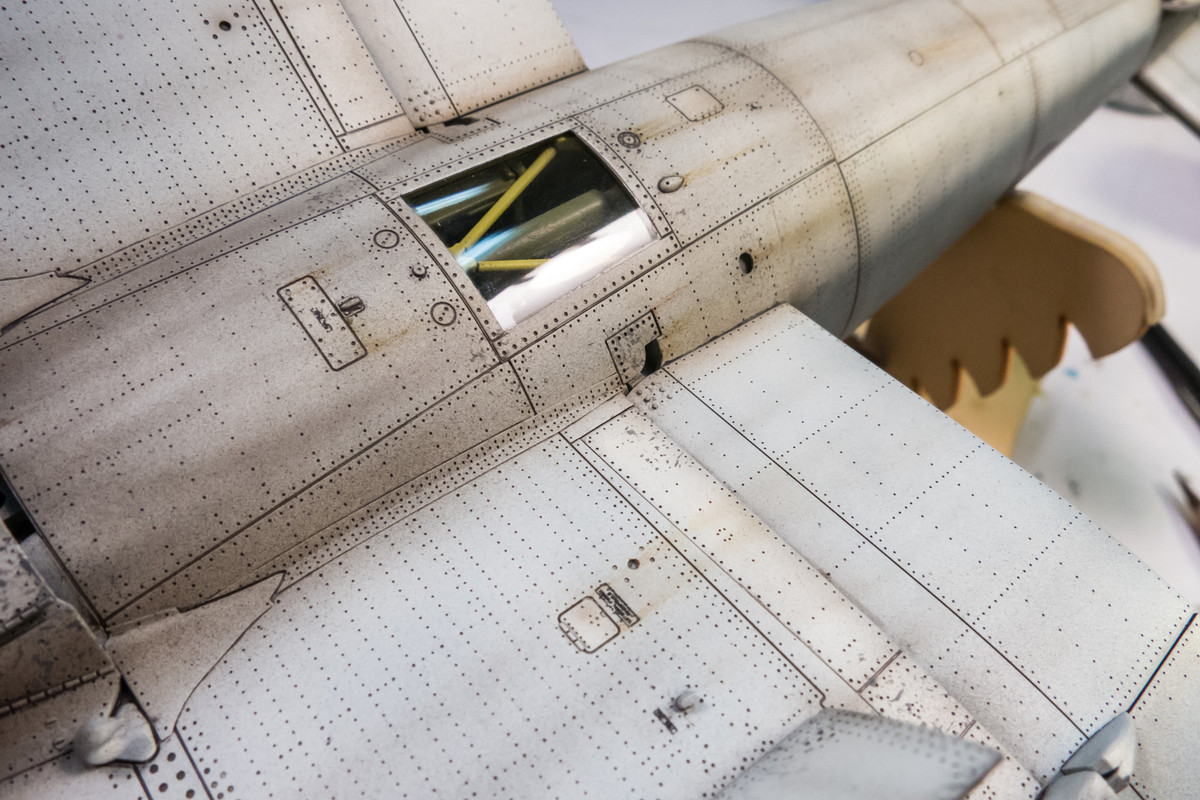
Thanks for the comments! Bruce... I'm not sure I am interpreting your comments correctly but I think you are saying that the chipping, especially on the upper inner wings, should be "unified" into logical sub-groups instead of spread out haphazardly. If that is a correct interpretation, then I agree. There is actually a bit more chipping that was applied using pencils that is not showing up in the photos. For example, the lighter replacement wing around the ammo boxes has lots of chipping but it's simply disappeared. I COULD do a round of sponge chipping in different colors but that would require another flat coat and I'm afraid of igniting the hidden areas of salt into white frosting, which has happened to me before.
Personally, I'm fairly ok with the topside. It's the bottom that feels "unfinished" to me. Without the tonal variation layer of salt fading, it looks just a bit too monochromatic to me. But futzing with that does risk the potential of going backwards and I'm loathe to take it too far and have to re-trace steps to get back to step 1. I feel like I'm one technique short of a full deck when it comes to bottom weathering techniques. We'll see... I have other projects I can work on while I mull these thoughts over. And look up "chiaroscuro" in the dictionary.
Personally, I'm fairly ok with the topside. It's the bottom that feels "unfinished" to me. Without the tonal variation layer of salt fading, it looks just a bit too monochromatic to me. But futzing with that does risk the potential of going backwards and I'm loathe to take it too far and have to re-trace steps to get back to step 1. I feel like I'm one technique short of a full deck when it comes to bottom weathering techniques. We'll see... I have other projects I can work on while I mull these thoughts over. And look up "chiaroscuro" in the dictionary.
John aka JKim
-----------<><
-----------<><
Re: 1/32 Tamiya F4U-1a Corsair - Boyington 17740
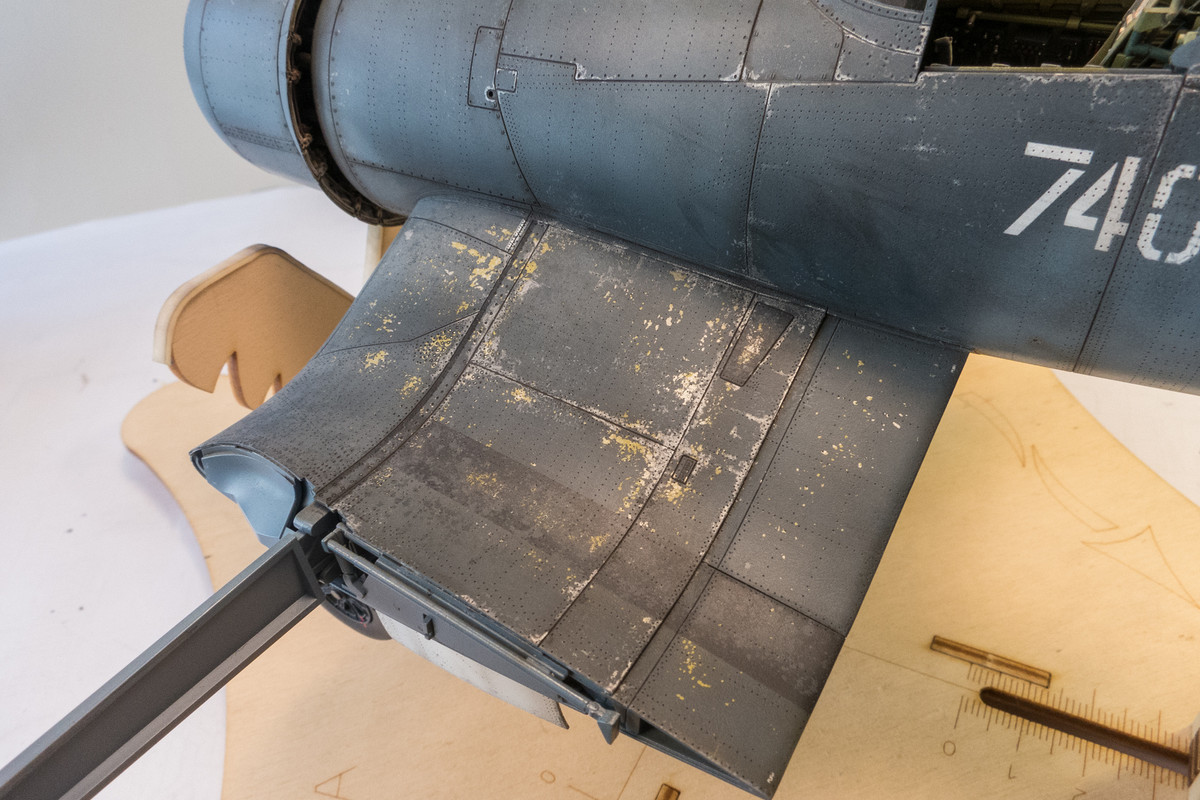
Added some more chipping with a silver pencil...
John aka JKim
-----------<><
-----------<><
-
speedgraflex
- Moderator
- Posts: 11129
- Joined: Fri Feb 10, 2017 11:08 pm
- Contact:
Re: 1/32 Tamiya F4U-1a Corsair - Boyington 17740
Yes, thank you for interpreting, John. I believe I was writing with the intent to be neutral in tone, and stepping carefully as possible. Anyway, you got the gist and what you are doing looks incredibly good. After I wrote my reply I thought, “He intends to do the penciling anyway,” which was suddenly how I interpreted what you wrote earlier about not quite being there yet. Any plans to add the blown streaks of oil? I was watching an old Apogee Studios video where they showcase early ILM style weathering, using blown air from an air brush and a much diluted medium to dark grey wash. Perhaps something like that will be a solution, adding wet effects amongst all the dry dust and burnt smoke?
Make more models!
Re: 1/32 Tamiya F4U-1a Corsair - Boyington 17740
I have some effects to replicate liquid leaks but they are on the subtle side and sometimes don't show up in the photographs.
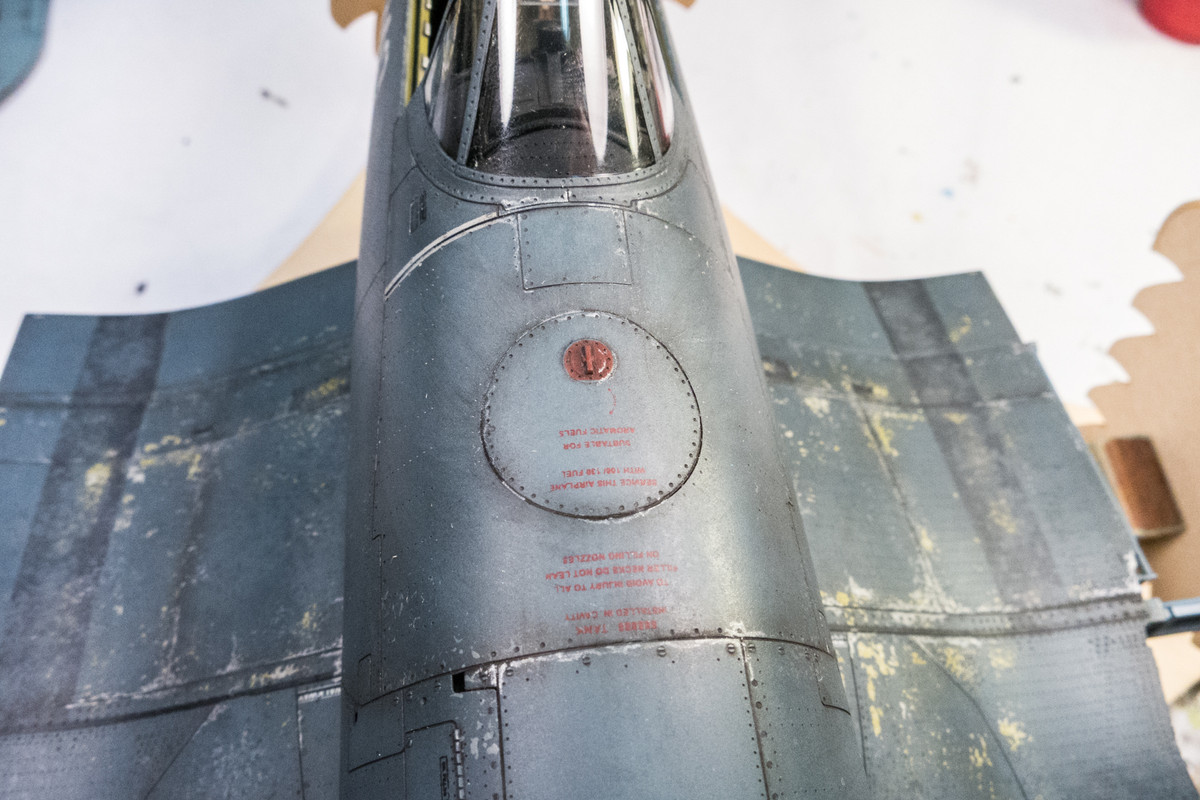
740 does not have the antenna mast on the fuselage spine behind the cockpit so I need to fill in the hole.
740 does not have the antenna mast on the fuselage spine behind the cockpit so I need to fill in the hole.
John aka JKim
-----------<><
-----------<><

Re: 1/32 Tamiya F4U-1a Corsair - Boyington 17740
John, this just gets better and better!
To make each build less crappy than the last one. Or, put another way, "Better than the last one, not as good as the next one!"..

Re: 1/32 Tamiya F4U-1a Corsair - Boyington 17740
KSaarni wrote:John, your Corsair build will go to the history books of SPAM !
Without doubt, one of the best WW2 fighter plane builds on this forum.
And that is a fact.
- Kari
Stuart Templeton 'I may not be good but I'm slow...'