John Eaton's Build Logs

A reference source for our builds without "commercial interruption" as it were. Commentary and pictures. All members can post a build log.
User avatar
jeaton01
Elite Member
Posts: 2110
Joined: Thu Apr 23, 2020 9:20 am
Location: Northern California
Contact:

Re: John Eaton's Build Logs

Post by jeaton01 »

I really should be more attentive to this thread!

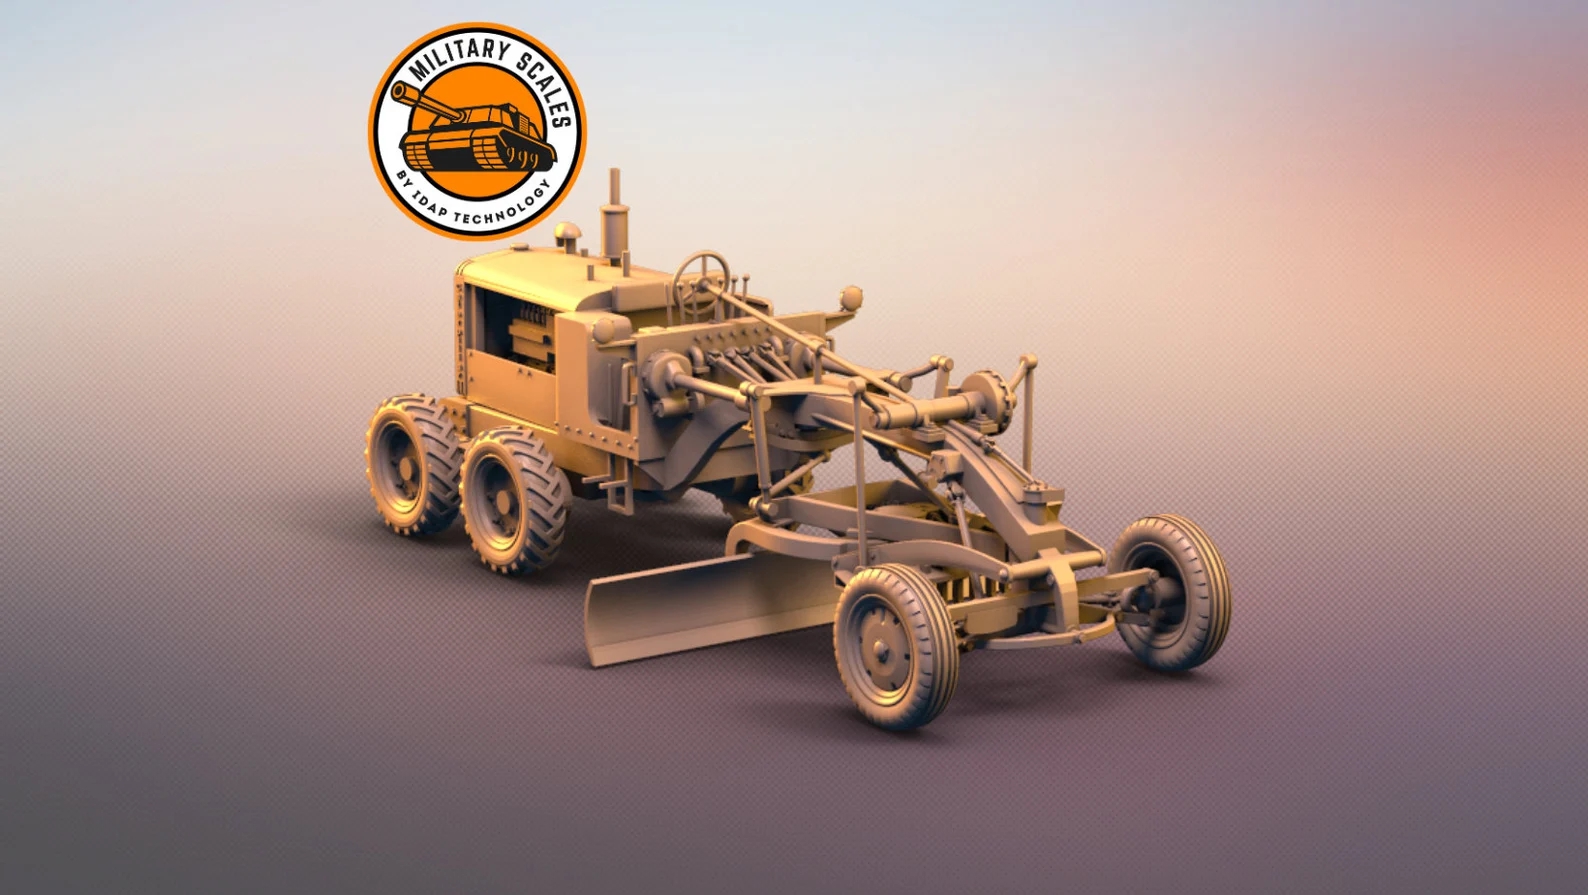
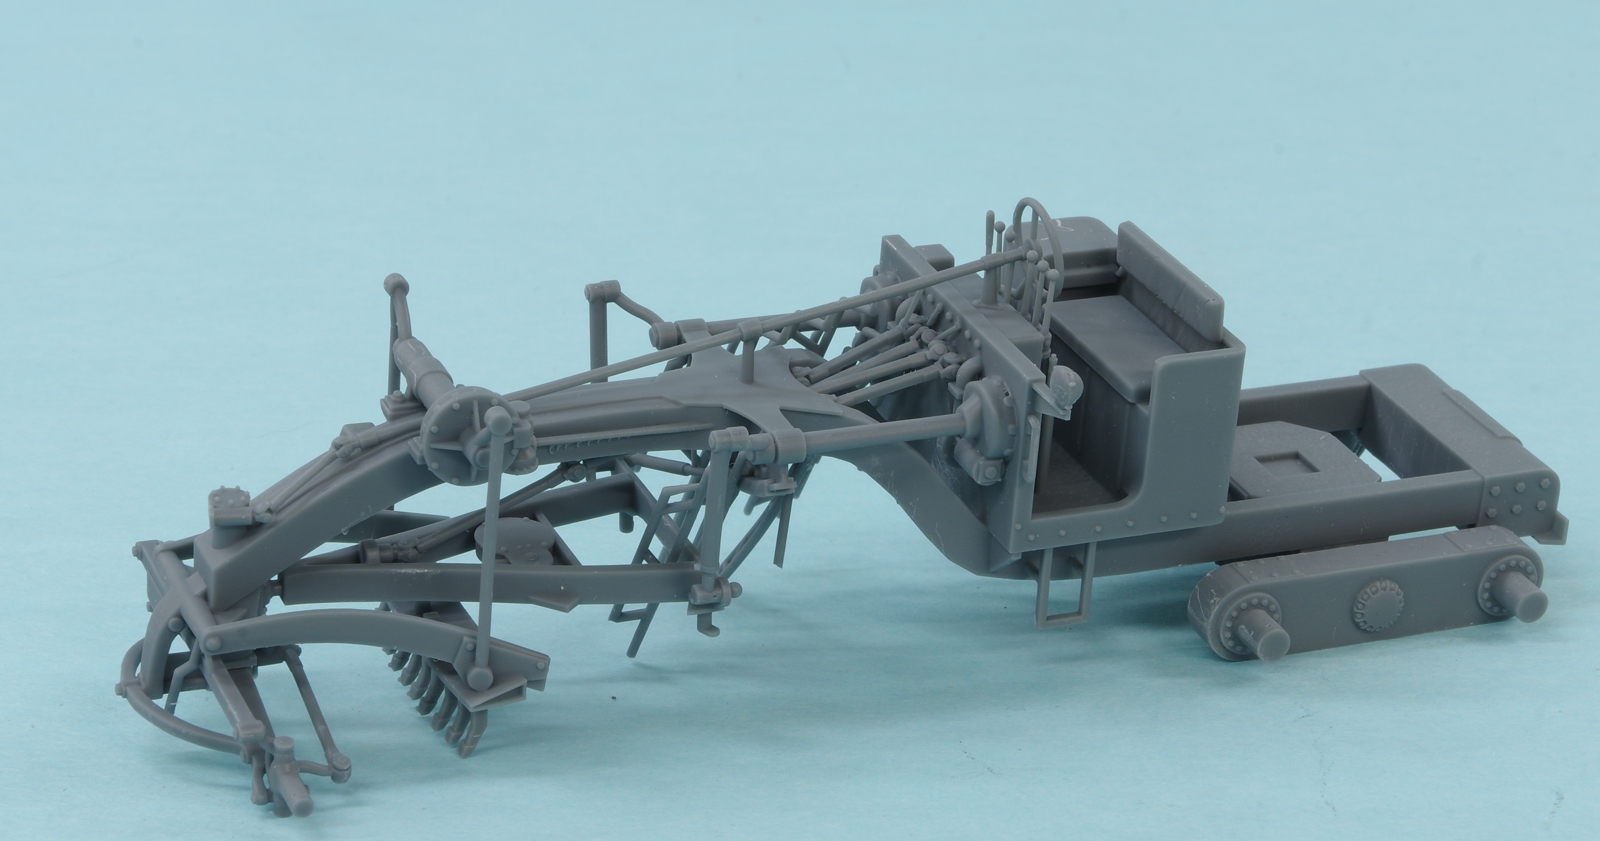
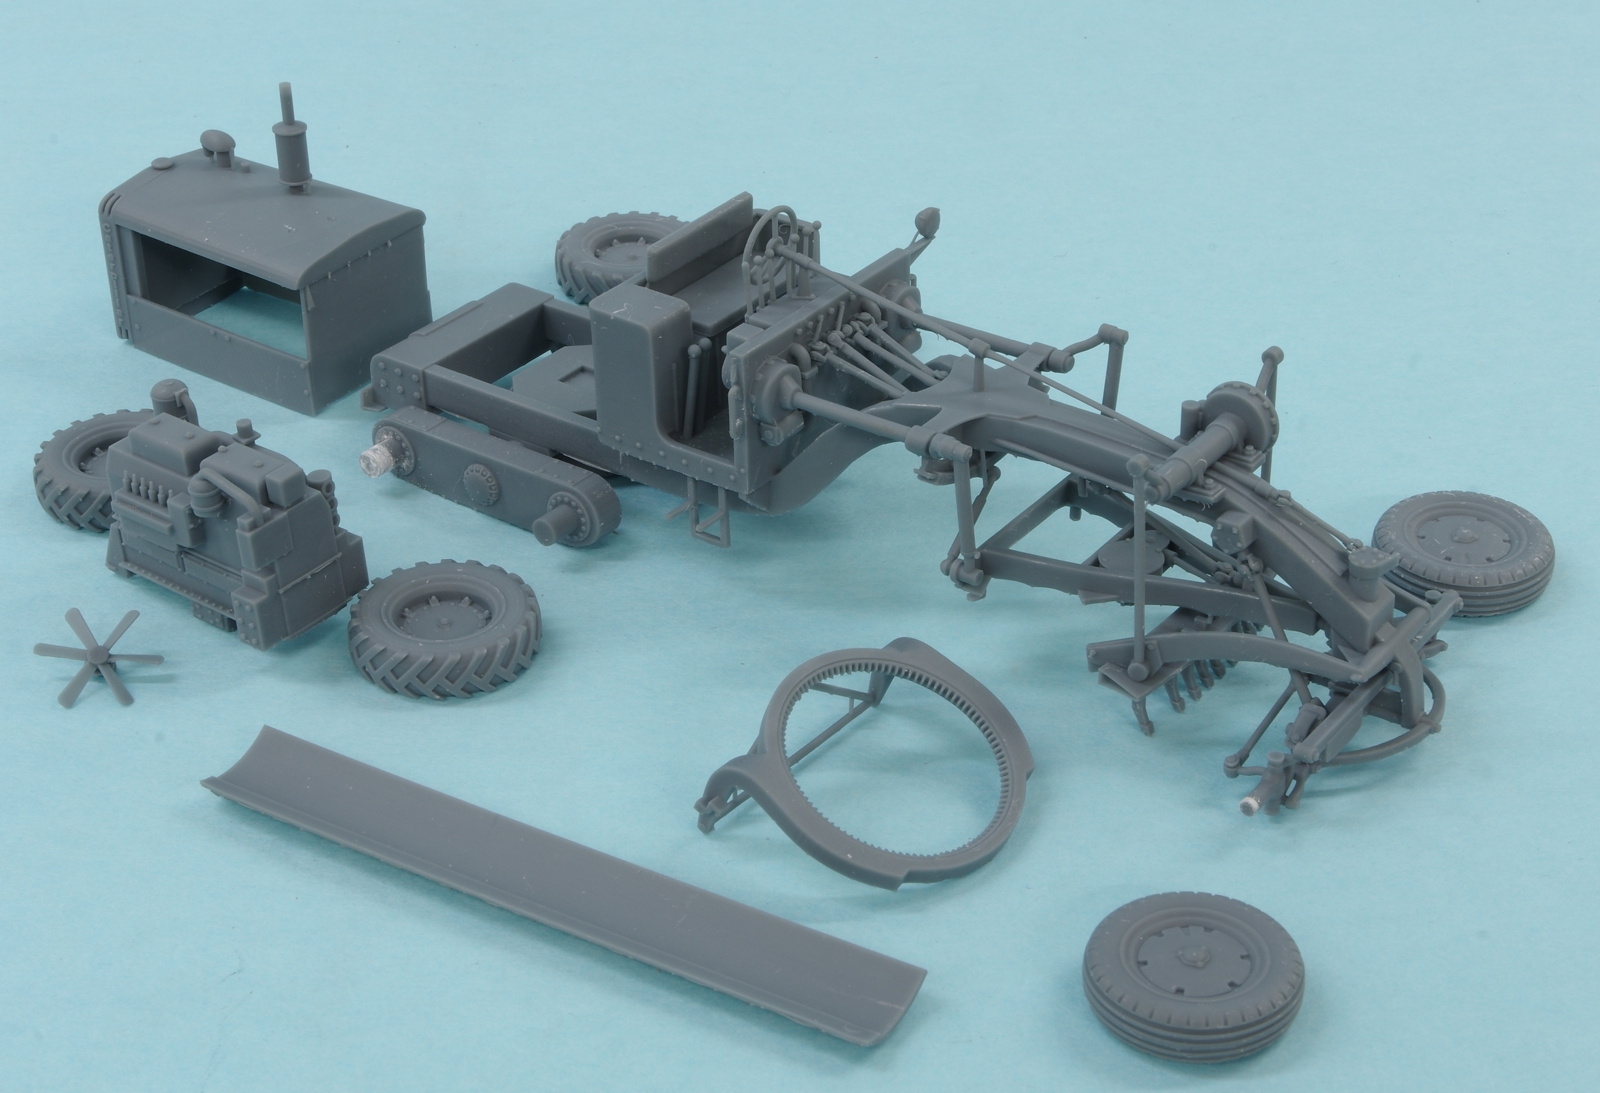
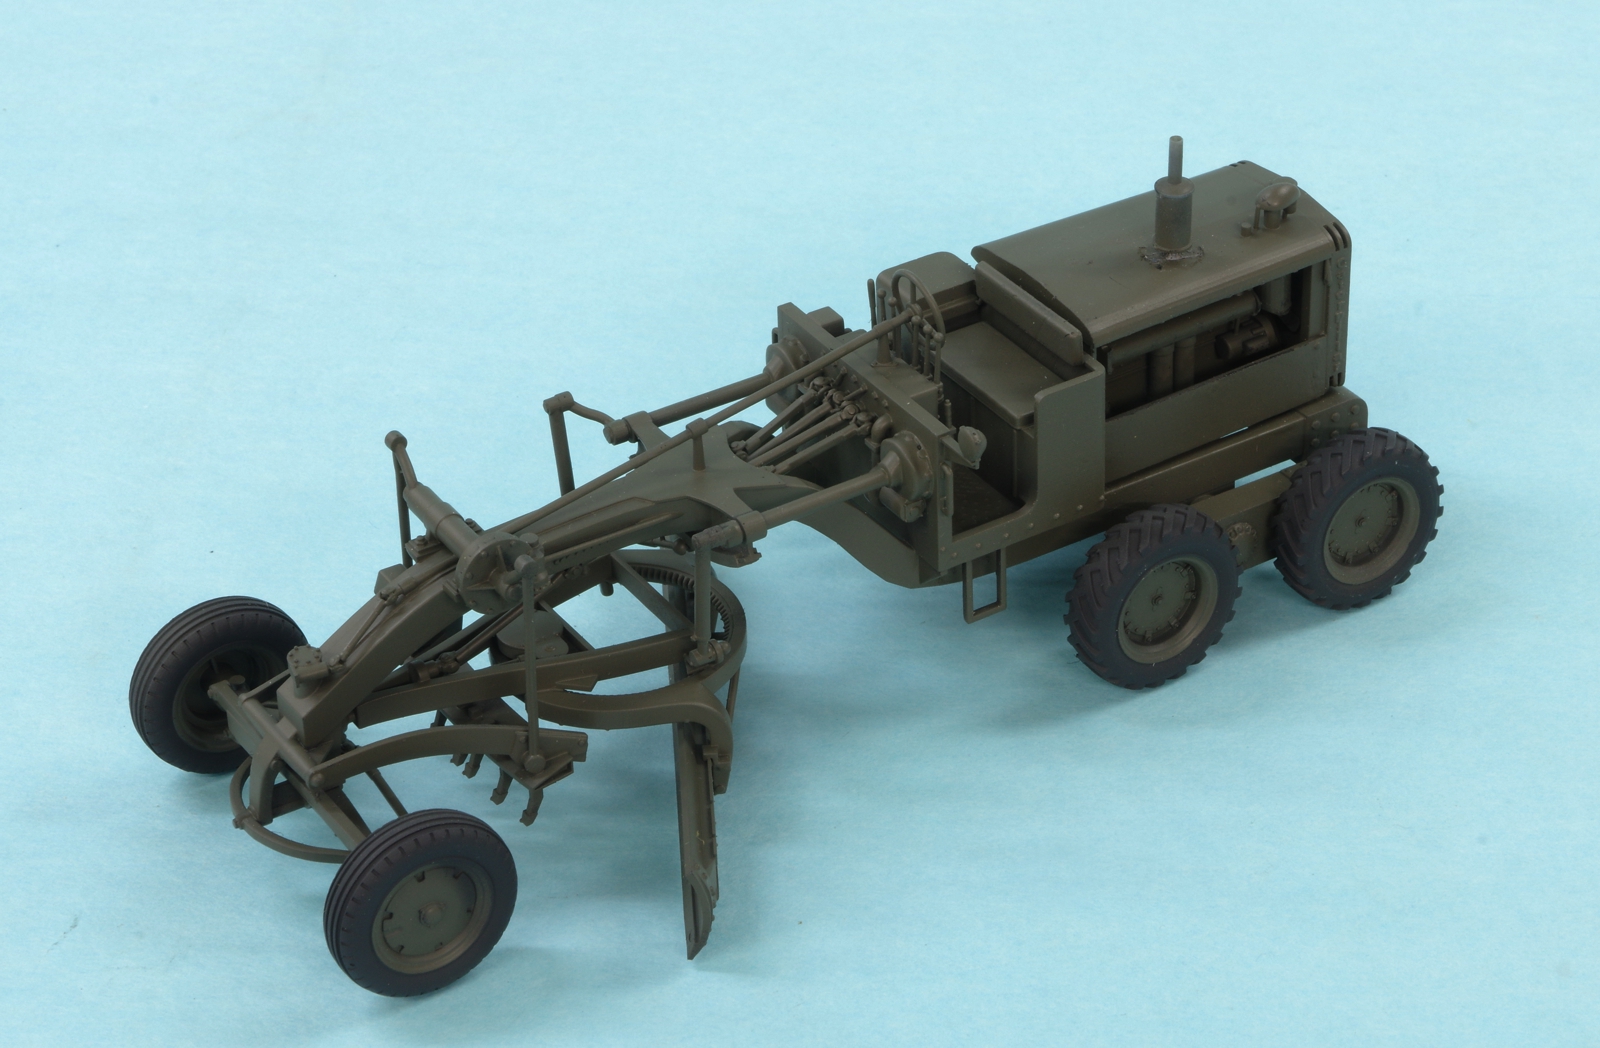
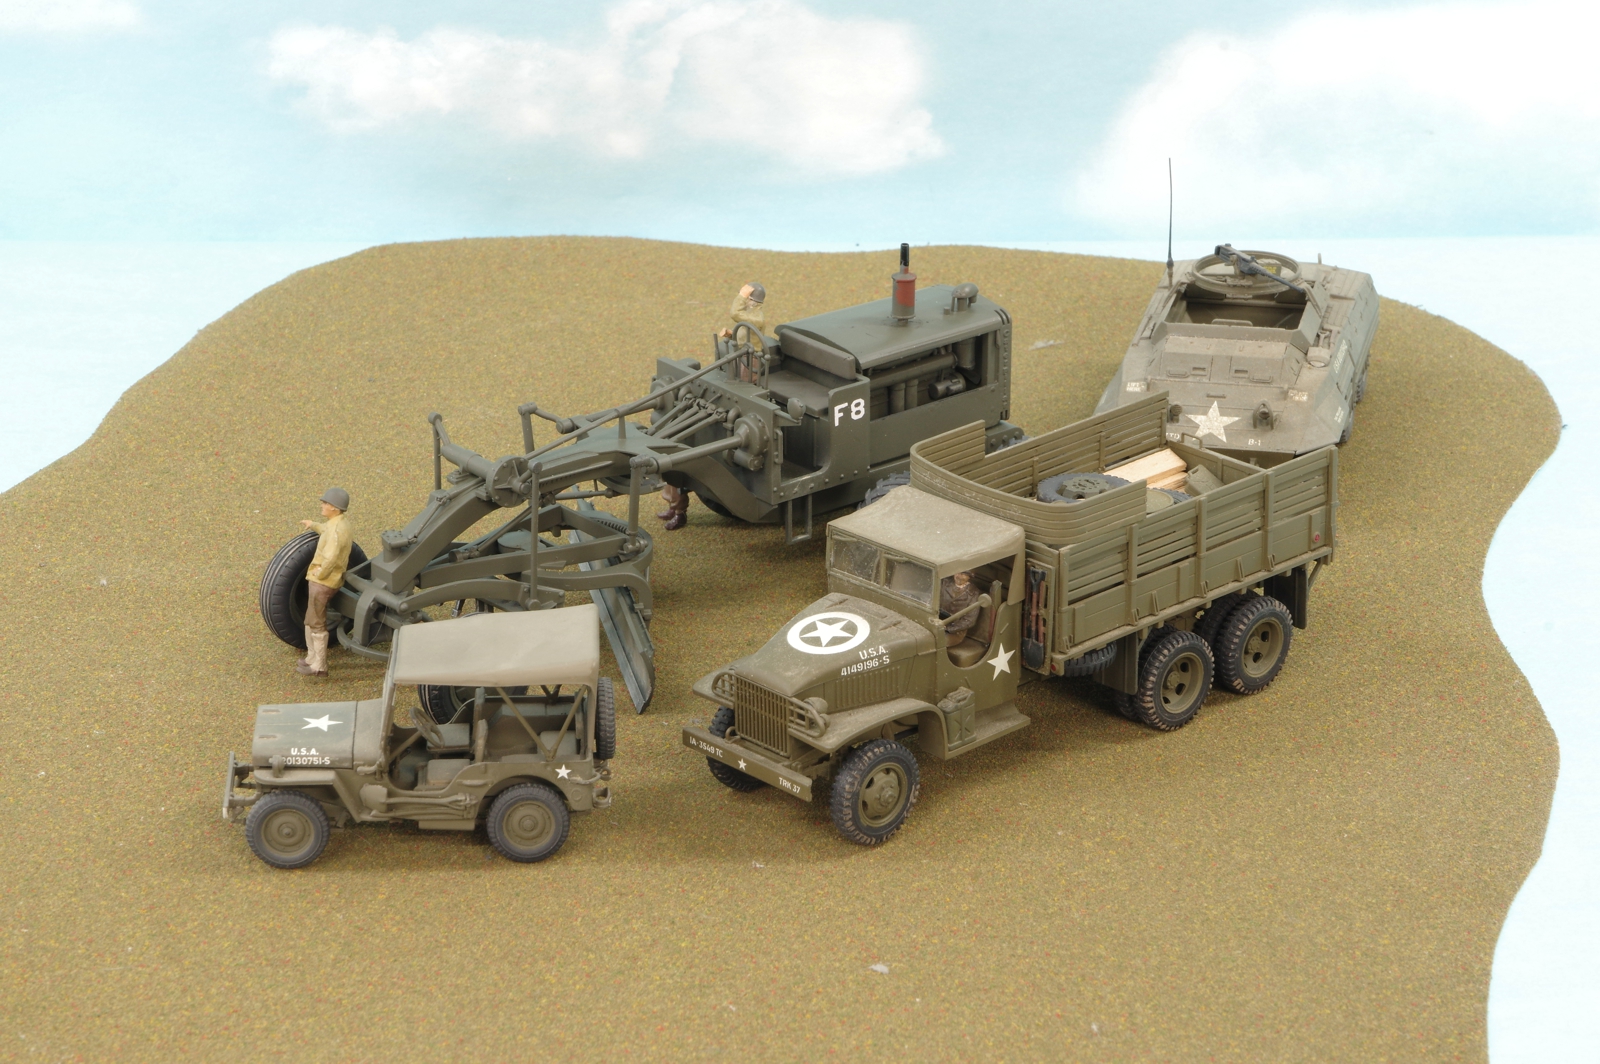
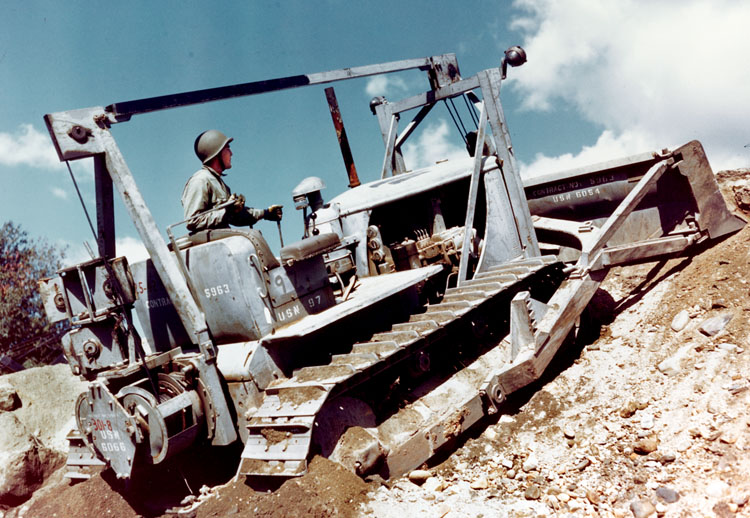
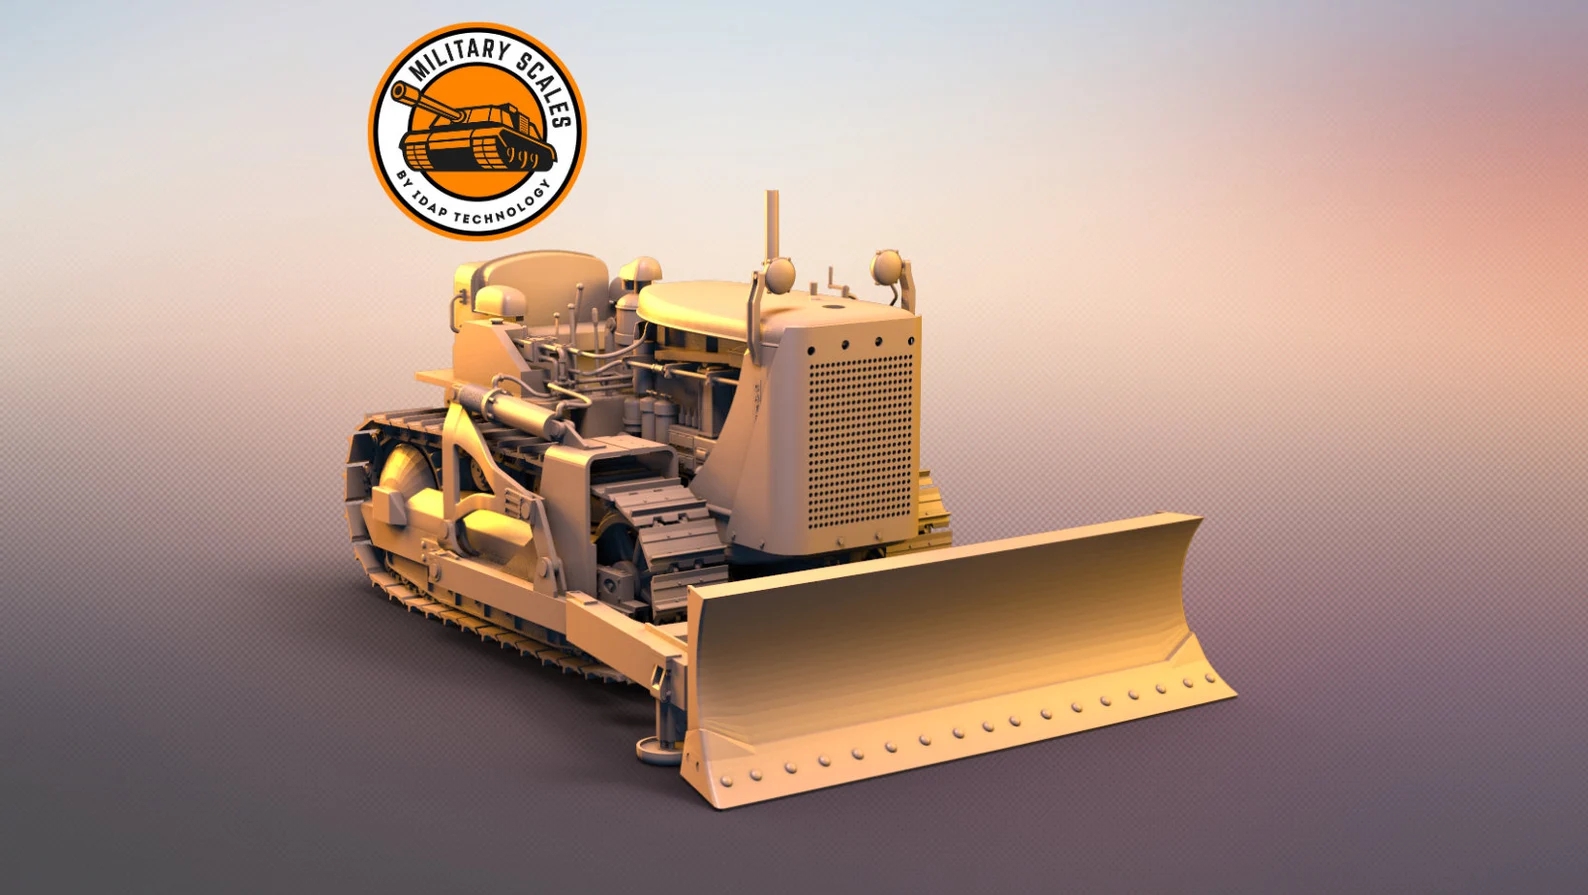
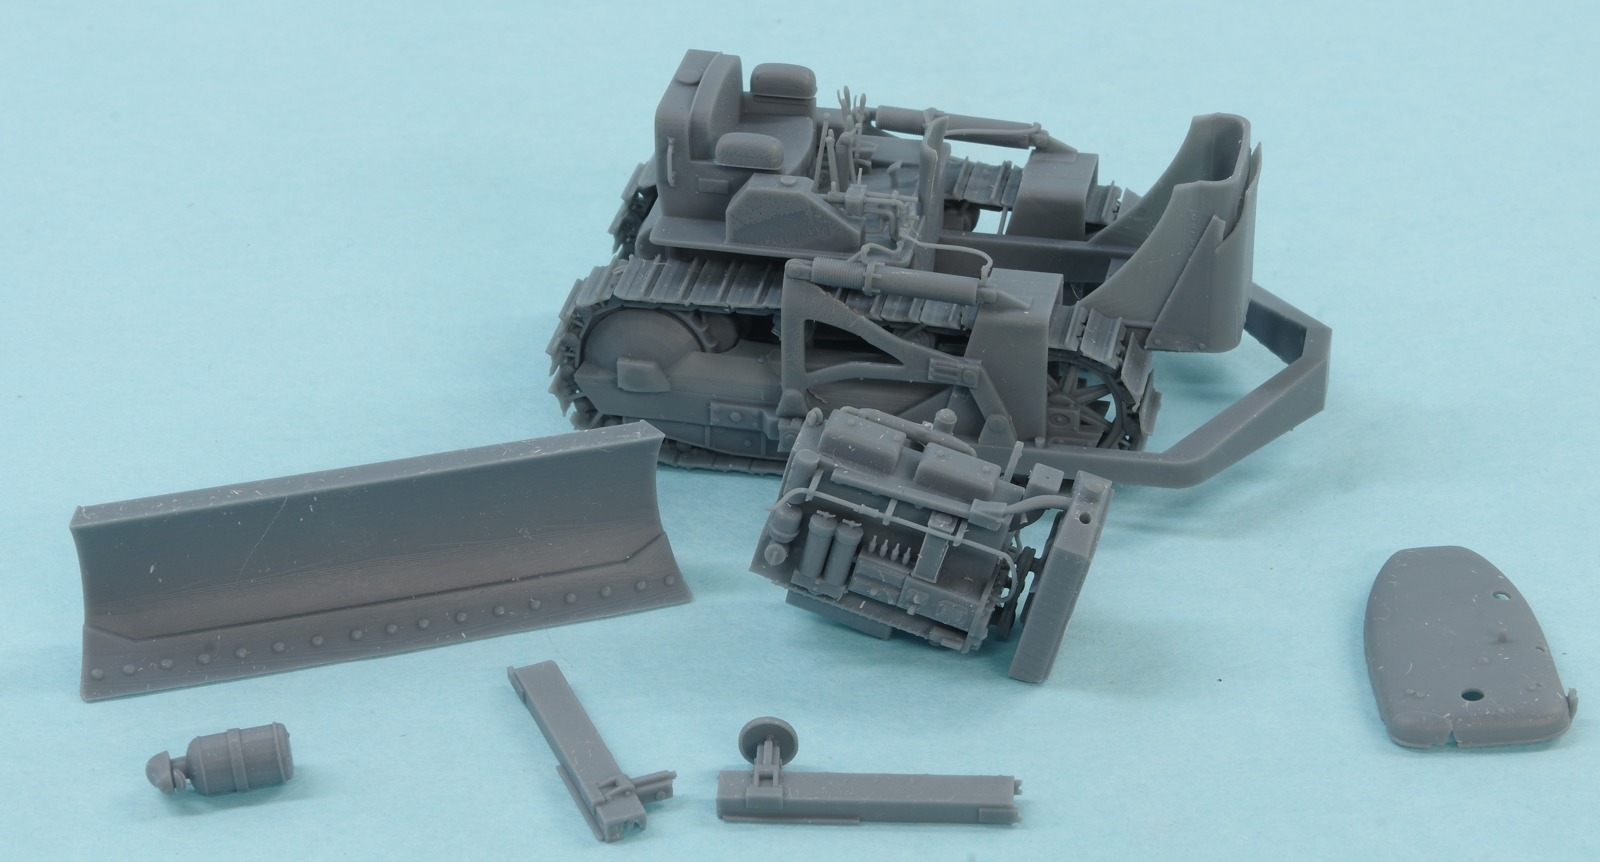
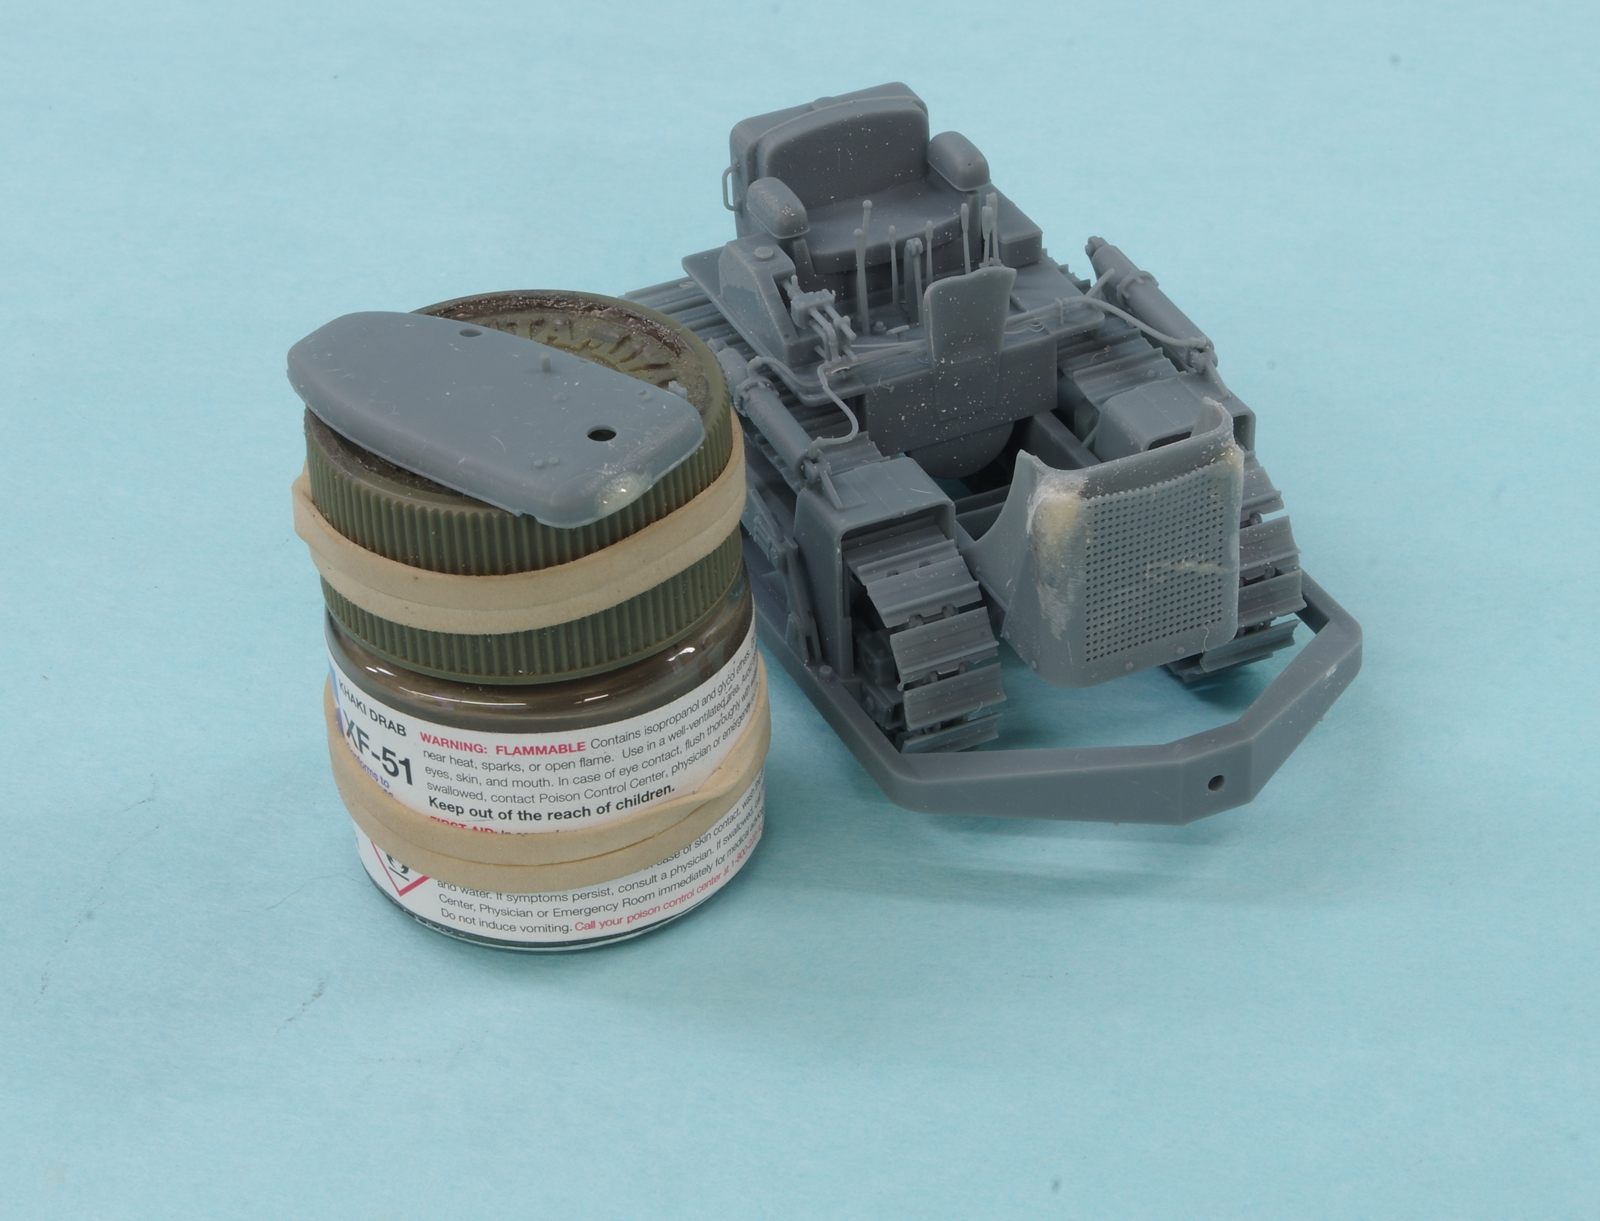
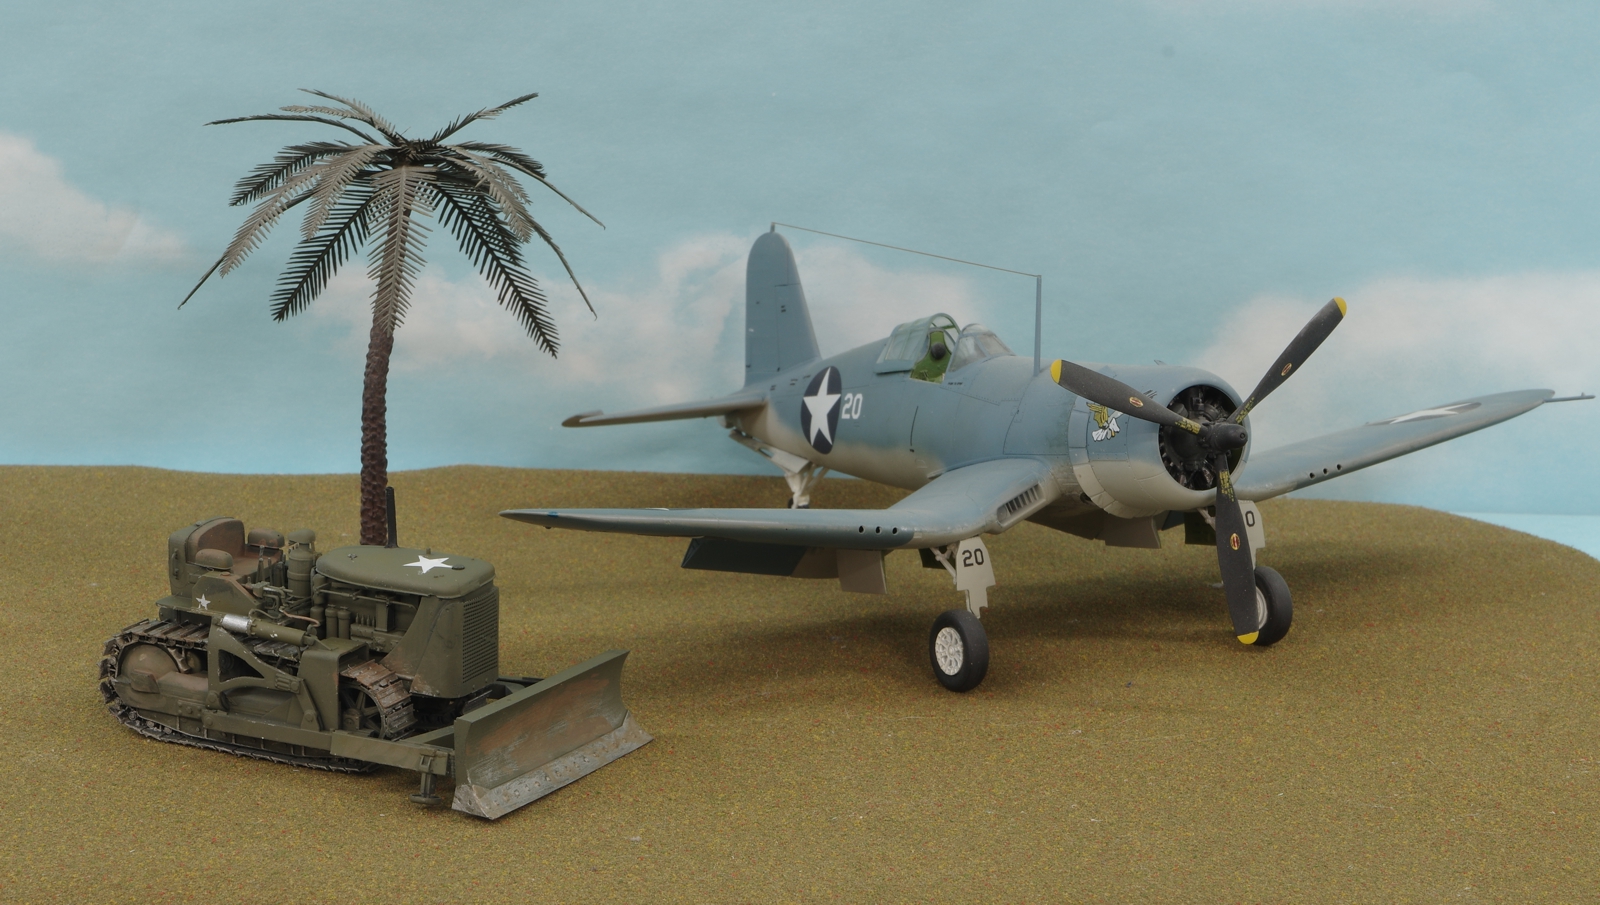
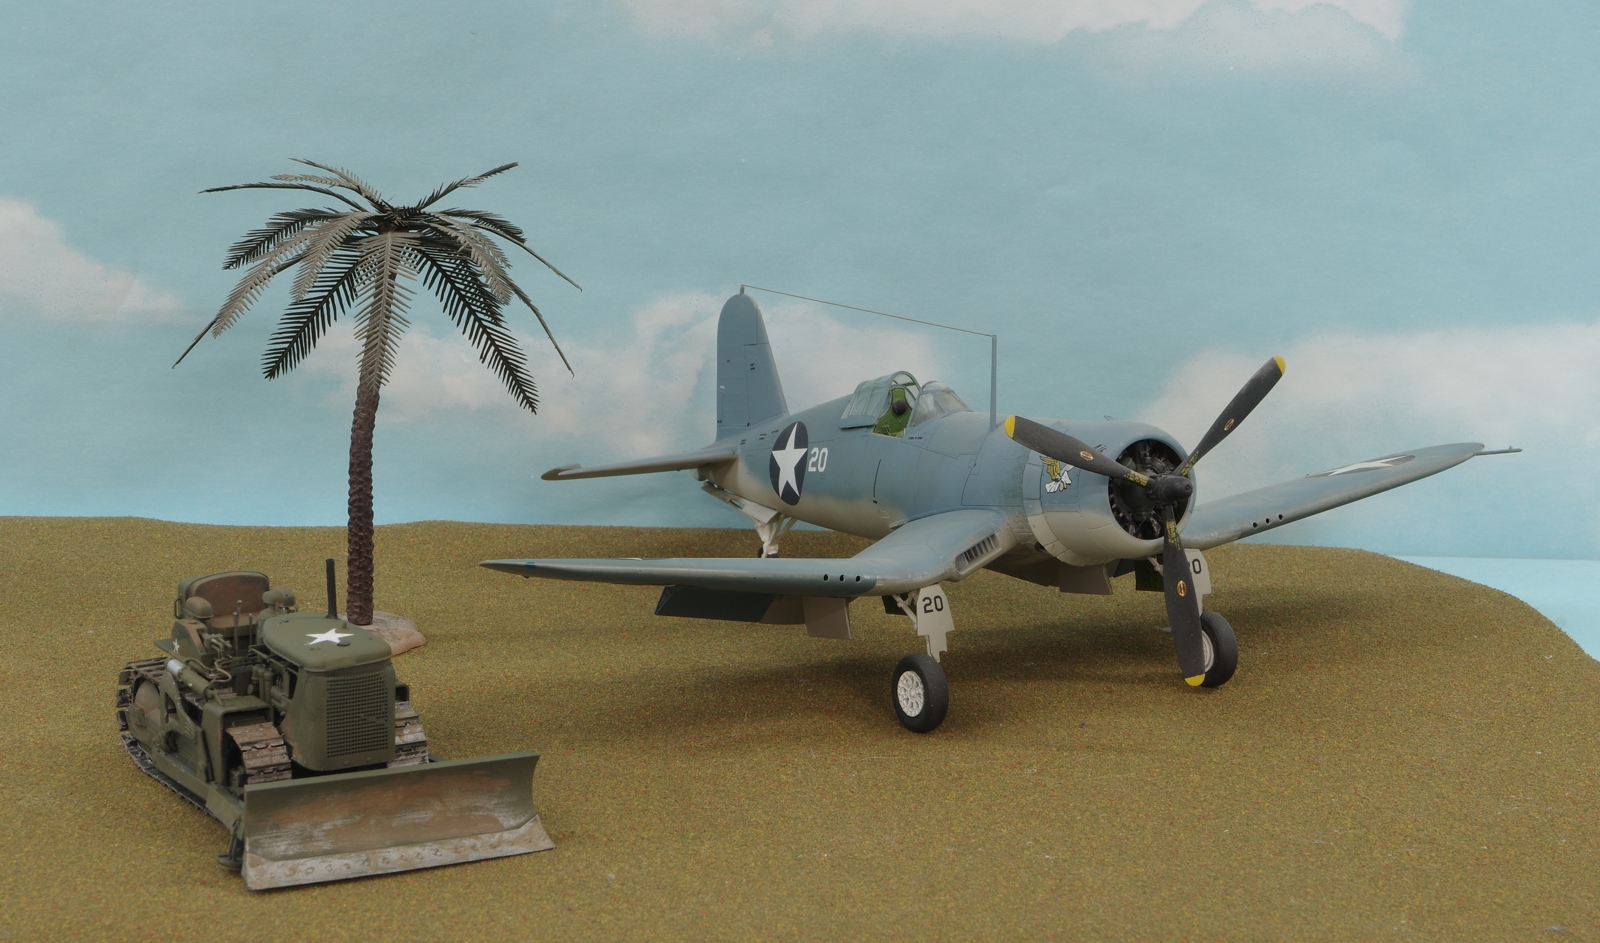
This is a 3D printed kit from Poland from a firm called IDAP Technologies, in their line called Military Scales. I bought this one, a Caterpillar Model 12 Grader and a D-7 dozer from them via ETSY. They make them in numerous scales, the price rises as does the size, of course. While not the equal of the best plastic injection moldings they are better than most and are of much sturdier resin than some other 3D stuff I have used. Just a hint here and there of stepping, and mostly in areas that are easy to work or don't matter in 1/48 scale. Only a few parts to put together and the fit was very good.

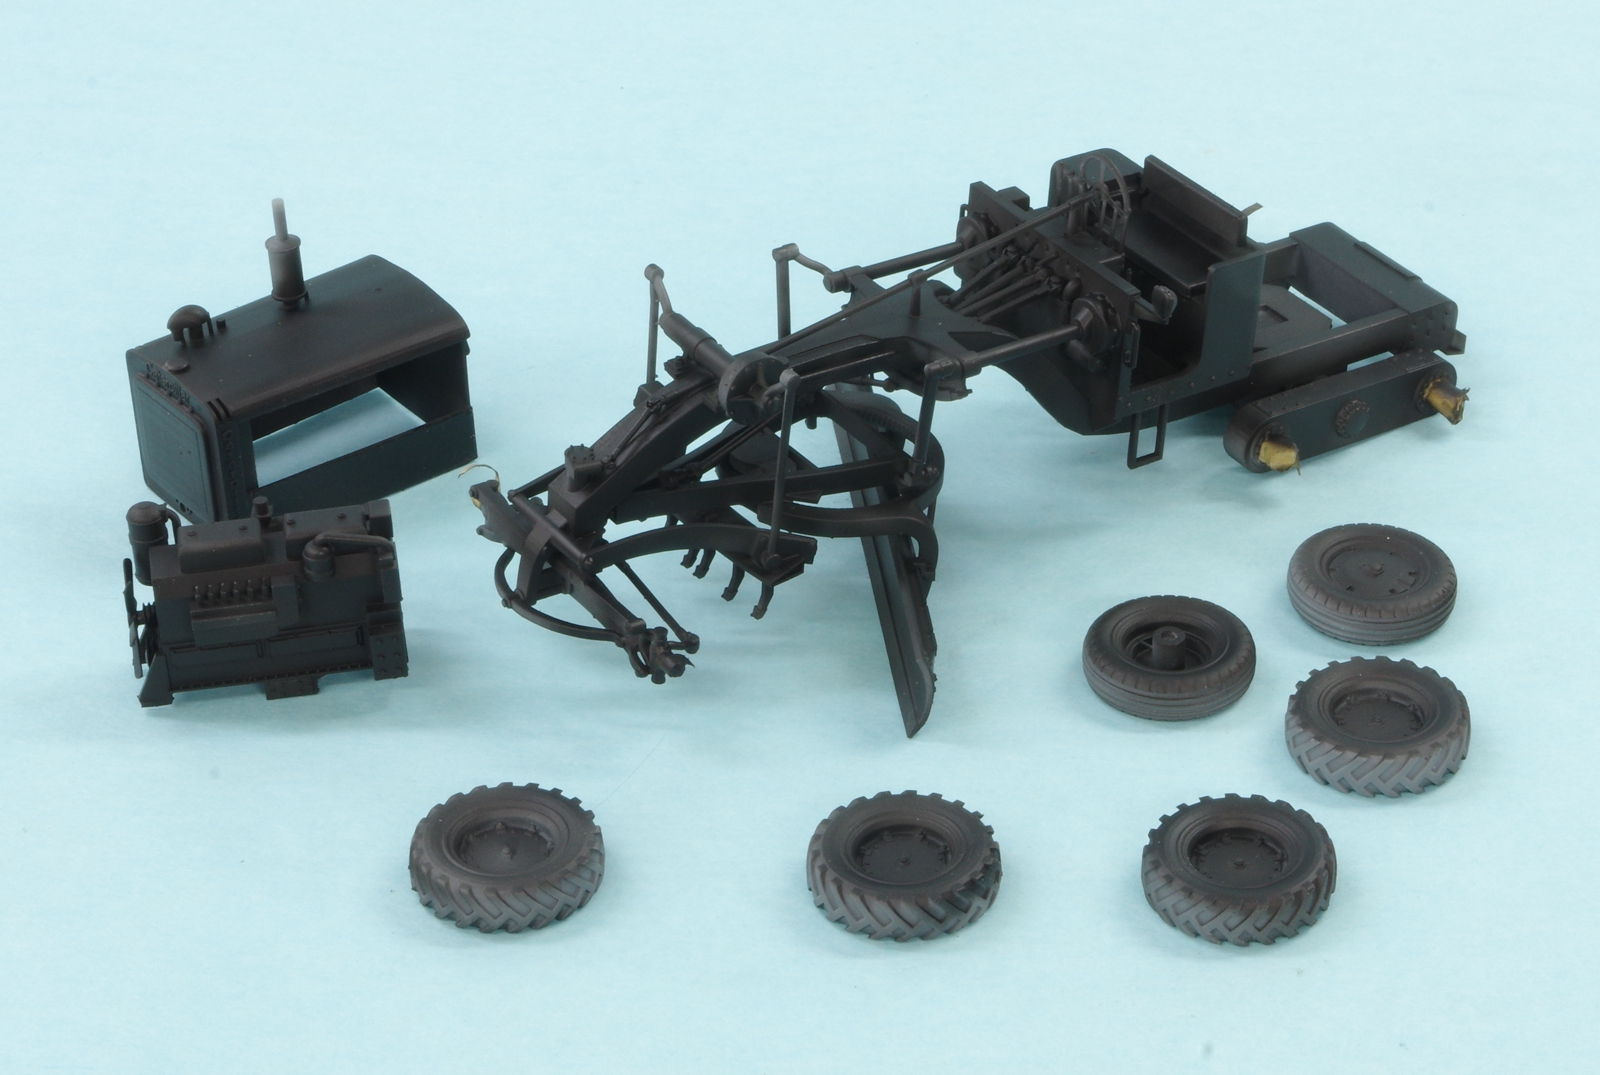
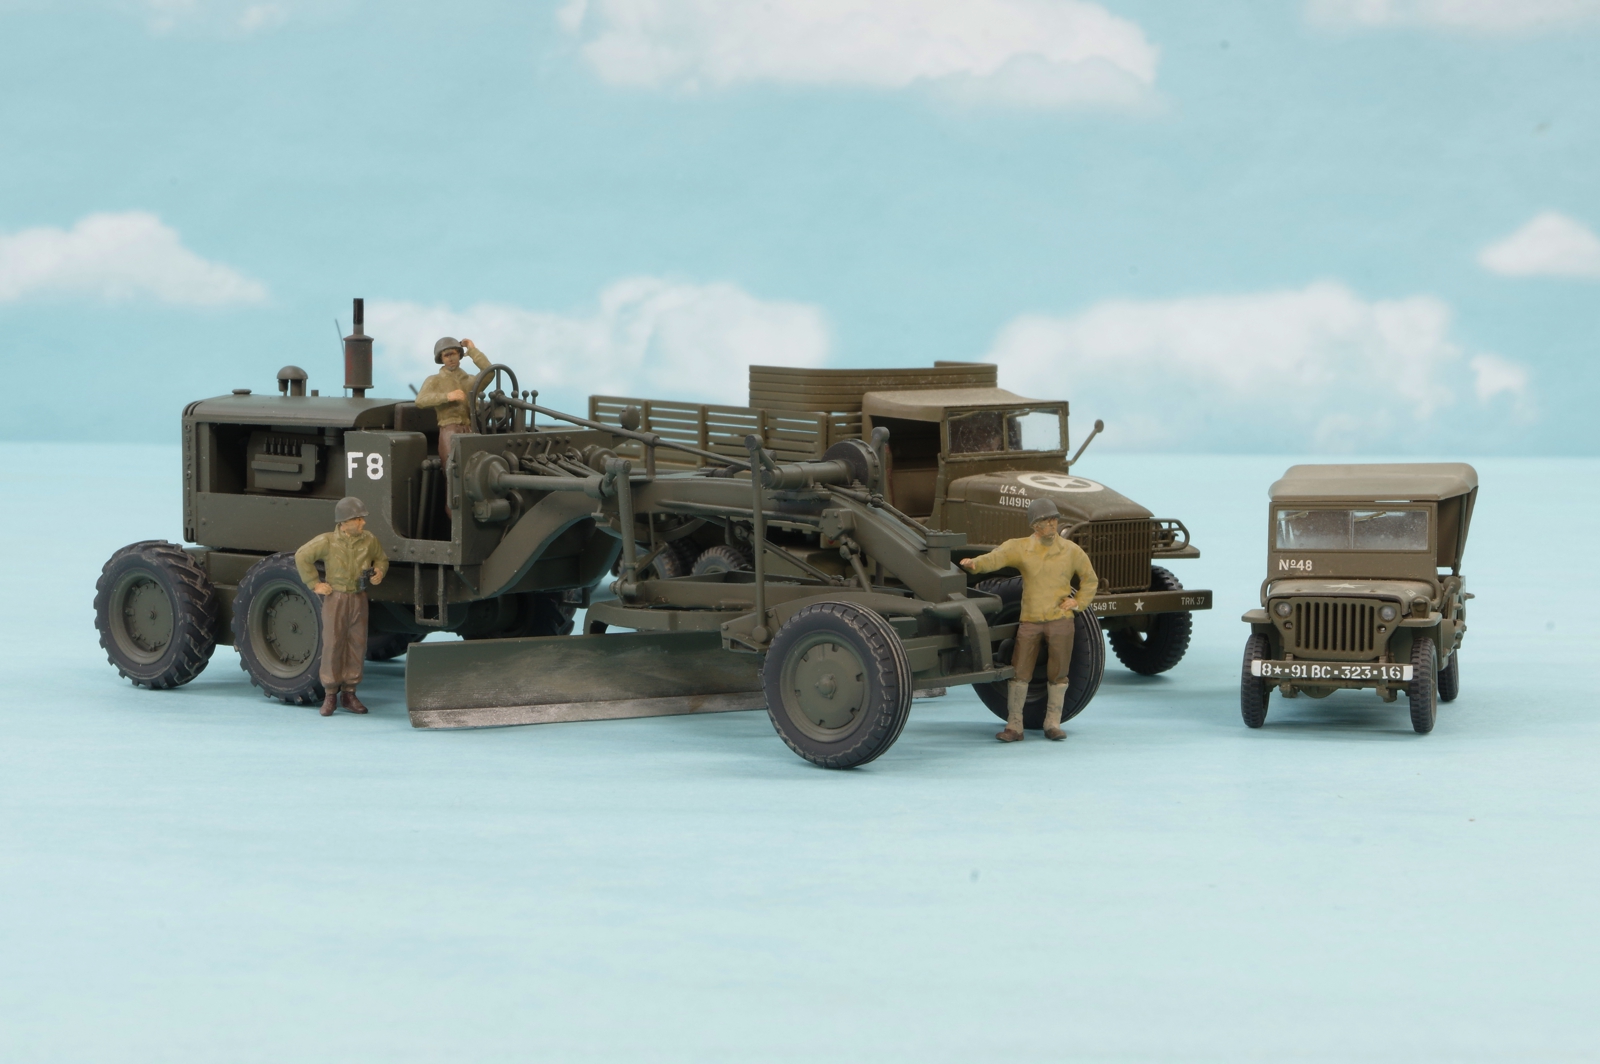
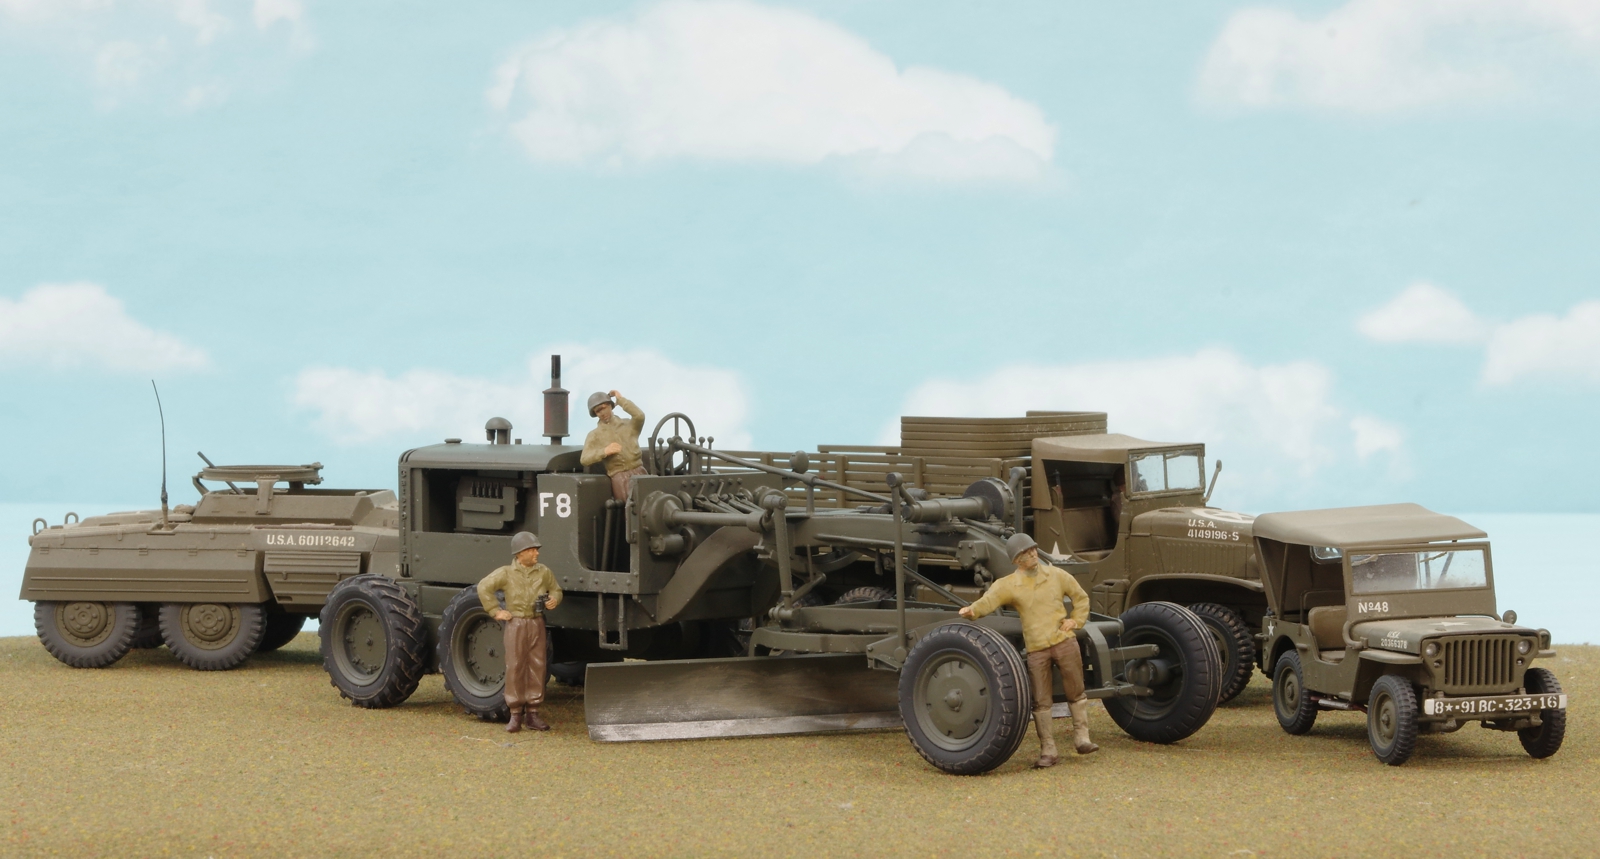
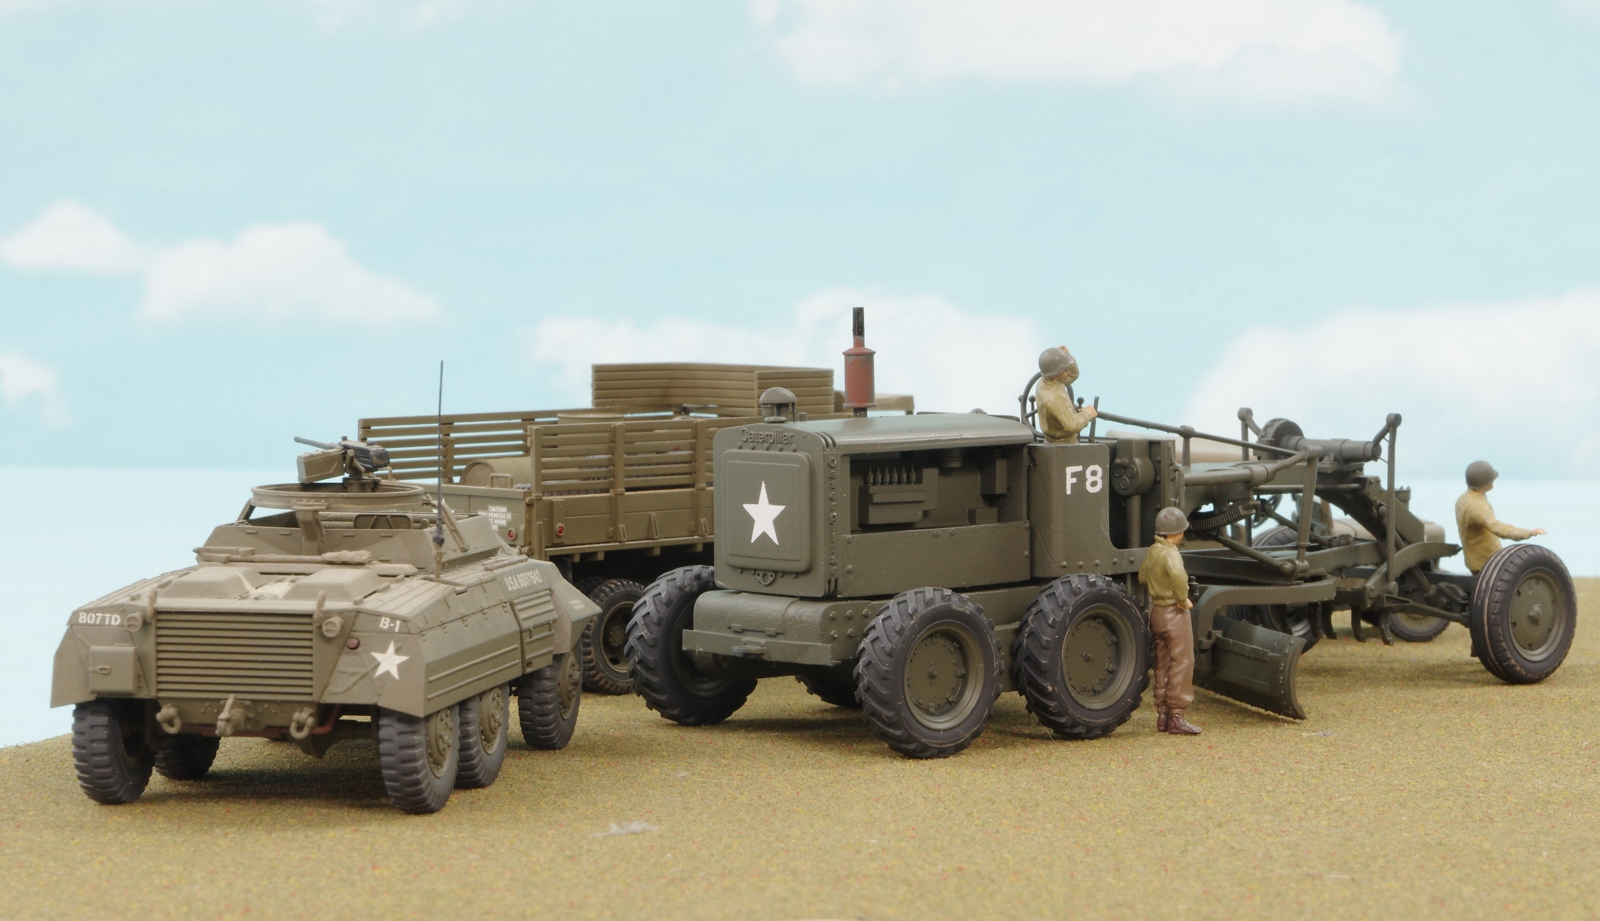
I primered everything with Gunze black finishing primer and used a Vallejo OD, I would rather it was more like the old Model Master Faded Olive Drab but then it gives it some contrast with the other vehicles it is with. The figures are from the Tamiya scout car set, painted long ago. I will give them a wash and a flat coat before I put them away. The markings were suggested by photos I found on the web and were painted on using stencils.

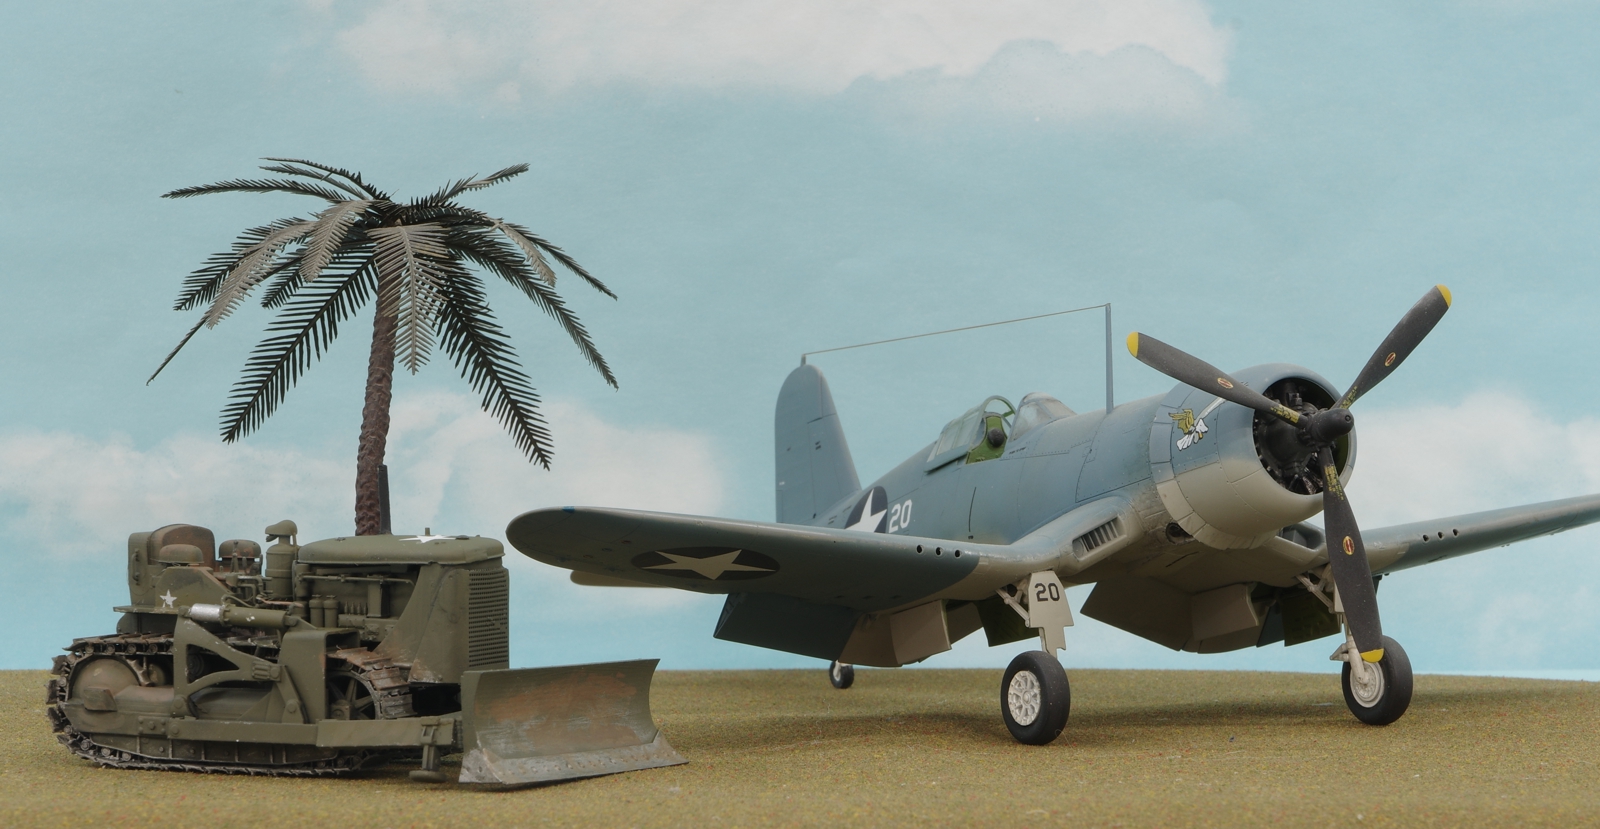
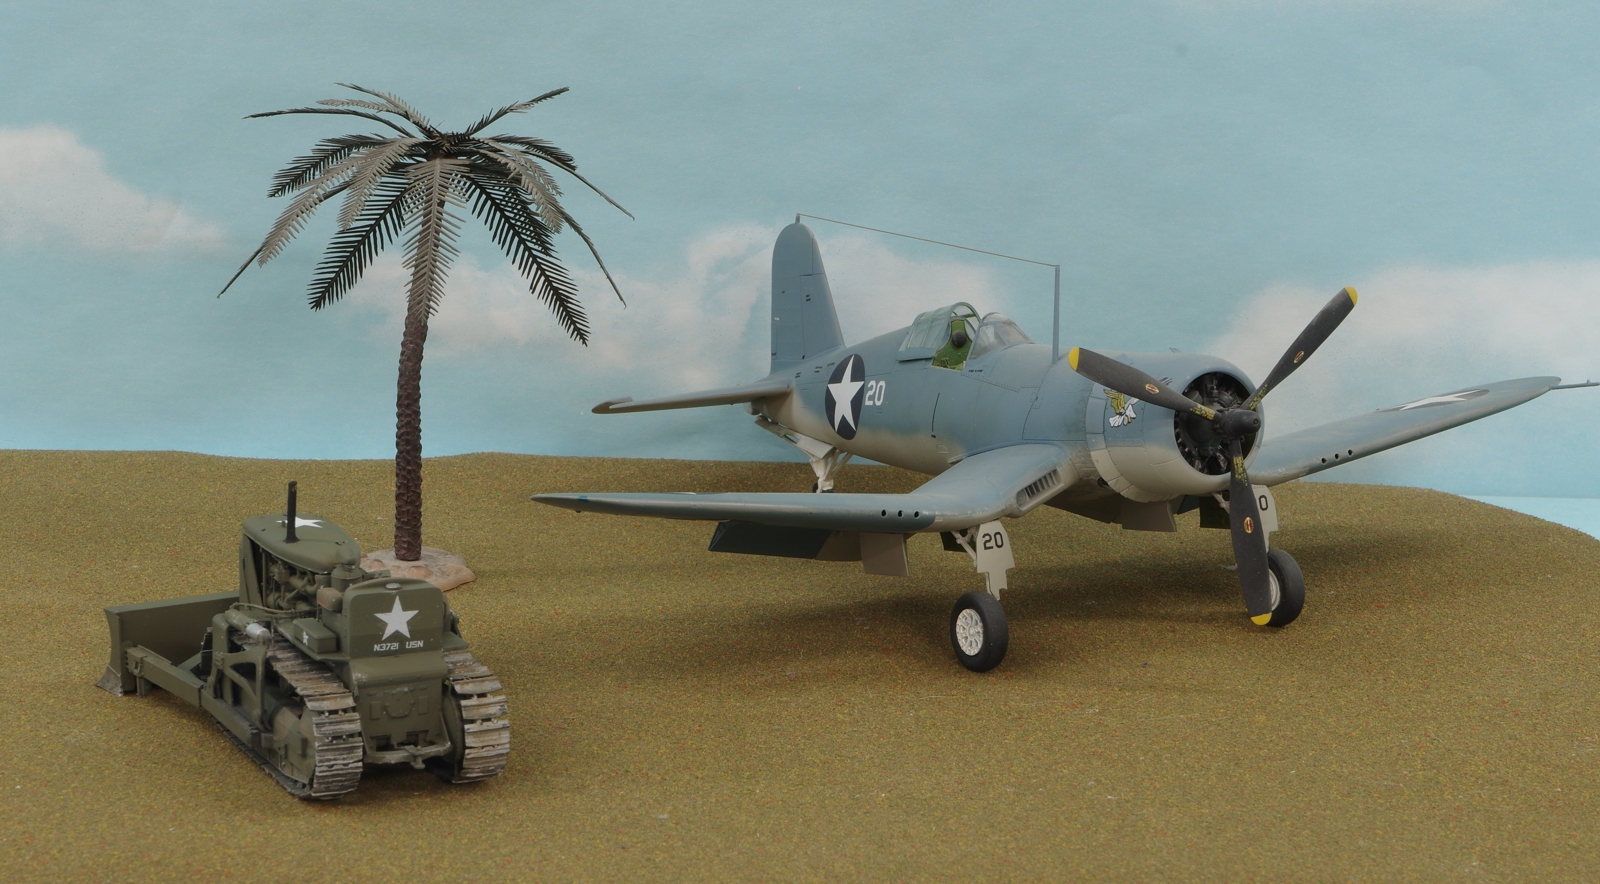
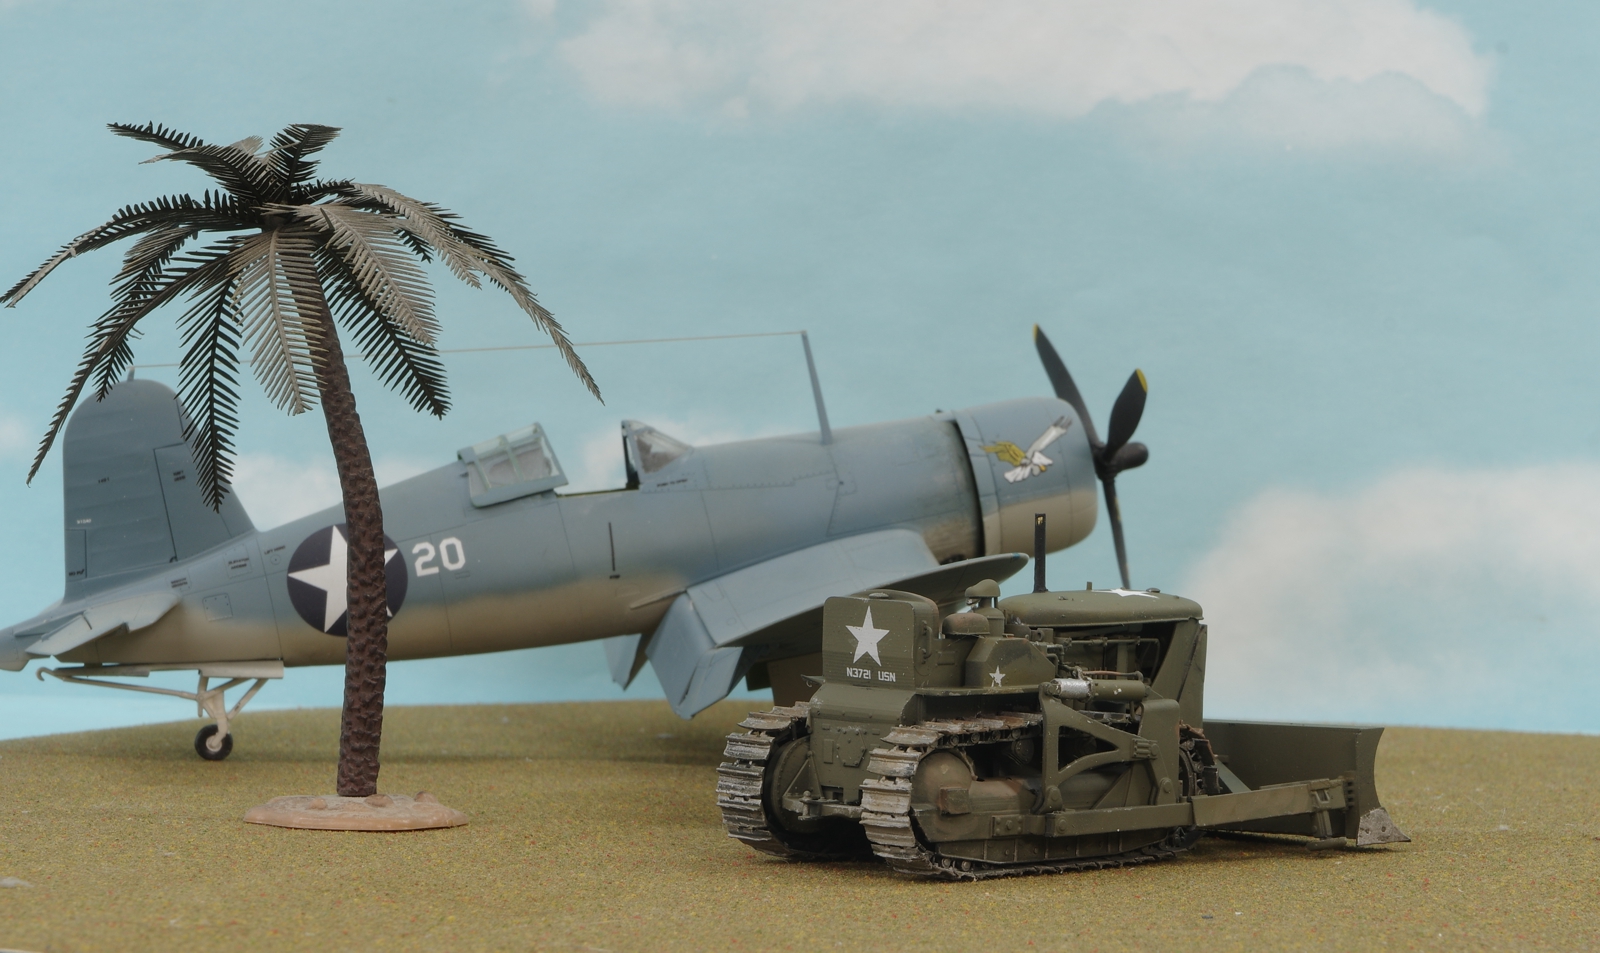
I guess I can claim it as a weekend build, it was only removed from the supports prior to Friday evening. I would have had it done even sooner except I clumsily broke off the muffler reaching for a paint bottle and broke off the right blade lift lever while I was masking the F8 on the right side and had to find the lever and reinstall both items. I weathered it with a mixture of steel and silver chrome on the blade and scarifier shanks, and then added Tamiya Sand and Mud on the blade and tires. I had better luck with those than in the past because I figured out I could thin and blend them using Tamiya acrylic thinner.

Image

Image

Image

Image

Image

Image

Image

Image

Image

Image

Image
My modelling website, with build logs.

http://goldeneramodel.com/mymodels/mymodels.html
User avatar
keavdog
Elite Member
Posts: 3695
Joined: Thu Jan 10, 2019 1:14 am
Location: Goodyear, AZ

Re: John Eaton's Build Logs

Post by keavdog »

Neat stuff John
Thanks,
John
User avatar
cbaltrin
Master Member
Posts: 818
Joined: Mon Dec 26, 2022 9:10 pm
Location: Detroit

Re: John Eaton's Build Logs

Post by cbaltrin »

Very cool John! Now get that thing to work building some runways! :shoutout:
Big Joe: 'You just keep those Tigers busy and we'll take care of the rest.'
Oddball: 'The only way I got to keep them Tigers busy is to let them shoot holes in me...'

My Stash https://www.scalemates.com/profiles/mat ... 53&p=stash
User avatar
Stikpusher
Moderator
Posts: 19057
Joined: Sat Apr 05, 2014 8:37 pm
Location: Ceti Alpha 5

Re: John Eaton's Build Logs

Post by Stikpusher »

Very nice grader! Pretty soon you’ll have an engineer unit 👍🏼
"Surely I have made my meaning plain? I intend to avenge myself upon you, Admiral. I have deprived your ship of power, and when I swing 'round, I intend to deprive you of your life."

FLSM
User avatar
jeaton01
Elite Member
Posts: 2110
Joined: Thu Apr 23, 2020 9:20 am
Location: Northern California
Contact:

Re: John Eaton's Build Logs

Post by jeaton01 »

The D-7 is underway. I'm assuming the Sea Bees painted things OD at least part of the time. Hard to find any color pictures of their equipment and if I go OD they can be in Europe or the Pacific I think.
My modelling website, with build logs.

http://goldeneramodel.com/mymodels/mymodels.html
User avatar
Stikpusher
Moderator
Posts: 19057
Joined: Sat Apr 05, 2014 8:37 pm
Location: Ceti Alpha 5

Re: John Eaton's Build Logs

Post by Stikpusher »

Either OD or Navy Gray...

Image
"Surely I have made my meaning plain? I intend to avenge myself upon you, Admiral. I have deprived your ship of power, and when I swing 'round, I intend to deprive you of your life."

FLSM
User avatar
jeaton01
Elite Member
Posts: 2110
Joined: Thu Apr 23, 2020 9:20 am
Location: Northern California
Contact:

Re: John Eaton's Build Logs

Post by jeaton01 »

Thanks, Carlos. Obviously it is a posed photo as there is no black smoke coming from that exhaust pipe!

Here's the D-7 from the same source as the grader. I had to do some repair work on the hard nose and hood where the build was incomplete, thick CA and dental alginate were used for that.

Image


Image

Image

Image

Image

Image

Image

Image
My modelling website, with build logs.

http://goldeneramodel.com/mymodels/mymodels.html
User avatar
jeaton01
Elite Member
Posts: 2110
Joined: Thu Apr 23, 2020 9:20 am
Location: Northern California
Contact:

Re: John Eaton's Build Logs

Post by jeaton01 »

I started another X-Plane, one that I have had in the workshop pile for 10 years or so. It is the 1/48 Czech Models XP-56. It has resin detail parts and the rest is fairly good limited run injection moldings. Fit is very good so far but bring a rough file for the pour stubs.

The cockpit tub positioning wasn't too bad and it locks the nosewheel bay in place. The main gear bays fit well once all of the pour remnants were belt sanded down to flush with the perimeters. I painted the cockpit interior green as well as the gear bays. The inside of the tip venturies were painted flat black but it might have been good to put some sheet plastic in there to block the see through. I installed the wings to the fuselage halves and taped the assembly together to check for any ballast requirements but the model appears to be balanced well to stay on the nosewheel without any. I didn't install two subpanel that fit at an angle to the main panel as it looked like getting them in the right spot was going to be difficult and they would be hard to see anyway. There were no instrument panel decals in the kit but there is sufficient detail on the panels for some drybrushing.

The wing to fuselage joins needed some work due to the fuselage mating detail being a little too wide in the vertical dimension. A large exacto blade shaped to a curve scraped things into a close shape followed by a rough file and some Tamiya Putty. The putty was held to a narrow area by Tamiya Tape applied on both sides of the problem areas.

The vacuform canopy fitted nicely, I cut it close with Tamiya nippers and did the final shaping with a low powered Dremel like tool from Harbor Freight. I used a 2 inch carborundum wheel running at the lowest speed so that process wasn't too exciting. I took photos of the canopy and scaled them to size in Corel Draw, outputted a dxf file and cut them in a Silhouette Cameo vinyl cutter. Once masked some interior green was sprayed on for the interior color.

1/16 aluminum tubing was inserted into holes drilled at an angle in the depressions the kit had for the exhaust and glued in with CA. I should have roughed up the outside of the tubing first as that gives the tubing some tooth for the CA but I forgot. That made it so I couldn't be as aggressive as I would have liked to be when I hollowed out the tubing. Before hollowing the tubing out I clipped the stubs off at an angle and filed them down flush with the fuselage skin.

Image

Image

Image

Image

Image

Image

Image

Image

Image

Image

Image
My modelling website, with build logs.

http://goldeneramodel.com/mymodels/mymodels.html
User avatar
KSaarni
Elite Member
Posts: 5331
Joined: Sun Apr 06, 2014 7:13 am
Location: Gent, Belgium
Contact:

Re: John Eaton's Build Logs

Post by KSaarni »

What a special looking "flying thing", if it ever flew.
I guess the Me-163 acted as the "role model"

- Kari
---
On the bench:
Tamiya F-4B Phantom II 1/48
Kinetic F-16A (new tool) 1/48


https://www.facebook.com/GrundAsk-Scale ... 721218708/
User avatar
jeaton01
Elite Member
Posts: 2110
Joined: Thu Apr 23, 2020 9:20 am
Location: Northern California
Contact:

Re: John Eaton's Build Logs

Post by jeaton01 »

Kari, the two prototypes both flew. The first only a few times before it blew a tire on landing and rolled up in a ball. The second made 10 flights before the program was cancelled.

Working up the propellers this morning. 3/32 brass tubing and 1/16 music wire for the bearings and shafts. The kit did call for the shaft but not the bearings but things run truer and smoother with the brass bearings. All the prop blades are individual and there is no fixture for alignment so that was all Mk 1 eyeball. I know I have the blade faces correct and pitched for opposite rotation but I could have the rotation backwards on both. Who will know?

[youtube]https://youtu.be/gfrek7gZO1E[/youtube]

Image

Image

Image
My modelling website, with build logs.

http://goldeneramodel.com/mymodels/mymodels.html
Post Reply

Return to “Build Logs Of Finished Work”