
Junkers F13 Floatplane by MiniArt 1:48
-
Stikpusher

- Moderator
- Posts: 21290
- Joined: Sat Apr 05, 2014 8:37 pm
- Location: Ceti Alpha 5
Re: Junkers F13 Floatplane by MiniArt 1:48
Man that looks beautiful! I can understand the needing to take breaks due to the apparent complications of the assembly here.
"Surely I have made my meaning plain? I intend to avenge myself upon you, Admiral. I have deprived your ship of power, and when I swing 'round, I intend to deprive you of your life."
FLSM
FLSM

Re: Junkers F13 Floatplane by MiniArt 1:48
Thanks Bruce, it felt liberating, it did!speedgraflex wrote: ↑Wed Aug 19, 2026 3:56 pm Congratulations! How does it feel, knowing that this difficult series of construction steps is over?
Many thanks Carlos, especially when some struts broke during the process..Stikpusher wrote: ↑Wed Aug 19, 2026 6:24 pm Man that looks beautiful! I can understand the needing to take breaks due to the apparent complications of the assembly here.
But now it's amazingly sturdy construction!
- Kari
---
On the bench:
MiniArt 1:48 - Junkers F13 Float Plane
https://www.facebook.com/GrundAsk-Scale ... 721218708/
On the bench:
MiniArt 1:48 - Junkers F13 Float Plane
https://www.facebook.com/GrundAsk-Scale ... 721218708/
Re: Junkers F13 Floatplane by MiniArt 1:48
Next step in the process, paintbooth!
Now, the Junkers does not have too complicated paint scheme, bare metal finish and matt black.
First a layer or two Dull Alumiunium (Vallejos Meta Color's)
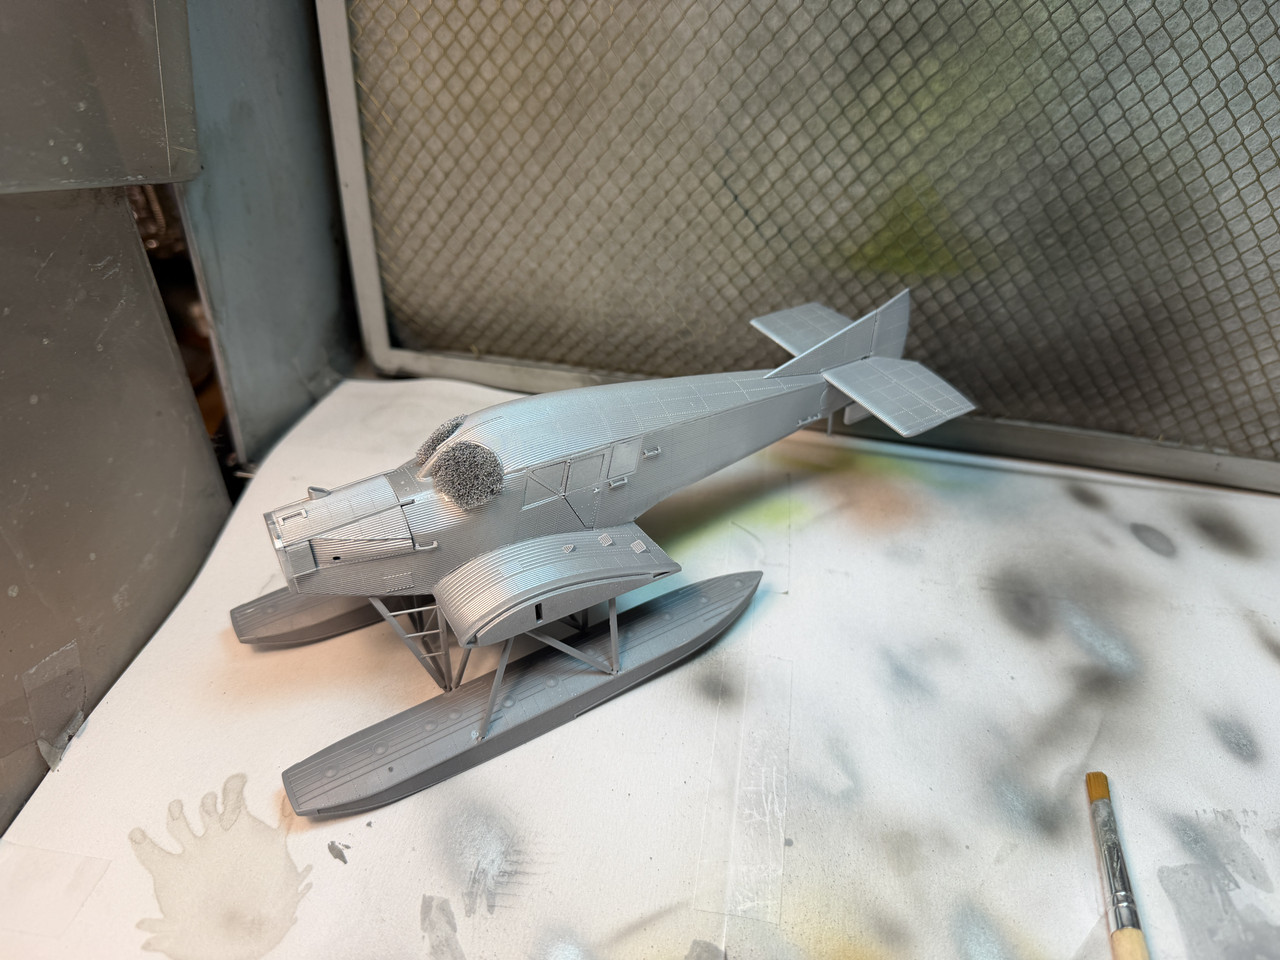
And then with Mr Paints "Super Matt Black"
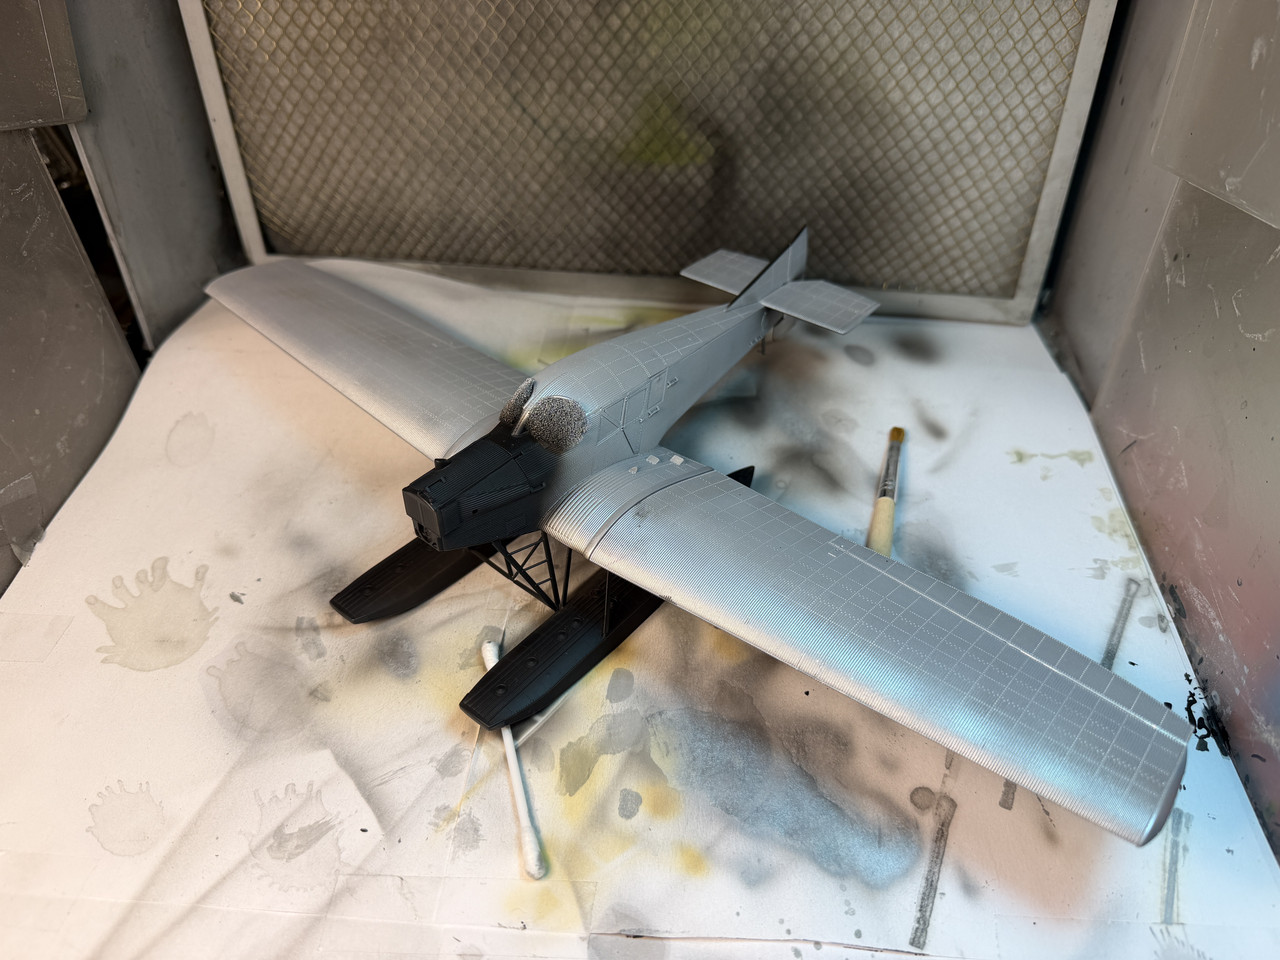
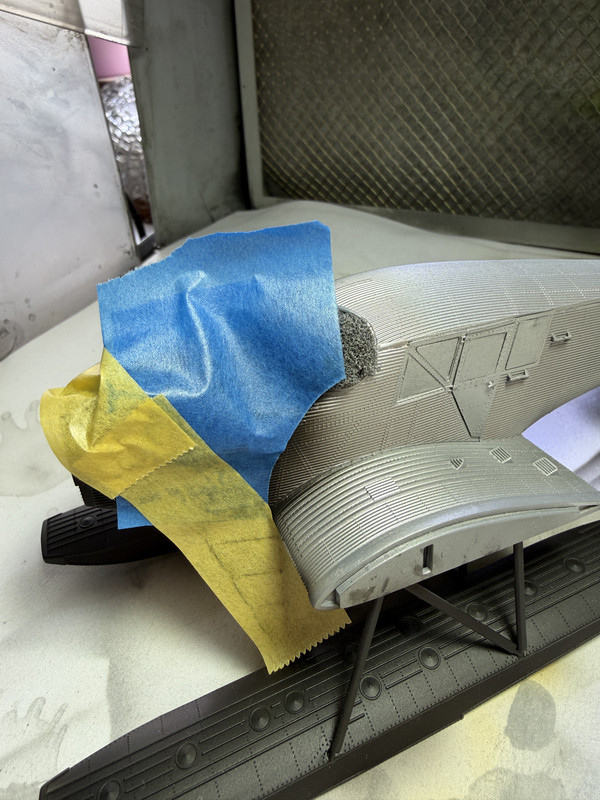
Where "aluminium meets black" required some masking
And the result, rather satisfied
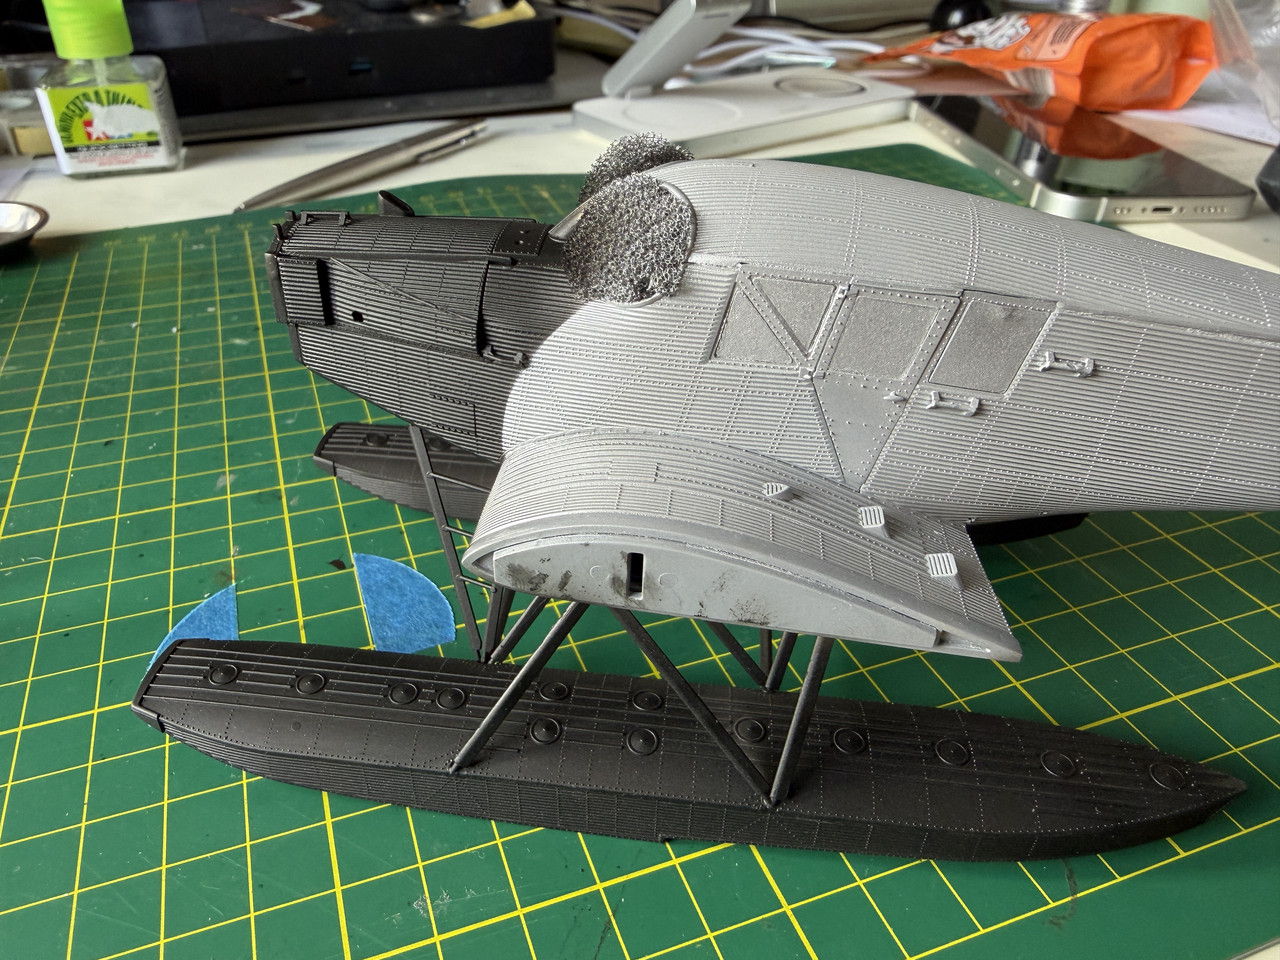
Next step is a number of details that need paint.. For example the raised padding along the rim of the cockpit opening still needs a suitable leather color..Need to check if I have something suitable, some Hull red I should have... but where...
Let's see what next!
- Kari
Now, the Junkers does not have too complicated paint scheme, bare metal finish and matt black.
First a layer or two Dull Alumiunium (Vallejos Meta Color's)
And then with Mr Paints "Super Matt Black"
Where "aluminium meets black" required some masking
And the result, rather satisfied
Next step is a number of details that need paint.. For example the raised padding along the rim of the cockpit opening still needs a suitable leather color..Need to check if I have something suitable, some Hull red I should have... but where...
Let's see what next!
- Kari
---
On the bench:
MiniArt 1:48 - Junkers F13 Float Plane
https://www.facebook.com/GrundAsk-Scale ... 721218708/
On the bench:
MiniArt 1:48 - Junkers F13 Float Plane
https://www.facebook.com/GrundAsk-Scale ... 721218708/
-
speedgraflex

- Moderator
- Posts: 11466
- Joined: Fri Feb 10, 2017 11:08 pm
- Contact:
Re: Junkers F13 Floatplane by MiniArt 1:48
Beautiful work, Kari. I’ve always felt your painting was particularly fine and you’ve shone such great finesse here. Beautiful choice of dull aluminum!
Make more models!

Re: Junkers F13 Floatplane by MiniArt 1:48
Great progress. Really nice work masking and spraying on the corrugated surface. Silver and black looks good!
Thanks,
John
John
Re: Junkers F13 Floatplane by MiniArt 1:48
Thank you Bruce and John for the kind words!
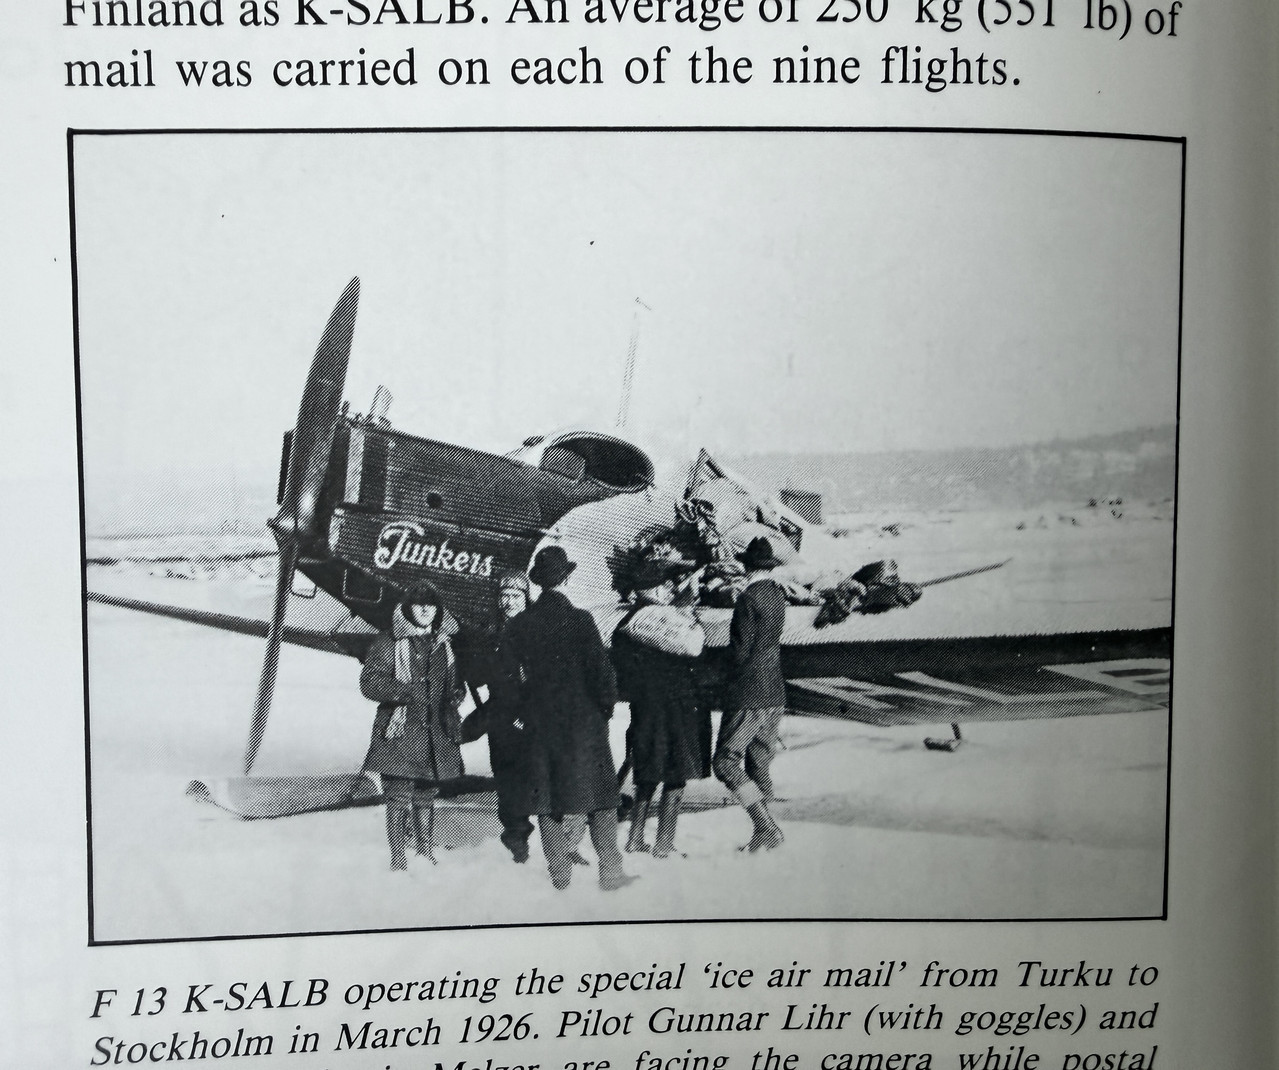
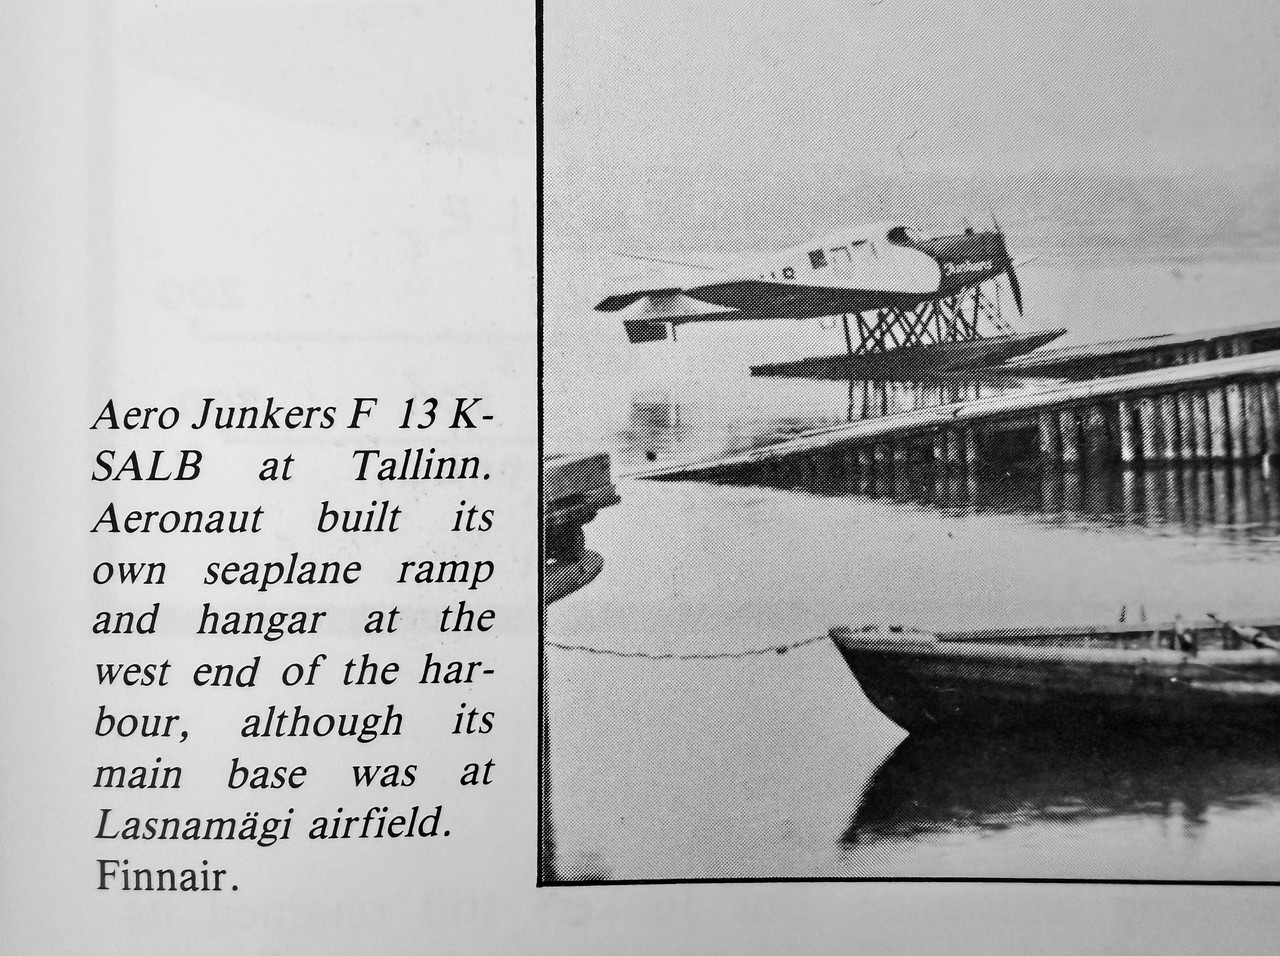
Decaling will be the next bigger step in this build, and below you see a few reference pictures of K-SALB
With skis:
With floats:
Let's see what next!
- Kari
Decaling will be the next bigger step in this build, and below you see a few reference pictures of K-SALB
With skis:
With floats:
Let's see what next!
- Kari
---
On the bench:
MiniArt 1:48 - Junkers F13 Float Plane
https://www.facebook.com/GrundAsk-Scale ... 721218708/
On the bench:
MiniArt 1:48 - Junkers F13 Float Plane
https://www.facebook.com/GrundAsk-Scale ... 721218708/

Re: Junkers F13 Floatplane by MiniArt 1:48
Bit late to the party but it's really good to see this back on the bench Kari....
It looks amazing, and especially good work on getting the floats on.

It looks amazing, and especially good work on getting the floats on.
Stuart Templeton 'I may not be good but I'm slow...'


Re: Junkers F13 Floatplane by MiniArt 1:48
Thanks Stuart and Mike!
- Kari
- Kari
---
On the bench:
MiniArt 1:48 - Junkers F13 Float Plane
https://www.facebook.com/GrundAsk-Scale ... 721218708/
On the bench:
MiniArt 1:48 - Junkers F13 Float Plane
https://www.facebook.com/GrundAsk-Scale ... 721218708/
Re: Junkers F13 Floatplane by MiniArt 1:48
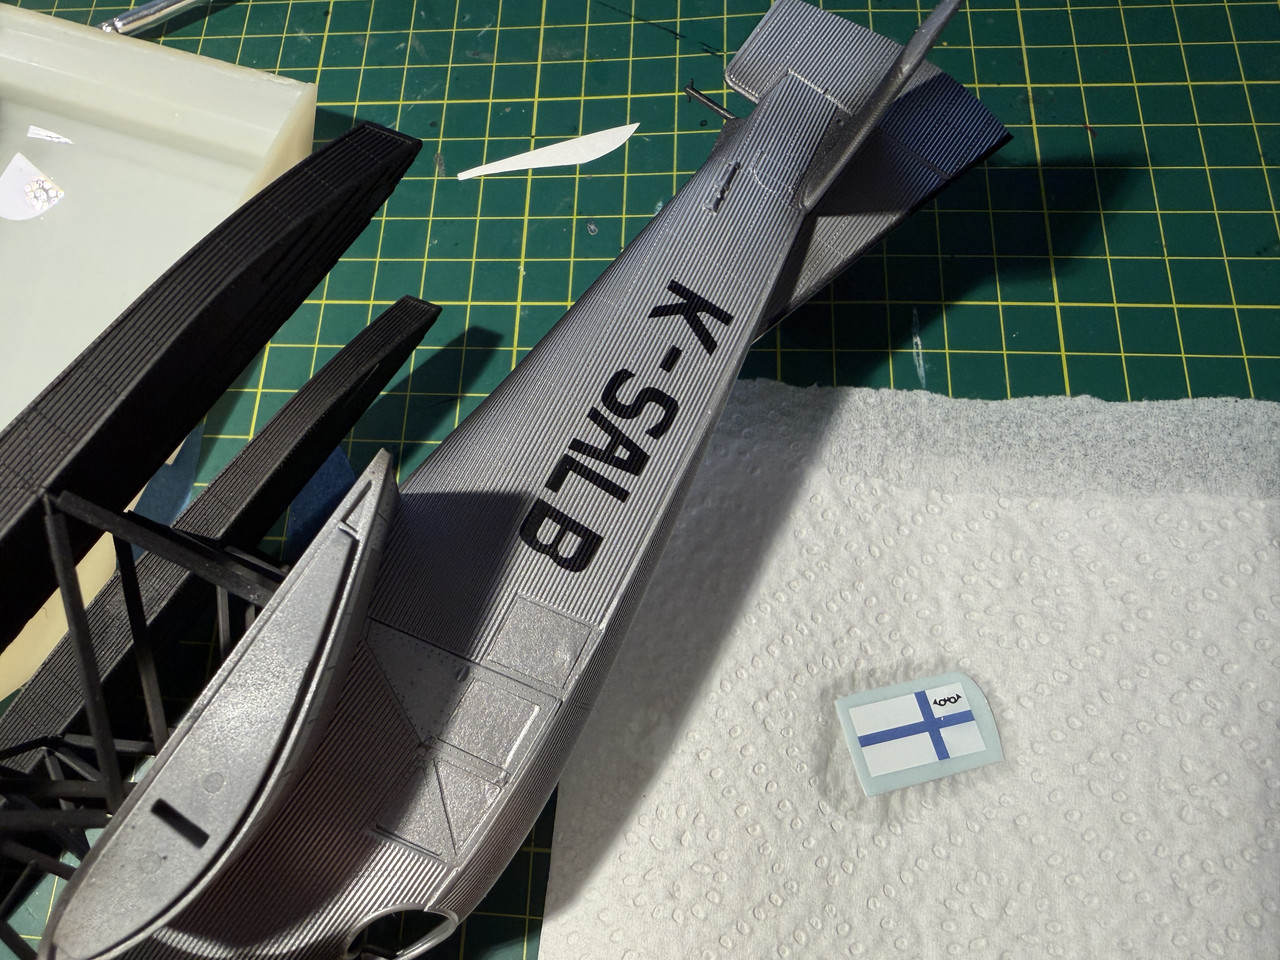
Decided to put the decals first on before painting the raised padding around the cockpit opening. (found some Hull Red)
Some of the decals are quite big in size, asking, no - yelling to be painted instead.
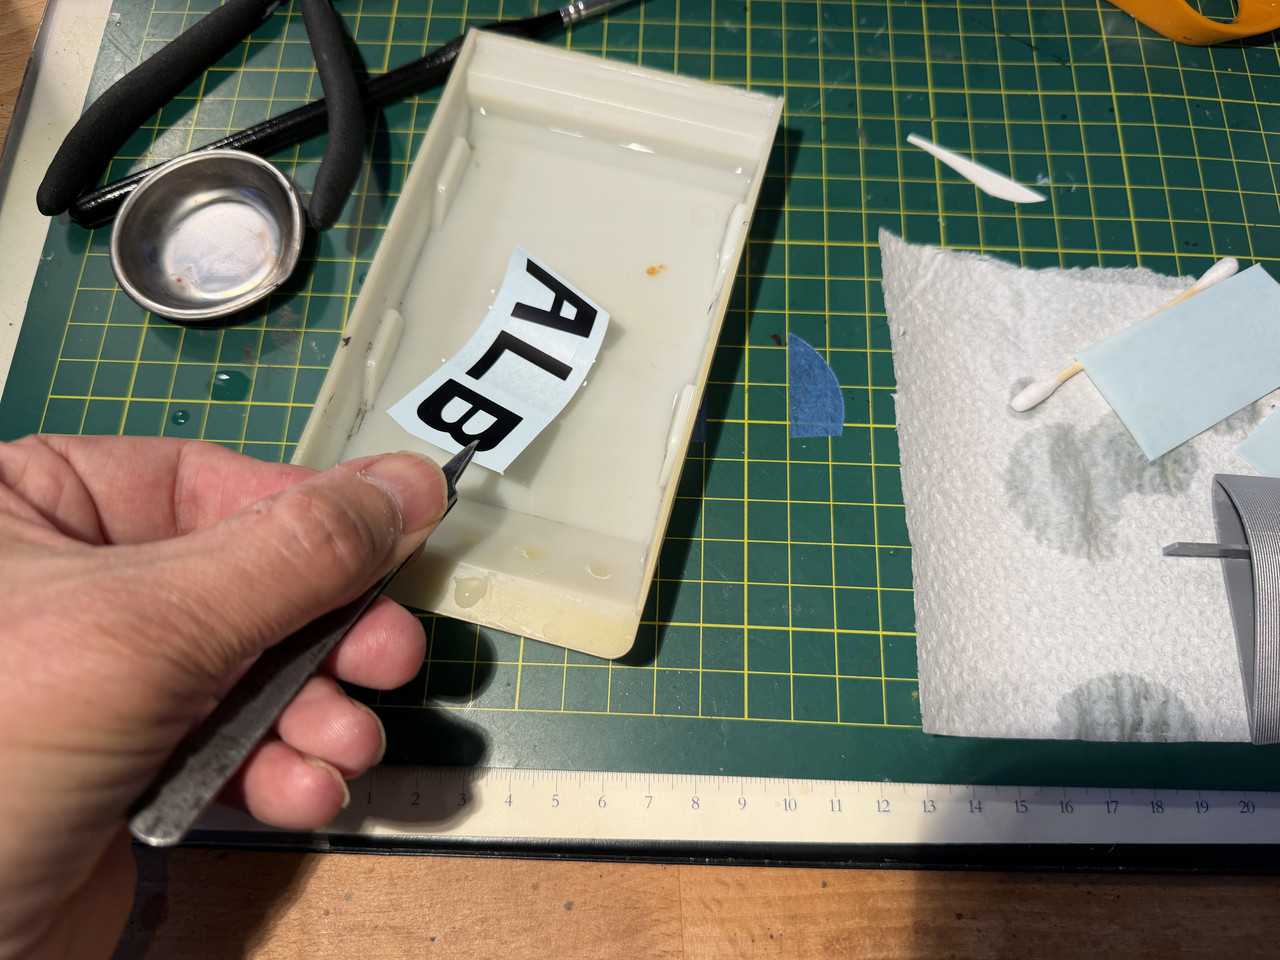
I started with the wings, on both side of the wings same markings
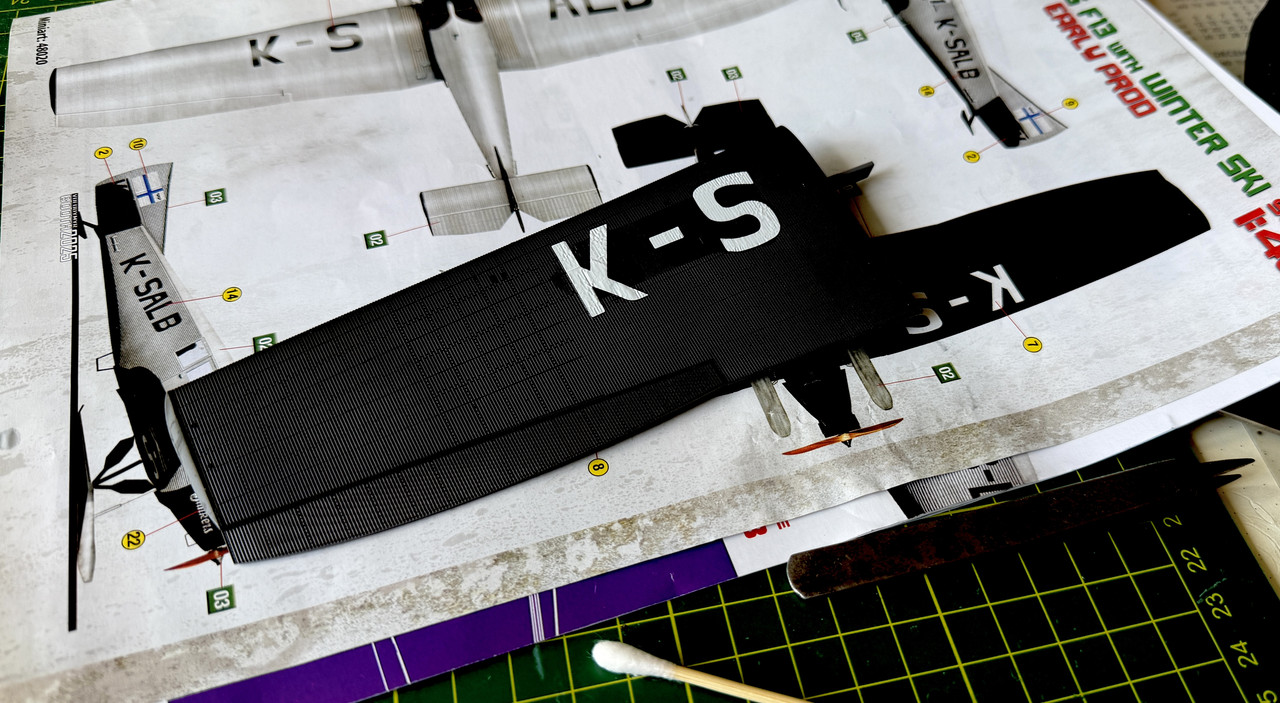
I was a little bit worried, that the carrierfilm would be clearly visible, I thought for a moment to cut of every letter carefully. But then again, the decals come from Cartograf, so I thought, those guys know how make decals, even with a lot of carrierfilm... so let's see.
Of course, I used Tamiyas Mark Fit decal/softening setting rather generously. In the picture above the "bubbling" effect has started, quite visible on black background.
It's a joy to work with high-quality decals like Cartograf. The blue of the Finnish flag is a bit off, though - way too light with a strange tint to it. Oh well, MiniArt's research team probably used a slightly overexposed photo with wrong white balance as their reference...
And here the Lady with a big L stands, in full glory aka all decals and on top of that, the paint covers removed from the cockpit opening!
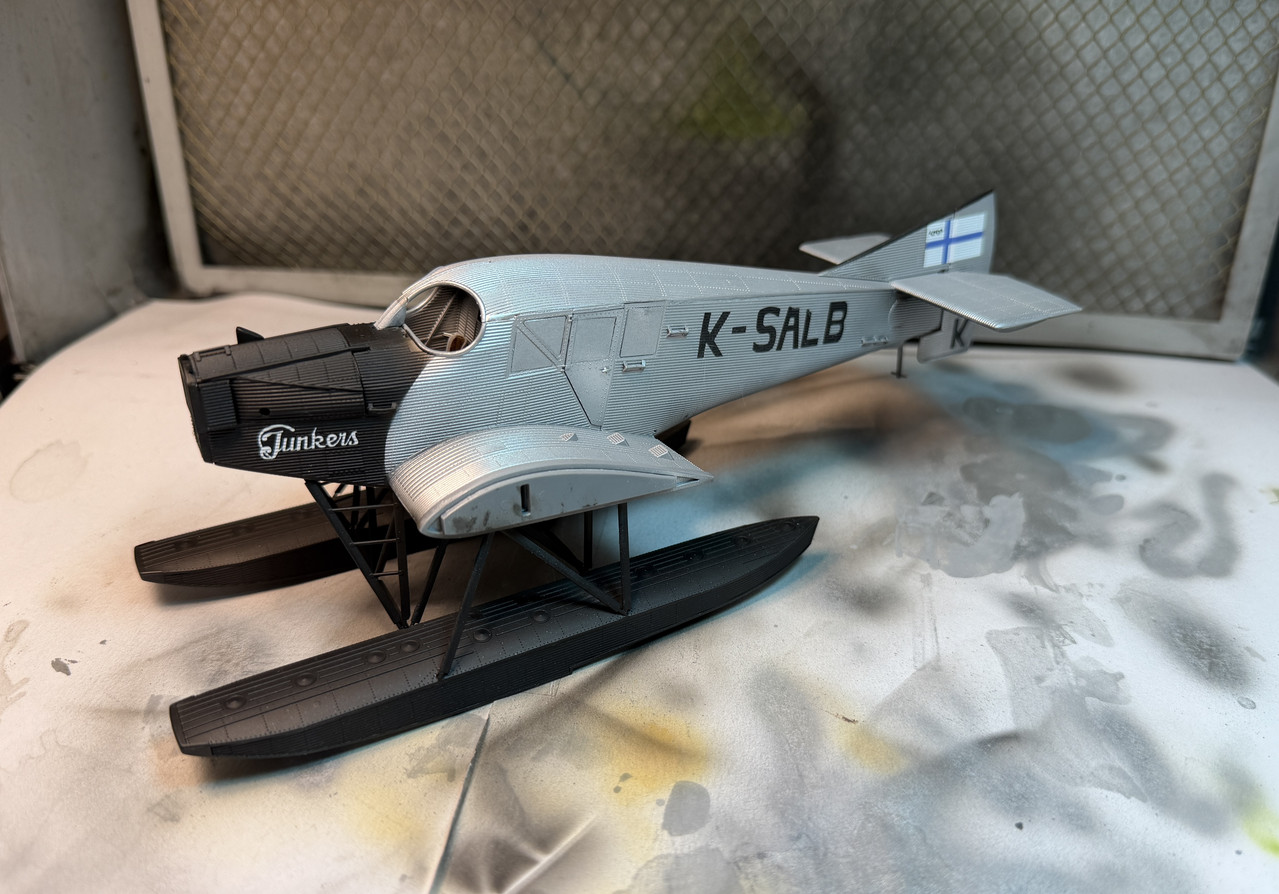
Let's see how well the Mark Fit has done it's job after a while!
- Kari
Some of the decals are quite big in size, asking, no - yelling to be painted instead.
I started with the wings, on both side of the wings same markings
I was a little bit worried, that the carrierfilm would be clearly visible, I thought for a moment to cut of every letter carefully. But then again, the decals come from Cartograf, so I thought, those guys know how make decals, even with a lot of carrierfilm... so let's see.
Of course, I used Tamiyas Mark Fit decal/softening setting rather generously. In the picture above the "bubbling" effect has started, quite visible on black background.
It's a joy to work with high-quality decals like Cartograf. The blue of the Finnish flag is a bit off, though - way too light with a strange tint to it. Oh well, MiniArt's research team probably used a slightly overexposed photo with wrong white balance as their reference...
And here the Lady with a big L stands, in full glory aka all decals and on top of that, the paint covers removed from the cockpit opening!
Let's see how well the Mark Fit has done it's job after a while!
- Kari
---
On the bench:
MiniArt 1:48 - Junkers F13 Float Plane
https://www.facebook.com/GrundAsk-Scale ... 721218708/
On the bench:
MiniArt 1:48 - Junkers F13 Float Plane
https://www.facebook.com/GrundAsk-Scale ... 721218708/