1/32 Hasegawa Fw 190D-13 Yellow 10
-
jeaton01

- Elite Member
- Posts: 2374
- Joined: Thu Apr 23, 2020 9:20 am
- Location: Northern California
- Contact:
Re: 1/32 Hasegawa Fw 190D-13 Yellow 10
The engines accessory section looks like a real one, John.
-
BlackSheep214

- Elite Member
- Posts: 12991
- Joined: Sun Apr 06, 2014 8:47 pm
Re: 1/32 Hasegawa Fw 190D-13 Yellow 10
“Who controls the skies, controls the fate of this Earth”
Author unknown- 352nd Fighter Group, Blue-Nosed Bastards of Bodney
“Send one plane it’s a sortie; send two planes it’s a flight; send four planes it’s a test of airpower. - Richard Kohn
Author unknown- 352nd Fighter Group, Blue-Nosed Bastards of Bodney
“Send one plane it’s a sortie; send two planes it’s a flight; send four planes it’s a test of airpower. - Richard Kohn

Re: 1/32 Hasegawa Fw 190D-13 Yellow 10
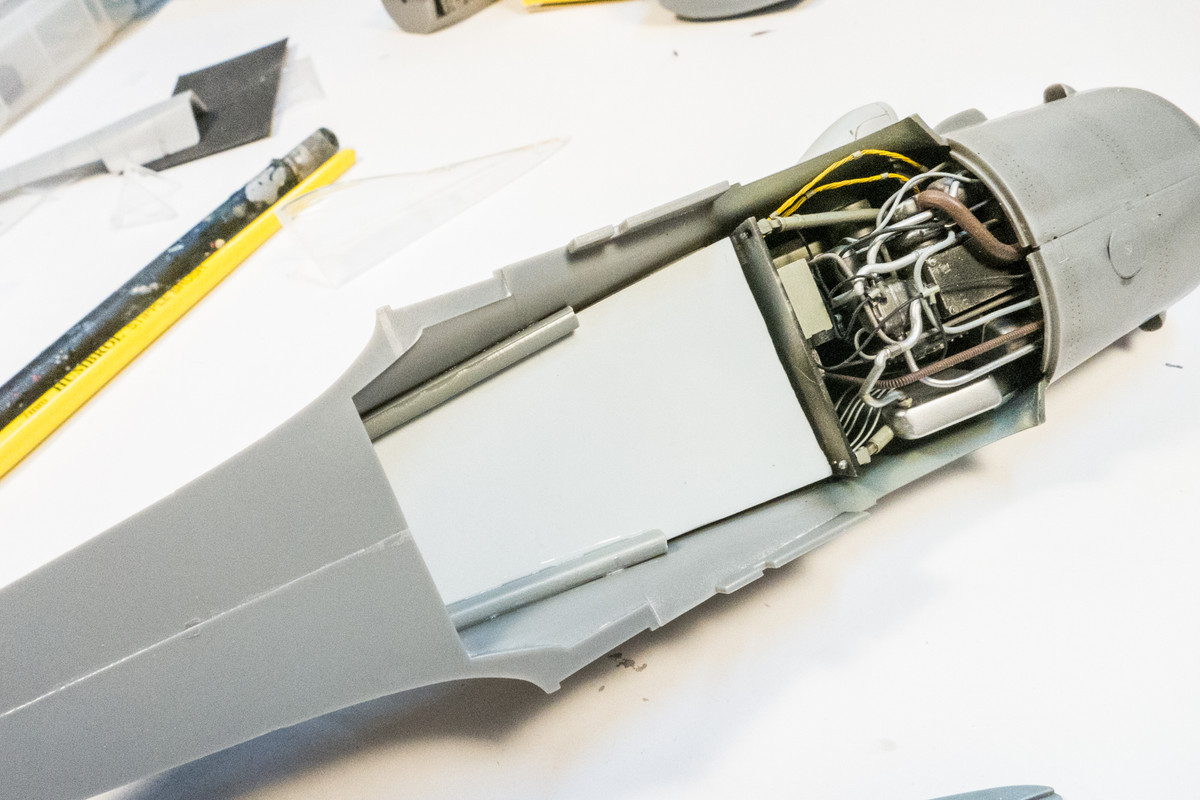
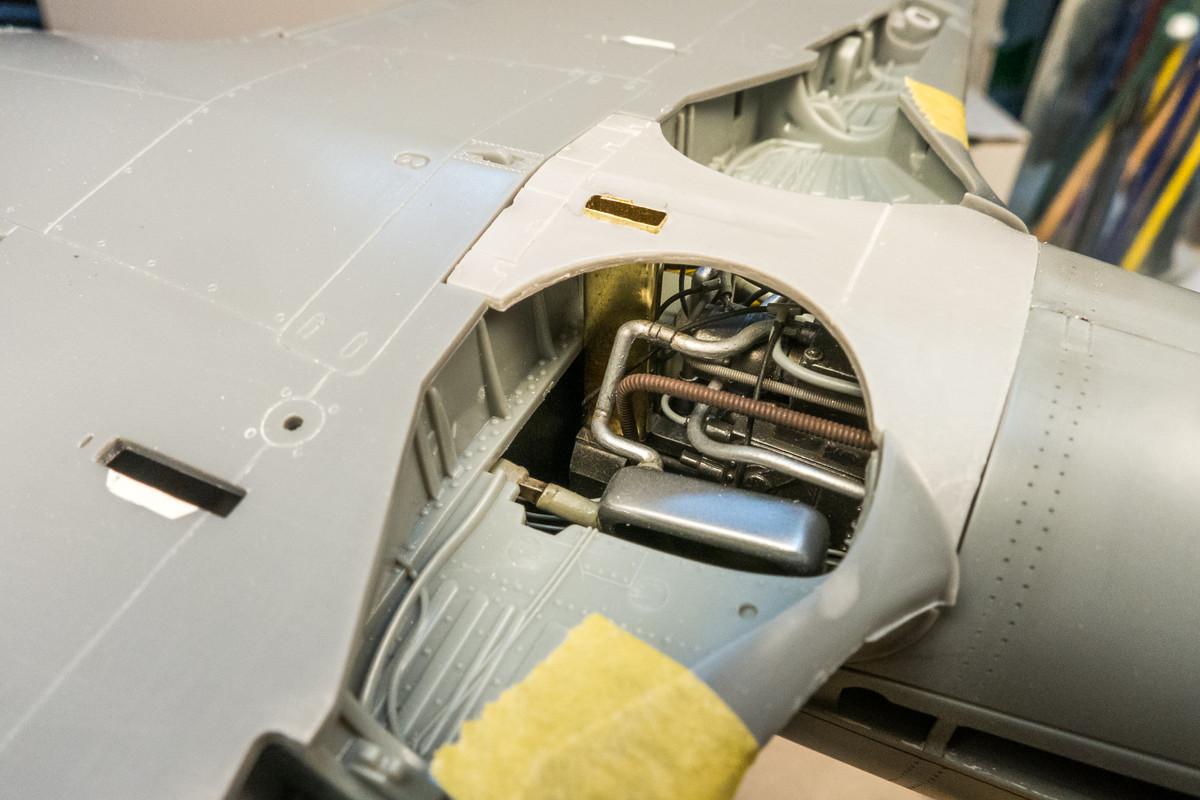
Thanks guys! The plumbing is not 100% accurate but I did my best to make it look authentic. As you can see, the MG151 cannon body is buried down in the bowels of the engine assembly and is very difficult to make out but it is there and I feel good that I incorporated that element into this build since it is one of the distinguishing features of the D-13.
As I was dry fitting the cockpit, the leftover CA glue from the engine bulkhead caught the cockpit so I just left it in place and secured it using pieces of sprue, fused with more CA glue.
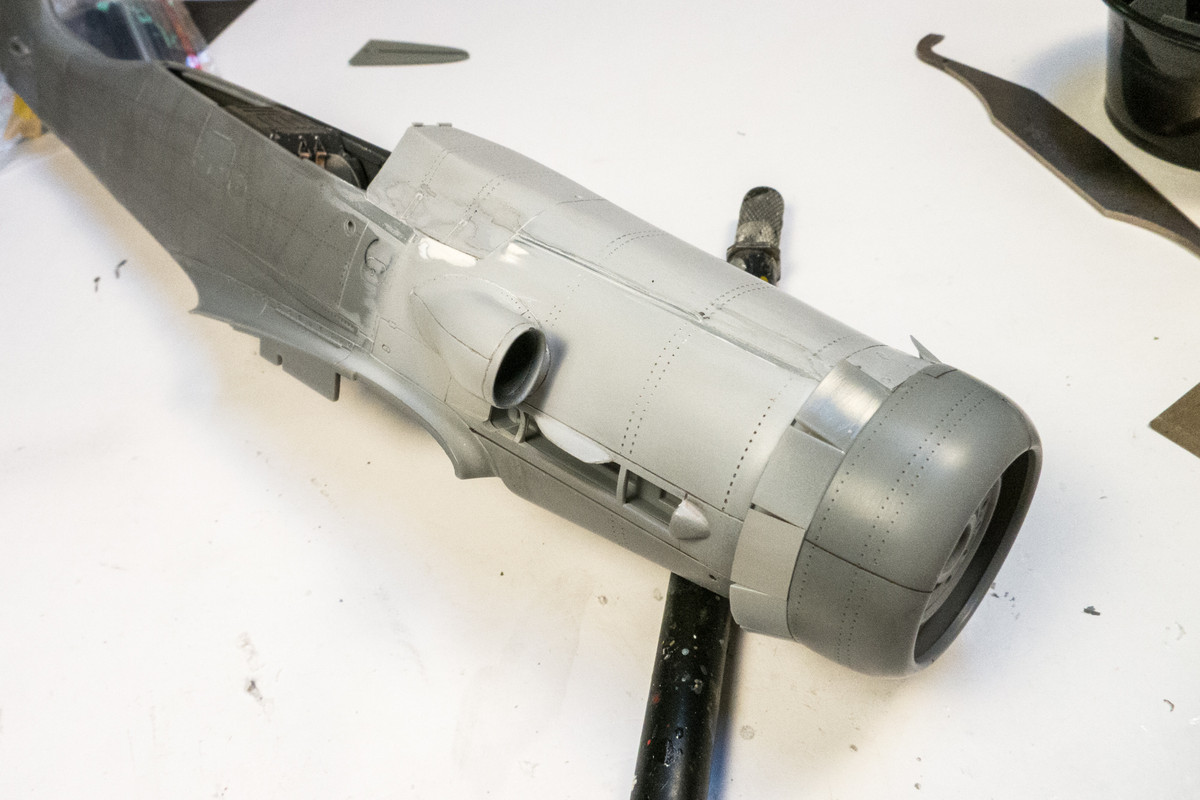
I then glued the top engine cowling into place. This is the resin piece from the Grey Matter conversion set and I used JB Kwik Weld. It didn't hold the cowling in place that well so I had to re-secure it with CA glue.
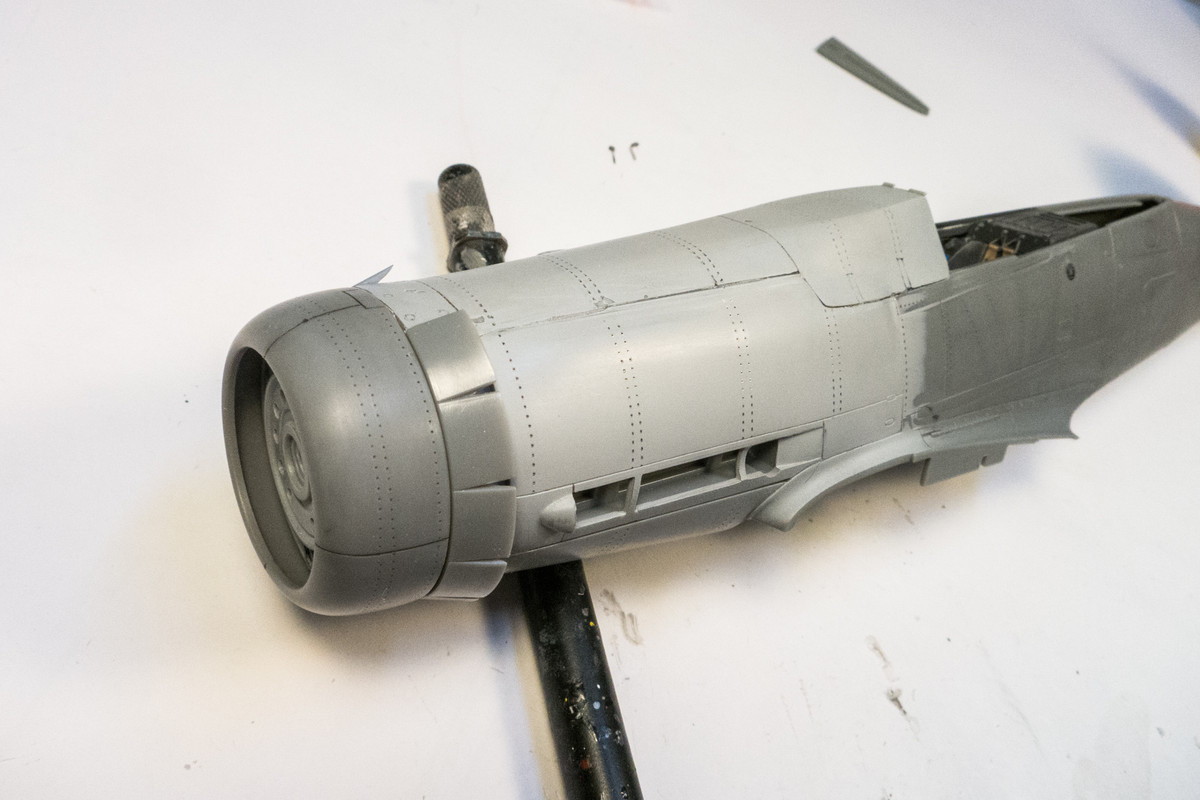
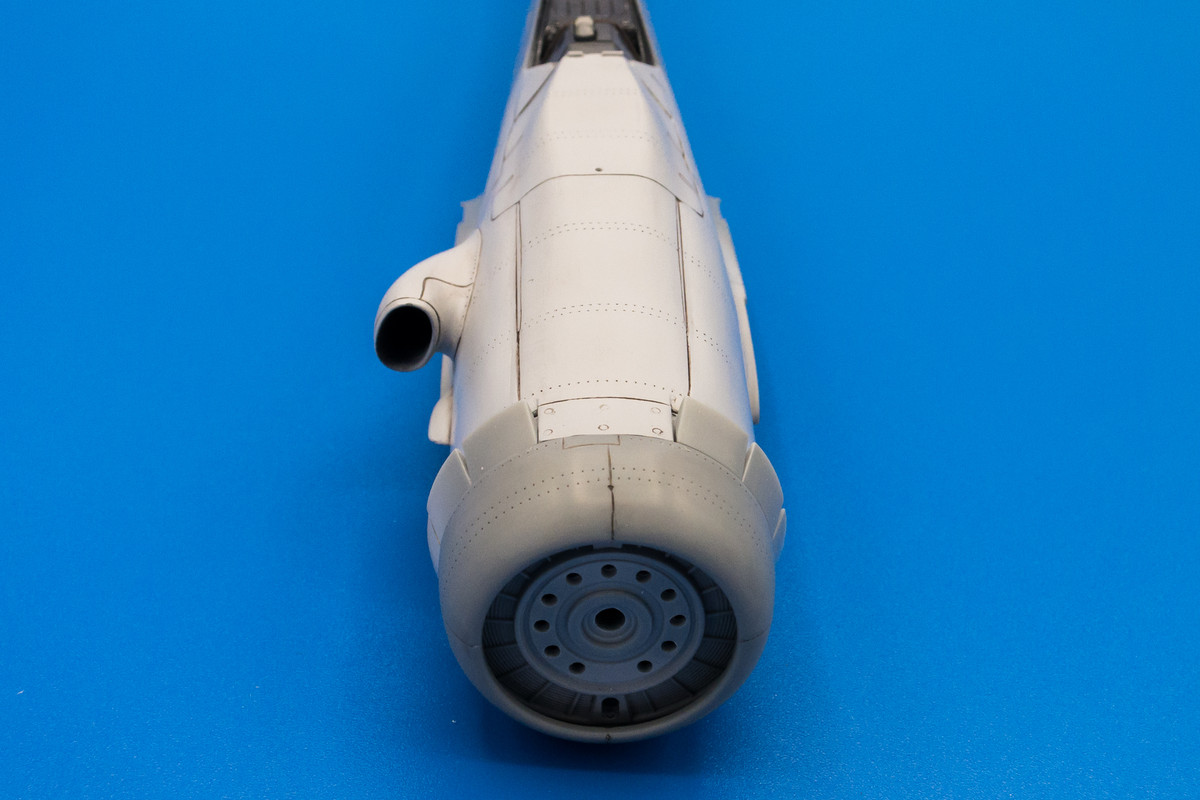
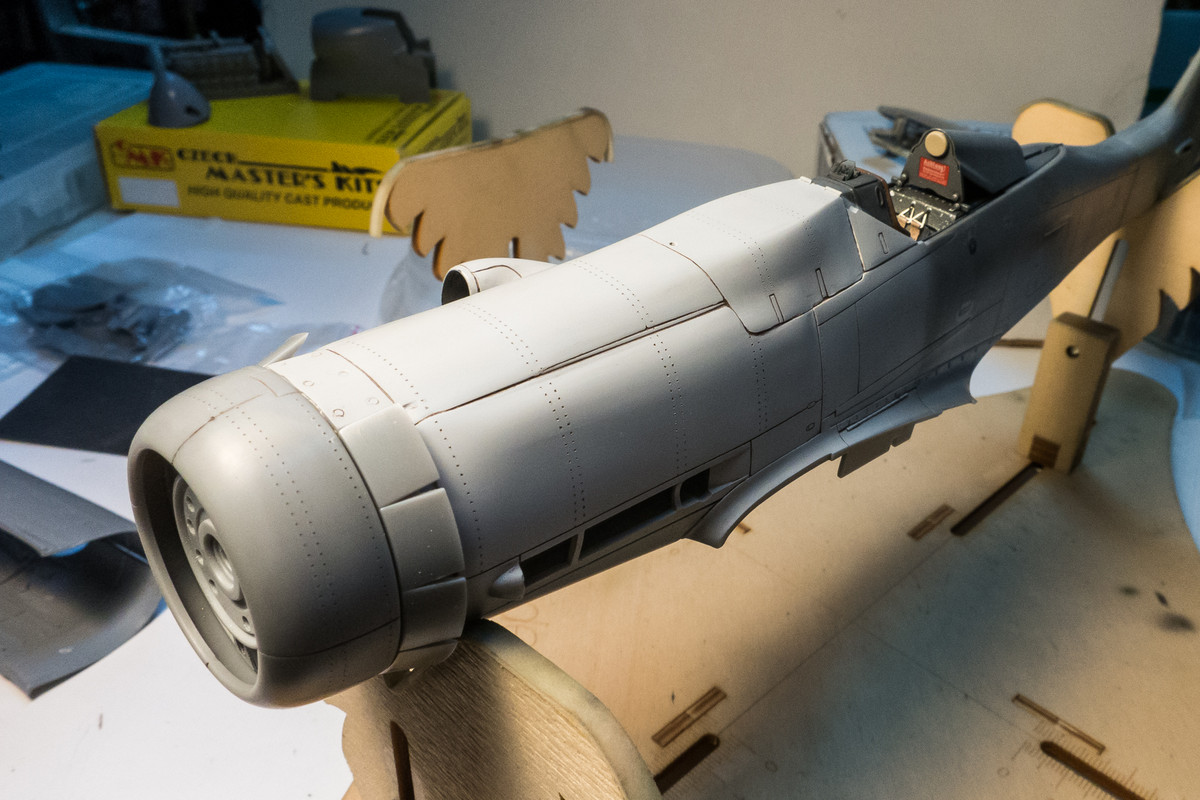
A check of the radiator cowling parts. There is a slight overhang between the radiator cowling and the resin engine cowling which will need some trimming. I am adding components and doing clean-up as I go, paying special attention to this area since it is so integral to the presentation of a D-13.
As I was dry fitting the cockpit, the leftover CA glue from the engine bulkhead caught the cockpit so I just left it in place and secured it using pieces of sprue, fused with more CA glue.
I then glued the top engine cowling into place. This is the resin piece from the Grey Matter conversion set and I used JB Kwik Weld. It didn't hold the cowling in place that well so I had to re-secure it with CA glue.
A check of the radiator cowling parts. There is a slight overhang between the radiator cowling and the resin engine cowling which will need some trimming. I am adding components and doing clean-up as I go, paying special attention to this area since it is so integral to the presentation of a D-13.
John aka JKim
-----------<><

-----------<><
Re: 1/32 Hasegawa Fw 190D-13 Yellow 10
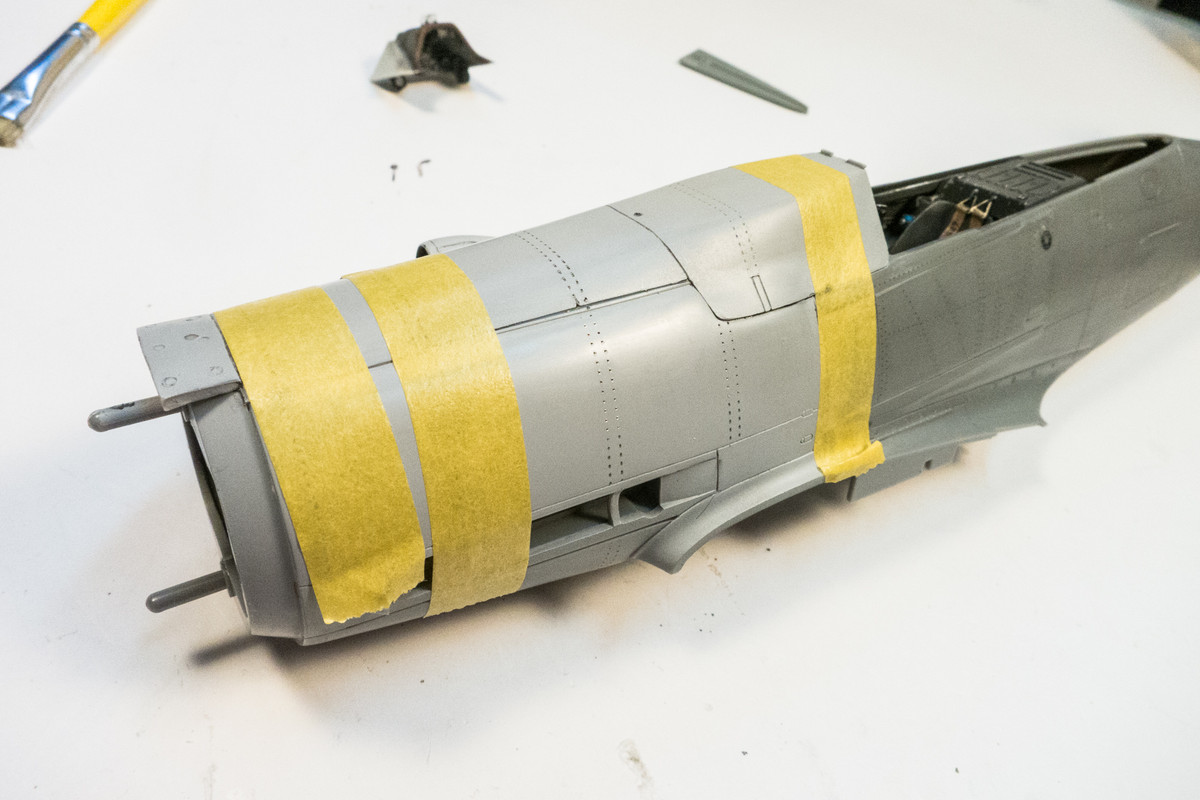
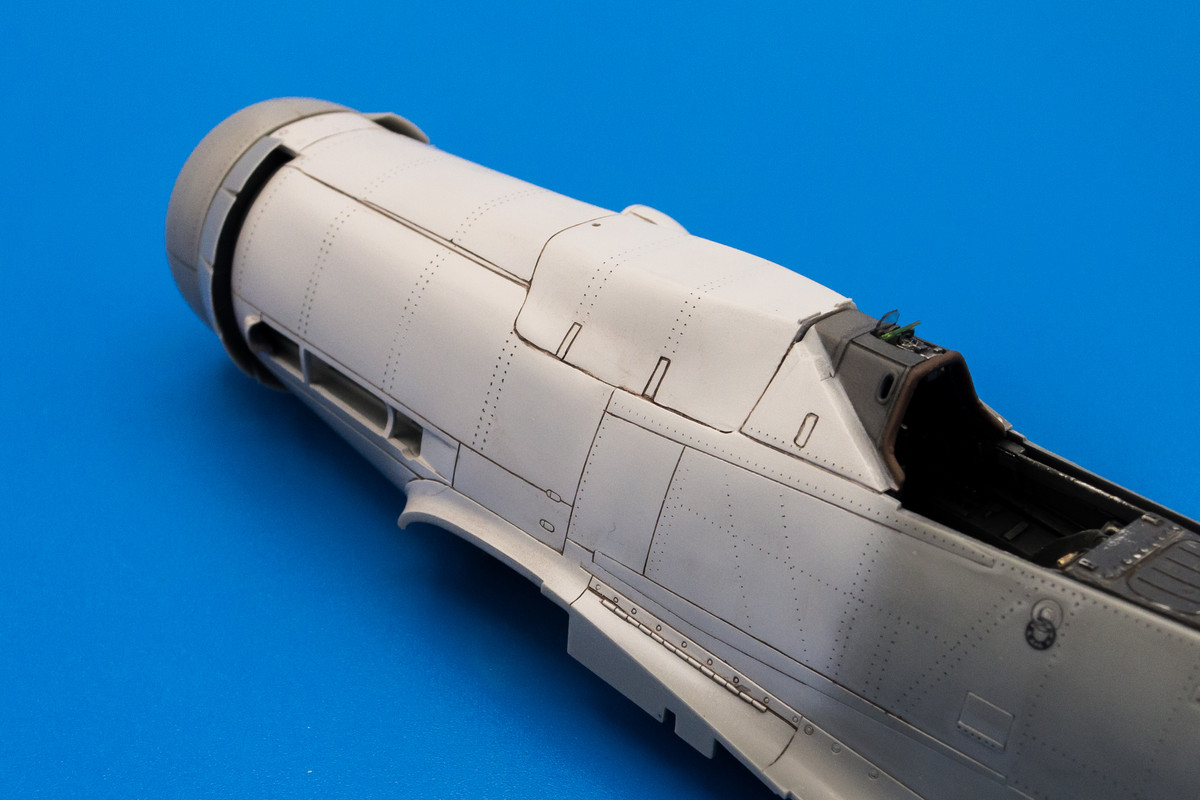
The instrument panel hood, which is from the Eagle Editions resin set was trimmed heavily to make it fit the narrower rear portion of the Grey Matter engine cowling. A lateral sander like the David Union D400 makes this type of work easy and yields nicely consistent flat surfaces. After some minor filling and cleanup, a trip to the light box to summarize where we are to date with the D-13 build...

John aka JKim
-----------<><
-----------<><
-
BlackSheep214
- Elite Member
- Posts: 12991
- Joined: Sun Apr 06, 2014 8:47 pm
Re: 1/32 Hasegawa Fw 190D-13 Yellow 10
I.... I.... I..... screw it.... the only reaction is this... 

“Who controls the skies, controls the fate of this Earth”
Author unknown- 352nd Fighter Group, Blue-Nosed Bastards of Bodney
“Send one plane it’s a sortie; send two planes it’s a flight; send four planes it’s a test of airpower. - Richard Kohn
Author unknown- 352nd Fighter Group, Blue-Nosed Bastards of Bodney
“Send one plane it’s a sortie; send two planes it’s a flight; send four planes it’s a test of airpower. - Richard Kohn
-
Duke Maddog

- Elite Member
- Posts: 7580
- Joined: Tue Jun 03, 2014 11:22 am
- Location: Rowland Heights, CA
Re: 1/32 Hasegawa Fw 190D-13 Yellow 10
The Duke
Virtuoso of Miniatures
"Do you know what the chain of command is? It's the chain I get and beat you with 'till you understand who's in ruttin' command!"
-Jayne Cobb, Firefly Episode 2 "The Train Job"
We are modelers - the same in spirit, in hunger to insanely buy newly released kits, hustlers in hiding our stash from our better halves and experts in using garbage as replacements for after-market parts.
Re: 1/32 Hasegawa Fw 190D-13 Yellow 10
Thank you kindly everyone!
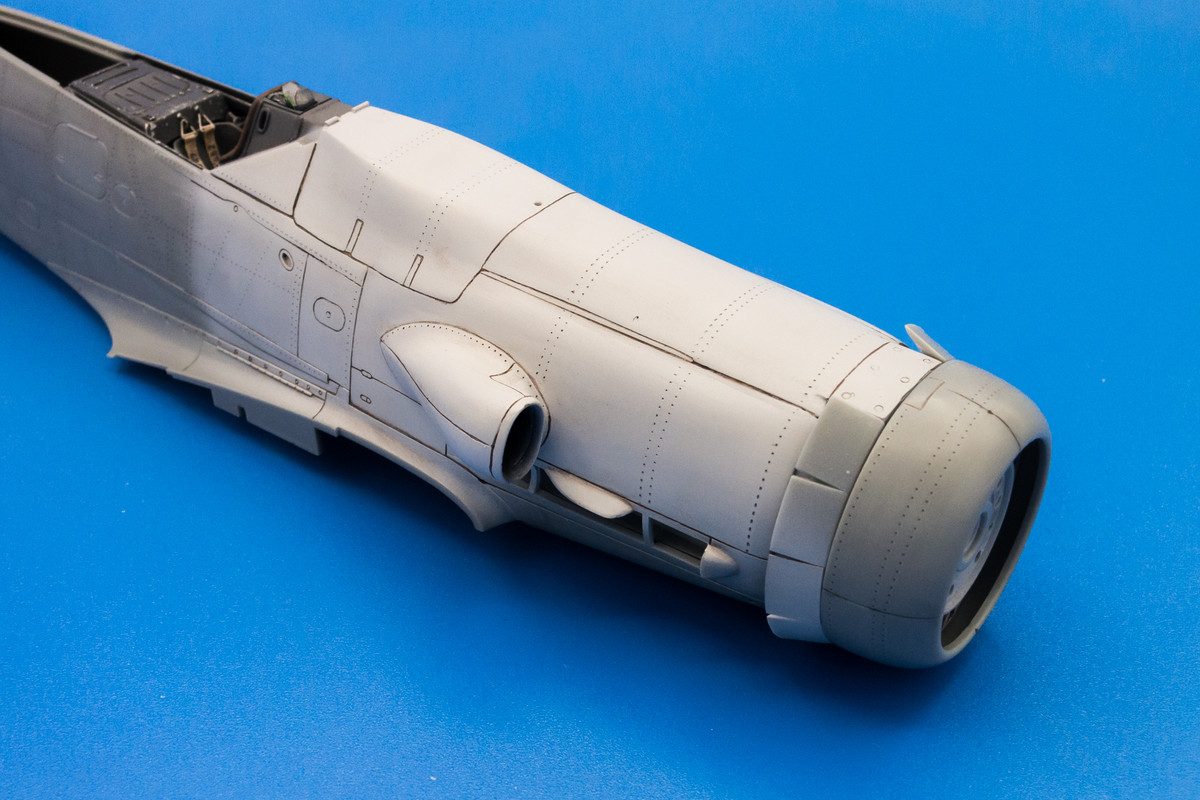
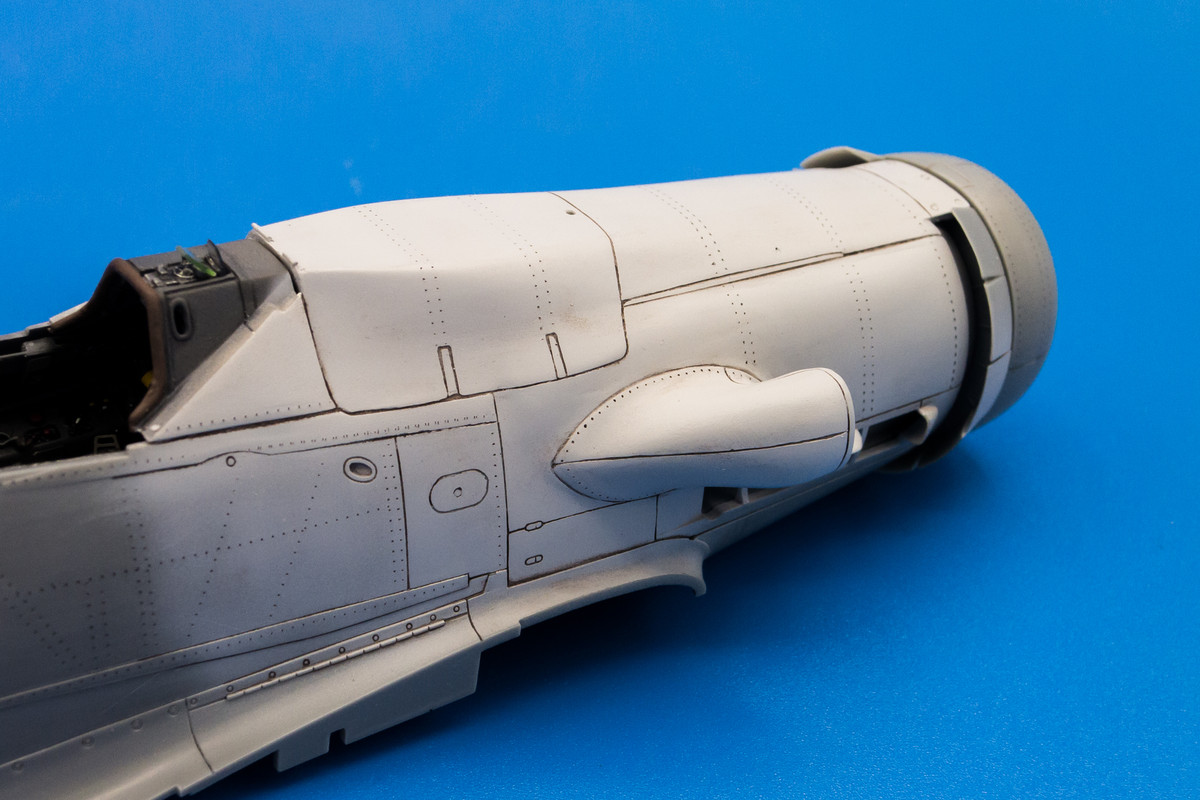
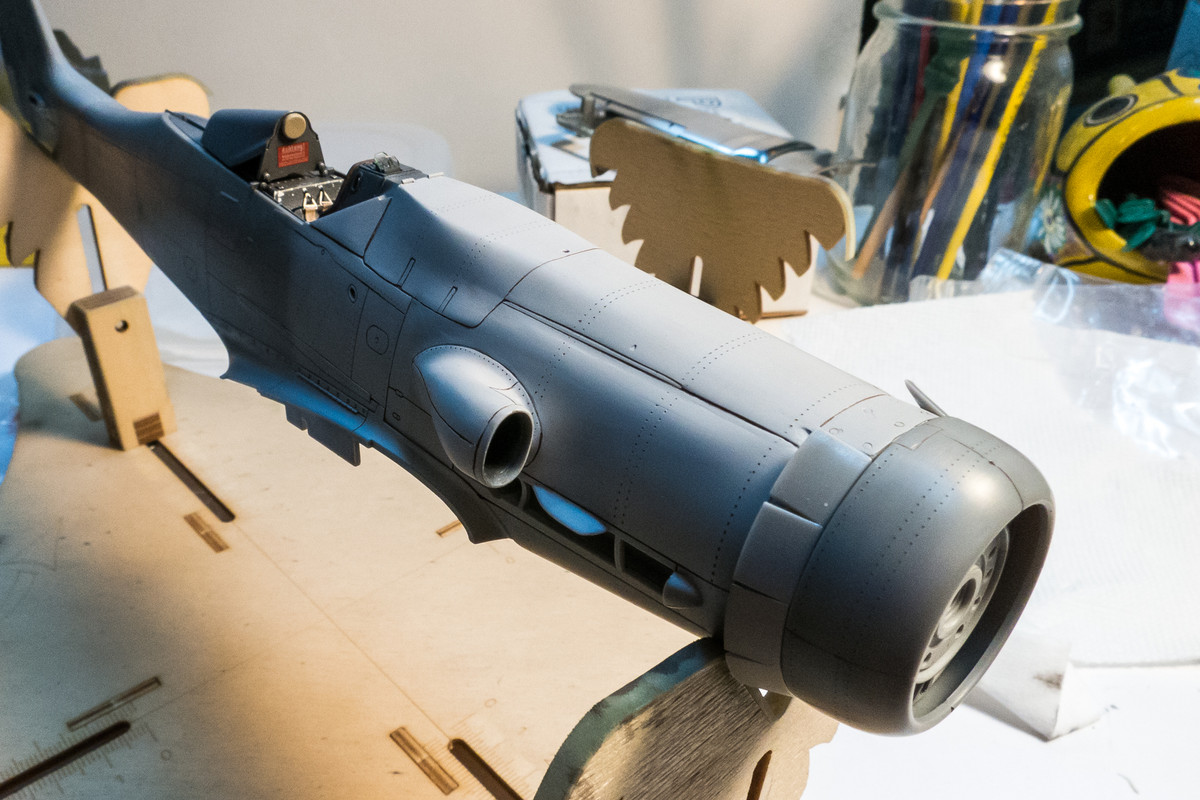
I'm moving closer to getting the fuselage closed up and moving to the wings. A couple of shots with side lighting to help emphasize the sculpting that went into the engine cowling. Although it is not 100% accurate, I do feel that the shapes are better integrated and more in-line with the available data (including the cross sections of the D-13 found in the Appendix of the Crandall Dora books) than the Grey Matter resin conversion, which to me, looks rather grafted on.
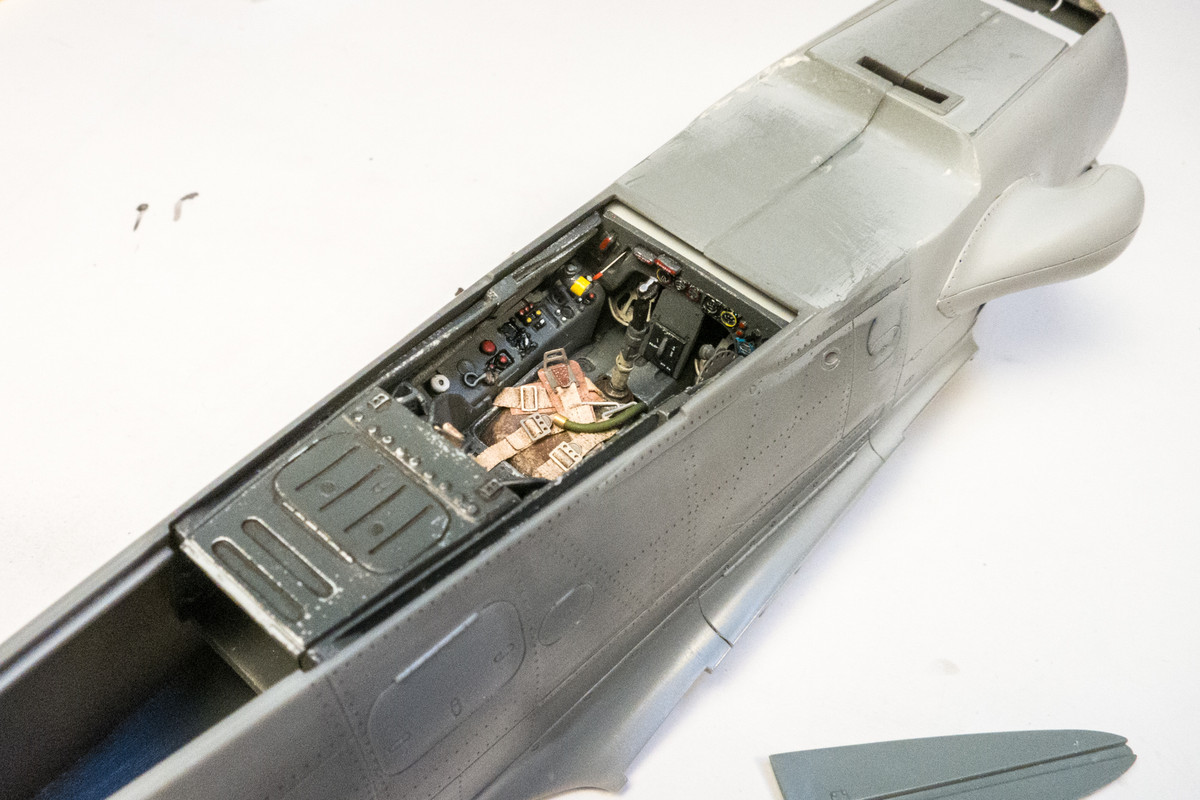
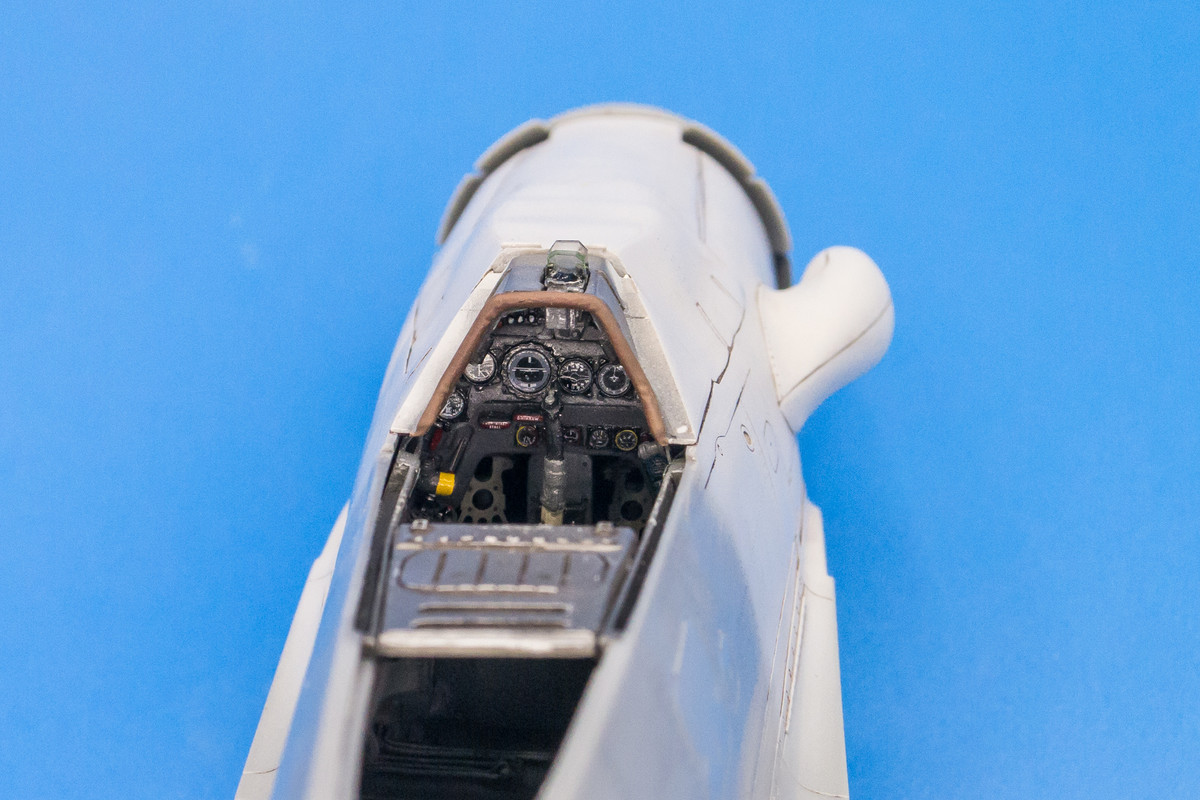
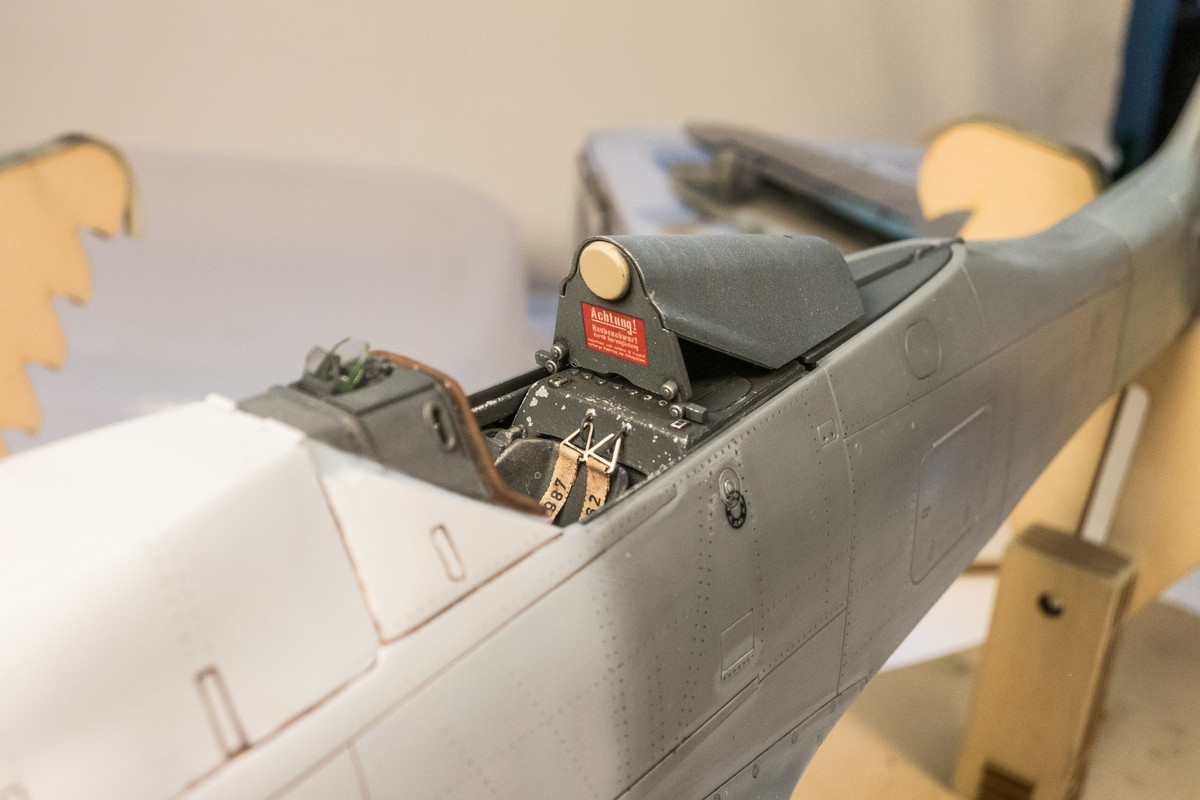
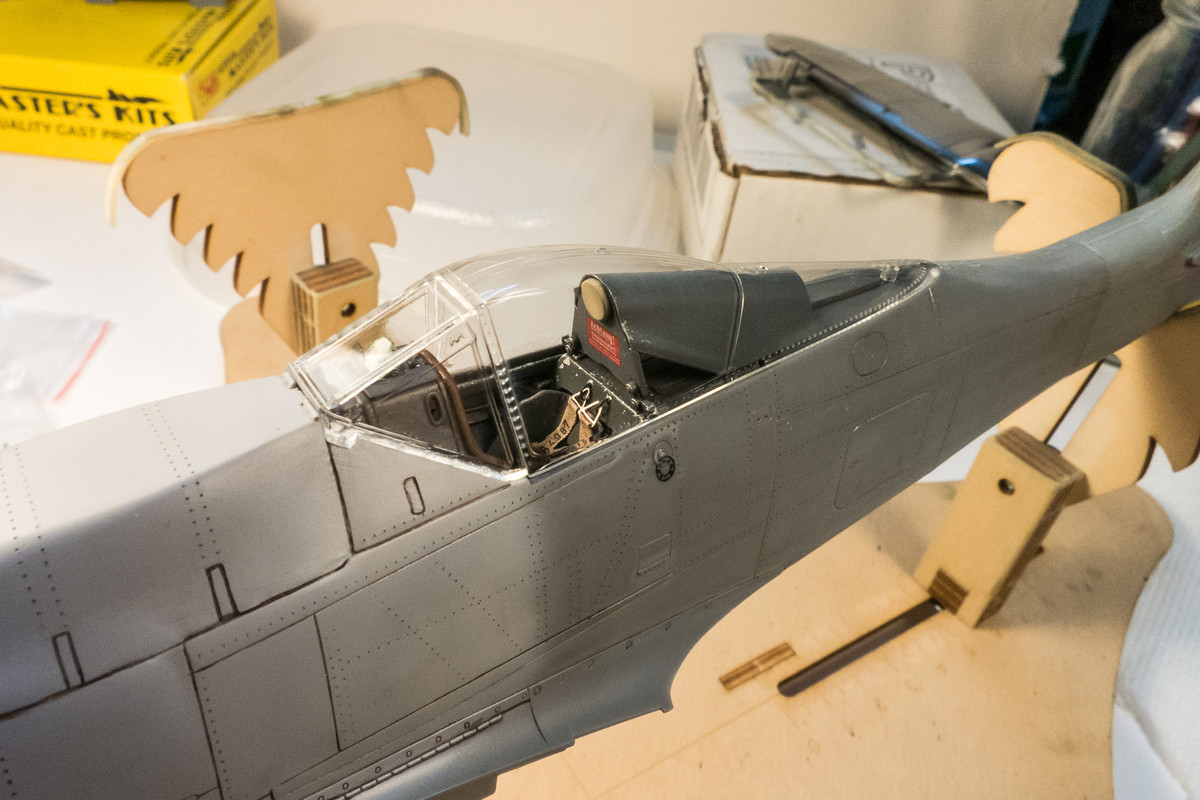
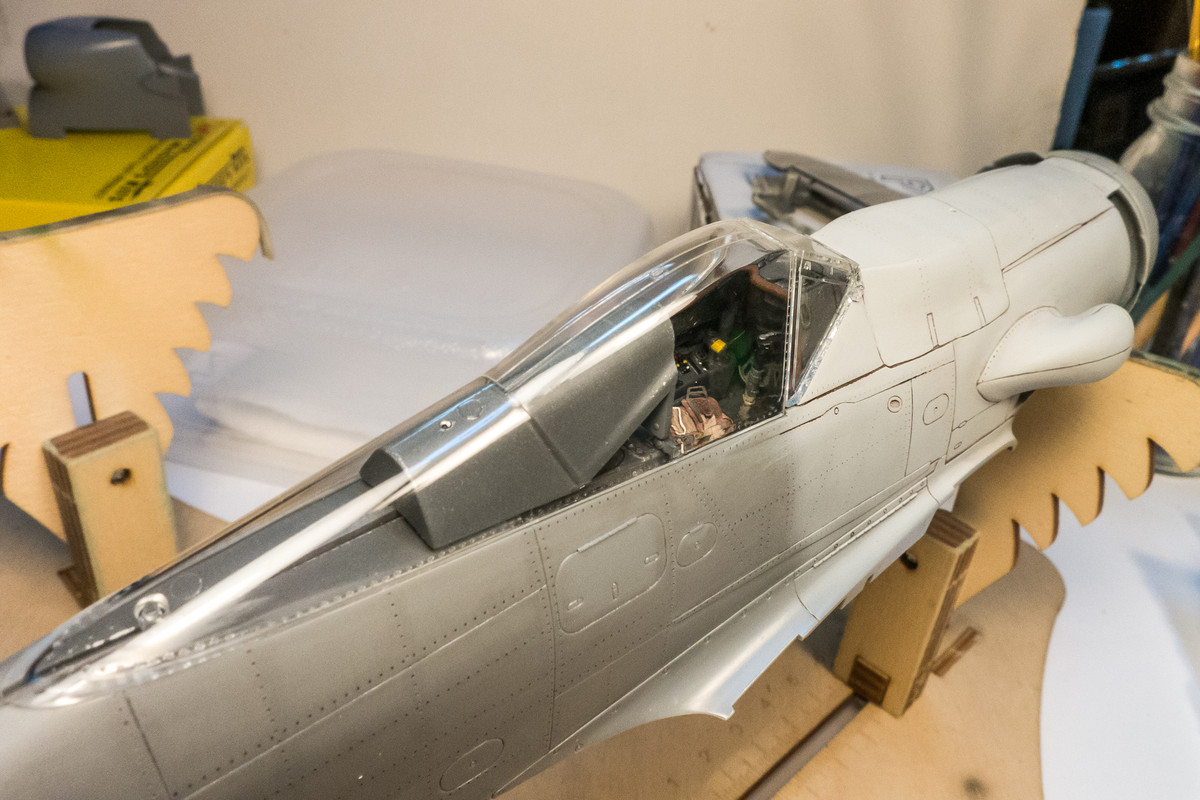
A few peeks at the cockpit from the outside...
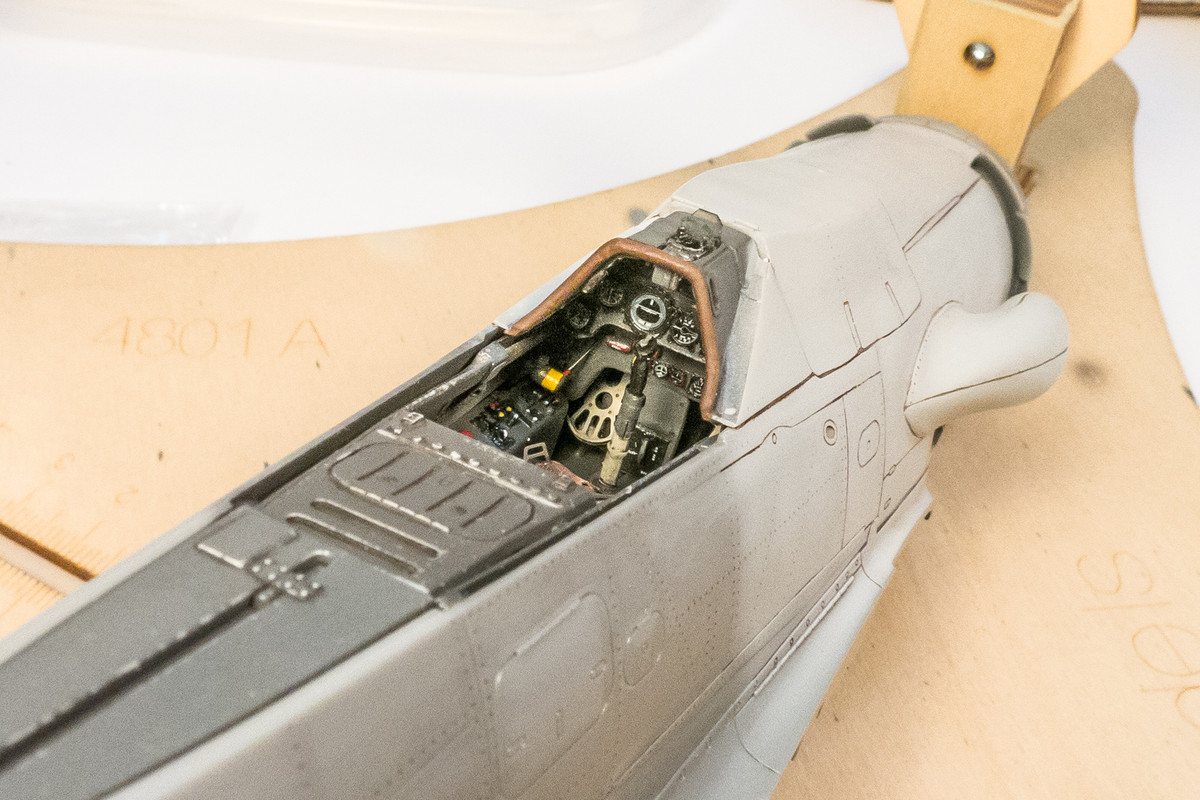
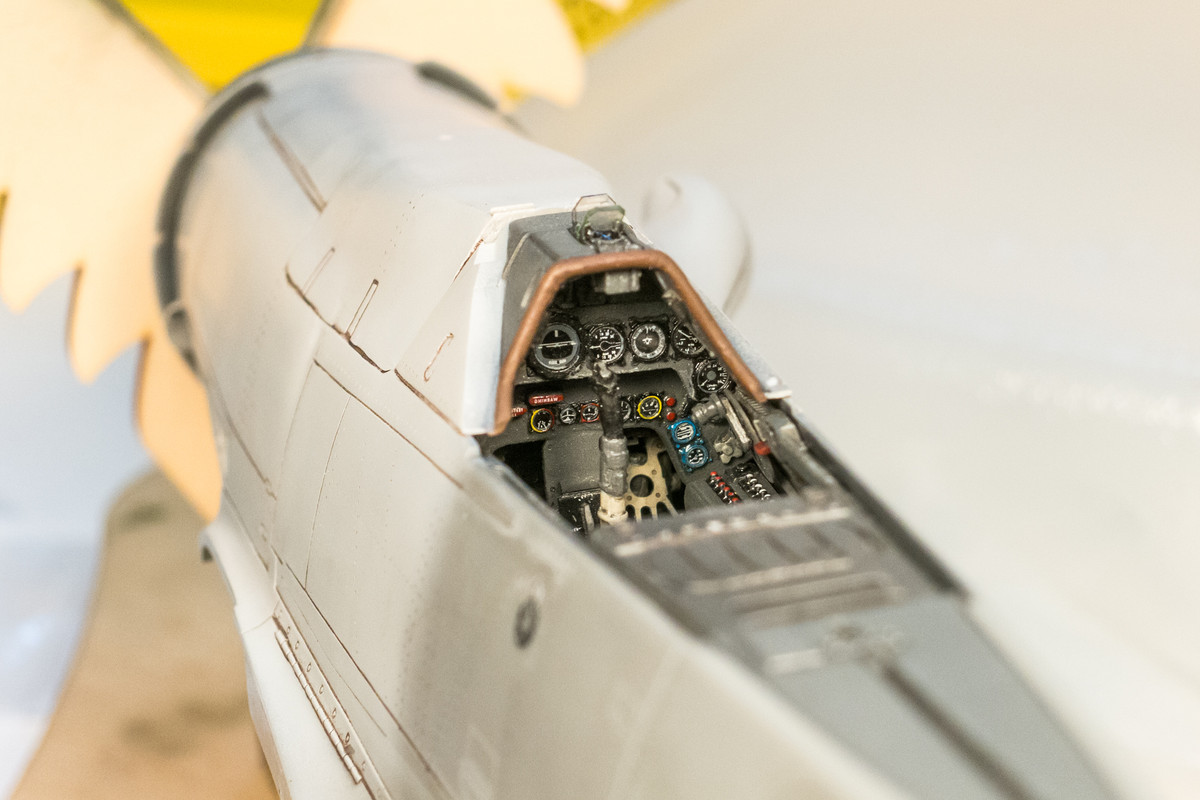
The rear deck, which was cut from the kit part rather than use the photoetch piece that comes with the Eagle Edition cockpit has been painted.
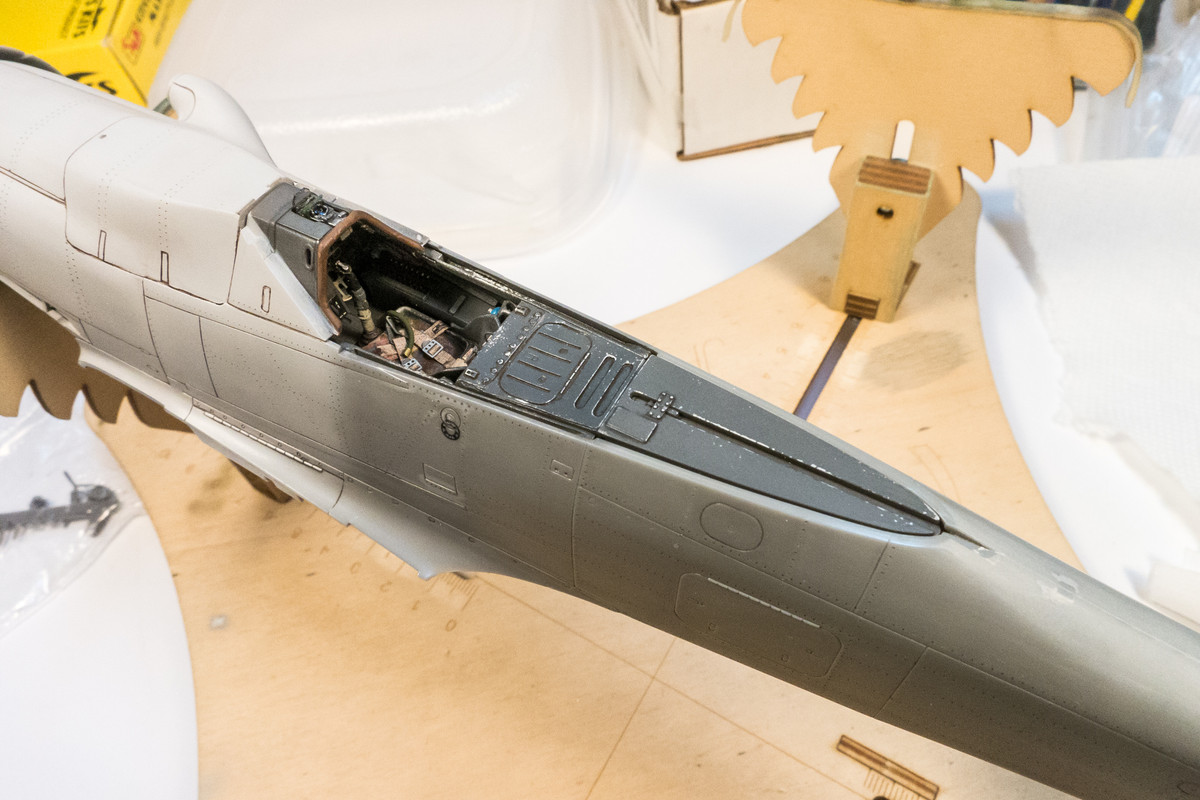
The headrest hood was also painted. The circular cushion was painted a light tan color to match the archive photos of Yellow 10.
The clear parts were dipped in Future to increase clarity prior to masking.
To make the ammo chute, I used a form made from a piece of thick styrene sheet. The cross section matches the opening in the bottom of the wing, just a little bit smaller. Placing the form in position, I mark the approximate length of the piece, which can be trimmed more exactly later.
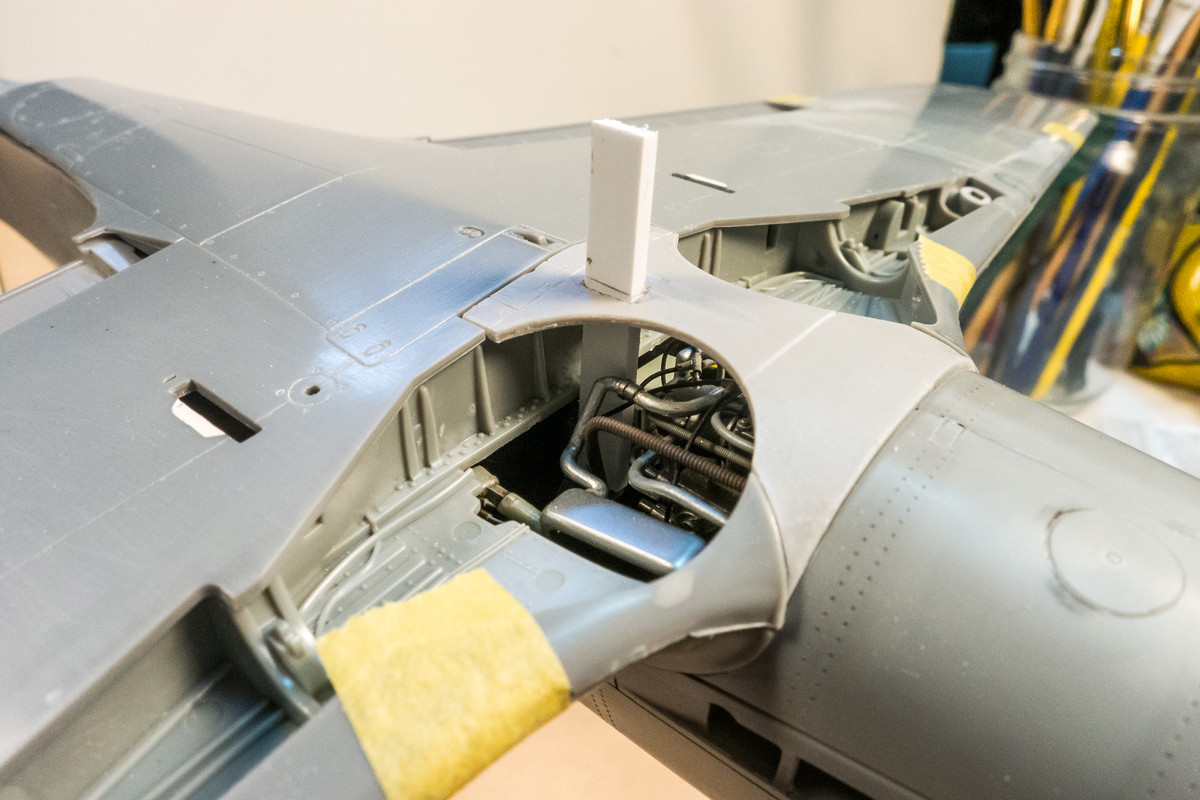
A section of brass sheeting is folded around the form to produce the hollow ammo chute.
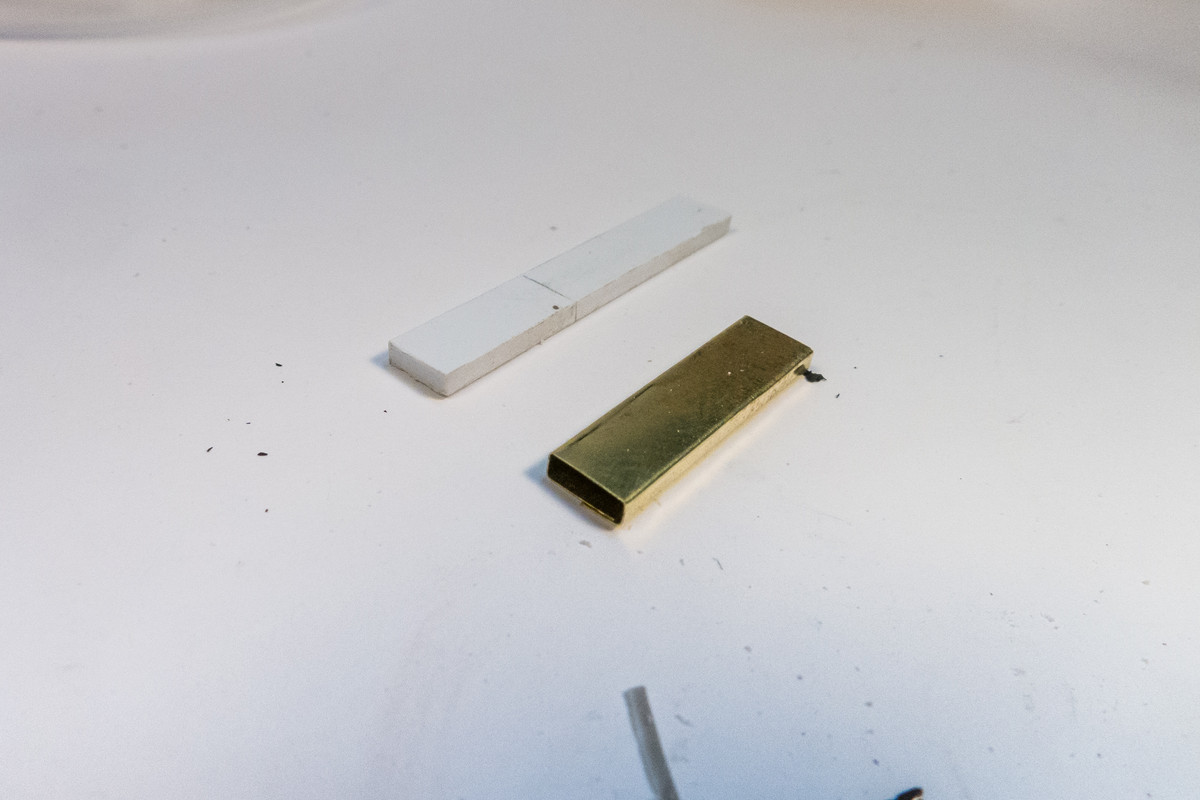
The new chute is a nice tight fit into the opening.
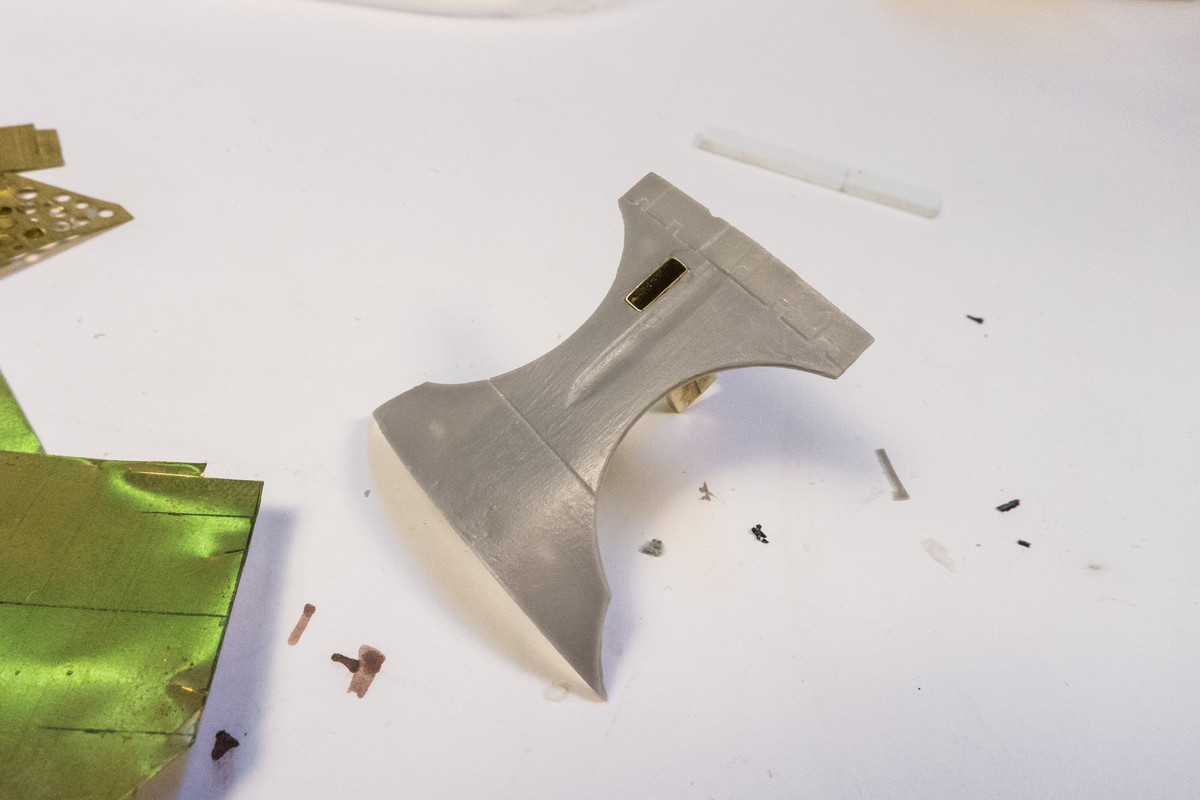
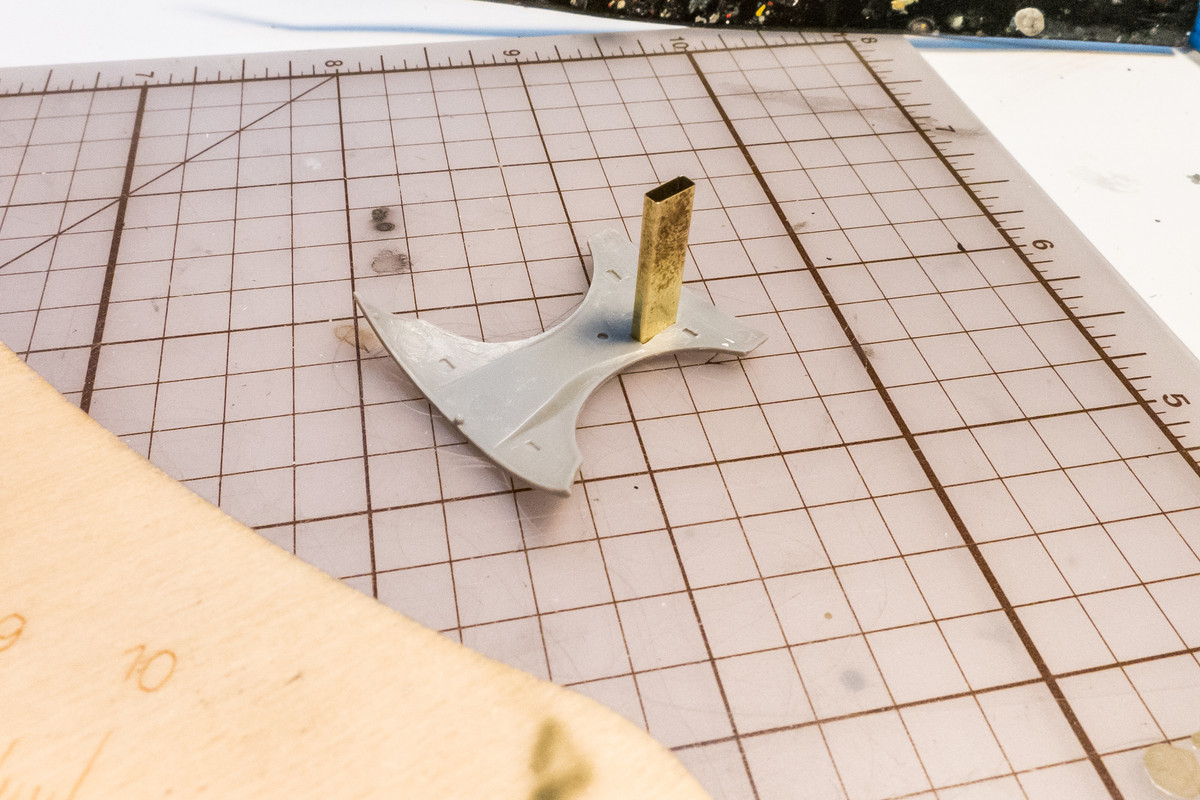
I will have to trim the length of the chute a tad but otherwise, it seems to fit ok. This will be painted and glued into the center wing bottom piece and should slide into the correction position when it comes time to attach the wings to the fuselage.
I'm moving closer to getting the fuselage closed up and moving to the wings. A couple of shots with side lighting to help emphasize the sculpting that went into the engine cowling. Although it is not 100% accurate, I do feel that the shapes are better integrated and more in-line with the available data (including the cross sections of the D-13 found in the Appendix of the Crandall Dora books) than the Grey Matter resin conversion, which to me, looks rather grafted on.
A few peeks at the cockpit from the outside...
The rear deck, which was cut from the kit part rather than use the photoetch piece that comes with the Eagle Edition cockpit has been painted.
The headrest hood was also painted. The circular cushion was painted a light tan color to match the archive photos of Yellow 10.
The clear parts were dipped in Future to increase clarity prior to masking.
To make the ammo chute, I used a form made from a piece of thick styrene sheet. The cross section matches the opening in the bottom of the wing, just a little bit smaller. Placing the form in position, I mark the approximate length of the piece, which can be trimmed more exactly later.
A section of brass sheeting is folded around the form to produce the hollow ammo chute.
The new chute is a nice tight fit into the opening.
I will have to trim the length of the chute a tad but otherwise, it seems to fit ok. This will be painted and glued into the center wing bottom piece and should slide into the correction position when it comes time to attach the wings to the fuselage.
John aka JKim
-----------<><
-----------<><
-
jeaton01
- Elite Member
- Posts: 2374
- Joined: Thu Apr 23, 2020 9:20 am
- Location: Northern California
- Contact:
Re: 1/32 Hasegawa Fw 190D-13 Yellow 10
Yeah, nice!

Re: 1/32 Hasegawa Fw 190D-13 Yellow 10
You've got a lot done on this in a short amount of time. I really like how you made the ammo chute.
March as one, Don't look back
Odin's sons... Attack!
Unleash hell! Do not repent! Warfare grants us no lament
Let your weapons slash and tear This is no place for fear
Hold the lines! Move as one! In unity our victory's won
Our shields will form a mighty wall
United we shall never fall
Odin's sons... Attack!
Unleash hell! Do not repent! Warfare grants us no lament
Let your weapons slash and tear This is no place for fear
Hold the lines! Move as one! In unity our victory's won
Our shields will form a mighty wall
United we shall never fall