Page 19 of 30
Re: 1/32 Hasegawa Fw 190D-13 Yellow 10
Posted: Sat Feb 27, 2021 4:04 pm
by jkim
Floki wrote:That had to be hard to wipe all that work you put into the landing gear. If anyone but him would of said it then I would of just left it.
It wasn't too bad. I should've checked my references more carefully... can't deny the reference photos. After the paint was stripped, I took some extra time to scribe the delineations on the landing gear legs to allow them to hold a wash better. I figured if I was going to re-do them, I would make them better somehow.
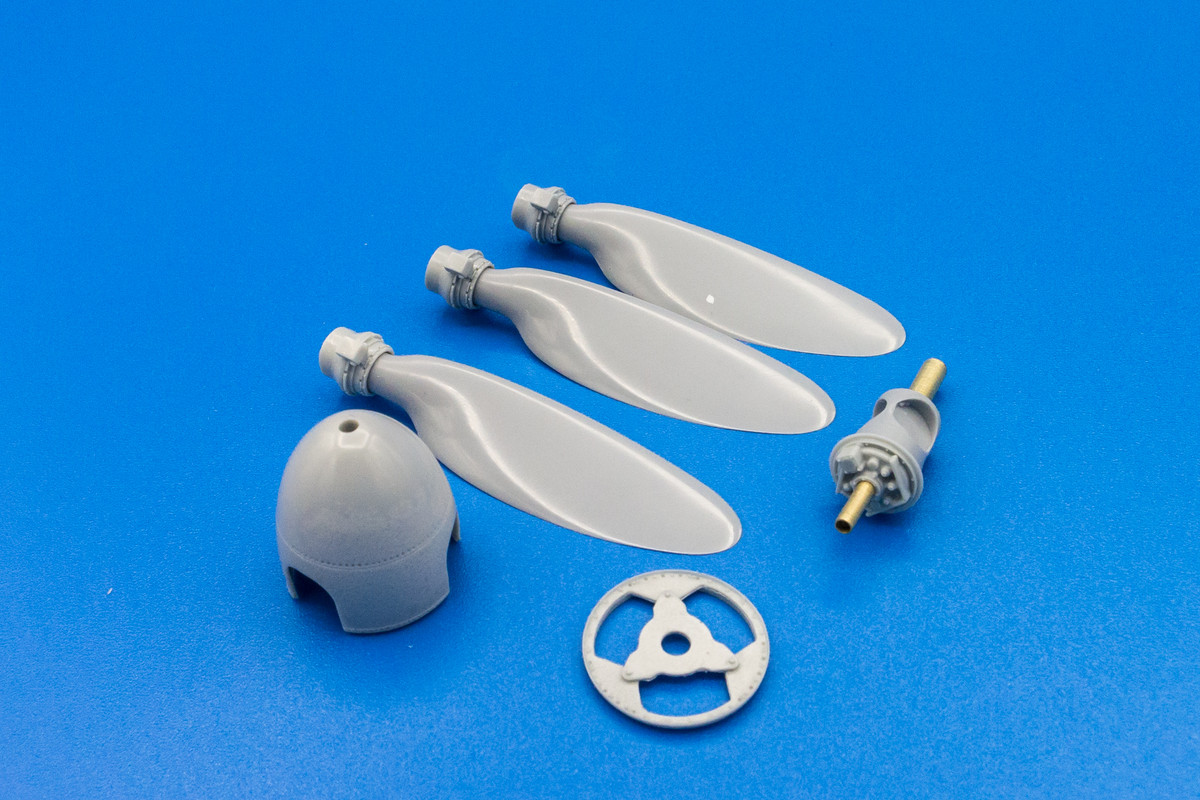
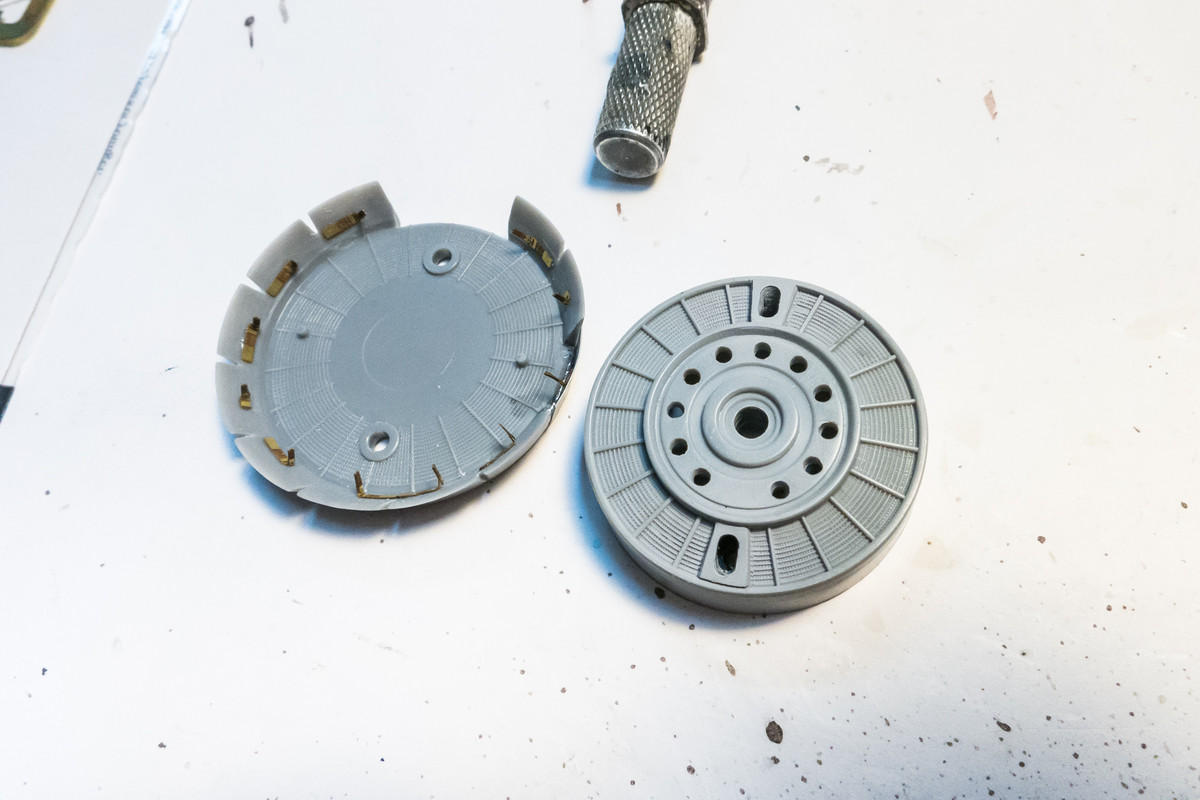
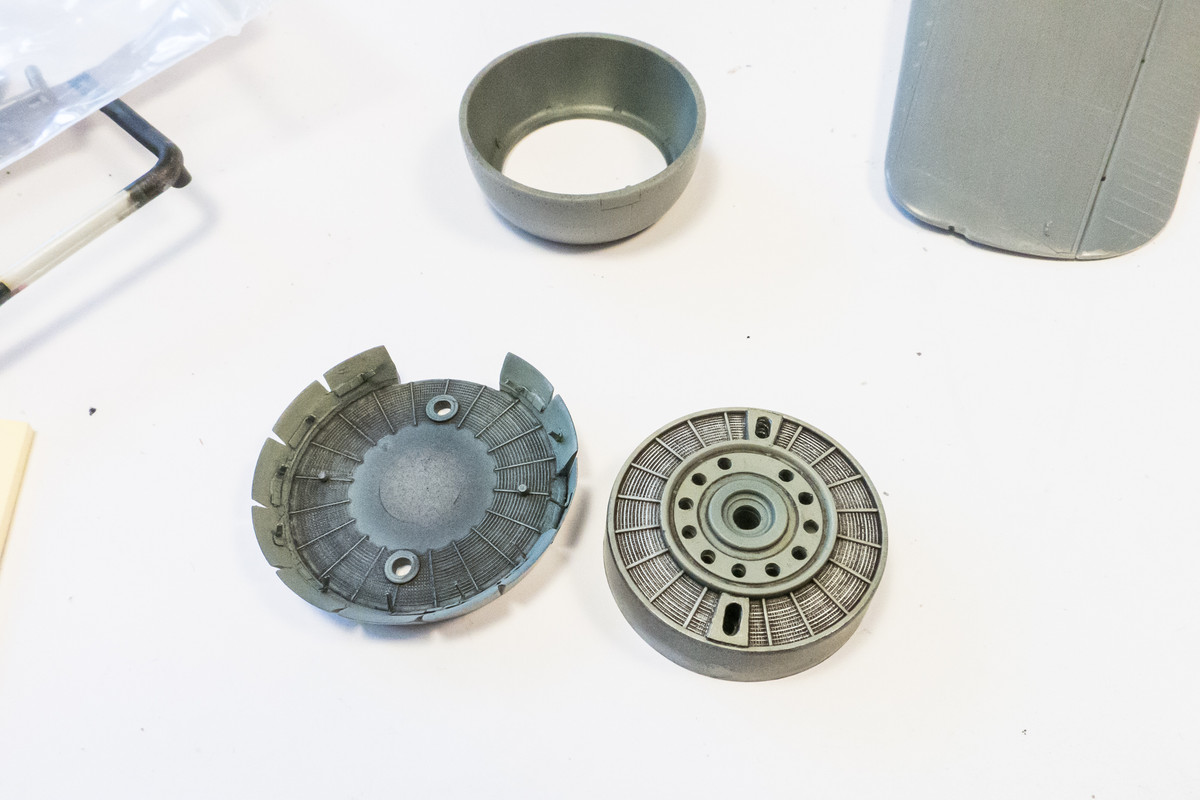
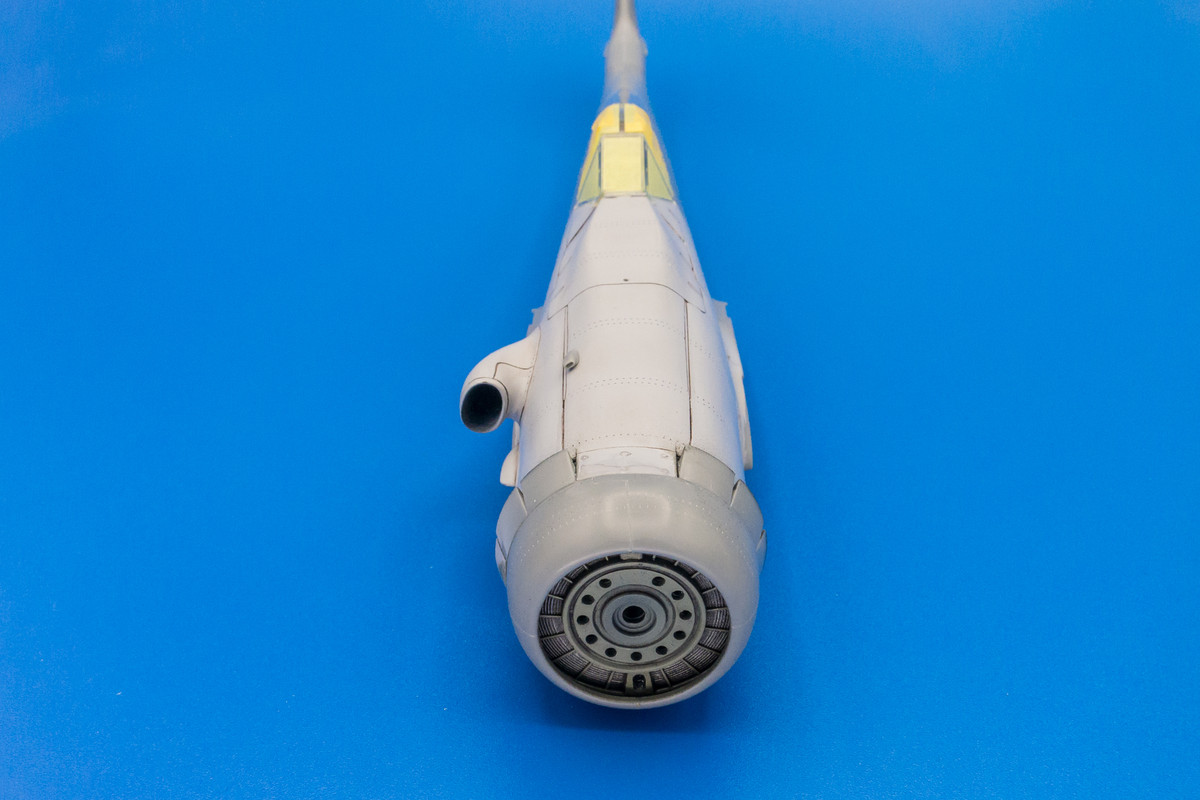
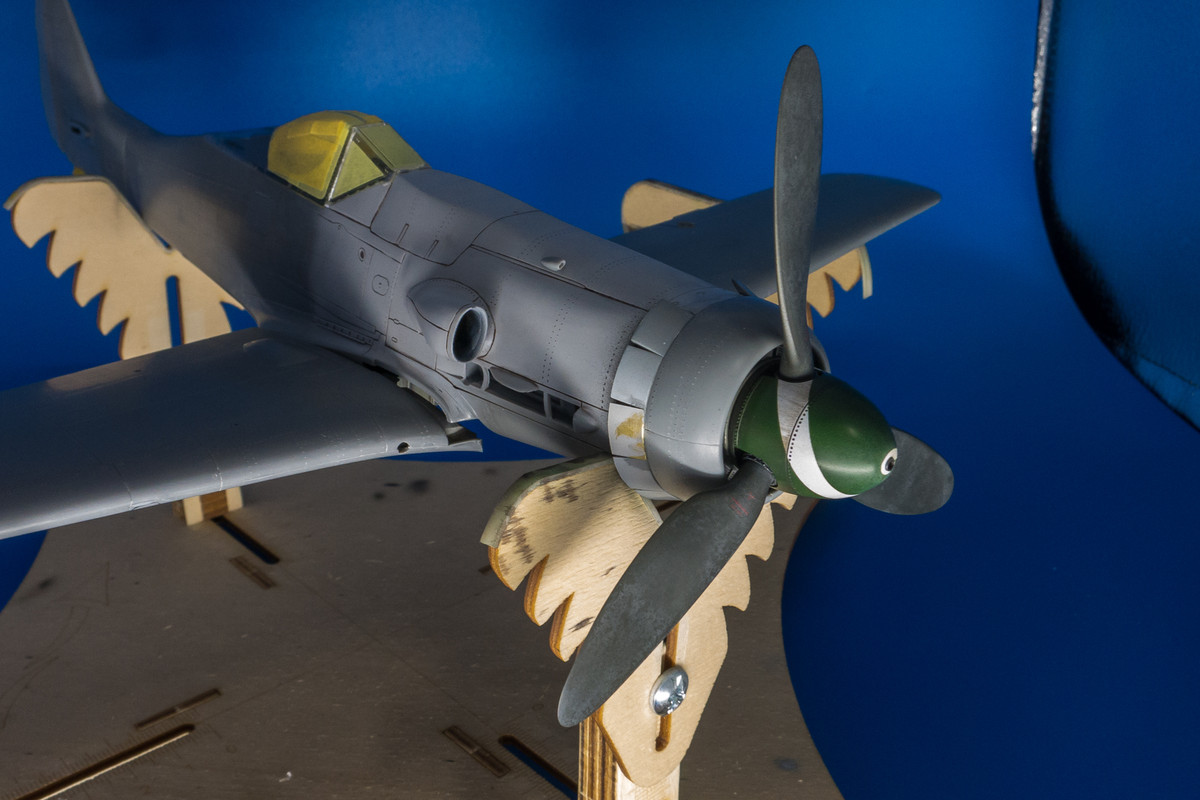
Here are the radiator pieces. I had a couple of Eduard 190D-9 Exterior details sets, which will largely go unused since most of included items are for wheel wells, which have been superseded by the Aires resin set. But... there are some actuating arms for the radiator cowling flaps that I was able to use so you can see them in the photo.
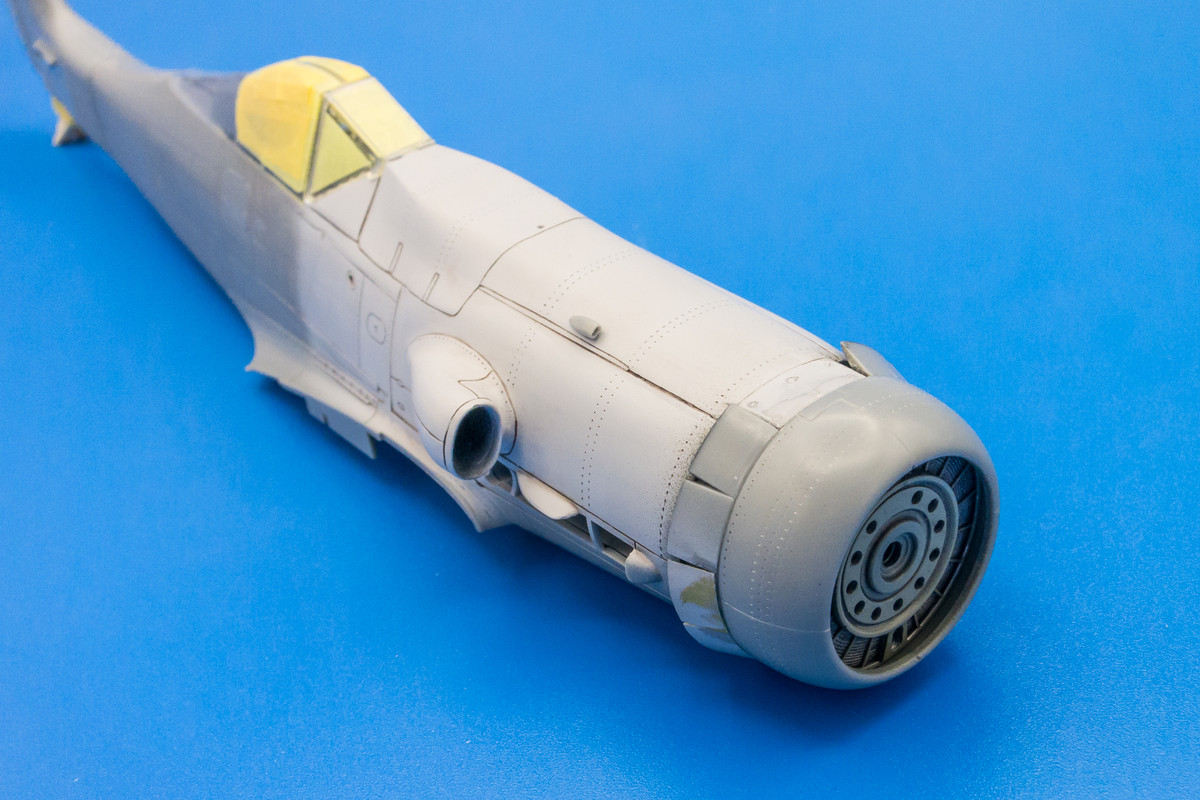
The radiator cowling pieces have been glued into place. I've also added the little scoop on top of the engine cowling. The opening of the scoop was "scooped" out using an x-acto blade.

Re: 1/32 Hasegawa Fw 190D-13 Yellow 10
Posted: Sun Feb 28, 2021 12:13 am
by jkim
Re: 1/32 Hasegawa Fw 190D-13 Yellow 10
Posted: Sun Feb 28, 2021 8:58 am
by Floki
A beautiful looking prop! Really is some great looking resin! Great job on the spiral. It looks like the gun barrel holds the spinner in place really well if you was wanting to keep it removable.
Re: 1/32 Hasegawa Fw 190D-13 Yellow 10
Posted: Sun Feb 28, 2021 11:44 am
by Medicman71
Just incredible! The painting on the spinner looks awesome!
Re: 1/32 Hasegawa Fw 190D-13 Yellow 10
Posted: Mon Mar 01, 2021 12:00 am
by jkim
Thanks guys!
Floki wrote:A beautiful looking prop! Really is some great looking resin! Great job on the spiral. It looks like the gun barrel holds the spinner in place really well if you was wanting to keep it removable.
Nope. The spinner will have to be permanently attached to the backplate... it just doesn't have enough friction to hold together without glue. And the gun barrel is painted brass, which is highly susceptible to the paint scratching off.
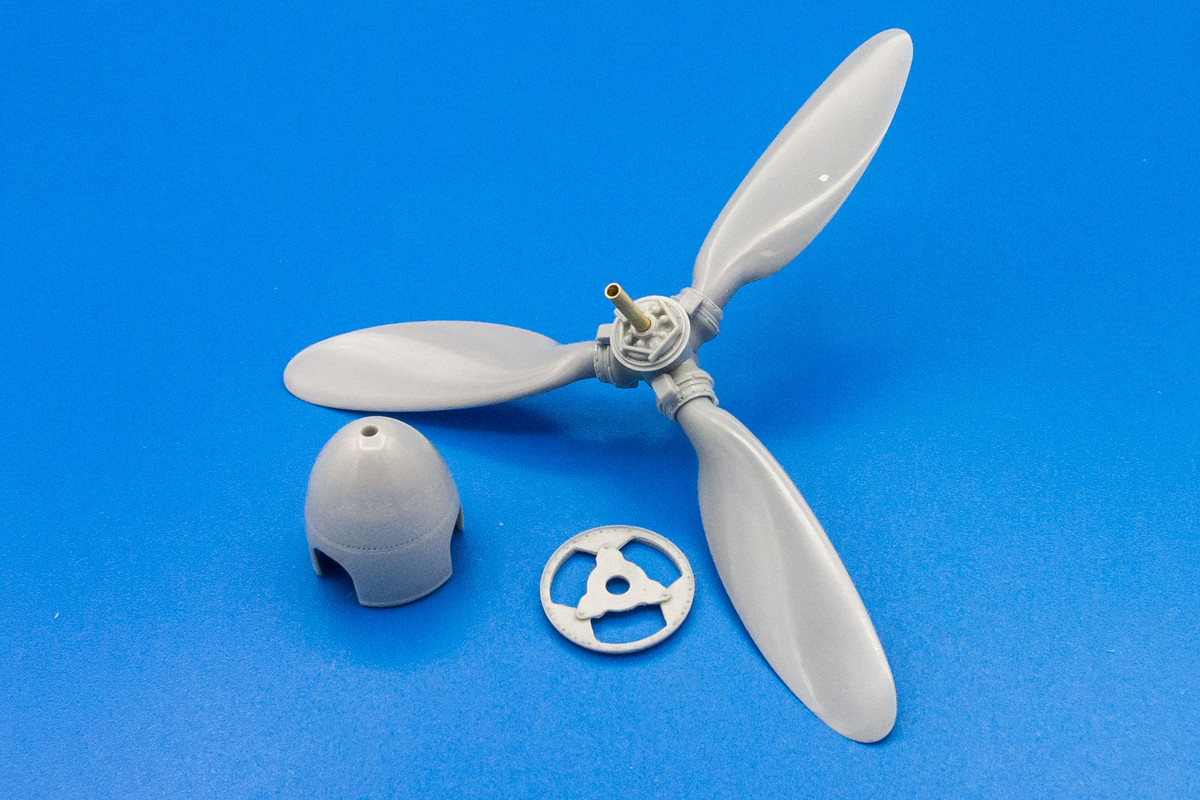
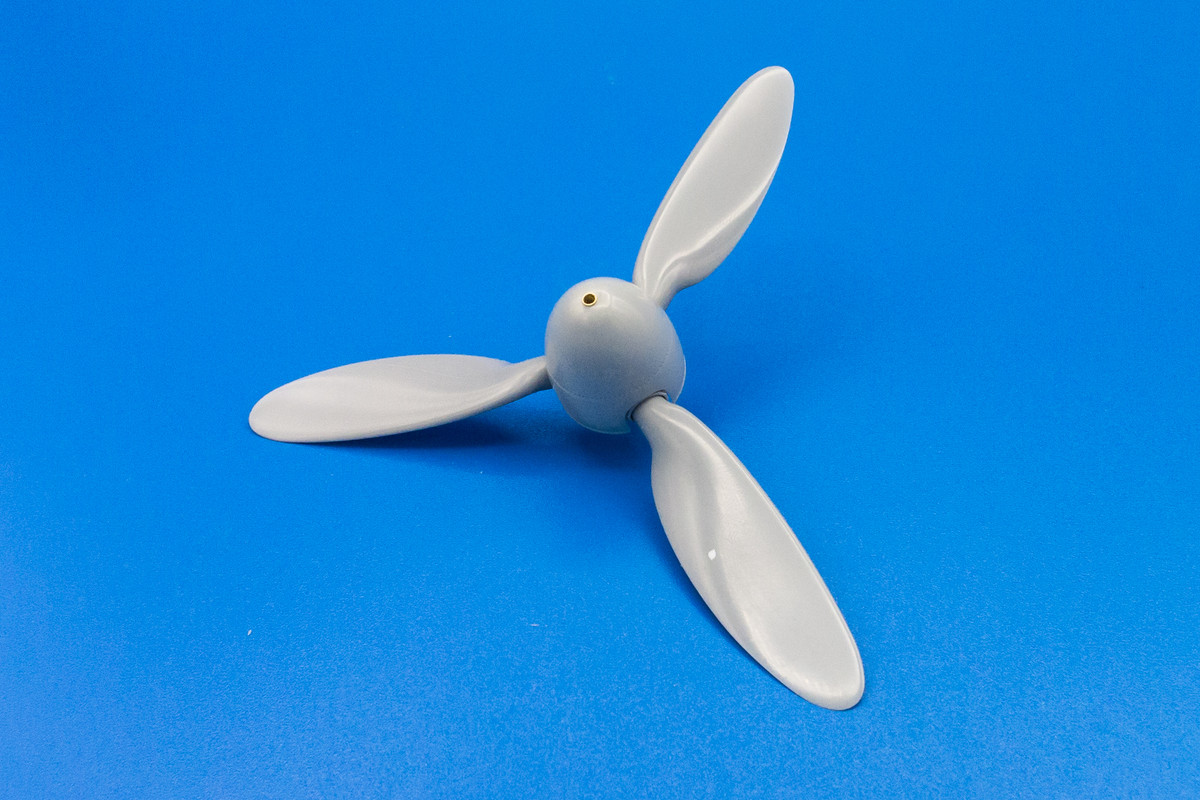
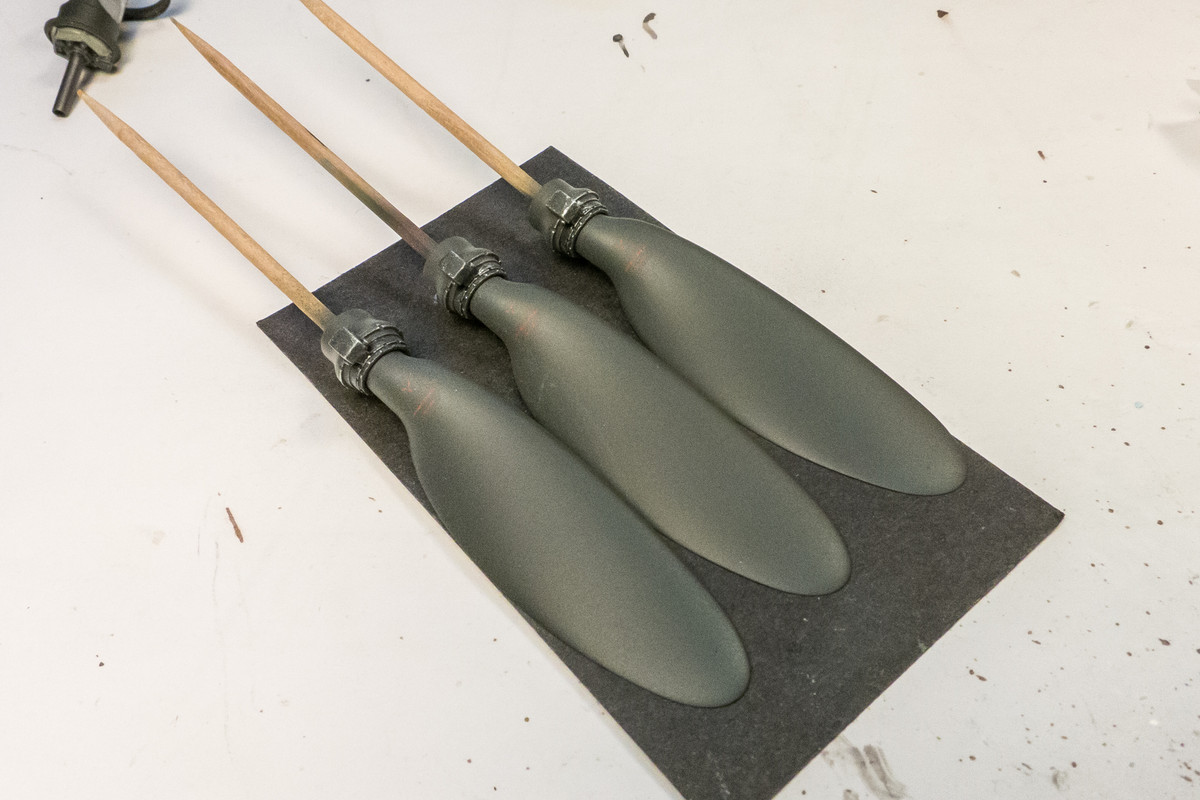
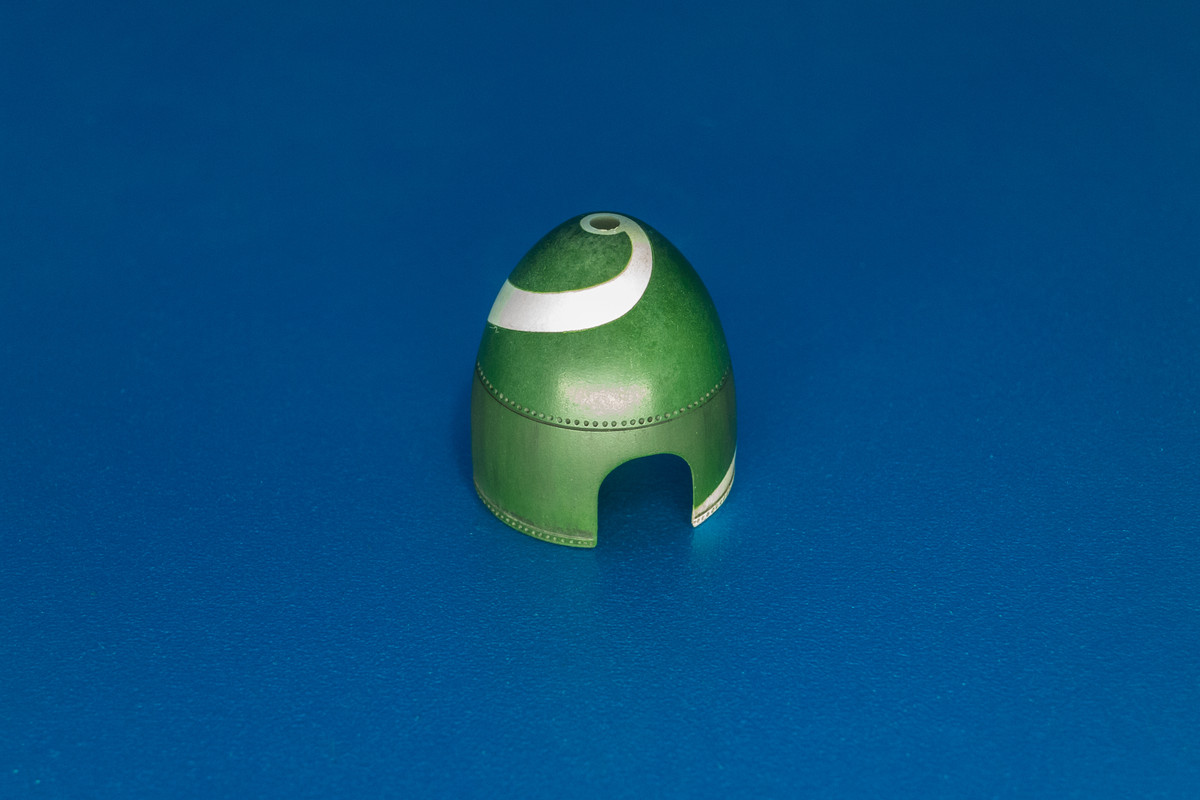
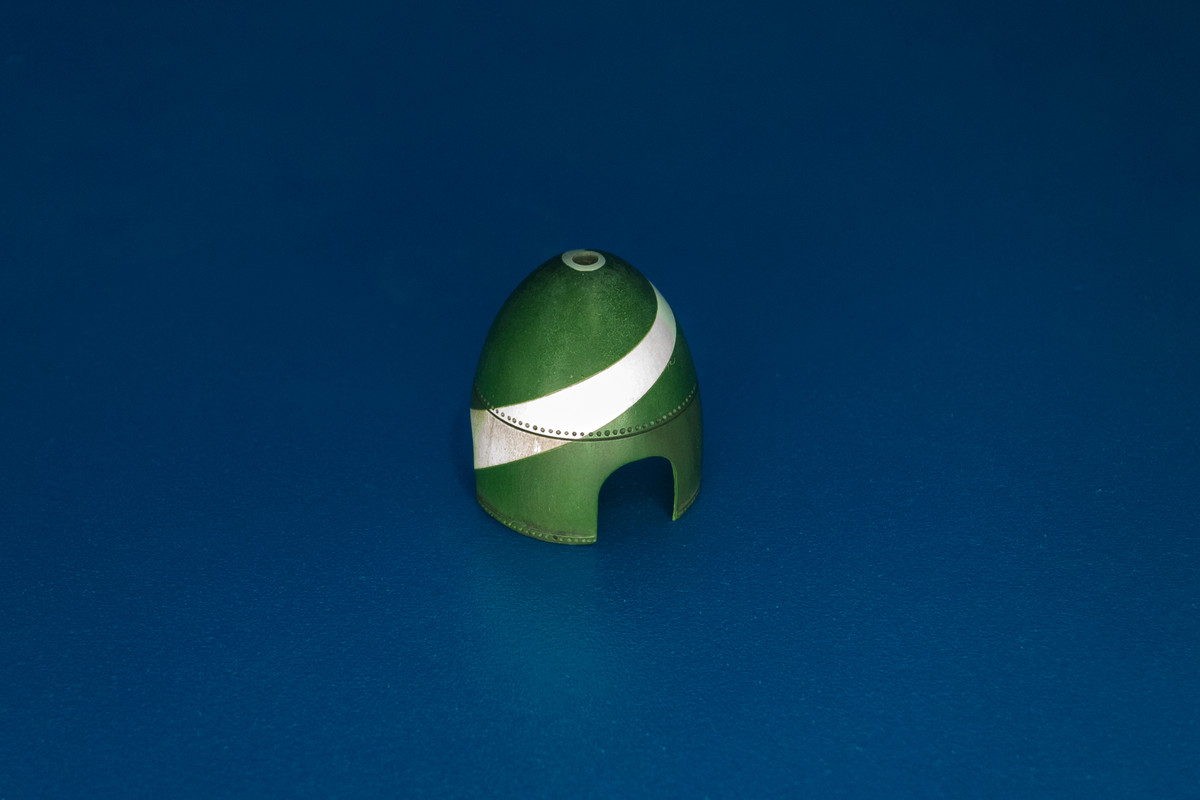
The prop blades were treated to a few rounds of salt fading. I am very cautious with this technique because it looks pretty strange when it is overdone. So I tend to wisp on very thin light grays and tans and sometimes I find that the effect is not even visible. If the effect is a little too heavy, I can dial it back by gently rubbing some micromesh on it.
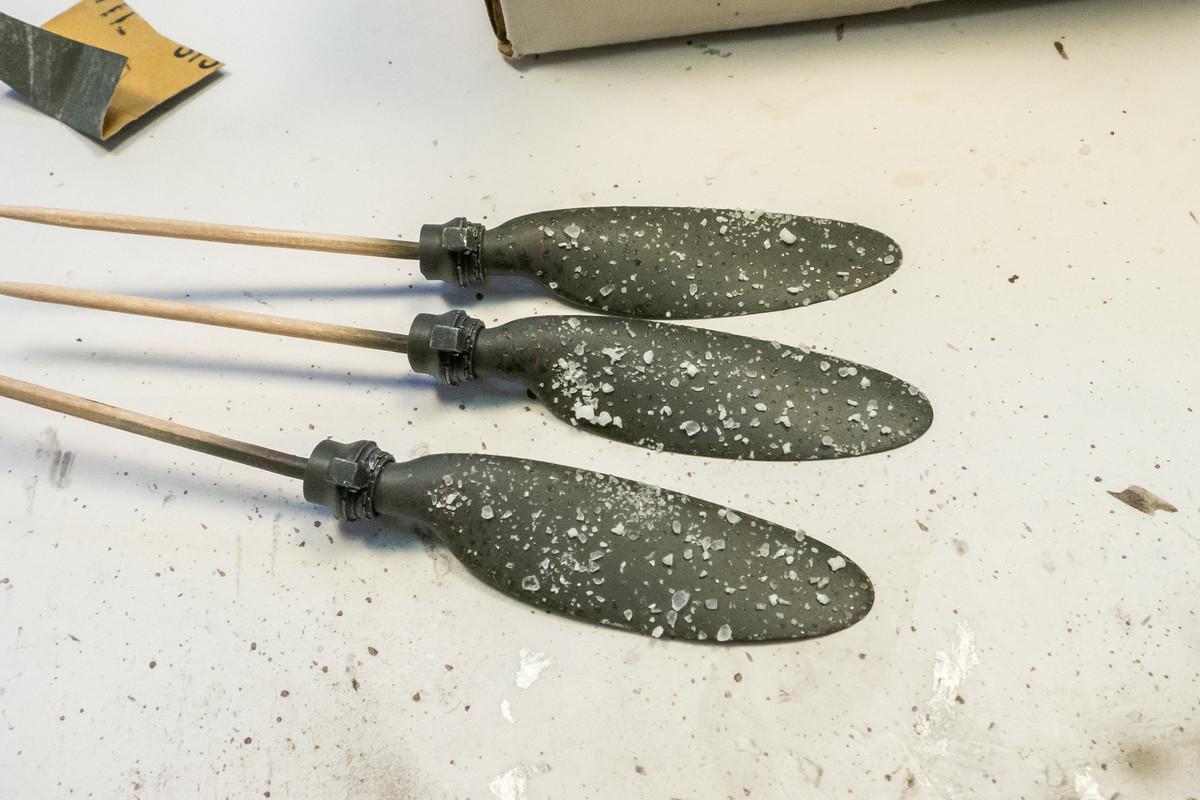
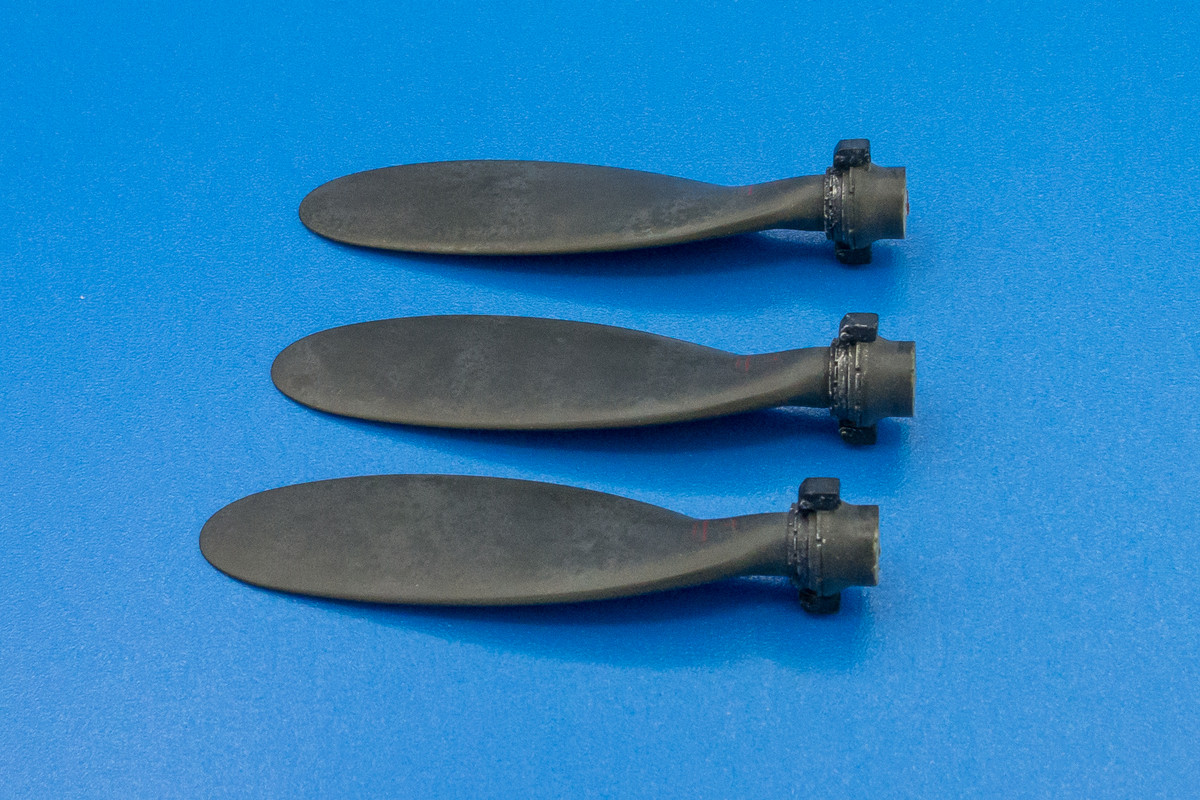
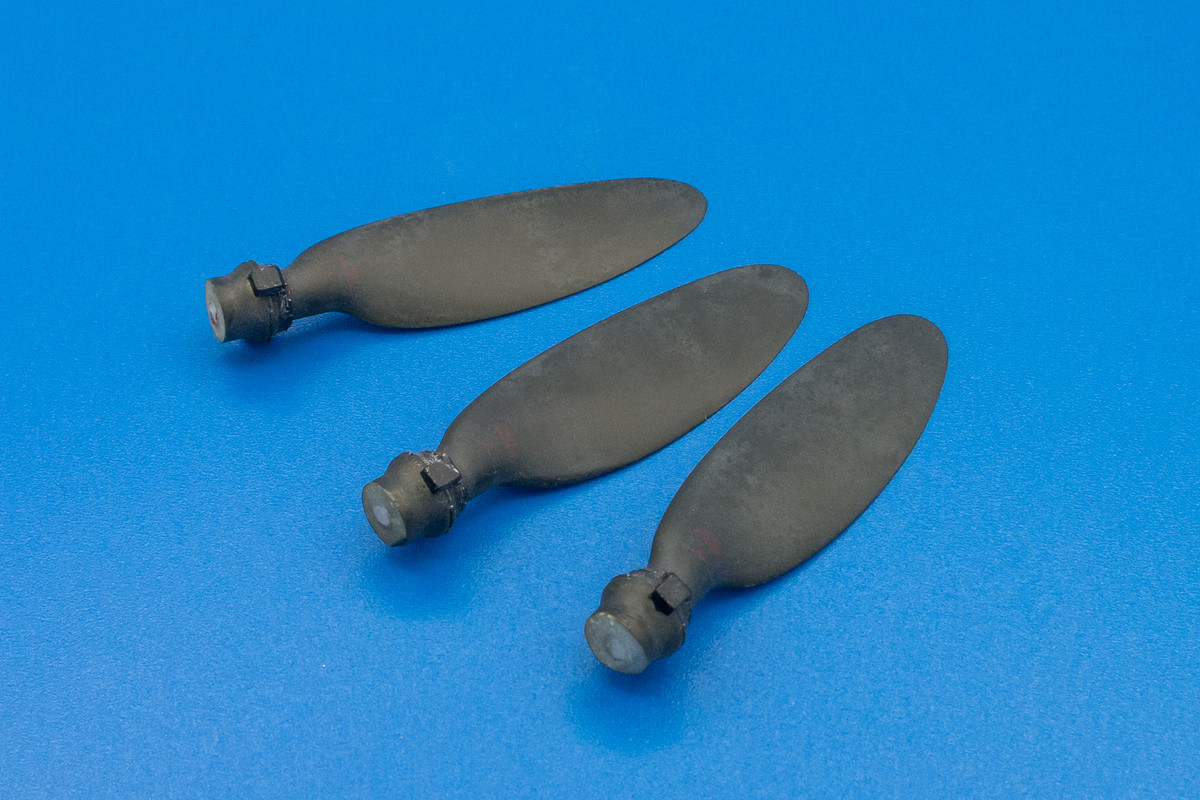
Here are the prop blades after 3 salt fading attempts. The effect is pretty subtle and these photos represent my attempt to maximize the visibility of it. In some angles, you can hardly see it.

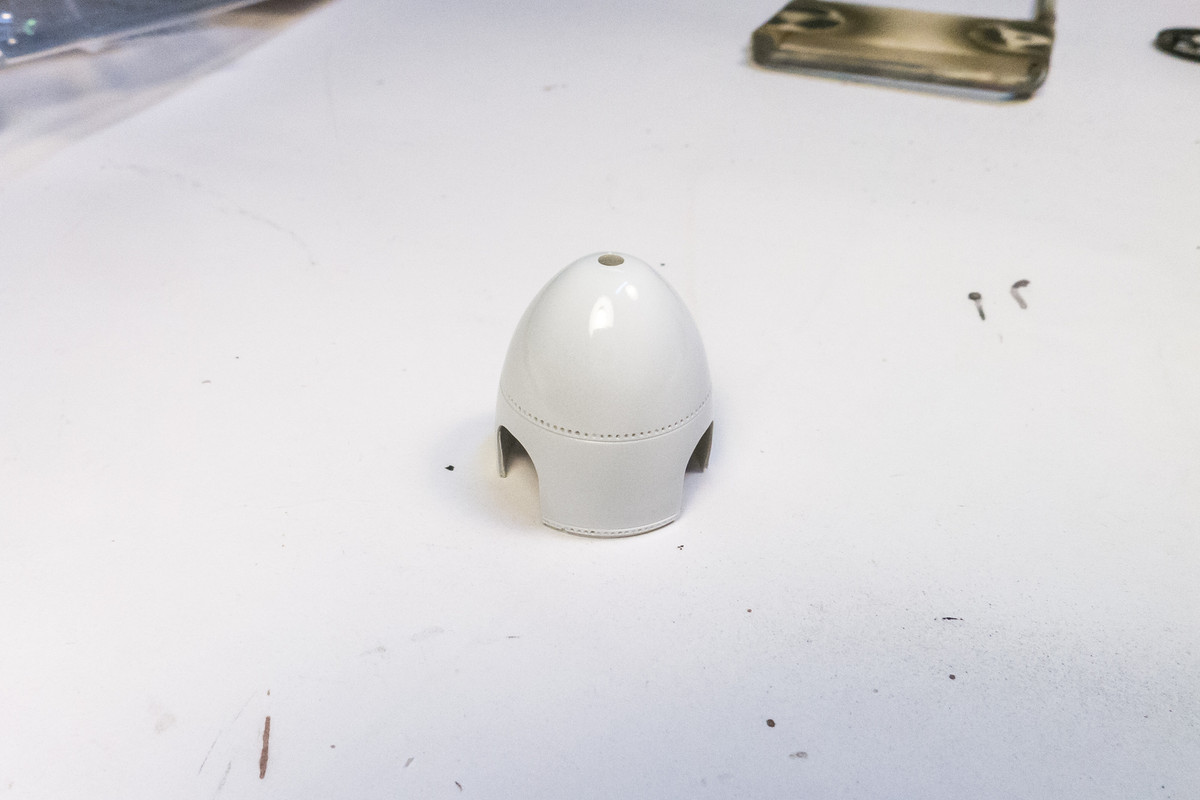
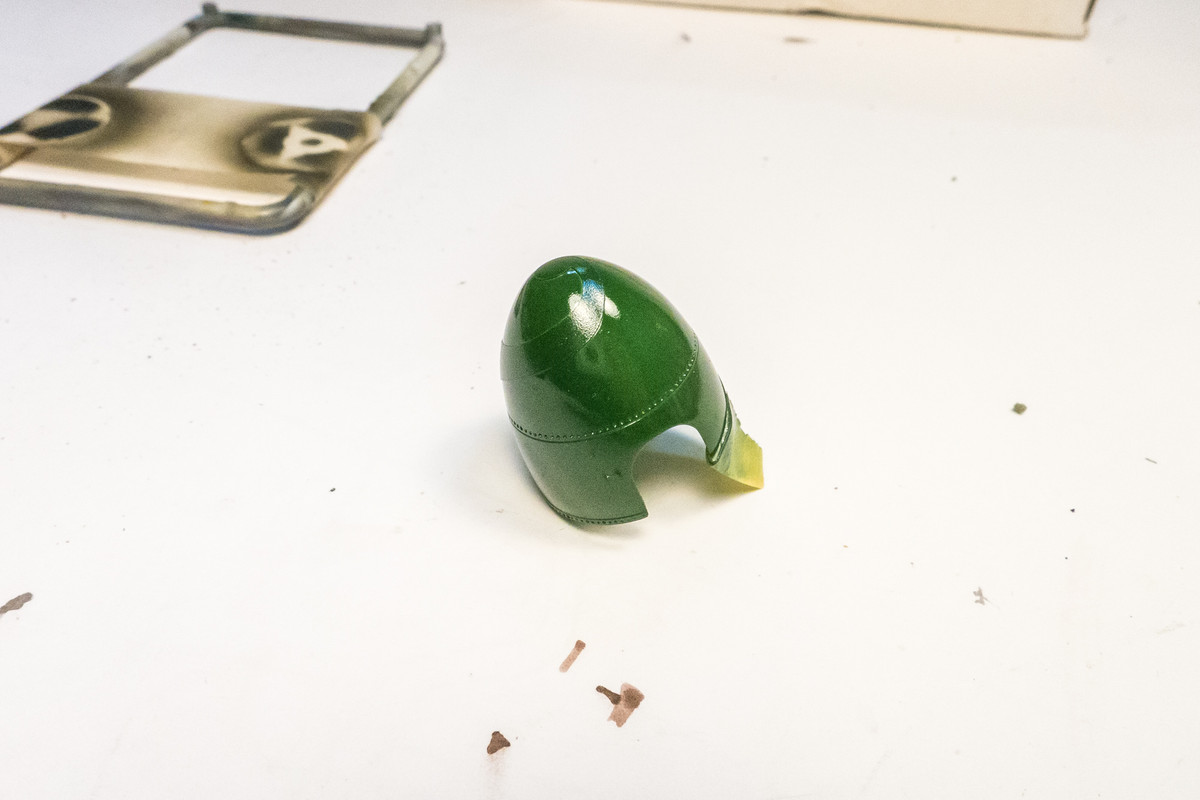
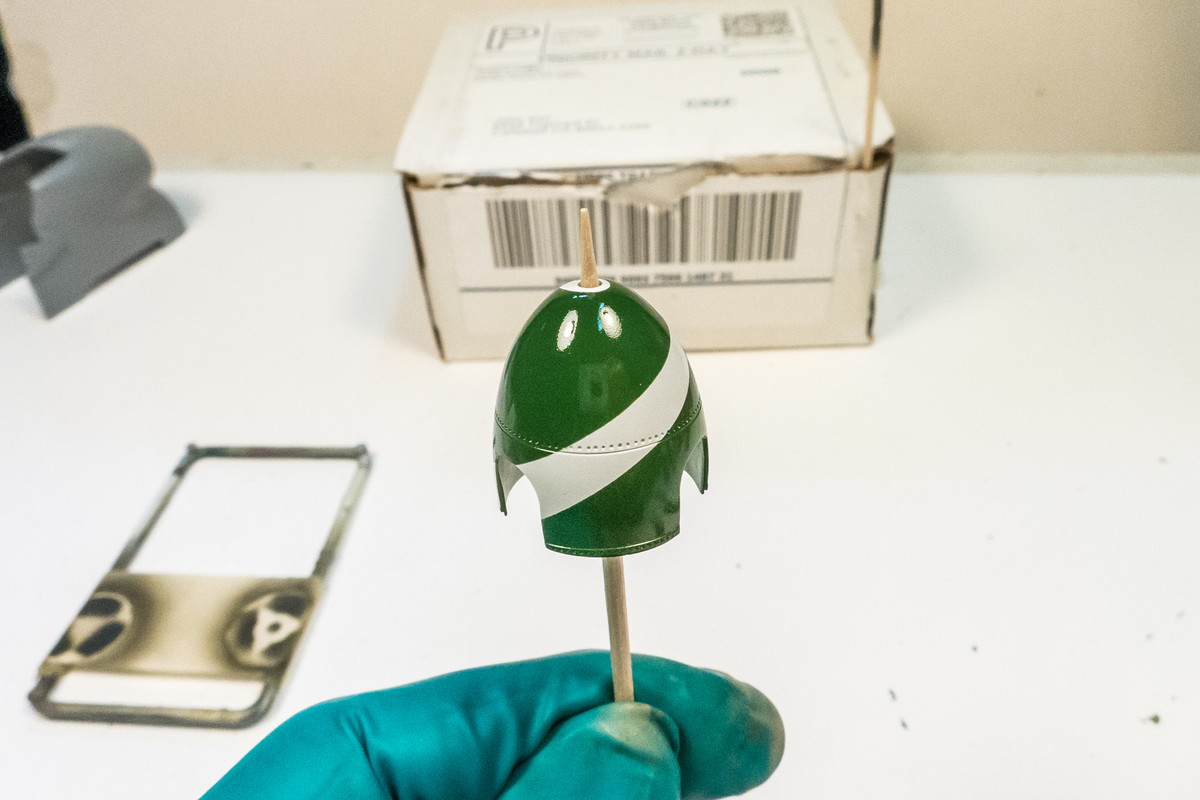
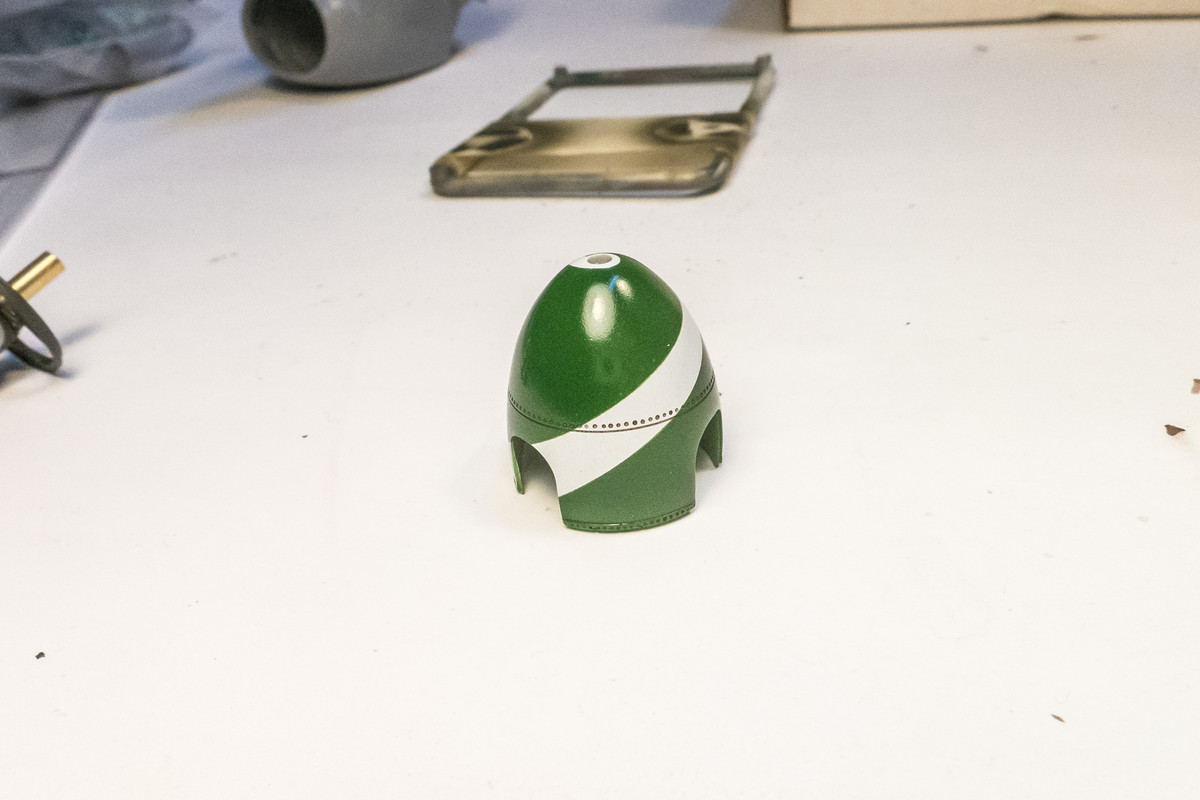
Some initial attempts at staining the prop spinner. This is just playing with pastel staining on a matte paint surface. I'll probably try to layer some more discrete stains, maybe with oils. And yes, I did a salt fade on the spinner too.
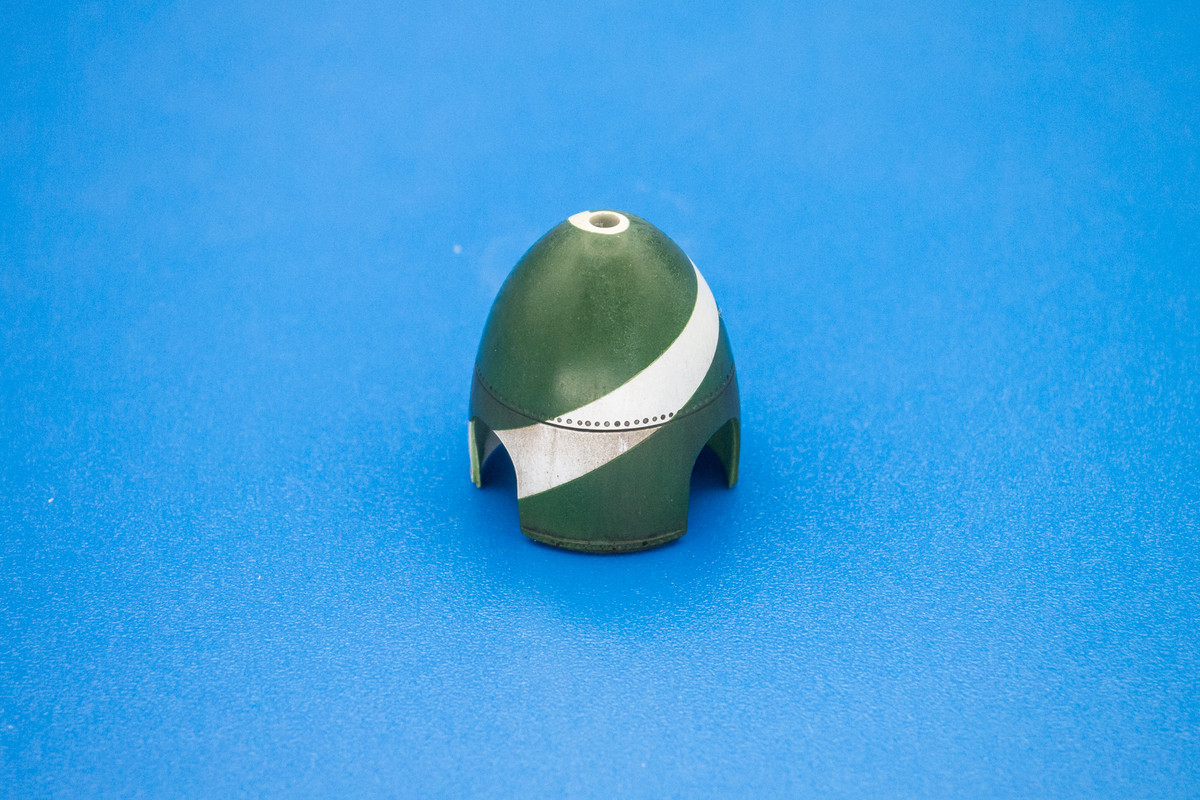
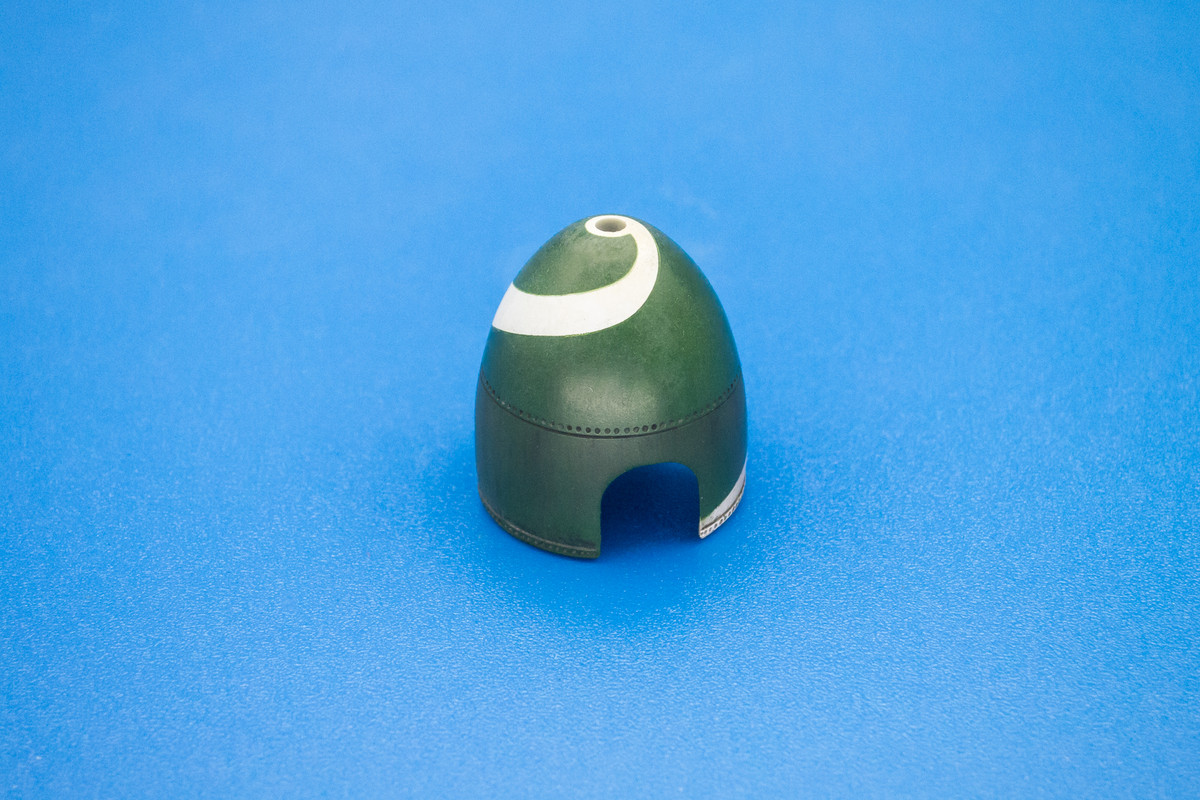
Playing around with different light configurations to get another perspective on the spinner.
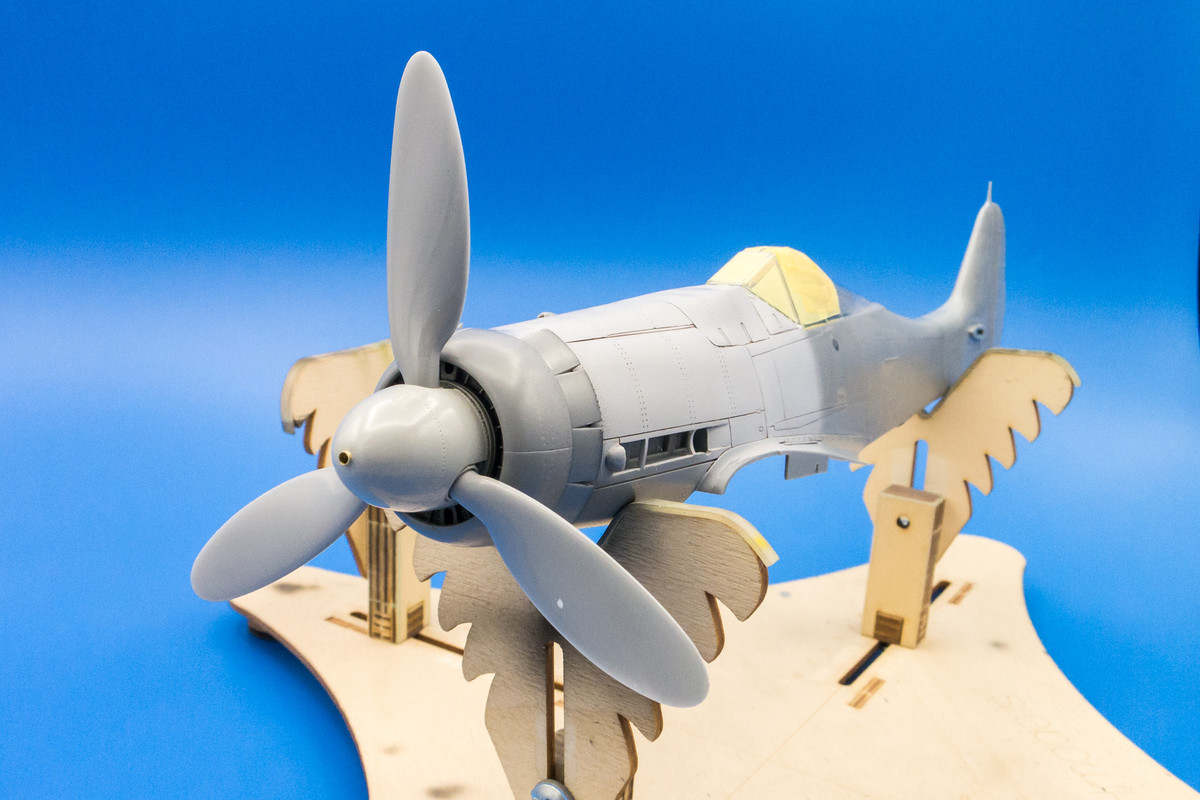
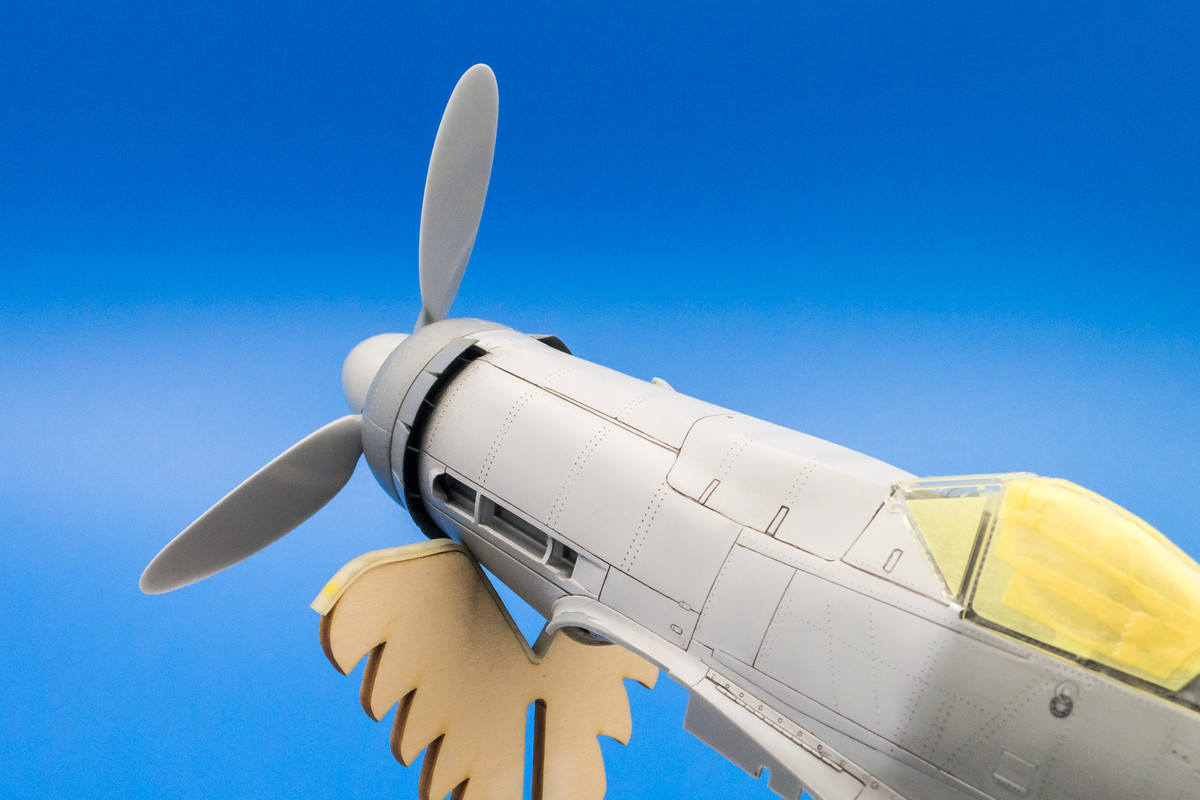
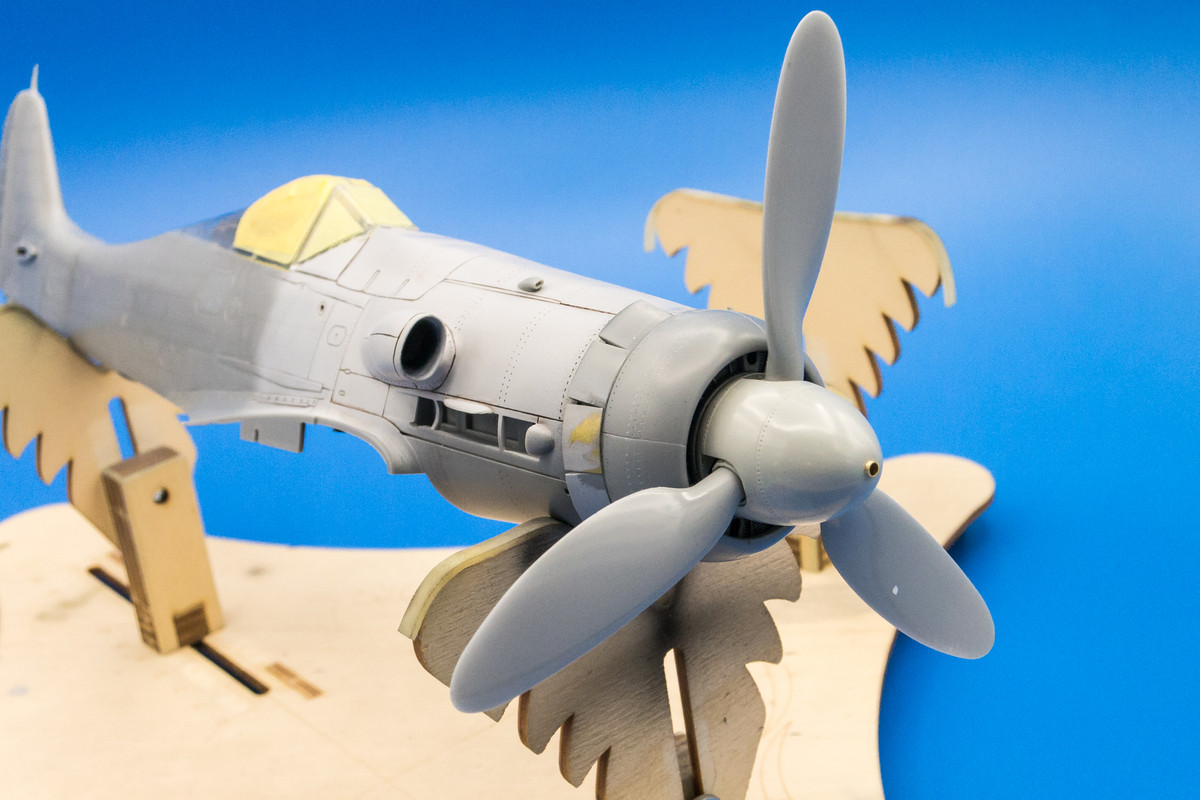
A peek of the assembled prop mounted onto the fuselage.
Re: 1/32 Hasegawa Fw 190D-13 Yellow 10
Posted: Mon Mar 01, 2021 4:11 am
by Stuart
Re: 1/32 Hasegawa Fw 190D-13 Yellow 10
Posted: Mon Mar 01, 2021 2:51 pm
by Duke Maddog
Re: 1/32 Hasegawa Fw 190D-13 Yellow 10
Posted: Mon Mar 01, 2021 4:31 pm
by Stikpusher
Beautiful!

The green spiral spinner is a nice change from the usual black green or black.
Re: 1/32 Hasegawa Fw 190D-13 Yellow 10
Posted: Mon Mar 01, 2021 7:30 pm
by mustang1989
John I really don't know what all to say about the work that you're putting into this build. I certainly admire all that you're doing not only on a modeling / technique level but also on an accuracy level. This has got to be one of the best D-9 examples I've ever seen built up and you're not even done yet.
Re: 1/32 Hasegawa Fw 190D-13 Yellow 10
Posted: Mon Mar 01, 2021 9:17 pm
by jkim
Thanks guys! I'm really enjoying this build. It's a mix of familiar and strange. It's a Dora, which I've done many but it's a D-13, which makes it unique and different in many ways. The 190D has always been a favorite of mine, even in childhood, so I feel especially motivated to do my best even when going through (essentially) the same cockpit and engine stuff 4-5 times now.
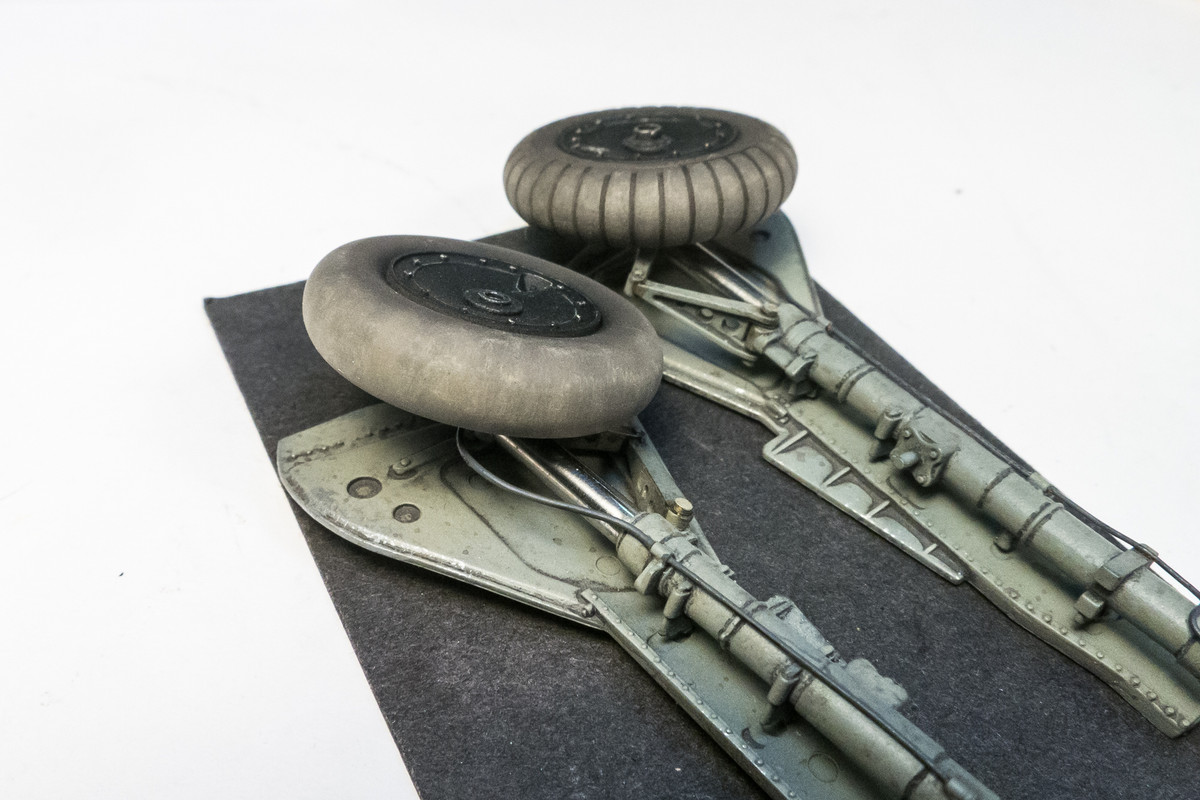
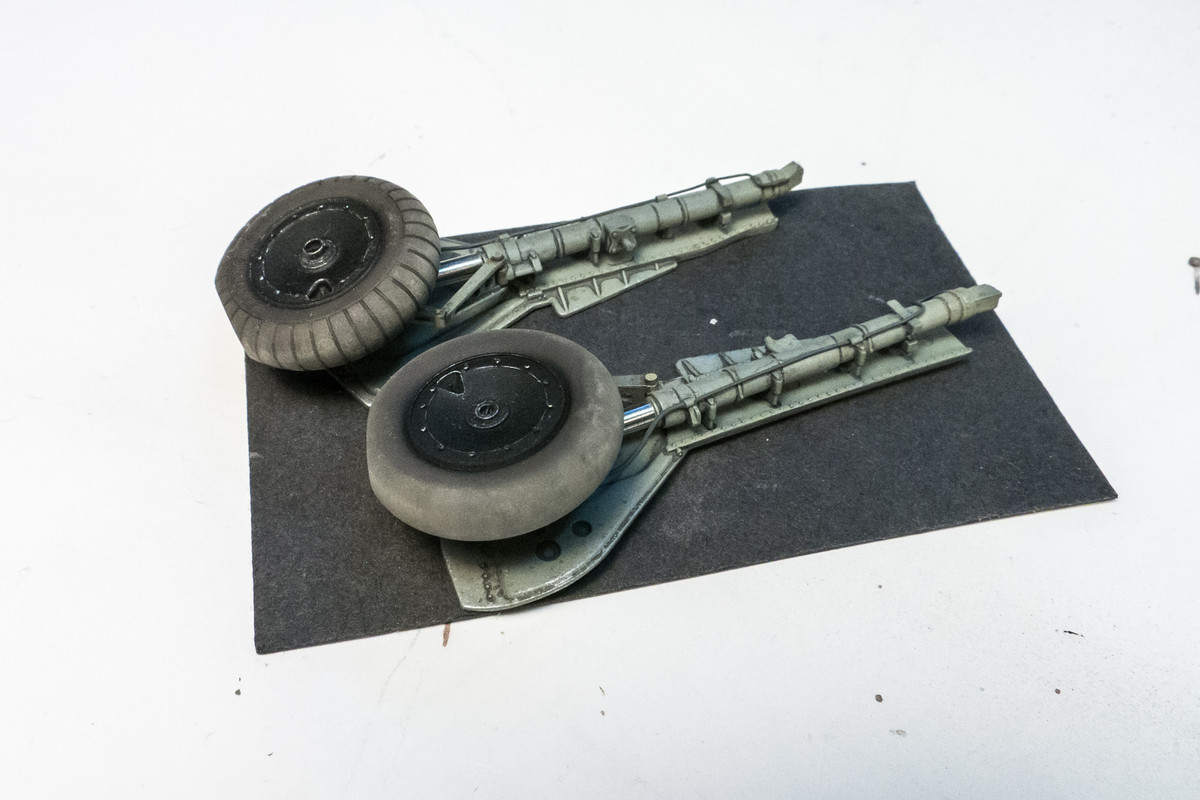
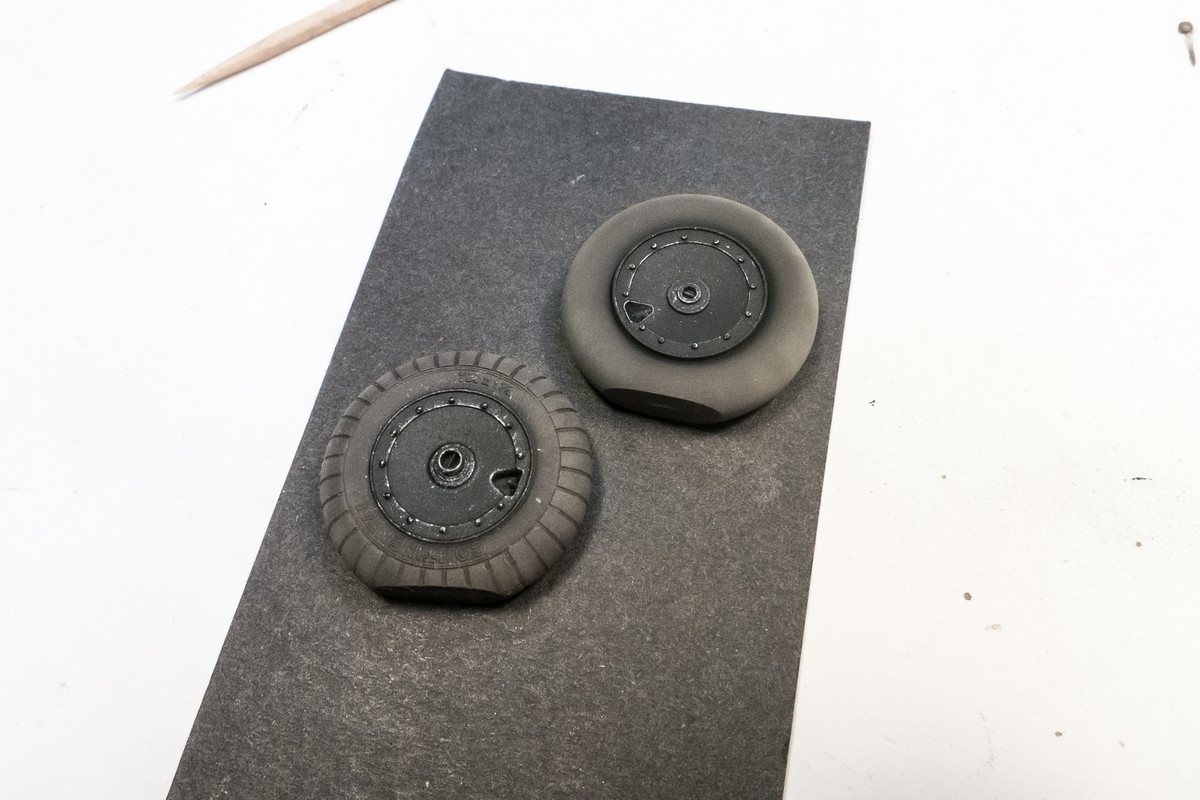
The wheels have been painted. No, they do not match! Photographs of Yellow 10 at capture clearly show that the plane had both the smooth and treaded tires. I used one of the kit wheels for the smooth version and a Barracuda resin wheel for the treaded one. Hub detail is a slightly different but close enough not to stand out. As for painting, I like to use a dark brown on the rubber tires. Mostly to contrast with the black metal wheel discs but I guess real rubber can have that tinge of brown to it. I've lightened the wear surfaces with a tan color but I've always been dissatisfied with the paint effects up to this point... it's just too smooth and airbrush-like.
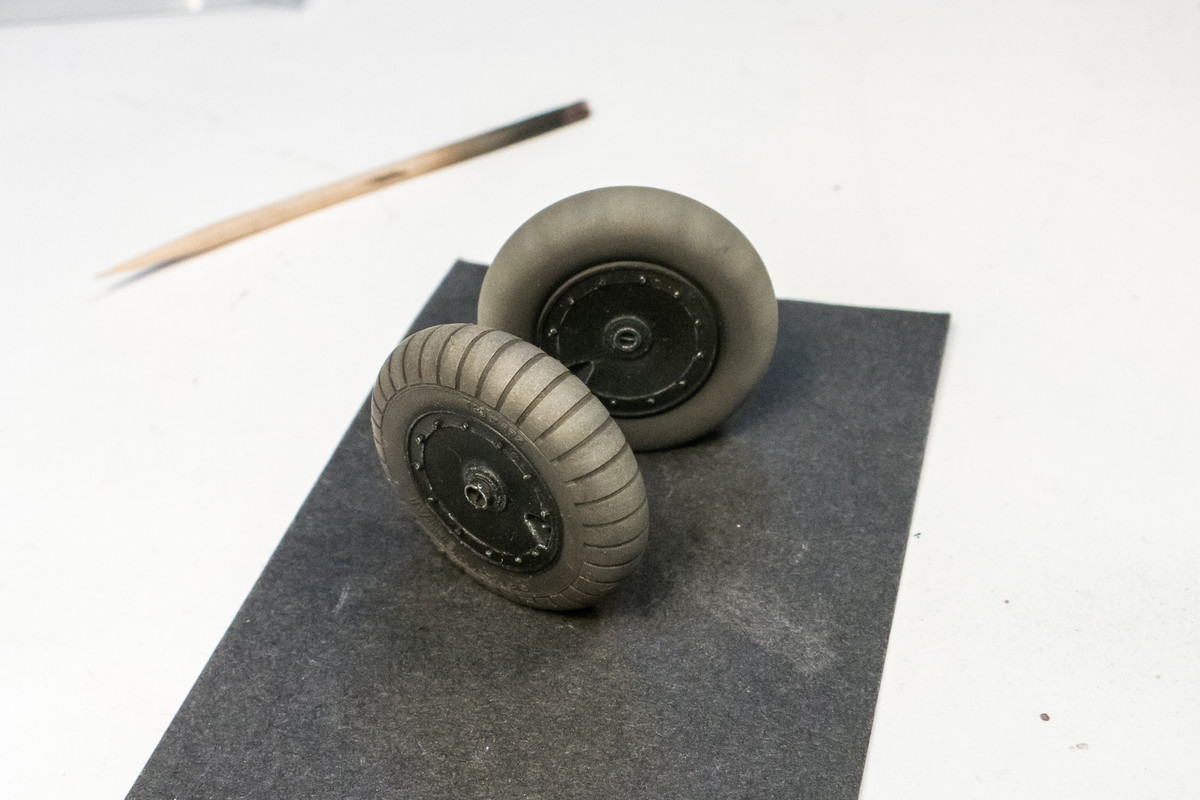
On the last few builds, I've been developing a technique to impart some smaller, more hard-edged staining to the tires. I'm sure other people have done this but I've never seen it described or named. So I'm gonna pretend I invented it and call it "pastel staining". What I'm doing is using the propensity for a liquid pastel wash to spread out and create tide stains on matte surfaces. Using a light-colored, tannish wash that I've mixed up from pastel chalks, I put small dots of the wash along the center of the tires. Capillary action draws out the dot of fluid onto a bigger area, dragging with it the fine chalk dust and creating irregular tide marks.
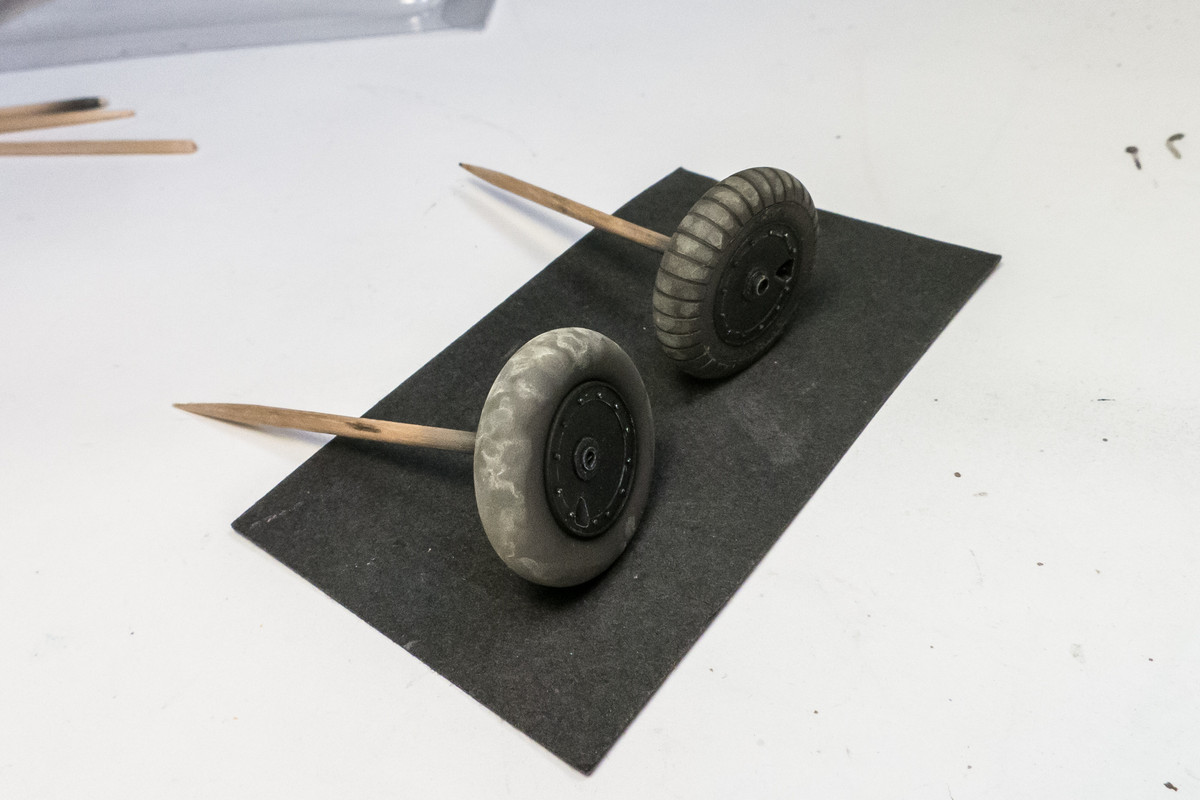
Using a slightly dampened piece of paper towel, the stained areas are carefully wiped off, usually from side to side perpendicular to how the tire rolls to transition the stains from the contact area onto the tire sidewalls. The trick here is to use a light stroke to smooth and smear the wash without completely removing it.

The pattern is repeated until I've achieved a layered set of random stains that looks semi-convincing.

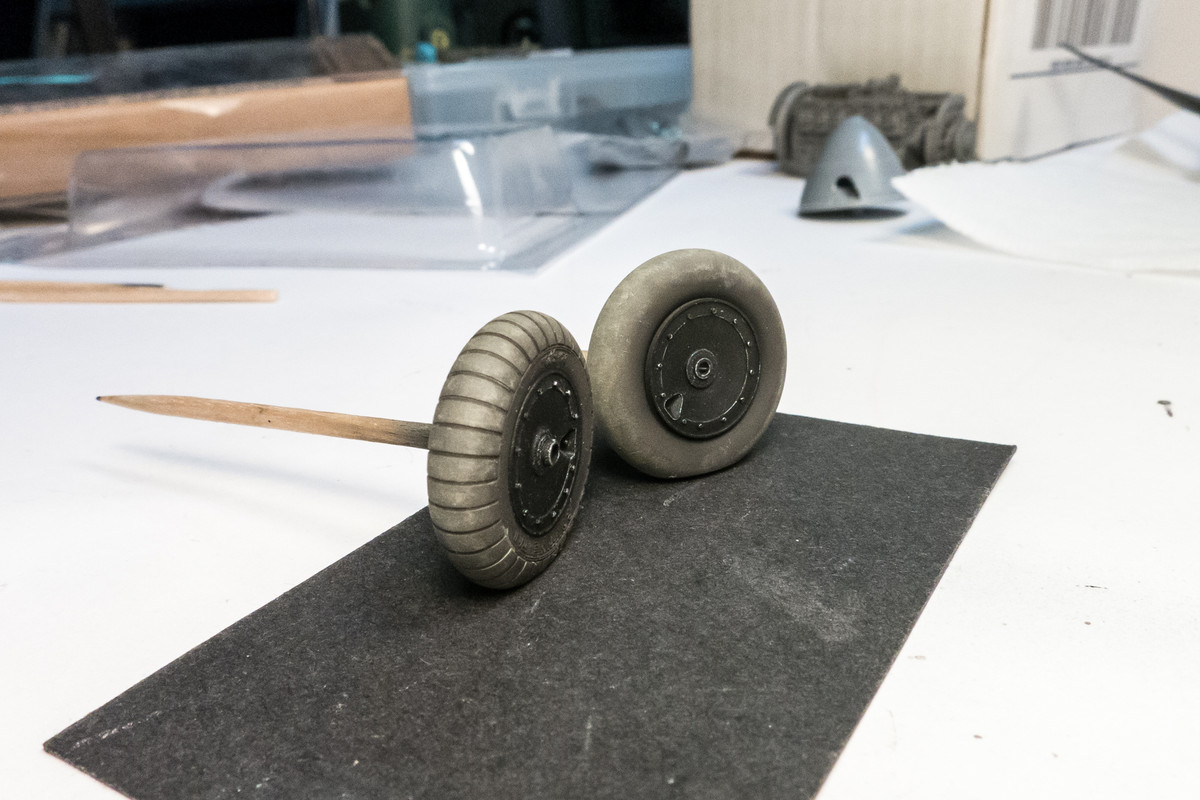
To seal the deal, I spray a light coat of clear matte (Model Master Acryl Clear Flat), making sure the matte goes on "dry".