Page 3 of 6
Re: Zvezda 1/48 Bf109F-4
Posted: Thu Feb 12, 2015 7:14 pm
by Manny1943
Looking good...the F is the most graceful of the 109s IMO...
Re: Zvezda 1/48 Bf109F-4
Posted: Sun Feb 15, 2015 10:12 am
by wing_nut
Manny1943 wrote:Looking good...the F is the most graceful of the 109s IMO...
Thanks you and absolute agree. They got too "bumpy" afterwards.
Re: Zvezda 1/48 Bf109F-4
Posted: Sun Feb 15, 2015 1:29 pm
by wing_nut
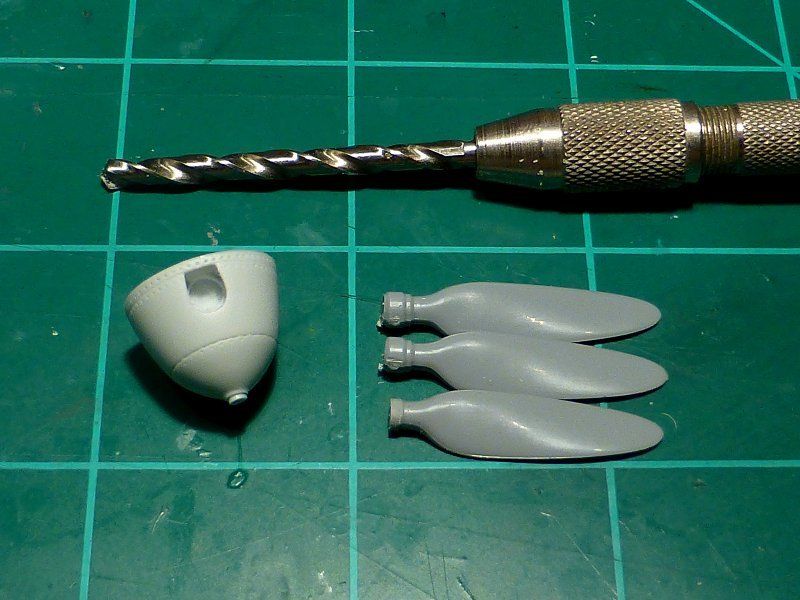
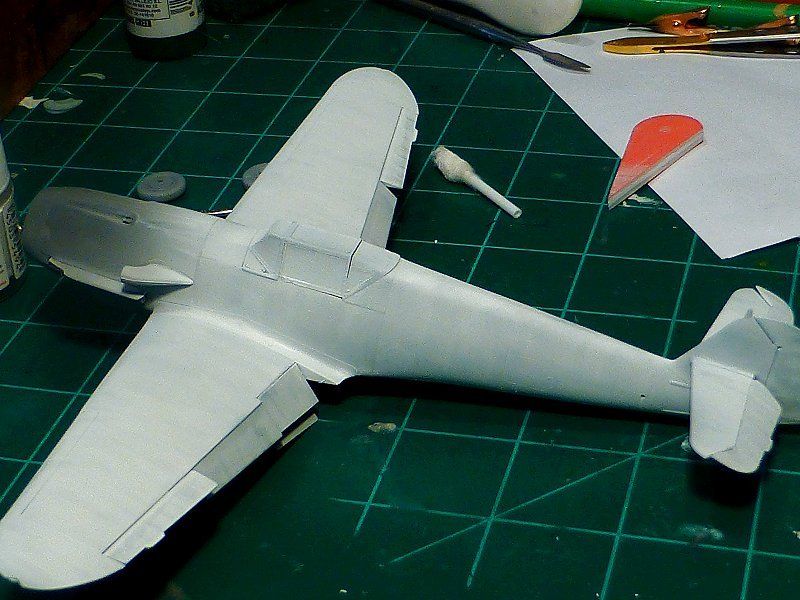
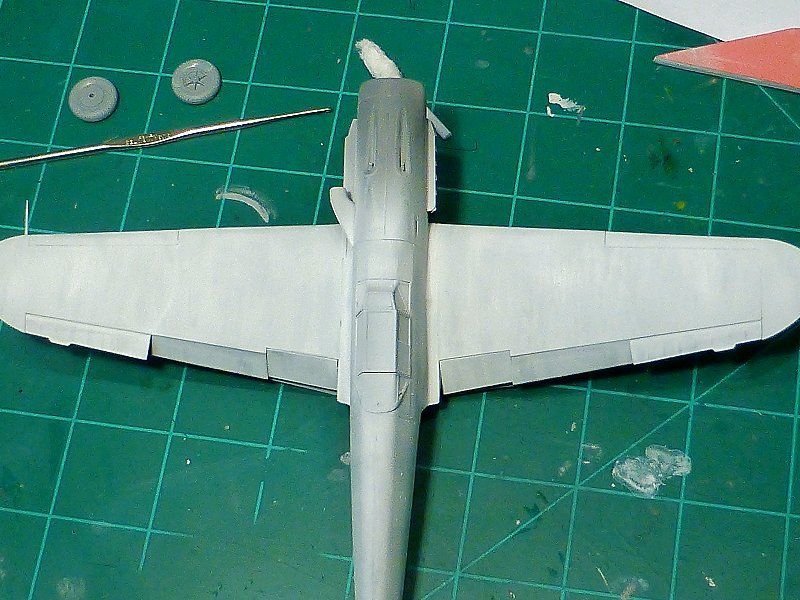
Some minor surgery was needed to the kit prop blades to fit since the spinner was designed for the Hasegawa kit (I think). The hole sin the spinner was drilled to 1/8" and the end of the blade modified to fit. And now that I've got the blades all glued in there... Would a winter F-4 have these wider prop blade or the more slender ones?
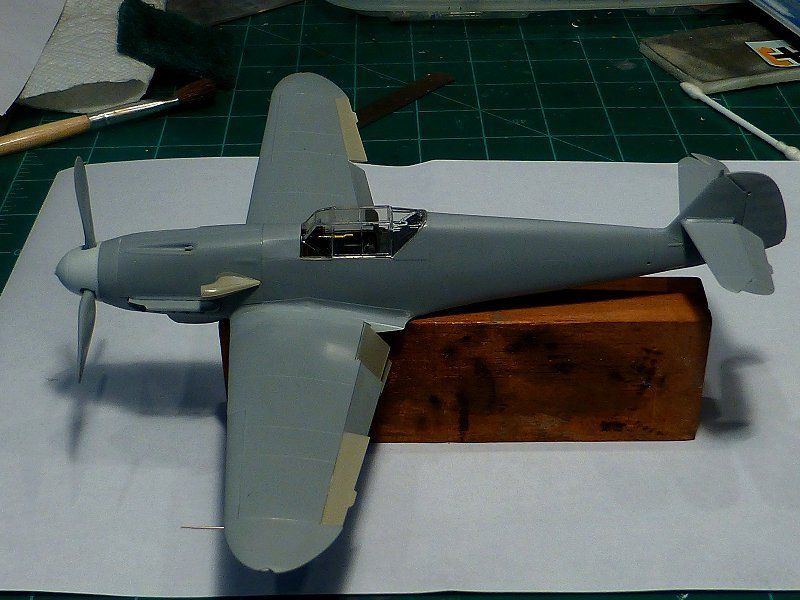
A final pre-paint mock up
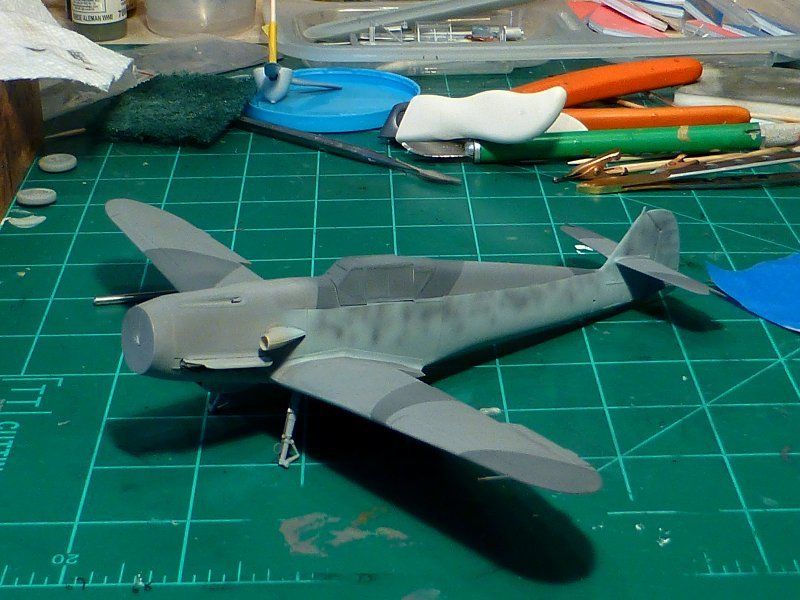
I put down some made up camo to have that under the white wash in case is pokes through during weathering. And yet one more "I'm not paying attention" thingy. I should sprayed the yellow of the fuselage band and masked that 1st. Now i have to mask off the fuselage to paint the band, them mask the band to paint the white.
Re: Zvezda 1/48 Bf109F-4
Posted: Sun Feb 15, 2015 6:06 pm
by wing_nut
Question... I am working off the profiles from the decal sheet and it looks like its showing the underside as white too. Would they have gone over the 76 as well?
Re: Zvezda 1/48 Bf109F-4
Posted: Sun Feb 15, 2015 6:19 pm
by Manny1943
wing_nut wrote:Question... I am working off the profiles from the decal sheet and it looks like its showing the underside as white too. Would they have gone over the 76 as well?
Great question...
Short answer is "NO"...
Remember that the whitewash is expected to be observed from above when the fighter is on the ground or in flight...to blend in w snowy terrain...
I tend to go with a very light shade of 76 that comes closer to a weathered white than you'd think, so unless you turn mine over they almost look to be in an overall whitewash...
Re: Zvezda 1/48 Bf109F-4
Posted: Sun Feb 15, 2015 6:42 pm
by wing_nut
Thanks Manny. I was just having this same conversation "over there" and that was my thinking too. As I was searching for a relatively clear period photo I realized that it would be tough to tell RLM 76 from a weather white. I'll take route.
I know you know you stuff when it comes to Luftwaffe. Knowing that your a good source for this kind of thing... Would you know is any of the 109 series had a wooden prop? And also didn't some late 190D series have them, or am I thinking of the wooden tail?
Re: Zvezda 1/48 Bf109F-4
Posted: Sun Feb 15, 2015 8:00 pm
by Manny1943
wing_nut wrote:Thanks Manny. I was just having this same conversation "over there" and that was my thinking too. As I was searching for a relatively clear period photo I realized that it would be tough to tell RLM 76 from a weather white. I'll take route.
I know you know you stuff when it comes to Luftwaffe. Knowing that your a good source for this kind of thing... Would you know is any of the 109 series had a wooden prop? And also didn't some late 190D series have them, or am I thinking of the wooden tail?
I'm not aware of any 109s w wooden props...some late war series 190 D's w the wide paddle props did have wooden blades and some did have wood in parts of their tail assemblies, as well as some late war 109s...
Re: Zvezda 1/48 Bf109F-4
Posted: Mon Feb 16, 2015 7:26 am
by wing_nut
Took me a minute t figure out the difference between the 2 posts but got it in the end. So... Thanks you, thank you
Re: Zvezda 1/48 Bf109F-4
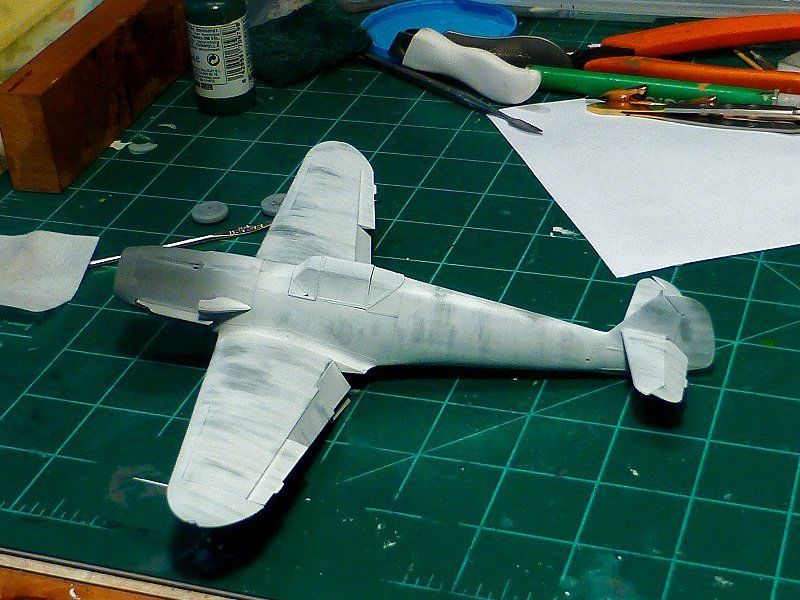
Posted: Tue Feb 17, 2015 4:10 pm
by wing_nut
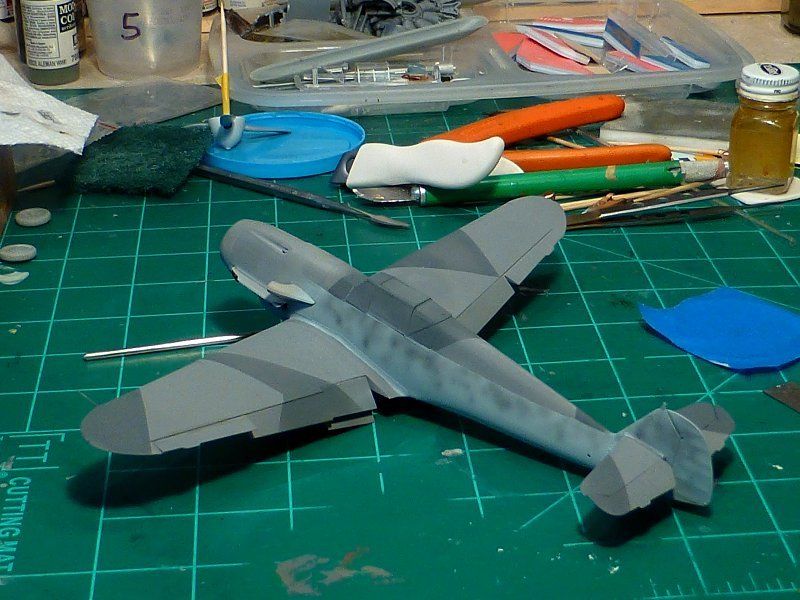
Dunno if this has been done before or not as a technique but it popped into my head so I figured I'd give it a try. I sealed the camo with Testor's DullCote lacquer since I knew it wouldn't be affected by the next step which uses alcohol.
I painted the airframe... not the bottom

... with Tamiya white just getting enough down to cover the camo but still a bit splotchy. Then I used a cloth just damp with alcohol to wear away the paint. I actually did a bit more than what you see n the 1st photo. Then I went back over that whole thing with very thinned down white leaving the worn stuff showing through a bit. The overall effect doesn't show to well in the photos and is more discernable to the naked eye.
Next will be to mask for the yellow bits and try the same thing with that colo