Italeri 1/32 Mc.202 Folgore

Post your work in progress of your aircraft builds in here.
User avatar
jkim
Elite Member
Posts: 4073
Joined: Mon Apr 10, 2017 4:03 pm

Italeri 1/32 Mc.202 Folgore

Post by jkim »

Image


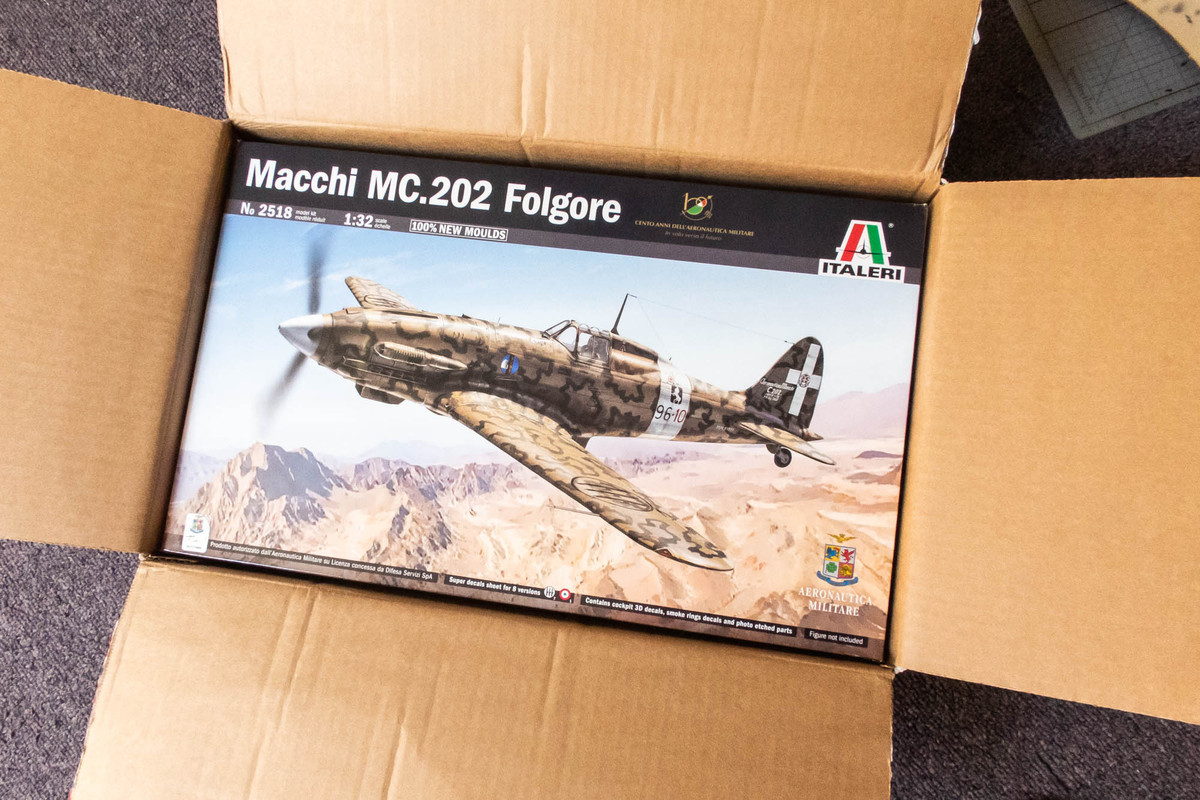
I bought this kit immediately after release, paying some extra dime to get it shipped from Italy. I've always loved this airframe and jumped at the chance to get a new release Folgore. It's been out long enough for some aftermarket improvements to be made available and I have a bunch of those to possibly utilize on this build.

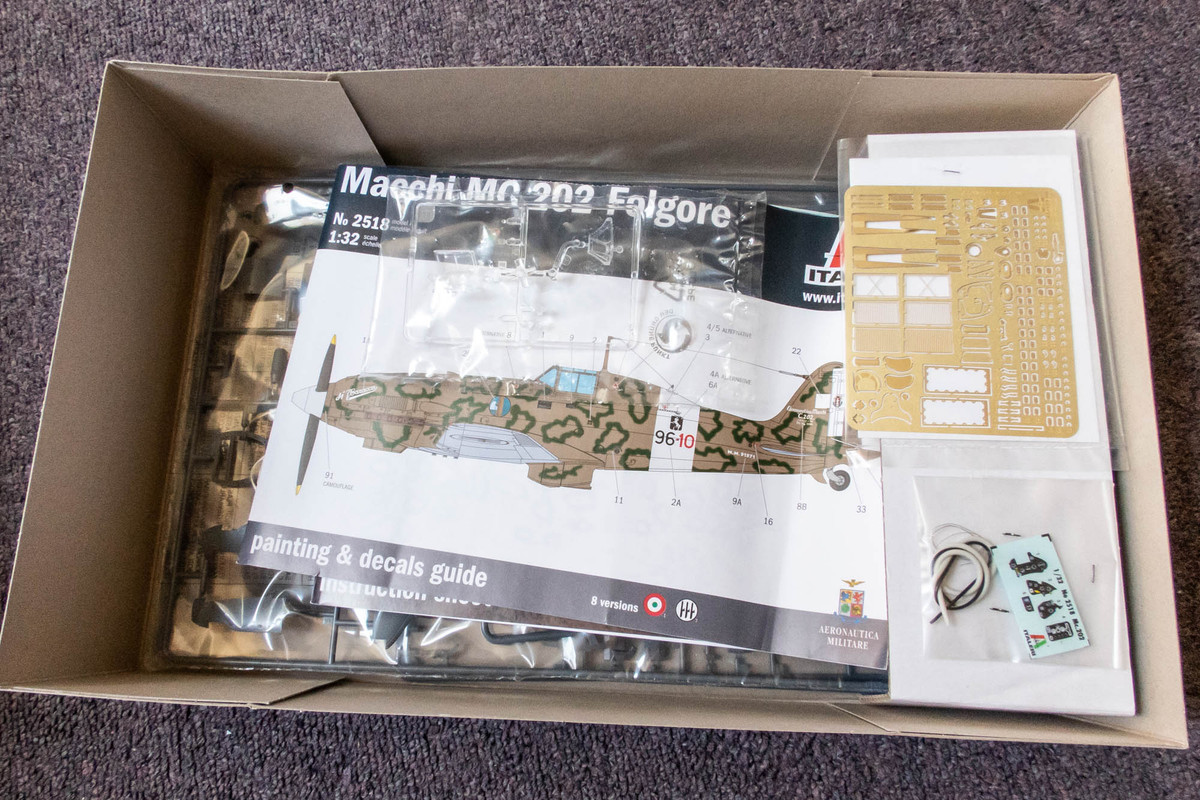
The kit comes in a big, deep box but there is a lot of empty space due to the relatively few sprues that are provided. Kinda disappointing to open box that's only 1/3 full. There are five sprues of grey plastic parts divided into two plastic baggies. That means you have lots of sprues rubbing and shaking up against each other. For international shipments like mine (Italy to the US), expect some parts broken off sprues. I had about 5-6 small pieces floating around the bags and some parts partially detached from sprues but I haven't damage... yet.
Image

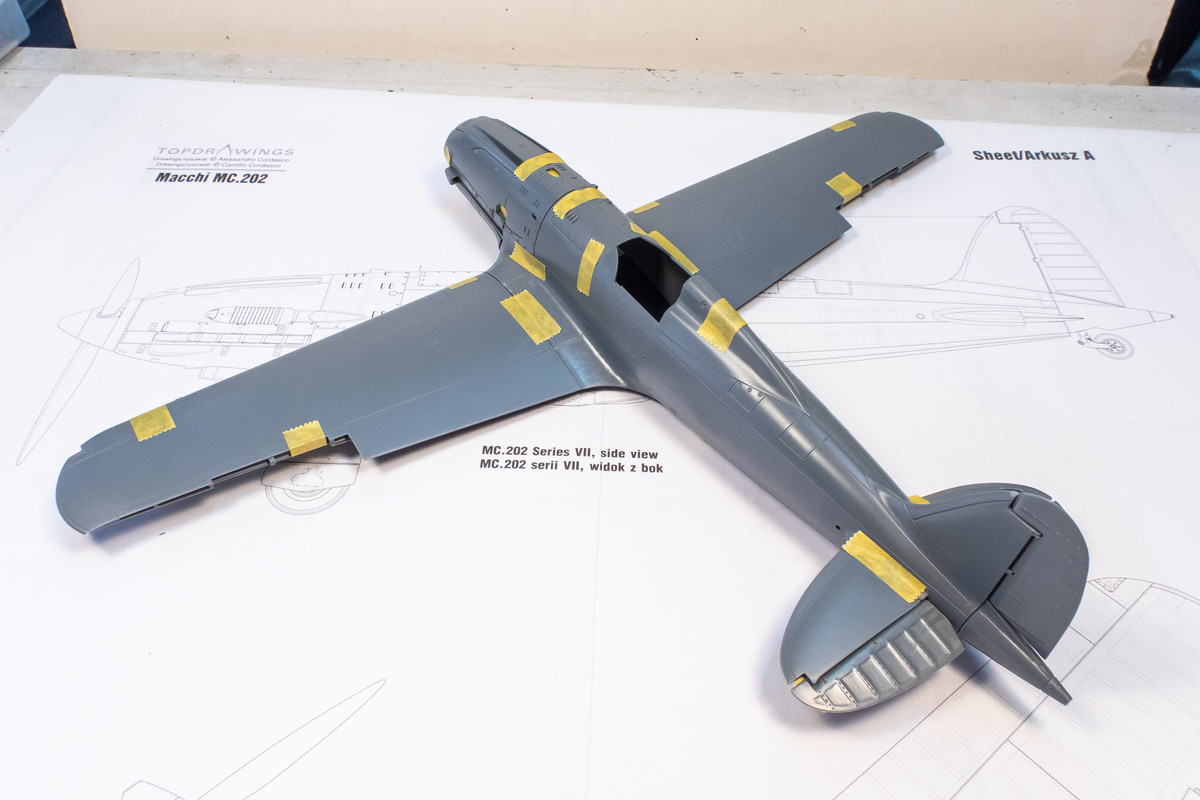
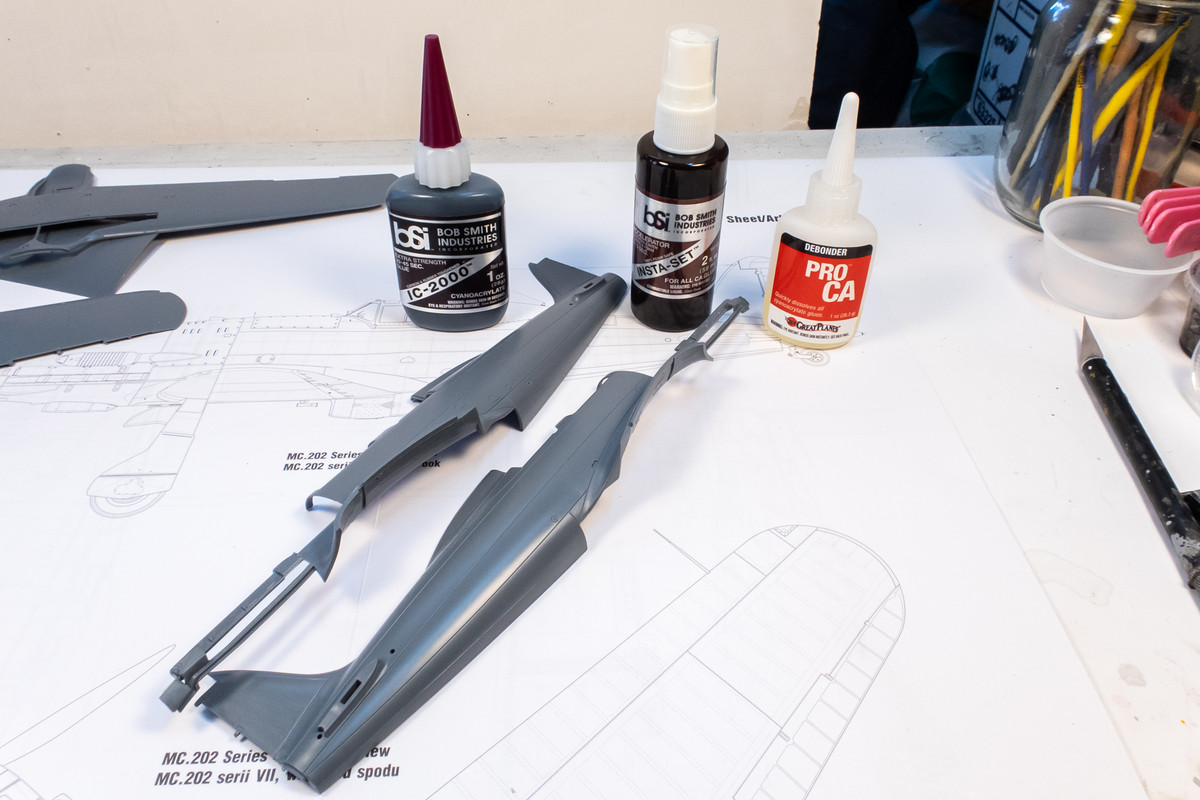
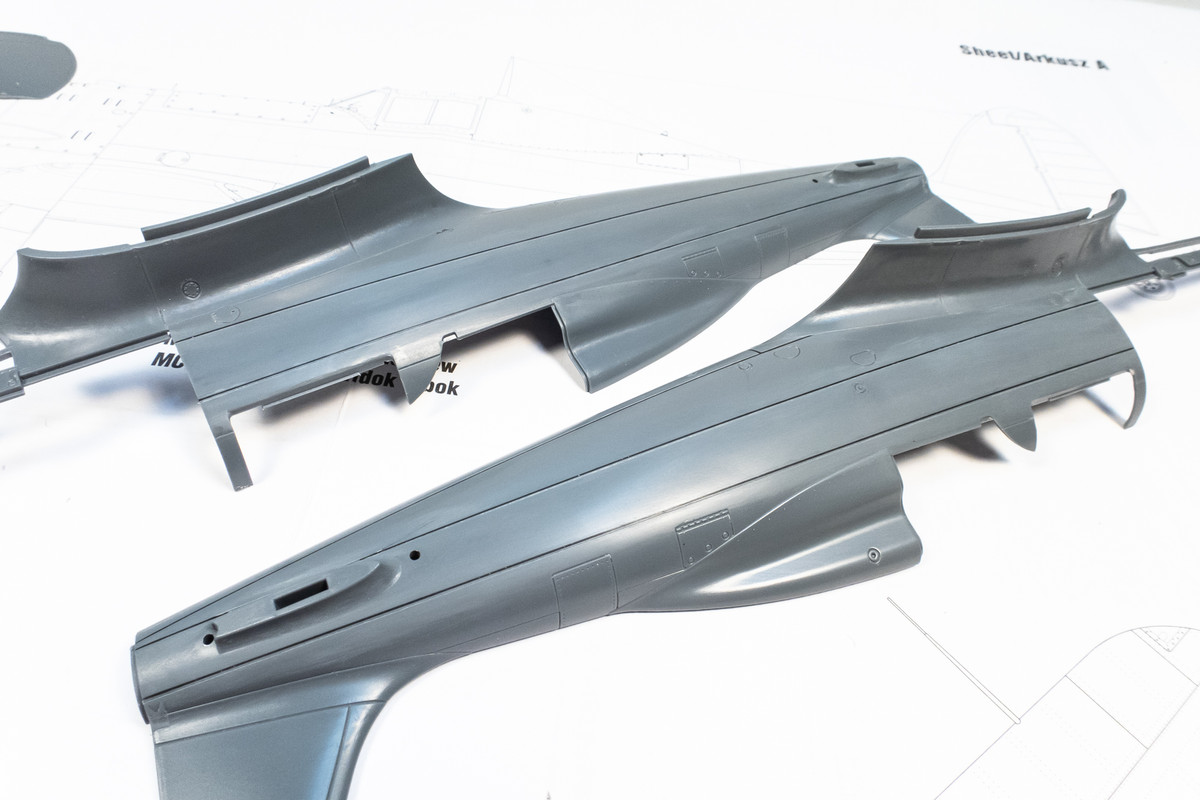
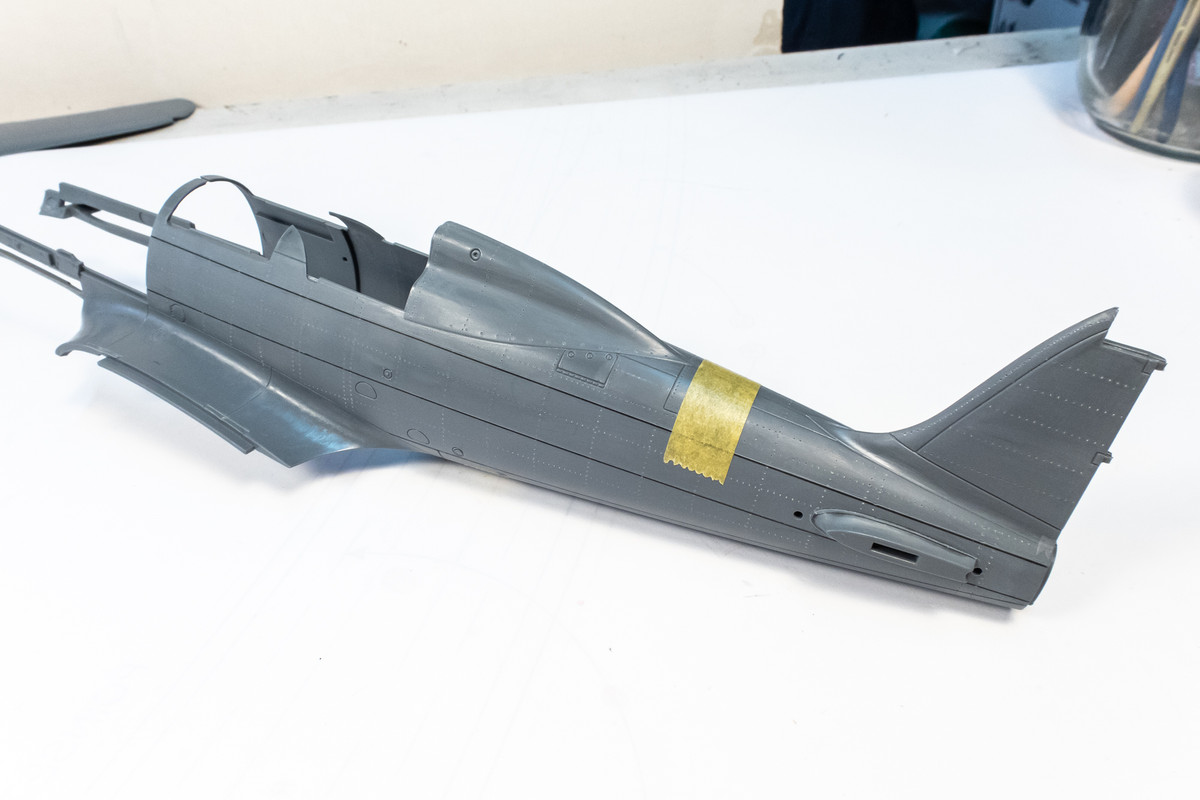
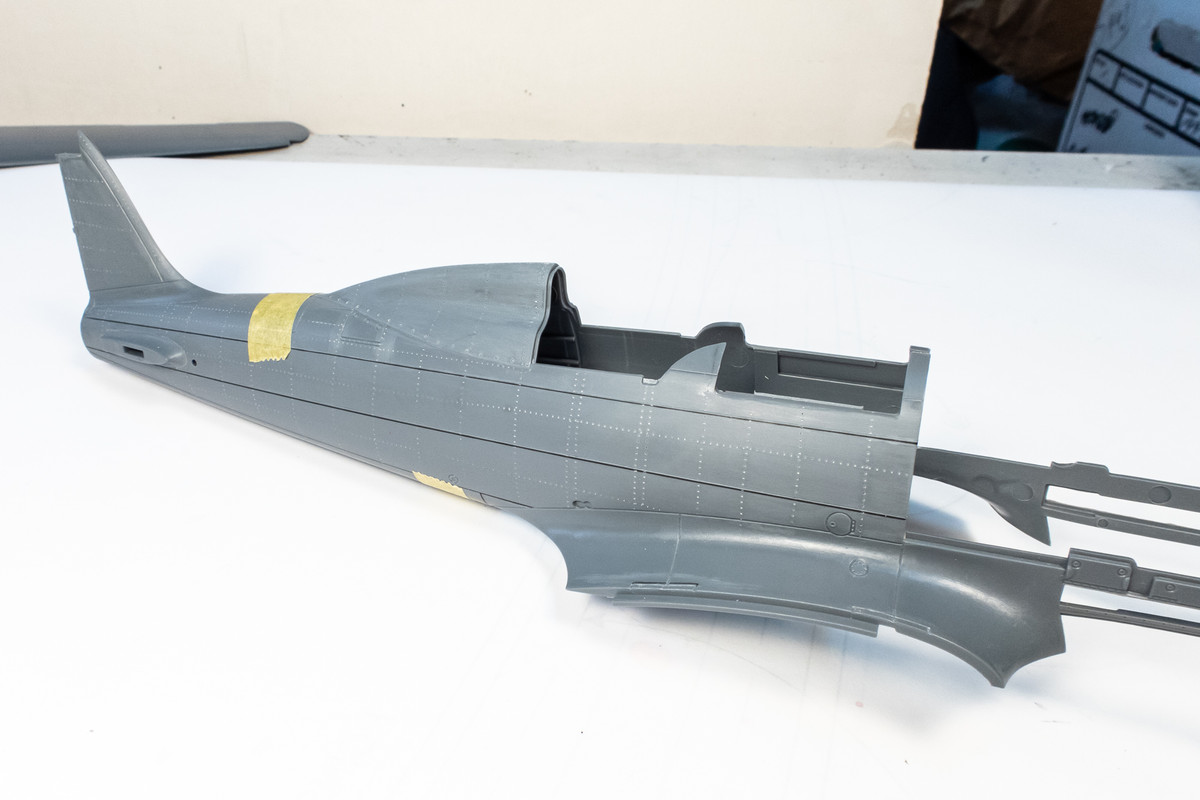
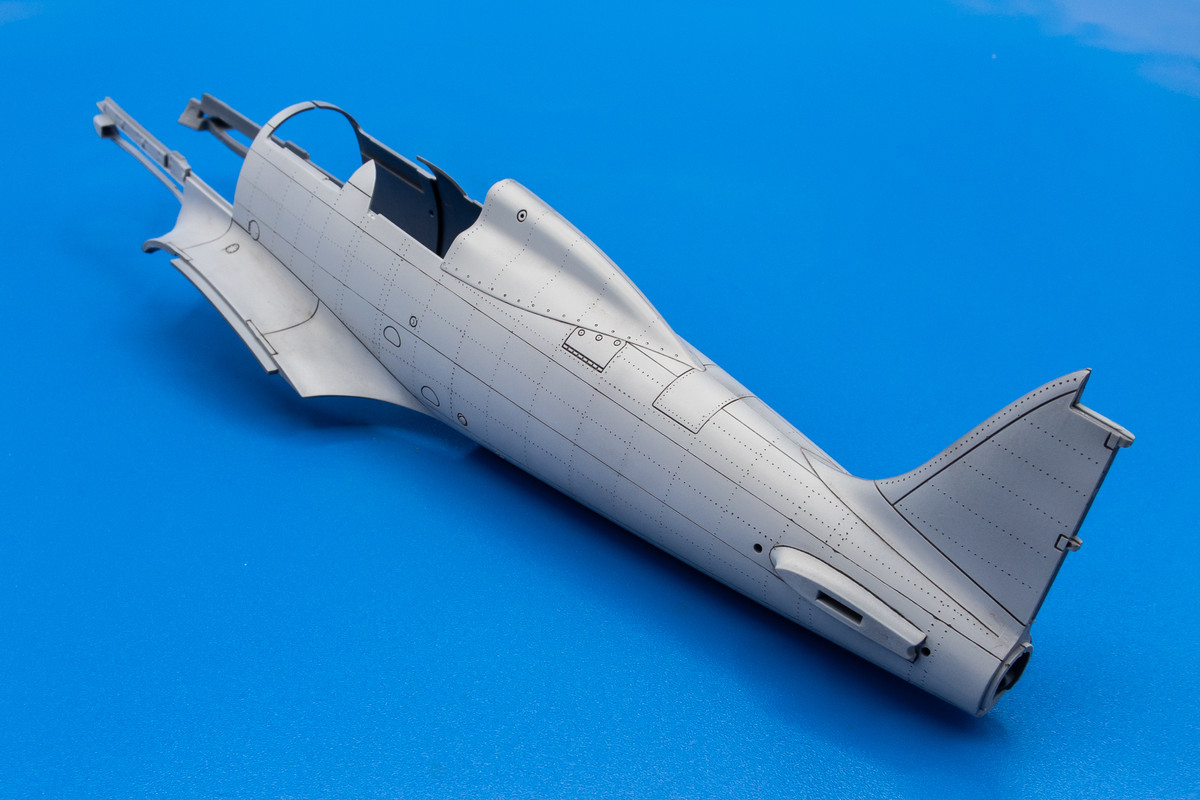
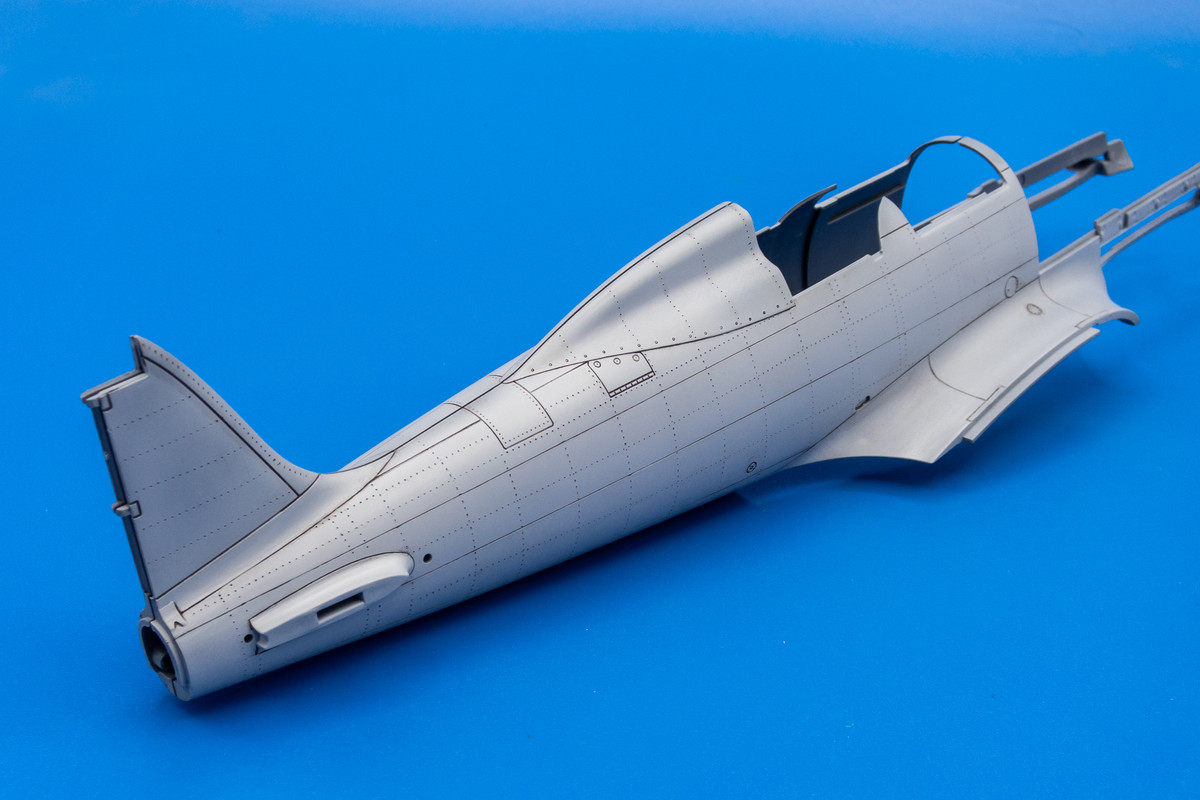
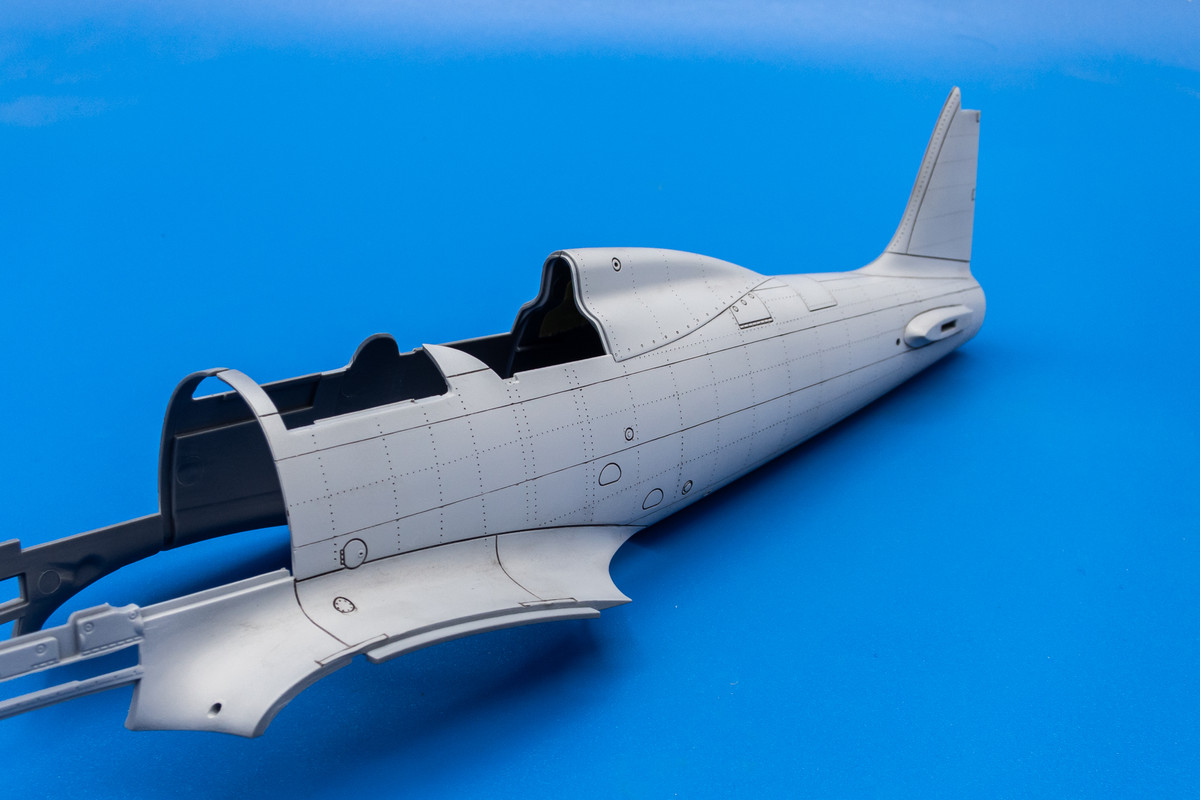
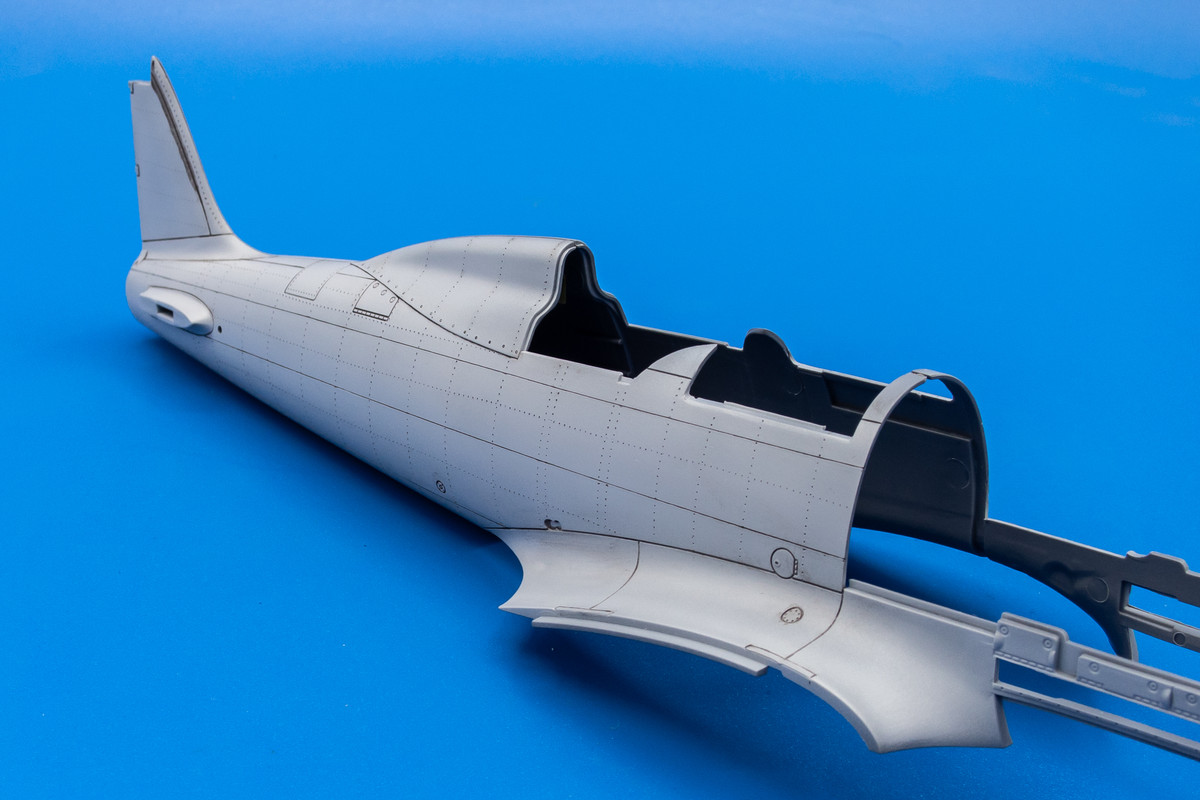
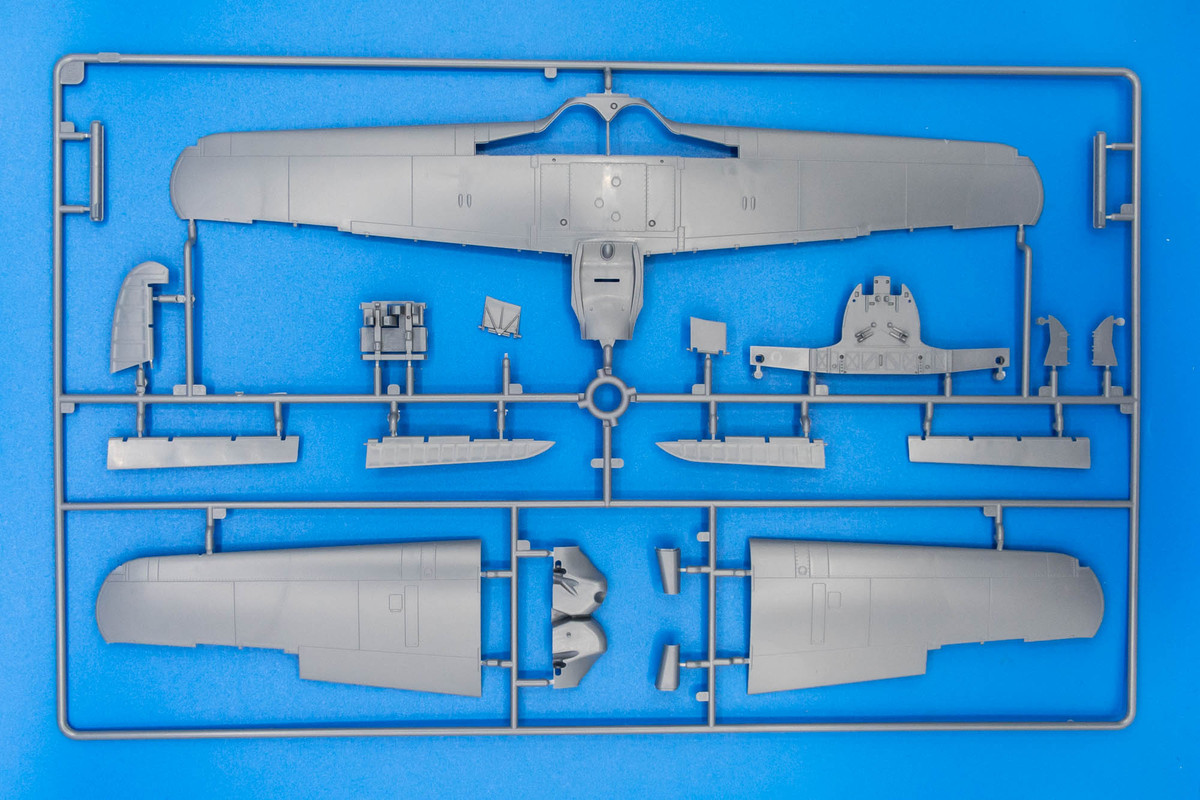
Here is Sprue A, which holds the fuselage halves. Finally... a 1/32 scale Folgore from a major manufacturer... a long time coming!
Image

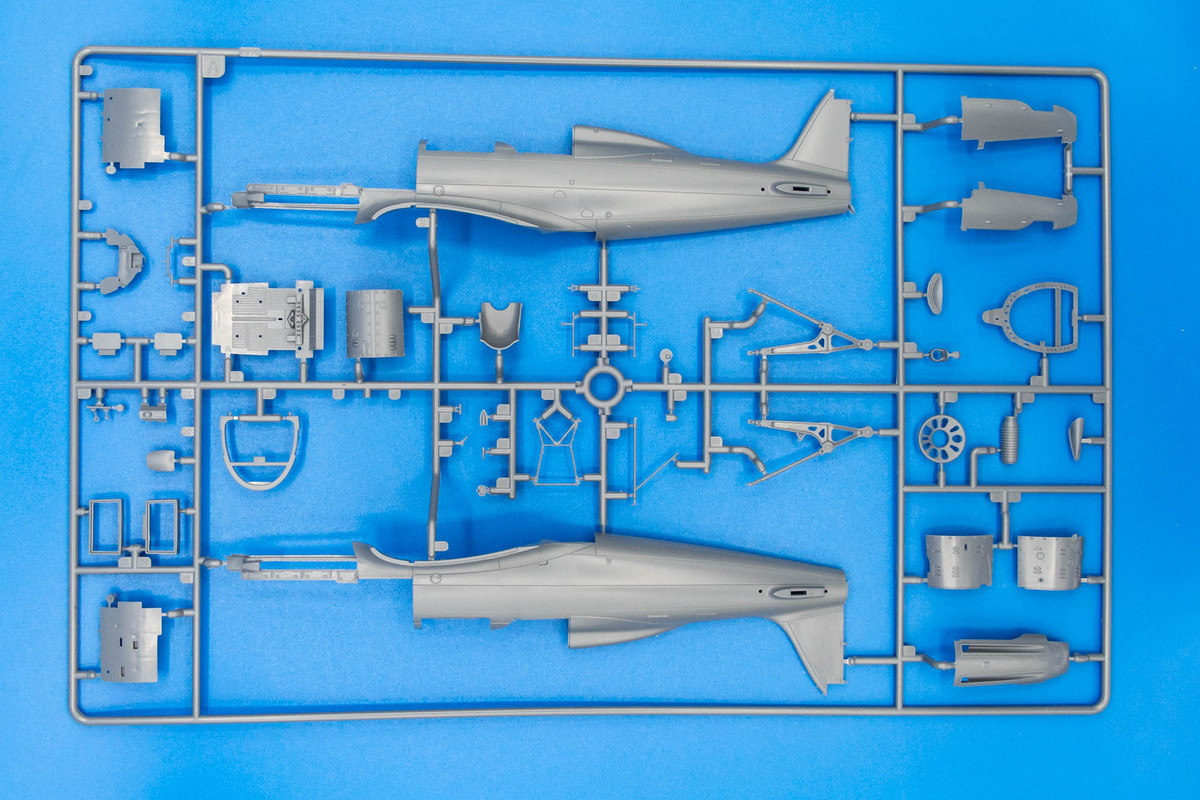
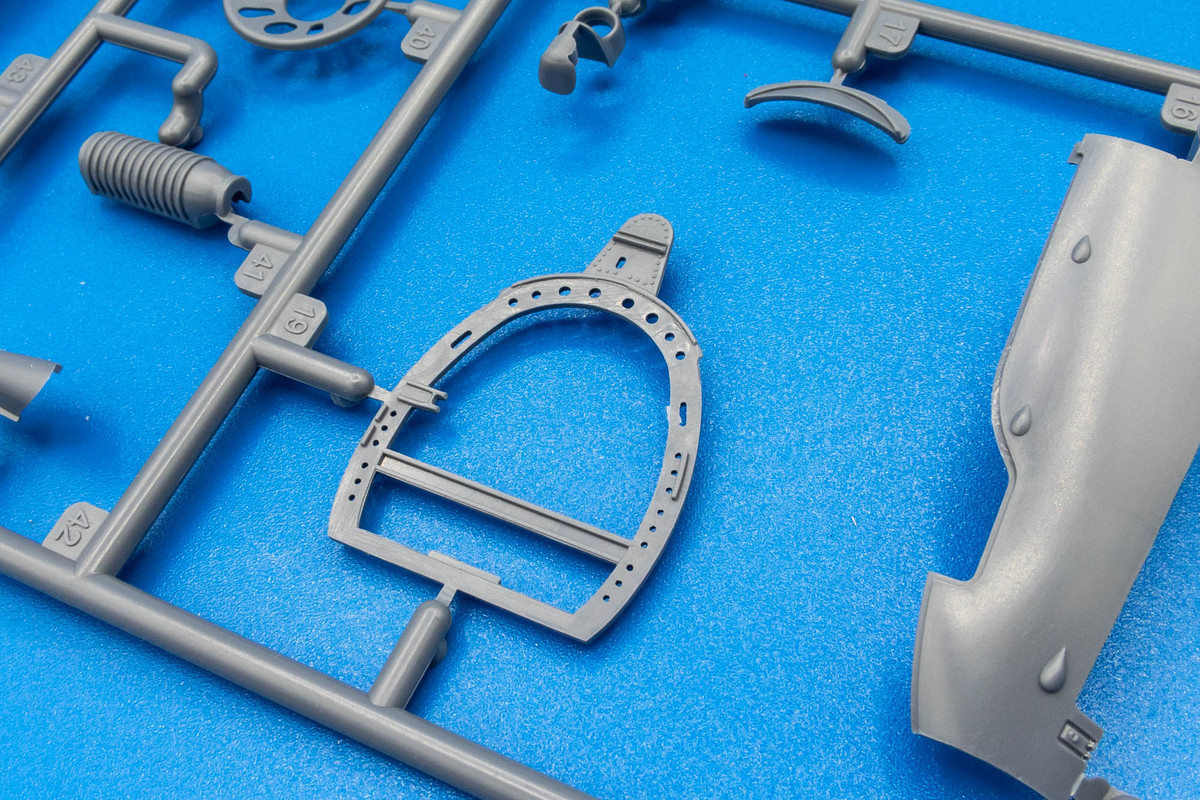
There's a lot to like in these moldings. Normally, lightening holes on bulkheads are simply depressions but rarely molded as actual holes as Italeri has done here.
Image

It will be difficult to be impressed when I'm jumping from the Tamiya Spitfire to this but mold definition on most of the parts looks good. But lots of flash.
Image

Other parts have rather heavy detailing.
Image

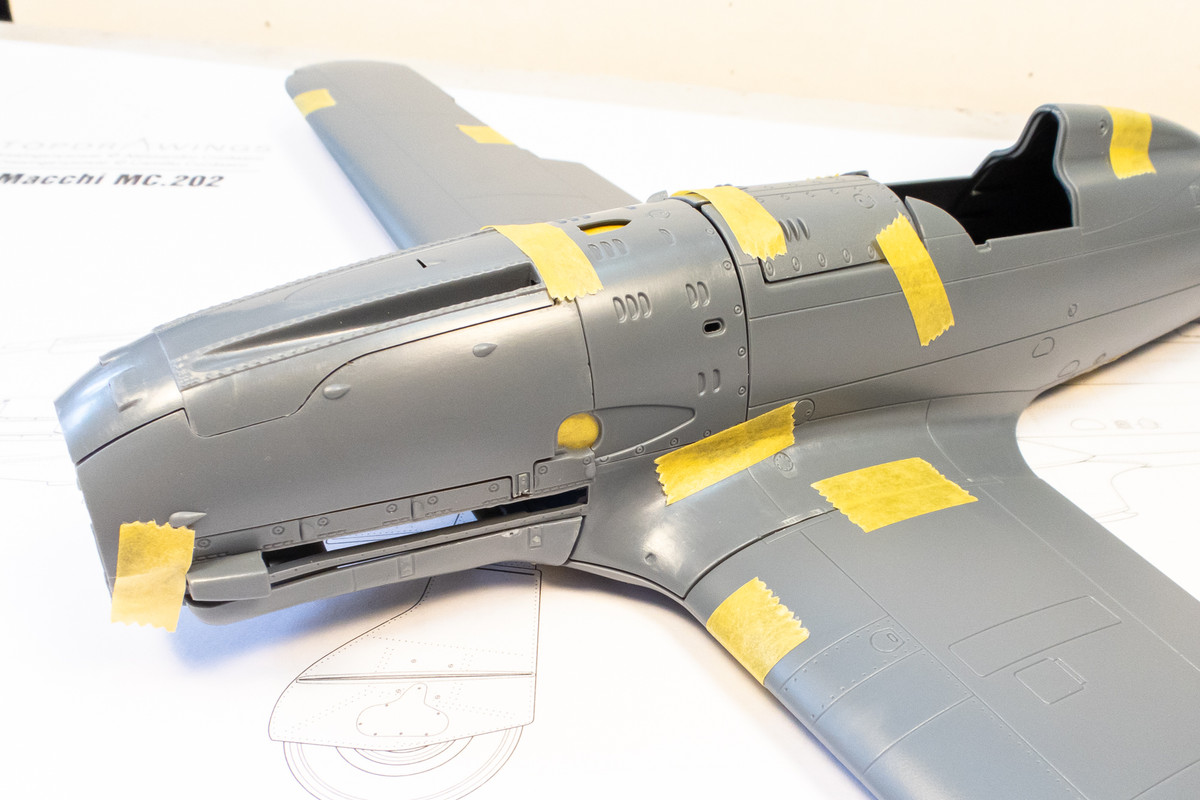
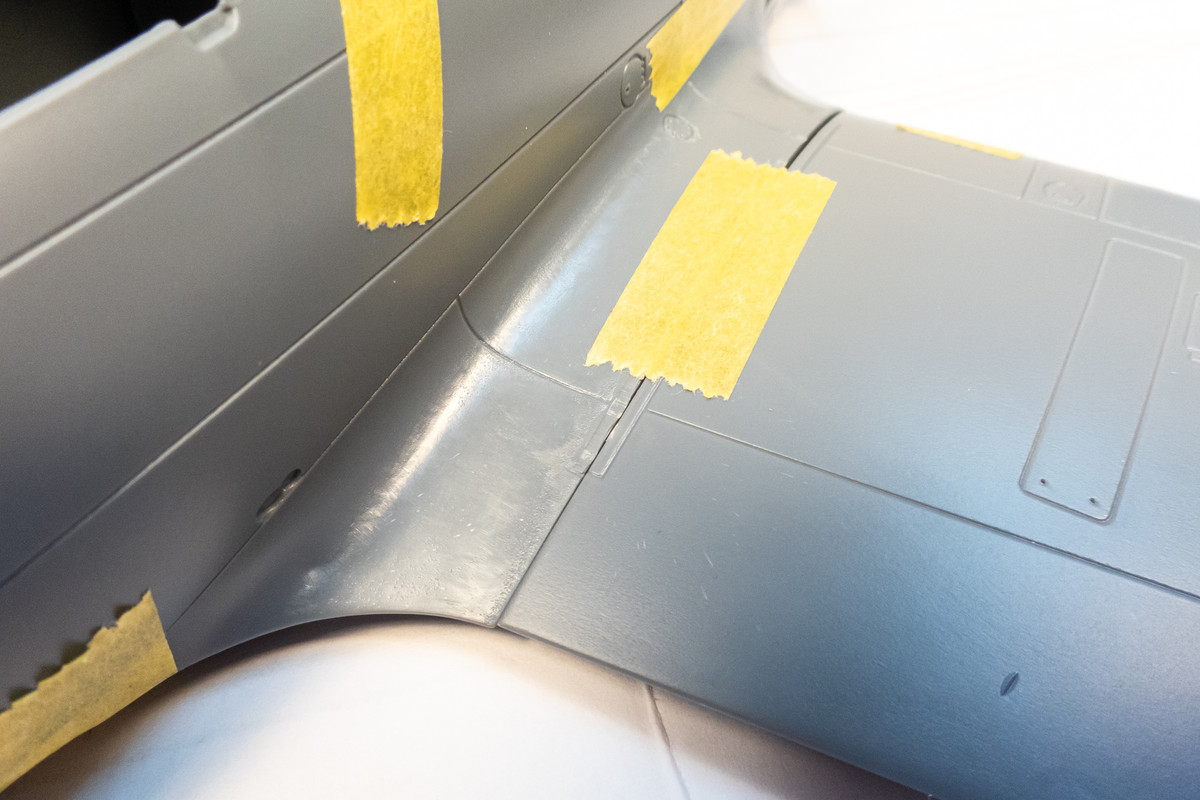
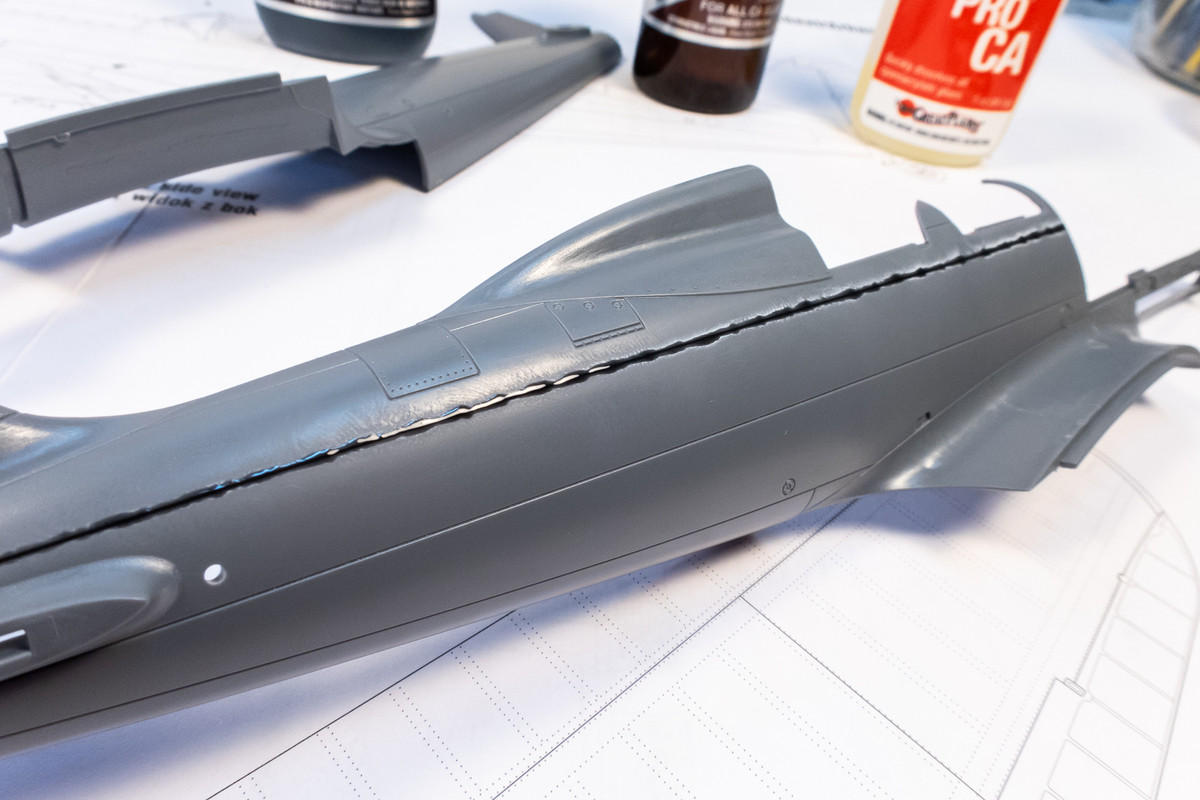
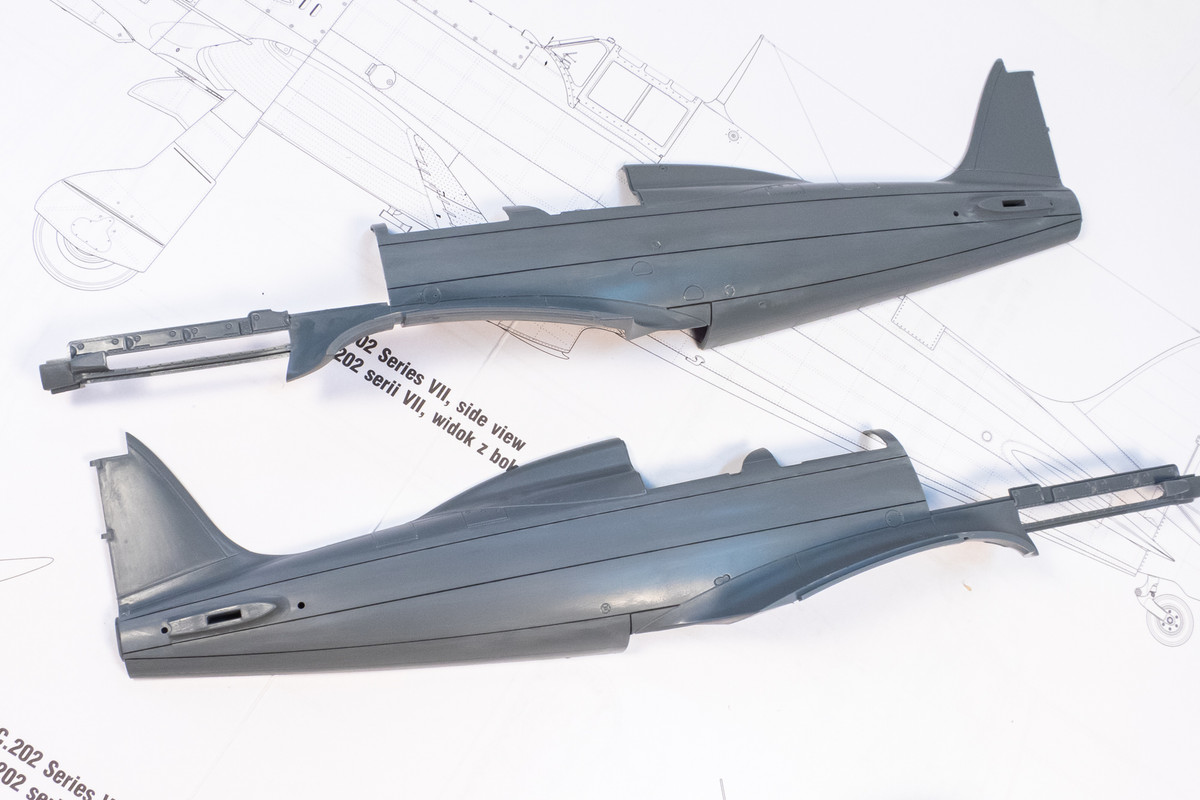
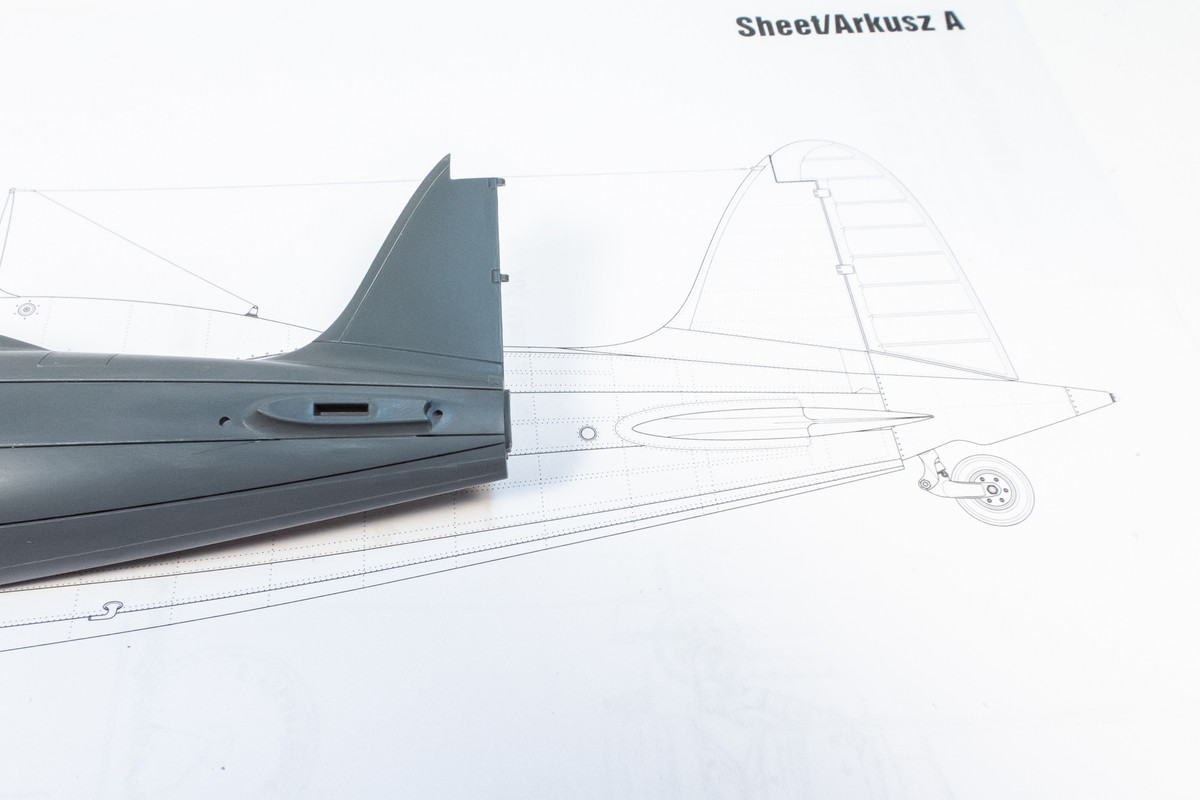
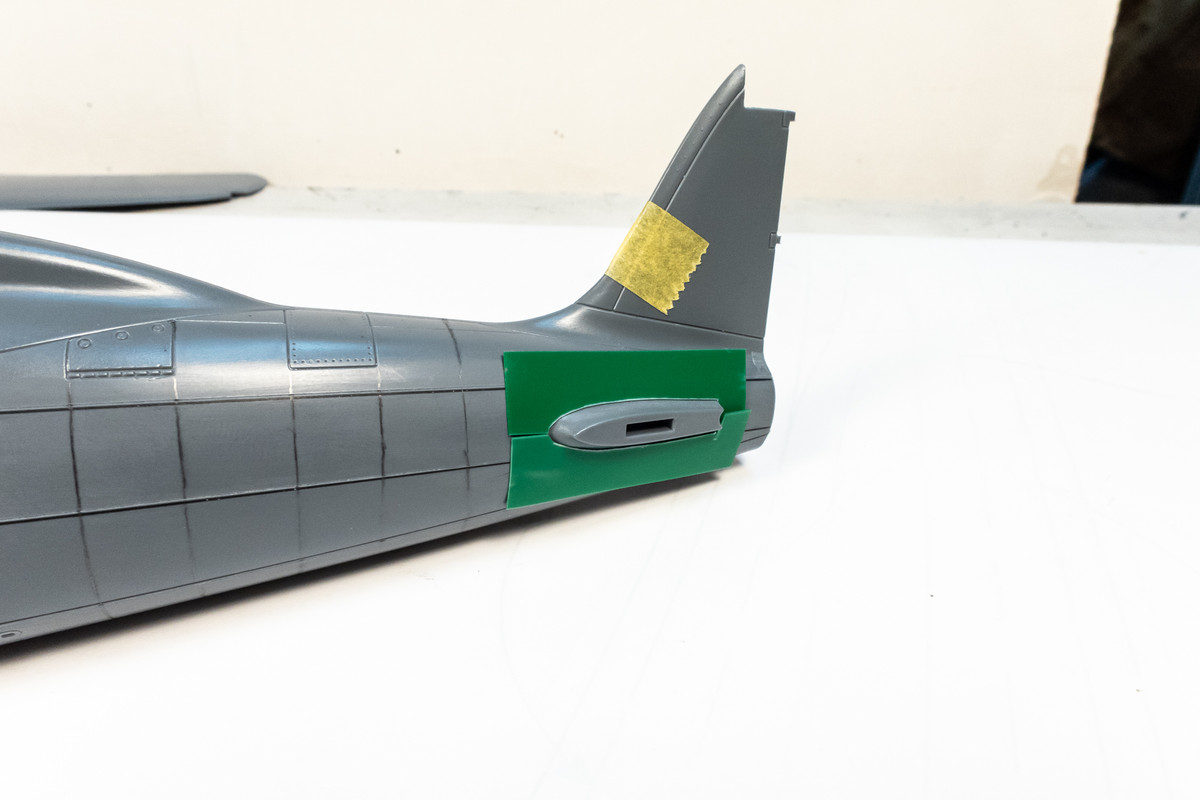
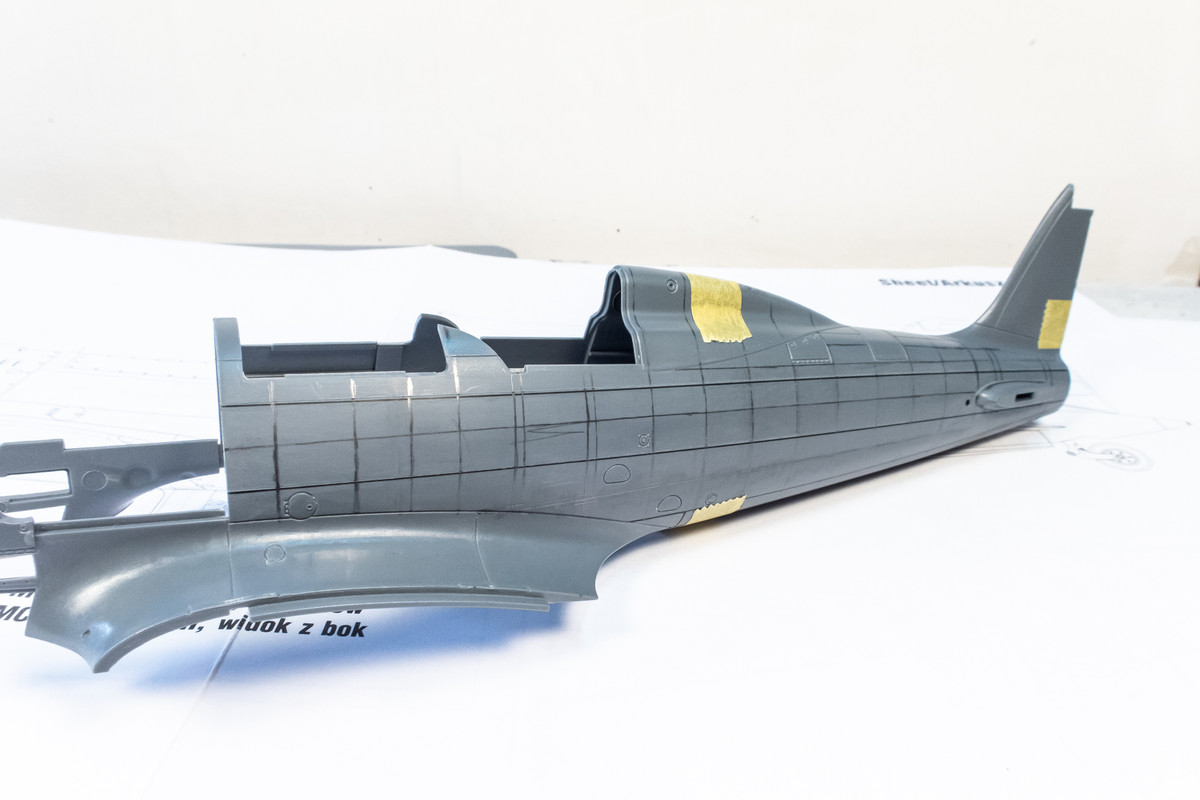
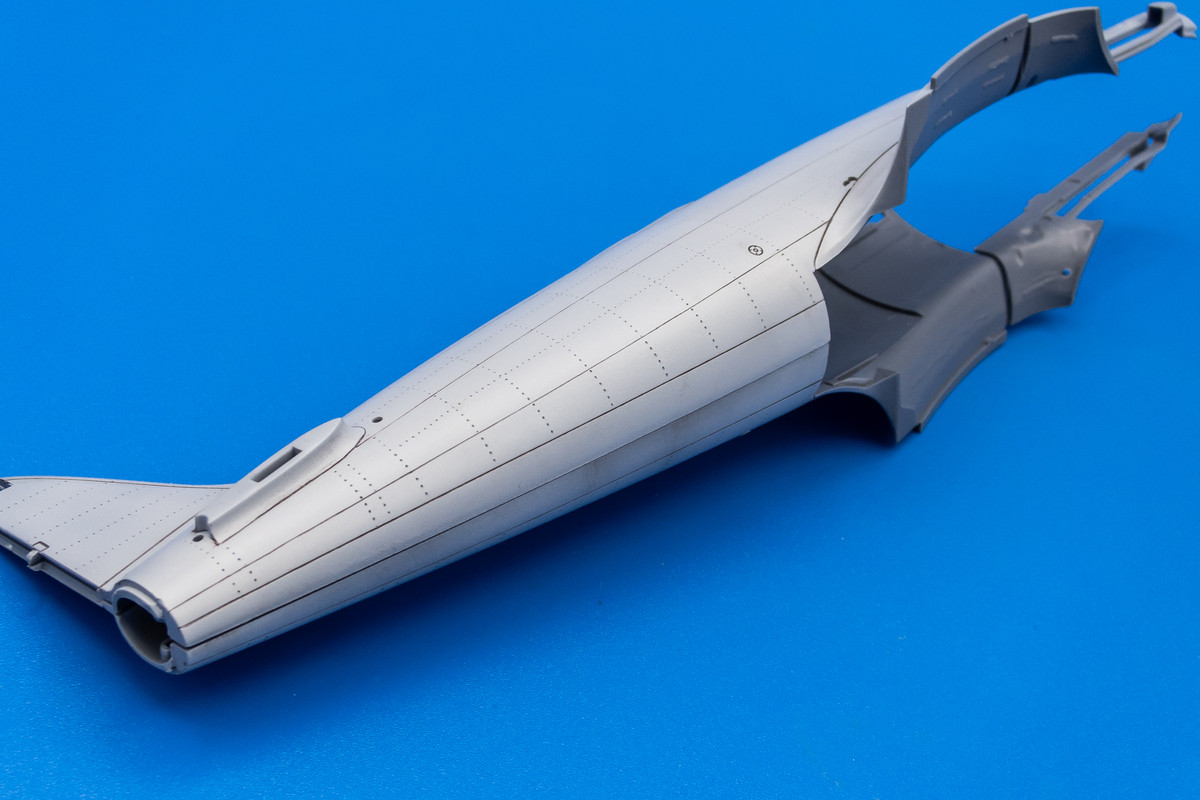
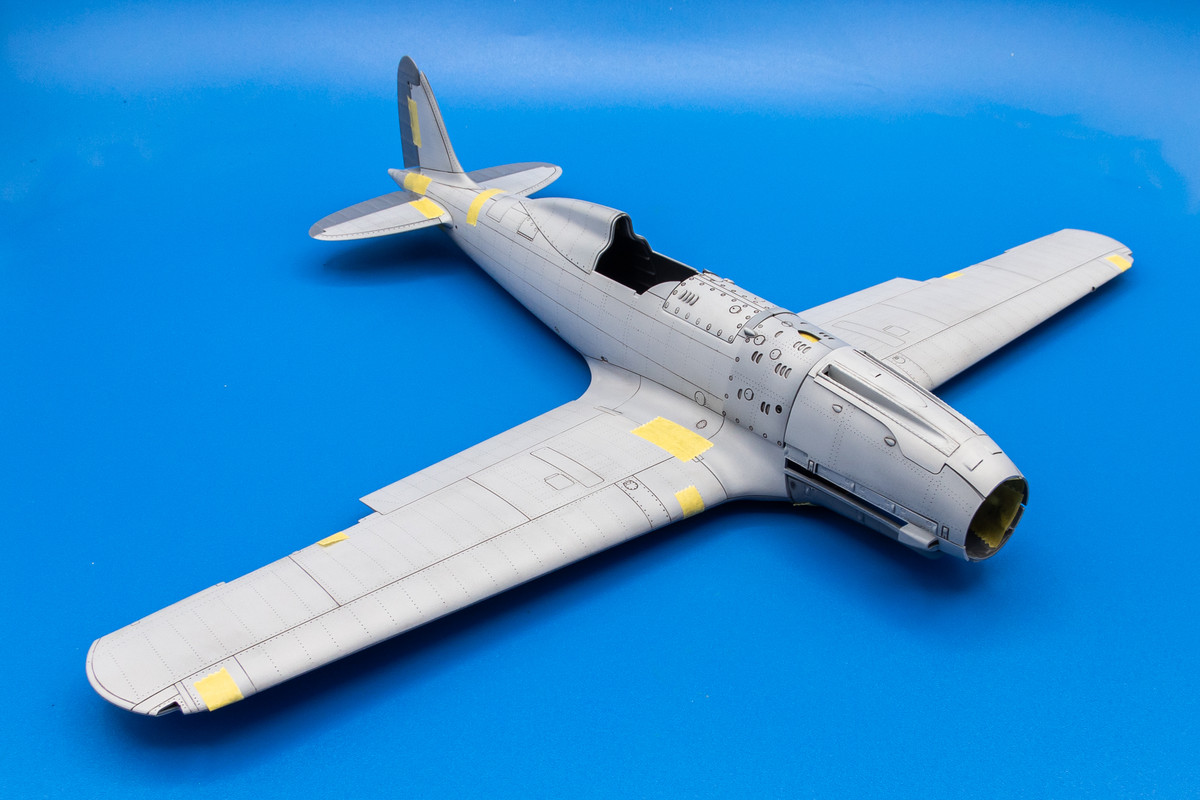
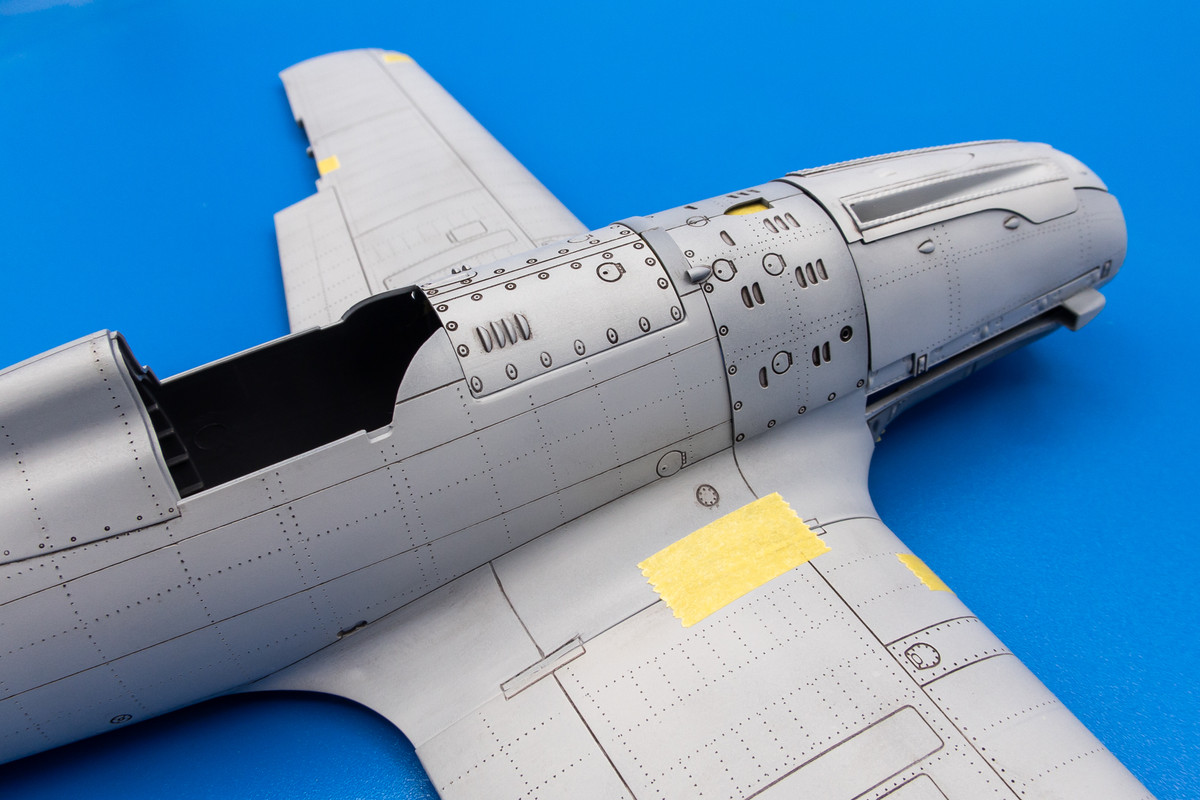
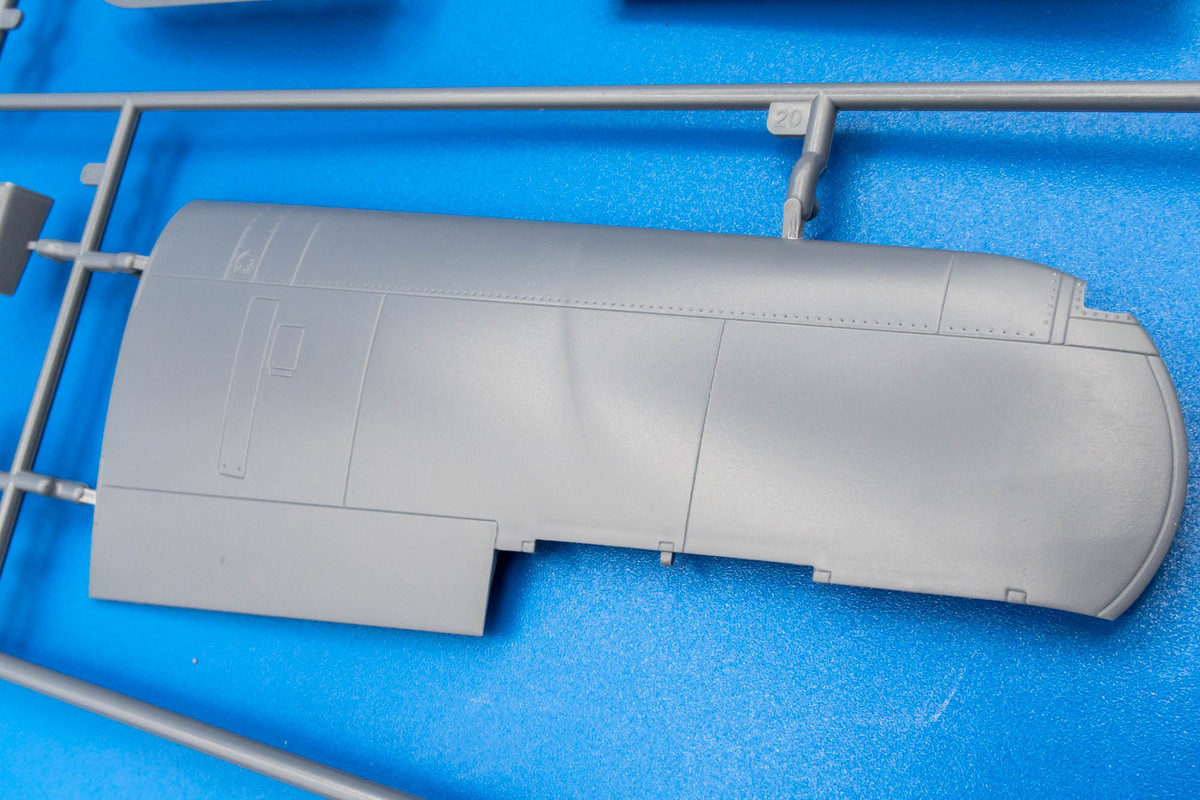
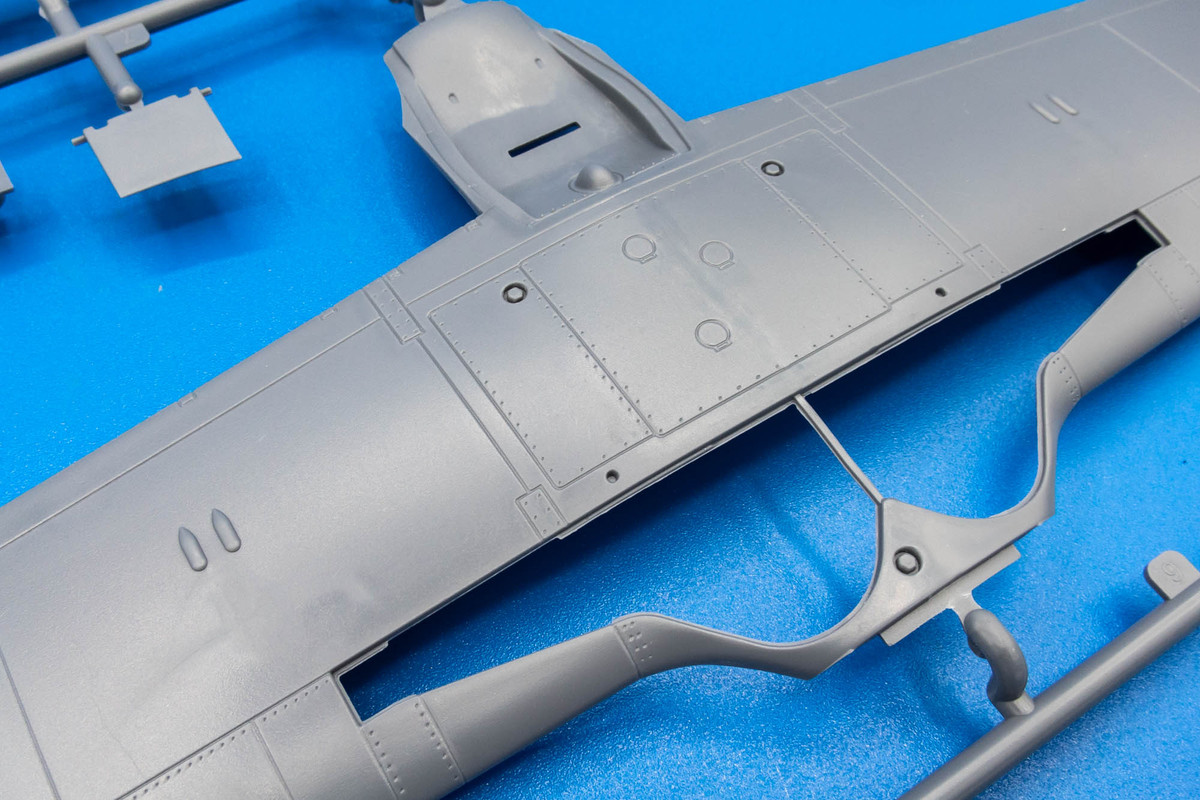
The most egregious of the heavy hand that Italeri chose to exert on the details is exhibited on the panel lines on the fuselage. Super deep and wide. Almost appears to be u-shaped channel.
Image

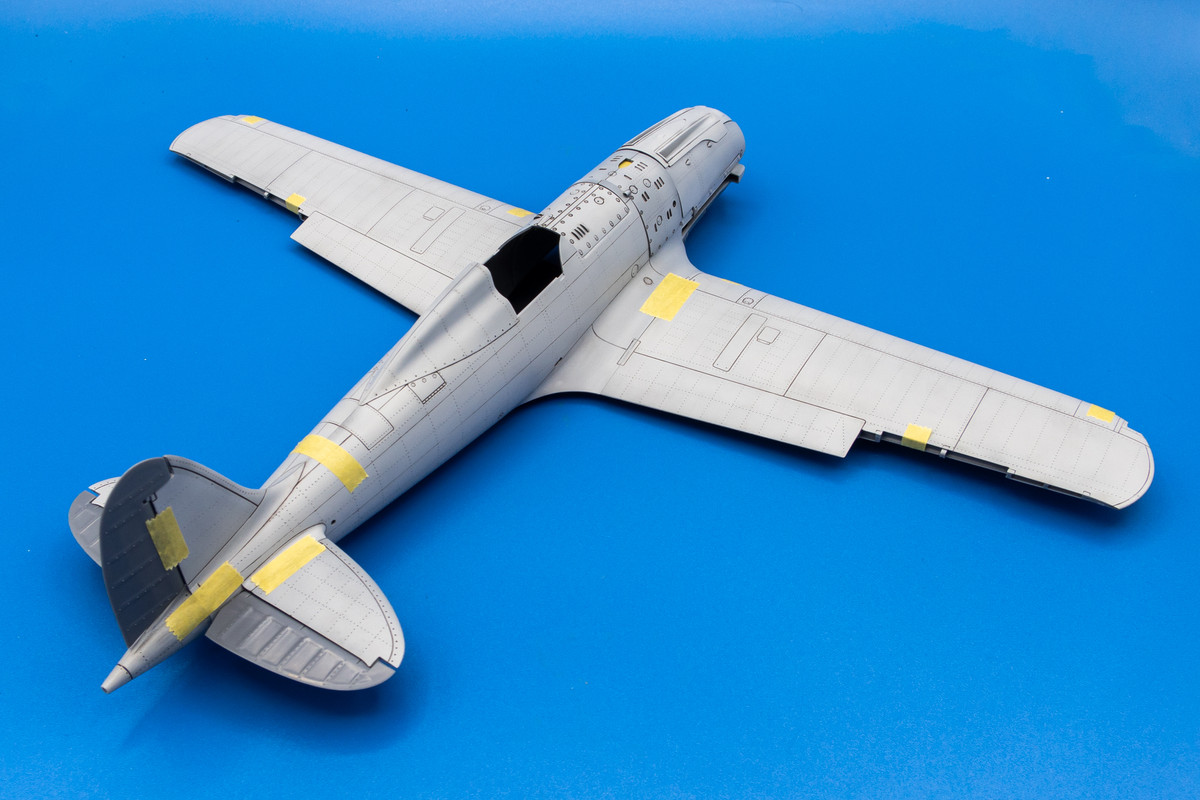
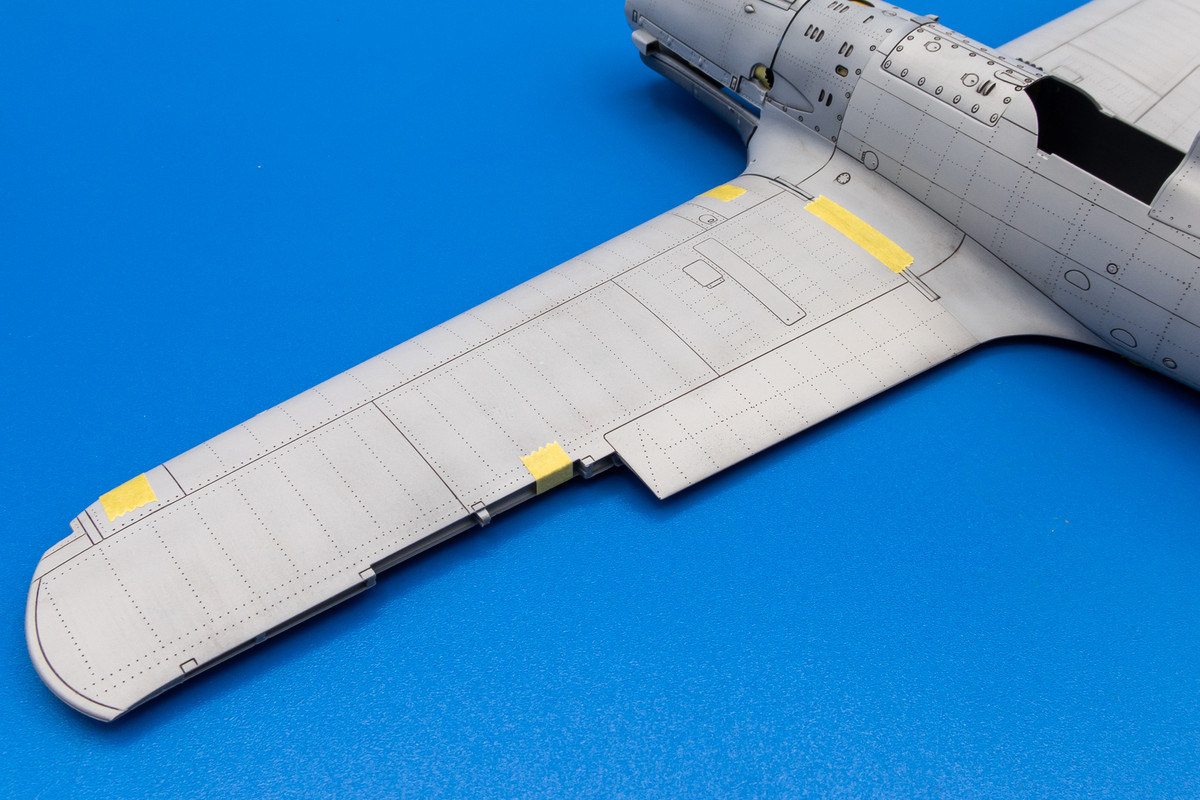
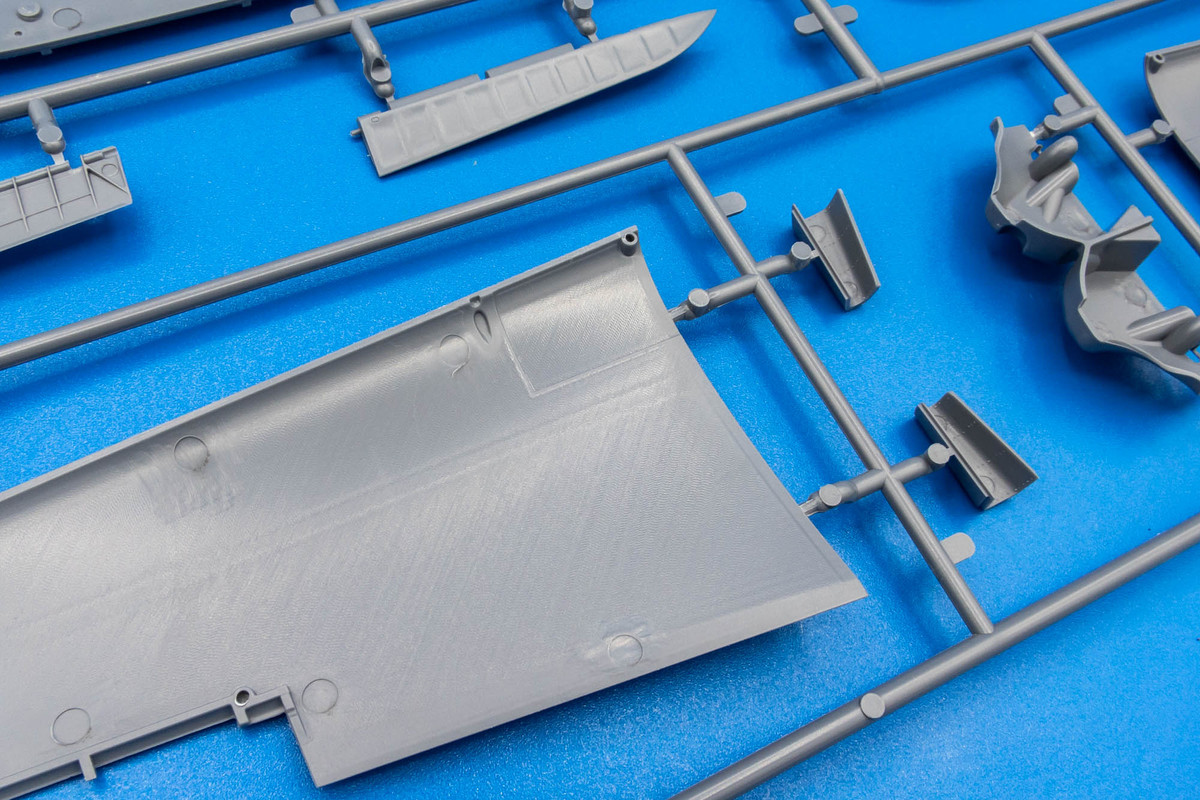
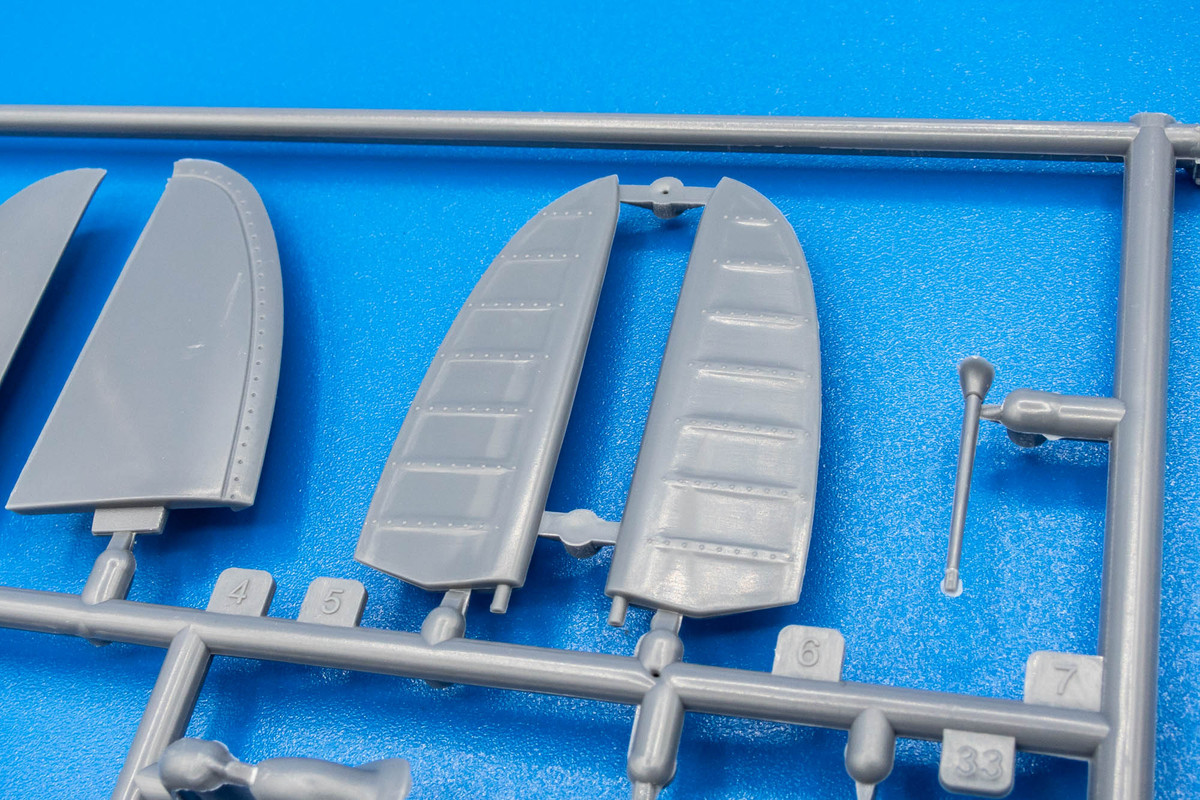
Sprue B is the other big sprue and it holds the wings.
Image

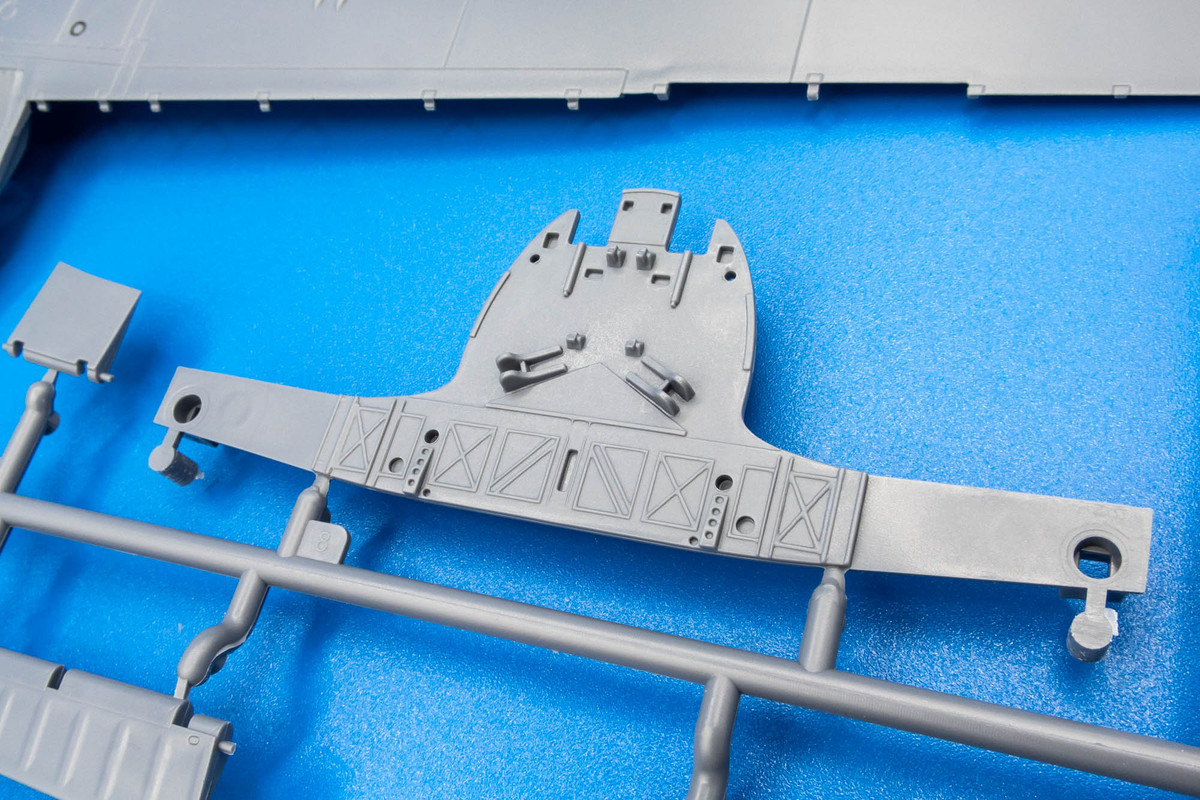
The rear wall of the wheel wells is supplied as a separate bulkhead/spar. The landing gear attachment points are on the ends of the spars. The attachment point is squared, which is a good indication for a positive, non-ambiguous fit.
Image
Image
Image

Here is the optional cover for the wheel wells. Vague detailing and large ejection marks... no thanks!
Image

No details molded onto the inner surface of the upper wings so those wanting to leave the wheel well cover off may want to spruce up this area?
Image

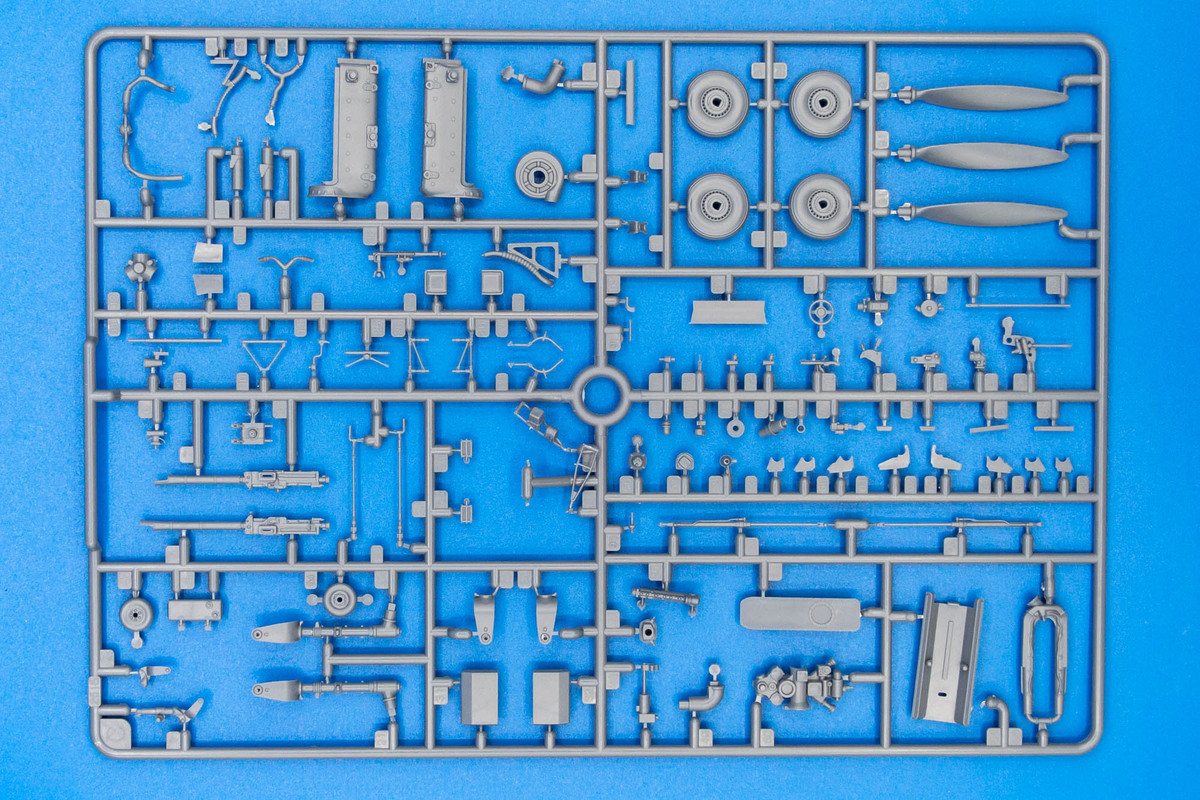
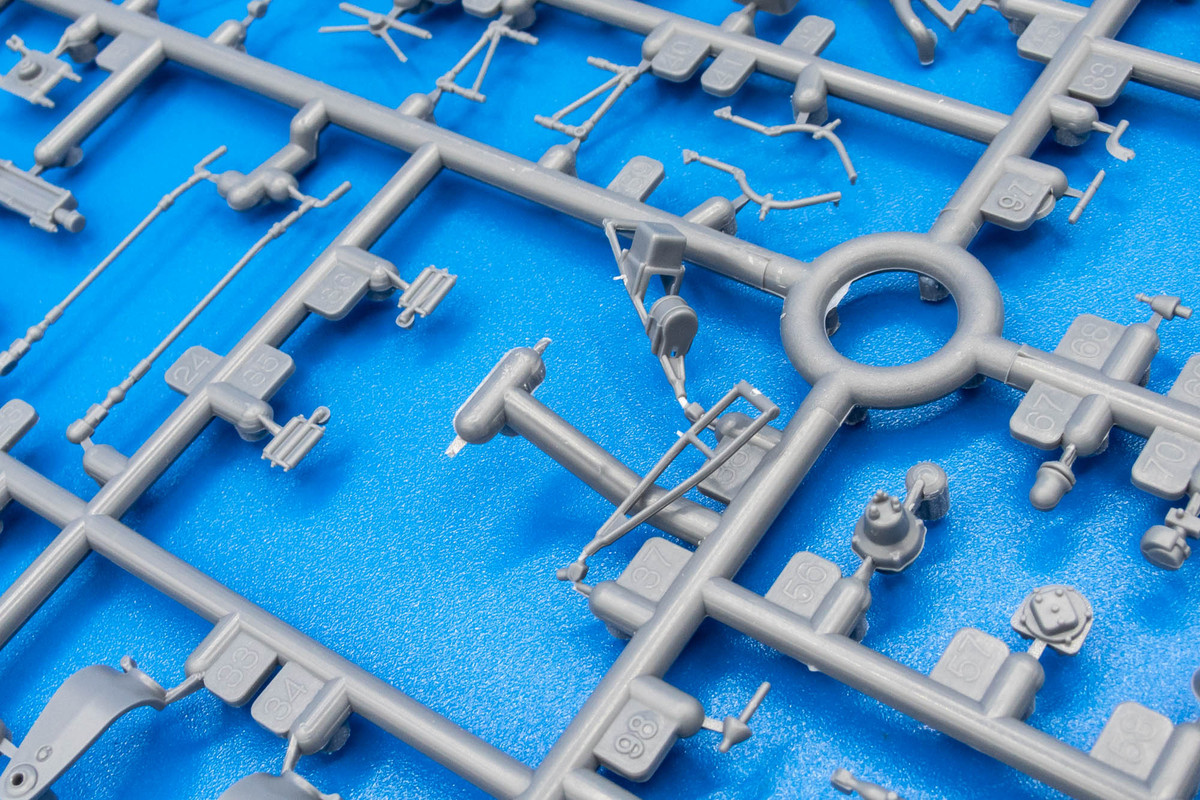
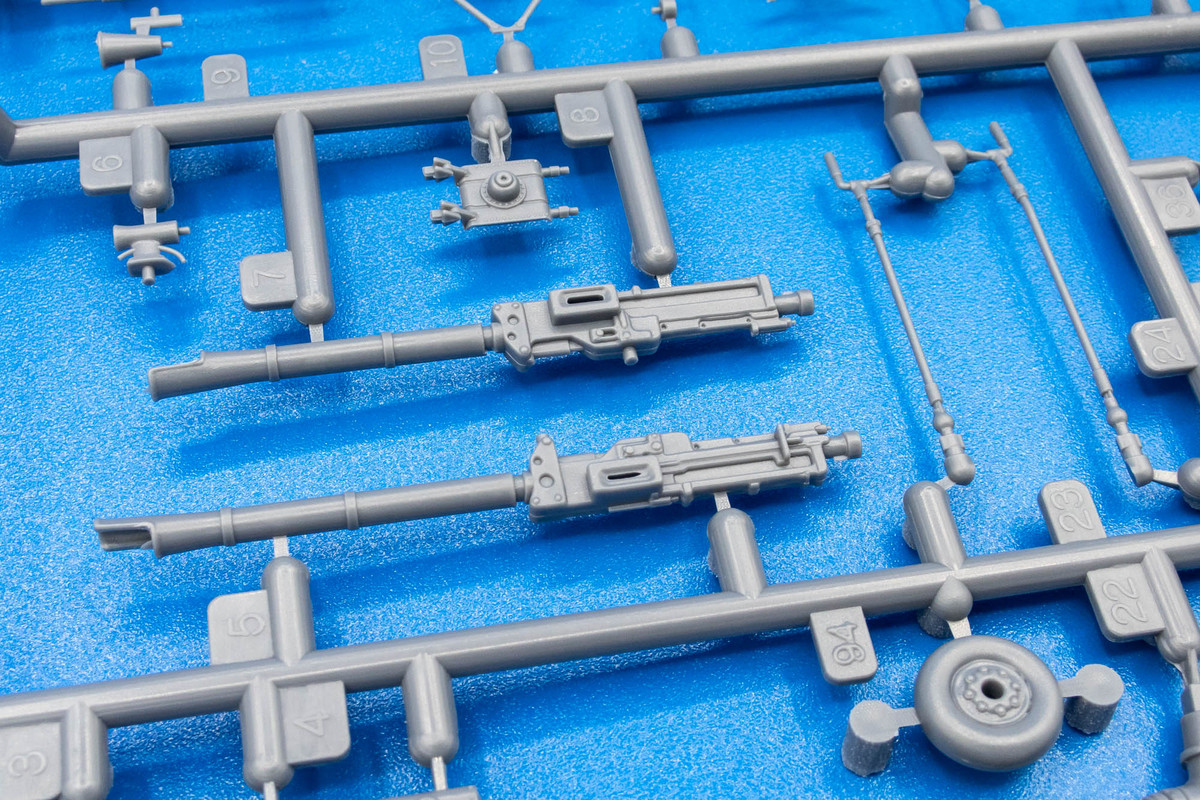
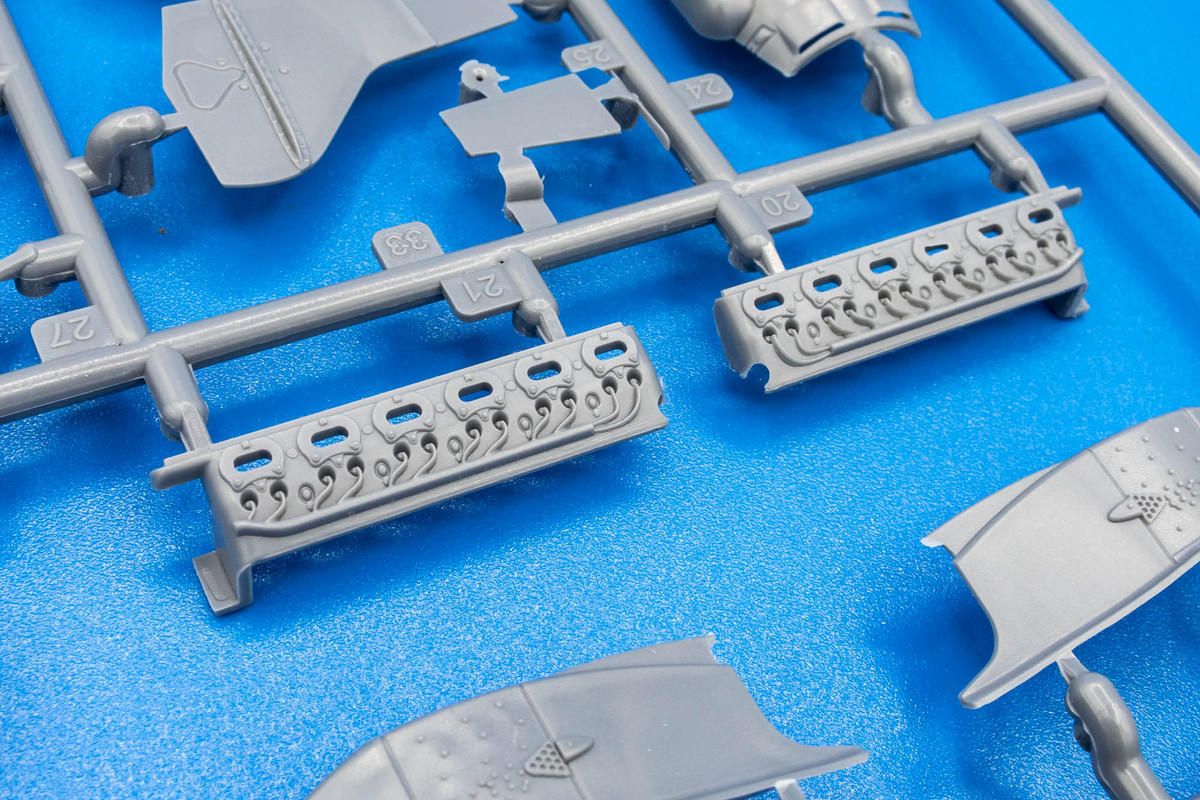
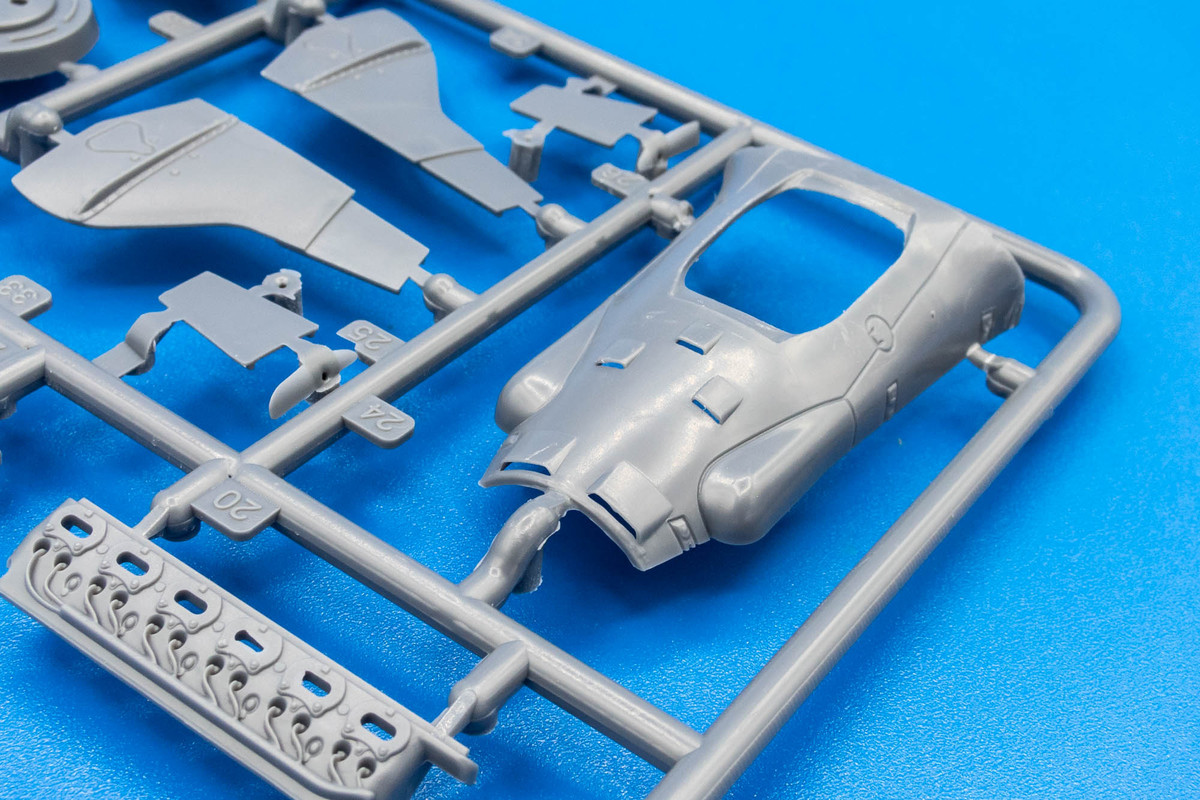
Sprue C is loaded with all of the small parts.
Image
Image

Another example of parts partially broken off their sprues. Hopefully, nothing is broken but Part 37 looks like it is on the verge of snapping.
Image

The engine area includes the fuselage-mounted 12.7mm Breda-Safat machine guns.
Image

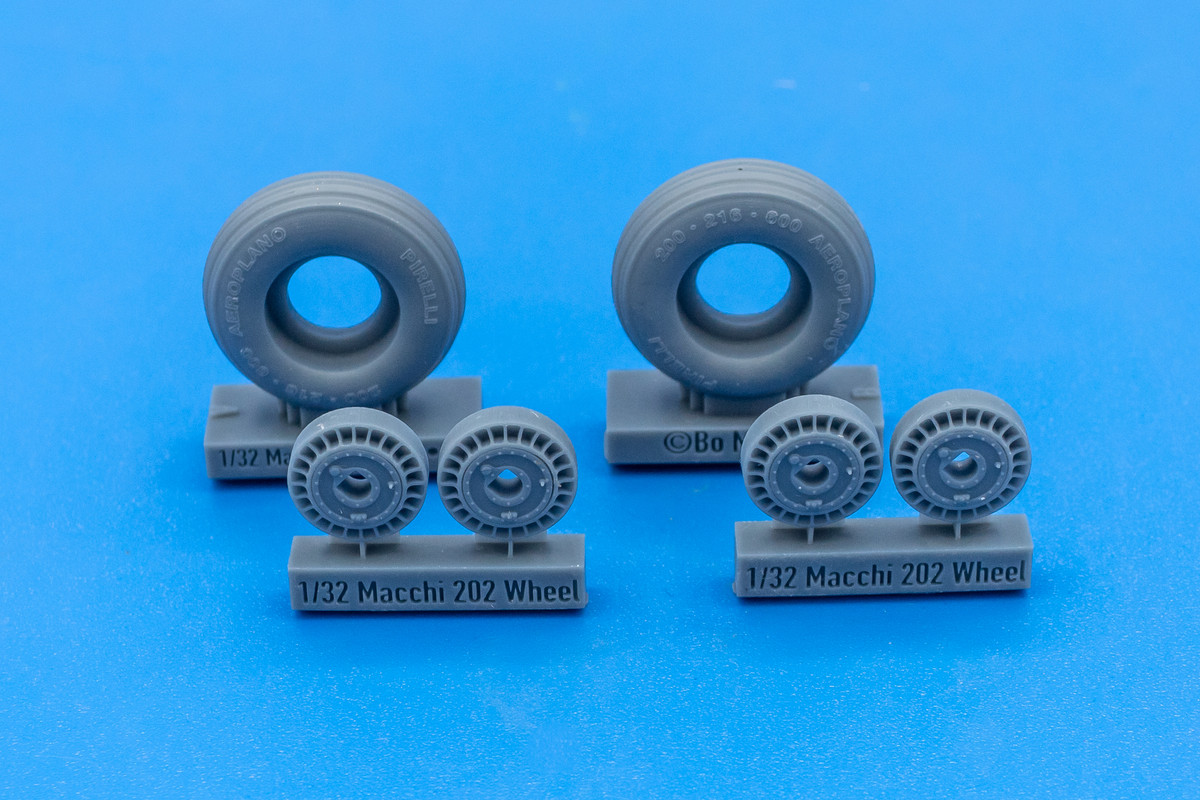
Again, a mix of the good and bad. Keyed holes in the wheels means that the weighted flat spot will be properly aligned but the weighted effect looks more like the tire melted.
Image
Image

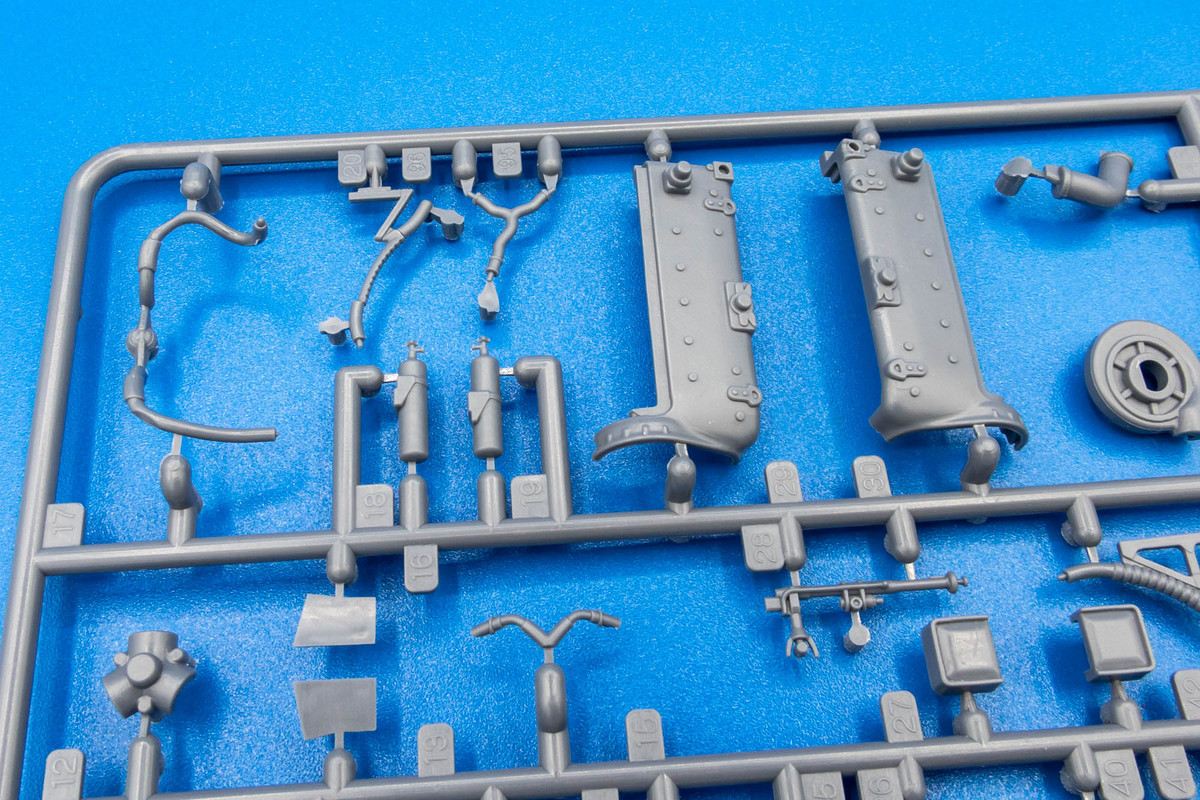
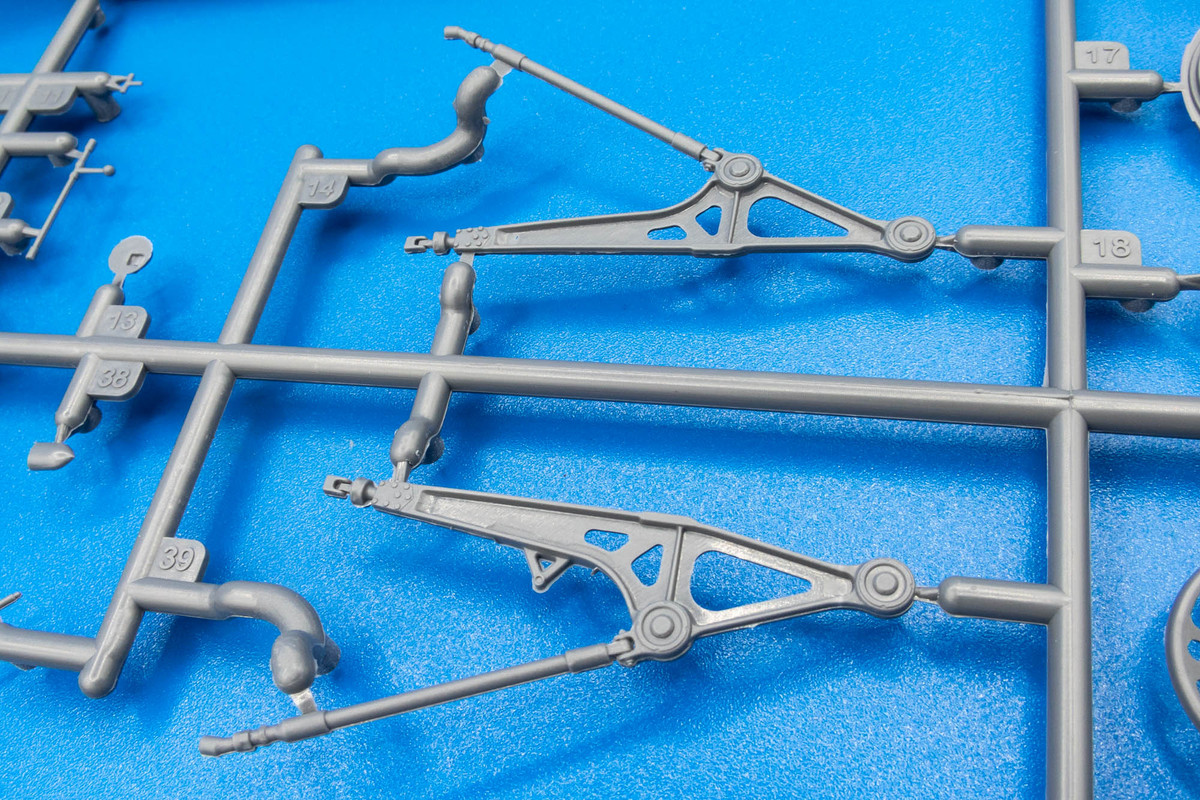
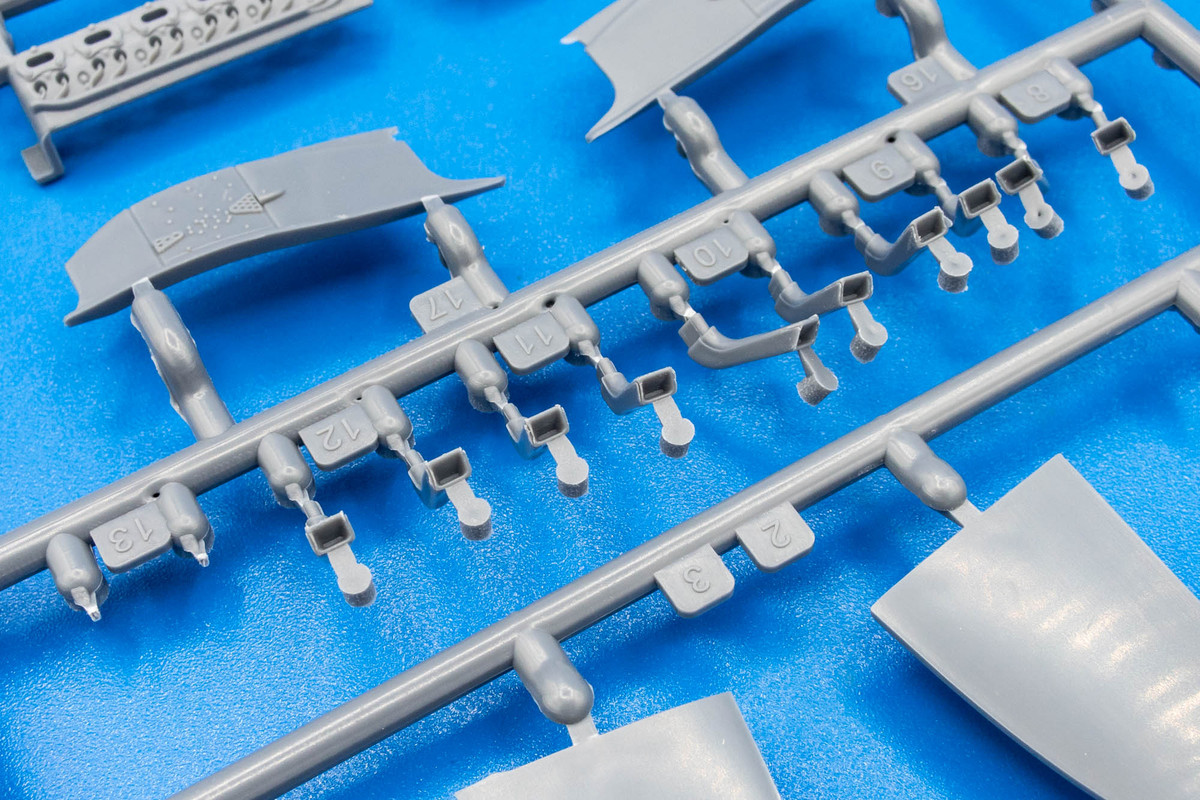
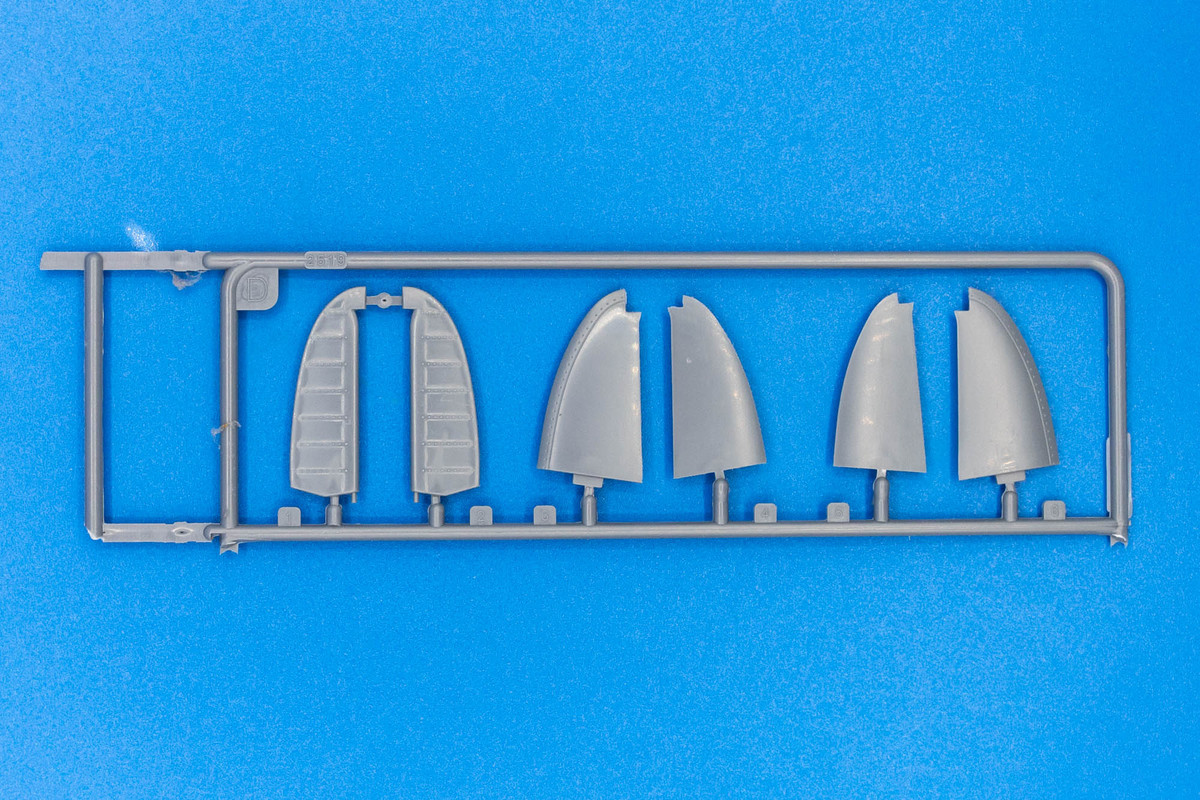
Sprue D has a lot of the external components including the rear stabilizers (early version), intakes, fairings, landing gear covers, etc.
Image
Image

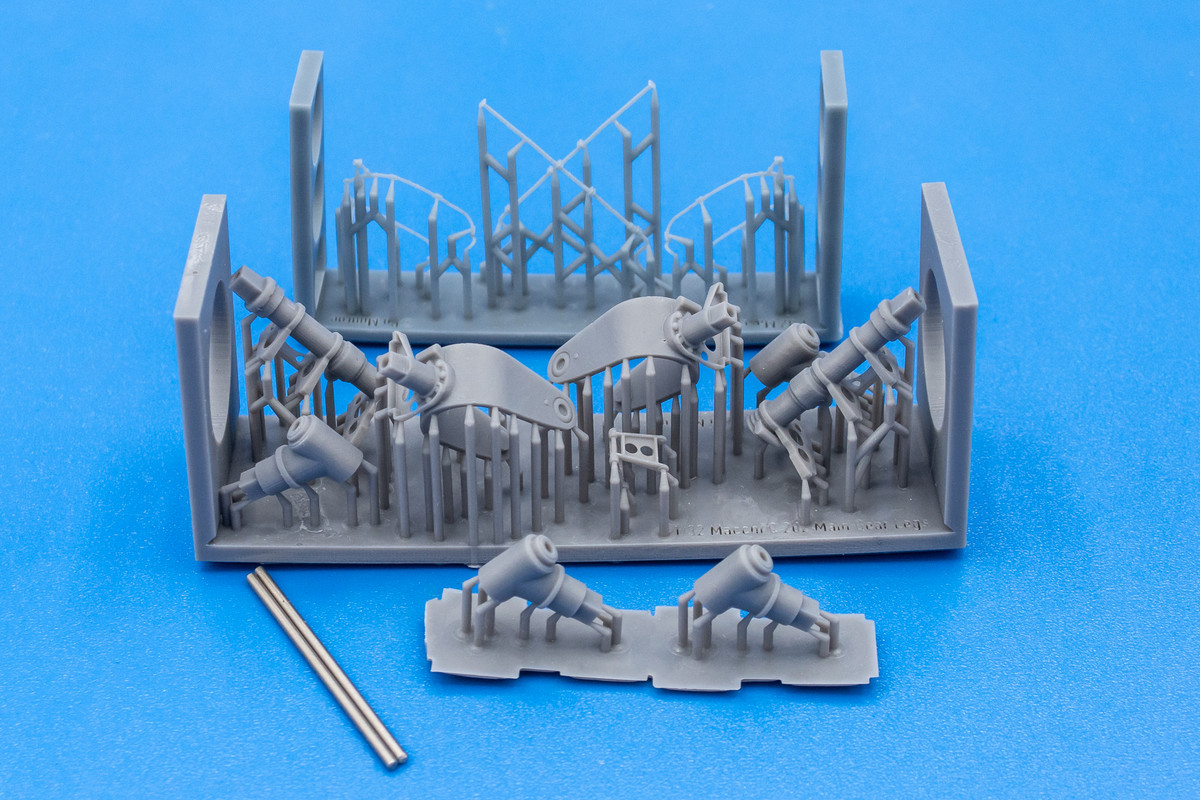
The exhaust outlets are represented as individual pieces and they have hollowed ends.
Image

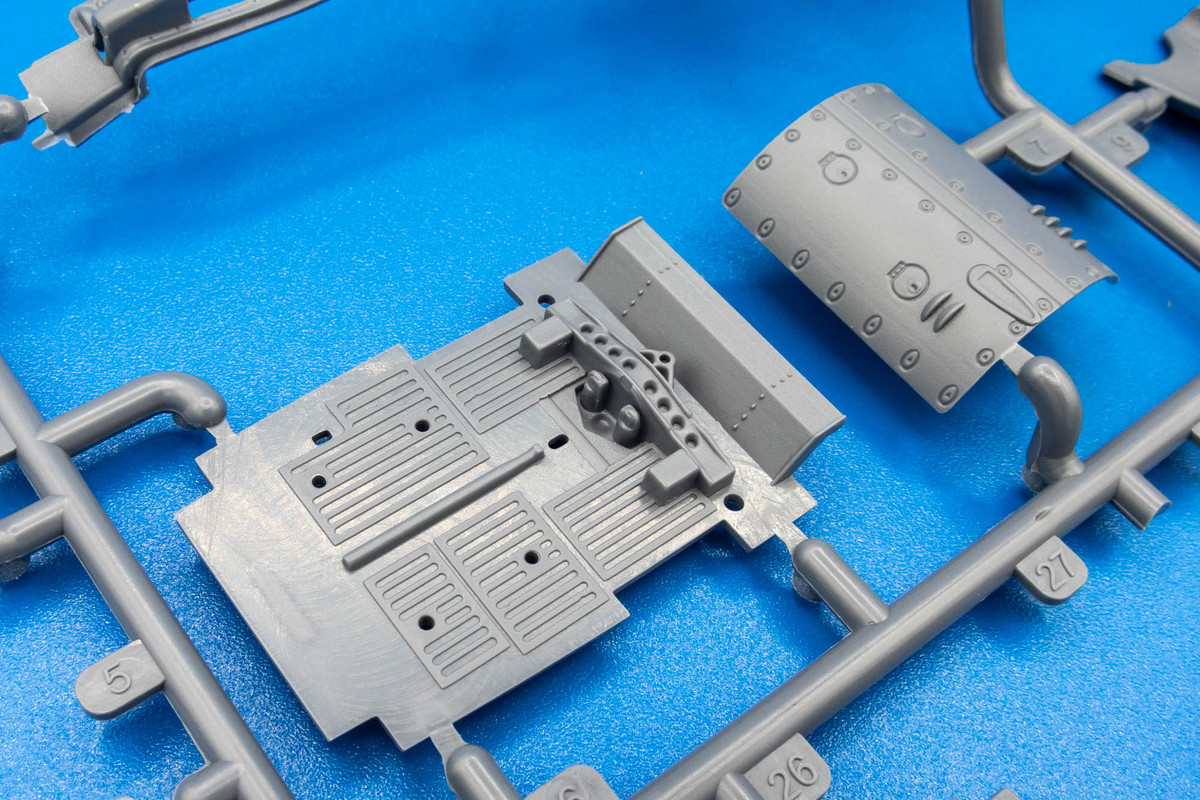
Nicely molded wiring detail on the engine parts.
Image

If you look closely at the lower nose fairing, you can see that every small scoop has a hollowed out opening... very nice!
Image
Image

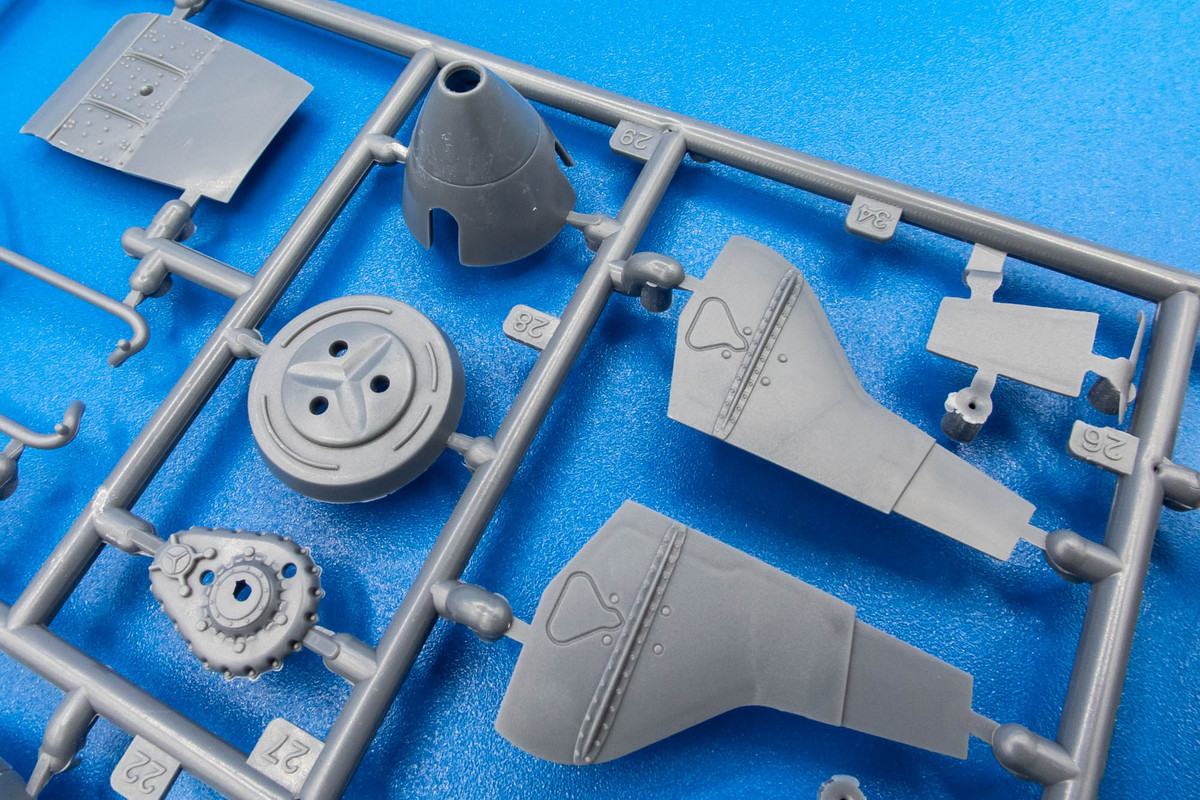
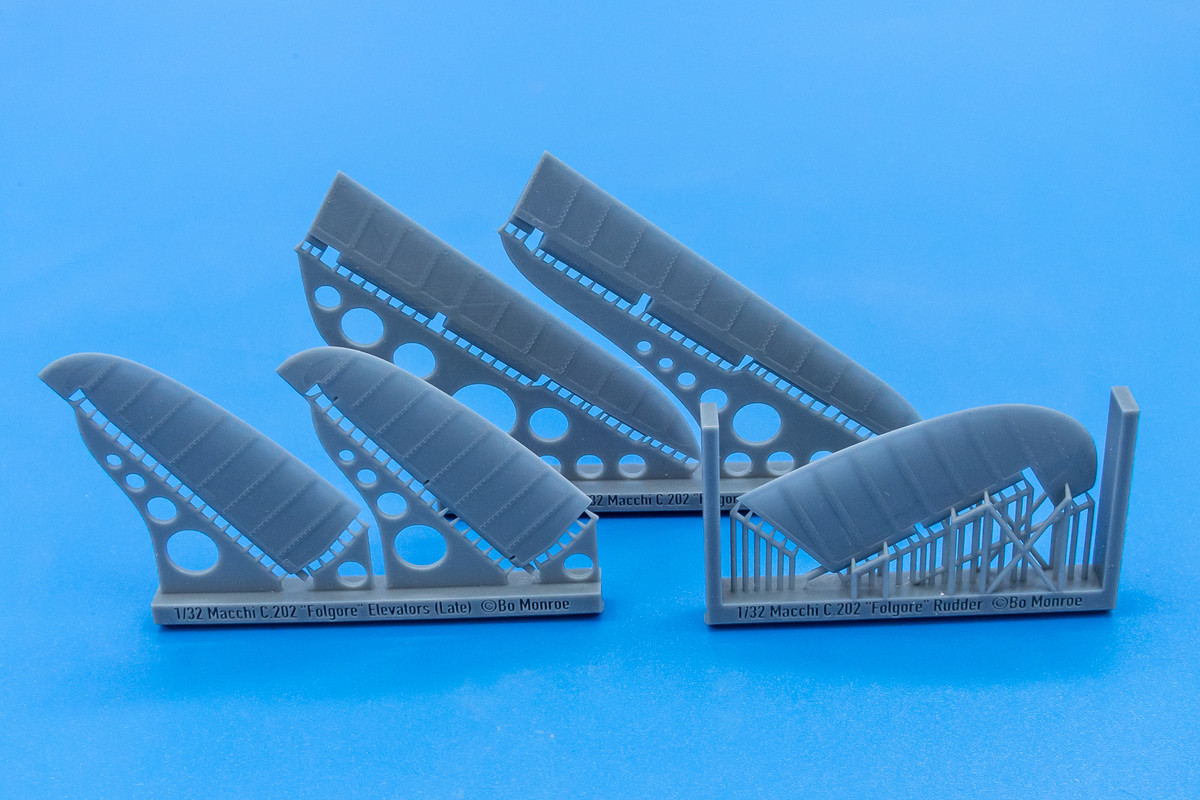
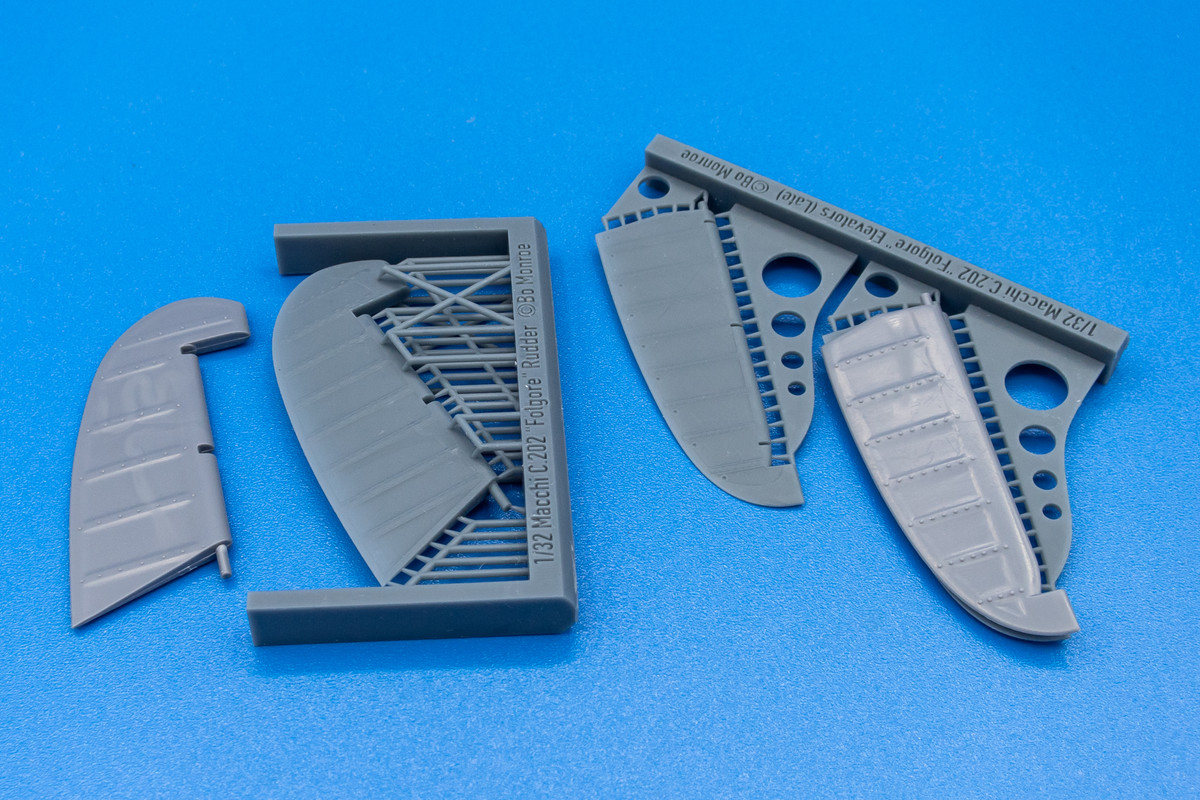
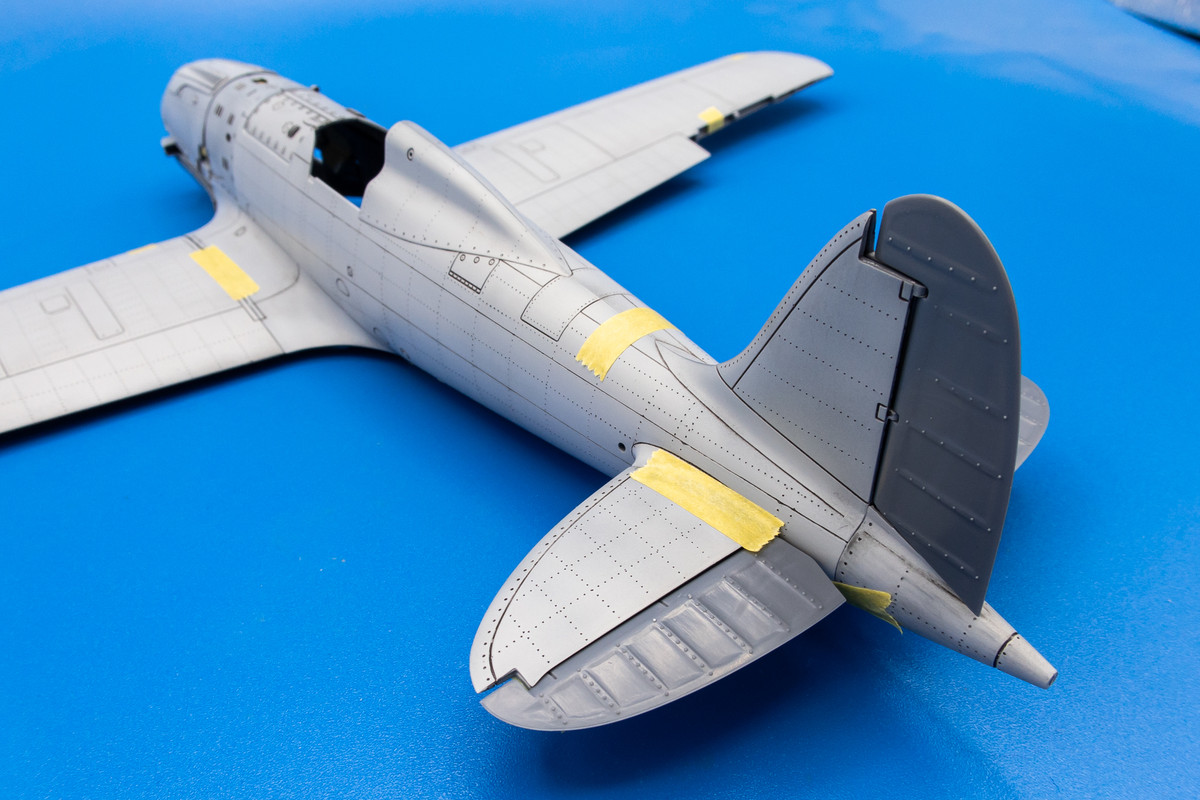
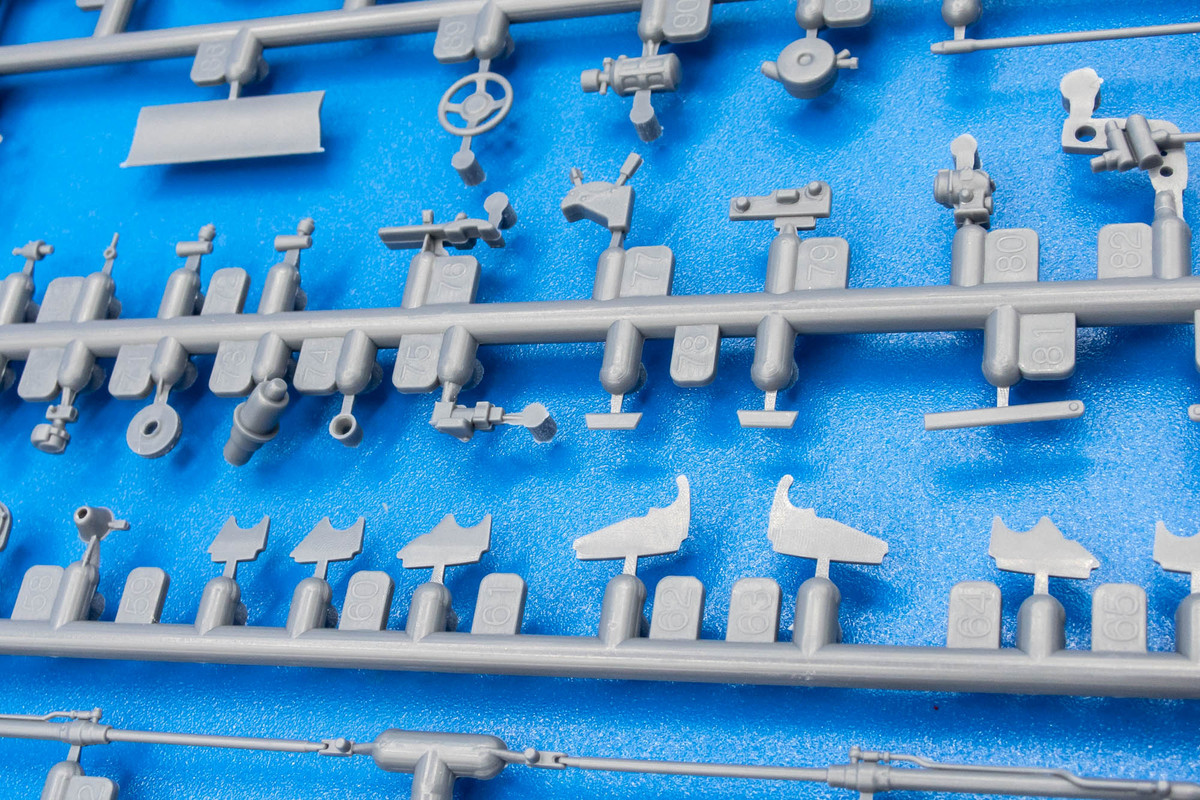
Italeri offers some options when it comes to either early or late versions of the Folgore. The small balance horns on the ends of stabilizers indicate late version.
Image

To be continued...
John aka JKim
-----------<><
Image
User avatar
jkim
Elite Member
Posts: 4073
Joined: Mon Apr 10, 2017 4:03 pm

Re: Italeri 1/32 Mc.202 Folgore

Post by jkim »

Just to wrap up the contents of the Italeri boxing of the Folgore. We have an extensive photoetch fret. It was enclosed in a plastic sleeve that was open on one end, so it got loose and a few parts got bent out of shape.
Image
Image

Most of the tiny pieces are meant to detail the joints of the control surfaces.
Image

The clear sprue is very small due to the small size of the canopy and windscreen on the Folgore.
Image
Image
Image

And finally... here is a close-up look at the 3D instrument panel. I'm not sure I like this option and have an alternative (Yahu) to consider.
Image
Image

Jumping into the present... one of the things that I want to address on this build is the size of the panel lines on this kit. Thankfully, there aren't that many of them so it shouldn't be too hard to fill them. Re-scribing them might be tricky as they are long and straight. I'm going to add rivets as well. To get a better feel of what I'm dealing with, I thought I'd try to tape together the major components. Fit looks decent. Not Tamiya good but just the fact I was able to do this is an indication of good fit.
Image
Image

I have zero intention of posing the engine or gun cowling open so I wanted to see what the panels look like in the closed position. Pretty good from this preliminary dry fit.
Image

One issue is the wing root. There might be fit issues here and the molding of the fasteners on the fuselage side of the joint is atrocious.
Image

Again, just the fact that I'm able to hold the model with just tape holding it together is a good sign.
Image
Image

Checking to see how the clear parts fit. Again, fit looks rather good.
Image
Image

To my eyes, the panel lines on the wings don't look as bad as the fuselage. So the initial plan is to fill and re-scribe the fuselage. Depending on how that goes, I'll decide whether or not I want to do the wings.

I'm going to fill the fuselage panel lines with black CA glue. I was initially going to use debonder to reduce sanding effort but since I want a flush finish, debonder doesn't really help.
Image
Image

The panel lines have been filled. Next is re-scribing. I'm leery of trying to scribe directly on top of the black CA so I'm planning to scribe just above or below.
Image
John aka JKim
-----------<><
Image
User avatar
keavdog
Elite Member
Posts: 4726
Joined: Thu Jan 10, 2019 1:14 am
Location: Earth

Re: Italeri 1/32 Mc.202 Folgore

Post by keavdog »

Beautiful Airplane. I just finished the Italeri 1/48 Veltro. Does this kit come with the smoke ring decals? They did in my kit and it's a huge cheat but quite welcome. Looking forward to what you do with this one John. BTW I got the national insigina markings backwards. The spikes should face outward :headslap:

Image
Thanks,
John
User avatar
jkim
Elite Member
Posts: 4073
Joined: Mon Apr 10, 2017 4:03 pm

Re: Italeri 1/32 Mc.202 Folgore

Post by jkim »

That's a beautiful Veltro,John! Yes, the Italeri kit comes with smoke ring decals. But I want to try do the smoke rings with my airbrush somehow. Going over a few ideas in my head.

The fuselage panel lines have been filled. Not all of them but the major lateral ones that I'll be re-scribing. We'll see how the new scribing looks compared to the hatches and other recessed lines that I left alone.

Dymo label tape is a scriber's best friend. It's thick, stiff and adhesive... perfect for establishing guide lines for panel scribing.
Image

To avoid unnecessary waste, I like to cut the Dymo tape in half, longitudinally. I purposefully cut it messy so I can easily distinguish the straight side. Because the strip is now narrower, it's also easier to slightly curve the tape if necessary.
Image

To avoid running into the black CA as much as possible, I've elected to scribe the new panel lines just above or below the existing one. My scriber of choice is the SCR-01 by UMM. It's actually only one I have experience with so I'm not sure how it compares to others. It works for me. I use the "hook" with a pulling motion for straight lines.
Image

With the black CA lines still visible, it's hard to make out the scribed lines but they're there.
Image

While checking out the reference drawing to lay out the rivet lines, I noticed that the there is no panel line around the base of the horizontal stabilizer... it just magically protrudes from the fuselage.
Image

The drawing shows a line around it so I searched the internet and found this photo of the NASM Mc.202 tail. The more I look at this kit, the more surprised I am at the sloppiness/laziness of the Italeri kit designers. Especially since this is such an iconic home-grown subject for them. They could've done better research.
Image

Anywho, I made up some templates using the Dymo tape and scribed some lines myself.
Image

Using the reference drawing, I added the rivet lines using a soft-leaded pencil. I am using the Kagero book but I'm not following the rivet lines exactly. There are too many for my limited patience and the camo is going to camoflage most of it, visually. The rivets will serve to give some visual detail to the model surfaces but won't be 100% accurate.
Image

I used the 1.0mm dot pitch rivet wheel from Galaxy Tools. After the rivets are applied, I sand down the raised plastic around each rivet hole. Looks much better when you do this.
Image
Image

It's impossible to tell what the new panel lines and rivets look like so I give the fuselage halves a coat of Mr Primer Surfacer 1000 and a temporary brown wash.
Image
Image
Image
Image
Image

I think this selective replacement of the panel lines is a good compromise in improving the overall scale look of the model and not spending crazy hours on filling and scribing.
John aka JKim
-----------<><
Image
User avatar
jkim
Elite Member
Posts: 4073
Joined: Mon Apr 10, 2017 4:03 pm

Re: Italeri 1/32 Mc.202 Folgore

Post by jkim »

Before I go any further, I am going to show the aftermarket stuff that I bought for this build. I typically don't use everything that I buy but new aftermarket items intrigue me and I like to inspect what's available firsthand before deciding to incorporate something into the build.

First up is the Big Ed set from Eduard. You save a little bit of money when you buy a Big Ed versus each item individually.
Image

This set comes with four Eduard products. The canopy masks are a no-brainer... the best masks in the business. I bought this particular set because I wanted an alternative to the kit seat harnesses and Steel series harnesses are included here. I'm up in the air with the brass flap set. Mostly because of the work involved to fit these types of flaps into the model. And sometimes the folding process is so intricate that I can't figure it out (i.e. Ta-152H flaps). The last item is photoetch detail set containing a mix of internal and external upgrades.
Image

The detail set also includes a Eduard's version of the instrument panel. I'm not a big fan of Eduard instrument panels. They tend to be flat, have that distracting surface texture and always use the same purplish grey for the instrument panel color which doesn't match any paint that I have. And resolution of the dial detail has been surpassed by other companies and technologies.
Image

Which brings me to the Yahu instrument panel.
Image

Being photoetch-based like Eduard, the Yahu panels are also flat, lacking the 3D relief that resin or plastic can provide. But the dial resolution is incredible. Remember, the Italeri includes a 3D printed decal so I'll have some choices here.
Image

Next up is a box full of 3D-printed resin parts from a new company, Aircraft in Pixels. Similar to Laminar Flow Designs, which provided the excellent conversion for the Spitfire XIVe build, A-i-P seems to be a one-man shop cranking out specialty parts for mostly WW1 aircraft. But luckily for us, he likes the Macchi Folgore too.
Image

I bought a lot but not everything that he offers for the Folgore kit. He bundles most of the stuff I was interested in into an Essentials bundle, which include the spinner, the wheels, the fabric control surfaces and the desert air filter. Of primary interest is the corrected spinner. No prop blades are included so I'm assuming that the kit blades pop into the backplate.
Image

Per Maurizio Di Terlizi, who authored a very helpful modeler guide to building the Italeri Foglore kit, the kit spinner is incorrect and was based on a largely modified spinner from a Macchi Mc.205 Veltro. In essence, it is too long and the hole in front of the spinner much too large. You can see the obvious difference in shape between the kit spinner and A-i-P's version. To be honest, I'm not sure how correct the A-i-P spinner is either. Mr. Terlizi gives some measurements in his article so I'll follow up with that.
Image

Another egregious error that the A-i-P corrects are the fabric-covered control surfaces.
Image

The kit parts feature a somewhat exaggerated stitching and sagging fabric effect and even worse, they got the number of ribs wrong on both the rudder and horizontal tail planes. The rudder should have 8 ribs but the kit rudder has 6. The horizontal tail surfaces should have 8 but the kit has 7. The A-i-P versions have the correct number of ribs and look better to boot. How Italeri could make a mistake like that is beyond me. Really highlights a lack of attention to detail, which you would think be Job #1 at a company that produces scale models.
Image

The weighted effect of the wheels is much more subtle and realistic than Italeri's attempt. Also got some cool Pirelli logos on the tires!
Image

The air filter is surprisingly complex, comprised of four separate parts, not including the kit PE mesh grill.
Image

Although I am not planning to have the engine cowling open, the rear of the engine is visible from the wheel wells, similar to the Focke Wulf Dora. Any help to spruce up this area is welcome. So I picked up two of the detail sets that may or not help.
Image

The kit exhausts are hollowed out at the tips so the A-i-P exhausts were not a must. This was more of a "why not?" purchase.
Image

The construction order is unusual in that the landing gear legs are installed during wing construction. This may create awkward situations later on and isn't ideal. The A-i-P landing gear circumvents this issue by separating the landing gear mounts from the legs. The legs are strengthened by metal rods. A-i-P even includes an ambitious set of very delicate brake lines, which I'm sure to snap.
Image
John aka JKim
-----------<><
Image
User avatar
BlackSheep214
Elite Member
Posts: 13300
Joined: Sun Apr 06, 2014 8:47 pm

Re: Italeri 1/32 Mc.202 Folgore

Post by BlackSheep214 »

Lots goodies ya got going on...
“Who controls the skies, controls the fate of this Earth”

Author unknown- 352nd Fighter Group, Blue-Nosed Bastards of Bodney

“Send one plane it’s a sortie; send two planes it’s a flight; send four planes it’s a test of airpower. - Richard Kohn
User avatar
Medicman71
Elite Member
Posts: 11257
Joined: Mon Apr 07, 2014 9:32 am
Location: Houston, Tx

Re: Italeri 1/32 Mc.202 Folgore

Post by Medicman71 »

Italeri isn't know for accuracy. The Growler that I attempted to do was so far off and had such a horrible fit that I just binned it. I'm sure you'll do great things with the Folgore.
Mike

Sponsored by Boeing, Lockheed Martin, Northrop Grumman, Saab, BAE, and Dassault
User avatar
jkim
Elite Member
Posts: 4073
Joined: Mon Apr 10, 2017 4:03 pm

Re: Italeri 1/32 Mc.202 Folgore

Post by jkim »

More riveting progress on the upper wings and forward fuselage panels.
Image
Image
Image
Image
Image
John aka JKim
-----------<><
Image
User avatar
mostrich
Admin
Posts: 3105
Joined: Sun Apr 06, 2014 2:13 pm
Location: Hamburg, Germany
Contact:

Re: Italeri 1/32 Mc.202 Folgore

Post by mostrich »

Looking at the first pictures of the roughly taped fuselage and then at the primed and perfectly scraped and riveted version is breathtaking. Everything's looking so clean as if it was molded that way.
Can't wrap my head around the BS with the u-shaped trenches and missing main panel lines. Plain thoughtlessness in the design department.
Cheers,
Torben
User avatar
jkim
Elite Member
Posts: 4073
Joined: Mon Apr 10, 2017 4:03 pm

Re: Italeri 1/32 Mc.202 Folgore

Post by jkim »

Thanks Torben!

I'm gonna put a pause on this build as well. I was really curious about re-scribing the fuselage panel lines and now that's done, I'll save this build for a little later.
John aka JKim
-----------<><
Image
Post Reply

Return to “Aircraft Work in Progress”